manuals.online logo
Brands
  1. Home
  2. •
  3. Brands
  4. •
  5. Sealey
  6. •
  7. Welding Accessories
  8. •
  9. Sealey SWH189 User manual

Sealey SWH189 User manual

2.1. Introduction
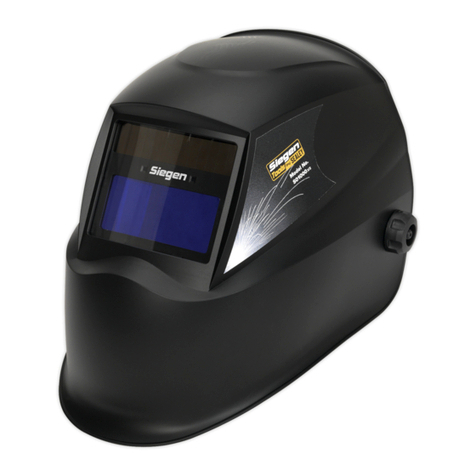
The SWH189 Automatic Welding Helmet is supplied with an automatic cartridge. With the electronic cartridge
installed solar cells will automatically darken the eye shade when the arc is struck.
2.2. Specification
Light transmittance, automatic cartridge . . . . . . . .Light state - shade 3. Dark state - shade 10
plus optional shade 1 filter . . . . . . .Light state - shade 4. Dark state - shade 11
Operating temperature . . . . . . . . . . . . . . . . . . . .-100C (+140F) to + 700C (+1580F).
Helmet material . . . . . . . . . . . . . . . . . . . . . . . . .High-impact plastic, stability of shape up to 2200C/4280F
UV/IR protection (all cartridge states) . . . . . . . . .Maximum
Auto. response (light to dark @ room temp) . . . .0.8ms
Auto. response (light to dark @ +550C/1310F) . . .0.3ms
Auto. response (dark to light) . . . . . . . . . . . . . . .0.2 to 0.3 s
Viewing area . . . . . . . . . . . . . . . . . . . . . . . . . . . .92 x 35mm (3.62 x 1.38)
Cartridge size . . . . . . . . . . . . . . . . . . . . . . . . . . .50.8 x 108 x 5.3mm (2 x 4.25 x 0.21)
Weight . . . . . . . . . . . . . . . . . . . . . . . . . . . . . . .0.3kg
Energy source . . . . . . . . . . . . . . . . . . . . . . . . . . .Solar cells
01284 757500
E-mail:
sales@sealey.co.uk
01284 703534
Sole UK Distributor,
Sealey Group, Bury St. Edmunds, Suffolk.
NOTE: It is our policy to continually improve products and as such we reserve the right to alter data, specifications and component
parts without prior notice.
IMPORTANT: No liability is accepted for incorrect use of this equipment.
WARRANTY: Guarantee is 12 months from purchase date. proof of which will be required for any claim.
INFORMATION: For a copy of our latest catalogue and promotions call us on 01284 757525 and leave your full name and address
including your postcode.
Thank you for purchasing a Sealey Safety Product. Manufactured to a high standard
this product will, if used according to these instructions and properly maintained, give you
years of trouble free performance.
IMPORTANT:PLEASE READ THESE INSTRUCTIONS CAREFULLY. NOTE THE SAFE OPERATIONAL REQUIREMENTS, WARNINGS AND CAUTIONS.
USE THIS PRODUCT CORRECTLY AND WITH CARE FOR THE PURPOSE FOR WHICH IT IS INTENDED. FAILURE TO DO SO MAY CAUSE
DAMAGE AND/OR PERSONAL INJURY AND WILL INVALIDATE THE WARRANTY. PLEASE KEEP INSTRUCTIONS SAFE FOR FUTURE USE.
Declaration of Conformity We, the sole importer into the UK, declare that the product listed here
is in conformity with the following standards and directives. The construction file for this product is held by
the Manufacturer and may be inspected, by a national authority, upon request to Jack Sealey Ltd.
For Jack Sealey Ltd. Sole importer into the UK of Sealey Safety Products
Signed by Mark Sweetman 16th July 2003
INSTRUCTIONS FOR:
AUTOMATIC WELDING HELMET
Model: SWH189
1. SAFETY INSTRUCTIONS
2. INTRODUCTION & SPECIFICATION
Automatic Welding Helmet
Model SWH189
BS EN 175 : 1997
BS EN 169 : 2002
BS EN 379 : 1994
1.1. GENERAL SAFETY
p
p
WARNING! Ensure the front lens, filter(s) and rear lens are securely in place before use.
p
p
WARNING! This helmet is not suitable for use when laser or gas welding.
p
p
WARNING! DO NOT use the helmet if damaged or thought to be faulty. (Contact Service Agent).
p
p
WARNING! The helmet will not offer protection against mis-use of workshop tools, equipment or accessories.
p
p
WARNING! The eye protection plate in the helmet is NOT unbreakable. Helmet will not protect against
severe impact hazards such as, (but not limited to), fragmenting abrasive discs/grinding wheels, stones
and other grinding tools, explosive devices or corrosive fluids.
p
p
WARNING! The helmet will only protect the eyes and face from radiation and sparks.
7 DO NOT use helmet unless you have been instructed in its use by a qualified person.
7 DO NOT open or tamper with the automatic cartridge.
7DO NOT get the helmet wet or use in damp or wet locations.
7DO NOT leave work area with helmet in lowered position, as bright light source may darken cartridge unexpectedly.
7DO NOT place the helmet on a hot surface.
3Ensure all workshop safety rules, regulations, and conditions are complied with when using welding equipment.
3Maintain the helmet in good condition and protect cartridge from liquid and dirt contact.
3Regularly replace the protective front and rear lenses and replace any damaged or worn parts. Use
genuine parts only. Unauthorised parts may be dangerous and will invalidate the warranty.
3Fit the helmet and adjust the head band so the helmet will sit as low and near to your face as possible.
3Use helmet only in temperatures ranging from -100C (+140F) to + 700C (+1580F).
3Maintain correct balance and footing. Ensure the floor is not slippery and wear non-slip shoes.
3Keep children and unauthorised persons away from the working area.
1.2. PERSONAL PRECAUTIONS
3Remove ill fitting clothing, remove ties, watches, rings, and other loose jewellery.
3Clean helmet (see Section 6) and store in a safe, dry, childproof location.
3Ensure there is another person within sight close enough to come to your aid should a problem arise when working
s
s
DANGER! If, at any time, the automatic cartridge FAILS to darken when exposed to a welding
arc, DO NOT USE. Remove cartridge and return to your dealer for service/inspection. Continued use of the
product knowing that the auto darkening feature is not functioning may damage your eyes and cause
blindess. Continued use of the helmet which is not functioning will invalidate the warranty and could
prohibit a successful claim on any insurance policy.
SWH189 - 3 - 160703 SWH189 - 3 - 160703
3.2. Assembly
p
p
WARNING! Ensure the automatic cartridge is fitted with the solar cells and sensor facing toward the front
of the face mask and towards the top.
3.2.1. The face mask is supplied with the front cover lens, automatic filter and rear cover lens in place, which will
provide shade 10 protection. If shade 11 protection is required, release the wire retaining clip at the base
of the filter stack, remove the rear cover lens, fit the shade 1 filter and
secure the lens stack using the wire retaining clip.
Note: For reference, fig.7. shows the lens/filter stack.
A - Front Cover Lens
B - Automatic Cartridge
C - Shade 1 Filter or Rear Cover Lens
D - Retaining Clip
3.2.2. Assemble the helmet as shown in, fig.8.
3.2.3. Ensure the right hand spacer is fitted with the cutout facing the front of the mask and the left hand
spacer is fitted facing the rear of the mask.
3.2.4. Ensure the locating pin on the adjustment back plate locates in one of the three angle adjustment
holes in the helmet and that the adjustment tab faces away from the side of the helmet.
6.1 Replacing front/rear lens/filters/cartridge.
p
p
WARNING! Ensure the automatic cartridge is fitted with the solar cells and sensor facing forward of the
face mask and towards the top.
6.1.1. Release the spring retaining clip and remove lens stack.
6.1.2. Replace damaged/faulty items ensuring the filter stack conforms to fig.7.
6.1.3. Refit the lens stack into recess of helmet and engage spring retaining clip.
6.1.4. If required, place shade1 filter behind cartridge.
Note:If shade 1 filter is not used clear rear cover lens must be fitted.
6.2. Cleaning
6.2.1. Clean the helmet by wiping with a soft clean cloth. Clean the cartridge surfaces regularly but do not use strong
cleaning solutions.
6.2.2. Clean the sensors and solar cells with methylated spirit and a clean cloth and wipe dry with a lint-free cloth.
p
p
WARNING! Before use, ensure that you read, understand and apply Section 1 safety instructions.
4.1. Check that the front cover lens, automatic filter and rear cover lens are correctly installed and that
the retaining clip is securely in place. See Section 3.2.
4.2. Adjust the headband, fig.8.A. so the helmet is seated on the head as low as possible.
4.3. Push in and then rotate the headband knob at the rear, fig.8.B. until the headband and sweat band sit firmly
but comfortablyin place. Release knob to lock selected adjustment.
4.4. Adjust left hand pivot knob fig.8.C so helmet will stay in any position, but can be easily rotated by hand.
4.5. Face mask angle may be altered by lifting the adjustment tab and relocating the pin in one of the other
holes in the side of the face mask.
PROBLEM CAUSE(S) CORRECTION
SHADE CARTRIDGE DOES The sensors are soiled or obstructed. Clean
NOT DARKEN OR FLICKERS. Front cover lens soiled or damaged. Clean or replace
Welding current too low. Adjust welding current
Solar cells inactive Expose to daylight for 10 mins. and retest
POOR VISION Lenses and/or filters soiled. Check, clean or replace
Insufficient ambient light. Illuminate work place
SLOW RESPONSE Operating temperature too low Do not use at temperatures
below -100C (+140F)
WELDING HELMET SLIPS Headband not adjusted correctly.Readjust helmet, refer to Section 4.
4. INSTRUCTIONS FOR USE
5. PROBLEM SOLVING
6. MAINTENANCE
SWH189 - 3 - 160703
7. PARTS LIST
s
s
DANGER! If, at any time, the automatic cartridge FAILS to darken when exposed to a welding arc, DO NOT USE.
Remove cartridge and return to your dealer for service/inspection. Continued use of the product knowing that the auto
darkening feature is not functioning may damage your eyes and cause blindess. Continued use of the helmet which is not
functioning will invalidate the warranty and could prohibit a successful claim on any insurance policy.
3.1. Contents
3.1.1. Check contents against the list below and in the case of missing or damaged items contact your supplier
immediately.
 Face mask with automatic cartridge filter, front and clear rear cover lens fitted, fig.1.
 Headband/harness assembly, fig.2.  Square section pivot bolt (2), fig.3. Spacer(2), fig.4.
 Adjustment back plate, fig.5. Nut (2), fig.6. Shade 1 Filter (not shown).
MIG/EW200R Cover lens, front
MIG/EW201R Shade 1 filter (for use with automatic cartridge)
SWH099/ICL Cover lens, rear (for use with automatic cartridge)
SWH189 Automatic cartridge plus shade 1 filter and rear cover lens.
Fig 7
3. CONTENT &ASSEMBLY
Fig 8 A
B
C
SWH189 - 3 - 160703
Fig 1 Fig 2 Fig 3 Fig 4 Fig 5 Fig 6

Other Sealey Welding Accessories manuals

Sealey PWH599 User manual

Sealey

Sealey PWH599 User manual

Sealey SGA1.v3 User manual

Sealey

Sealey SGA1.v3 User manual

Sealey SR20.V2 User manual

Sealey

Sealey SR20.V2 User manual

Sealey GCSC219 User manual

Sealey

Sealey GCSC219 User manual

Sealey SHADE 10 User manual

Sealey

Sealey SHADE 10 User manual

Sealey PWH616 User manual

Sealey

Sealey PWH616 User manual

Sealey SGA3.V2 User manual

Sealey

Sealey SGA3.V2 User manual

Sealey SSP6 User manual

Sealey

Sealey SSP6 User manual

Sealey SGA1.V4 User manual

Sealey

Sealey SGA1.V4 User manual

Sealey BTR4.V3 User manual

Sealey

Sealey BTR4.V3 User manual

Sealey MIG/LITE User manual

Sealey

Sealey MIG/LITE User manual

Sealey WFS94X User manual

Sealey

Sealey WFS94X User manual

Sealey PWH610 User manual

Sealey

Sealey PWH610 User manual

Sealey PWH399 User manual

Sealey

Sealey PWH399 User manual

Sealey Siegen Tools S01000.V2 User manual

Sealey

Sealey Siegen Tools S01000.V2 User manual

Sealey Siegen Tools S01001.V2 User manual

Sealey

Sealey Siegen Tools S01001.V2 User manual

Sealey PWH620 User manual

Sealey

Sealey PWH620 User manual

Sealey MIG/N315 User manual

Sealey

Sealey MIG/N315 User manual

Sealey SWT1120 User manual

Sealey

Sealey SWT1120 User manual

Sealey SGA3 User manual

Sealey

Sealey SGA3 User manual

Sealey PWH599 User manual

Sealey

Sealey PWH599 User manual

Sealey VSAC135 User manual

Sealey

Sealey VSAC135 User manual

Sealey PWH599 User manual

Sealey

Sealey PWH599 User manual

Sealey PWH601 User manual

Sealey

Sealey PWH601 User manual

Popular Welding Accessories manuals by other brands

Hypertherm PAC200T Field Service Bulletin

Hypertherm

Hypertherm PAC200T Field Service Bulletin

COWLEY INDUSTRIES LRS1000 Installation and operating instructions

COWLEY INDUSTRIES

COWLEY INDUSTRIES LRS1000 Installation and operating instructions

Migatronic Push Pull FKS 400 user guide

Migatronic

Migatronic Push Pull FKS 400 user guide

Nederman Fume Eliminator FE 840/2500/P150 user manual

Nederman

Nederman Fume Eliminator FE 840/2500/P150 user manual

Redarc RS3WK-001 instruction manual

Redarc

Redarc RS3WK-001 instruction manual

Miller Watertank L owner's manual

Miller

Miller Watertank L owner's manual

Amada IS-800A-10 Series Operation manual

Amada

Amada IS-800A-10 Series Operation manual

Lincoln Electric IDEALARC AC-1200 Technical specifications

Lincoln Electric

Lincoln Electric IDEALARC AC-1200 Technical specifications

Laser BWT15 manual

Laser

Laser BWT15 manual

Hobart Inventor Series owner's manual

Hobart

Hobart Inventor Series owner's manual

Cebora 1676 instruction manual

Cebora

Cebora 1676 instruction manual

Masterweld MW 8100 User & maintenance manual

Masterweld

Masterweld MW 8100 User & maintenance manual

Abicor Binzel MF1-Rear operating instructions

Abicor Binzel

Abicor Binzel MF1-Rear operating instructions

RUD LRBS-FIX Series manual

RUD

RUD LRBS-FIX Series manual

Ozito ADWH-001 instruction manual

Ozito

Ozito ADWH-001 instruction manual

iBell IBL 550S Operator's manual

iBell

iBell IBL 550S Operator's manual

RPB z4 instruction manual

RPB

RPB z4 instruction manual

Goldschmidt SMARTWELD RECORD Brief Instruction

Goldschmidt

Goldschmidt SMARTWELD RECORD Brief Instruction

manuals.online logo
manuals.online logoBrands
  • About & Mission
  • Contact us
  • Privacy Policy
  • Terms and Conditions

Copyright 2025 Manuals.Online. All Rights Reserved.