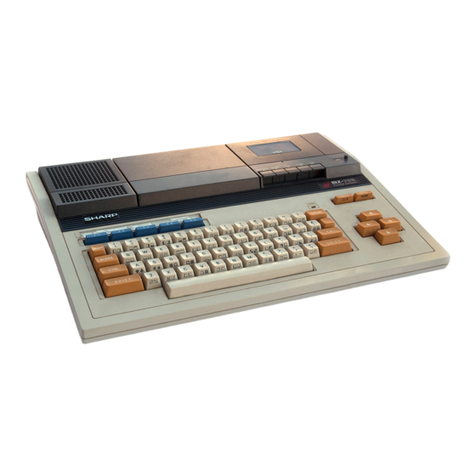
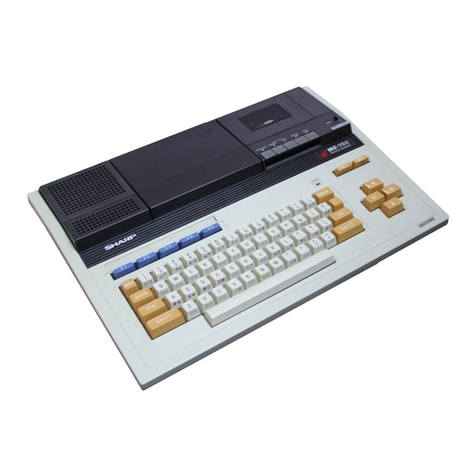
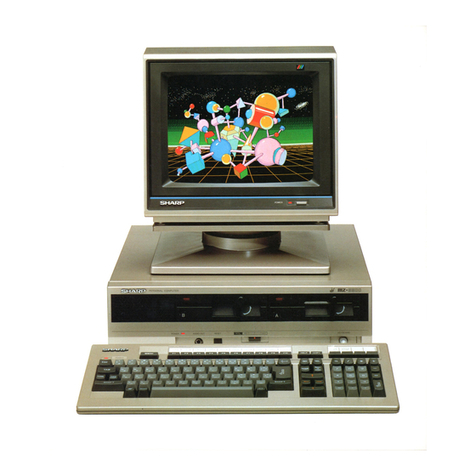
Sharp MZ-800 User manual

Personal
Computer
MZ-SOO
OWNER’S
MANUAL

Personal
Computer
MNZSOO
Owner’s
Manual
(©
SHARP
CORPORATION

NOTICE
This
manual
has
been
written
for
the
MZ-800
personal
computers
and
the
BASIC
interpreter
(1Z-016)
which
is
provided
with
the
MZ-800.
(1)
All
system
software
for
the
MZ-800
computers
is
supported
in
software
packs
(cassette
tape,
etc.)
in
file
form.
The
contents
of
all
system
software
and
the
material
presented
in
this
manual
are
subject
to
change
without
prior
notice
for
the
purpose
of
product
improvement
and
other
reasons,
and
care
should
be
taken
to
confirm
that
the
file
version
number
of
the
system
soft-
ware
used
matches
that
specified
in
this
manual.
(2)
All
system
software
for
the
Sharp
MZ-800
personal
computer
has
been
de-
veloped
by
the
Sharp
corporation,
and
all
rights
to
such
software
are
reserved.
Reproduction
of
the
system
software
or
the
contents
of
this
book
is
pro-
hibited.
(3)
This
computer
and
the
contents
of
this
manual
have
been
fully
checked
for
completeness
and
correctness
prior
to
shipment;
however,
if
you
should
en-
counter
any
problems
during
operation
or
have
any
questions
which
cannot
be
resolved
by
reading
this
manual,
please
do
not
hesitate
to
contact
your
Sharp
dealer
for
assistance.
Not
withstanding
the
foregoing,
note
that
the
Sharp
Corporation
and
its
representatives
will
not
assume
responsibility
for
any
losses
or
damages
in-
curred
as
a
result
of
operation
or
use
of
this
equipment.

Preface
Congratulations
on
purchasing
the
MZ-800
computer.
Your
MZ-800
is
a
compact
personal
computer,
featuring
640
x
200
dot
addressable
graphics,
16-colour
display,
and
a
programmable
sound
genera-
tor
(PSG)
which
can
generate
3-tone
chords
over
6
octaves.
One
of
the
excellent
features
of
the
MZ-800
is
that
it
contains
hardware
which
makes
it
compatible
with
the
MZ-700
series
computer.
This
makes
it
possible
for
you
to
use
most
of
the
existing
programs
for
the
SHARP
MZ-700
series
computers
on
your
MZ-800.
This
manual
is
written
both
as
a
guide
to
the
MZ-800
and
a
BASIC
reference
manual.
The
manual
is
constructed
as
follows.
Chapter
I
describes
how
to
unpack,
handle,
and
setup
your
MZ-800,
and
what
to
do
if
a
problem
occurs.
Chapter
2
describes
how
to
turn
on
the
power,
load
the
BASIC
interpreter,
and
turn
off
the
power.
Chapter
3
explains
the
BASIC
interpreter.
This
chapter
also
shows
you
how
to
write
a
simple
pro-
gram,
edit
it,
save
it
on
a
cassette
tape
and
load
it
back
into
memory.
Chapter
4
describes
the
functions
of
the
keyboard
keys.
This
chapter
also
describes
how
to
operate
the
data
recorder
and
handle
tapes.
Chapter
5
presents
the
background
knowledge
you
need
to
be
able
to
write
programs.
Chapter
6
describes
the
BASIC
commands
and
statements.
Chapter
7
describes
the
hardware
configuration
of
the
MZ-800
and
I/O
port
control.
It
also
describes
peripheral
devices
and
how
to
connect
them.
Chapter
8
explains
the
monitor
program,
which
allows
you
to
‘bypass’?
BASIC
and
directly
access
the
MZ-800’s
memory.
Chapter
9
explains
the
MZ-700
mode
of
the
MZ-800.
Make
sure
that
you
read
the
handling
and
setup
instructions
before
turning
on
the
computer’s
power
switch.
Read
this
manual
thoroughly
to
get
the
most
out
of
your
MZ-800
computer.

CONTENTS
Chapter
1
Introduction
1.1
Unpacking
.
1.2
Handling
...
1.3
Appearance
1.4
Setup
Chapter
2
Start
Up
2.1
Power-on
2.3
Running
the
Demonstration
Program
Chapter
3
Basic
Operation
SA
ntrod
chon
evvecsspaavicesanwarccsnesexrenascacusvaesavsannventawasteansawdaceanaaetiaevetcessacebecewediee
3.2
Getting
to
know
the
Keyboard
3.3
Writing
a
Simple
Program
3.4
Editing
Programs
...........
3.5
Saving
a
Program...
3.6
Loading
a
Program.
Chapter
4
Keyboard
and
Data
Recorder
4.1
Keyboard
Fe
DAE
RECOLOR
ans
svi
covnnsscianssivasing
cescunaneuvensavasensvanavinesivasny
CaniceasuatacennasuskansnsavauTiy
4-6
Chapter
5
Programming
Concepts
5.1
Multi-statement
Lines
and
Line
Numbers
5.2
Numeric
Data
and
String
Data
5.3
Constants...
5.4
Variables
...
5.5
Array
Variables
5.6
Expressions
5.9
Screen
Coordinates
.
Chapter
6
MZ-800
BASIC
Commands
and
Statements
G21
Commands
sts
evesanecesnnrsssunnseonnnuresaaaneanianatsswpunssenavestavtaasundacavenncnnceecsmedessaeven
ts
6.2
Fundamental
Statements
..
6.3
File
Control
Statements
...
6.4
Graphics
Control
Statements
.
6.5
Music
Control
Statements
...
6.6
Printer
Control
Statements..
6.7
Machine
Language
Control
Statements
6.8
Error
Processing
Statements

Chapter
7
Hardware
7.1
MZ-800
Hardware
.,
7.1.1
System
diagram
7.1.2
System
switch
settings.
7.1.3
I/O
port
control..
7.2
Peripheral
Devices
..
7.2.1
Standard
interfaces
.
7.2.2
Expansion
I/O
connector
.
7.2.3
RAM
file
board
(MZ-1R18).
7.2.4
Joystick
..
7.2.5
Printers
7.2.6
Optional
graphic
memory
MZ-1R25.
7.2.7
External
cassette
tape
recorder
(for
MZ-811
only)
-
7-2
7-2
7-3
+
7-4
-
7-8
7-8
-
7-8
-
7-10
-
7-11
.
7-13
.
7-16
.
7-18
Chapter
8
Monitor
S21)
General
sssciesesssievasesvnves
aaa
8.2
ROM
Monitor
and
BASIC
Monito
8.3
Starting
the
ROM
Monitor
8.4
Monitor
Commands
8.5
BASIC
Monitor
.....
8.6
BASIC
Monitor
Commands
+
8-2
.
8-3
.
8-5
-
8-9
Chapter
9
MZ-700
Mode
9.1
Using
MZ-700
Programs
9.2
Summary
of
MZ-700
BASIC
Commands
and
Statements,
Functions
and
Operations
Appendixes
Appendix
A
Display
Control
in
the
MZ-800
Mode
Programmable
Sound
Generator
.
.
A-7
Reserved
Words,
scsssisossisrsesse
Restrictions
on
Using
File
1/O
Commands
and
Statements
.A-13
Monitor
Subroutines...
-
A-l4
Making
Backup
Copy
of
the
BASIC
Interpreter
Optional
Colour
Plotter-Printer
MZ-1P16
Colour
Plotter-Printer
Control
Codes
COdS
TRADES,
saves
sxinsapsesvrnsnvnaxsncsceds
Error
Messages
Generated
by
the
Monito!
Error
Messages
Generated
by
BASIC
ZEZrxcrro
mma
Specification
..


Chapter
1
Introduction

This
chapter
describes
how
to
handle
and
set
up
the
MZ-800
computer
system.
Read
this
chapter
carefully
before
turning
on
the
power
switch.
1.1
Unpacking
Remove
the
MZ-800
from
the
packing
carton
and
check
that
you
have
the
following
items.
Cassette
(containing
the
MZ-800
BASIC
interpreter
program,
a
demonstration
program
for
the
MZ-800
BASIC
interpreter,
the
MZ-700
BASIC
interpreter,
and
demonstration
programs
for
the
MZ-700
BASIC
interpreter)
ES;
Owner's
manual
(this
manual)
Computer
>
Definable
key
label
Store
the
carton
and
packing
materials
away
in
a
safe
place,
so
that
you
can
reuse
them
if
you
have
to
transport
the
computer
in
the
future,
1-2

1.2
Handling
1)
This
computer
uses
many
precision
parts.
Do
not
use
or
store
it
in
extremely
hot
or
cold
condi-
tions,
or
under
conditions
where
the
temperature
changes
rapidly.
2)
Do
not
use
or
store
the
computer
in
damp
or
dusty
places,
and
avoid
exposing
it
to
corrosive
chem-
icals
or
gases.
3)
Do
not
block
the
ventilation
holes
or
place
large
objects
nearby
that
will
disrupt
ventilation.
4)
Do
not
subject
the
computer
to
shock
or
vibration.
5)
Do
not
expose
the
computer
to
direct
sunlight.
6)
Do
not
allow
water
or
other
liquid
to
enter
the
cabinet.
Using
the
computer
when
it
is
wet
is
very
dangerous,
and
will
damage
the
computer’s
electronics.
7)
Do
not
disassemble
the
cabinet
unless
you
are
installing
options
as
instructed
by
documents
from
SHARP.
8)
Radios
and
TV
sets
may
pick
up
interference
from
RF
(radio
frequency)
noise
generated
by
the
computer.
Keep
such
equipment
(other
than
that
you
may
be
using
as
the
computer’s
display
unit)
well
away
from
the
computer.
9)
When
peripheral
devices
are
connected,
the
display
image
may
jitter.
If
this
problem
occurs,
change
the
layout
of
your
system’s
equipment.
10)
Do
not
place
any
object
other
than
the
optional
plotter/printer
(MZ-1P16)
on
the
cabinet.
11)
After
turning
off the
power
switch,
unplug
the
power
cable
by
grasping
the
plug
molding,
not
the
cable.
12)
Make
sure
that
you
turn
off
the
power
switch
when
you
not
using
the
computer.
After
turning
off
the
power
switch,
wait
at
least
10
seconds
before
turning
it
on
again,
otherwise
the
system
may
not
operate
properly.
13)
Use
a
dry
soft
cloth
to
clean
the
unit.
Do
not
use
a
wet
cloth
or
volatile
fluids
such
as
alcohol
or
benzene.
Discolouration
or
deformation
of
the
cabinet
may
result
if
this
precaution
is
ignored.
14)
If
you
notice
any
abnormal
condition
such
as
an
extremely
high
temperature,
an
abnormal
odour,
or
smoke,
stop
what
you
are
doing
and
quickly
turn
off
the
power
then
unplug
the
power
cable.
MZ-811
and
MZ-821
One
of
the
models
described
in
this
manual
may
not
be
available
in
some
countries.
This
manual
explains
two
personal
computer
models:
the
MZ-811
and
the
MZ-821.
Differences
between
these
two
computers
are
as
follows.
Model
name
|
MZ-811 MZ-821
|
Data
recorder
|
Optional
Standard
|
Not
connectable
Ordinary
cassette
recorder
|
Connectable
When
the
optional
MZ-1T04
data
recorder
is
installed
on
the
MZ-811,
it
becomes
equivalent
to
the
MZ-821.
Procedures
for
installing
the
data
recorder
are
described
in
the
MZ-1T04
in-
struction
manual.
The
explanations
in
this
manual
are
based
on
the
MZ-821.
However,
the
explanations
on
pages
7-3
and
7-18
apply
only
to
the
MZ-811.

1.3,
Appearance
(Front
view)
Data
recorder
ay
/
Cursor
control
keys
Insert
and
delete
keys

(Rear
view)
Channel
control
B/W-colour
switch
Composite
signal
output
jack
RGBI
signal
output
connector
Expansion
slot
compartment
cover
Reset
switch
Power
cable
socket
Printer
connector
Cassette
tape
recorder
jacks
(These
jacks
are
not
used.)
‘System
switch
Power
switch
Joystick
connectors
RF
signal
output
jack
Volume
control
Printer
power
jack
(Note:
If
this
jack
is
short-circuited,
the
memory
contents
will
be
lost.)
1-5

1.4
Setup
To
operate
your
MZ-800
computer,
you
must
first
set
up
the
system.
To
do
this,
you
will
need
to
con-
nect
a
display
unit
to
see
what
the
computer
is
doing.
SHARP
supplies
several
types
of
display
units
for the
MZ-800
computer,
or
you
can
use
an
ordinary
home
TV
set
providing
it
can
receive
the
VHF
band.
The
minimum
configuration
your
computer
can
operate
with
is
shown
below:
The
following
explanation
shows
the
setup
procedure
for
a
typical
system.
(1)
Using
a
TV
set
To
use
a
TV
set
as
the
display
unit,
use the
monitor
cable
provided
with
your
MZ-800.
1)
Disconnect
all
antenna
cables
from
the
TV
set.
(If
they
are
left
connected,
RF
interference
generat-
ed
by
the
computer
will
be
radiated
from
your
TV
antenna,
which
may
interfere
with
neighboring
TV
sets.)
2)
Insert
the
monitor
cable
pin
plug
into
the
RF
pin
socket
on
the
rear
of
the
MZ-800.
Connect
the
other
end
of
the
cable
to
the
75-ohm
UHF
antenna
terminal
on
your
TV
set.

750
UHF
antenna
terminal
3)
If
the
TV
set
is
a
colour
unit,
position
the
B/W-colour
switch
on
the
MZ-800
to
COLOR,
otherwise
position
the
switch
to
B/W.
4)
Tune
the
channel
selector
on
your
TV
set
to
a
vacant
channel
between
33
and
39.
5)
Turn
on
the
TV
set
then
turn
on
the
MZ-800.
As
shown
in
the
figure
below,
adjust
the
channel
control
trimmer
so
that
the
following
image
is
clearly
displayed
on
the
TV
screen.
|
|RF

Make
ready
CMT
Please
push
key
C:
Cassette
tape
M:
Monitor
Notes:
©
The
image
quality
on
your
TV
set
will
not
be
as
good
as
that
obtained
from
a
monitor
supplied
by
SHARP.
*
Part
of
the
image
may
not
be
displayed
on
some
TV
sets,
and
this
is
most
likely
due
to
how
the
TV
controls
are
set
up.
In
such
cases,
consult
your
dealer,
*
If
the
UHF
antenna
terminal
does
not
use
a
pin
jack,
use
a
monitor
cable
with
a
pin
plug
at
one
end
and
the
correct
connector
for
your
TV
set
at
the
other
end,
The
monitor
cable
impedance
must
be
75
ohms,
to
match
the
impedance
of
the
RF
socket
of
your
TV.
*
No
audio
signal
is
output
from
the
RF
socket,
therefore
adjust
the
volume
control
of
the
TV
set
to
minimum.
(2)
Using
the
MZ-1D19
colour
display
unit
1)
Plug
the
square
connector
of
the
connection
cable
provided
with
the
MZ-1D19
into
the
connector
on
the
rear
panel
of
the
display
unit.
2)
Plug
the
DIN
connector
of
the
connection
cable
into
the
RGB
connector
on
the
rear
panel
of
the
MZ-800.
Note:
A
colour
TV
set
which
has
an
RGB
input
terminal
can
also
be
connected
to
the
RGB
connector
of
the
MZ-800.
Prepare
the
monitor
cable
as
described
in
the
instruction
manual
for
the
TV
set.

(3)
Using
a
green
display
unit
(MZ-1D04)
Insert
the
pin
plug
of
the
green
display
unit
cable
into
the
composite
signal
output
jack
on
the
rear
panel
of
the
MZ-800.
Position
the
B/W-colour
switch
to
B/W.
Note:
A
colour
TV
set
with
a
video
input
terminal
can
be
connected
to
the
composite
signal
output
jack
of
the
MZ-800.
The
monitor
cable
provided
with
the
MZ-800
can
be
used
for
this
connection.

1.5
In
Case
of
Difficulty
If
you
have
any
problems
with
your
MZ-800
either
now
or
in
the
future,
read
this
section
first
then
if
necessary
contact
your
dealer.
The
following
table
lists
possible
problems
and
checks
you
can
make.
Problem
T
Points
to
check
Image
quality
is
poor.
*
Is
the
monitor
cable
connected
correctly?
Is
the
selected
TV
channel
the
same
as
the
channel
control
setting
on
the
MZ.-800?
(See
page
1-7.)
Is
the
B/W-colour
switch
selected
correctly?
Nothing
is
displayed.
*
Is
the
power
switch
of
the
display
switched
ON?
©
Is
the
display
unit
power
cable
plugged
into
an
AC
outlet?
_|
The
program
will
not
stop.
*
To
stop
a
BASIC
program,
press
and
hold
the
|
SHIFT
|
key,
then
press
the
|
BREAK
|
key.
To
stop
a
machine
language
program
or
the
monitor
program,
press
the
RESET
switch
on
the
rear
panel.
ms
The
program
cannot
be
loaded
from
the
cassette.
*
Is
loading
method
for
the
program
correct?
The
loading
method
differs
for
machine
language
programs
and
BASIC
programs.
Use
the
monitor
L
command
to
load
a
machine
language
program
and
the
LOAD
state-
ment
to
load
a
BASIC
program.
Other
problems
*
Press
the
RESET
switch
on
the
rear
panel
to
restart
MZ-800
)
operation.
|
1-10

Chapter
2
Start
Up

2.1
Power-on
To
start
up
your
MZ-800
computer,
first
turn
on
the
MZ-800,
then
turn
on
the
display
unit
and any
other
connected
peripheral
devices
power
switch.
Turn
on
the
equipment
in
the
following
order.
1)
The
MZ-800
computer
2)
The
expansion
unit
(MZ-1U06)
3)
Peripheral
devices
(such
as
the
printer)
You
will
see
the
following
message
on
the
screen
of
the
display
unit.
Make
ready
CMT
Please
push
key
C:
Cassette
tape
M:
Monitor
Remove
any
slack
from
the
cassette
tape
(see
page
4-7).
Press
the
|
EJECT
|
button
on
the
MZ-800
data
recorder.
Then
insert
the
cassette
with
the
side
marked
‘‘BASIC
1Z-016”
facing
upwards.
Close
the
cassette
compartment
cover
by
hand.
Press
the
[c]
key
on
the
main
keyboard.
(Pressing
the
[M]
key
starts
the
monitor.
See
Chapter
8.)
The
screen
display
will
change
as
follows:
[
Make
ready
CMT
Press
the
|PLAY
|
button
on
the
data
recorder.
The
screen
display
will
change
as
follows:
[
IPL
is
looking
for
a
program
2-2

The
following
message
is
then
displayed.
|
IPL
is
loading
MZ-1Z016
Wait
for
several
minutes,
then
the
following
display
will
appear
on
the
screen.
The
tape
stops
auto-
matically,
Press
the
STOP]
button.
BASIC
interpreter
12-016
VX.XX
Copyright
(C)
1984
by
SHARP
CORP.
XXXXxX
bytes
free
Ready
.
L
Cursor
(blinking)
This
display
indicates
that
the
BASIC
interpreter
has
been
loaded
into
memory
and
the
MZ-800
is
ready
to
accept
BASIC
commands.
This
display
is
called
the
‘‘initial’’
frame.
2.2
Power-off
When
you
switch
the
MZ-800
off,
all
programs
and
data
stored
in
memory
will
be
lost.
Therefore,
execute
a
SAVE
operation
prior
to
powering
the
computer
off.
(Chapter
3
describes
how
to
save
data
onto
the
cassette
tape.)
To
power
off
the
MZ-800,
finish
any
BASIC
operations
you
may
have
started,
then
check
the
screen
to
make
sure
‘‘Ready”’
is
displayed
and
the
cursor
is
blinking.
Switch
OFF
the
power
switch.
Turn
off
the
equipment
in
the
following
order.
1)
Peripheral
devices
(such
as
the
printer)
2)
The
expansion
unit
(MZ-1U06)
3)
The
MZ-800
computer
Note:
Do
not
power
off
the
MZ-800
while
the
data
recorder
is
operating
(turning).
2-3
Other manuals for MZ-800
2
Table of contents
Other Sharp Desktop manuals

Sharp
Sharp MZ-80A User manual

Sharp
Sharp MZ-700 Series User manual

Sharp
Sharp SCR3042FB User manual

Sharp
Sharp MZ-350C User manual

Sharp
Sharp CE-159 User manual

Sharp
Sharp PC-4741 User manual

Sharp
Sharp MZ-700 Series User manual

Sharp
Sharp MZ-3500 User manual

Sharp
Sharp MZ-800 User manual

Sharp
Sharp PC-6220 User manual

Sharp
Sharp PC-AX40 User manual

Sharp
Sharp MZ-700 Series User manual

Sharp
Sharp Shuttle PN-SPCi5W7 User manual

Sharp
Sharp PN-L602B Instruction Manual

Sharp
Sharp YO-250M User manual

Sharp
Sharp PC-7200 User manual

Sharp
Sharp MZ-5500 User manual

Sharp
Sharp ZQ-4400 User manual

Sharp
Sharp PC-1500A User manual
Sharp
Sharp MZ-80B User manual