manuals.online logo
Brands
  1. Home
  2. •
  3. Brands
  4. •
  5. Sharp
  6. •
  7. Electronic Dictionary
  8. •
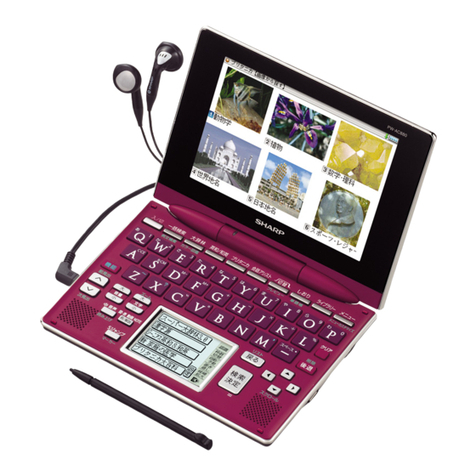
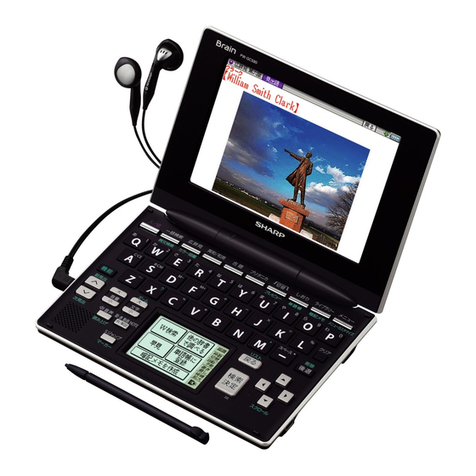
  9. Sharp PW-AC900 User manual

Sharp PW-AC900 User manual

QUICK REFERENCE PW-AC900
PRINTED IN JAPAN 09FSP
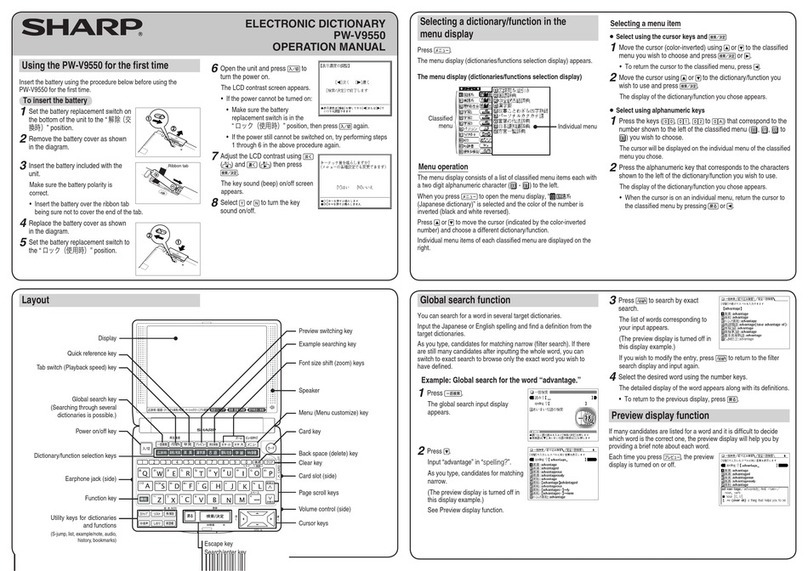
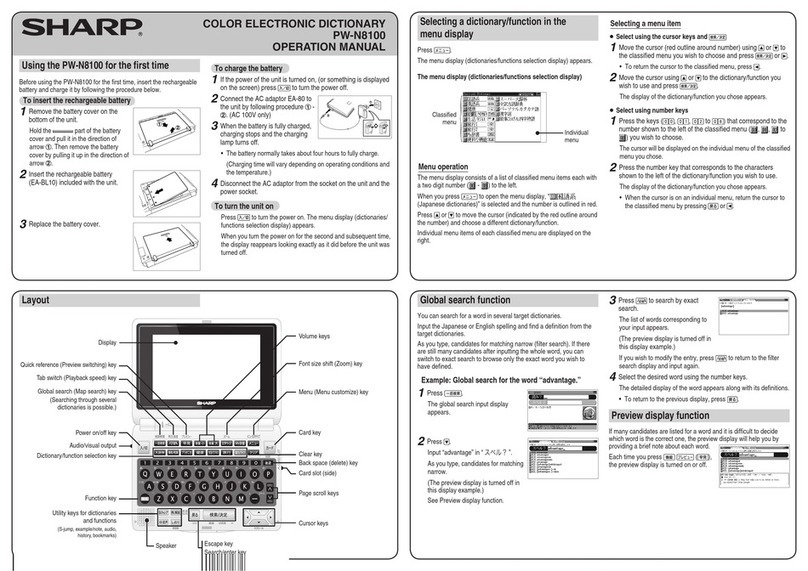
Global search function
You can search for a word in multiple contents/dictionaries.
Enter a word into any of the “日本語” (Japanese), “スペル” (English spelling),
“中国語” (Chinese), “ピンイン” (Pinyin), and “韓国語” (Korean) fields to
search within the target dictionary.
As you type, the candidates for matching narrow (filter search). If there are still
many candidates after entering the whole word, you can switch to “exact search”
to browse only the exact word you wish to have defined (Except for the search
using Pinyin).
• Japanese kanji, Chinese (Simplified characters), and Korean (Hangul) characters
have to be entered by hand.
Example: Global search for the word “advantage.”
1
Press 一括検索 .
The global search entry screen
appears.
Select the text field according the
entry character type by using
or .
2
Press andenter
“advantage” in the “スペル?”
field.
As you type, the candidates for
matching narrow.
3
Press to search by
“exact search”.
The list of words corresponding to
your entry appears.
To change the entry, press to return to the filter search screen and enter
again.
4
Select the desired word using or and press
検索/決定 .
The details screen of the word appears along with its definitions.
• To return to the previous screen, press 戻る .
Preview display function
If many candidates are listed for a word and it is difficult to decide which word is
the correct one, the preview display will help you by providing a brief note about
each word.
Each time you press 機能
“プレビュー ” (preview) while
candidates are listed, the preview
display will be shown on the bottom,
shown on the right, or turned off in
this order.
(The preview display is turned off in
this screen example.)
Using the PW-AC900 for the first time
Be sure to charge the battery before using the unit.
1
Connect the (EA-80A) AC adapter in the order of ①and then ②.
When the charge lamp lights red, the charging has started.
Ĭ
ĭ
AC adapter connector
Charge lamp Power outlet
(AC)
2
When charging is complete, the charge lamp will turn off.
• A complete charge will normally take approximately 5.5 hours (the
charging time can change depending on operating temperature and
conditions).
3
Remove the AC adapter from the connector and the outlet.
4
Open the unit and press
入/切 to turn on the
power.
After a while, the calibration screen
for the touch pad appears on the
display (main display).
5
Pull out the stylus and use it to accurately touch each center
of the four “+” characters displayed on the touch pad on
the display. Then do the same to the four “+” characters
displayed on the handwriting pad (small screen).
Stylus
Pull out the
stylus to use.
Back of
the unit
• When calibration is finished the LCD contrast adjustment screen is displayed.
6
Adjust the LCD contrast of the handwriting pad by touching
or on the pad.
7
After these adjustments, press 検索/決定 .
The key sound (beep) on/off screen appears.
8

Press
Y
or
N
to turn the key sound on/off.
The kana entry screen appears.
9
Press Yto select alphabet character input or press Nto
select Japanese input.
The date/time settings screen is displayed.
10
Select the date items using or , and then enter “年”
(year), “月” (month) and “日” (day) (e.g. June 12th, 2010 →
10 06 12) using the number buttons on the handwriting pad.
Confirm that the cursor is on “AM (午前)” or “PM (午後)”,
and then select one of them using or .
Press , select the time items using or and then
enter “時” (hour) and “分” (minute) (e.g. 9:00 →09 00).
11
Confirm that the information entered is correct and press
検索/決定 .
The Home screen appears.
Selecting a content in the dictionary menu screen
Press
辞書
メニュー
.
The dictionary menu screen appears.
Dictionary menu screen
(contents/functions selection display)
Select an item by pressing
or .
Category menu
Select an item by pressing
or and then press
検索/決定
.
Or, select an item by typing
1
to
9
.
Individual menu
Selecting a menu item
1
Press
辞書
メニュー
.
2
Use or to select a category menu item.
Or, use the numeric keys to enter the category number to
select the item.
The individual menu for the selected category menu item is displayed.
3
In the individual menu, use or to select the content/
function and then press 検索/決定 .
Or, use the numeric keys ( 1to 9) to enter the number
in front of the content/function (1 to 9).
The selected content/function screen is displayed
.
•The selected content/function screen can also be selected by touching the
relevant menu item.
Selecting a function in the Home screen
Press Home to display the Home screen. You can select and use unit functions
from the Home screen.
Move the cursor to the desired
icon using , , , or
and press 検索/決定 or touch
the icon to select it.
Touch operations
The PW-AC900 can be operated by touching the main screen with the stylus.
The following touch operations are
supported.
①②
Single touch:
This is the operation of lightly touching or
pressing an item or button on the screen
and releasing it.
①②
Double touch:
This is the operation of touching the same
place twice on the screen.
On the dictionary list screen, for example, a candidate is selected by the first touch
and the screen is switched by the second touch.
ELECTRONIC DICTIONARY
Display (main display)
/
touch pad
Charge lamp
Example/explanation key
Global search key
Power ON/OFF key
Function key
Earphone jack (side)
Page scroll keys
Speaker
Volume control keys
(volume up/down)
A
udio key
Content selection keys
Character size change keys Handwriting pad
Card slot (Front)
Escape key
Clear key
AC adapter connector (side)
USB connector (side)
Stylus holder (side)
Utility keys for
dictionaries/functions
Search/enter key
Cursor keys
S-jump key
Back space key
Home key
Dictionary menu key
Layout
PW-AC900_QUICK REFER_Omote_E.ind1 1 6/25/2009 1:00:16 PM
Entering characters using the frameless pad
Example: Enter the word “clump” in an English-Japanese dictionary
1

Before entering the word in an English-Japanese dictionary,
touch
枠数
to switch the pad to the frameless pad. *
* You can only switch to the frameless pad when entering alphabet characters.
2

Use the stylus to write the word “clump” in the handwriting area.
If automatic recognition is set, the character will be
recognized and a candidate character will appear in
the character entry display area 1 to 2 seconds after
the stylus has been removed.
If manual recognition is set, write the final character
and then touch 認識 to let it be recognized. For
longer words, enter up to twelve characters and
touch 採用 to transfer them to the entry area.
3
If the word is correctly recognized, touch 採用 to transfer it
to the entry area.

4

If the word is not correctly recognized, use the following method.
<Switching characters>
If the number of recognized characters is correct and
one of the characters is incorrect, touch the incorrect
character. Candidate characters will be displayed below
the entry area. Touch the correct character to replace the
incorrect character to the correct one.
<Selecting from candidates>
When the number of recognized characters (and/or the
characters themselves) is incorrect, touch
別候補
and
then select a correctly spelled word from the displayed
candidates.
Points on writing handwritten characters
Paying attention to the following points will ensure that handwritten characters are
easily recognized.
• Write each individual stroke clearly. Ensure that characters have the correct
number of strokes.
• Write clearly and do not use short or conventional forms. Avoid writing
sloping characters.
• On the single-frame or dual-frame pad, write lower case characters smaller
to distinguish between identical-looking upper and lower case characters
such as upper case “C” and lower case “c”. Small characters such as the
small “ っ”should also be written smaller.
• Write English letters in block form and do not attach ornamentation to the
ends of strokes.
• When using frameless entry, write English characters separately, one at
a time. You cannot write in cursive style or return to previously formed
characters to add dots or crosses.
• When using frameless entry, write words on a single line. You cannot write
on two lines.
• When writing letters, do not press hard; always write lightly.
Using the mark on the screen
Appearance of the
 
例,
 
解説 ,
 
NOTE
,
 
図,
 
表, or 動画
mark on the details screen indicates more information related to the entry is
available, such as example sentences, explanations, notes, illustrations, diagrams,
tables, and videos.
By pressing 例/解説 in screens where this mark is displayed, the mark will
display inverted.
When there are multiple marks, move to the desired mark by using , ,
, or . By pressing 検索/決定 , the contents are displayed.
To exit, press 戻る twice.
Listen to audio
When the mark appears, audio of the displayed information can be played
back.
Press to select the first mark, and the color of the mark is inverted.
Press , , , or to move the highlight to the desired mark and
press 検索/決定 (or touch the mark) to play back the contents.
Example: Play back the audio using “英会話とっさのひとこと
辞典”.
1
Press
辞書
メニュー
, use
to select “英語系Ⅰ”, and
then use to select “英会
話とっさのひとこと辞典”.
Press 検索/決定 until the
details screen is displayed.
2
Press and the mark
becomes inverted ( ).
Each time you press
検索/決定 , the audio
plays.
If several marks appear, press or to move the cursor to
the desired mark and press 検索/決定 .
By highlighting an English word and pressing 検索/決定 , you can look
up the word in English-Japanese dictionary and play back the audio.
◆
Press 戻る to stop the audio during play. Press 戻る and the color
of reverts to non-inverted.
◆Use 音量小 or 音量大 to first set the volume to low, then adjust it
to the desired level.
Selecting functions by touching
You can select various functions by touching the screen with the stylus, (or
highlighting by dragging).
1
Press 英和/和英 .
2Enter the word (Eg.: “header”) in the “スペル? ” field, and
press 検索/決定 .
3
Touch the starting point
“文” and drag to highlight
the words up to the end
point “ど”.
4
Touch the function to execute (Eg.: “マーカー(マーカーを
引きます)” (mark user-selected words).
The marker color selection window appears.
5
Select the marker color to use (green, yellow, pink, orange,
purple).
The words are registered in the word dictionary and marked in the selected
color.
• To select a different function such as Audio or S-jump, select the desired
function in Step 4 by touching it.
Entering a text memo
• When using a microSD memory card, insert it before switching to the Text
Memo screen. The unit exits Text Memo mode when a card is inserted or
removed while on the Text Memo screen.
Cards should be inserted or removed when on the Home screen.
Example: Enter “パラオ(Palau)は、風光明媚な国です。”
1

Press
Home
and then select
“テキストメモ” (
Text Memo
)
.
2
Touch カon the handwriting pad to select the character
type. Then enter “パラオ” and confirm it by pressing
検索/決定 .
•Kana cannot be entered in a text memo using 50-character kana entry.
3
Press 音量大 once or twice to display the full width symbol
palette, and then select “
(” to enter it.
4

Touch
 
_
a
on the handwriting pad to switch the character
type. Then press
機能
,
P
,
A
,
L
,
A
, and
U
to enter “Palau”.
5
Repeat step 3 to enter “ )
”.
6Touch あon the handwriting pad to switch the character
type. Then enter “は、
” and press 検索/決定 .
“、
” is entered when 文字大 is pressed.
7
Enter “ふうこうめいびな” and then press .
The entered characters change to “風光姪雛” with “風 光” in red
characters and “姪雛” in blue characters.
Red characters indicate the current conversion target.
8
Since “風 光” is correct, press 検索/決定 to move the
conversion target to the next block.
“姪” turns red and becomes the conversion target.
9
Select “明” using or and then press 検索/決定 .
“姪” changes to “ 明”, and “雛” turns red, indicating that it is now the
conversion target.
10
Since “雛” is not a conversion segment delimiter (i.e. a
phrase), it needs to be changed. Press 一括検索 or to
contract the phrase.
“雛” changes to “美名”, and “美” turns red.
11
Select “媚” using , and then press 検索/決定 . Then
select “な” in the same way and press 検索/決定 again.
The entered characters change to “風光明媚な”.
12
Enter “くにです”, select “国です” using , and then press
検索/決定 .
13
Press 文字小 , enter “ 。
”, and then press 検索/決定 .
14
When text entry is finished, save the data.
(1) Press
切替
to display the file menu, and then select “
名前を付けて
保存
”. The file save screen appears.
(2) Touch 本体 or カード as necessary, (or press
切替
) and
select memory.
(3) Enter a file name in the entry area and press 検索/決定 . The file is
saved with the entered name.
15
Press Home to exit Text Memo.
Note: Operation may not always proceed as described above due to the learning
function.
For details on using Text Memo, see “テキストメモ for Brain 使
用説明” in the manual.
Entering characters using the handwriting pad
Parts and functions
The handwriting pad is set to enter characters when the cursor is in any part of
the character entry area.
[
Single-frame pad]
• Touching the 枠数 button switches the single-frame pad to the dual-frame
pad or frameless pad.
認識 button
枠数 button
自動/手動 button
書き直し button
拡大 button
手書
/
50
音
button
Backlight button
Handwriting area (frame)
Candidate list display area
スペース button
Character entry type
indicator
Automatic/manual
recognition indicator
Entering characters using the single-frame pad
Example: Enter a Japanese word “持つ” from a Japanese-English dictionary.
1Press 英和/和英 and then to move the cursor to the
Japanese entry area.
The handwriting pad is now switched to enter kanji and kana.
2
Use the stylus to write “持” in the handwriting area.

3
If the character in the entry area is not the one you desired,
use the stylus to touch and select the desired character in
the list.
The character in the entry area changes.
• If you cannot find the character in the list, touch 書き直し or press
後退 to erase it and redraw it on the pad.
4
Likewise, enter “つ” in the entry area.
5

Press
検索/決定
.
The details screen appears.
The character shown in the candidate list display area
is also placed in the entry area so that the dictionary
search can proceed.
• When the manual recognition is used or when you
want to have the entry recognized soon after you
finished writing, press 認識 .
• When you start drawing, the previous entry is confirmed
and then erased.
PW-AC900_QUICK REFER_ura_E.indd 2 6/25/2009 10:54:03 AM

Other Sharp Electronic Dictionary manuals

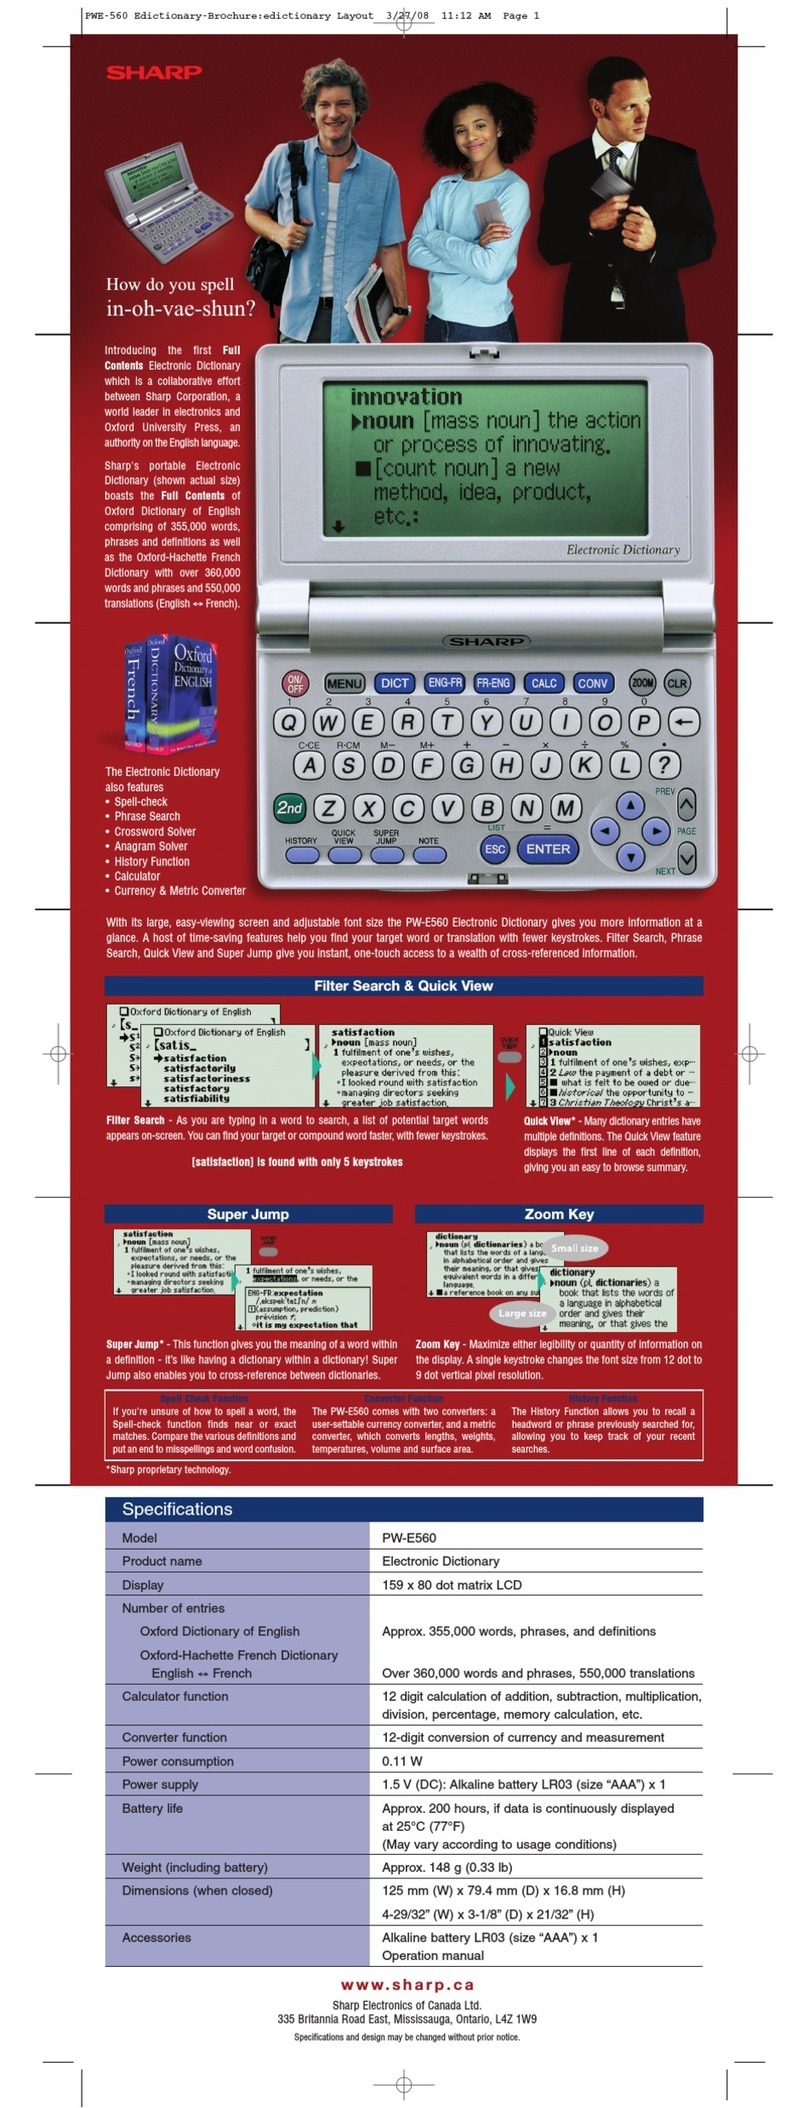
Sharp PW-AT770 User manual

Sharp

Sharp PW-AT770 User manual

Sharp PW-E410 User manual

Sharp

Sharp PW-E410 User manual

Sharp PW-A9200 User manual

Sharp

Sharp PW-A9200 User manual

Sharp PW-A7200 User manual

Sharp

Sharp PW-A7200 User manual

Sharp PW-GT570 User manual

Sharp

Sharp PW-GT570 User manual

Sharp PW-AC890 User manual

Sharp

Sharp PW-AC890 User manual

Sharp PW-V8910 User manual

Sharp

Sharp PW-V8910 User manual

Sharp PW-AC880 User manual

Sharp

Sharp PW-AC880 User manual

Sharp PW-E550 User manual

Sharp

Sharp PW-E550 User manual

Sharp PW-AT790 User manual

Sharp

Sharp PW-AT790 User manual

Sharp PW-A7000 User manual

Sharp

Sharp PW-A7000 User manual

Sharp PW-AT780 User manual

Sharp

Sharp PW-AT780 User manual

Sharp PW-E300 User manual

Sharp

Sharp PW-E300 User manual

Sharp PW-GC590 User manual

Sharp

Sharp PW-GC590 User manual

Sharp PW-TC980 User manual

Sharp

Sharp PW-TC980 User manual

Sharp PW-E560 User manual

Sharp

Sharp PW-E560 User manual

Sharp PW-AM700 User manual

Sharp

Sharp PW-AM700 User manual

Sharp PW-E420 User manual

Sharp

Sharp PW-E420 User manual

Sharp PW-N8100 User manual

Sharp

Sharp PW-N8100 User manual

Sharp PW-E310 User manual

Sharp

Sharp PW-E310 User manual

Sharp PW-V9550 User manual

Sharp

Sharp PW-V9550 User manual

Sharp PW-AT750 User manual

Sharp

Sharp PW-AT750 User manual

Sharp PW-E560 User manual

Sharp

Sharp PW-E560 User manual

Sharp PW-E260 User manual

Sharp

Sharp PW-E260 User manual

Popular Electronic Dictionary manuals by other brands

Openmoko Pocket manual

Openmoko

Openmoko Pocket manual

Franklin Deutsch/English Professor PRO BDS-1860 user guide

Franklin

Franklin Deutsch/English Professor PRO BDS-1860 user guide

Alula RE508XC installation guide

Alula

Alula RE508XC installation guide

Lingo TR-800A instruction manual

Lingo

Lingo TR-800A instruction manual

SmartRoom SR-ZSWDPW-UART-01 quick guide

SmartRoom

SmartRoom SR-ZSWDPW-UART-01 quick guide

Franklin DMQ-440N user guide

Franklin

Franklin DMQ-440N user guide

Symmetricom TM7000 user guide

Symmetricom

Symmetricom TM7000 user guide

Besta CD-637P user manual

Besta

Besta CD-637P user manual

LEXIBOOK COLLINS POCKET ENGLISH SPELLCHECKER WITH... instruction manual

LEXIBOOK

LEXIBOOK COLLINS POCKET ENGLISH SPELLCHECKER WITH... instruction manual

Kramer FC-5 user manual

Kramer

Kramer FC-5 user manual

Ectaco Partner X8 quick start

Ectaco

Ectaco Partner X8 quick start

Bosch INTEGRUS user manual

Bosch

Bosch INTEGRUS user manual

Resolution Products Wireless Translator RE208 instructions

Resolution Products

Resolution Products Wireless Translator RE208 instructions

Cross Technologies 2083-714A instruction manual

Cross Technologies

Cross Technologies 2083-714A instruction manual

Franklin BOOKMAN BDS-2023 user guide

Franklin

Franklin BOOKMAN BDS-2023 user guide

Ectaco Partner EB400T user manual

Ectaco

Ectaco Partner EB400T user manual

Tekron TTM 01-G user manual
Tekron

Tekron TTM 01-G user manual

Seiko TR-2250 Operation manual

Seiko

Seiko TR-2250 Operation manual

manuals.online logo
manuals.online logoBrands
  • About & Mission
  • Contact us
  • Privacy Policy
  • Terms and Conditions

Copyright 2025 Manuals.Online. All Rights Reserved.