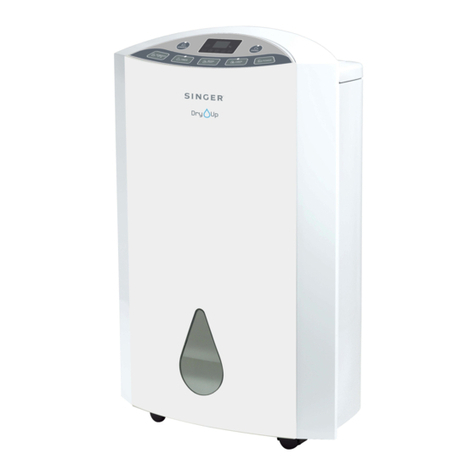
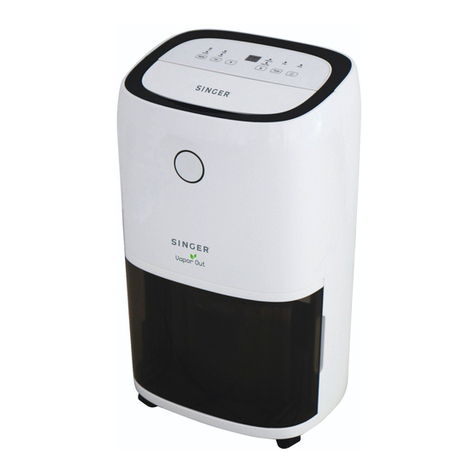
Singer Dry Up SDHM-20L ECO User manual

SDHM-20L ECO DRY UP
Dehumidifier
Αφυγραντήρας
GB
INSTRUCTION MANUAL
GR
ΒΙΒΛΙΟ ΟΔΗΓΙΩΝ
R290

GB ENGLISH....................................... 3
GR EΛΛΗΝΙΚΑ .................................. 30

3
ENGLISH
This product is using the Environment
friendly refrigerant R290. R290 has no
damaging influence on the ozone layer
(ODP), a negligible greenhouse effect (GWP)
and is available worldwide. This refrigerant
is tasteless and combustible, moreover,
it can burn and explode under certain
condition. Special precautions must be
taken into consideration before using and
maintenance of this appliance due to the
coolant's high flammability: so please read
this user manual carefully before using and
maintenance.
SYMBOLS FROM THE UNIT AND USER MANUAL
This unit uses a flammable refrigerant gas.
If refrigerant gas leaks and comes in contact
to fire or heating part, it will be created harmful
gas and there is risk of fire.
Read the USER MANUAL carefully before op-
eration and maintenance.
Further information is available in the USER
MANUAL and the SERVICE MANUAL.
Service personnel are required to carefully
read the USER and SERVICE MANUAL before
operation and maintenance.
Additional warning for appliance with R290 refrigerant gas
(refer to the rating plate for the type of refrigerant gas used).
R290 refrigerant gas complies with European environmental
directives.

4
ENGLISH
WARNINGS (FOR USING R290 REFRIGERANT ONLY)
Appliance shall be installed, operated and
stored in a room with a floor area larger than
4 m2.
This product needs to be in a room without
continuously operating ignition sources (for
example: open flames, an operating gas appli-
ance, an operating electric heater or stove with
open fire, etc.)
• Be aware that the refrigerants may not contain an odor.
• Do not pierce or burn.
• Do not use means to accelerate the defrosting process or to
clean, other than those recommended by the manufacturer.
• Compliance with national gas regulations shall be observed.
• Keep ventilation openings clear of obstruction.
• The appliance shall be stored so as to prevent mechanical
damage from occurring.
• A warning that the appliance shall be stored in a well-ventilat-
ed area where the room size corresponds to the room area as
specified for operation.
CAUTION: RISK OF FIRE
FLAMMABLE MATERIAL
READ THE MAΝUAL CAREFULLY
BEFORE USING THE APPLIANCE.
MAKE SURE TO SAVE THIS MANUAL
FOR FUTURE REFERENCE.

5
ENGLISH
• Any person who is involved with working on or breaking into a
refrigerant circuit should hold a current valid certificate from an
industry-accredited assessment authority, which authorizes
their competence to handle refrigerants safely in accordance
with an industry recognized assessment specification.
• Servicing shall only be performed as recommended by the
equipment manufacturer. Maintenance and repair requiring
the assistance of other skilled personnel shall be carried out
under the supervision of the person competent in the use of
flammable refrigerants.
IMPORTANT SAFETY INFORMATION
• Avoid installation behind a door.
• Use only with the supply voltage specified on the rating plate
of the Dehumidifier.
• Before installing, cleaning and servicing turn off the power and
unplug the unit.
• Do not place appliance close to a radiant heat source.
• Do not use the appliance near flammable gas of combustibles,
such as gasoline, bezene, thinner, etc.
• Do not immerse in liquid or allow liquid to run into the interior of
the appliance, as this could create an electrical shock hazard.
• Do not use this appliance on a wet surface, or where it can fall
or be pushed into water.
• Do not reach for an appliance that has fallen into water. Switch
off at supply and unplug immediately.
• Do not operate any appliance with a damaged cord, plug or
after the appliance malfunctions or has been dropped or dam-

6
ENGLISH
aged in any manner. Refer appliance to a qualified electrical
person for examination, electrical or mechanical adjustment,
service or repair before further use.
• Do not operate appliance with wet hands.
• This appliance is intended for indoor household use only and
not for commercial or industrial use.
• Use this appliance only as described in this manual. Any other
use is not recommended by the manufacturer and may cause
fire, electric shock or injury.
• Do not use this appliance in a window as rain may cause elec-
tric shock.
• Do not use abrasive cleaning products on this appliance. Wipe
with a soft cloth to clean the exterior. Always remove plug from
the mains supply before cleaning.
• Switch off the appliance before changing its position.
• Do not remove the power plug from the socket by pulling the
cord – grip the plug instead.
• Always unplug appliance when not in use.
• Do not run cord under carpeting, throw rugs or runners etc.
Arrange cord away from areas where it is likely to be tripped
over.
• Do not modify power cord length or share the outlet with other
appliances.
• Disconnect the power if strange sounds, smell or smoke
comes from it.
• Do not place heavy object on the power cord and take care so
that the cord is not compressed.
• This appliance is not intended for use by persons (including
children) with reduced physical, sensory or mental capabili-
ties, or lack of experience and knowledge, unless they have
been given supervision or instruction concerning use of the

7
ENGLISH
appliance by a person responsible for their safety.
• Young children should be supervised to ensure they do not
play with the appliance.
• If the supply cord is damaged, it must be replaced by a quali-
fied electrical person in order to avoid a hazard.
• Do not spray pesticides or flammable gas near the unit.
• Do not scrape the unit using sharp objects.
• Do not splash any oil or water into the unit.
• Install the unit on a flat, horizontal surface to avoid vibration
and noise.
• Do not put heavy objects on the appliance.
• Do not cover the intake or exhaust opening with cloths or tow-
els.
• Do not drink or use the water drained from the unit.
• Do not take the water tank out during operation.
• Empty the water tank before moving the unit to avoid water
spilling.
• Do not tilt the unit to prevent water from spilling and damaging
the machine.
• Do not insert or allow slim rods or other foreign objects to enter
any opening, as this may cause an electric shock, fire or dam-
age to the appliance.
• Never insert your finger or other foreign objects into grills or
openings. Take special care to warn children of these dangers.
• If any abnormal situations occur, immediately turn off the pow-
er supply.

8
ENGLISH
SERVICE & REPAIR
1. For service or repair under warranty, please contact the au-
thorized service company that is mentioned on the guarantee
card that accompanies the product.
2. Do not operate any product with a damaged cord or plug. If
the supply cord is damaged, return the appliance to a SINGER
service center for examination repair or adjustment. Do not at-
tempt to dismantle any part of the appliance. This should only
be done at an authorized SINGER service centre.
3. The partial or total non-respect of the safety instructions in the
present instruction manual will automatically release Singer of
any type of responsibility in case of malfunction of the machine
or injuries to persons or animals.
4. In case of manipulation, repairing or any modification of the
machine made by unqualified persons or in case of improper
use, the guarantee will be automatically cancelled.
PRODUCT DESCRIPTION
The dehumidifier is used to remove excessive moisture from the
air. The resulting reduction in relative humidity protects buildings
and their contents from the adverse effects of excess humidity.
Before Initiation
• To avoid any damage, place the unit in an upright position for
at least 24 hours before initiation.
• Make sure that the air outlet and air inlet are never blocked.
• Only operate the unit on a horizontal surface to ensure no wa-
ter leaks out.
• After removing the packaging, make sure that the appliance is
in good condition.
• Do not allow children to play with the packaging materials as
there is risk of suffocation.

9
ENGLISH
air outlet
control panel
float
water tank cover
water tank
viewing window
handle
air inlet
3 in 1 filter
washable dust filter
OVERVIEW
Front View
Rear View

10
ENGLISH
3 IN 1 FILTER gives a healthy and fresh atmosphere.
The continuous release of formaldehyde from furniture, harmful
gases, foul odors, bacteria, viruses, pollen, pet dander and other
allergens suspended in the air, are endangering your family’s res-
piratory health.
1. ACTIVE CARBON FILTER (BLACK): is the filter most used
to remove gases. The result is purifying the air from contami-
nants and particulates.
2. FILTER TO CATCH FORMALDEHYDE (RED): Formalde-
hyde levels are higher in
• Homes with new products or new construction. Formal-
dehyde levels are higher in new manufactured wood prod-
ucts such as flooring and furniture. Formaldehyde can also be
found in some fabrics.
• Homes with smokers. Tobacco smoke contains formalde-
hyde. If someone in your home smokes tobacco roducts, the
smoke may be the greatest source of formaldehyde in your
home.
3. SILVER IONS (SILVER:) succeeds disinfection and steriliza-
tion.
SPECIFICATIONS
MODEL No. SDHM-20L ECO DRY UP
Dehumidify Capacity 20L/day (30°C,80%)
Rated Voltage AC220-240V
Rated Frequency 50Hz
Rated power input 360W
Rated Current 2,2A (30ºC,80%)
Water Tank Capacity 5,3L
Air volume 180m³/h
Noise Level min-max 44-47dB(A)
Refrigerant Charge R290 ecologic gas/95 (g)
Dimensions (LxWxH) 239 x 388 x 598mm
Net Weight 14kg

11
ENGLISH
BEFORE FIRST USE
Install the unit in a convenient position as per the diagram shown below.
Notes:
• Before moving the unit, remove any water from the water tank.
• To save energy, keep windows and door closed when unit is running.
• Please install the unit on a flat horizontal surface.
CONTROL PANEL
POWER: Press the POWER button to turn the unit on or off
LOCK: Child Lock. Keep the button pressed to lock or unlock all the
keys.
• Press and hold LOCK button for more than 2sec to lock all
the control panel buttons.
• Press and hold LOCK button again for more than 2sec to
unlock all the control panel buttons.
%
TIMER
POWE R
HUMIDITY
LOCK
3 SEC
MODE
3 SEC
TIMER
POWE R
HUMIDITY
LOCK
MODE
(3 SEC)
(3 SEC)

12
ENGLISH
MO
DE: Press the MODE button to select the mode of operation. Five dif
-
f
erent modes are possible:
A
UT
O
mode: Thi
s
i
s
the de
f
ault mode
s
elected when the Power But
-
ton is turned on. In this mode, the de
f
ault humidit
y
is set to 50
%
T
h
is can
b
e c
h
an
g
e
d
usin
g
t
h
e Humi
d
ity
b
utton
.
W
h
en t
h
e room
h
umi
d
it
y
> set
h
umi
d
it
y
+ 5%, t
h
e unit works wit
h
H
IGH SPEED fan
.
W
h
en t
h
e room
h
umi
d
it
y
= set
h
umi
d
it
y
+/- 5%, t
h
e unit works wit
h
LOW SPEED fan.
When the room humidity < set humidity – 5%, the dehumidi
f
yin
g
f
unc
-
tion is
O
FFand the fan is also
O
FF
.
H
I
G
H DEH
U
MIDIFYIN
G
m
o
de: Press the M
O
DE button once to se
-
l
ect this mode. Here, the unit always works with hi
g
h
f
an speed
f
or any
r
oom
h
umi
d
it
y.
LOW DEHUMIDIFYING mode (ECONOMY mode)
:
Press the MODE
b
utton twice to select t
h
is mo
d
e. Here, t
h
e unit alwa
y
s works wit
h
low
f
an speed
f
or an
y
room humidit
y.
FAN
O
NLY mode
:
Press the MODE button three times to select this
mode. Here, only the
f
an operates. The de
f
ault
f
an speed is hi
g
h. You
c
an switch to low
f
an speed usin
g
the Humidity button
.
INTERNAL DRYIN
G
m
o
de
:
Press and hold the MODE button for
more t
h
an 2sec to select t
h
is mo
d
e. Use t
h
is mo
d
e to
d
r
y
t
h
e unit
w
hen it will not be used a
g
ain
f
or a lon
g
period. This dries the inner
body o
f
the unit and prevents mildew. For e
ff
ective dryin
g
, run the unit
in thi
s
mode
f
or an hour
.
Note: To cancel Internal Dryin
g
mo
d
e, press an
d
h
ol
d
t
h
e Mo
d
e
b
utton
f
or 2sec. The unit returns to the previous mode. To stop Dryin
g
mode,
press t
h
e Power
b
utton
.

13
ENGLISH
TIMER: Press the button to determine off or on time (0-24h)
Setting of timed shutdown
Under the operation status of the machine, press the [Timer] key
to adjust the time from 1 hour to 24 hours. Each press will in-
crease the set time by one hour and after 24 hours, the figure
will return to 1 for another circulation. User could also long press
the [Timer] key and the time increases in rotation. When the set
time is due, the machine will be shut down automatically. After
the setting, if there’s no action on the [Timer] key within 5 sec-
onds, it means the timing has been confirmed. Under the timed
shutdown status, the key light above the [Timer] is on.
Setting of the timed startup
Under the standby status of the machine, the way to adjust the
time is the same as that of the timed shutdown. After the setting,
if there is no action on the [Timer] key within 5 seconds, it means
the timing has been confirmed. Under the timed startup status,
the key light above the [Timer] is on and the control screen dis-
plays the set time.
HUMIDITY: Press the button to set the desired dehumidification degree
(40%-70%).
Press this button to set the fan speed (air purification mode).
This button has two functions:
1. In AUTO mode, press this button to set the room humidity
(from 40% to 70%). The humidity can be set in 5% increments
from 40, 45,…, 70. 65,…, 40.
2. In FAN ONLY mode, press this button to change the fan speed
to low. Press it again to return to high fan speed.

14
ENGLISH
Clothes drying: Place the unit in a room with closed doors along with
the clothes rack and switch on the appliance by pressing the HIGH
DEHUMIDIFYING mode button.
LED DISPLAY
Auto Dehumidifying mode
High Dehumidifying mode
Low Dehumidifying (Economy) mode
Fan Only mode
Internal Drying mode
Water Tank full/ Water Tank not placed correctly
Room Humidity. In Auto mode, when the Humidity button is
pressed, the Set Humidity is displayed
water tank full
dehumidification
degree
internal drying
auto mode
high
dehumidification
low
dehumidification
fan

15
ENGLISH
OPERATING INSTRUCTIONS
Caution: Make sure that the water tank is properly placed in the unit before
turning on the unit.
Note: The Air Outlet does not open automatically when the unit is turned on. It
needs to be adjusted manually.
1. Plug in the unit to an electrical outlet that matches the voltage and fre-
quency on the rating label.
2. Turn on the unit using the POWER Button.
3. Manually open and adjust the Air Outlet to the desired angle for comfort.
4. The unit starts working in AUTO Dehumidifying mode with humidity set to
50% (default value).
5. Use the Mode button to change to other modes (HIGH Dehumidifying,
LOW Dehumidifying or FAN Only).
6. Use the HUMIDITY button to change set humidity in AUTO Mode.
7. Use the TIMER button to set Unit turn-off time. (Or Turn-on time if the unit
is off).
8. Use the MODE button to select INTERNAL Drying mode if the unit will not
be used for a long time.
9. Once the desired setting is chosen, you may use the LOCK Button to lock
the keypad.
Note: The unit will not work if the water tank is full. Read the following Drain-
age Section for information on how to empty the tank.

16
ENGLISH
DRAINAGE
The unit has a 5,3L water tank attached that must be emptied when it is full.
When the water tank is full, the unit stops automatically. The water tank icon
flashes and a beep sound is produced (15 times) as an alarm.
Warning: Empty the water only when the water tank is full. Make sure that the
assembly of the water tank cover and the water tank are correct.
• Put one hand on the concave
part on the bottom of water tank
to carefully remove the water
tank from the unit. Then remove
the water tank cover and empty
the water
• Replace the water tank cover
and insert the water tank into
the unit gently until it reaches
the correct position. Then, you
can restart the unit.

17
ENGLISH
CONTINUOUS DRAINAGE
You can also connect a drainage pipe (inner diameter 12 mm) for continuous
drainage to avoid emptying the tank.
Note: A 2m drainage pipe is provided with the unit.
Finf the continuous drainage port
in the rear panel
Connect the drainage pipe of cor-
rect lenght to the port
Please check carefully before
using to avoid water leakage
Cut the drainage stopper and
take it out from the unit

18
ENGLISH
CLEANING AND MAINTENANCE
The unit must be regularly cleaned to prolong its life and keep it functioning
properly.
Warning: Before performing any cleaning, turn off the unit and unplug it to
avoid electrical shocks.
Do not use hot water or chemical solvents for cleaning.
1. Regularly, clean the Water Tank and its cover with cold or warm water and
dry with a soft cloth to avoid any mildew.
2. Clean the surface of the unit using a moist cloth. Do not use detergents or
abrasive sponges that can cause damage to the plastic surface.
3. Clean the Washable Air Filter as described in the following section.
4. When the unit will not be used for a long time, use the Internal Drying
Function to dry the interior to prevent mildew.
CLEANING
WASHABLE AIR FILTER
There is a Washable Air Filter on the rear of the unit (see Overview diagram)
that must be removed and cleaned regularly.
Caution: Do not use hot water or chemical solvents for cleaning.
• If there is only a little dust, you may use a soft cloth or a vacuum cleaner
to remove the dust.
• If the air filter is really dirty, you can wash it in warm water (temperature <
40°C).
• To avoid deformation, let the filter air dry, away from any heated surfaces.
3 IN 1 FILTER
This filter is not washable and should be replaced every 3 months.

19
ENGLISH
TROUBLESHOOTING
This section summarizes a few common problems you might encounter when
using the Dehumidifier.
Please read the relevant sections in the manual for more detailed instructions.
Problem Possible Cause Solution
Hot air comes out N/A
The dehumidifier does
not have a cooling
function, so the air
that comes out from
the condenser will be
warm.
The unit doesn’t oper-
ate
Has the power cord
been disconnected?
Plug the power cord
into the outlet.
Is the Water Tank Full
icon flashing? This
means that the tank is
full or positioned incor-
rectly.
Empty the Water Tank
and then reposition it
correctly.
The dehumidifying
function doesn't work
Is the temperature of
the room less than
2°C?
The unit will stop work-
ing if temperature of the
room less than 2°C.
Is the humidity of the
room too low?
In dry weather, mois-
ture removal will be
reduced.
Is the Air Inlet or Air
Outlet obstructed?
Remove the obstruction
from the Air Inlet or Air
Outlet.

20
ENGLISH
No air is coming out
Is the unit running un-
der drying mode?
The fan stops after 30
minutes in drying mode.
But it takes an hour for
complete drying.
Is the Washable Air
Filter clogged?
Clean Washable Air
Filter (see section
“CLEANING THE
WASHABLE AIR FIL-
TER” for details).
The unit is noisy during
operation
Is the unit tilted or un-
steady?
Move the unit to a sta-
ble, sturdy location.
Is the Washable Air
Filter clogged?
Clean Washable Air
Filter (see section
“CLEANING THE
WASHABLE AIR FIL-
TER” for details).
PRODUCT REPAIR FOR APLLIANCES CONTAINING R290
Warnings
• Do not exceed impedance greeter than 0.236ohm in supply the appli-
ance is connected to. Failure to comply may lead the supply authority
to impose restrictions to connection. Please consult your energy supply
authority if the use of equipment exceeds 0.236 ohm.
• All operators or refrigeration circuit maintenance personnel should obtain
a valid certificate issued by an industry-approved assessment agency to
determine their qualification for safe disposal of refrigerants as required
by the industry-approved assessment specification.
• Remember the environment when disposing of packaging around the ap-
pliance and when the appliance has reached its by date.
• A warning that the appliance shall be stored in a well-ventilated area
where the size corresponds to the room area as specified for operation.
• The appliance shall be stored to prevent mechanical damage from occur-
ring.
Table of contents
Languages:
Other Singer Dehumidifier manuals

Singer
Singer Mega Dry SDHM-25L-50DI User manual

Singer
Singer SDHM -10M User manual

Singer
Singer Supreme Dry SDHM-25L-25DIA User manual

Singer
Singer Smart Out SDHM-10-18DI User manual

Singer
Singer Arido SDHM-10L User manual

Singer
Singer PrestoDry SDHM-10L-25DIA User manual

Singer
Singer SDHM-16L PURE DRY ION User manual

Singer
Singer SDHM-16L-55DIA User manual

Singer
Singer SDHM-10L SMART ION User manual

Singer
Singer SDHM-16L-55DIA User manual