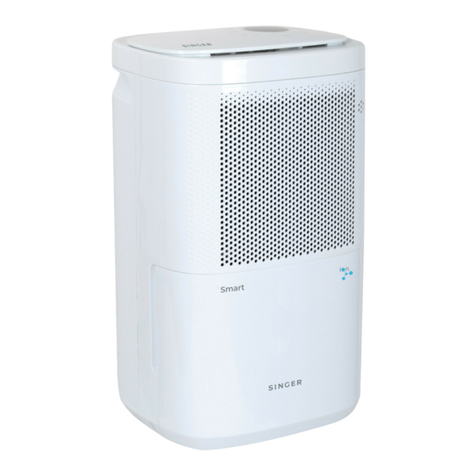
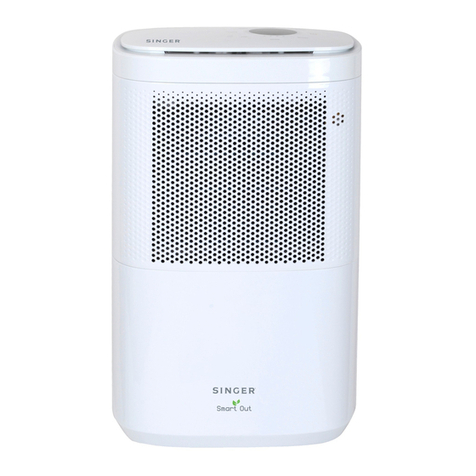
Singer Smart Out SDHM-10-18DI User manual

GB
INSTRUCTION MANUAL
GR
ΒΙΒΛΙΟ ΟΔΗΓΙΩΝ
BG
ИНСТРУКЦИИ ЗА ЕКСПЛОАТАЦИЯ
Dehumidifier
Αφυγραντήρας
Влагоабсорбатор
SDHM-10L-18DI

GB
ENGLISH......................................................... 3
GR
EΛΛΗΝΙΚΑ .................................................... 17
BG
БЪЛГАРСКИ................................................. 32

3
ENGLISH
Please keep this manual carefully for further refer-
ence!
INTRODUCTION
• Before using your new dehumidifier, please care-
fully read through the following instructions.
Keep this booklet in a safe place for future refer-
ence.
• After removing the packaging, make sure that
the appliance is in good condition.
• Do not allow children to play with the packaging
materials as there is risk of suffocation.
SAFETY INFORMATION
1. Please read the operating instructions carefully be-
fore using your dehumidifier for the first time and
keep them in a safe place.
2. Never immerse the appliance in water or other liq-
uids.
3. Place the unit on a stable flat surface to avoid loud
noises and vibrations.
4. Never operate the appliance if a cable or connec-
tor has been damaged, after appliance malfunction
or if the appliance was dropped or otherwise dam-
aged.

4
ENGLISH
5. The appliance may only be repaired by qualified
personnel, improper repair work can be a source of
considerable danger for the users.
6. Pull out the power plug before transporting it and/or
before cleaning.
7. Operate the appliance only at the voltage specified
on the rating label.
8. The device may not be connected to a power strip
with other household appliances.
9. Use the appliance only in the household and only
for the purpose it was developed for.
10. Do not operate this unit near heating appliances
and flammable or dangerous objects.
11. If the dehumidifier is operated in a room with gas
driven devices, the room must be aired regularly
and often.
12. Please use the function of the internal drying, if
the device is not used for a long time. This will
prevent formation of mildew and unpleasant smell
inside the unit.
13. Do not place heavy objects on the appliance.
14. Do not hang curtains or wet clothes in front of the
air outlet, this will overload the device.
15. The drainage hose may not be installed outdoors
at low temperatures.

5
ENGLISH
16. To prevent spillage, empty the water tank before
relocating the appliance.
17. Do not tip the appliance to any side as escaping
water could damage the appliance.
18. If the supply cord is damaged, it must be replaced
by a qualified person to avoid a hazard.
19. If you smell the smoke during start-up or if you can
see the smoke, immediately disconnect the power
plug and contact your dealer.
20. The unit should be installed with a minimum dis-
tance of 50 cm from the wall or other obstacles.
This appliance can be used by children aged from 8
years and above and persons with reduced physical,
sensory and mental capabilities or lack of experience
and knowledge if they have been given supervision or
instruction concerning use of the appliance in a safe
way and understand the hazards involved. Cleaning
and maintenance shall not be made by children with-
out supervision.

6
ENGLISH
SERVICE & REPAIR
1. For service or repair under warranty, please contact the authorized service
company that is mentioned on the guarantee card that accompanies the
product.
2. Do not operate any product with a damaged cord or plug. If the supply cord
is damaged, return the appliance to a SINGER service center for examina-
tion repair or adjustment. Do not attempt to dismantle any part of the appli-
ance. This should only be done at an authorized SINGER service centre.
3. The partial or total non-respect of the safety instructions in the present
instruction manual will automatically release Singer of any type of respon-
sibility in case of malfunction of the machine or injuries to persons or ani-
mals.
4. In case of manipulation, repairing or any modification of the machine made
by unqualified persons or in case of improper use, the guarantee will be
automatically cancelled.
COMMON QUESTIONS
Q: Why the dehumidifier doesn’t work or stop working suddenly?
• Please check if the water tank is full or not well-installed. If yes, pour away
the water and install the water tank in the correct way.
• Please check if the ambient temperature is very low or very high (when
operation temperature is lower than 5℃or higher than 32℃, the unit will not
work).
The operation temperature for the unit must range between 5-32℃and relative
humidity between 30%-80%. Best operation temperature range is 16-32℃.
Q: Why the outlet air is a little warm?
It is not a defect. When room air is condensed by the condensing system,
the water comes out and falls to the tank, the dry air flows through the inner
system but becomes warm.
7
ENGLISH
INSTALLATION
• Empty the water tank before every use of the device.
• During the operation keep the door and windows closed to conserve energy.
• Put the device stably as the following photo instructs (at least 20cm from the
front/back and the left/right and at least 50cm from the top.)

8
ENGLISH
COMPONENTS
Control panel
Air inlet
Water tank
Handle
Air outlet
Continuous
drainage mouth
Cable storage
Filter

9
ENGLISH
CONTROL PANEL(WITH ANION FUNCTION)
Timer: 24 hours timer. Press the key to set the timer off or on. Timer ranges from 1 to 24
hours; it will increase 1 hour by every press of the key. Press the key until”--” flash. There is a
cancel function as well. To cancel the timer set-up, press the timer button twice continuously
after confirming setup.
Internal drying function: press the key to start the function.
Press the key for 3s, anion function will start.
Press the key for 3s again to cancel the function.
Display screen: in auto dehumidifying or cloth dry
mode, it will indicate the actual room humidity. You can
also set the humidity from “setting humidity”. In timer
mode, it indicates the setting time.
Humidity setting key: in auto dehumidifying
mode, press the key to set humidity.
The humidity range is from 30% to 80%.
You can increase it 5% by every press.
Mode key: after unit is on, press the key to choose
auto dehumidifying & cloth dry modes. The lights will
flash when you choose these modes.
On/Off: press the key to turn on/ off the unit.
Fan: press the key to choose high or low fan speed.

10
ENGLISH
CONTROL PANEL(WITHOUT ANION FUNCTION)
Timer: 24 hours timer. Press the key to set the timer off or on. Timer ranges from 1 to 24
hours; it will increase 1hour by every press of the key. Press the key until”--” flash. There is a
cancel function as well. To cancel the timer set-up, press the timer button twice continuously
after confirming setup.
Internal drying function: press the key to start the function.
Display screen: in auto dehumidifying or cloth dry
mode, it will indicate the actual room humidity, while to
set the humidity in auto dehumidifying mode, choose
“setting humidity”. In timer mode, it indicates the
setting time.
Humidity setting key: in auto dehumidifying mode,
press the key to set humidity. Humidity range is from
30% to 80%. You can increase it 5% by every press.
Mode key: after unit is on, press the key to choose
auto dehumidifying & cloth dry modes. The lights will
flash when you choose these modes.
On/Off: press the key to turn on/turn off the unit.
Fan—In Auto or continuous dehumidifying model, press the key to
choose high or low fan speed.

11
ENGLISH
OPERATION
TIMER OFF
While the unit is working, press “Timer” to start the function. Then press
“Humidity setting key/Timing increasing” key to set timer. Timer range is from
1 to 24 hours and you can increase it 1 hour by every press. The unit will turn
off when your timer setting terminates. During this setting and if no other key is
pressed, hold the key for 5s and your setting will be conserved while the timer
light will switch on.
TIMER ON
While the unit is connected with power but not in use, press “Timer” to start
the function. Then press “Humidity setting key/Timing increasing” key to set
hours. The unit will turn off when your timer setting terminates. During this
setting and if no other key is pressed, hold the key for 5s and your setting will
be conserved while the timer light will switch on and the display screen will
indicate the setting hours.
AUTO DEHUMIDIFYING MODE
During this mode, if the room’s humidity is higher than the set humidity or
between ±5% of the set humidity, the compressor will start and the fan will
work at the set speed. If the room’s humidity is lower than the set humidity by
-5%, the compressor will stop but the fan will work at the set speed. The initial
humidity value is 50%.
CLOTH DRY MODE
During this mode, the device will work regardless of the room’s humidity.
The compressor will work and fan will work in high speed. The fan speed is
adjustable.

12
ENGLISH
DRAINAGE
1. Water tank
When the water tank is full, the light on the control panel will flash. The device
will stop working, the buzzer will sound 10 times and then it will stop but the
light indicator will stay on. Take off the water tank to empty the water and install
the water tank like the images below.
Note: before putting back the water tank, please ensure the float is flexible.
2. Continuous drainage
The water can be drained continuously by connecting a water pipe in the back
(the inner diameter is 9mm). Please check if the pipe is stably connected with
the drainage mouth to avoid water flowing out.
Note: please ensure that the water pipe will not be too long (usually 1m or
1.5m) and the height cannot surpass the height of drainage mouth to avoid
water leakage.

13
ENGLISH
MAINTENANCE
Notice:
Pull out the power plug before transporting it and/or before cleaning.
Pull out the power plug if the unit will not be used for a long time.
Do not use chemical solvent such as alcohol, gasoline, benzene to clean
the device.
If the water tank gets moldy,
clean it with a soft cloth.
Use a wet cloth to clean the device, do not use chemical solvents.
Clean the filter with water at least every two weeks.
No need to use hot water or chemical solvents.

14
ENGLISH
DEHUMIDIFIER STORAGE
If the dehumidifier will not be used for an extended period of time:
1. Drain the water tank completely and make sure there is no more water
stocked inside.
2. Unplug the unit and fold up the power supply cord.
3. Remove and clean the air filter, allow it to dry completely and reinstall it.
4. Store the dehumidifier in a cool, dry location, away from direct sunlight,
extreme temperature and excessive dust.

15
ENGLISH
Troubles Possible reasons Resolution
Device doesn’t work
Is the power plug con-
nected?
Put the plug in the
socket.
Is the water tank full?
Is the water tank put in
the correct position?
Pour away the water
from the water-tank and
then put the tank into
the unit.
Operation temperature is
too low or too high.
Operation temperature
range is 5-35℃.
Dehumidifying
doesn’t work
Operation temperature or
humidity is too low.
In dry season, the
dehumidifying effect will
not be so obvious.
Is air outlet or air inlet
blocked?
Clean the air outlet or
air inlet.
No outlet air Is filter blocked? Clean the filters.
Too loud noise
Is the device tilted or not
stable?
Put the device in a flat
floor.
Is air filter blocked? Clean the filters.
There is sound of water
flow.
It is not a defect; it is
the refrigerant flowing in
the device.
Water leakage
Drainage pipe is not
tightly connected.
Check the drainage
pipe.
Pipe is blocked. Clean the debris in
pipe.
Frosted evaporator
Operation temperature
is low; the device is in
defrosting mode.
The device has self-
defrosting function.
After defrosting,the
device will work.

16
ENGLISH
Model SDHM-10L-18DI
Voltage 220-240V/50Hz
Dehumidifying capacity
(30℃,RH80%)
10L/day
Rated power 240W
Water tank 1.8L
Net weight 9.5kg
Size (mm)
(length*depth*height)
297*217 *416
Disposal of old Electrical & Electronic Equipment (Applicable in the Eu-
ropean Union and other European countries with separate col-
lection systems).
This symbol on the product or on its packaging indicates that this
product shall not be treated as household waste. Instead it shall be
handed over to the applicable collection point for the recycling of
electrical and electronic equipment. By ensuring this productis dis-
posed of correctly, you will help prevent potential negative consequences for
the environment and human health, which could otherwise be caused by inap-
propriate waste handling of this product. The recycling of materials will help to
conserve natural resources. For more detailed information about recycling of
this product, please contact your local city office, your household waste dis-
posal service or the shop where you purchased the product.

17
ΕΛΛΗΝΙΚΑ
Παρακαλούμε όπως φυλάξετε το παρόν βιβλίο
οδηγιών χρήσης για τυχόν μελλοντική αναφορά.
ΕΙΣΑΓΩΓΗ
• Πριν από τη χρήση του νέου σας αφυγραντήρα,
παρακαλούμε όπως διαβάσετε προσεκτικά τις
ακόλουθες οδηγίες.
• Αφού αφαιρέσετε τη συσκευασία, βεβαιωθείτε
ότι ησυσκευή είναι σε καλή κατάσταση.
• Μην επιτρέπετε στα παιδιά να παίζουν με τα
υλικά συσκευασίας, καθώς υπάρχει κίνδυνος
ασφυξίας.
ΣΗΜΑΝΤΙΚΕΣ ΟΔΗΓΙΕΣ ΑΣΦΑΛΕΙΑΣ
1. Διαβάστε προσεκτικά τις οδηγίες χρήσης πριν
χρησιμοποιήσετε τον αφυγραντήρα για πρώτη
φορά και φυλάξτε τις σε ασφαλές μέρος.
2. Μην βυθίζετε τη συσκευή σε νερό ήάλλου εί-
δους υγρά.
3. Τοποθετήστε τη συσκευή σε μια σταθερή και
επίπεδη επιφάνεια για να αποφύγετε κραδα-
σμούς και θόρυβο.
4. Μη χρησιμοποιείτε τη συσκευή εάν το καλώδιο
ρεύματος ήτο φις είναι φθαρμένα, εάν έχουν
πέσει κάτω ήέχουν υποστεί βλάβη.

18
ΕΛΛΗΝΙΚΑ
5. Ησυσκευή πρέπει να επισκευασθεί μόνο από
εξουσιοδοτημένο προσωπικό, ακατάλληλες ερ-
γασίες επισκευής θα έχουν ως αποτέλεσμα σο-
βαρούς κινδύνους για τους χρήστες.
6. Αφαιρέστε τη συσκευή από την πρίζα εάν επι-
θυμείτε να τη μετακινήσετε και/ήπριν την κα-
θαρίσετε.
7. Πριν συνδέσετε τη συσκευή στο ρεύμα, ελέγ-
ξτε αν ητάση που αναφέρεται στην ετικέτα
προδιαγραφών της συσκευής ανταποκρίνεται
στην τοπική τάση.
8. Μην συνδέετε τη συσκευή σε πολύμπριζο μαζί
με άλλες οικιακές συσκευές.
9. Χρησιμοποιείτε τη συσκευή μόνο για οικιακή
χρήση και μόνο για τον σκοπό για τον οποίο κα-
τασκευάστηκε.
10. Μην τοποθετείτε τη συσκευή κοντά σε πηγές
παραγωγής θερμότητας ήκοντά σε εύφλεκτα
και επικίνδυνα υλικά.
11. Αν οαφυγραντήρας λειτουργεί μέσα σε δωμά-
τιο που υπάρχουν συσκευές που λειτουργούν
με αέριο, τότε το δωμάτιο πρέπει να αερίζεται
τακτικά και πολλές φορές.
12. Χρησιμοποιήστε τη λειτουργία εσωτερικής
αφύγρανσης, εάν ησυσκευή δεν έχει χρησι-
μοποιηθεί για πολύ καιρό. Αυτό θα εμποδίσει

19
ΕΛΛΗΝΙΚΑ
τη συσσώρευση μούχλας και ανεπιθύμητων
οσμών μέσα στη συσκευή.
13. Μην τοποθετείτε βαριά αντικείμενα πάνω στη
συσκευή.
14. Μην κρεμάτε κουρτίνες ήβρεγμένα ρούχα
μπροστά από την έξοδο του αέρα, γιατί αυτό
θα υπερφορτώσει τη συσκευή.
15. Οσωλήνας αποστράγγισης δεν πρέπει να
εγκαθίσταται σε εξωτερικούς χώρους και σε
χαμηλές θερμοκρασίες.
16. Για να αποφύγετε τυχόν διαρροές, αδειάστε
το δοχείο νερού πριν μετακινήσετε τη συ-
σκευή.
17. Μη γέρνετε τη συσκευή καθώς μπορεί να τρέ-
ξει νερό από το δοχείο συσσώρευσης νερού
και να υποστεί ζημιά ησυσκευή.
18. Εάν το καλώδιο τροφοδοσίας έχει φθαρεί θα
πρέπει να αντικατασταθεί από έναν εξουσιο-
δοτημένο ηλεκτρολόγο, προκειμένου να απο-
φευχθεί οκίνδυνος ηλεκτροπληξίας.
19. Εάν μυρίσετε καπνό κατά τη διάρκεια της εκ-
κίνησης ήαν δείτε να βγαίνει καπνός από τη
συσκευή, αποσυνδέστε τη αμέσως από την
πρίζα και επικοινωνήστε με τον εξουσιοδοτη-
μένο αντιπρόσωπο.
20. Ησυσκευή πρέπει να τοποθετηθεί τουλάχι-

20
ΕΛΛΗΝΙΚΑ
στον 50 εκατοστά πιο μακριά από τον τοίχο ή
άλλα εμπόδια.
Ησυσκευή μπορεί να χρησιμοποιηθεί από παιδιά 8
χρονών και πάνω και από άτομα με μειωμένες σω-
ματικές, αισθητήριες ήδιανοητικές ικανότητες ή
έλλειψη εμπειρίας ή/και γνώσεων, μόνο εφόσον
επιτηρούνται ήέχουν ενημερωθεί σχετικά με την
ασφαλή χρήση της συσκευής και έχουν κατανοή-
σει τους υπάρχοντες, κατά τη χρήση, κινδύνους.
Ηκαθαριότητα και ησυντήρηση δεν θα πρέπει να
γίνεται από παιδιά χωρίς επίβλεψη.
ΣΥΝΤΗΡΗΣΗ & ΕΠΙΣΚΕΥΗ
1. Για συντήρηση ήεπισκευή εντός της εγγύησης, παρακαλούμε όπως
επικοινωνήσετε με τα στοιχεία της εταιρείας σέρβις που αναφέρονται
στο φύλλο εγγύησης που συνοδεύει τη συσκευή.
2. Μη χρησιμοποιείτε τη συσκευή εάν το καλώδιο ρεύματος ήτο φις
είναι φθαρμένα, εάν έχουν πέσει κάτω ήέχουν υποστεί βλάβη. Επι-
σκεφθείτε ένα εξουσιοδοτημένο κατάστημα σέρβις της SINGER για
έλεγχο, συντήρηση ήεπισκευή της συσκευής, πριν τη χρησιμοποιή-
σετε. Μην επιχειρήσετε να αποσυναρμολογήσετε οποιοδήποτε εξάρ-
τημα της συσκευής. Αυτό μπορεί να γίνει μόνο από ένα εξουσιοδοτη-
μένο κατάστημα σέρβις της SINGER.
3. Ημη τήρηση μέρους ήτου συνόλου των κανονισμών και που ανα-
γράφονται στο παρόν βιβλίο οδηγιών, απαλλάσσει αυτομάτως τη
SINGER από κάθε ευθύνη σε περίπτωση κακής λειτουργίας ήπρό-
κλησης βλάβης σε άτομα, ζώα κλπ.
4. Ηκακή χρήση ήπαρέμβαση από το χρήστη δεν επιτρέπονται και ακυ-
ρώνουν αυτομάτως την εγγύηση του προϊόντος.
Table of contents
Languages:
Other Singer Dehumidifier manuals

Singer
Singer Arido SDHM-10L User manual

Singer
Singer SDHM -10M User manual

Singer
Singer SDHM-10L SMART ION User manual

Singer
Singer PrestoDry SDHM-10L-25DIA User manual

Singer
Singer Dry Up SDHM-20L ECO User manual

Singer
Singer SDHM-16L-55DIA User manual

Singer
Singer VAPOR OUT SDHM-16L User manual

Singer
Singer SDHM-10L SMART OUT User manual

Singer
Singer SDHM-16L-55DIA User manual

Singer
Singer Mega Dry SDHM-25L-50DI User manual