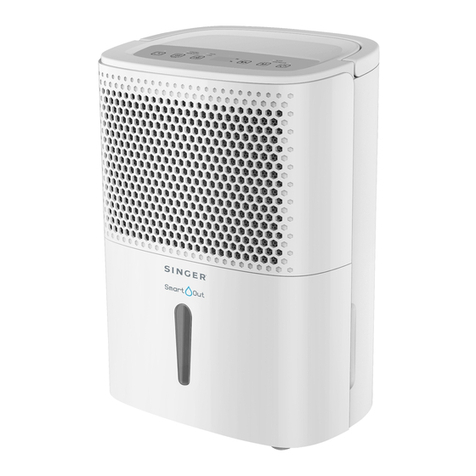
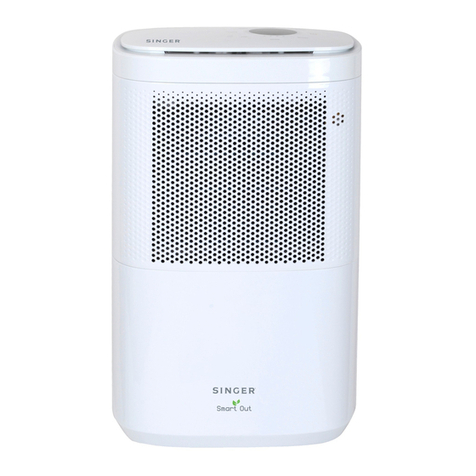
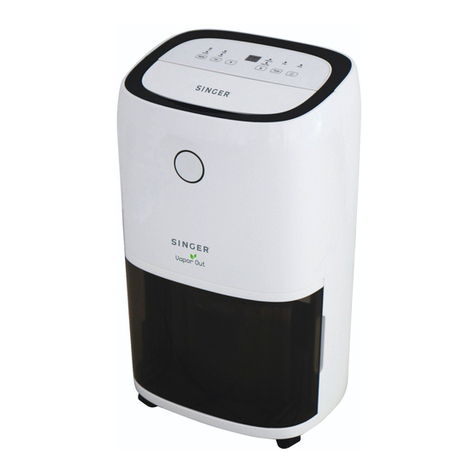
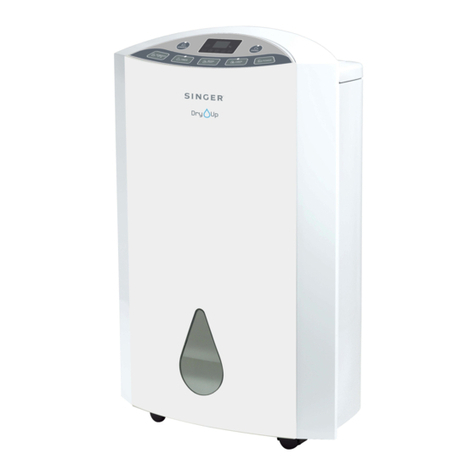
Singer PrestoDry SDHM-10L-25DIA User manual

SDHM-10L-25DIA
SDHM-12L-25DIA
Dehumidifier
Αφυγραντήρας
Влагоабсорбатор
GB
INSTRUCTION MANUAL
GR
ΒΙΒΛΙΟ ΟΔΗΓΙΩΝ
BG
ИНСТРУКЦИИ ЗА ЕКСПЛОАТАЦИЯ

2
ENGLISH
Please keep this manual for future reference
INTRODUCTION
• Before using your new dehumidifier for the first time, please
read carefully the following instructions.
• After removing the packaging, make sure that the appliance
is in good condition.
• Do not allow children to play with the packaging materials as
there is risk of suffocation.
The dehumidifier will remove excess moisture from the
air, creating a comfortable environment for your home. Its
compact design allows you to easily move it to every room.
SAFETY INFORMATION
Please read the operating instructions carefully before
using your dehumidifier for the first time.
1. Install the unit on a stable flat surface to avoid loud noises
and vibrations.
2. Never immerse the unit in water or other liquids or allow
liquid to run inside the appliance to avoid electric shock.
3. Never operate the unit if the cable or other connector is
damaged. Ιf something abnormal happens, please call
customer service for help.
4. Disconnect the unit from power supply when it is not in
use or before relocating or cleaning it.
5. Operate the unit only at the specified voltage.
6. Do not put heavy objects on the appliance.
7. Do not tip the unit to any side as spilt water could damage
the appliance.
8. Never insert any other object into the unit body to avoid
any hazard or unit failure. Do not put your fingers or other
objects inside appliance grills.

3
ENGLISH
9. Do not put the unit close to heat-generating devices or
near flammable and dangerous materials.
10. Do not operate the dehumidifier in a closed area such as
inside a closet, as it may cause a fire.
11. This appliance is not intended for use by persons
(including children) with reduced physical, sensory or
lack of experience and knowledge, unless they have
been given supervision or instruction concerning use of
the appliance by a person responsible for their safety.
Children should be supervised to ensure that they do not
play with the appliance.
12. If the supply cord is damaged, it must be replaced by a
qualified person in order to avoid any hazard.
13. The appliance must be positioned so that the plug is
accessible.
14. The ambient temperature range for the appliance is 5°-
35°.
15. Use the appliance only in the household and only for the
purpose it was developed for.
16. The appliance shall be installed in accordance with
national wiring regulations.
17. Do not hang curtains or wet clothes in front of the air
outlet, this will overload the device.
18. The drainage hose may not be installed outdoors at low
temperatures.
19. To prevent spillage, empty the water tank before relocating
the appliance.
20. If you smell smoke during start-up or if you can see smoke,
immediately disconnect the power plug and contact your
dealer.
21. The device may not be connected to a power strip with
other household appliances.

4
ENGLISH
22. If the device is not used for a long time, please use the
function of the internal drying. This will prevent formation
of mildew and unpleasant smell inside the unit.
23. Install drain piping at a downhill grade to make sure that
condensed water can be drained continuously.
SERVICE & REPAIR
1. For service or repair under warranty, please contact the authorized service
company that is mentioned on the guarantee card and accompanies the
product.
2. Do not operate any product with a damaged cord or plug. If the supply
cord is damaged, return the appliance to a SINGER service center for
examination, repair or adjustment. Do not attempt to dismantle any part of
the appliance. This should only be done at an authorized SINGER service
center.
3. The partial or total non-respect of the safety instructions in the present
instruction manual will automatically release Singer of any type of
responsibility in case of malfunction of the machine or injuries to persons
or animals.
4. In case of manipulation, repairing or any modification of the machine
made by unqualified persons or in case of improper use, the guarantee
will be automatically cancelled.
FEATURES
Powerful Dehumidifying Capability
Taking advantage of refrigeration technology, the dehumidifier removes excess
moisture from the air to decrease the humidity level of the room and keep the
indoor air dry and comfortable.
Lightweight Portable Design
The dehumidifier is built to be compact and lightweight. The castors on the
bottom of the unit make it easy to move from room to room.

5
ENGLISH
Low Temperature Operation with Automatic Defrost
When room temperature and humidity conditions are abnormal and ice is
created on the condenser, the appliance automatically enters in defrost mode
periodically.
Adjustable Humidistat
Set the desired humidity level by the adjustable humidistat.
Timer On / Off
Set the unit to automatically turn on and off at the desired time.
Quiet Operation
The unit operates with a low noise level.
Energy Efficient
Power consumption of the unit is low.
INSTALATION
1. Install the unit in a stable & flat floor and keep the room ventilated.
2. Leave at least 20-30cm space around the unit (when the hose is not
connected). Do not block or restrict the airflow around the unit.
3. Place unit in vertical operating position and allow 2 hours before initial use
in order to avoid malfunctions.
I
N
S
T
A
L
A
T
I
O
N

6
ENGLISH
4. Check that all filters are installed in the filter box, located on the back of
the unit. If the Active carbon filter is not installed, place the active carbon
filter found on the packaging in the order shown in Figure 1.
• Filter grid
• Air filter
• Active carbon filter
5. Before the initial operation, please check, if the
water level switch, located within the water bucket
area, is in the right position. In case that the water
level switch is not in the right position the TANK
FULL sensor will not operate.
For installation of the unit in operation of Continuous water
drainage, please see below point Continuous water drainage.
Water level switch
Fig. 1

7
ENGLISH
PRODUCT DIAGRAM
PARTS
1. Top cover
2. LED display - Control panel
3. Back panel
4. Filter box
5. Front panel
6. Removable Water tank
7. 4 Castors
8. Supply cord
9. Drain hose outlet
10. Active carbon filter
11. Water Drain hose
ACCESSORY
SPECIFICATIONS
MODEL No. SDHM-10L-25DIA SDHM-12L-25DIA
Dehumidify Capacity 10L/day (30℃,80%) 12L/day (30℃,80%)
Rated Voltage AC220-240V AC220-240V
Rated Frequency 50Hz 50Hz
Rated Power 220W (30℃,80%) 230W (30℃,80%)
Rated Current 0,96A (30℃,80%) 1.0A (30℃,80%)
Water Tank Capacity 2.5L 2.5L
Noise Level min-max 40-44dB(A) 40-44dB(A)
Refrigerant Charge R134a/80g R134a/85g
Product Dimension (DXWXH)
198X288X509mm 198X288X509mm
Net Weight 9,8kg 10kg

8
ENGLISH
OPERATING INSTRUCTIONS
Button Functions-touch
1. Power indicator ON/OFF
2. Humidity Settings
3. Fan speed indicator – High/Low
4. Ionizer indicator – UV/ION
5. Timer indicator
6. Water tank full indicator
Digital Display
7. Room Humidity indication/Humidity settings
8. Room Temperature indication/Timer settings
Note: In case of damaged unit, screens 7 and 8 shows the problem (see
Troubleshooting table on the control panel).
Digital Humidity indication (7) Humidity settings
HUMIDITY
The digital indicator Humidity features 2 functions:
1. When the unit is plugged in, it will indicate the room humidity level.

9
ENGLISH
2. When you set the humidity, it will indicate the humidity that you have selected
and then reverts to room’s humidity level.
Digital Temperature indication (8) and 24 Hours timer
TEMPERATURE
The digital indicator Temperature features 2 functions:
1. When the unit is plugged in, it will indicate the room temperature level.
2. When you program the time for the unit to turn on and off, it will show the
programmed hours.
3. When the environment humidity is lower than 35%, it will show “LO”
4. When the environment humidity is higher than 95%, it will show “HI”
OPERATING INSTRUCTIONS
The buzzer will alarm and the power indication light will turn on when the unit
is plugged in, regardless of whether the unit is operating or not. The display
shows the humidity and room temperature. The unit is in stand-by mode.
1. Press button once to start operation. The fan indication light switches
on. Press it again to stop operation and revert to stand-by mode.
2. Press button to set the desired fan speed. It can be adjusted between
high and low speed.
3. Press button to set the desired humidity level in the room. You can
adjust humidity from 40% to 80%. Each press of the button increases level
by 5%.
When room humidity is lower than the selected humidity by 2%-5% compressor
will stop, but the fan will stop working 3 minute later.
When room humidity is equal to or higher than the selected humidity by 2%-
5%, then compressor will restart to work on after 3 minutes time protection.

10
ENGLISH
Note: W
h
en t
h
e unit is starte
d
to operate, an
d
w
h
en t
h
e room
h
umi
d
it
y
percentage is less than 40%, the fan does not work unless you operate the
I
O
N / UV button.
C
lothes dryin
g:
Place t
h
e unit in a room wit
h
close
d
d
oors alon
g
wit
h
the clothes rack and switch on the appliance by pressing the dehumidifier
b
utt
o
n
.
24-H
O
URS TIME
R
1
. Pre
ss
button to
s
et the timer
f
unction:
Pre
ss
b
utton to set t
h
e auto turn-on time w
h
en t
h
e unit is in stan
d
-
by
mode and switched on. The LED will displa
y
the time
f
rom 00-01-02……23
-
24
,
w
h
ere 01 sets turn-on in 1
h
our
,
02 sets turn-on in 2
h
ours etc. You set t
h
e
d
e
s
ire
d
time an
d
t
h
e unit will auto turn on t
h
e
s
electe
d
time
.
Pre
ss
button to set the auto turn-o
ff
time when the unit is in workin
g
f
uncti
o
n
.
The LED will displa
y
the time
f
rom 00-01-02……23-24,
y
ou set the desired
time and the unit will auto turn o
ff
the
s
elected time
.
I
f
you want to cancel the timer pro
g
rammin
g
, press th
e
b
utton to a
d
just
t
h
e time at
00.
The pro
g
rammed time will be cancelled when unit is turn o
ff.
The pro
g
rammed time remains unchan
g
ed i
f
the machine stops to work due
t
o
wat
e
r tank
f
ull.
I
O
N/UV
O
PERATI
ON
1
. Pre
ss
button
,
the ION/UV function will be turn on and the indicator
l
amp will li
gh
t up
.

11
ENGLISH
2. In order to turn off the ION/UV function, you press again button, and
the indication lamp will switch off.
WATER DRAINAGE
Water tank
When the drainage tank is full:
• the tank FULL indicator light will turn on
• the operation will stop automatically and
• the buzzer will beep 15 times to alert the user, that the water need to be
emptied from the drainage tank.
How to empty the water tank
1. Lightly press on the sides of the tank with both
hands and pull the tank out gently.
2. Empty the collected water carefully.

12
ENGLISH
CAUTION
1. Do not remove the float from the water tank. The water full sensor will no
longer be able to detect the water level correctly without the float and water
may leak from the water tank. Drain the water tank completely when is full and
reset your setting.
2. If the drainage tank is dirty, wash it with cold or lukewarm water. Do not use
detergent, scouring pads, chemically treated dust cloths, gasoline, benzene,
thinner, or other solvents, as these can scratch and damage the tank and
cause water leakage.
3. When replacing the drainage tank, press the tank firmly into place with both
hands. If the tank is not positioned properly, the “TANK FULL” sensor
will be activated, and the dehumidifier will not operate.
Continuous water drainage
1. Open the cover on the back of the dehumidifier.
2. Take out the water tank.
3. Insert a drain hose (with inner diameter 10mm); put the other side of the pipe
into a container, such as a bucket.
C
ontinuous water
d
d
d
d
d
d
d
d
d
d
d
d
d
d
d
d
d
d
d
d
rararara
ra
ra
ra
ra
ra
ra
ra
ra
ra
ra
ra
ra
ra
ra
ra
ra
r
in
in
in
in
in
in
inininin
in
in
in
in
in
in
in
in
in
in
ag
ag
ag
ag
ag
ag
ag
ag
ag
ag
ag
agagag
ag
ag
ag
ag
ag
ag
ag
e
e
e
e
e
e
e
e
e
e
e
e
e
e
e
e
e
e
e
e
e
1
. O
pe
n the cover
o
o
o
o
o
o
o
o
on
o
o
o
o
o
t
he
b
b
b
b
b
b
ac
c
c
c
c
c
c
c
c
c
c
c
c
c
c
c
k
of
o
o
o
o
o
o
o
o
o
o
o
o
o
o
o
o
o
o
o
t
t
t
t
t
t
t
t
t
t
t
t
t
he dehumidifie
r.
2. Tak
e
o
ut t
he
wa
te
t
t
t
te
t
te
t
ee
te
te
te
t
t
t
t
t
r tank
.
3
. Insert a drain ho
se
s
s
s
s
s
s
s
s
s
s
s
s
s
s
s
s
s
s
(with i
nn
n
n
n
n
n
n
n
n
n
n
n
n
n
n
n
n
er
r
r
d
d
d
d
d
d
d
d
dd
d
d
d
i
i
i
i
i
a
i
i
i
i
i
i
meter
10
mm
mm
mm
mm
mm
mm
mm
mm
mm
m
m
m
m
m
m
);
put t
he
he
he
he
he
he
he
he
he
he
he
he
he
he
he
he
he
h
he
o
o
o
o
o
o
o
o
o
o
o
o
o
o
o
o
o
o
th
th
t
th
th
th
t
t
er
side
of
of
of
o
o
o
o
o
o
o
o
o
o
o
o
o
o
o
o
t
t
t
t
t
t
t
t
t
t
t
he pipe
into a con
ta
a
a
a
a
a
a
a
a
a
a
a
a
a
a
a
a
a
a
a
in
in
in
in
in
in
in
in
in
in
in
in
in
in
in
in
in
in
in
in
n
e
e
e
e
e
e
e
e
er
e
e
e
e
e
e
e
e
e
e
e
,
su
ch
ch
ch
ch
ch
ch
ch
ch
ch
ch
ch
ch
ch
ch
ch
ch
ch
ch
ch
ch
h
aaaaa
a
a
a
a
a
aa
a
a
a
s
s
s
s
s
s
s
s
s
s
s
sss
s
s
s
s
s
s
a
a
a
a
a
aa
a
a
a
a
a
a
a
a
a
a
a
a
a
bubu
bu
bu
bu
bu
bu
bu
bu
bu
bu
bu
bu
bu
bu
bu
bu
bu
bu
u
ckck
ck
ck
ck
ck
ck
ck
ck
ck
ck
ck
ckck
ckck
ck
ck
ck
ck
et
et
et
e
e
et
et
et
et
et
et
e
et
et
e
et
et
e
e
e
.
.
.
.
.
.

13
ENGLISH
Continuous water drainage
1. Open the cover on the back of the dehumidifier.
2. Take out the water tank.
3. Insert a drain hose (with inner diameter 10mm); put the other side of the pipe
into a container, such as a bucket.
CAUTION:
1. Never block the water outlet or the pipe.
2. Do not fold the water pipe and do not stretch it above 1.5 m from the
base of the appliance.
3. Do not replace the water drain pipe. It is a special component made
specifically for this unit and other similar tubes may not fit the device.
If it is destroyed or lost, call customer service for replacement.
4. Always put the drainage pipe lower than the outlet.
5. Always close the cover when there is no need for continuous drainage.
Cleaning
Unplug the unit before cleaning. Clean the housing with a soft moist cloth. Do
not use chemical solvents (such as benzene, alcohol, gasoline).
The surface may be damaged or even the whole case may be deformed.
Do not spray water directly on the unit.
Air filter
The unit is equipped with washable air filter. Take out the washable air filter.
After you finished cleaning it, insert the filter back to its place. Clean the
washable filter every two weeks. If the filter is blocked with dust, the efficiency

14
ENGLISH
of it will reduce. Wash the air filter by immersing it gently into warm water
(about 40°C) with a neutral detergent, rinse it and dry it thoroughly in a shaded
place.
1.Open the inlet grill firstly and remove the air filter
2. Run a vacuum cleaner lightly over the surface of the air filter to remove
dirt. If the air filter is exceptionally dirty, wash it with warm water and a mild
cleanser and dry thoroughly.
3. After you have ensured that it has dried well, insert the filter into the grill
smoothly and place the inlet grill into right place.
R
l
l
l
l
l
l
i
i
i
h
ht
ht
l
l
l
h
th
th
f
f
f
f
t
h
i
fi
l
tt

15
ENGLISH
Active Carbon Filter
There is also an active carbon filter together with the unit. This active carbon
filter CANNOT be cleaned. When the filter gets very dirty, replace it with the
new filter.
Dehumidifier storage
If the dehumidifier will not be used for an extended period of time:
1. Drain the water tank completely and make sure there is no more water
stocked inside.
2. Unplug the unit and fold up the power supply cord.
3. Remove and clean the air filter, allow it to dry completely and reinstall it.
4. Store the dehumidifier in a cool, dry location, away from direct sunlight,
extreme temperature and excessive dust.
TROUBLESHOOTING
Before contacting service, review this list. This list includes common problems
that are not a result of a defect in the appliance.
Problem Possible Cause Solution
The unit doesn't operate
No power supply Connect to a functioning
outlet and switch on.
Water full indicator flashes Drain water tank and reset
your setting or replace the
water tank to the correct
position.
Room temperature is
under 5 degrees or above
35 degrees
Self-Protection is designed
to protect the unit. The unit
cannot work under such
temperatures.
Timer function is active Deactivate Timer function.

16
ENGLISH
The dehumidifying
function doesn’t work
or the unit turns on/off
frequently
Is the air filter clogged? Clean the air filter as
instructed above.
Is the door/window open? Close the door/window.
Is the unit close to any
heat source?
Remove the unit to a cool
place.
Is the intake duct or dis-
charge duct obstructed?
Remove the obstruction
from the discharge duct or
intake duct.
Operation is noisy
Is the unit tilted or un-
steady?
Place on a stable surface
(less vibration).
Is the air filter clogged? Clean the air filter as
instructed above.
PROBLEM INDICATION - CONTROL PANEL
The screen shows E1 The sensor of the dehu-
midifier is damaged
Please contact your au-
thorized Service Singer in
order to change the sen-
sor of the dehumidifier.
Disposal of old Electrical & Electronic Equipment (Applicable in
the European Union and other European countries with separate
collection systems).
This symbol on the product or on its packaging indicates that this
product shall not be treated as household waste. Instead it shall
be handed over to the applicable collection point for the recycling
of electrical and electronic equipment. By ensuring this product is disposed
of correctly, you will help prevent potential negative consequences for
the environment and human health, which could otherwise be caused by
inappropriate waste handling of this product. The recycling of materials will
help to conserve natural resources. For more detailed information about
recycling of this product, please contact your local city office, your household
waste disposal service or the shop where you purchased the product.

17
ΕΛΛΗΝΙΚΑ
Παρακαλούμε όπως φυλάξετε το παρόν βιβλίο οδηγιών χρή-
σης για μελλοντική αναφορά.
ΕΙΣΑΓΩΓΗ
• Πριν από τη χρήση του νέου σας αφυγραντήρα, παρακα-
λούμε όπως διαβάσετε προσεκτικά τις ακόλουθες οδηγί-
ες.
• Αφού αφαιρέσετε τη συσκευασία, βεβαιωθείτε ότι ησυ-
σκευή είναι σε καλή κατάσταση.
• Μην επιτρέπετε στα παιδιά να παίζουν με τα υλικά συ-
σκευασίας, καθώς υπάρχει κίνδυνος ασφυξίας.
Οαφυγραντήρας θα απορροφήσει την περιττή υγρασία του
αέρα, δημιουργώντας έτσι ένα άνετο περιβάλλον στο σπίτι
σας. Οβολικός σχεδιασμός του σας επιτρέπει να τον μεταφέ-
ρετε εύκολα σε οποιοδήποτε δωμάτιο του σπιτιού.
ΣΗΜΑΝΤΙΚΕΣ ΟΔΗΓΙΕΣ ΑΣΦΑΛΕΙΑΣ
Διαβάστε προσεκτικά όλες τις οδηγίες χρήσης πριν
χρησιμοποιήσετε για πρώτη φορά τον αφυγραντήρα.
1. Τοποθετήστε τη συσκευή σε μια σταθερή και επίπεδη επι-
φάνεια για να αποφύγετε κραδασμούς και θόρυβο.
2. Μη βυθίζετε τη συσκευή σε νερό ήάλλα υγρά ήεπιτρέ-
πετε σε υγρό να τρέξει στο εσωτερικό της συσκευής, για
αποφυγή ηλκτροπληξίας.
3. Μη χρησιμοποιείτε τη συσκευή εάν το καλώδιο ρεύματος
ήτο φις είναι φθαρμένα, εάν έχουν πέσει κάτω ήέχουν
υποστεί βλάβη. Επισκεφθείτε ένα εξουσιοδοτημένο κα-
τάστημα σέρβις της SINGER για έλεγχο, συντήρηση ή
επισκευή της συσκευής, πριν τη χρησιμοποιήσετε.
4. Αποσυνδέστε τη συσκευή από το ρεύμα όταν δεν τη χρη-
σιμοποιείτε ήπριν τη μεταφέρετε σε άλλο σημείο ήπριν
την καθαρίσετε.

18
ΕΛΛΗΝΙΚΑ
5. Λειτουργήστε τη μονάδα μόνο με την τάση που καθορίζε-
ται στην ετικέτα διαβάθμισης.
6. Μην τοποθετείτε βαριά αντικείμενα πάνω στη συσκευή.
7. Μη γέρνετε τη συσκευή καθώς μπορεί να τρέξει νερό
από το δοχείο συσσώρευσης νερού και να υποστεί ζημιά
ησυσκευή.
8. Μην εισάγετε ξένα αντικείμενα στη συσκευή ώστε να
αποφύγετε βλάβες και πιθανούς κινδύνους. Ποτέ μη βά-
ζετε τα δάκτυλά σας ήάλλα αντικείμενα μέσα στις γρί-
λιες της συσκευής.
9. Μην τοποθετείτε τη συσκευή κοντά σε πηγές θερμότη-
τας ήκοντά σε εύφλεκτα και επικίνδυνα υλικά.
10. Μην λειτουργείτε τον αφυγραντήρα σε κλειστούς χώ-
ρους όπως για παράδειγμα μέσα σε ντουλάπα καθώς μπο-
ρεί να προκληθεί φωτιά.
11. Ησυσκευή δεν μπορεί να χρησιμοποιηθεί από παιδιά 8
χρονών και πάνω και από άτομα με μειωμένες σωματικές,
αισθητήριες ήδιανοητικές ικανότητες ήέλλειψη εμπει-
ρίας ή/και γνώσεων, παρά μόνο εφόσον επιτηρούνται ή
έχουν ενημερωθεί σχετικά με την ασφαλή χρήση της συ-
σκευής και έχουν κατανοήσει τους υπάρχοντες, κατά τη
χρήση, κινδύνους. Ηκαθαριότητα και ησυντήρηση δεν
θα πρέπει να γίνεται από παιδιά χωρίς επίβλεψη.
12. Εάν το καλώδιο τροφοδοσίας έχει φθαρεί θα πρέπει να
αντικατασταθεί από έναν εξουσιοδοτημένο ηλεκτρολό-
γο, προκειμένου να αποφευχθεί οκίνδυνος ηλεκτροπλη-
ξίας.
13. Ησυσκευή πρέπει να είναι τοποθετημένη ώστε το καλώ-
διο να είναι εύκολα προσβάσιμο.
14. Ηθερμοκρασία λειτουργίας της συσκευής πρέπει να κυ-
μαίνεται μεταξύ 5°-35°.

19
ΕΛΛΗΝΙΚΑ
15. Ησυσκευή προορίζεται μόνο για οικιακή χρήση και μόνο
για τον σκοπό για τον οποίο κατασκευάστηκε.
16. Ησυσκευή πρέπει να εγκατασταθεί σύμφωνα με τους
εθνικούς κανονισμούς ασφαλείας και σύνδεσης.
17. Μην κρεμάτε κουρτίνες ήβρεγμένα ρούχα μπροστά από
την έξοδο του αέρα, γιατί αυτό θα υπερφορτώσει τη συ-
σκευή.
18. Οσωλήνας αποστράγγισης δεν πρέπει να εγκαθίσταται
σε εξωτερικούς χώρους και σε χαμηλές θερμοκρασίες.
19. Για να αποφύγετε τυχόν διαρροές, αδειάστε το δοχείο
νερού πριν μετακινήσετε τη συσκευή.
20. Εάν μυρίσετε καπνό κατά τη διάρκεια της εκκίνησης ήαν
δείτε να βγαίνει καπνός από τη συσκευή, αποσυνδέστε τη
αμέσως από την πρίζα και επικοινωνήστε με τον εξουσιο-
δοτημένο αντιπρόσωπο.
21. Μην συνδέετε τη συσκευή σε πολύμπριζο μαζί με άλλες
οικιακές συσκευές.
22. Χρησιμοποιήστε τη λειτουργία εσωτερικής αφύγρανσης,
εάν ησυσκευή δεν έχει χρησιμοποιηθεί για πολύ καιρό.
Αυτό θα εμποδίσει τη συσσώρευση μούχλας και ανεπιθύ-
μητων οσμών μέσα στη συσκευή.
23. Εγκαταστήστε τον σωλήνα αποστράγγισης στην αποχέ-
τευση με κατηφορική κατεύθυνση ώστε να διασφαλίσετε
την σωστή συνεχή αποστράγγιση του νερού.

20
ΕΛΛΗΝΙΚΑ
ΣΥΝΤΗΡΗΣΗ & ΕΠΙΣΚΕΥΗ
1. Για συντήρηση ήεπισκευή εντός της εγγύησης, παρακαλούμε όπως
επικοινωνήσετε με τα στοιχεία της εταιρείας σέρβις που αναφέρο-
νται στο φύλλο εγγύησης που συνοδεύει τη συσκευή.
2. Μη χρησιμοποιείτε τη συσκευή εάν το καλώδιο ρεύματος ήτο φις
είναι φθαρμένα, εάν έχουν πέσει κάτω ήέχουν υποστεί βλάβη. Επι-
σκεφθείτε ένα εξουσιοδοτημένο κατάστημα σέρβις της SINGER
για έλεγχο, συντήρηση ήεπισκευή της συσκευής, πριν τη χρησιμο-
ποιήσετε. Μην επιχειρήσετε να αποσυναρμολογήσετε οποιοδήποτε
εξάρτημα της συσκευής. Αυτό μπορεί να γίνει μόνο από ένα εξουσι-
οδοτημένο κατάστημα σέρβις της SINGER.
3. Ημη τήρηση μέρους ήτου συνόλου των κανονισμών και που ανα-
γράφονται στο παρόν βιβλίο οδηγιών, απαλλάσσει αυτομάτως τη
SINGER από κάθε ευθύνη σε περίπτωση κακής λειτουργίας ήπρό-
κλησης βλάβης σε άτομα, ζώα κλπ.
4. Ηκακή χρήση ήπαρέμβαση από το χρήστη δεν επιτρέπονται και
ακυρώνουν αυτομάτως την εγγύηση του προϊόντος.
ΧΑΡΑΚΤΗΡΙΣΤΙΚΑ
Ισχυρή δυνατότητα αφύγρανσης
Χάρη στην τεχνολογία ψύξης, ησυσκευή έχει τη δυνατότητα να απο-
μακρύνει όλη την περίσσεια υγρασία από τον αέρα, δημιουργώντας ένα
άνετο περιβάλλον.
Ελαφριά φορητή συσκευή
Συμπαγής σχεδιασμός που κάνει τη μεταφορά της συσκευής εύκολη.
Λειτουργία ακόμα και σε Χαμηλές Θερμοκρασίες με Αυτόματη Απόψυξη
Όταν οι συνθήκες θερμοκρασίας και υγρασίας του δωματίου είναι εκτός
φυσιολογικών ορίων και δημιουργηθεί πάγος στο στοιχείο, ησυσκευή
μπαίνει αυτόματα σε λειτουργία απόψυξης.
This manual suits for next models
1
Table of contents
Languages:
Other Singer Dehumidifier manuals

Singer
Singer SDHM-16L-55DIA User manual

Singer
Singer Arido SDHM-10L User manual

Singer
Singer Dry Up SDHM-20L ECO User manual

Singer
Singer Dry Up SDHM-20DI User manual

Singer
Singer SDHM -10M User manual

Singer
Singer Mega Dry SDHM-25L-50DI User manual

Singer
Singer Supreme Dry SDHM-25L-25DIA User manual

Singer
Singer SDHM-10DI User manual

Singer
Singer SDHM-16L-55DIA User manual

Singer
Singer SDHM-16L PURE DRY ION User manual