N - FREEVIA 400 installation and operating guide - SOMFY
N
ontents
roduct description 2
-Contents of the pack 2
-Space requirements 3
-Field of application 3
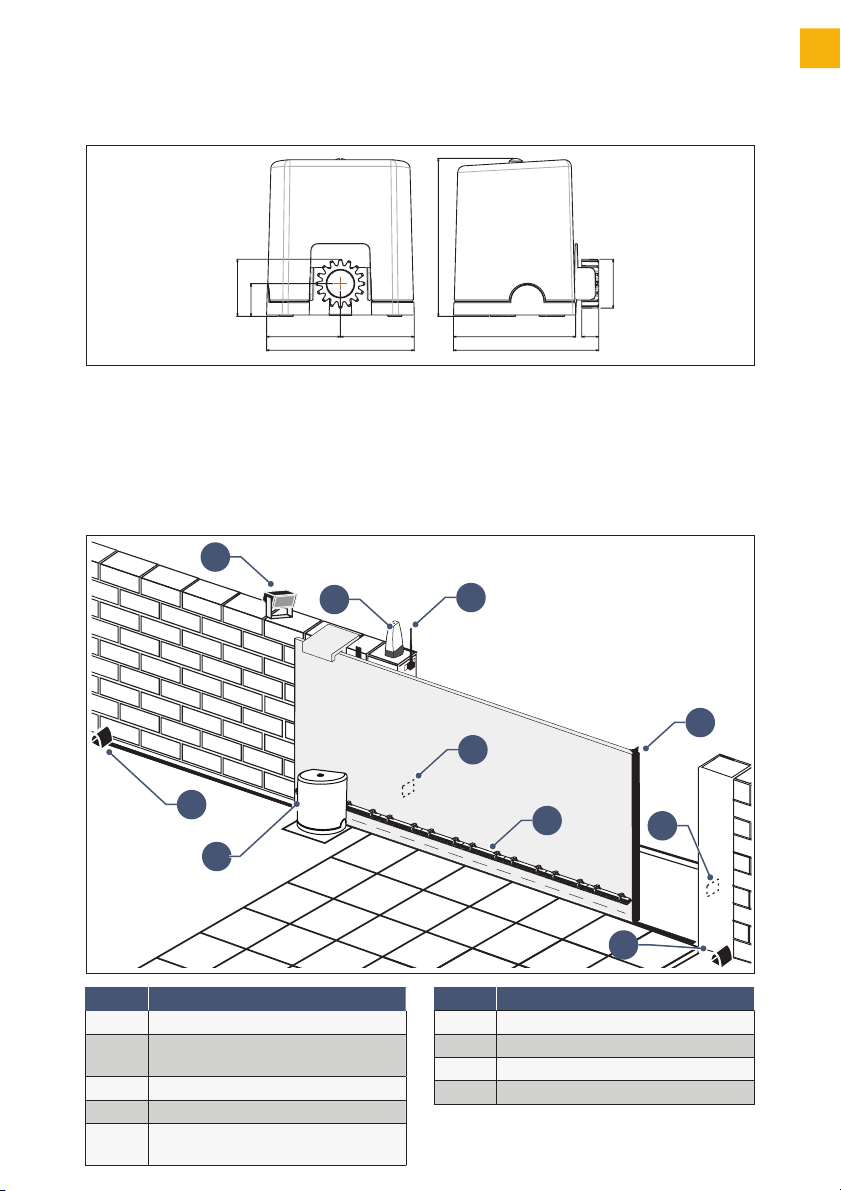
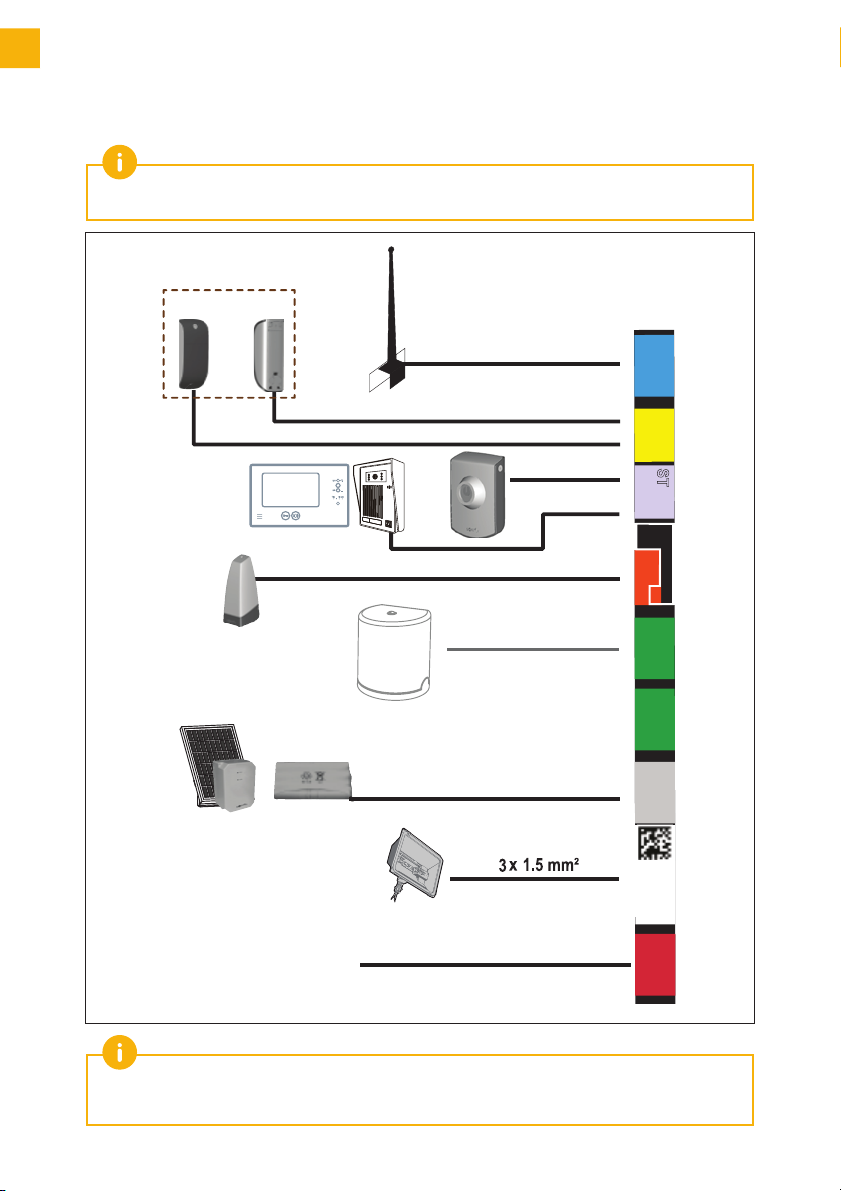
-General view of the installation 3
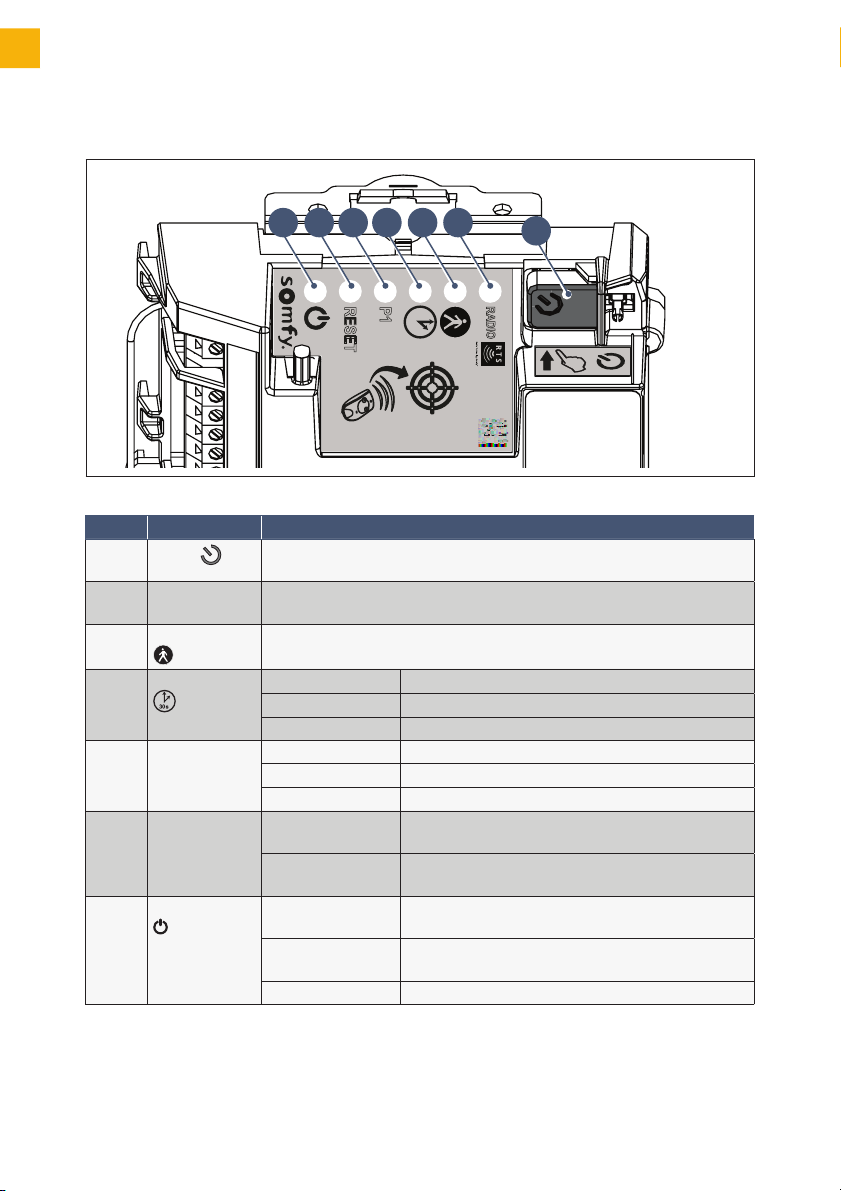
-Presentation of the control electronics 4
rerequisites for installation 5
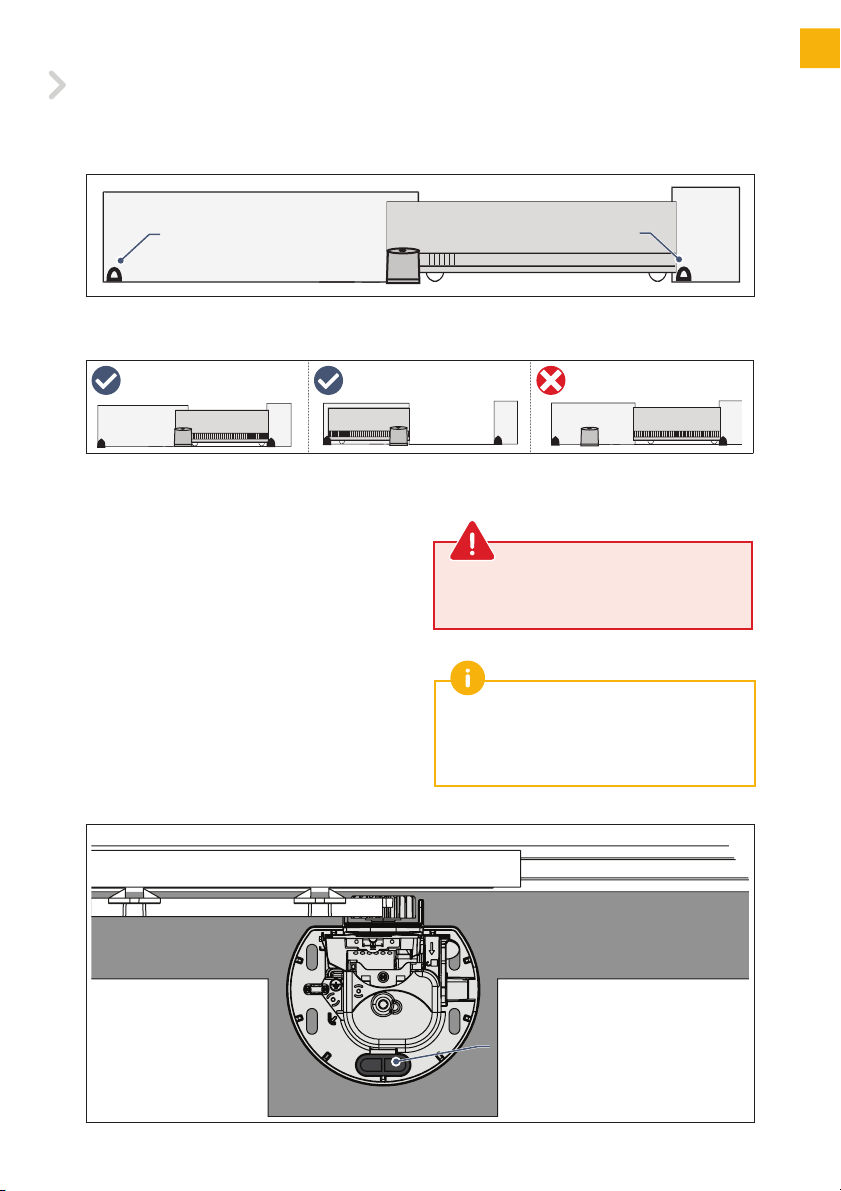
-Stop blocks on the ground 5
-Positioning the motor 5
-Electrical preequipment 5
-Cables required 6
-Concrete base 7
-Tools require for installation (not provided) 8
-Screws etc. required for installation of the rack
and pinion (not provided) 8
1 Installation 9
1.1 Unlock the motor 9
1.2 Installing the motor 9
- Fastening the motor to the ground 9
- Fastening the rack and pinion 0
1.3 Checking the installation of the motor 11
1.4 Locking the motor 11
1.5 Wiring the motor 12
1.6 Connecting to the 230V power supply 13
1.7 Earthing the control
electronics 14
1.8 Position of the control electronics
aerial 14
2 Commissioning and
standard use 15
2.1 Switching the installation on 15
2.2 Gate travel self-learning 15
2.3 Standby / reactivation of the control
electronics 16
2.4 Plugging the openings 16
2.5 Liing the cover 16
2.6 Fully opening and closing the gate 17
2.7 Obstacle detection 17
3 Wiring the accessories 18
3.1 Photoelectric cells
(depending on the pack chosen) 18
3.2 Orange light (depending on the pack chosen) 18
3.3 Battery (optional) 19
3.4 Offset aerial (optional) 19
3.5 Videophone (optional) 20
3.6 Key lock (optional) 20
3.7 Area lighting (optional) 20
3.8 Solar power (optional) 21
4 Advanced parameter settings 22
4.1 Pedestrian opening 22
- Pedestrian opening operation 22
- Activating the pedestrian opening 22
- Deactivating the pedestrian opening 22
4.2 Automatic closing 23
- Automatic closure operation 23
- Activating automatic closing 23
- Deactivating automatic closing 24
4.3 Gate speed 25
- Area of application 25
- Setting slow speed 25
- Returning to standard speed 26
5 rogramming the remote
controls 27
5.1 Presenting the remote controls 27
- Possibilities for programming the 2-button
remote control 27
- Possibilities for programming the 4-button
remote control 28
- Using a 3-button remote control 28
5.2 Adding a remote control 29
- 2 or 4-button remote control 29
- 3-button remote control 29
5.3 Deleting a remote control 29
6 Repairs 30
6.1 Assistance 30
6.2 Replacing the remote control battery 30
6.3 Clear the settings 31
6.4 Diagnostics 32
7 Technical data 33
ranslated version of the guide