Sony CCP-9000-C User manual

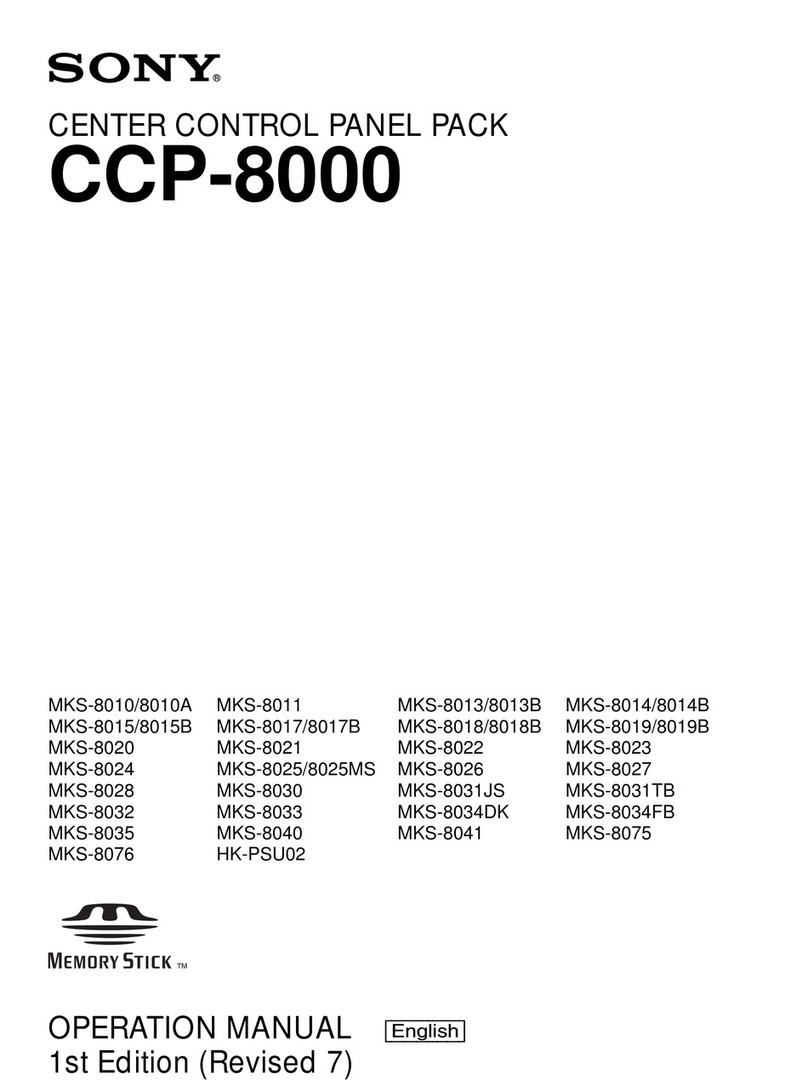
CENTER CONTROL PANEL PACK
CCP-9000-C
INSTALLATION MANUAL
1st Edition (Revised 1)
MKS-9011
MKS-9012
MKS-8011
MKS-8031TB
MKS-8032
MKS-8033
MKS-8035
MKS-8041
MKS-8075
SWC-5002
SWC-5005
SWC-5010

CCP-9000
!WARNING
This manual is intended for qualified service personnel only.
To reduce the risk of electric shock, fire or injury, do not perform any servicing other than that
contained in the operating instructions unless you are qualified to do so. Refer all servicing to
qualified service personnel.
!WARNUNG
Die Anleitung ist nur für qualifiziertes Fachpersonal bestimmt.
Alle Wartungsarbeiten dürfen nur von qualifiziertem Fachpersonal ausgeführt werden. Um die
Gefahr eines elektrischen Schlages, Feuergefahr und Verletzungen zu vermeiden, sind bei
Wartungsarbeiten strikt die Angaben in der Anleitung zu befolgen.Andere als die angegeben
Wartungsarbeiten dürfen nur von Personen ausgeführt werden, die eine spezielle Befähigung
dazu besitzen.
!AVERTISSEMENT
Ce manual est destiné uniquement aux personnes compétentes en charge de l’entretien.Afin
de réduire les risques de décharge électrique, d’incendie ou de blessure n’effectuer que les
réparations indiquées dans le mode d’emploi à moins d’être qualifié pour en effectuer d’autres.
Pour toute réparation faire appel à une personne compétente uniquement.
MKS-8011 Serial No. 10001 and Higher
MKS-8031TB Serial No. 10001 and Higher
MKS-8032 Serial No. 10001 and Higher
MKS-8033 Serial No. 10001 and Higher
MKS-8035 Serial No. 10001 and Higher
MKS-8041 Serial No. 10001 and Higher
MKS-8075 Serial No. 10001 and Higher
MKS-9011 Serial No. 10001 and Higher
MKS-9012 Serial No. 10001 and Higher
SWC-5002 Serial No. 10001 and Higher
SWC-5005 Serial No. 10001 and Higher
SWC-5010 Serial No. 10001 and Higher

CCP-9000
Attention-when the product is installed in Rack:
1. Prevention against overloading of branch circuit
When this product is installed in a rack and is
supplied power from an outlet on the rack, please
make sure that the rack does not overload the supply
circuit.
2. Providing protective earth
When this product is installed in a rack and is
supplied power from an outlet on the rack, please
confirm that the outlet is provided with a suitable
protective earth connection.
3. Internal air ambient temperature of the rack
When this product is installed in a rack, please make
sure that the internal air ambient temperature of the
rack is within the specified limit of this product.
4. Prevention against achieving hazardous
condition due to uneven mechanical loading
When this product is installed in a rack, please make
sure that the rack does not achieve hazardous
condition due to uneven mechanical loading.
5. Install the equipment while taking the operating
temperature of the equipment into consideration
For the operating temperature of the equipment, refer
to the specifications of the Operation Manual.
6. When performing the installation, keep the rear of
the unit 10 cm (4 inches) or more away from walls
in order to obtain proper exhaust and radiation of
heat.
WARNING
This unit has no power switch.
When installing the unit, incorporate a readily
accessible disconnect device in the fixed wiring, or
connect the power cord to a socket-outlet which must be
provided near the unit and easily accessible, so that the
user can turn off the power in case a fault should occur.
WARNUNG
Dieses Gerät hat keinen Netzschalter.
Beim Einbau des Geräts ist daher im Festkabel ein
leicht zugänglicher Unterbrecher einzufügen, oder das
Netzkabel mu
ß
mit einer in der Nähe des Geräts
befindlichen, leicht zugänglichen Wandsteckdose
verbunden werden, damit sich bei einer
Funktionsstörung die Stromversorgung zum Gerät
jederzeit unterbrechen lä
ß
t.
When using a LAN cable:
For safety,do not connect to the connector for
peripheral device wiring that might have excessive
voltage.
1 (P)


1
CCP-9000
Manual Structure
Purpose of this manual .............................................................................................. 3
Related manuals......................................................................................................... 3
Contents ..................................................................................................................... 4
1. Installation
1-1. Operating Environment (Common) ............................................................1-1
1-2. Power Supply ..............................................................................................1-1
1-3. Installation Space ........................................................................................1-2
1-3-1. External Dimensions ..................................................................1-2
1-3-2. Installation Space .......................................................................1-5
1-4. Installing the Control Panel.........................................................................1-6
1-4-1. Installing into the Control Console ............................................1-6
1-4-2. Installing the Side Caps (L) and (R) ..........................................1-7
1-5. Installing the Menu Panel............................................................................1-8
1-6. Installation of Options.................................................................................1-8
1-6-1. Installation to MKS-8075 (Extension Adaptor) .........................1-9
1-6-2. How to Connect the MKS-8075...............................................1-10
1-6-3. How to Connect the Cables......................................................1-14
1-6-4. Rack Mounting the MKS-8075 (Extension Adaptor) ..............1-14
1-7. Matching Connectors and Cables..............................................................1-16
1-8. Input/Output Signals of Connectors..........................................................1-17
1-9. Setting of On-board Switches and Function of LEDs...............................1-19
1-10. System Connection....................................................................................1-26
1-10-1. System Connection of the MVS-8000 Series...........................1-26
1-10-2. Connecting the Center Control Panel.......................................1-27
2. Service Overview
2-1. Troubleshooting ..........................................................................................2-1
2-1-1. Center Control Panel MKS-9011/9012 ......................................2-1
2-1-2. Menu Panel MKS-8011..............................................................2-1
2-2. Periodic Inspection and Maintenance .........................................................2-2
2-2-1. Cleaning .....................................................................................2-2
2-3. About the Data Backup Capacitor...............................................................2-2
Table of Contents


3
CCP-9000
Purpose of this manual This manual is the installation manual of Center Control Panel Pack CCP-9000-C
and the optional boards and units.
This manual is intended for use by trained system and service engineers, and
describes the information on installing the CCP-9000-C.
Related manuals The following manuals are prepared for CCP-9000-C and the optional boards and
units.
..
..
.Operation Manual (Supplied with CCP-9000-C)
This manual describes the overview, system connection example and specifica-
tions of options of CCP-9000-C.
..
..
.User’s Guide (Volume 1, Volume 2) (Supplied with CCP-9000-C)
This manual describes the application and operation of CCP-9000-C.
..
..
.System Setup Manual (Available on request)
This manual describes the information that is required to connect the MVS-8xxx/
MVE-8000/DCU-8000/CCP-8000 to the MVS-8000 system, and to start up the
system.
If this manual is required, please contact your local Sony Sales Office/Service
Center.
..
..
.Maintenance Manual (Available on request)
This manual describes the detailed service information.
If this manual is required, please contact your local Sony Sales Office/Service
Center.
..
..
.“Semiconductor Pin Assignments” CD-ROM (Available on request)
This “Semiconductor Pin Assignments” CD-ROM allows you to search for
semiconductors used in B&P Company equipment.
Semiconductors that cannot be searched for on this CD-ROM are listed in the
maintenance manual for the corresponding unit. The maintenance manual contains
a complete list of all semiconductors and their ID Nos., and thus should be used
together with the CD-ROM.
Part number: 9-968-546-XX
Manual Structure

4CCP-9000
Contents This manual is organized by following section.
Section 1 Installation
This section describes the operating environment, power supply, installation space,
installation of option, rack mounting, connectors, input and output signals of
connectors, checking upon completion of installation, system configuration, and
setup.
Section 2 Service Overview
This section describes the troubleshooting and periodic inspection and maintenance.

1-1
CCP-9000
For customers in the all European countries
1Power cord, 250 V 10 A (2.4 m) : !1-782-929-21
1AC inlet
For customers in the U.S.A. and Canada
1Power cord, 125 V 10 A (2.4 m) : !1-557-377-11
AC inlet
1
Section 1
Installation
1-1. Operating Environment (Common)
Operating guaranteed temperature : +5 dC to +40 dC
Performance guaranteed temperature : +10 dC to +35 dC
Operating humidity : 10 % to 90 %
Storage temperature : _20 dC to +60 dC
Mass
MKS-9011 : Approx. 11.5 kg
MKS-9012 : Approx. 12.5 kg
MKS-8011 : Approx. 2.5 kg
MKS-8031TB : Approx. 0.7 kg
MKS-8032 : Approx. 0.8 kg
MKS-8033 : Approx. 0.7 kg
MKS-8035 : Approx. 0.6 kg
MKS-8041 : Approx. 0.4 kg
MKS-8075 : Approx. 0.9 kg
Prohibited locations for installation
.Areas where the unit will be exposed do direct sunlight
or any other strong lights.
.Dusty areas
.Areas subject to vibration.
.Areas with strong electric or magnetic fields.
.Areas near heat sources.
.Areas where is subject to electrical noise.
.Areas subject to static electricity.
Ventilation
The inside of the MKS-9011/9012 is cooled by a fan.
The power supply can be damaged if the exhaust vent (on
the rear) and air intake (on the front) are blocked or the fan
is stopped.
Therefore, leave a blank space of more than 10 cm in the
front and back of the MKS-9011/9012.
1-2. Power Supply
1. Power specifications
A switching regulator is used for the power supply of
MKS-9011/9012. A voltage within the range of 100 V to
240 V can be used without changing the supply voltage.
Power requirements: AC 100 to 240 V ±10 %
Power frequency: 50/60 Hz
Current consumption
MKS-9011: 1.0 to 0.5 A
MKS-9012: 1.1 to 0.5 A
n
As the inrush current at turn-on is a maximum 20 A (at
100 V)/60 A (at 230 V), the capacity of the AC power
source must be commensurate with this load.
If the capacity of the AC power is not adequately large, the
AC power source breaker will operate or the unit will
abnormally operate.
2. Recommended power cord
w
.The power cord is not supplied with the MKS-9011/
9012.
Be sure to use the power cord that is applicable to places
in the area.
To avoid a fire or an electric shock, be sure to use the
designated power cord.
.Do not damage the power cord otherwise a fire or
electric shock may result.
Designated power cord

1-2 CCP-9000
220
160
213
424 46
440
340
140.9
290
441.8 (10U)
370
425.617
9.8101.8
197.7478.3 Unit : mm
30
1-3. Installation Space
1-3-1. External Dimensions
Center controll panel MKS-9012/Menu panel MKS-8011
MKS-8011
MKS-9012

1-3
CCP-9000
1-3. Installation Space
Center controll panel MKS-9011
440
340
140.9
290
441.8 (10U)
370
425.617
9.8101.8
197.7478.3
Unit : mm
30

1-4 CCP-9000
1-3. Installation Space
Extension adaptor MKS-8075
263
79
85
91
396
Unit : mm

1-5
CCP-9000
2-ø3 hole with 3 or more in depth
6-M5
Model name
MKS-9011
MKS-9012
Serial No.
10001 - 10012
10013 -
10001 - 10044
10045 -
264.3 132.1
266.7 133.4
264.3 132.1
266.7 133.4
AB
465
7.5
30
140 or more
7.5
7.5
1.7
444.5
332.8
A67.7
30 80
B
11.5
7.5
1.7
Unit : mm
1-3. Installation Space
1-3-2. Installation Space
When the controll panel is recessed into a control console or similar, make holes as shown below into the
control console with the following dimensions.

1-6 CCP-9000
P5 x6
P5 x6
1-4. Installing the Control Panel
1-4-1. Installing into the Control Console
n
When installing the control panel into the control console,
be sure to install it with two persons or more.
Install the control panel by following the procedure
described below.
Tool required
.Screws (P5 x6): 6 pcs
1. Remove the six module covers on both sides.
2. Remove the six screws and remove the three caps (L)
and (R) each on both sides in the direction of the
arrow.
Module covers
Cap(R)
Cap (L)
PSW3 x6
PSW3 x6
3. While lifting up the control panel with one person, and
holding it with another person, and then install the
control panel into the control console.
4. Fix the control panel to the control console by tighten-
ing the six screws.
5. Install the caps (L) and (R), and module covers in the
reverse order of removal.

1-7
CCP-9000
Cap (L)
Cap (R)
Rack mount
braket (L)
Rack mount
braket (R)
PSW3 x6
B3 x6
B3 x6
PSW
3 x6
1-4. Installing the Control Panel
1-4-2. Installing the Side Caps (L) and (R)
The width of the MKS-9011/9012 can be made below into
the width of the opening of the 19-inch standard rack by
attaching the side caps (L) and (R) to the MKS-9011/9012.
Tool required
.Side caps (L) and (R): 3 pcs each (Supplied)
.Screws (B3 x6): 12 pcs
1. Remove the six module panels on both sides. (Refer to
Section 1-4-1.)
2. Remove the six screws, and remove the three caps (L)
and (R) each on both sides in the direction of the
arrow.
3. Remove the eight screws, and remove the rack mount
brackets (L) and (R).
4. Install the three side caps (L) and (R) each on both
sides by tightening the twelve screws.
5. Install the caps (L) and (R), and module covers in the
reverse order of removal.
Side cap (L)
Side cap (R)
B3 x6
B3 x6

1-8 CCP-9000
1-5. Installing the Menu Panel
Tools required
.Screws (B4 x6) : 4 pcs
.Screws (B3 x5) : 4 pcs
.EL table assemblies :
2 pcs (Sony Part No. : X-3167-779-1)
1. Open the screw holes (M4) as shown in the illustration
into the positions to which the menu panel is going to
be installed.
2. Install the EL table assemblies to the screw holes that
are opened in step 1 using the four screws.
3. Install the menu panel using the four screws (B3 x5).
1-5. Installing the Menu Panel
1-6. Installation of Options
B4 x 6
68.5 mm
378 mm
B4 x 6
EL table assemblies
Menu panel
B3 x 5
B3 x 5
EL table assemblies
1-6. Installation of Options
The CCP-9000-C system is comprised of the following
models according to the system to be used, and shipped
from the factory.
Model name
MKS-9011 1-M/E CONTROL PANEL
MKS-9012 2-M/E CONTROL PANEL
MKS-8011 MENU PANEL
MKS-8031TB TRACKBALL MODULE
MKS-8032 DSK FADER MODULE
MKS-8033 UTILITY/SHOTBOX MODULE
MKS-8035 KEY CONTROL MODULE
MKS-8041 BLANK PANEL (1/2)
MKS-8075 EXTENSION ADAPTOR
SWC-5002 PANEL CABLE (2 m)
SWC-5005 PANEL CABLE (5 m)
SWC-5010 PANEL CABLE (10 m)

1-9
CCP-9000
Ball cover
Track ball
MKS-8031TB
MKS-8075
Module covers
Operation module
Screws
(with drop-safe)
Screws
(with drop-safe)
1-6. Installation of Options
1-6-1. Installation to MKS-8075 (Extension
Adaptor)
c
Be sure to disconnect the power cord before starting to
install modules.
If installation of modules is started with the POWER
switch left on, it may cause electrical shock damage
printed circuit boards.
Applicable modules
.MKS-8031TB Track Ball Module
.MKS-8032 DKS Fader Module
.MKS-8033 Utility/Shotbox Module
.MKS-8035 Key Control Module
Installation
1. Remove the module cover on both sides of the opera-
tion module that you want to remove, as shown.
2. Loosen the four screws (with drop-safe) fixing the
operation module.
3. Remove the operation module by holding the two
screws on the sides of the operation module.
4. Fit the operation module that you want to install into
the position as described in step 3. Fix the operation
module by tightening the four screws (with drop-safe)
on both sides.
5. Install the module cover.
n
Installation of the MKS-8031TB requires installation
of the track ball after the module is installed in steps 1
to 5.
Install the track ball by following the procedure below.
6. Rotate the ball cover counterclockwise to release the
lock.
7. Remove the ball cover and the track ball.
8. Rotate the ball cover clockwise until it is locked.

1-10 CCP-9000
234
Number of
connections
: Blank panel
(Using the blank panel)
BV3 x10
BV3 x10
Adaptor case
Side plates
Module covers
Operation module
Cap (L)
Cap (R)
Scrwes
(with drop-safe)
Scrwes
(with drop-safe)
BV3 x10
BV3 x10
1-6. Installation of Options
1-6-2. How to Connect the MKS-8075
Structure of MKS-8075 (Extension adaptor)
Adaptor case : 1
Screw (BV3 x10) : 4
Connecting plate A : 1
Connecting plate B : 1
Connecting plate C : 2
Panel cover (L) : 1
Panel cover (R) : 1
Cable (D-sub 50-pin): 1
m
.A maximum of three extension adaptors (maximum of
four when using the blank panel) can be connected either
horizontally, or vertically.
(Up to two extension adaptors can be connected horizon-
tally.)
(For an example of connection, refer to Fig. 1.)
.There are three methods of vertical connection as
described below. (Refer to Fig. 2. (on page 1-13.))
Method A : Install the extension adaptors on the panel so
that they have differences in height like a
flight of steps and with the same outside
appearance as that of the main panel.
Method B : Install the extension adaptors flat on the
panel with no difference in height.
(In such a case as installed on tabletop)
Method C : Install the extension adaptors in the rack.
(Horizontal connection is also required.)
.When extension adaptors are installed using both
horizontal and vertical connections, be sure to perform
the vertical connections first then perform the horizontal
connections.
.When the vertical connection (A) is selected, be sure to
secure all of the side panels with screws. Never panel it a
table top. (The fixing method is same as that of the main
panel.)
Connecting procedure
1. Remove the module cover. Remove the screws (BV3
x10) fixing the caps (L) and (R), and remove the caps
in the direction of the arrow.
2. Loosen the four screws (with drop-safe) fixing the
operation module.
3. Hold the two screws (with drop-safe) in the front of
the both sides of the operation module, and remove the
operation module.
4. Remove the screws (BV3 x10) fixing the side plates
to the adaptor case, and remove the side plates.
Fig. 1

1-11
CCP-9000
BV3 x10
BV3 x10
Adaptor cases
Connecting plate B
FRONT
FRONT
BV3 x10
BV3 x10
Adaptor cases
Instruction given on the
bottom of the cases
Connecting plates A
FRONT
FRONT
BV 3 x10
BV 3 x 10
Connecting
plate C
Connecting
plate C
Instruction given on
the bottom of the case
Adaptor cases
1-6. Installation of Options
(3) Fix the bottom plate of the adaptor cases at the loca-
tions shown in the illustration using the 4 connecting
screws (BV3 x10) and 2 of the connecting plates B
for every 2 adaptor cases.
n
When the Vertical connection (A) is selected, there are
several locations where the connecting plate B cannot
be fixed.
5. Install the side panel.
n
The screw positions that fix the side panel are different
in the connection methods (A), (B) and (C) respective-
ly. (Refer to Fig. 2 (on page 1-13.))
6. Install the operation module and fix it by tightening
the four screws on the sides.
When the Vertical connection is selected
(1) Connect the adaptor cases together.
(Be careful of the direction of the adaptor cases. See the
instruction given on the bottom of the adaptor case.)
(2) Fix the right sides and left sides of the adaptor cases as
shown in the illustration using the two pieces of the con-
necting plate C.
.
When fixing the adaptor cases, you can select either the
flat connection or the connection like a flight of steps.
.When selecting the connection like steps of the
connection method (A), (see Fig. 2) the two screws
are secured with one notch offset each other.
.When the flat connection method (B, C) is selected,
(see Fig. 2) the two screws are secured in the same
height.
When the Horizontal connection is selected
(1) Connect the adaptor cases together.
(Be careful of the direction of the adaptor cases. See the
instruction given on the bottom of the adaptor case.)
(2) Fix the top plate of the adaptor cases at the locations
shown in the illustration using the two connecting
screws and the two connecting plates A for every two
adaptor cases.

1-12 CCP-9000
Stepped screws M3
Stepped screws M3
Panel cover (R)
Panel cover (L)
BV3 x 10
BV3 x 10
Module covers
Cap (L) Cap (R)
7. For connection methods (A) and (B) (Refer to Fig. 2
(on page 1-13.)), install the caps (L) and (R), and the
module cover in the direction of the arrow.
For connection method (C) (Refer to Fig. 2 (on page 1-
13.)), remove the four stepped screws and install the
panel covers (L) and (R).
1-6. Installation of Options
Other manuals for CCP-9000-C
1
Table of contents
Other Sony Control Unit manuals

Sony
Sony BVE-700A User manual

Sony
Sony HXCU-TX70 User manual

Sony
Sony HDCU1000 User manual

Sony
Sony HSCU-300 User manual

Sony
Sony FCB-EV7300 User manual

Sony
Sony Clie Gear PEGA-MSB1 User manual
Sony
Sony HDCU3100 User manual

Sony
Sony Ipela User manual

Sony
Sony BKS-R3210 User manual

Sony
Sony MB0402C2 User manual