manuals.online logo
Brands
  1. Home
  2. •
  3. Brands
  4. •
  5. Spectrum
  6. •
  7. Indoor Furnishing
  8. •
  9. Spectrum Esports Meta 37340 User manual

Spectrum Esports Meta 37340 User manual

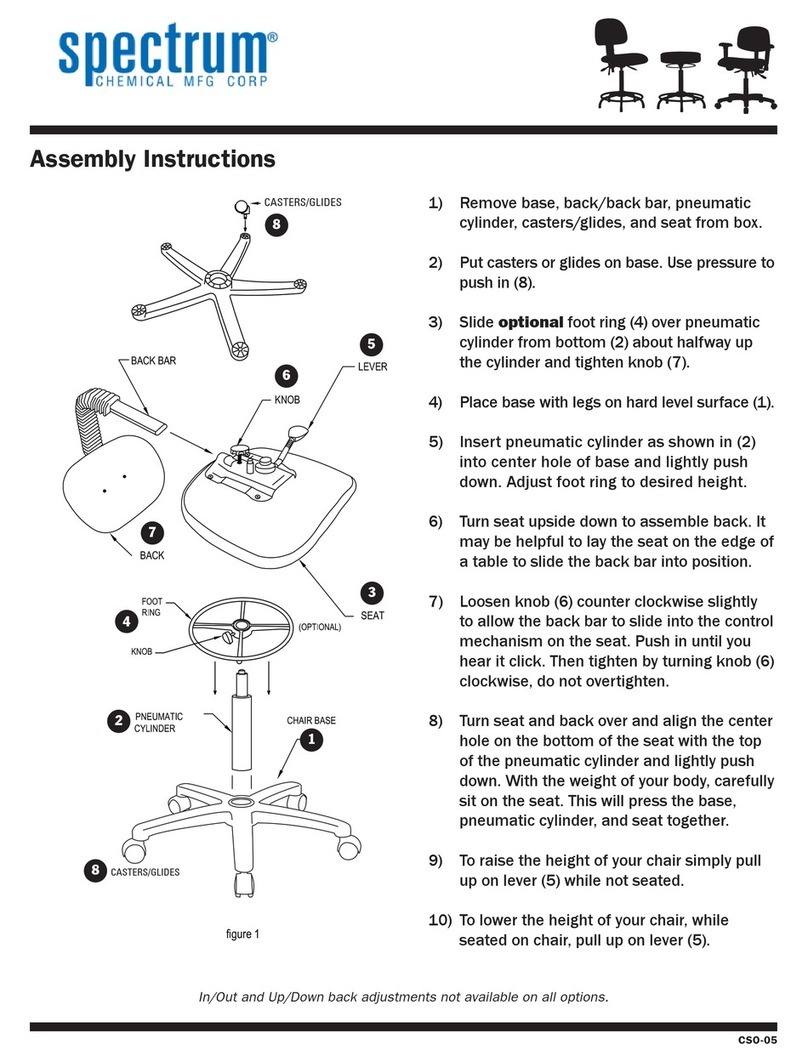
Assembly InstructionsAssembly Instructions
0192096R1 Page 1 of 8
Assembly InstructionsAssembly Instructions
Important
Before you begin, read and comply with all safety and operating instructions,
and ensure all parts and correct quantities are included.
Any parts damaged during shipment must be reported within 5 days of receipt.
To report information regarding missing parts or damage, to purchase parts
or accessories, or if you have any questions, please contact us.
www.spectrumfurniture.com
800-235-1262, 715-723-6750
Thank you for purchasing Spectrum products!
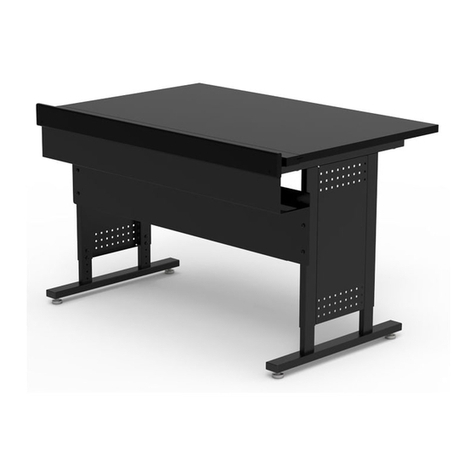
Esports Meta Bank Desk - 37340Esports Meta Bank Desk - 37340
Esports Shadow Bank Desk - 37341Esports Shadow Bank Desk - 37341
(1) Worksurface
3
/
8”
(1) 0151223
Left Leg
(1) 0152137
Cord channel
bottom
Meta Bank
worksurface
(1) 0152138
Cord channel
front
(1) 0154472
Support panel
(1) 0151501
Right Leg
Shadow Bank
worksurface
7
/
16
”
Assembly tip: Do not tighten component fasteners completely
until all have been installed. Keeping them loose will help with
alignment between parts during assembly.
0192096R1 Page 2 of 8
(1) 021521
10-24 Keps nut
(15) 038064
#14 x 3/4” PHSM
(1) 025069
Glide Wrench
Hardware
(4) 037779
5/16-18 x 1” Glide
(24) 0100167
8-32 x 1/2” PH Thrd ctg
(3) 035728
1/4-20 x 1/2” PHMS
(7) 037542
#8 x 5/8” PHSM
(1) 0150570
Headset
hanger
(1) 0152128
Mid bracket
(2) 0151290
Worksurface
pivot bracket
(2) 0190903
1/4-20 locknut
(2) 026547
1/4-20 x 1-1/2”
PHMS
(2) 0141778
5/16” x 15/16” clamp
(2) 0192078
1/4-20 routing
eyebolt, 1” shank
(2) 0146230
Latch
(4) 0151462
Latch bracket
(2) 0191585
.72 OD x 1.75”
Spring
(2) 0151464
Tilt bracket
(2) 026069
#8 x 5/8” PHSM
(4) 026296
Recessed bumper
w/ washer
(4) 050523
.265 ID x .375 OD x
3/4”L Spacer
(4) 0190419
#14 x 1” PHSM
(2) 0191866
Adjustable lid
stay, 13 lb
(2) 0191005
3/32” dia x 3/16” OD
wire cable
0192096R1 Page 3 of 8
1. Assemble worksurface1. Assemble worksurface
1. Place both worksurfaces laminate side-down as shown onto a non-
abrasive surface like a carpeted oor. Figure 1.
2. Attach the mid bracket to the secondary worksurface as shown with
(1) #14 x 3/4” PHSM screw.
3. Attach each pivot bracket with (2) #8 x 5/8” PHSM screws.
4. Attach each tilt bracket with (2) #14 x 3/4” PHSM screws.
Figure 1
(1) #14 x 3/4”
PHSM
Primary worksurface
Mid bracket
(2) #8 X 5/8”
PHSM
Tilt bracket
(2) #14 x 3/4”
PHSM
Pivot
bracket
Tilt bracket
(2) #8 X 5/8”
PHSM
(2) #14 x 3/4”
PHSM
Pivot
bracket
Secondary
worksurface
2. Attach laminate leg panels - optional2. Attach laminate leg panels - optional
1. If you ordered optional laminate leg insert panels, install them into
the legs at this point with (4) #14 x 3/4” PHSM screws. Figure 2.
If you don’t have laminate leg panels-skip to step 3.
Figure 2
Laminate leg
panel insert
#14 x 3/4” PHSM
(4 required)
0192096R1 Page 4 of 8
3. Attach bumpers to top of each leg3. Attach bumpers to top of each leg
1. Attach (2) recessed bumpers to the top of each leg in the positions
shown with (2) 8-32 x 1/2” PH thread-cutting screws. Figure 3. The
top of the leg is the side with the 2” tube.
Figure 3
Glide
4. Attach glides to bottom of each leg4. Attach glides to bottom of each leg
1. Attach (2) glides to the bottom of each leg. The bottom of the leg is
the side with the 1” tube. The glides can be adjusted later to keep
the desk level on uneven surfaces. Figure 4.
8-32 x 1/2”
PH Thrd ctg
8-32 x 1/2”
PH Thrd ctg
Recessed
bumper
Recessed
bumper
2”
Figure 4
1”
5. Attach legs to worksurface5. Attach legs to worksurface
1. The left and right legs will attach to the worksurface with the
hardware mounting holes facing inward. Figure 5.
2. Attach the leg (the side with 2” tube) to the secondary worksurface
with (2) spacers and (2) #14 x 1” PHSM screws. (The spacers go
between the leg and worksurface).
3. Place front of each leg inside pivot bracket and install a 1/4-20 x
1-1/2” PHM screw from the outside.
4. Secure pivot screw with (1) 1/4-20 locknut. Tighten screw, but not
completely so the worksurface will pivot freely.
Bottom of leg
Figure 5
Top of leg
Primary worksurface
Secondary worksurface
(1) #14 x 1”
PHSM
(1) #14 x 1”
PHSM Leg
(1) 1/4-20
locknut
(1) 1/4-20 x
1-1/2” PHMS
Hardware
mounting
holes facing
inward
3
/
8”
(2) .265 ID x .375
OD x 3/4”L Spacer
1 2 Slide spring over latch and insert latch into bracket slot and hold.
Figure 6.2.
3Place latch bracket #2 over latch and secure to leg with
(2) 8-32 x 1/2” PH thread-cutting screws. Figure 6.3.4
Set lid stay into position and attach to leg with (2) 8-32 x 1/2”
thread-cutting screws. Figure 6.4.
Set lid stay into position and attach to leg with (2) 8-32 x 1/2”
thread-cutting screws. Install (2) #8 x 5/8” PHSM screws to attach
to worksurface. Figure 5.4.
0192096R1 Page 5 of 8
6. Attach tilting hardware6. Attach tilting hardware
Figure 6.1 Figure 6.2
Figure 6.3 Figure 6.4
Latch bracket #1
8-32 x 1/2”
PH Thrd ctg
(2 required)
Latch
Spring
8-32 x 1/2”
PH Thrd ctg
(2 required)
Leg Leg
Leg Leg
Latch bracket #2
Attach latch bracket #1 to the leg with (2) 8-32 x 1/2” PH
thread-cutting screws. Figure 6.1.
Note: Repeat this process on the other side of the desk.
Lid stay
8-32 x 1/2”
PH Thrd ctg
(2 required)
(2) #8 x 5/8”
PHSM
0192096R1 Page 6 of 8
Figure 7
7. Attach cable eyelets7. Attach cable eyelets
1. Screw in the eyelet as shown. Figure 7.
2. Orient the eyelet vertically.
3. Repeat with eyelet on other leg.
Eyelet
Leg
8. Attach cable8. Attach cable
1. Attach the (2) 5/16” x 15/16” clamps to the worksurface with #8 x 5/8”
PHSM screws as shown. Figure 8.
2. Thread the cable through the (2) clamps and (2) eyelets.
3. Thread the cable ends through the two latch holes to lock the cable
ends in place as shown. Figure 8.1. Each cable end should end up
pointing toward a leg after threading through both holes. Adjust the
cable to be tight enough to release both latches when pulled from the
user-side of the desk.
Figure 8
Figure 8.1
Cable
(2) #8 x 5/8”
PHSM
Clamps
Eyelet
Eyelet
Cable
Latch
0192096R1 Page 7 of 8
9. Attach cord channel9. Attach cord channel
1. Align the cord channel front with the leg holes and mid bracket as
shown. Figure 9.1. Secure with (2) 8-32 x 1/2” PH thread-cutting
screws and (1) 10-24 Keps nut at the mid bracket.
8-32 x 1/2” PH
Thrd ctg
(1 per leg)
Cord channel
bottom
Cord channel
front
(1) 10-24
Keps nut
Figure 9.1
Figure 9.2
Mid bracket
(3) 1/4-20 x
1/2” PHMS
2. Align the cord channel bottom and secure to the cord channel front
with (3) 1/4-20 x 1/2” PHM screws. Figure 9.2.
3. Secure to each leg with (1) 8-32 x 1/2” PH thread-cutting screws.
8-32 x 1/2” PH
Thrd ctg
(1 per leg)
0192096R1 Page 8 of 8
925 FIRST AVENUE, CHIPPEWA FALLS, WI 54729 / 800-235-1262 / 715-723-6750 / WWW.SPECTRUMFURNITURE.COM925 FIRST AVENUE, CHIPPEWA FALLS, WI 54729 / 800-235-1262 / 715-723-6750 / WWW.SPECTRUMFURNITURE.COM
© 2021 Spectrum Industries Inc., All rights reserved.
Figure 12
10. Attach support panel10. Attach support panel
1. Align the support panel as shown. Figure 10.
2. Secure to the legs with (4) 8-32 x 1/2” PH thread-cutting screws.
3. Tighten ALL screws.
Figure 11
12. Attach headphone hanger12. Attach headphone hanger
1. The headphone hanger can be attached to the left or right-side of the
desk using (3) #8 x 5/8” PHSM screws. Figure 12.
8-32 x 1/2” PH
thrd ctg
(2 per leg)
13. Flip desk upright13. Flip desk upright
1. Using two people, carefully ip the assembled desk upright. Figure 13.
(3) #8 X 5/8”
PHSM
Support panel
Headphone
hanger
Figure 13
Worksurface
CAUTION
Do not allow the desk legs to contact the oor until
the table is completely ipped over. Excessive
side-loading of the legs could cause damage.
11. Attach metal leg panels - optional11. Attach metal leg panels - optional
Figure 10
Acrylic leg
panel assembly
8-32 x 1/2” PH
Thrd ctg
(4 per panel)
1. The upper rear screw is shared with the cord channel.
2. Attach the panel to the inside of each leg with (4) 8-32 x 1/2” PH
Thread cutting screws. Figure 11.
Leg

This manual suits for next models

1

Other Spectrum Indoor Furnishing manuals
Spectrum 55496 User manual

Spectrum

Spectrum 55496 User manual

Spectrum CORE Lectern 55548 User manual

Spectrum

Spectrum CORE Lectern 55548 User manual

Spectrum 55148 User manual

Spectrum

Spectrum 55148 User manual

Spectrum Pivot 37325 User manual

Spectrum

Spectrum Pivot 37325 User manual

Spectrum 55241 User manual

Spectrum

Spectrum 55241 User manual

Spectrum Oxford Series User manual

Spectrum

Spectrum Oxford Series User manual

Spectrum Mendota 30 Portable Lifeguard Chair User manual

Spectrum

Spectrum Mendota 30 Portable Lifeguard Chair User manual

Spectrum Flex Active 37239 User manual

Spectrum

Spectrum Flex Active 37239 User manual

Spectrum 55405 User manual

Spectrum

Spectrum 55405 User manual

Spectrum Pivot Premier Workstation User manual

Spectrum

Spectrum Pivot Premier Workstation User manual

Spectrum Media Manager Elite Lectern 55258 User manual

Spectrum

Spectrum Media Manager Elite Lectern 55258 User manual

Spectrum Honors Lectern 55178 User manual

Spectrum

Spectrum Honors Lectern 55178 User manual

Spectrum 55334 User manual

Spectrum

Spectrum 55334 User manual
Spectrum 55273 User manual

Spectrum

Spectrum 55273 User manual

Spectrum 37256 User manual

Spectrum

Spectrum 37256 User manual

Spectrum 55283 User manual

Spectrum

Spectrum 55283 User manual

Spectrum Freedom One eLift User manual

Spectrum

Spectrum Freedom One eLift User manual

Spectrum 22499 User manual

Spectrum

Spectrum 22499 User manual
Spectrum 68 Series User manual

Spectrum

Spectrum 68 Series User manual

Spectrum Freedom XRS Elite User manual

Spectrum

Spectrum Freedom XRS Elite User manual

Spectrum Pfister Tenet GT572-TNT User manual

Spectrum

Spectrum Pfister Tenet GT572-TNT User manual

Spectrum 55140 User manual

Spectrum

Spectrum 55140 User manual

Spectrum GG Gaming Desk 37421 User manual
Spectrum

Spectrum GG Gaming Desk 37421 User manual

Spectrum mLT-30 User manual

Spectrum

Spectrum mLT-30 User manual

Popular Indoor Furnishing manuals by other brands

EXPEDO COLORADO K3S Assembly manual

EXPEDO

EXPEDO COLORADO K3S Assembly manual

Safavieh Furniture Annika BST9906A quick start guide

Safavieh Furniture

Safavieh Furniture Annika BST9906A quick start guide

KC STORE FIXTURES T-shirt Spinner 55103 Assembly instructions

KC STORE FIXTURES

KC STORE FIXTURES T-shirt Spinner 55103 Assembly instructions

modway EEI-2554 manual

modway

modway EEI-2554 manual

Lifetime Kidsrooms SS70010 Assembly instructions

Lifetime Kidsrooms

Lifetime Kidsrooms SS70010 Assembly instructions

Costway HY10097 manual

Costway

Costway HY10097 manual

Home Decorators Collection GRAYSON 20305-VS61C-ST Assembly instructions

Home Decorators Collection

Home Decorators Collection GRAYSON 20305-VS61C-ST Assembly instructions

Sensio Eclipse SE30298T0 installation guide

Sensio

Sensio Eclipse SE30298T0 installation guide

Walker Edison W44CS1DGR Assembly instructions

Walker Edison

Walker Edison W44CS1DGR Assembly instructions

VABCHES J3L211BS01 manual

VABCHES

VABCHES J3L211BS01 manual

Alice's Garden CHICAGO XTSAF245R8AT manual

Alice's Garden

Alice's Garden CHICAGO XTSAF245R8AT manual

Invacare Viscomixt user manual

Invacare

Invacare Viscomixt user manual

Argos Silbury 4146922 Assembly instructions

Argos

Argos Silbury 4146922 Assembly instructions

Safavieh Furniture Jett ACC4201 Assembly

Safavieh Furniture

Safavieh Furniture Jett ACC4201 Assembly

Rauch M2593 Assembly instructions

Rauch

Rauch M2593 Assembly instructions

John Lewis 803/12315 manual

John Lewis

John Lewis 803/12315 manual

Croydex MM710100E manual

Croydex

Croydex MM710100E manual

Mayer 2280 quick start guide

Mayer

Mayer 2280 quick start guide

manuals.online logo
manuals.online logoBrands
  • About & Mission
  • Contact us
  • Privacy Policy
  • Terms and Conditions

Copyright 2025 Manuals.Online. All Rights Reserved.