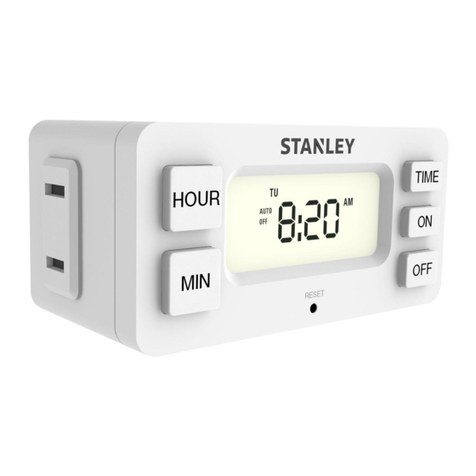
Stanley TIMEIT TM201 User manual

TIMEIT™OUTDOOR TWIN
Model/Modelo/Modèle# TM201
User manual
Manual de usuario / Manuel utilisateur

1 - Locate the electrical outlet that is close to the
device you want to control.
2 - Set the ON / TIMER switch located next
to the dial to the TIMER position. Plug the
timer into the outlet.
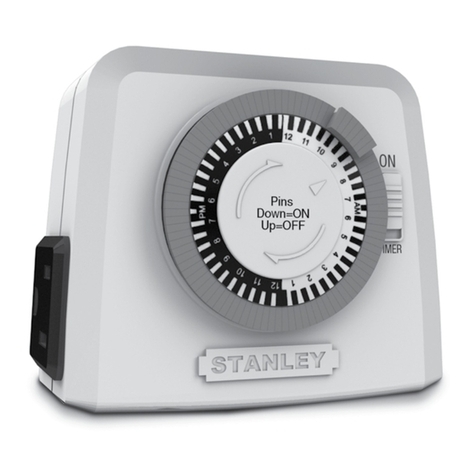
3 - Set the current time - turning clockwise,
align the Arrowhead (See diagram) on TOP
of the timer to the
present time (lines
between numbers
are in increments of 30 minutes).
There is no need to touch the
pins to set current time. NOTE:
Dial is based on AM/PM.
4 - Determine desired start time and push “DOWN”
all pins until desired OFF time. When pins are pushed
down the timer will be on and working. When pins are
in the UP position timer is OFF (note: “pins” are grey
12
11
10
9
8
7
6
5
4
3
2
1
12
9
3
1
11
10
8
7
6
5
4
2
AM
PM
ON
TIMER
Pins
Down=ON
Up=OFF
12
11
10
9
8
7
6
5
4
3
2
1
12
9
3
1
11
10
8
7
6
5
4
2
AM
PM
ON
TIMER
Pins
Down=ON
Up=OFF
ENGLISH
Timer pins are factory preset in the
“pushed down” (‘ON’) position.
Pull pins up for timers ‘OFF’ intervals.
OPERATING INSTRUCTIONS
Install the cord and unit at least 5ft (1.5m) above
ground level with the outlet receptacle facing
downward. Let the switch hang downward so
moisture doesn’t accumulate in the outlet. Plug the
lights or appliances into the outlets at the bottom.
INITIAL USE:

slices around the dial.) For example: to turn the timer
ON at 5pm and OFF at 10pm, push down all the pins
from 5pm to 10pm.
5 - Plug your electrical device directly into the timer.
The electrical device must be set to “ON” position for
the timer control to work properly.
6 - The switch on the timer must be set to the TIMER
position for the timer to work.
To use the Manual “Always ON” feature,
switch the ON / TIMER switch (located next
to the dial) to ON for “Always ON”
Be sure to set switch back to the TIMER
position for proper timer function.
In case of power failure, reset the time of
day as indicated in step 3.
12
11
10
9
8
7
6
5
4
3
2
1
12
9
3
1
11
10
8
7
6
5
4
2
AM
PM
ON
TIMER
Pins
Down=ON
Up=OFF
2 Grounded outlets and plug
Rated: 125VAC/60Hz/8A/1000W Resistive
8A/1000W Tungsten
500VA Electronic Ballast
1/2 HP Motor Load
SPECIFICATIONS

If within the first year from date of purchase, this unit fails due to
a defect, exchange where purchased, or ship it prepaid with proof
of purchase to The NCC, 1840 McDonald Avenue, Brooklyn, New
York 11223. Units that fail to operate during the second or third
year from date of purchase must be shipped prepaid with proof of
purchase to The NCC. We will replace unit. This guarantee excludes
normal wear and tear and damage resulting from accident,
alteration, or misuse. This warranty gives you specific legal rights,
and you may also have other rights which vary from state to
state. For warranty replacementunit must be purchased from an
authorized reseller.
THREE YEAR LIMITED WARRANTY
• NO ENCHUFE EL TEMPORIZADOR A UN CABLE • DO
NOT PLUG THIS TIMER INTO AN EXTENSION CORD OR
OTHER ELECTRICAL ADAPTER. PLUG DIRECTLY INTO AN
ELECTRICAL OUTLET.
• DO NOT CONNECT THIS TIMER TO APPLIANCES THAT
CONTAIN HEATING ELEMENTS (COOKING APPLIANCES,
HEATERS, IRONS, ETC.). FAILURE OF THE TIMER TO SHUT
OFF SUCH DEVICES MAY LEAD TO OVERHEATING AND A
POTENTIAL FIRE.
• DO NOT PLUG IN THIS TIMER IF IT IS WET.
• DO NOT CLEAN THIS TIMER WHEN IT IS PLUGGED IN.
• DO NOT EXCEED THE MAXIMUM RATINGS
OF THE TIMER.
• POTENTIAL SHOCK HAZARD:
KEEP OUT OF REACH OF CHILDREN.
• RISK OF ELECTRIC SHOCK. GROUNDING CONTINUITY
MUST BE MAINTAINED.
WARNING
1 - Localizar el enchufe situado cerca del dispositivo
que desea controlar.
2 - Ajuste el interruptor ON/TIMER situado
junto a la esfera a la posición TIMER.
Conecte el tempotizador al enchufe.
3 - Configure la hora actual - Girando
en la dirección del reloj alinee la flecha
indicadora (vea el
diagrama) en la
parte de arriba del temporizador
al tiempo actual (lineas
debajo de los números son
incrementos de 30 minutos). No
es necesario topar los ganchos
12
11
10
9
8
7
6
5
4
3
2
1
12
9
3
1
11
10
8
7
6
5
4
2
AM
PM
ON
TIMER
Pins
Down=ON
Up=OFF
12
11
10
9
8
7
6
5
4
3
2
1
12
9
3
1
11
10
8
7
6
5
4
2
AM
PM
ON
TIMER
Pins
Down=ON
Up=OFF
ESPAÑOL
MODO DE OPERACIÓN
Instale el cable y la unidad por lo menos 5ft (1.5m)
por encima del nivel del suelo con el receptáculo
de salida hacia abajo. Deje el interruptor cuelgue
hacia abajo para que la humedad no se acumule
en la toma de corriente. Conecte las luces o
aparatos a los enchufes de la parte inferior.
USO INICIAL:
Los ganchos del cronómetro son
valores predeterminados de la
fábrica y estan “empujados hacia
abajo” la posición ’ON’ (encendido).
Hale los ganchos para intervalos en
posición ‘OFF’ (apagado).

para establecer la hora actual. NOTA: El marcado en la
esfera se basa en AM/PM.
4 - Determinar la hora de inicio deseada y presione
“hacia abajo” todos los ganchos deseados hasta el
tiempo de apagar (OFF). Cuando empujen los ganchos,
el temporizador estará encendido y funcionando.
Cuando los ganchos están halados el temporizadorestá
apagado. (nota: Los “ganchos” son rebanadas grises
alrededor de la esfera.) Por Ejemplo: Para encender
el temporizador a las 5pm y apagarlo a las 10pm,
empuje hacia abajo todos los ganchos desde las 5pm
hasta 10pm.
5 - Conecte el dispositivo eléctrico directamente
en el temporizador. El equipo eléctrico debe
estar configurado para controlar que funcione
correctamente.
6 - El interruptor debe estar en la posición
TIMER para que el temporizador funcione.
Para utilizar la opción Manual “Siempre
Encendido” cambie el interruptor ON /
TIMER (situado al lado de la esfera) en ON
para“Siempre Encendido”.
12
11
10
9
8
7
6
5
4
3
2
1
12
9
3
1
11
10
8
7
6
5
4
2
AM
PM
ON
TIMER
Pins
Down=ON
Up=OFF

2 Tomacorrientes y 1 Enchufe a Tierra
Clasificasión: 125VAC/60Hz/8A/1000W Resistiva
8A/1000W Tungsteno
500VA Lastre Eletrónico
1/2 HP Motor de Carga
ESPECIFICACIONES
If within the first year from date of purchase, this unit fails due to
a defect, exchange where purchased, or ship it prepaid with proof
of purchase to The NCC, 1840 McDonald Avenue, Brooklyn, New
York 11223. Units that fail to operate during the second or third
year from date of purchase must be shipped prepaid with proof of
purchase to The NCC. We will replace unit. This guarantee excludes
normal wear and tear and damage resulting from accident,
alteration, or misuse. This warranty gives you specific legal rights,
and you may also have other rights which vary from state to
state. For warranty replacementunit must be purchased from an
authorized reseller.
THREE YEAR LIMITED WARRANTY
Asegúrese de ajustar el interruptor a la posición TIMER
para el funcionamiento correcto.
En caso de fallo de energía, restablezca la hora del día,
como se indica en el paso 3.

• NO ENCHUFE EL TEMPORIZADOR A UN CABLE DE
EXTENSIÓN U OTRO ADAPTADOR ELÉCTRICO. CONECTE
DIRECTAMENTE UNA TOMA DE CORRIENTE.
• NO CONECTE EL CONTADOR A APARATOS QUE
CONTIENEN ELEMENTOS DE CALENTAMIENTO (COCINA
ELECTRODOMÉSTICOS, CALENTADORES, PLANCHAS, ETC)
EL FALLO DEL TEMPORIZADOR PARA APAGAR ESTOS
DISPOSITIVOS PUEDE PROVOCAR UN SOBRECALENTA
MIENTO Y UN POSIBLE INCENDIO.
• NO ENCHUFE EL TEMPORIZADOR SI ESTÁ HÚMEDO.
• NO LIMPIE EL TEMPORIZADOR
CUANDO ESTÁ ENCHUFADO
• NO EXCEDA LOS VALORES MÁXIMOS DE EL TEMPO-
RIZADOR.
• POSIBLE RIESGO DE DESCARGA: MANTENER FUERA DEL
ALCANCE DE LOS NIÑOS.
• RIESGO DE DESCARGA ELÉCTRICA. LA CONTINUIDAD DE
LA CONEXIÓN A TIERRA DEBE MANTENERSE.
ADVERTENCIA
FRANÇAIS
Broches de temporisation sont
préréglées en usine sur la position
“enfoncé” (‘ON’). Tirez broches
rattraper le temps ‘OFF’ intervalles.
Installer le cordon et l’appareil à au moins 5ft
(1.5m) au dessus du niveau du sol avec la sortie
du réceptacle aurientée vers le bas. Laissez
l’interrupteur pendre vers le bas pour éviter
l’accumulation d’humidité dans la sortie. Branchez
les lumières ou les appareils dans les prises au fond.
PREMIÈRE UTILISATION:

1 - Localisez la sortie électrique la plus rapprochée de
l’appareil à contrôler.
2 - Réglez le ON / TIMER situé à côté de la
molette sur la position TIMER. Branchez la
minuterie dans la prise.
3 - Placer à l’heure courante – En tournant
dans le sens des
aiguilles d’une
montre, aligner la Tête deFlèche
(Voir schéma) sur le dessus de la
minuterie à l’heure courante (les
lignes sous les nombres sont en
augmentation de 30 minutes). Il
n’est pas nécessaire de toucher
aux chevilles pour indiquer l’heure courante. NOTE: Le
cadran est basé sur AM/PM.
4 - Déterminez l’heure du départ désirée et poussez
“VERS LE BAS” toutes les broches jusqu’autemps
d’arrêt désiré. Lorsque les broches sont insérées la
minuterie sera en marche. Si les chevilles sont en
position élevée la minuterie n’est pas en opération
(note: Les broches sont les fentes grises autour du
cadran). Comme exemple: Pour démarrer la minuterie
à 5 heures PM et l’arrêter à 10 heures PM, poussez
toutes les chevilles de 5pm à 10pm.
MODE D’OPÉRATION
12
11
10
9
8
7
6
5
4
3
2
1
12
9
3
1
11
10
8
7
6
5
4
2
AM
PM
ON
TIMER
Pins
Down=ON
Up=OFF
12
11
10
9
8
7
6
5
4
3
2
1
12
9
3
1
11
10
8
7
6
5
4
2
AM
PM
ON
TIMER
Pins
Down=ON
Up=OFF
Voir le schéma à la page suivante

CARACTÉRISTIQUES
5 - Branchez votre appareil électrique directement dans
la minuterie. L’appareil doit être en position d’opération
ON pour que la minuterie puisse le contrôler
efficacement.
6 - L’interrupteur sur la minuterie doit être en TIMER
position pour que la minuterie opère.
Pour utiliser le manuel “Toujours ON” fonction,
basculer le ON /TIMER commutateur (situé à côté de la
molette) ON pour “Toujours ON”.
Assurez-vous de mettre l’interrupteur à l’TIMER la
position de la minuterie à travailler.
En cas de panne de puissance, replacez la minuterie
telle qu’indiqué à l’étape 3 ci-dessus.
2 Prises and Fils avec Mises à la Terre
Calibré à: 125VAC/60Hz/8A/1000W Résistive
8A/1000W Tungstène
500VA Ballast Électronique
1/2 HP Charge du Moteur

• NE PAS BRANCHER CETTE MINUTERIE SUR UNE RAL-
LONGE OU TOUT AUTRE ADAPTATEUR ÉLECTRIQUE.
BRANCHEZ-LA DIRECTEMENT DANS UNE SORTIE
ÉLECTRIQUE.
• NE PAS BRANCHER CETTE MINUTERIE À DES APPAREILS
QUI CONTIENNENT DES ÉLÉMENTS DE CHAUFFAGE
(APPAREILS DE CUISSON, CHAUFFERETTES, FERS ETC.).
SI LA MINUTERIE NE PEUT ARRÊTER CES APPAREILS, ILS
POURRONT SURCHAUFFER ET DEVENIR UNE SOURCE
POSSIBLE D’INCENDIE.
• NE PAS BRANCHER CETTE MINUTERIE SI ELLE EST
MOUILLÉE.
• NE PAS NETTOYER CETTE MINUTERIE LORSQU’ELLE
EST BRANCHÉE.
• NE PAS EXCÉDER LA CAPACITÉ MAXIMUM DE LA
MINUTERIE.
• SOURCE POTENTIELLE DE CHOC: ELOIGNEZ DE LA
PORTÉE DES ENFANTS.
• RISQUE DE LA DÉCHARGE ÉLECTRIQUE. LA MISE DU
COURANT A LA TERRE DOIT MAINTENUE.
AVERTISSEMENT
GARANTIE LIMITÉE DE TROIS ANS
Si au cours de la première année à compter de la date d’achat cet
appareil tombe en panne en raison d’un défaut, échangez-le là où il
a été acheté ou expédiez-le en port payé ccompagné d’une preuve
d’achat à THE NCC, 1840 McDonald Avenue, Brooklyn, New York
11223. Les appareils qui tombent en panne au cours de la seconde
ou de la troisième année à compter de la date d’achat doivent être
expédiés en port payé accompagnés d’une preuve d’achat à THE
NCC. Nous remplacerons l’appareil. Cette garantie exclut l’usure
normale et les dommages résultant d’accidents, de modifications
ou d’un usage inapproprié. Cette garantie vous accorde des droits
légaux spécifiques, vous pouvezaussi avoir d’autres droits lesquels
peuvent varier d’un état a l’autre. Pour remplacer la garantie de
l’unité il doit être acheté chez un revendeur agréé.

ITEM / ARTICULO / ARTICLE#
31214 | W31214 | 56433
STANLEY® and the STANLEY® logo are registered
trademarks of Stanley Black & Decker, Inc., or one of its
affiliates, and are used under license.
STANLEY® y el STANLEY® logo son marcas registradas
de Stanley Black & Decker, Inc., o uno de sus afiliados, y
se usan con licencia.
STANLEY® et le STANLEY® logo sont des marques
déposées de Stanley Black & Decker, Inc., ou de l’une de
ses sociétés affiliées, et sont utilisés sous licence.
©2019 Stanley Black & Decker, Inc.
Manufactured and distributed by/
Fabricado y distribuido por/
Manufacturé et distribué par:
The NCC, Brooklyn, NY 11223
1.800.730.3707 • www.stanleyacpower.com
MADE IN CHINA / HECHO EN CHINA /
FABRIQUÉ EN CHINE
Customer Service / Servicio al Cliente / Service à la clientèle
1-800-730-3707 • 10AM - 6PM, EST
Monday to Friday / Lunes a Viernes / Lundi au Vendredi
Table of contents
Languages:
Other Stanley Timer manuals

Stanley
Stanley Timelt Twin TM425 User manual

Stanley
Stanley TIMERMAX DIGISLIM TWIN 28426 User manual

Stanley
Stanley TM502 User manual

Stanley
Stanley PLUGBANK 3 SELECT User manual

Stanley
Stanley TIMERMAX OUTDOOR PRO User manual

Stanley
Stanley TM-266 User manual

Stanley
Stanley TIMEIT BND-60/U49A User manual

Stanley
Stanley TIMERMAX WEEKLY TWIN User manual

Stanley
Stanley TIMERMAX DIGISLIM TM-262 User manual

Stanley
Stanley TimerMax Digislims TM213 User manual