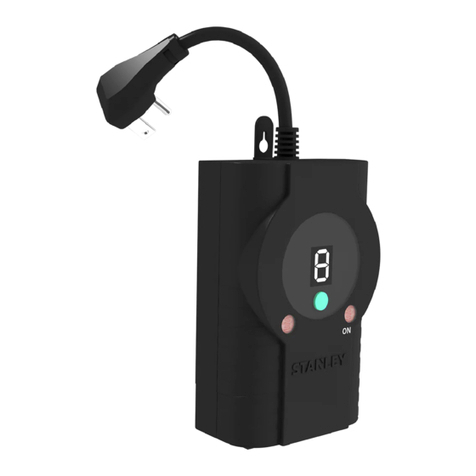
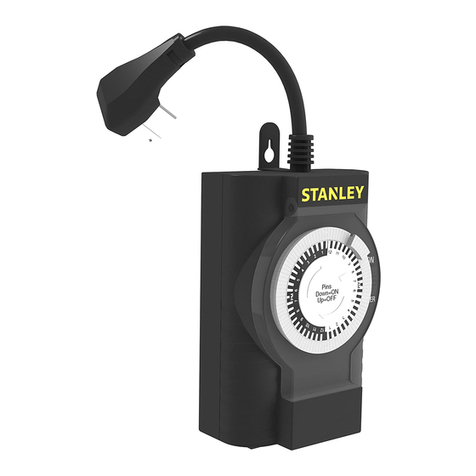
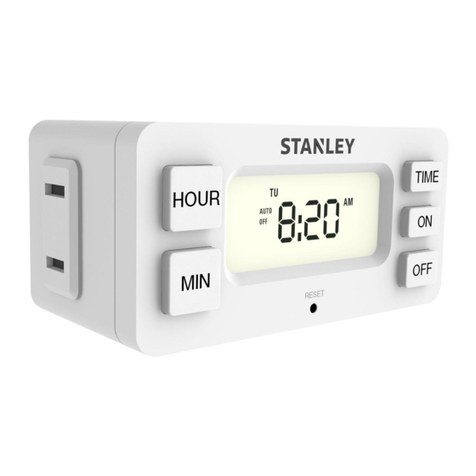
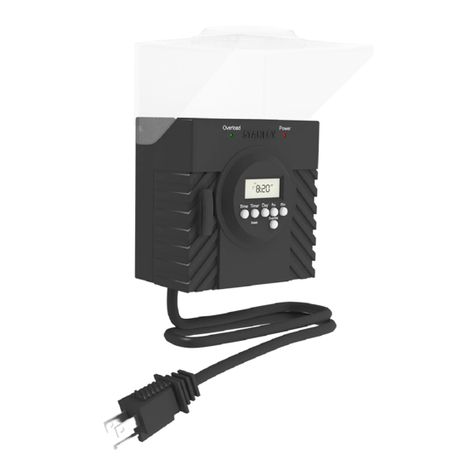
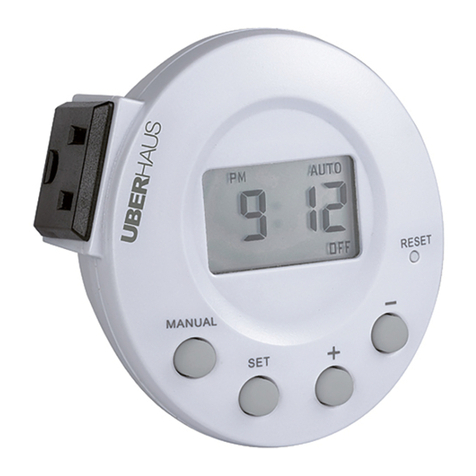
Stanley TimerMax Digislims TM213 User manual

TIMERMAX™DIGISLIM
Customer Service / Servicio al Cliente / Service à la Clientèle
1-800-730-3707 • 10AM - 6PM, EST
Monday to Friday / Lunes a Viernes / Lundi au Vendredi
Model/Modelo/Modele# TM213
USER MANUAL
MANUAL DE USUARIO
MANUEL UTILISATEUR

The fist time you use the timer plug it into a wall outlet for
1 hour to charge the built-in rechargeable battery. After the
battery is finished charging, press the reset button (under
the LCD screen) with a pointed ogject to reset and clear and
previously set program.
La primera vez que use el temporizador, enchúfelo a un
tomacorriente de pared durante 1 hora para cargar la
batería recargable incorporada. Una vez que la batería haya
terminado de cargarse, presione el botón de reinicio (debajo
de la pantalla LCD) con un objeto puntiagudo para reiniciar,
borrar y programar el programa previamente.
La première fois que vous utilisez la minuterie, branchez-la
dans une prise murale pendant 1 heure pour charger la
batterie rechargeable intégrée. Une fois la batterie chargée,
appuyez sur le bouton de réinitialisation (sous l’écran
ACL) avec un objet pointu pour réinitialiser et effacer le
programme précédemment défini.
PROGRAMMING INSTRUCTIONS
INSTRUCCIONES DE PROGRAMACION
INSTRUCTIONS DE PROGRAMMATION

OPERATING INSTRUCTIONS
MODO DE OPERACIÓN
MODE D’OPÉRATION
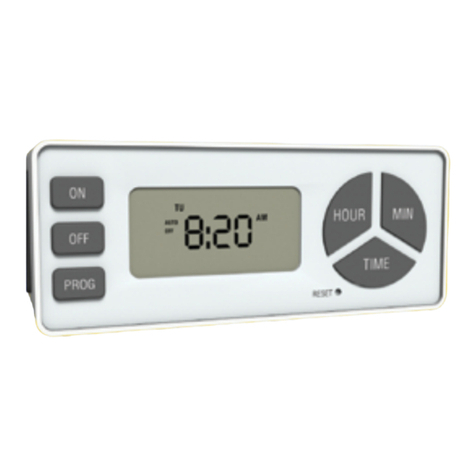
To set to the current time:
Press and hold the TIME button. While holding, press
the HOUR button until the current hour is displayed.
Continuously pressing the HOUR/MINUTE button will
cycle the time from AM to PM.
RESET
HOUR TIME
ON
OFF
MIN
1
Para establecer la hora actual:
Mantenga pulsado el botón TIME. Mientras pulsa, presione
el botón HOUR hasta que la hora actual se muestre. Cuando
pulsa continuamente el botón HOUR/MINUTE el ciclo de
tiempo cambia de AM a PM.
Pour régler à l’heure courante:
Appuyez et maintenez enfoncé le bouton TIME. Tout en
maintenant, appuyez sur le bouton d’heure jusqu’à ce que
l’heure actuelle est affichée. Lorsque vous appuyez sur le
bouton HOUR/MINUTE continuellement changements de
temps de cycle de AM à PM.

2To set the time at which your lamp will turn ON:
While holding the ON button down, press HOUR until
the desired “on” hour is displayed (noting AM or PM).
To set the “on” minute, hold ON and press MINUTE
until the desired “on” minute is displayed. (Example:
display will read “ON 6:30 PM”). The timer will display
current time when the ON button is released. To view the
programmed “on” time, press ON.
Para ajustar la hora a la que la lámpara se enciende:
Mientras mantiene el botón de encendido presiando
pulse HOUR hasta que aparezca “ON” en la pantalla
(señalando AM o PM). Para ajustar los minutos ON,
espera y pulse MINUTE hasta que aparezca los minutos
de “encendido”. (Ejemplo: pantalla aparecerá “ON
6:30 PM”). El temporizador mostrará la hora actual
cuando se suelta el botón de encendido. Para ver la hora
programada “on”, presione ON.
Pour régler l’heure à laquelle la lampe s’allumera:
En tenant la touche ON (en marche) enfoncée, appuyez
sur la touche HOUR (heure) jusqu’à ce que l’heure désirée
de mise en marche s’affiche (notez bien AM matin ou
PM soir). Pour régler les minutes de la mise en marche,
tenez la touche ON (en marche) enfoncée et appuyez
sur la touche MINUTE jusqu’à ce que les minutes de
l’heure désirée de mise en marche en cours s’affichent.
l’affichage indiquera “ON (en marche) 6:30 PM”). La
minuterie affichera l’heure en cours lorsque la touche ON
est relâchée. Pour afficher l’heure de mise en marche,
appuyez sur la touche ON.

3To set the time at which your lamp will turn OFF:
While holding the OFF button down, press HOUR until the
desired “off” hour is displayed (noting AM or PM).
To set the “off” minute, hold OFF and press MINUTE
until the desired “off” minute is displayed. (Example:
Display will read “OFF 11:30 PM”) The timer will display
current time when the OFF button is released. To view the
programmed “off” time, press OFF.
Always On Mode:
Slide the top switch to ON for “Always On” mode.
Slide the switch to TIMER to return to timer control.
Para ajustar la hora a la que la lámpara se apagará:
Mientras mantiene el botón de apagado pulsado, pulse
HOUR hasta que aparezca la hora de “apagar” deseada
(AM o PM señalando).
Para establecer a minuto “off”, mantenga OFF y pulse
minuto hasta que aparezcan los minutos de “apagar”
deseados. (Ejemplo: pantalla aparecerá “OFF 11:30 PM”)
El temporizador mostrará la hora actual cuando se
suelta el botón OFF. Para ver la hora programada “off,”
presione OFF.
Modo - Siempre Encendido:
Deslice el interruptor de la parte superior en ON para
“Always On” de modo.
Deslice el interruptor de temporizador para volver al
control automático.

Pour régler l’heure à laquelle la lampe s’éteindra:
En tenant la touche OFF (arrêt) enfoncée, appuyez sur la
touche HOUR (heure) jusqu’à ce que l’heure désirée d’arrêt
s’affiche (notez bien AM matin ou PM soir).
Pour régler les minutes de l’heure d’arrêt, tenez la touche
OFF enfoncée, appuyez sur la touche MINUTE jusqu’à ce
que les minutes de l’heure désirée d’arrêt s’affichent. (Par
exemple, l’affichage indiquera “OFF (arrêt) 11:30 PM”).
La minuterie affichera l’heure en cours lorsque la touche
OFF est relâchée. Pour afficher l’heure d’arrêt, appuyez sur
la touche OFF.
Mode Toujours en marche:
Glissez l’interrupteur du haut vers ON (en marche) pour le
mode Toujours en marche. Glissez l’interrupteur à TIMER
(minuterie) pour retourner aux réglages de la minuterie.

SECURITY MODE INSTRUCTIONS:
Press the ON and OFF button at the same time. The SEC
symbol will appear on the LCD display, indicating that the
security feature has been enabled.
In Security Mode, the timer controls your lighting/devices
randomly to give the appearance that someone is home.
To disable, press the ON and OFF button at the same time.
The SEC symbol will disappear indicating that the security
feature has been disabled.
SEGURIDAD INSTRUCCIONES DE MODO:
Pulse el botón de encendido y apagado al mismo tiempo.
La SEC aparecerá el símbolo en la pantalla LCD, indicando
indicación de que la función de seguridad-ha sido habilitada.
En el modo de seguridad, el temporizador controla la
iluminación / dispositivos al azar para dar la apariencia de
que hay alguien en casa.
Para desactivarlo, pulse el botón de encendido y apagado
al mismo tiempo. La SEC Desaparecerá símbolo indica que
indica que la función de seguridad se ha desactivado.
MODE DE SÉCURITÉ INSTRUCTIONS:
Appuyez sur le bouton d’ON ET OFF en même temps. Le
symbole SEC semblera sur l’étalage de LCD, en indiquant que
la caractéristique de sécurité a été permise
Dans le Mode de Sécurité, le compte-minutes contrôle votre
éclairage/artifices au hasard pour donner l’apparence que
quelqu’un est à la maison.
Rendre infirme, appuyer sur le bouton d’ON ET OFF en même
temps. Le symbole SEC disparaîtra en indiquant que la
caractéristique de sécurité a été rendue infirme.

TROUBLESHOOTING
PROBLEM: Lights do not turn on, even when the timer is in
“Always ON” position.
POSSIBLE CAUSE: Light are not in “ON” position, lights are not
functioning, or the timer is not receiving power.
SOLUTION: Check that the lights are functional by plugging them
directly into the outlet and turning them on.
PROBLEM: Lights do not turn On and OFF at the set time.
POSSIBLE CAUSE: Interal Battery may not be fully charged, or the
timer is not set properly.
SOLUTION: On initial setup, plug in the time and allow the battery
to charge for 1 hour. Press the reset button and re-program
the timer.
SOLUCIÓN DE PROBLEMAS
PROBLEMA: Las luces no se encienden, incluso cuando el
temporizador está en la posición “Siempre ENCENDIDO”.
CAUSA POSIBLE: Las luces no están en la posición “ON”, las
luces no funcionan o el temporizador no recibe alimentación.
SOLUCIÓN: Verifique que las luces funcionen conectándolas
directamente a la toma de corriente y enciéndalas.
PROBLEMA: Las luces no se encienden y apagan a la
hora establecida.
CAUSA POSIBLE:Es posible que la batería interna no esté
completamente cargada o que el temporizador no esté
configurado correctamente..
SOLUCIÓN: En la configuración inicial, conecte la hora y deje que

DÉPANNAGE
PROBLÈME: Les lumières ne s’allument pas, même lorsque la
minuterie est en marche. «Always ON» position.
CAUSE POSSIBLE: Les lumières ne sont pas en position “ON”,
les lumières ne fonctionnent pas, ou la minuterie n’est pas sous
tension.
SOLUTION: Assurez-vous que les lumières fonctionnent brancher
directement dans la prise. Assurez-vous que les lumières sont “ON”
si elles ont leur propre interrupteur. Assurez-vous que la sortie est
reliée à la minuterie est active.
PROBLÈME Lumières ne seront pas allumer et éteindre à
l’heure demandée.
CAUSE POSSIBLE La batterie interne ne peut pas être
complètement chargée, ou horloge est réglée correctement.
SOLUTION: Dans la configuration initiale, branchez la minuterie
et laisser une heure pour charger la batterie interne. Si après le
réglage initial, appuyez sur le bouton de réinitialisation, puis régler
la minuterie.
la batería se cargue durante 1 hora. Presione el botón de reinicio y
reprograme el temporizador.battery to charge for 1 hour. Press the
reset button and re-program the timer.

What this timer does:
Your timer can be programmed to turn a lamp or other electric
device on and off automatically, once per day.Before using the
timer, make sure that the lamp works by plugging it into the wall
outlet. While the lamp is on, unplug it from the wall. Plug the lamp
into the timer and plug the timer into the wall. Your timer will turn
your lamp on and off automatically. Before initial use, please plug
in your timer for at least 1 hour to charge the internal battery. After
the LCD display appears, your unit will be ready for programming.
Qué hace este reloj:
El temporizador se puede programar para encender una lámpara u
otro aparato eléctrico encendido y apagado automático, una vez al
día. Antes de utilizar el temporizador, haga amargo que la lámpara
funciona conectándolo a la toma de corriente. Mientras la lámpara
está encendida, desenchufarlo de la pared.
Enchufe la lámpara en el temporizador y enchufe el temporizador
en la pared. Su temporizador encenderá la lámpara y se apaga
automáticamente. Antes del primer uso, conecte el temporizador
durante al menos 1 hora para cargar la batería interna. Aparece
después de la pantalla LCD, la unidad estará lista para la
programación.unidad estará lista para la programación.
Ce que fait cette minuterie:
Votre minuterie peut être programmée pour allumer une lampe
ou mettre en marche et arrêter un appareil électrique, une fois
par jour. Avant d’utiliser la minuterie, assurez-vous que la lampe
fonctionne en la branchant dans la prise murale. Lorsque la lampe
est allumée, débranchez-la de la prise murale.
Branchez la lampe dans la minuterie et branchez la minuterie dans
la prise murale. Votre minuterie allumera et éteindra la lampe
automatiquement. Avant la première utilisation, veuillez brancher
votre compteur pour au moins 1 heure pour charger la batterie
interne. Après l’écran LCD apparaît, votre unité sera prêt pour la
programmation.
1 polarized outlet
Rated: 120VAC/60Hz/5A/600W Resistive
5A/600W Tungsten
500VA Electronic Ballast
1/2 HP Motor Load
1 enchufe polárizado
Clasificado: 120VAC/60Hz/5A/600W
Resistiva
5A/600W Tungsteno
500VA Balasto Eléctronico
1/2 HP Motor de Carga
1 prise polarisée
Calibré à: 120VAC/60Hz/5A/600W Resistif
5A/600W Tungstène
500VA Ballast Électronique
1/2 HP Charge du Motuer
SPECIFICATIONS
ESPECIFICACIONES
CARACTÉRISTIQUES

WARNING
THIS DEVICE COMPLIES WITH PART 15 OF THE FCC
RULES. OPERATION IS SUBJECT TO THE FOLLOWING
TWO CONDITIONS: (1) THIS DEVICE MAY NOT
CAUSE HARMFUL INTERFERENCE, AND (2) THIS
DEVICE MUST ACCEPT ANY INTERFERENCE
RECEIVED, INCLUDING INTERFERENCE THAT MAY
CAUSE UNDESIRED OPERATION.
THREE YEAR LIMITED WARRANTY
If within the first year from date of purchase, this unit fails due to a defect,
exchange where purch,ased, or ship it prepaid with proof of purchase to The NCC,
1840 McDonald Avenue, Brooklyn, New York 11223. Units that fail to operate
during the second or third year from date of purchase must be shipped prepaid
with proof of purchase to The NCC.We will replace unit. This guarantee excludes
normal wear and tear and damage resulting from accident, alteration, or misuse.
This warranty gives you specific legal rights, and you may also have other rights
which vary from state to state. For warranty replacementunit must be purchased
from an authorized reseller.

ADVERTENCIA
ESTE DISPOSITIVO COMPLETA CON LA PARTE 15
DE LAS NORMAS FCC. EL FUNCIONAMIENTO ESTÁ
SUJETO A LAS SIGUIENTES DOS CONDICIONES: (1)
ESTE DISPOSITIVO DEBE MAYO NO INTERFERENCIA
PERJUDICIAL, Y (2) ESTE DISPOSITIVO DEBE
ACEPTAR CUALQUIER INTERFERENCIA RECIBIDA,
INCLUYENDO INTERFERENCIAS QUE PUEDAN,
PORQUE UN FUNCIONAMIENTO NO DESEADO.
TRES AÑOS DE GARANTÍA
Si dentro del primer año desde la fecha de compra, esta unidad falla debido a un
defecto, cambio de lugar de compra, o envíelo por encomienda de prepago con
el comprobante de compra al NCC, 1840 McDonald Avenue, Brooklyn, New York
11223. Las unidades que no pueden operar durante el segundo o tercer año de la
fecha de compra se deben enviar pagaron por adelantado con el comprobante de
compra a los NCC. Vamos a sustituir la unidad. Esta garantía no cubre el desgaste
normal y los daños causados por accidentes, alteración o uso indebido. Esta
garantía le otorga derechos legales específicos, y usted también puede tener otros
derechos que varían de estado a estado. Para reemplazar con garantía la unidad
debe ser adquirida en un distribuidor autorizado.

AVERTISSEMENT
CET APPAREIL EST CONFORME À L’ARTICLE 15 DES
RÈGLEMENTS DUFCC. LE FONCTIONNEMENT EST
ASSUJETTI AUX DEUX CONDITIONSSUIVANTES:
(1) CET APPAREIL NE DOIT PAS PROVOQUER
DEBROUILLAGE PRÉJUDICIABLE ET (2) CET
APPAREIL DOIT ACCEPTERTOUTE INTERFÉRENCE
REÇUE, INCLUANT UNE INTERFÉRENCE QUI
PEUTPROVOQUER UN FONCTIONNEMENT NON
DÉSIRÉ.
GARANTIE LIMITÉE DE TROIS ANS
Si au cours de la première année à compter de la date d’achat cet appareil tombe
en panne en raison d’un défaut, échangez-le là où il a été acheté ou expédiez-le
en port payé ccompagné d’une preuve d’achat à THE NCC, 1840 McDonald
Avenue, Brooklyn, New York 11223. Les appareils qui tombent en panne au cours
de la seconde ou de la troisième année à compter de la date d’achat doivent
être expédiés en port payé accompagnés d’une preuve d’achat à THE NCC. Nous
remplacerons l’appareil. Cette garantie exclut l’usure normale et les dommages
résultant d’accidents, de modifications ou d’un usage inapproprié. Cette garantie
vous accorde des droits légaux spécifiques, vous pouvezaussi avoir d’autres droits
lesquels peuvent varier d’un état a l’autre. Pour remplacer la garantie de l’unité il
doit être acheté chez un revendeur agréé.

STANLEY® and the STANLEY® logo are registered trademarks
of Stanley Black & Decker, Inc., or one of its affiliates, and are
used under license.
STANLEY® y el STANLEY® logo son marcas registradas de
Stanley Black & Decker, Inc., o uno de sus afiliados, y se usan
con licencia.
STANLEY® et le STANLEY® logo sont des marques déposées de
Stanley Black & Decker, Inc., ou de l’une de ses sociétés affiliées,
et sont utilisés sous licence.
©2019 Stanley Black & Decker, Inc.
Manufactured and distributed by/Fabricado y distribuido por/
Manufacturé et distribué par:
The NCC, Brooklyn, NY 11223 • 1.800.730.3707
www.stanleyacpower.com
MADE IN CHINA /HECHO EN CHINA / FABRIQUÉ EN CHINE
Item/Artículo/Article#
38424 |38425 |56420|59470
Table of contents
Other Stanley Timer manuals

Stanley
Stanley TM-266 User manual

Stanley
Stanley TIMERMAX DIGISLIM TWIN 28426 User manual

Stanley
Stanley PLUGBANK GS-602 User manual

Stanley
Stanley TIMERMAX DIGISLIM TM-262 User manual

Stanley
Stanley TIMEIT TWIN User manual

Stanley
Stanley TIMEIT BND-60/U49A User manual

Stanley
Stanley TIMERMAX WEEKLY TWIN User manual

Stanley
Stanley TimerMax User manual

Stanley
Stanley Timelt Twin TM425 User manual

Stanley
Stanley PLUGBANK 3 SELECT User manual