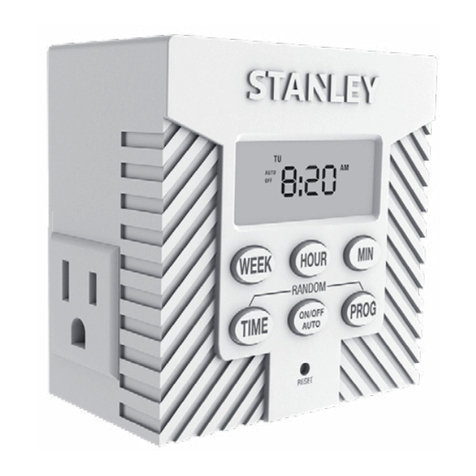
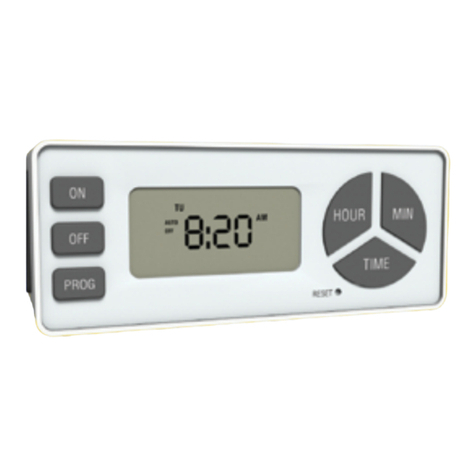
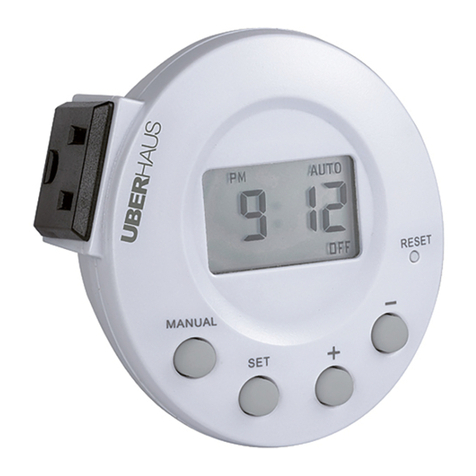
Stanley TIMERMAX WEEKLY TWIN User manual

TIMERMAX™WEEKLY TWIN
Customer Service / Servicio al Cliente / Service à la Clientèle
1-800-730-3707 • 10AM - 6PM, EST
Monday to Friday / Lunes a Viernes / Lundi au Vendredi
Model/Modelo/Modele# TM-266
QUICK START GUIDE
GUÍA DE INICIO RÁPIDO
GUIDE DE DÉMARRAGE RAPIDE

OPERATING INSTRUCTIONS
MODO DE OPERACIÓN
MODE D’OPÉRATION
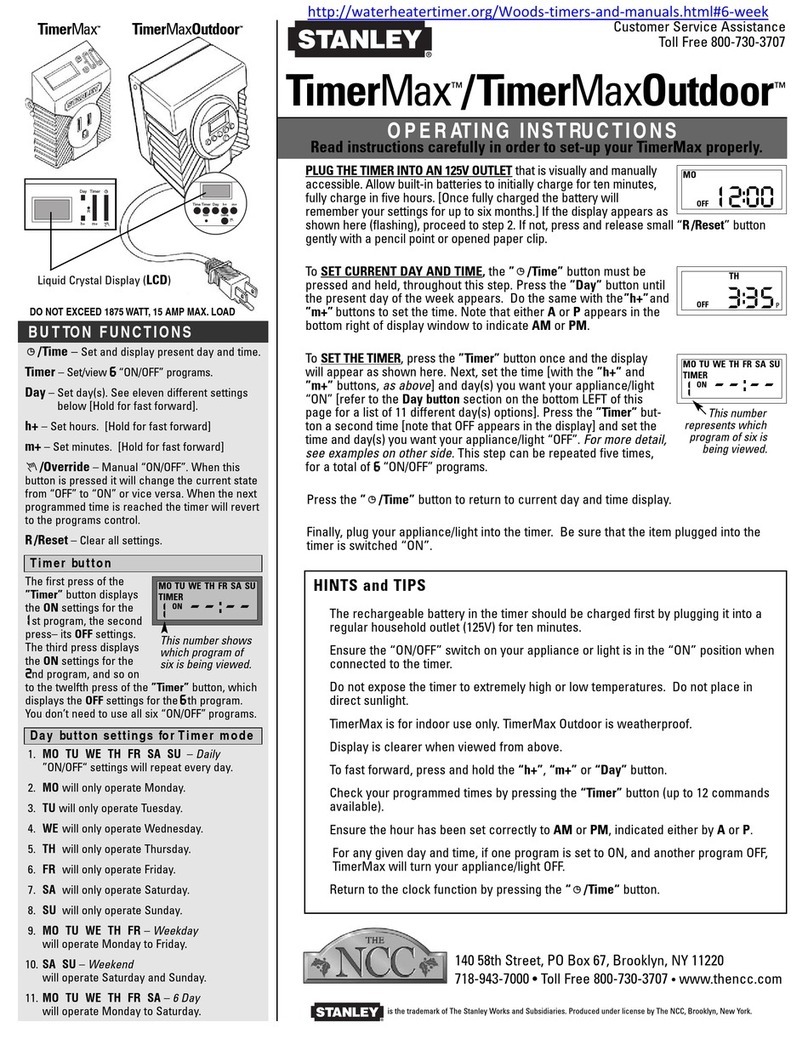
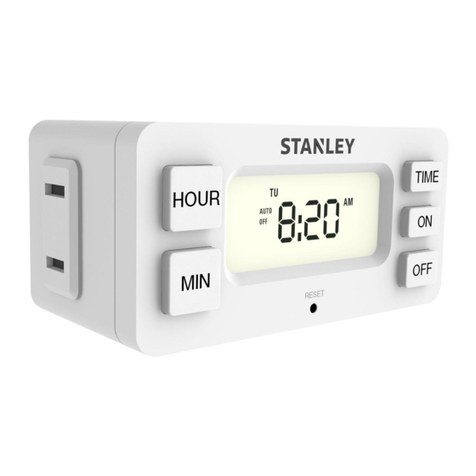
Press and hold the “TIME” button, then press the “WEEK”
button to set the current day.
Pulse y mantenga pulsado el botón “TIME”, luego presione el
botón “WEEK” para ajustar el día actual.
Poussez et tenez le bouton “TIME”, ensuite poussez le bouton
“WEEK” pour entrer le jour courant.
Press and hold the “TIME” button, then press the “HOUR”
button to set the current hour.
Pulse y mantenga pulsado el botón “TIME”, luego presione el
botón “HOUR” para ajustar la hora actual.
Poussez et tenez le bouton “TIME”, ensuite poussez le bouton
“HOUR” pour entrer l’heure courante.
Press and hold the “TIME” button, then press the “MIN”
button to set the current minute.
Pulse y mantenga pulsado el botón “TIME”, luego
presione el botón “MIN” para ajustar el minuto actual.
Poussez et tenez le bouton “TIME”, ensuite poussez le bouton
“MIN” pour entrer la minute courante.
1
2
3
RESET
RANDOM
WEEK
TIME PROG
ON / OFF
AUTO
HOUR MIN
TO SET TO THE CURRENT TIME:
CONFIGURAR HORA ACTUAL
REGLAGE DE L’HEURE COURANTE:

1
2
3
4
Press the “PROG” button to enter
the program setting; you will see all the days of the week on
the top and “1 ON” to the left of the display.
Pulse el botón “PROG” para entrar en la configuración del
programa; verá todos los días de la semana en la parte superior
y “1 ON” a la izquierda de la pantalla.
Poussez le bouton “PROG” pour régler le programme, vous
verrez tous les jours de la semaine en haut et “1 ON” à la
gauche de l’écran.
Press the “WEEK” button to set the program “1 ON” days of
the week that you want the timer to function.
Pulse el botón “WEEK” para establecer el programa de
“1 ON” día de la semana en que desea que el temporizador
funcione.
Poussez le bouton “WEEK” pour régler le programme “1 ON”
pour les jours de la semaine ou vous désirez que la minuterie
fonctionne.
Press the “HOUR” button to set the program “1 ON” hour.
Pulse el botón “HOUR” para establecer el programa “1
ON” horas.
Poussez le bouton “HOUR” pour régler le programme “1 ON”
pour l’heure.
Press the “MIN” button to set the program “1 ON” minute.
Pulse el botón “MIN” para establecer el programa “1 ON”
minutos.
Poussez le bouton “MIN” pour régler le programme “1 ON”
pour la minute.
RESET
RANDOM
WEEK
TIME PROG
ON / OFF
AUTO
HOUR MIN
PROGRAM SETTING
CONFIGURAR PROGRAMA
RÉGLAGE DU PROGRAMME

5
6
Press the “PROG” button once and repeat step 2 to 4 to set
program “1 OFF”
Pulse el botón “PROG” una vez y repita los pasos 2 a 4 para
establecer el programa “1 OFF”.
Poussez une fois le bouton “PROG” et répétez les étapes de 2 à
4 pour régler le programme “1 OFF”.
After setting the program “1 OFF” press the “TIME” button
once to return to the current time. You can set up to 8 different
ON and OFF times for your timer. To do so, just repeat step 2 to
5 for program “2 ON”, “2 OFF”, “3 ON” etc...
Después de establecer programa “1 OFF” pulse el botón
“TIME” una vez para volver a la hora actual. Puede configurar
hasta 8 diferentes tiempos de encendido y apagado en el
temporizador. Para ello, sólo tiene que repetir el paso 2 a 5
para los programa “2 ON”,“OFF 2”,“3 ON” etc...
Après avoir réglé le frogramme “1 OFF” poussez une fois le
bouton “TIME” pour retourner à l’heure courante.
Vous pouvez utiliser jusqu’à 8 réglages ON et OFF différents sur
votre minuterie. Il s’agit de répéter les étapes de 2 à 5 pour “2
ON”, “2 OFF”, “3 ON” etc...

Pressing the “ON/OFF AUTO”
button when the current
time is being displayed will allow you to set the status of
the timer:
• If “ON” is to the left side of the display, the timer will be
active until the “ON/OFF AUTO” button is pressed.
• If “OFF” is to the left side of the display, the timer will not
activate until the “ON/OFF AUTO” button is pressed.
• If “AUTO” is to the left side of the display, the timer will
run on the program setting until the “ON/OFF AUTO” button
is pressed.
ANULACIÓN MANUAL
Al pulsar el botón “ON/OFF AUTO” cuando se muestra
la hora actual, le permitirá establecer el estado del
temporizador:
• Si “ON” está al lado izquierda de la pantalla, el
temporizador estará activo hasta que se pulse el botón “ON/
OFF AUTO”.
• Si “OFF” está al lado izquierdo de la pantalla, el
temporizador no se activará hasta que se pulse el botón
“ON/OFF AUTO”.
• Si “AUTO” está al lado izquierdo de la pantalla, el
temporizador ejecutará el programa hasta que se pulse el
botón “ON/OFF AUTO”.
COMMANDE MANUELLE
En poussant le bouton “ON/OFF AUTO” alors que l’heure actuelle
est affichée, vous permettra de régler la minuterie:
• Si “ON” apparait à la gauche de l’afficheur la minuterie sera
active jusqu’à ce que “ON/OFF AUTO” soit pressé.
• Si “OFF” apparait à la gauche de l’afficheur la minuterie sera
inactive jusqu’à ce que “ON/OFF AUTO” soit poussé.
• Si “AUTO” apparait à la gauche de l’afficheur, la minuterie
opérera selon les ajustements du programme jusqu’à ce que “ON/
OFF AUTO” soit poussé.
RESET
RANDOM
WEEK
TIME PROG
ON / OFF
AUTO
HOUR MIN
MANUAL OVERRIDE

SET VACATION SECURITY
Pressing the “TIME” and “PROG” buttons simultaneously will
activate security mode. If “SEC” is to the right side of the display
the timer will turn on randomly during different parts of the day.
Simply press “TIME” and “PROG” simultaneously to disable “SEC”.
CONFIGURAR SEGURIDAD DE VACACIONES
Pulsando los botones “TIME” y “PROG” simultáneamente activará
el modo de seguridad. Si “SEC” está a la derecha de la pantalla, el
temporizador se encenderá de forma aleatoria en diferentes partes
del día. Basta con pulsar “TIME” y “PROG” simultáneamente para
desactivar la opción “SEC”.
RÉGLAGE DE SÉCURITÉ POUR VACANCES:
En poussant simultanément les boutons “TIME” et “PROG” vous
activerez le mode de sécurité. Si “SEC” apparaît à la droite de
l’afficheur, la minuterie operera aléatoirement durant différentes
parties de la journée. Poussez simplement “TIME” et “PROG”
simultanément et vous désactiverez le mode “SEC”.

2 grounded outlets
Rated:
120VAC/60Hz/10A/1200W Resistive
5A/600W Tungsten
500VA Electronic Ballast
1/2HP Motor Load
2 enchufes de tierra
Clasificado:
120VAC/60Hz/10A/1200W Resistiva
5A/600W Tungsteno
500VA Lastre eletrónico
1/2HP Motor de Carga
2 prises de terre
Calibré á:
120VAC/60Hz/10A/1200W Résistive
5A/600W Tungstène
500VA Ballast électronique
1/2HP Charge du Moteur
Item/Artículo/Article# 31259
SPECIFICATIONS
ESPECIFICACIONES
CARACTÉRISTIQUES

NOTES
• The unit you are plugging into the timer has to be on.
• Make sure AM and PM are correct on the current time and in the
program settings.
NOTAS
• La unidad que usted enchufa en el temporizador tiene que estar
encendida.
• Asegúrese de AM y PM son correctos en el momento actual y en
la configuración del programa.
NOTES
• L’appareil branché dans la minuterie doit être à ON (ouvert).
• Assurez-vous que les positions AM et PM sont ajustées
selon l’heure courante et aussi pour les ajustements des autres
programmes.

WARNING
USE INDOORS ONLY. DO NOT USE IN WET, OILY OR
HIGH TEMPERATURE CONDITIONS. NOT INTENDED
FOR USE WITH AQUARIUMS, REFRIGERATORS,
OR DEHUMIDIFIERS. FULLY INSERT ONLY INTO A
GROUNDED 120VOLT THREE-PRONG RECEPTACLE.
DO NOT SPLICE, REPAIR, OR MODIFY PRODUCT.
DO NOT USE IF DAMAGED (INSPECT UNIT PERI-
ODICALLY). GRASP PLUG, NOT CORD, TO REMOVE
FROM OUTLET. UNPLUG WHEN NOT IN USE. NOT
INTENDED TO BE MOUNTED ON DESK OR SIMILAR
FURNISHING SURFACE.
TO REDUCE THE RISK OF ELECTRICAL SHOCK USE
ONLY INDOORS AND IN DRY LOCATION. THIS IS
NOT A SURGE PROTECTOR. DO NOT OVERLOAD THE
OUTLETS. 10 AMP, 1200 WATTS MAXIMUM. MAKE
SURE TO PLUG THIS UNIT INTO A 120 VOLT RATED
RECEPTACLE.
THREE YEAR LIMITED WARRANTY: If within the first year from date
of purchase, this unit fails due to a defect, exchange where purchased, or ship it
prepaid with proof of purchase to The NCC, 1840 McDonaldAvenue, Brooklyn, New
York 11223. Units that fail to operate during the second or third year from date
of purchase must be shipped prepaid with proof of purchase to The NCC.We will
replace unit. This guarantee excludes normal wear and tear and damage resulting
from accident, alteration, or misuse.This warranty gives you specific legal rights,
and you may also have other rights which vary from state to state. For warranty
replacementunit must be purchased from an authorized reseller.

ADVERTENCIA
UTILICE SÓLO EN INTERIORES. NO UTILIZAR EN
CONDICIONES DE TEMPERATURA HÚMEDAS,
ACEITOSAS O ALTAS. NO ESTÁ DISEÑADO PARA
SU USO CON ACUARIOS REFRIGERADORES
O DESHUMIDIFICADORES. INSERTE
COMPLETAMENTE SÓLO A UN TOMACORRIENTE DE
TRES CLAVIJAS CON CONEXIÓN A TIERRA DE 120
VOLTIOS. NO EMPALME, REPARAR O MODIFICAR
EL PRODUCTO. NO UTILICE SI ESTÁ DAÑADO
(INSPECCIONE LA UNIDAD PERIÓDICAMENTE).
SUJETE EL ENCHUFE, NO EL CABLE, PARA
RETIRAR LA TOMA DE CORRIENTE. DESENCHUFE
CUANDO NO ESTÉ EN USO. NO ESTÁ DISEÑADO
PARA SER MONTADO EN EL ESCRITORIO O
LA SUPERFICIE DE ARTÍCULOS SIMILARES.
PARA REDUCIR EL RIESGO DE DESCARGAS
ELÉCTRICAS UTILICE SÓLO EN INTERIORES Y
EN LUGAR SECO. ESTO NO ES UN PROTECTOR
CONTRA SOBRETENSIONES. NO SOBRECARGUE
LAS TOMAS DE CORRIENTE. 10 AMPERIOS, 1200
VATIOS MÁXIMO. ASEGÚRESE DE CONECTAR ESTA
UNIDAD A UN TOMACORRIENTE DE 120 VOLTIOS
NOMINAL.
TRES AÑOS DE GARANTÍA: Si dentro del primer año desde la fecha de
compra, esta unidad falla debido a un defecto, cambio de lugar de compra, o
envíelo por encomienda de prepago con el comprobante de compra al NCC, 1840
McDonald Avenue, Brooklyn, New York 11223. Las unidades que no pueden operar
durante el segundo o tercer año de la fecha de compra se deben enviar pagaron
por adelantado con el comprobante de compra a los NCC. Vamos a sustituir la
unidad. Esta garantía no cubre el desgaste normal y los daños causados por
accidentes, alteración o uso indebido. Esta garantía le otorga derechos legales
específicos, y usted también puede tener otros derechos que varían de estado
a estado. Para reemplazar con garantía la unidad debe ser adquirida en un
distribuidor autorizado.
AVERTISSEMENT
POUR UNE UTILISATION À L’INTÉRIEUR
SEULEMENT. NE PAS UTILISER DANS DES
CONDITIONS D’HUMIDITÉ, D’HILE OU DE
HAUTESTEMPÉRATURES. CET ARTICLE NE PEUT
PAS ÊTRE UTILISÉ POUR LES AQUARIUMS, LES
RÉFRIGÉRATEURS OU LES DÉSHUMIDIFICATEURS.
ASSUREZ-VOUS DE BIEN BRANCHER LE CORDON
D’ALIMENTATION DANS UNE PRISE DE 120V. NE
PAS ALTÉRER OU MODIFIER CET ARTICLE. NE
PAS UTILISER SI ENDOMMAGÉ. DÉBRANCHER LE
CORDON D’ALIMENTATION EN TIRANT SUR LA
PRISE, NON PAS PAR LE CORDON. DÉBRANCHER
LORSQUE PAS UTILISÉ. L’INSTALLATION SUR UN
BUREAU OU UNE SURFACE D’AMEUBLEMENT N’EST
PAS RECOMMANDÉE.
AFIN DE RÉDUIRE LES RISQUES DE CHOC
ÉLECTRIQUE, UTILISER UNIQUEMENT À L’INTÉRIEUR
ET AU SEC. CE N’EST PAS UN PROTECTEUR DE
SURTENSION. NE PAS SURCHARGER LA SORTIE 10
AMPS 1200 WATTS MAXIMUM. ASSUREZ-VOUS
DE BRANCHER CE DISPOSITIF DANS UNE SORTIE
CALIBRÉE 120 VOLT.
GARANTIE LIMITÉE DE TROIS ANS: Si au cours de la première année
à compter de la date d’achat cet appareil tombe en panne en raison d’un défaut,
échangez-le là où il a été acheté ou expédiez-le en port payé ccompagné d’une
preuve d’achat à THE NCC, 1840 McDonald Avenue, Brooklyn, New York 11223. Les
appareils qui tombent en panne au cours de la seconde ou de la troisième année à
compter de la date d’achat doivent être expédiés en port payé accompagnés d’une
preuve d’achat à THE NCC. Nous remplacerons l’appareil. Cette garantie exclut
l’usure normale et les dommages résultant d’accidents, de modifications ou d’un
usage inapproprié. Cette garantie vous accorde des droits légaux spécifiques, vous
pouvezaussi avoir d’autres droits lesquels peuvent varier d’un état a l’autre. Pour
remplacer la garantie de l’unité il doit être acheté chez un revendeur agréé.

IMPORTANT! - READ ALL INSTRUCTIONS
This device contains a built-in battery that must be charged
the first you use it. For first time use, plug the timer into a
power outlet for 1 hour, then press the “RESET” button.
IMPORTANTE! - LEA TODAS LAS INSTRUCCIONES
Este dispositivo contiene una batería
incorporada que se debe cargar la primera
vez que lo utilice. Para el primer uso, enchufe
el temporizador en un tomacorriente durante
1 hora, luego presione el botón “RESET”.
IMPORTANT! - LIRE TOUTES LES INSTRUCTIONS
Cet appareil contient une batterie intégrée qui doit être
chargée de la première utilisation. Pour la première
utilisation, brancher la minuterie dans une prise de courant
pendant 1 heure, puis appuyez sur le bouton “RESET”
STANLEY® and the STANLEY® logo are registered trademarks
of Stanley Black & Decker, Inc., or one of its affiliates, and are
used under license.
STANLEY® y el STANLEY® logo son marcas registradas de
Stanley Black & Decker, Inc., o uno de sus afiliados, y se usan
con licencia.
STANLEY® et le STANLEY® logo sont des marques déposées de
Stanley Black & Decker, Inc., ou de l’une de ses sociétés affiliées,
et sont utilisés sous licence.
©2019 Stanley Black & Decker, Inc.
Manufactured and distributed by/Fabricado y distribuido por/
Manufacturé et distribué par:
The NCC, Brooklyn, NY 11223 • 1.800.730.3707
MADE IN CHINA / HECHO EN CHINA / FABRIQUÉ EN CHINE
This manual suits for next models
1
Table of contents
Other Stanley Timer manuals

Stanley
Stanley TM502 User manual

Stanley
Stanley TIMERMAX BNH-60SU104A User manual

Stanley
Stanley TIMERMAX DIGISLIM TM-262 User manual

Stanley
Stanley TIMEIT TWIN User manual

Stanley
Stanley Timelt Twin TM425 User manual

Stanley
Stanley TIMEIT BND-60/U49A User manual

Stanley
Stanley TimerMax User manual

Stanley
Stanley TIMERMAX OUTDOOR PRO User manual

Stanley
Stanley TM-266 User manual

Stanley
Stanley TIMEIT TM201 User manual