Insert the “key” of the arm into the arm xing plate. The main body must be placed
at 90 degrees angle against the xing angle.
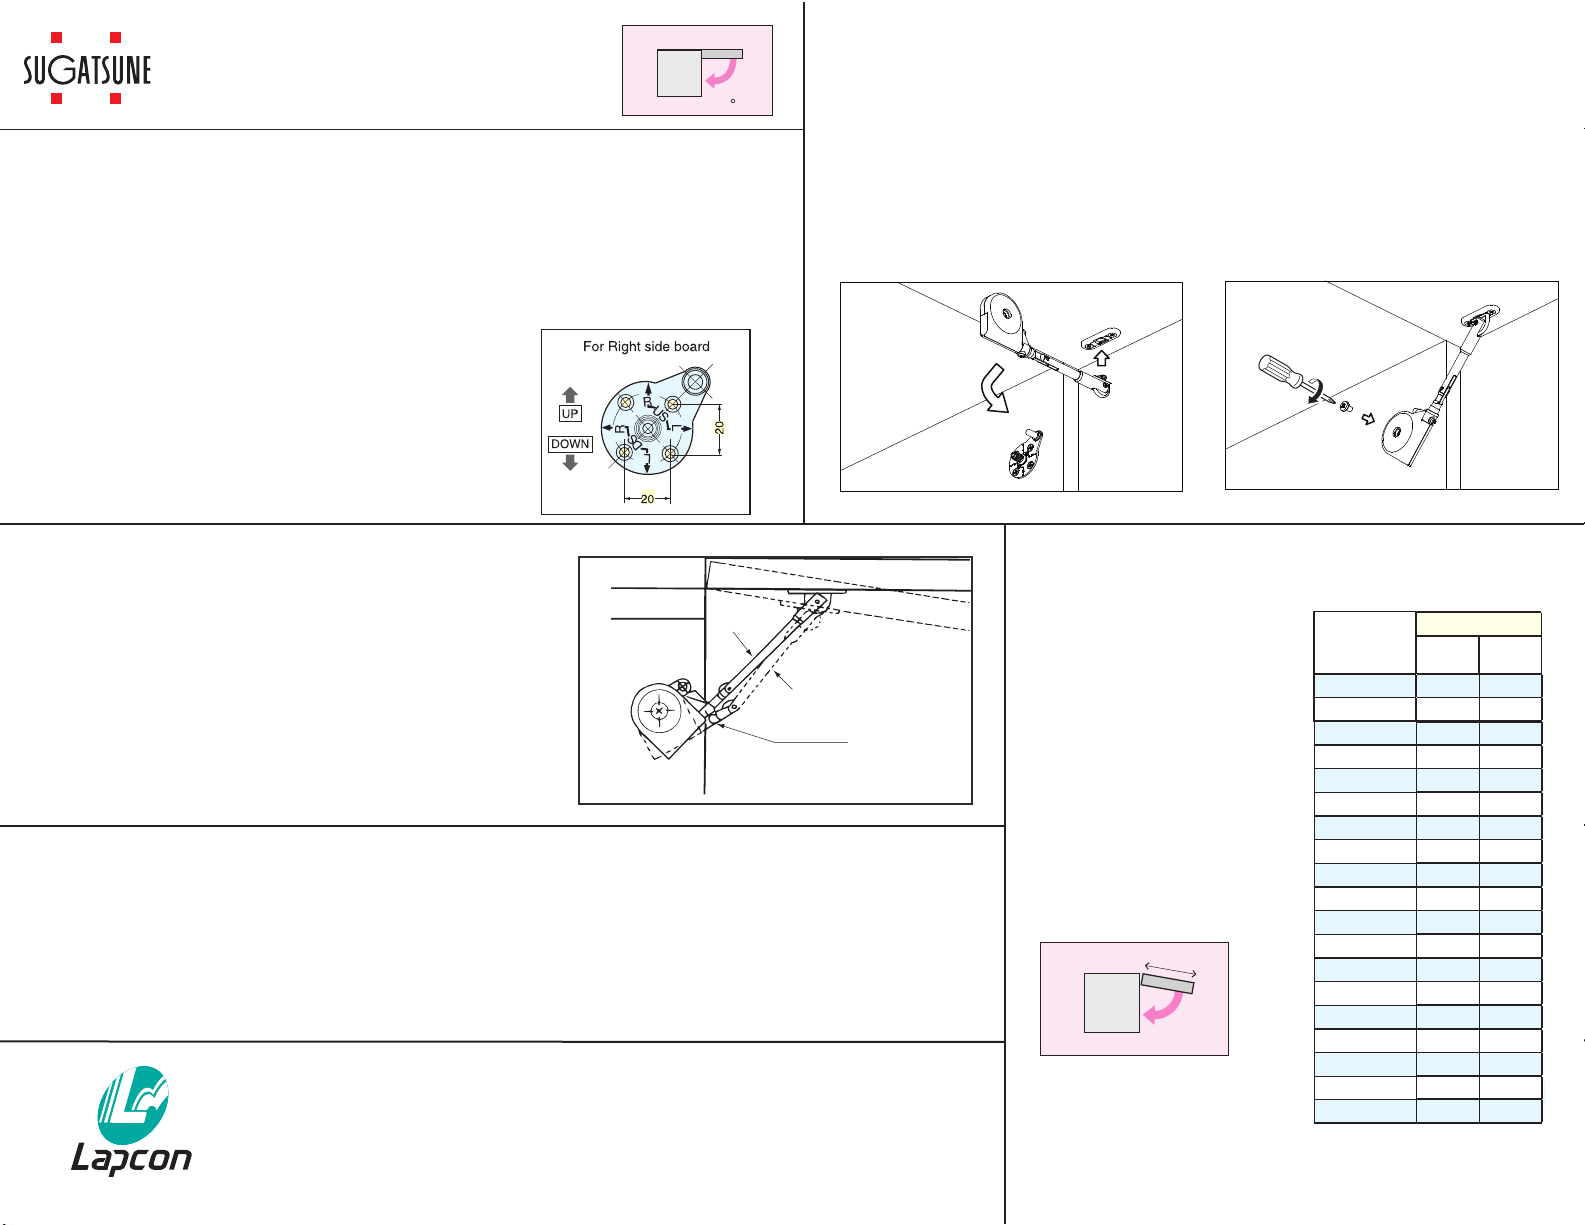
Turn the main body 90 degrees and insert the center gear of the mounting plate to
the hole of the main body.
③
③
Fix the main body with the bind screw.
①
①
②
②
Step 2 - Install the Main Body
Step 3 - Adjustment and Operation
If the lid stay is sagging (A), turn the adjustment screw(Z) at the
base of the arm until the lid stay straightens (B). The lid can then
be closed by pushing down gently on the lid. When the lid is
closing, do not put additional pressure on the lid (to close more
quickly, etc.) as it may damage the stay. If you have diculty with
operation or adjustment of the lid stay, please contact Sugatsune
for technical assistance.
(A)
(B)
Screw (Z)
Door
Height
(inch)
Door Weight(lbs)
Min Max
10 14.0 24.0
11 12.7 21.8
12 11.7 20.0
13 10.8 18.5
14 10.0 17.1
15 9.3 16.0
16 8.8 15.0
17 8.2 14.1
18 7.8 13.3
19 7.4 12.6
20 7.0 12.0
21 6.7 11.4
22 6.4 10.9
23 6.1 10.4
24 5.8 10.0
25 5.6 9.6
Door Weight Range
Per pair, in Lbs
8 17.5 30.0
9 15.6 26.7
Height
Weight and Door Height
The SDS-C301 must be used
taking the weight and door
height into consideration.
The table indicates the usable
weight range per door height
when using two stays. When
using one stay, the weight
range will be half of what is
shown.
For doors outside of the
recommended weight range,
please contact Sugatsune for
the recommended lid stay.
Remarks
• Do not attempt to disassemble or modify the lid stay as serious damage and/or injury may
occur.
• For extreme environments(high temperature, humidity, etc.), please contact Sugatsune for
technical assistance before installation.
• The product has been develop for use as a lid stay - other applications are not recommended.
Sugatsune America, Inc.
18101 Savarona Way
Carson, CA 90746-1411
SDS-C301N Installation
For Upward Opening Door 90
Step 1 - Position and Install Mounting Plates
The hinge type and the coverage aect the placement of the mounting plate and arm
xing plate. Please use the corresponding diagram on page 2 to determine the mounting
dimensions for your application. Position and install mounting plate and arm xing plate
using supplied screws.
For installation of the mounting plate on the right hand side,
the arrow of “R” on the “US” side should point upward
vertically. For the left side, the arrow of “L” on the “US”side
should point upward vertically.
All diagrams are shown for right side mounting.
Before installation, please check the Door Weight Range Table to determine
if the SDS-C301N is the correct stay for the size and weight door.
26 5.4 9.2
Toll Free (800) 562-5267
(310) 329-6373 Fax (310) 329-0819
www.sugatsune.com
Page 1 of 2
081010SDSC301UP


