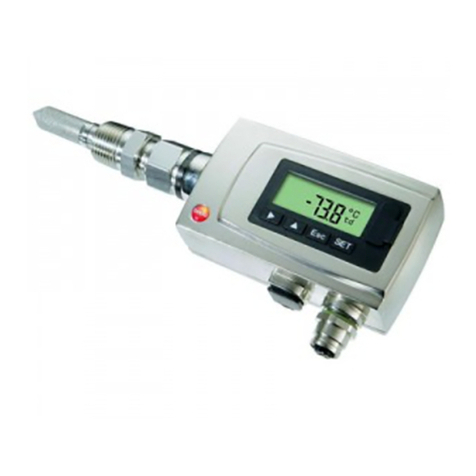
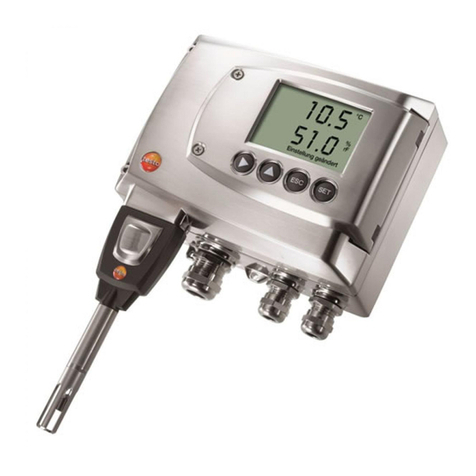
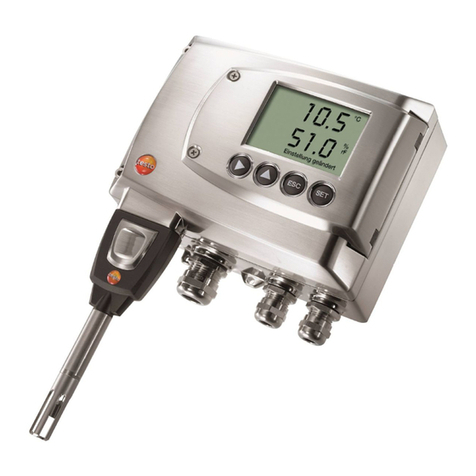
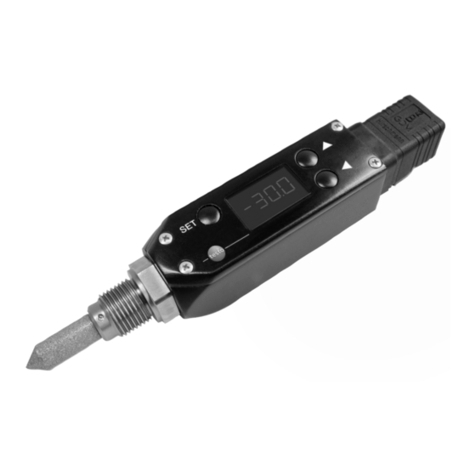
TESTO 6781 User manual

testo 6781 · Transmitter
P2A software · Parameterizing, adjusting and analyzing
Instruction manual

2

1 Safety and the environment
3
Pos: 1 /TD/Übersc hriften/MUF/Sicher heit und Umwelt @ 3\mod_1234 793958627_79.doc @ 26223 @ 1
1 Safety and the environment
Pos: 2 /TD/Sic herheit und Umwelt/Sicher heit gewährleisten/ MUF 63xx/Elektrisc he Gefahren vermeiden @ 3\ mod_1234794609299_79. doc @ 26280 @ 5
Avoiding electrical hazards
> Never use the instrument and connected probes to measure on
or near live parts!
> Damaged mains cables must only be replaced by authorized
personnel.
> Only have the transmitter wired and connected by authorized
personnel with the voltage disconnected.
> You must always comply with the regulations applicable in your
country for opening and repairing electrical equipment.
Pos: 3 /TD/Sic herheit und Umwelt/Sicher heit gewährleisten/ MUF 63xx/Personen- und Sac hschäden vermeiden @ 3\ mod_1234794744768_79 .doc @ 26299 @ 5
Avoiding personal injury and damage to equipment
> Installation, setting and calibration work must only be carried
out by qualified and authorized personnel!
> Only open the instrument when this is expressly described in
the instruction manual for installation, maintenance or repair
purposes.
> Observe the permissible storage, transport and operating
temperature.
Pos: 4 /TD/Sic herheit und Umwelt/Si cherheit gewähr leisten/Nicht mit Lös ungsmitteln lag ern @ 0\mod_117569237517 9_79.doc @ 583 @
> Do not store the product together with solvents. Do not use any
desiccants.
Pos: 5 /TD/Sic herheit und Umwelt/Sicher heit gewährleisten/ MUF 63xx/Bei War tungM UFnic ht zur Regelung verwende n @ 3\mod_1234794852377_7 9.doc @ 26318 @
> Do not use the instrument for control purposes at the same time
as operating or servicing the transmitter.
Pos: 6 /TD/Sic herheit und Umwelt/Si cherheit gewähr leisten/Produkt besti mmungsgemäß ver wenden @ 0\mod_117378126 1848_79.doc @ 386 @
> Only operate the product properly, for its intended purpose and
within the parameters specified in the technical data. Do not
use any force.
Pos: 7 /TD/Sic herheit und Umwelt/Sicher heit gewährleisten/ Nur beschriebene War tungsarbeiten durc hführen @ 0\mod_1175692705195 _79.doc @ 601 @
> Carry out only the maintenance and repair work on this
instrument that is described in the documentation. Follow the
prescribed steps exactly. Use only original spare parts from
Testo.
Pos: 8 /TD/Sic herheit und Umwelt/Sicher heit gewährleisten/ MUF 63xx/Fachpersonal @ 3\ mod_1234794940409_7 9.doc @ 26337 @
Any additional work must only be carried out by authorized
personnel. Otherwise testo will not accept any responsibility for the
proper functioning of the instrument after repair and for the validity
of certifications.

2 About this document
4
Pos: 9 /TD/Übersc hriften/MUF/Umwelt sc hützen @ 3\mod_1234858 757571_79.doc @ 26363 @ 5
Protecting the environment
Pos: 10 /TD/Sic herheit und Umwelt/ Umwelt schützen/Pr odukt entsorgen @ 0\ mod_1173780307072_ 79.doc @ 357 @
> At the end of its useful life, send the product to the separate
collection for electric and electronic devices (observe local
regulations) or return the product to Testo for disposal.
Pos: 11 /TD/Übersc hriften/MUF/Zu diese m Dokument @ 3\mod_12347939 91331_79.doc @ 26242 @ 1
2 About this document
Pos: 12 /TD/Sic herheit und Umwelt/Zu diese m Dokument/Verwendun g (Standard) @ 0\mod_117377 5068554_79.doc @ 337 @ 5
Use
> Please read this documentation through carefully and
familiarize yourself with the product before putting it to use. Pay
particular attention to the safety instructions and warning advice
in order to prevent injuries and damage to the products.
> Keep this document to hand so that you can refer to it when
necessary.
> Hand this documentation on to any subsequent users of the
product.
Pos: 13 /TD/Sic herheit und Umwelt/Zu die sem Dokument/Symbole und Sc hreibkonventione n/Warnhinweis W ARNUNG@ 2\ mod_1207646966234_7 9.doc @ 14398 @
WARNING Indicates potential serious injuries
Pos: 14 /TD/Sic herheit und Umwelt/Zu diese m Dokument/Symbole und Sc hreibkonventione n/Warnhinweis VORSIC HT@ 2\ mod_1207651416515_79. doc @ 14416 @
CAUTION indicates potential minor injuries
Pos: 15 /TD/Sic herheit und Umwelt/Zu diese m Dokument/Symbole und Sc hreibkonv. Soft ware[ Standard] @ 0\mod_11902 03332543_79.doc @ 4883 @ 5
Symbols and writing standards
Representa-
tion Explanation
Note: Basic or further information.
1. ...
2. ... Action: more steps, the sequence must be
followed.
> ... Action: a step or an optional step.
- ... Result of an action.
Menu Elements of the program interface.
[OK] Buttons of the program interface.
... | ... Functions/paths within a menu.
“...” Example entries
Pos:16 /TD/--- Seitenwechsel--- @ 0\mod_1173774430601_0. doc @ 283 @

3 Contents
5
Pos: 17 /TD/Übersc hriften/MUF/Inhal t @ 3\mod_1234794019831_ 79.doc @ 26261 @ 1
3 Contents
1Safety and the environment....................................................................3
2About this document...............................................................................4
3Contents...................................................................................................5
4Transmitter...............................................................................................8
4.1. Specifications ..................................................................................8
4.1.1. Functions and use ...........................................................................................8
4.1.2. Scope of delivery.............................................................................................8
4.1.3. Accessories .....................................................................................................8
4.1.4. Technical data .................................................................................................9
4.1.5. Dimensions....................................................................................................13
4.2. Product description........................................................................14
4.2.1. System components ......................................................................................14
4.2.2. At a glance.....................................................................................................15
4.2.3. Display and keypad........................................................................................16
4.2.4. Service interface............................................................................................16
4.2.5. Analog outputs...............................................................................................16
4.2.6. Parameters....................................................................................................16
4.2.7. Scaling .........................................................................................................16
4.3. Commissioning..............................................................................17
4.3.1. Mechanical assembly.....................................................................................17
4.3.1.1. Without stainless steel measurement chamber and cooling coil........18
4.3.1.2. With stainless steel measurement chamber (max. 35,000 hPa)........19
4.3.1.3. With stainless steel measurement chamber and cooling coil (max.
35,000 hPa)......................................................................................19
4.3.1.4. Connecting voltage supply and analog outputs.................................20
4.3.1.5. Plug-in connection for power supply and channel.............................21
4.3.2. Adjusting the instrument ................................................................................21
4.3.2.1. Self-adjustment.................................................................................21
4.3.2.2. 1-point adjustment by entering a reference value..............................22
4.3.2.3. Analog output adjustment .................................................................23
4.4. Operation.......................................................................................24
4.4.1. Relationship between user menu and mini-DIN socket is active ....................24
4.4.2. Password protection ......................................................................................24
4.4.3. Structure of user menu ..................................................................................24
4.4.4. Overview of the testo 6781 user menu...........................................................26
4.4.5. The individual main menus ............................................................................28
4.4.5.1. Editing main menu of channel 1........................................................28
4.4.5.2. Editing Main Menu Alarm..................................................................29
4.4.5.3. Editing Main Menu Settings ..............................................................30
4.4.5.4. Editing Main Menu Analysis..............................................................32
4.4.5.5. Editing Message main menu.............................................................34

3 Contents
6
4.4.5.6. Calling up Main Menu Ident ..............................................................35
4.4.5.7. Editing Main Menu Adjust.................................................................35
4.4.5.8. Editing Reset main menu..................................................................37
4.5. Status, warning and error messages ............................................37
4.5.1. Status messages...........................................................................................38
4.5.2. Warning messages........................................................................................39
4.5.3. Transmitter error messages...........................................................................40
4.5.4. Handling alarm messages .............................................................................40
4.6. Maintenance and cleaning............................................................41
4.6.1. Maintaining the instrument.............................................................................41
4.6.2. Cleaning the instrument.................................................................................41
5Parameterizing, adjusting and analyzing software (P2A software)..42
5.1. Specifications................................................................................42
5.1.1. Functions and use .........................................................................................43
5.1.2. System requirements.....................................................................................43
5.1.3. Scope of delivery...........................................................................................44
5.2. First steps .....................................................................................44
5.2.1. Installing the software/driver..........................................................................44
5.2.1.1. Installing P2A software .....................................................................44
5.2.1.2. Installing USB driver .........................................................................44
5.2.1.3. P2A software upgrade ......................................................................45
5.2.2. Starting the software......................................................................................45
5.2.2.1. Starting the program.........................................................................45
5.2.2.2. Establishing a connection with the instrument...................................45
5.2.2.3. Activating the connection with the instrument ...................................45
5.3. Using the software........................................................................46
5.3.1. User interface................................................................................................46
5.3.2. Editing instrument/parameter file ...................................................................48
5.3.2.1. Changing instrument/parameter file..................................................48
5.3.2.2. Creating a new instrument file...........................................................55
5.3.2.3. Saving parameters............................................................................55
5.3.2.4. Opening the parameter file ...............................................................56
5.3.2.5. Copying and pasting parameters......................................................56
5.3.2.6. Deleting instrument/parameter file....................................................57
5.3.3. Analyzing/testing the transmitter....................................................................57
5.3.3.1. Analyzing/testing the instrument.......................................................57
5.3.3.2. Carrying out factory reset..................................................................57
5.3.3.3. Testing analog output .......................................................................58
5.3.3.4. Displaying min./max. values..............................................................59
5.3.4. Adjusting the transmitter................................................................................60
5.3.4.1. 1-point adjustment............................................................................61
5.3.4.2. Adjusting the analog output ..............................................................62
5.3.5. Transmitter history.........................................................................................63

3 Contents
7
6Tips and assistance...............................................................................67
6.1. Questions and answers.................................................................67
6.2. Accessories and spare parts .........................................................67
6.2.1. Ordering options for testo 6781 transmitter (0555 6781)................................69
Pos:18 /TD/--- Seitenwechsel--- @ 0\mod_1173774430601_0. doc @ 283 @

4 Transmitter
8
Pos: 19 /TD/Übersc hriften/MUF/1 Messu mformer @ 3\mod_123425840 1060_79.doc @ 23894 @ 1
4 Transmitter
Pos: 20 /TD/Übersc hriften/MUF/1.1/2. 1/3.1 Leistungsbe schreibung @ 3\mod_123425 8595211_79.doc @ 23951 @ 2
4.1. Specifications
Pos: 21 /TD/Leis tungsbeschreibung/V erwendung/MUF63 xx/MUF 6781 @ 3\mod_12381622328 71_79.doc @ 30254 @ 3
4.1.1. Functions and use
The testo 6781 transmitter was developed especially for low
dewpoint temperatures and is suitable for the following
applications, amongst others:
• Compressed air process engineering
• Clean-room technology
• Regulation and monitoring of compressed air driers
• Production and conveyance of gases
• Monitoring of humidity and temperature in medical compressed
air or granulate driers
Pos: 22 /TD/Leis tungsbeschreibung/Li eferumfang/MUF 63 xx/MUF 6781 @ 3\mod_1238162497 483_79.doc @ 30275 @ 3
4.1.2. Scope of delivery
The scope of delivery of the testo 6781 transmitter includes the
following:
• Assembly accessories
• Operating instructions
• Calibration report
• CD-ROM with operating instructions (PDF) and P2A update
(this can only be used in conjunction with the P2A software,
which has to be ordered separately).
Pos: 23 /TD/Leis tungsbeschreibung/Li eferumfang/MUF 63 xx/Zubehör Übersicht 63 5x @ 3\mod_1236084601953 _79.doc @ 27292 @ 3
4.1.3. Accessories
The following accessories are available for the testo 6781
transmitter, amongst others:
• Mains unit
• P2A software (parameterizing, adjusting and analyzing
software)
• Assembly accessories
Information about accessories and their order numbers can
be found in Accessories and spare parts or on the
website at www.testo.com.

4 Transmitter
9
Pos: 24 /TD/Leis tungsbeschreibung/ Technische Daten/ MUF63 xx/MUF 6781 @ 3\mod_123816 2594608_79.doc @ 30296 @ 3555 5555555555555555555 555
4.1.4. Technical data
Parameter
• Dewpoint temperature1
Measuring range at 25 °C
• -90 to 30 °Ctd
Meas. uncertainty2
-20 °Ctd to -40 °Ctd: +/-1,5 K
-40 °Ctd to -60 °Ctd: +/-2 K
-60 °Ctd to -75 °Ctd: +/-2,5 K3
The measuring uncertainty increases with high flow values.
1Above 0 °Ctd the dewpoint temperature is shown and below 0 °Ctd the frost
point temperature is shown. In rare cases at frost point temperatures between
-35 °Ctd and 0 °Ctd differences between the 6781 and a dew mirror hygrometer
may occur.
2Expanded basic uncertainty (K = 2) at a process temperature of 25 °C.
Measuring uncertainty according to GUM (Guide to the Expression of Uncertainty in Measurement):
ISO guideline for determining the measuring uncertainty in order to render global measurement results
comparable.
The following uncertainties are used during the inquiry:
• Hysteresis
• Linearity
• Reproducibility
• Adjustment area/factory calibration
• Test location
An additional uncertainty factor independent of the dewpoint temperature and
process of ±0.03 K x reading (in °Ctd) + 0.2 K x (25 °C - process temperature in
°C) results from this overall view
Outside the stated range, a measurement inaccuracy of +/-5K (typically) applies.
3At process temperatures > 25 °C the lower limit of the measuring range
increases by 0.5 K/K. The uncertainty values are valid for the respective
measuring range.

4 Transmitter
10
Response time
t63 ≤3 s when changing from -75 °Ctd to -30 °Ctd
t90 ≤9 s when changing from -75 °Ctd to -30 °Ctd
t63 ≤300 s when changing from -30 °Ctd to -75 °Ctd
t90 ≤1080 s when changing from -30 °Ctd to -75 °Ctd
Resolution
Measuring range Resolution
0 to 100 % RH 0.001
0.001 to 28 g/kg 0.001
0.01 to 194 gr/lb 0.01
0 to 31 g/m30.001
0.001 to 14 gr/ft30.001
1 to 42,500 ppm (vol) 1
-90 to 30 °Ctd 0.1
-130 to 86 °Ftd 0.1
-110 to 30 °CtdA 0.1
-165 to 86 °FtdA 0.1
-40 to 70 °C 0.01
-40 to 158 °F 0.01
Meas. cycle
• 1/sec
Interface
• Mini-DIN for P2A software (adjustment and parameterization
software)
Voltage supply
• 4-wire (separate signal and supply lines): 20 to 30 V AC/DC,
300 mA power consumption

4 Transmitter
11
Maximum load
• 4-wire: 500 Ω(power output)
Maximal load
• 4-wire: 10 kΩ(voltage output)
Analog output
• 0 to 1 V ± 1.5 mV (4-wire) or
• 0 to 5 V ± 7.5 mV (4-wire) or
• 0 to 10 V ± 15 mV (4-wire) or
• 0 to 20 mA ± 0.03 mA (4-wire) or
• 4 to 20 mA ± 0.03 mA (4-wire)
Resolution of analog output
• 12 bit
Display
• 2-line LCD with plain text line (optional)
Operating temperature without display
• -40 to 70 °C
Operating temperature with display
• 0 to 50 °C

4 Transmitter
12
Storage temperature without display
• -40 to 80 °C
Storage temperature with display
• -20 to 80 °C
Process temperature
• -40 to 70 °C
Application humidity
• 0 to 100 % RH
Pressure application range
• 50,000 hPa
Housing, weight
• Metal, 0.5 kg
Process connection
• G 1/2 or
• NPT 1/2"
Protection class
• IP 65 only if the transmitter is wired and/or sealing plugs are
inserted
Directives, standards and tests
• EC Directive: 2004/108/EC
• 6781 was manufactured in accordance with EC pressure
equipment Directive 97/23/EC, Article 3 Paragraph 3 as per
"sound engineering practice", taking the regulations to be
observed into account.
Warranty
• Duration: 2 years
• Warranty conditions: see website www.testo.com/warranty

4 Transmitter
13
Pos: 25 /TD/Leis tungsbeschreibung/ Technische Daten/ MUF63 xx/MUF 6781 Abmessungen @ 3\ mod_1239806330094_79. doc @ 31183 @ 3
4.1.5. Dimensions

4 Transmitter
14
Pos: 26 /TD/Übersc hriften/MUF/1.2/2. 2 Produktbeschrei bung @ 3\mod_1234258723551 _79.doc @ 24008 @ 2
4.2. Product description
Pos: 27 /TD/Produk tbeschreibung/ Übersicht/MUF 63xx/Sys temkomponenten 6781 @ 3\ mod_1239868226476_79. doc @ 31305 @ 3
4.2.1. System components
Application System components
A With clean air and a process pressure
corresponding to the presetting of the
measurement chamber (1), a measurement
chamber (1) is required for the rapid
assembly (without de-pressurizing the
installation).
• 1: Measurement chamber
• testo 6781 with
G1/2 thread
B With clean air and a process pressure
greater than or less than 7000 hPa (1000 to
35,000 hPa) that therefore does not
correspond to the presetting of the inflow
valve, a measurement chamber (1) with a
flow meter (2) is required.
• 1: Measurement chamber
• 2: Flow meter
• testo 6781 with
G1/2 thread

4 Transmitter
15
Application System components
C For rapid assembly (without de-pressurizing
the installation), a measurement chamber (1)
is required. Connect a filter (4) upstream for
oily media.
• 4: Filter
• 1: Measurement chamber
• testo 6781 with
G1/2 thread
D With dry air (max. 140 °C), a PTFE tube (3)
is used and the valve of the measurement
chamber (1) is opened to maximum (suitable
up to -60 °Ctd).
• 3: PTFE tube
• 1: Measurement chamber
• testo 6781 with
G1/2 thread
E For process temperatures of 50 °C to 200 °C
and a process pressure corresponding to the
presetting, it is necessary to use a cooling
coil (5) and a measurement chamber (1).
Connect a filter upstream for oily media.
• Filter, if necessary
• 5: Cooling coil
• 1: Measurement chamber
• testo 6781 with
G1/2 thread
F If A to E are not required. The thread is
screwed directly into the process.
De-pressurized tube required during
installation.
• testo 6781 with
G1/2 thread
or
• testo 6781 with N1/2"
thread
Pos: 28 /TD/Produk tbeschreibung/ Übersicht/MUF 63xx/Auf einen Blick MUF 6781 @ 3\ mod_1238165303035_79. doc @ 30317 @ 3
4.2.2. At a glance
1 Display (optional)
2 Keys (only with optional display)
3 Test contacts
4 M 16 x 1.5 screw connection,
e.g. analog output
5 Service flap with connection for
service plug
6 Screw connection with process
connection (G 1/2 or NPT 1/2")
7 Sintered cap over sensor unit

4 Transmitter
16
Pos: 29 /TD/Produk tbeschreibung/ Übersicht/MUF 63xx/Dis play und Tastatur 6781 @ 4\ mod_1250064749770_79. doc @ 47423 @ 3
4.2.3. Display and keypad
The display option allows operation of the testo 6781 transmitter via
the display and four keys.
The LCD display consists of one 7-segment line for displaying
readings and units and of an information line (for status messages,
for example).
The brightness and contrast of the display and the background
lighting (permanent or off) can be changed via the user menu or the
P2A software.
Pos: 30 /TD/Übersc hriften/MUF/1.2. xSer viceschnitts telle @ 3\mod_123730689165 4_79.doc @ 29795 @ 3
4.2.4. Service interface
Pos: 31 /TD/Produk tbeschreibung/ Übersicht/MUF 63xx/Ser viceschnittstel le 635x @ 3\mod_12372173884 92_79.doc @ 29723 @
The parameterizing socket (mini-DIN) is located behind the service
flap as an interface to the P2A software.
Pos: 32 /TD/Produk tbeschreibung/ Übersicht/MUF 63xx/Ana logausgänge 635x @ 3\mod_1 234774510463_79.doc @ 25726 @ 3
4.2.5. Analog outputs
As analog outputs, the testo 6781 has either
• 1 current output of 0 to 20 mA (4-wire)/4 to 20 mA (4-wire) or
• 1 voltage output of 0 to 1 V/0 to 5 V/0 to 10 V (4-wire)
Pos: 33 /TD/Produk tbeschreibung/ Übersicht/MUF 63xx/Messgr ößen 6781 @ 3\mod_1239284 685066_79.doc @ 31095 @ 3
4.2.6. Parameters
The following parameters are displayed:
• Relative humidity in % RH (technical)
• Degree of humidity in g/kg and gr/lb
• Absolute humidity in g/m³ and gr/ft³
• Water content in ppm (vol)
• Dewpoint temperature in °Ctd and °Ftd
• Standardized dewpoint (at atmospheric pressure 1013 hPa) in
°CtdA and °FtdA
• Temperature °C and °F
Pos: 34 /TD/Produk tbeschreibung/ Übersicht/MUF 63xx/Ska lierung @ 3\mod_123477540 6989_79.doc @ 25783 @ 3
4.2.7. Scaling
There are three types of min./max. values:
1 The measuring range: The maximum sensor performance is in
this range. Values outside of the measuring range are displayed
via messages, for example.

4 Transmitter
17
2 Standard scaling: The output signals are assigned to this
measuring range as standard:
◦during delivery if no entries are made in the order code
◦after exchanging the unit, the measuring range recorded in
the instrument is applied as standard.
The transmitter even retains its scaling with the voltage
disconnected.
3 The maximum settings for the manual scaling
◦The maximum limits can be calculated as follows:
X = difference between MIN. and MAX. value of the
standard scaling
(Max. value of standard) + (50 % of X)
(Min. value of standard) - (50 % of X)
◦It is thus possible to scale beyond the measuring range, e.g.
for the adjustment of the scaling limits to standard values of
a PLC.
With the alarm definition, however, the physical measuring
range limits are decisive.
Pos: 35 /TD/Übersc hriften/MUF/1.3/2. 3 Inbetriebnahme @ 3\ mod_1234258805768_79. doc @ 24027 @ 2
4.3. Commissioning
Pos: 36 /TD/Erst e Schritte/MUF 63xx/ Mechanische Montage 6781 @ 3\mo d_1239807163104_79.doc @ 31204 @ 3444
4.3.1. Mechanical assembly
• Carefully perform assembly work.
• Take special care with leaktightness. We recommend
inserting a metal sealing ring (internal diameter 21 mm).
• Do not use any hygroscopic materials for the sealing.
> Only use force on the union nut.
Depending on the application, there are three different assembly
options:
Assembly Application
Without stainless steel
measurement chamber
and cooling coil
• Process temperatures 0 to 50 °C
• Attachment of the sensor directly in
the process possible
• No fast assembly/dismantling of the
testo 6781 required and sufficient
inflow of the sensor (1 l/min.) exists

4 Transmitter
18
Assembly Application
With stainless steel
measurement chamber • Process temperatures 0 to 50 °C
• Fast assembly/dismantling of the
testo 6781 required and/or
• No sufficient inflow of the sensor
(1 l/min.) exists
With stainless steel
measurement chamber
and cooling coil
• Process temperatures 50 to 200 °C
4.3.1.1. Without stainless steel measurement chamber and cooling
coil
CAUTION
Compressed air! Danger of injury!
> De-pressurize pipe sections (e.g. compressor off or use of
bypass) and vent them before opening.
Clamp ring screw connection is already pre-assembled.
Screw connection body (1) and union nut (2) have a point-
shaped marking (4).
1. Screw thread in process.
2. Turn housing (3) to desired position without much exertion
of energy.
3. Tighten union nut (2) finger-tight.
4. Hold screw connection body (1) with a suitable spanner.
5. Tighten union nut (2) slightly past the marking (4).
An increased resistance can be felt when tightening.

4 Transmitter
19
6. Close ventilation of the pipe section and pressurize the pipe
section again.
4.3.1.2. With stainless steel measurement chamber (max. 35,000 hPa)
1. Connect measurement chamber without testo 6781 transmitter
to quick-release compressed-air fastener for approx. 10 - 30
sec. to blow out any dirt deposits.
2. Remove measurement chamber from quick-release
compressed-air fastener.
3. Screw process connection (G1/2) of the testo 6781 transmitter
into the thread of the measurement chamber.
4. Mount 6781 as described under Without stainless steel
measurement chamber and cooling coil page 18.
5. Engage quick-release fastening of the measurement chamber
in the standardized socket of the compressed air line.
4.3.1.3. With stainless steel measurement chamber and cooling coil
(max. 35,000 hPa)
1. Connect measurement chamber without testo 6781 transmitter
to quick-release compressed-air fastener for approx. 10 - 30
sec. to blow out any dirt deposits.
2. Remove measurement chamber from quick-release
compressed-air fastener.
3. Screw process connection (G1/2) of the testo 6781 transmitter
into the thread of the measurement chamber.
4. Mount 6781 as described under Without stainless steel
measurement chamber and cooling coil page 18.
5. Engage quick-release fastening of the measurement chamber
in quick-release fastening of the cooling coil.
6. Engage second quick-release fastening of the cooling coil in the
standardized socket of the compressed air line.

4 Transmitter
20
Pos: 37 /TD/Erst e Schritte/MUF 63xx/Spa nnungsversorgung/ Analogausgänge ansc hließen 6781 @ 3\mod_12399516 83334_79.doc @ 31673 @ 45
4.3.1.4. Connecting voltage supply and analog outputs
Wiring diagram for 4-wire system (0 to 20 mA/4 to 20 mA/0 to
1 V/0 to 5 V/0 to 10 V) 1-channel
0 to 20 mA/4 to 20 mA
max. load per 500 Ω
0 to 1 V/0 to 5 V/0 to
10 V
Requirement for the connecting cable of the supply:
• Shielded and insulated with cross-section of at least
0.25 mm2.
• The supply line must be secured against exceeding 8 A.
• An OFF switch must be installed in an easily accessible
position close by and be marked as such.
Pos: 38 /TD/Erst e Schritte/MUF 63xx/ Option Steckerverbindun g 6781 @ 3\mod_123995174456 7_79.doc @ 31694 @ 4
Other manuals for 6781
1
Table of contents
Other TESTO Transmitter manuals
Popular Transmitter manuals by other brands

Stahl
Stahl 9182 Series operating instructions

BIOTRONIK
BIOTRONIK CardioMessenger II Technical manual

Greystone Energy Systems
Greystone Energy Systems CDD4 installation manual

Technical Materiel Corporation
Technical Materiel Corporation SBT-1K Technical manual

Ebtron
Ebtron GTx116 Technical manual

Emerson
Emerson Rosemount 326T quick start guide