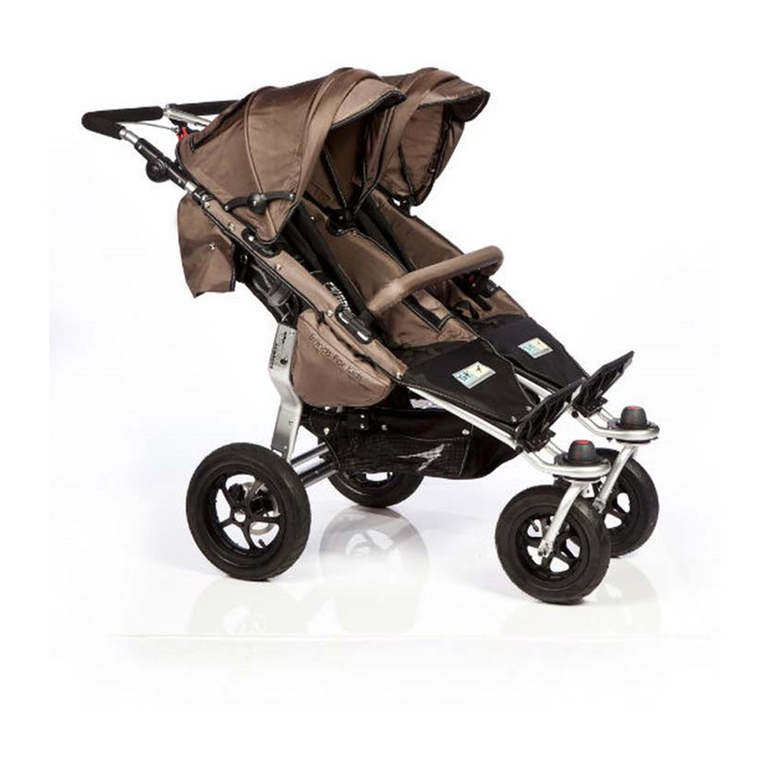
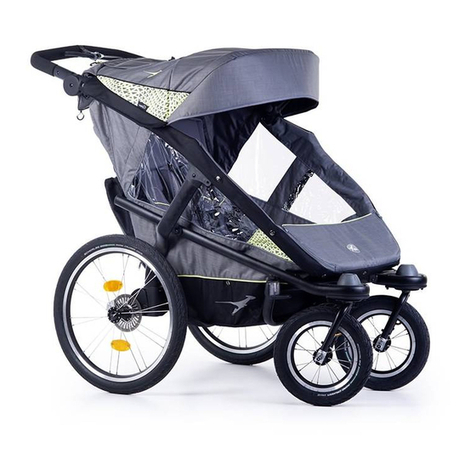
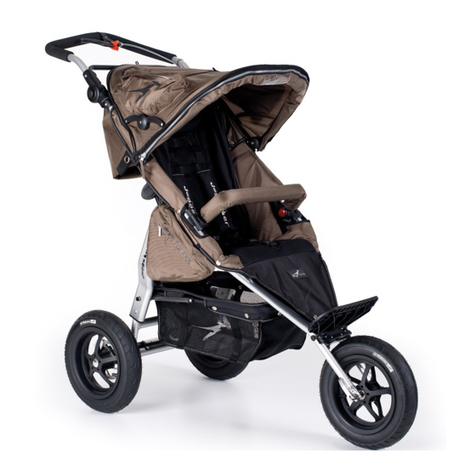
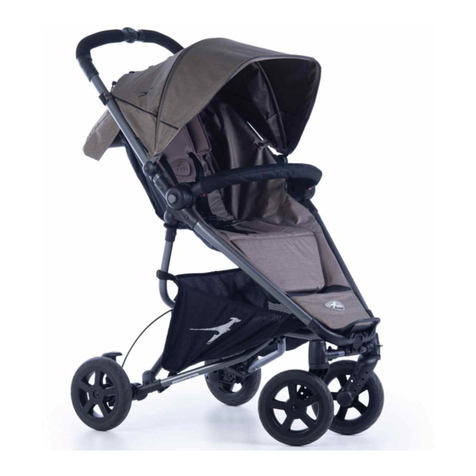
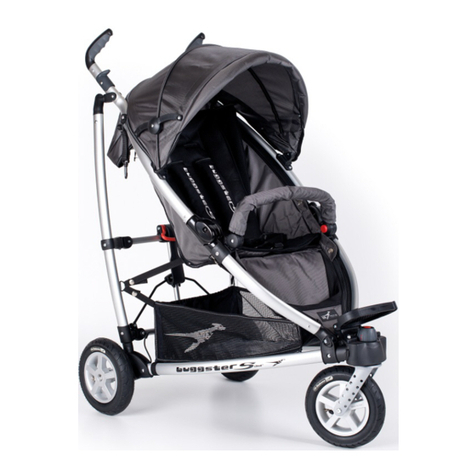
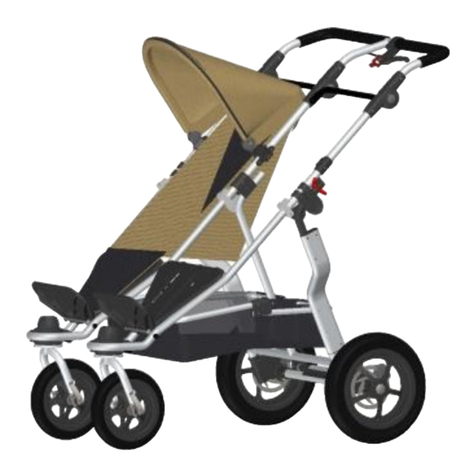
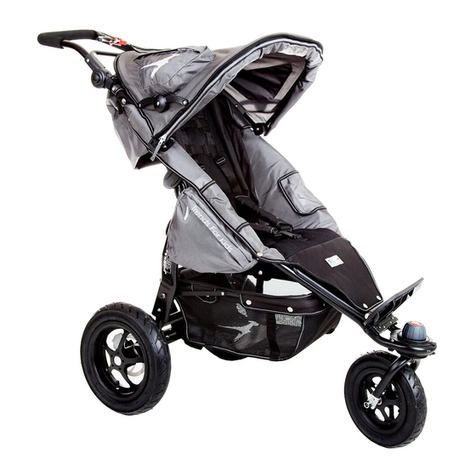
TFK TWIN TRAIL User manual

1
Gebrauchsanleitung
Operating manual
Istruzioni d’uso
Instrucciones de uso
Notice d’utilisation
Gebruiksaanwijzing
Bruksanvisning
Használati utasítás
Instrukcja obsługi
Návod k obsluze
Návod na použitie
Инструкции за употреба
Product video on
www.buggy.de
QR Code

2
V
II
I
1
III
a
b
IV
VI
VII
VIII
IX
X
XI
XII
XIII
XIV
2
a
a
a
d
c
c
x
x
y
y
z
4
5
6
7
8
13
14
15
16
17
18
19
20
22
21
23
23
24
25
26
9
10
11
11
d
19

3
DE Gebrauchsanleitung und Garantiebestimmungen 4
GB operating manual and warranty conditions 8
IT Instruzioni d’uso e condizioni di garanzia 12
ES Instrucciones de uso y condiciones de garantía 16
FR Notice d’utilisation et dispositions de garantie 20
NL Gebruiksaanwijzing en garantiebepalingen 24
NO Bruksanvisning og garantibestemmelser 28
SE Bruksanvisning och Garantipolicy 32
HU Használatiútmutatóésgaranciávalkapcsolatosrendelkezések 36
PL Instrukcja obsługi oraz warunki gwarancji 40
CZ Návod k obsluze a zàruční podmínky 44
SK Návod na použitie a podmienky záruky 48
BG Инструкции за употреба игаранция 52

4
Gebrauchsanleitung und Garantiebestimmungen
Herzlich willkommen in der Welt von TFK.
Bitte nehmen Sie sich ein Paar Minuten Zeit und lesen Sie die folgenden
Hinweise vor der Benutzung sorgfältig durch. WICHTIG: Bewahren Sie die
Anleitung für spätere Rückfragen auf. Wenn Sie diese Hinweise nicht
beachten, kann die Sicherheit Ihres Kindes beeinträchtigt werden!
SICHERHEITSHINWEISE + WARNUNGEN
WARNUNG: Lassen Sie Ihr Kind nicht unbeaufsichtigt!
WARNUNG: Diese Sitzeinheit ist für Kinder unter 6 Monaten nicht
geeignet. Gewicht bis maximal 15 kg! Befördern Sie maximal zwei Kinder!
WARNUNG: Dieser Wagen ist mit Zwillingswanne für Kinder ab 0 Monaten
bestimmt!
WARNUNG: Vergewissern Sie sich vor Gebrauch, dass alle
Verriegelungen geschlossen sind!
WARNUNG: Vergewissern Sie sich, dass Ihr Kind beim Aufklappen und
Zusammenklappen des Wagens außer Reichweite ist, um Verletzungen
zu vermeiden.
WARNUNG: Lassen Sie Ihr Kind nicht mit dem Wagen spielen.
WARNUNG: Dieses Erzeugnis ist nicht geeignet zum Joggen oder Skaten!
WARNUNG: Am Schieber befestigte Lasten beeinträchtigen die
Standfestigkeit des Wagens!
WARNUNG: Schnallen Sie Ihr Kind immer mit dem 5-Punkt-Gurt an, auch
mit Fußsack!
WARNUNG: Es ist zu überprüfen, dass der Kinderwagenaufsatz oder die
Sitzeinheit oder der Autokindersitz vor Gebrauch korrekt eingerastet ist.
- Autokindersitze, die in Verbindung mit einem Fahrgestell verwendet
werden, ersetzten weder eine Wiege noch ein Kinderbett. Sollte Ihr Kind
Schlaf benötigen, sollte es dafür in einen geeigneten
Kinderwagenaufsatz, eine geeignete Wiege oder ein geeignetes Bett
gelegt werden.
-Den Wagen nie ohne gesicherte Parkbremse abstellen!
-Heben Sie den Wagen niemals mit einem Kind darin hoch!
-Benutzen Sie keine (Roll-) Treppen, wenn sich ein Kind im Wagen
befindet!
-Beim Tragen über Treppen und sonstige Hindernisse, unbedingt die
Arretierungen überprüfen und den Wagen nur an festen Rahmenteilen
anheben!
-Die maximale Beladung im Korb ist 5 kg! Jede andere Tasche und der
Karabiner Haken am Verdeck darf mit max 0,5kg beladen werden.
Bitte überprüfen Sie in regelmäßigen Abständen die Verbindungen auf
ihre Funktion! Verwenden Sie im Reparaturfall nur originale Ersatzteile!

5
GEBRAUCHS- UND MONTAGEANLEITUNG
- (Abb.I) Um den Twin Trail benutzen zu können, klappen Sie die
Schiebestange (1) nach oben. Der komplette Wagen wird dadurch
aufgeklappt. Achten Sie darauf, dass die Pins in der Verriegelung (2)
hörbar einrasten.
- (Abb.II) Der Sitz wird mit je 4 Druckknöpfen (a) an beiden Seiten am
Rahmen befestigt. Zusätzlich wird er am Fußbrett mit 2 Druckknöpfen
(b) befestigt. Montieren Sie zuerst den in Fahrtrichtung linken Sitz.
- (Abb.III)Stecken Sie das Verdeck in die Halterungen (4)an der
äußeren Schiebestange und in die Halterung an der Mittelstange.
Anschießend wird es mit zwei Druckknöpfen (c) am Sitz und am
Rahmen (d) befestigt. An der Mittelstange kann es zusätzlich mit
einem Band befestigt werden. Wenn Sie den Reißverschluss (5)
öffnen, können Sie das Verdeck weiter nach vorne öffnen.
- (Abb.IV) Zur Montage der Hinterräder stecken Sie die Achse (6) in
den Rahmen, so dass auch die Bremse in der Halterung sitzt.
Befestigen Sie den Bremshaken (7) in der M-Brake (8). Wenn Sie die
Räder abnehmen möchten, lösen Sie das Bremskabel (7)und
drücken Sie den Känguru-Knopf in der Mitte des Rades ein. Jetzt
können Sie die Räder abziehen.
- (Abb.V) Stecken Sie das Vorderrad (9) in die dafür vorgesehene
Öffnung bis es hörbar einrastet. Auf Position 1 kann sich das
Vorderrad (9) frei drehen und auf Position 2 steht es fest. Wenn Sie
den roten Knopf mit dem Pfeil (10)eindrücken, können Sie das Rad
nach unten entnehmen. In der Radaufnahme befinden sich 2
Madenschrauben (11), mit denen Sie den Geradeauslauf des
Joggster Twist bei Bedarf einstellen können.
- (Abb.VI) Beide Sitzlehnen sind stufenlos mit dem Band verstellbar.
Drücken Sie dazu die beiden Plastikteile (13) zusammen und
Verstellen den Sitzwinkel mit dem Band.
- (Abb.VII) Die Fußraste kann nach oben geklappt werden. Arretieren
Sie dieses dazu mit dem Fußbrett (14).

6
- (Abb.VIII) Das Gurtschloss schließen Sie, indem Sie die beiden
Stecker (15) in das Gurtschloss (16) hörbar einrasten. Zum Öffnen
drücken Sie einfach den Knopf in der Mitte der Halterung (16). Die
Gurte können an die Größe ihres Kindes mit dem Spannsystem x, y
und z angepasst werden. Der Gurt ist an den 5 Punkten x, y, z
befestigt.
- (Abb.IX) Stecken Sie den Bauchbügel von oben auf die
Rahmenrohre. Sichern sie ihn durch Umlegen der Klemmhebel (17).
Durch drücken der roten Knöpfe (18) links und rechts können Sie ihn
in verschiedene Positionen schwenken.
- (Abb.X) Die Schiebestangenhöhe kann durch drücken der zwei
Verstellgelenke (23) eingestellt werden.
- (Abb.XI) Die Handbremse ist zugleich Lauf- und Parkbremse. Um die
Parkbremse zu aktivieren, müssen Sie den Bremshebel (20)ganz
anziehen und den roten Parkhebel (21) komplett umlegen, damit der
Bremshebel (20) maximal angezogen bleibt und die Bremse
dauerhaft blockiert. Falls die Bremswirkung nachlässt, können Sie eine
Feineinstellung vornehmen. Drehen Sie dazu die Stellschraube (22)
am Bremsgriff entgegen dem Uhrzeigersinn und prüfen Sie die
Bremswirkung erneut.
- (Abb.XII) Um den Twin Trail zusammen zulegen, müssen Sie die
beiden Verriegelungen (23) nach oben ziehen. Diese bleiben
automatisch geöffnet. Dann können Sie den Schiebergriff (24) nach
vorne hin umlegen. Die Rahmenkonstruktion klappt automatisch ein.
- (Abb.XIII) Schließen Sie die Transportsicherung (25) am Rahmen,
damit sich der Joggster Trail nicht versehentlich aufklappt.
- (Abb.XIV) Wenn Sie mit dem Twin Trail im freien Gelände unterwegs
sind, befestigen Sie bitte die mitgelieferte Fangschlaufe an der
Hinterachse. Dann streifen Sie sich die Seite mit dem Gummizug über das
Handgelenk.

7
PFLEGEHINWEISE
-Reinigen Sie alle Teile mit einem feuchten Tuch.
-Benutzen Sie keine aggressiven Reinigungs- oder Schmiermittel!
-Ölspray an den Faltgelenken und Radlagern stellt die Leichtgängigkeit sicher.
-Sie können den Sitzbezug mit der Hand bei 30° waschen. Nicht in die
Waschmaschine oder Trockner geben
-Die Bereifung kann unter Umständen zur Verfärbung des Bodenbelags führen.
Fremdkorper (z.B. Steinchen) in den Reifen müssen entfernt werden um eine
eventuelle Beschädigung von Bodenbelägen zu vermeiden.
GARANTIEBEDINGUNGEN
Bei berechtigten Beanstandungen gelten die gesetzlichen Bestimmungen. Zum
Nachweis des Erwerbes, bewahren Sie bitte den Kaufbeleg für die Dauer der
gesetzlichen Verjährungsfrist auf. Diese beträgt 2 Jahre *) und beginnt mit der
Übergabe des Produkts an Sie. Falls bei diesem Produkt Mängel bestehen, beziehen
sich diese auf sämtliche Material- und Herstellungsfehler, die zum Zeitpunkt der
Übergabe vorliegen. Keine Ansprüche bestehen für:
• Natürlicher Verschleiß und Schäden durch übermäßige Beanspruchung.
• Schäden durch ungeeignete oder unsachgemäße Verwendung.
• Schäden durch fehlerhafte Montage und Inbetriebnahme.
• Schäden durch nachlässige Behandlung oder Wartung.
• Schäden durch unsachgemäße Änderungen am Wagen.
Fehler müssen unverzüglich gemeldet werden, damit keine Folgeschäden entstehen!
Reklamationsfall oder nicht?
TFK Produkte sind meist zu einem hohen Teil aus Aluminium gefertigt und somit rostfrei.
Manche Teile sind jedoch auch lackiert, verzinkt oder haben eine sonstigen
Oberflächenschutz. Je nach Wartung oder Beanspruchung können diese Teile auch
rosten. Hierbei handelt es sich dann um keinen Mangel.
Kratzer sind normale Verschleißerscheinungen und kein Mangel.
Feuchte Textilien, die nicht getrocknet und ausreichend gelüftet werden, können
schimmeln und stellen keinen produktionsbedingten Mangel dar.
Durch Sonneneinstrahlung, Schweiß, Reinigungsmittel, Abrieb oder zu häufiges
Waschen ist ein Ausbleichen nicht auszuschließen und somit kein Mangel.
Bitte prüfen Sie beim Kauf genau, ob alle Stoffteile, Nähte, Druckknöpfe und
Reisverschlüsse ordnungsgemäß vernäht sind und funktionell in Ordnung sind.
Abgefahrene Räder sind natürliche Verschleißerscheinungen. Schäden durch
äußere Einwirkungen sind kein Mangel. Leichte Unwucht ist nicht vermeidbar und
stellt keinen Mangel dar.
Der Übergabe-Check soll immer durchgeführt werden, um Reklamationen schon im
Vorfeld zu vermeiden. Wenn Sie später einen Fehler feststellen, melden Sie diesen
unverzüglich bei Ihrem Händler. Dieser wird sich bei uns melden, um die weitere
Vorgehensweise zu besprechen. Unangemeldete oder unfreie Sendungen bei TFK
werden nicht akzeptiert.
*) gültig nur in der EU. In anderen Ländern sind die jeweils gesetzlichen Fristen gültig.

8
Operating Manual and Warranty Conditions
Welcome to the world of TFK.
Please take a few moments to read the following instructions
carefully before use. IMPORTANT: Please keep these instructions for
future questions. If you do not comply with the instructions, the safety
of your child could be compromised!
SAFETY INSTRUCTIONS + WARNINGS
WARNING: Do not leave your child unsupervised.
WARNING: This pushchair is not suitable for children aged under 6
months. Maximum weight: 15 kg! Do not carry more than two
children!
WARNING: If provided with a twin tray, this pushchair is intended for
children from 0 months.
WARNING: Before use, make sure that all the locks are properly
engaged!
WARNING: In order to avoid injury, make sure that your child is out of
reach when you open up or close the pushchair.
WARNING: Do not allow your child to play with the pushchair.
WARNING: This product is not suitable for jogging or inline skating!
WARNING: Loads attached to the push bar may impair the balance
of the pushchair!
WARNING: Always secure your child with the 5-point harness, even
when using the foot muff!
WARNING: Make sure that the pushchair seat or the seat unit or the
child car seat is correctly locked into place before use.
- Child car seats which are used in connection with a carriage do not
replace a cradle or a crib. If your child needs sleep, you should lie it
down in a suitable pushchair seat, a suitable cradle or a suitable bed.
-Never park the pushchair without engaging the parking brake!
-Never lift the pushchair when the child is sitting in it!
-Never use stairs (escalators) while the child is sitting in the pushchair!
-When carrying the pushchair on stairs or over other obstacles,
always check that the locks are secure! Lift the pushchair only at the
fixed frame parts!
-The maximum load in the basket is 5 kg! Any other bag or hook on
the hood may be loaded with max. 0,5 kg.
-Tyre pressure: 1.2 bar
Please regularly check the connections for their proper function! In
case of repair, only use original spare parts!

9
OPERATING AND ASSEMBLY MANUAL
- (Fig.I) In order to be able to use Twin Trail, fold the push bar (1)
upwards. The complete pushcar is folded open. Make sure that the
pins are audibly engaged in the lock (2).
- (Fig.II) The seat is mounted to the frame with 4 push buttons (a) on
each side of the frame. Additionally, it is fixed to the foot board with
2 push buttons (b). At first, you must mount the seat at the left side in
direction of driving.
- (Fig.III) Insert the hood into the holders (4) on the outer push bar
and into the holder on the centre push bar. Then it is secured to the
seat and the frame (d) with two push buttons (c). It can be
additionally secured to the centre bar with a belt. If you open the
zipper (5), you can extend the hood further forwards.
- (Fig.IV) For the assembly of the rear wheels, insert the axle (6) in the
frame so that the brake is also located in the holder. Mount the
brake calliper (7) in the M-brake (8). If you want to remove the
wheels, release the brake cable (7) and press the kangaroo button in
the centre of the wheel. Now you can remove the wheels.
- (Fig.V) Insert the front wheel (9) into the provided opening until it
audibly locks into place. At position 1, the front wheel (9) can turn
freely and at position 2, it is jammed. If you press the red button with
the arrow (10), you can remove the wheel downwards. Inside of the
wheel mount there are 2 set screws (11), with which you can adjust
the straight running of the Joggster Twist when necessary.
- (Fig.VI) Both backrests can be continuously adjusted with the belt.
To this end, you must press both plastic parts (13) together and adjust
the seat angle with the belt.
- (Fig.VII) The foot rest can be folded upwards. To this end, it must be
locked in place with the foot board (14).
- (Fig.VIII) Close the belt buckle by audibly engaging both plugs (15)
in the belt buckle (16). If you want to open the harness, simply press
the button in the centre of the buckle (16). The harnesses can be
adjusted to the size of your child using the tensioning system x, y and
z. The harness is located at the 5 points x, y, z.

10
- (Fig.IX) Insert the belly bar from above into the frame tubes. Secure
it by moving the clamping lever (17). By pressing the red buttons (18)
at the left and right side you can swivel it to different positions.
- (Fig.X) You can set the height of the push bar by pressing the two
adjustment joints (23).
- (Fig.XI) The handbrake is a walking and parking brake at the same
time. To activate the parking brake, you must pull the brake lever
(20) fully tight and completely close the red parking lever (21), so
that the brake lever (20) remains tightened to the maximum and the
brake is permanently blocked. If the braking effect starts to weaken,
you can carry out a fine adjustment. To do so, turn the adjusting
screw (22) on the brake grip anti-clockwise and check the braking
effect again.
- (Fig.XII) To close the Twin Trail, you must push both locks (23)
upwards. They remain automatically open. Then you can move the
push bar (24) in forward direction. The frame construction
automatically closes.
- (Fig.XIII) Close the transport lock (25) on the frame to ensure that
the Joggster Trail does not accidentally open up again.
- (Fig.XIV) If you are using the Twin Trail in cross-country terrain, please
fasten the enclosed retention strap on the rear axle. Then pull the
side with the elastic band over your wrist.

11
CARE INSTRUCTIONS
- Clean all parts with a damp cloth.
- Do not use any caustic cleaning or lubricating agents!
- An oil sprayon the folding jointsandthe wheel bearings willguarantee smoothrunning.
- You can wash the seat cover by hand at 30°. Not suitable for a washing
machine or tumble dryer!
- The tires can cause eventually a discoloration of the floor surfacing.
Foreign bodies in the tires (such as small stones) have to be removed in order
to prevent a possible damage of the floor surfacing.
WARRANTY CONDITIONS
The statutory provisions shall apply for justified complaints. As proof of
purchase, please keep the till receipt for the duration of the statutory period
of limitation. This term is 2 years *) and starts with the handover of the
product to you. Should any faults arise in relation to this product, they shall
involve any faults of material and manufacture that exist at the date of
transfer. Any claims shall be excluded for:
• Natural wear and damage due to excessive stress
• Damage due to unsuitable or improper use
• Damage due to faulty assembly and commissioning
• Damage due to negligent handling or maintenance
• Damage due to improper modifications to the pushchair
Faults must be notified immediately, so that no subsequent damage can be
caused!
A case for complaint or not?
• Most TFK products are produced to a large extent from aluminium and so
are rust-proof. However, some parts are also painted, galvanized or have
other surface protection. These parts may rust, depending on the level of
maintenance and stress. This can therefore not be regarded as a fault.
• Scratches are normal signs of wear and are not a fault.
• Moist textiles that are not dried can moulder and so can not be considered
as a production-related fault.
• The fading of colours due to sunshine, perspiration, cleaning agents,
abrasion or excessively frequent washing cannot be ruled out and so does not
represent a fault.
• Please check carefully at the time of purchase whether all the fabric parts,
seams, press studs and zips are sewn and function properly.
• Worn-down wheels are of course a sign of wear. Damage due to external
influences is not a fault. STrail imbalances are inevitable and do not
represent a fault. The handover check must always be carried out to prevent
inconvenient problems right at the outset. If you find a fault at a later date,
please notify your authorised dealer immediately. He will then contact us to
discuss the subsequent procedure. Any deliveries to TFK that are unnotified or
not prepaid will not be accepted.
*) valid only in the EU. In other countries according to the respective
warranty terms.

12
Istruzioni d’uso e condizioni di garanzia
Benvenuti nel mondo di TFK.
Prendetevi qualche minuto e leggete attentamente le seguenti
istruzioni. Conservatele poi per riferimenti futuri. La mancata lettura
delle presenti istruzioni può essere pericolosa per la sicurezza del
vostro bambino!
AVVERTENZE DI SICUREZZA
AVVISO: Non lasciare mai inosservato il suo bambino!
AVVISO: Il passeggino è idoneo per bambini di età a partire da 6
mesi e fino ad un peso massimo di 15 kg! Utilizzare il passeggino al
massimo per due bambini!
AVVISO: Questo passeggino è destinato ad essere usato con una
vasca gemellare per bambini a partire da 0 mesi!
AVVISO: Prima di utilizzare il passeggino, assicurarsi sempre che tutti i
dispositivi di bloccaggio siano inseriti!
AVVISO: Assicurarsi che alla chiusura e all'apertura del passeggino i
bambini siano fuori dalla sua portata, al fine di evitare infortuni.
AVVISO: Non lasciare giocare il suo bambino con il passeggino.
AVVISO: Questo prodotto non è idoneo al jogging o al pattinaggio!
AVVISO: I carichi fissati allo scorrevole pregiudicano la stabilità del
passeggino!
AVVISO: Fissare sempre il bambino con la cintura di sicurezza a 5
punti, anche se si utilizza il sacco coprigambe!
AVVISO: Prima dell'uso, controllare che la parte superiore o l'unità
seggiolino o il seggiolino auto siano correttamente innestati.
- I seggiolini auto che vengono utilizzati in abbinamento ad un telaio
portante, non sostituiscono né una culla, né un lettino. Se il vostro
bambino dovesse aver bisogno di dormire, esso deve essere messo
in un idoneo elemento passeggino, in un'idonea culla o in un
idoneo lettino.
- Quando si sosta, assicurasi sempre che il freno di parcheggio sia
inserito!
- Non sollevare mai il passeggino quando il bambino è al suo interno!
- Non utilizzare le scale o scale mobili quando il bambino è all’interno
del passeggino!
- Verificare sempre i dispositivi di arresto quando si scendono scale o
simili ostacoli e sollevare il passeggino solo afferrandolo dalle parti
rigide del telaio!
- Non caricare nel cestello pesi superiori a 5 kg! Ogni altra tasca può
essere caricata al massimo con 0,5 kg.
- Pressione di gonfiaggio degli pneumatici: 1,2 bar

13
Siete pregati di verificare regolarmente il corretto funzionamento dei
collegamenti! In caso di riparazione utilizzare esclusivamente ricambi
originali!
ISTRUZIONI D'USO E DI MONTAGGIO
- (Fig.I) Per poter utilizzare il Twin Trail, ribaltate verso l'alto l'asta di
spinta (1). Così facendo, l'intero passeggino viene aperto. Fate
attenzione che i pin si innestino sonoramente nel bloccaggio (2).
- (Fig.II) Il seggiolino viene fissato al telaio su entrambi i lati con 4
bottoni a pressione per lato (a). Inoltre, esso viene fissato in
corrispondenza della pedana poggiapiedi con 2 bottoni a pressione
(b). Guardando in senso di marcia, montate dapprima il sedile
sinistro.
- (Fig.III) Infilare la capottina nei supporti (4) sull'asta di spinta esterna
e nel supporto sull'asta centrale. Successivamente, essa viene fissata
con due bottoni a pressione (c) sul seggiolino e sul telaio (d). Sull'asta
centrale essa può essere fissata inoltre con un nastrino. Se aprite la
chiusura lampo (5), potete aprire la capote in avanti ancor di più.
- (Fig.IV) Per montare le ruote posteriori, infilate l'asse (6) nel telaio in
maniera che anche il freno risieda nel supporto. Fissate il gancio
freno (7) nell'M-Brake (8). Se desiderate staccare le ruote, staccate il
cavo del freno (7) e premete in dentro il pulsante canguro al centro
della ruota. Ora potete sfilare le ruote.
- (Fig.V) Infilate la ruota anteriore (9) nell'apertura prevista sino a che
non vi si innesta sonoramente. In posizione 1, la ruota anteriore (9) è
libera di ruotare mentre in posizione 2 essa è fissa. Se premete in
dentro il pulsante rosso con la freccia (10), potete staccare la ruota
verso il basso. Nella sede della ruota vi sono 2 grani filettati (11) con
cui potete regolare, se necessario, la direzionalità del Joggster Twist.
- (Fig.VI) Entrambi gli schienali possono essere regolati in maniera
lineare per mezzo del nastro. Premete a tale scopo i due elementi di
plastica (13) e regolate l'inclinazione del sedile con il nastro.
- (Fig.VII) La pedana poggiapiedi può essere aperta verso l'alto.
Arrestatela in tale posizione con il sostegno (14).

14
- (Fig.VIII) La fibbia di chiusura viene chiusa innestando sonoramente
entrambe le spine (15) nella fibbia di chiusura (16). Per aprirla è
sufficiente aprire il pulsante al centro del supporto (16). Le cinture
possono essere adattate alla statura del vostro bambino con il
sistema di tensionamento x, y e z. La cintura è fissata ai 5 punti x, y, z.
- (Fig.IX) Infilate la staffa di sicurezza dall'alto sui tubi del telaio.
Fissatela ruotando la leva di serraggio (17). Premendo i pulsanti rossi
(18) a sinistra e a destra potete regolarla in diverse posizioni.
- (Fig.X) L'altezza dell'asta di spinta può essere regolata premendo i
due snodi di regolazione (23).
- (Fig.XI) Il freno a mano funge allo stesso tempo da freno di marcia
e freno di parcheggio. Per attivare il freno di parcheggio, dovete
tirare del tutto la leva del freno (20) e ribaltare del tutto la leva di
parcheggio rossa (21), in maniera che la leva del freno (20) rimanga
tirata al massimo e che il freno blocchi in maniera permanente. Se
l'effetto frenante dovesse ridursi, potete eseguire una regolazione
fine. Ruotate a tale fine la vite di posizionamento (22) sulla maniglia
del freno in senso antiorario e verificate nuovamente l'effetto
frenante.
- (Fig.XII) Per ripiegare il Twin Trail dovete tirare verso l'alto i due
bloccaggi (23). Essi rimangono aperti automaticamente. Potete poi
ribaltare in avanti la maniglia (24). Il telaio si richiude
automaticamente.
- (Fig.XIII) Chiudete la sicura di trasporto (25) sul telaio, in maniera
che il Joggster Trail non si dispieghi accidentalmente.
- (Fig.XIV) Se usate il Twin Trail su terreni non asfaltati, fissate l'ansa di
ritegno fornita all'asse posteriore. Fate poi passare il lato con il tirante
in gomma sopra il polso.

15
INDICAZIONI DI MANUTENZIONE
-Pulire tutti gli elementi con un panno umido.
-Non utilizzare detergenti o lubrificanti aggressivi!
-Olio lubrificante sui giunti pieghevoli e sui cuscinetti delle ruote assicura il facile azionamento.
-La fodera può essere lavata a mano ad una temperatura di 30°. Non lavare a
macchina o mettere nell’asciugabiancheria!
-In alcuni casi, le gomme delle ruote potrebbero lasciare macchie nere sul
pavimento. Devono essere rimossi i corpi estranei (p.e. sassolini) dalle gomme delle
ruote per evitare di rovinare i pavimenti.
CONDIZIONI DI GARANZIA
In caso di reclami giustificati, vengono applicate le disposizioni di legge. Conservare lo
scontrino come prova d’acquisto per l’intera durata della garanzia. “Ha una durata di
due anni *) ed inizia con la consegna del passeggino all’acquirente.
Se il prodotto presenta difetti, si tratta di vizi del materiale o errori di produzione già
presenti al momento della consegna. La garanzia non è valida per
• normale usura e danni causati da eccessiva sollecitazione;
• danni causati da uso improprio o incuria;
• danni causati da montaggio e messa in funzione errati;
• danni causati da uso o manutenzione negligenti;
• danni causati da modifiche improprie al prodotto.
I difetti devono essere comunicati immediatamente al fine di evitare ulteriori danni!
È un caso di reclamo?
I prodotti TFK sono fabbricati in gran parte con alluminio e quindi inossidabili. Alcuni
componenti sono però smaltati, zincati o hanno una protezione superficiale. A
seconda della manutenzione o della sollecitazioni a cui sono sottoposti, questi
componenti possono anche arrugginirsi. In questo caso non si tratta di difetti del
prodotto.
I graffi sono normali segni d’usura e non rappresentano un vizio del prodotto.
Sui tessuti umidi che non vengono asciugati e ben arieggiati si può formare della
muffa, che non rappresenta un difetto di produzione.
Non è possibile escludere uno scolorimento del materiale dovuto all’esposizione ai
raggi solari, al sudore, ai detergenti di pulizia, all'usura o a lavaggi troppo frequenti;
non si tratta dunque di vizi del prodotto.
Si prega di controllare al momento dell’acquisto che tutte le parti in stoffa, le
cuciture, i bottoni e le chiusure lampo siano cucite e funzionino correttamente.
Ruote consumate sono normali conseguenze dell’usura. Danni dovuti a cause
esterne non rappresentano difetti del prodotto. Un leggero sbilanciamento non può
essere evitato e pertanto non rappresenta un difetto del prodotto.
Controllare il prodotto al momento dell’acquisto per evitare possibili reclami
successivi. Se successivamente si dovessero presentare dei difetti, comunicarli
immediatamente al proprio rivenditore di fiducia. Questi si metterà in contatto con TFK
per discutere le misure da adottare. TFK non accetta spedizioni senza preavviso o non
affrancate.
*) valida solo nell’UE. Negli altri Paesi valgono le rispettivi norme vigenti in
materia.”

16
Instrucciones de uso y condiciones de garantía
Muy bienvenido al mundo de TFK.
Antes de utilizar, tómese unos minutos para leer cuidadosamente las
instrucciones que siguen. IMPORTANTE: A continuación, guarde el
manual cuidadosamente, para futuras consultas. ¡El incumplimiento
de estas instrucciones puede poner en peligro la seguridad del niño!
INSTRUCCIONES DE SEGURIDAD + ADVERTENCIAS
ADVERTENCIA: ¡Nunca deje a su niño solo en el coche!
ADVERTENCIA: Esta unidad de asiento no es adecuada para niños
menores de 6 meses. ¡Peso máximo de 15 kg! ¡Adecuado para el
transporte de un máximo de dos niños!
ADVERTENCIA: ¡Este coche es adecuado para niños a partir de 0
meses cuando está equipado con un dispositivo para gemelos!
ADVERTENCIA: ¡Antes de usar, asegúrese de que todos los
dispositivos de bloqueo están cerrados!
ADVERTENCIA: Al plegar y desplegar el coche para los niños,
asegúrese de que su hijo se encuentra apartado del coche, a fin de
evitar daños personales.
ADVERTENCIA: No deje que su niño juegue con el coche.
ADVERTENCIA: ¡Este equipo no es adecuado para el senderismo o
practicar el patinaje!
ADVERTENCIA: ¡Las cargas fijadas en la barra de empuje perjudica la
estabilidad del coche!
ADVERTENCIA: ¡Apretar el cinturón de seguridad de 5 puntos de su
hijo, incluso en el caso de uso de una bolsa para coche de niños!
ADVERTENCIA: Debe asegurarse de que el capazo, la unidad de
asiento o el asiento de coche para niños están instalados
correctamente.
- Los asientos de coche para niños con una plataforma no se
pueden utilizar como cama para dormir o cuna. Si su hijo necesita
dormir, debe utilizar el equipo apropiado para carros de niños, una
cuna o una cama adecuada.
- ¡Nunca estacione el coche sin los frenos de aparcamiento fijados!
- ¡Nunca levante el coche con el niño sentado!
- ¡Nunca utilice el coche en escaleras mecánicas, con el niño
sentado!
- ¡Antes de transportar sobre escaleras u otro tipo de obstáculos,
revise siempre los dispositivos de bloqueo y levante el coche sólo a
través de los componentes firmes de la estructura!

17
- ¡La carga máxima de la canasta es de 5 kg! Cualquier otro
compartimiento del coche puede llevar únicamente máx. 0,5 kg.
- Presión de aire en los neumáticos 1,2 bar
¡Verifique las conexiones a intervalos regulares para un
funcionamiento correcto! ¡En caso de reparaciones, utilice sólo
piezas de recambio originales!
INSTRUCCIONES DE MONTAJE Y USO
- (Fig. I) Para utilizar el Twin Trail, abata la barra de empuje (1), hacia
arriba. El coche es, como tal, abierto. Asegúrese de que las clavijas
encajen de forma audible en el dispositivo de bloqueo (2).
- (Fig. II) El asiento es fijado con 4 botones pulsadores (a) en ambos
lados de la estructura. Además, este se apoya en el reposapiés por
medio de dos botones pulsadores (b). Montar primero en el asiento
de la izquierda, en el sentido de la marcha.
- (Fig. III) Encajar la cobertura en los soportes (4), en la barra exterior,
y el soporte en la barra intermedia. A continuación, la cobertura se
fija por medio de dos botones pulsadores (c), en el asiento y en la
estructura (d). Puede ser fijada, además, en la barra intermedia con
una correa. Al abrir el cierre (5), la cobertura se puede abrir más
adelante.
- (Fig. IV) Para hacer el montaje de las ruedas traseras, encajar los
ejes (6) en la estructura, de modo que los frenos asienten en el
soporte. Fijar los ganchos de bloqueo (7) en el freno (8). Si desea
quitar las ruedas, suelte el cable del freno (7) y presione el botón de
canguro en el centro de la rueda. En ese momento, será posible
quitar las ruedas.
- (Fig. V) Instale la rueda delantera (9) en la abertura prevista a tal
fin, hasta que encaje de forma audible. En la posición 1, la rueda
delantera se puede girar libremente (9) y en la posición 2 se puede
fijar. Al pulsar el botón rojo con la flecha (10), la rueda se puede
quitar por debajo. En el soporte de la rueda se encuentran 2 tornillos
(11), con los cuales puede ajustar el curso recto del Twin Trail, si es
necesario.

18
- (Fig. VI) Los dos respaldos del coche se pueden ajustar de manera
continua con la correa. Para ello, presione las dos piezas de plástico
(13) y ajuste la escuadra del asiento con la correa.
- (Fig. VII) El reposapiés se puede plegar hacia arriba. Bloquéelo con
el dispositivo para descansar los pies (14).
- (Fig. VIII) El cinturón de seguridad se aprieta correctamente
cuando las dos hebillas (15) encajen audiblemente en la cerradura
del cinturón de seguridad. Para abrir, sólo tiene que pulsar el botón
en el centro del soporte (16). El cinturón se puede adaptar al
tamaño del niño, con el sistema de sujeción x, y, z. El cinturón se fija
en los 5 puntos x, y, z.
- (Fig. IX) Encaje la barra abdominal, por arriba, en los agujeros de la
estructura. Fije la barra abdominal, usando las palancas de sujeción
(17). Al pulsar los botones rojos (18) de los lados izquierdo y derecho,
es posible moverla para varias posiciones.
- (Fig. X) La altura de la barra de empuje se puede arreglar
presionando las dos articulaciones de ajuste (23).
- (Fig. XI) El freno de mano funciona como freno de aparcamiento y
de arranque en simultáneo. Para activar el freno de aparcamiento,
tire completamente la palanca del freno (20) y ajuste la palanca de
estacionamiento (21) de manera que la palanca de freno quede
bien apretada (20) y los frenos permanentemente bloqueados. Si se
verifica una reducción del efecto de frenado, es posible realizar un
ajuste. Para ello, gire el tornillo de ajuste (22) en la palanca de freno,
en la dirección opuesta a las agujas del reloj, y compruebe el efecto
de frenado.
- (Fig. XII) Para plegar el Twin Trail, es necesario tirar de los dos
dispositivos de bloqueo (23) hacia arriba. Estos permanecen abiertos
de forma automática. A continuación, el mango (24) se puede tirar
hacia adelante. La estructura se pliega automáticamente.
- (Fig. XIII) Cerrar la protección de transporte (25) en la estructura,
para que el Joggster Trail no se despliegue inadvertidamente.
- (Fig. XIV) Si viaja con Twin Trail en áreas no protegidas, fijar el
cinturón de seguridad provisto en el eje trasero. A continuación, fije
la correa elástica en su muñeca.

19
INSTRUCCIONES DE MANTENIMIENTO
-Para limpiar todas las piezas, utilice un paño húmedo.
-No utilice detergentes ni lubricantes agresivos.
-Aplique aceite en spray en las articulaciones y los cojinetes de las ruedas para que
funcionen con suavidad.
-Las fundas del asiento se pueden lavar a mano a 30°. No las lave a máquina ni las
introduzca en la secadora.
-En ocasiones, las ruedas pueden dejar marcas negras en el suelo. Retire las cosas
que se enganchen en las ruedas (p. ej. piedras) para evitar daños en el suelo.
CONDICIONES DE GARANTÍA
En caso de reclamación justificada, se aplicará la normativa legal. Conserve el recibo
de la compra como comprobante durante el período de garantía legal. Ésta es de 2
años y empieza cuando se le entrega el cochecito. Las deficiencias del producto
quedan limitadas a defectos de material y fabricación que ya existían en el momento
de la entrega. La garantía no cubre:
• Síntomas naturales de desgaste y daños ocasionados por el uso excesivo.
• Daños derivados de una utilización inadecuada o incorrecta.
• Daños derivados de un montaje y la puesta en funcionamiento inadecuados.
• Daños derivados de un manejo o mantenimiento negligentes.
• Daños derivados de alteraciones improcedentes del cochecito.
Notifique los defectos inmediatamente para evitar daños mayores.
Motivos de reclamación
Los productos de TFK se fabrican principalmente a base de aluminio y, por tanto, son
inoxidables. Sin embargo algunas piezas están lacadas, galvanizadas o disponen de
otro tipo de protección en la superficie. En función del mantenimiento y el uso, estas
piezas se pueden oxidar. De ser así, esto no se considera un defecto.
Los rasguños son síntomas normales de desgaste y no se consideran un defecto.
Los tejidos húmedos que no se sequen ni ventilen lo suficiente pueden
enmohecerse. Esto no se considera un defecto de fabricación.
La luz del sol, el sudor, los detergentes, el roce o un lavado muy frecuente pueden
decolorar el tejido, lo cual no se considera un defecto.
Al comprar el producto, le recomendamos que compruebe si el tejido, las costuras
y las cremalleras están bien cosidos y funcionan correctamente.
Después de un uso continuado, las ruedas presentarán signos naturales de
desgaste. Los daños derivados de acciones externas no se consideran un defecto.
Es inevitable que pueda haber algún desequilibrio en el cochecito, lo cual no se
considera un defecto.
Compruebe por norma el producto al recibirlo para evitar posteriores reclamaciones.
Si detecta una tara posteriormente, diríjase a su distribuidor lo antes posible. Éste se
pondrá en contacto con nosotros para saber cómo proceder. TFK no acepta envíos
sin previo aviso y sin autorización.
*) válido sólo en la UE. En los demás países se aplicarán los plazos establecidos por la
ley.

20
Notice d’utilisation et dispositions de garantie
Bienvenue dans le monde de TFK.
Nous vous prions de bien vouloir consacrer quelques minutes à la
lecture des consignes suivantes avant la première utilisation.
IMPORTANT : conservez-les ensuite pour vous y reporter
ultérieurement en cas de besoin. Si vous ne respectez pas ces
consignes, la sécurité de votre enfant peut être mise en danger !
CONSIGNES DE SÉCURITÉ + AVERTISSEMENTS
AVERTISSEMENT : ne laissez pas votre enfant sans surveillance !
AVERTISSEMENT : ce groupe de sièges est destiné aux enfants de
moins de 6 mois et dont le poids maximal n’est pas supérieur à
15 kg ! Transportez deux enfants au maximum !
AVERTISSEMENT : cette poussette est prévue pour être utilisée avec
une nacelle pour jumeaux accueillant des enfants dès 0 mois !
AVERTISSEMENT : assurez-vous avant l’utilisation que tous les blocages
sont bien fermés !
AVERTISSEMENT : assurez-vous que votre enfant se trouve hors de
portée lorsque vous dépliez et repliez la poussette afin de ne pas le
blesser.
AVERTISSEMENT : ne laissez pas votre enfant jouer avec la poussette.
AVERTISSEMENT : ce produit n’est pas adapté au jogging ou au roller
skating !
AVERTISSEMENT : les charges fixées au guidon nuisent à la stabilité de
la poussette !
AVERTISSEMENT : attachez toujours votre enfant avec le harnais
d’attache à 5 points, même lorsque vous utilisez une chancelière !
AVERTISSEMENT : vérifiez avant toute utilisation que la nacelle, le
groupe de sièges ou le siège auto pour enfants est bien fixé.
- Les sièges auto pour enfants utilisés en combinaison avec un châssis
ne remplacent ni un berceau ni un lit pour enfants. Si votre enfant a
besoin de dormir, il doit être placé dans une nacelle, un berceau ou
un lit approprié.
- Ne garez jamais la poussette sans avoir serré le frein de
stationnement !
- Ne soulevez jamais la poussette lorsque votre enfant y est assis !
- N’utilisez pas d’escaliers (mécaniques) si votre enfant est assis dans
la poussette !
- Vérifiez impérativement les blocages lorsque vous portez la
poussette dans les escaliers ou par-dessus d’autres obstacles et ne
soulevez la poussette que par les parties fixes du châssis !
Table of contents
Languages:
Other TFK Stroller manuals
