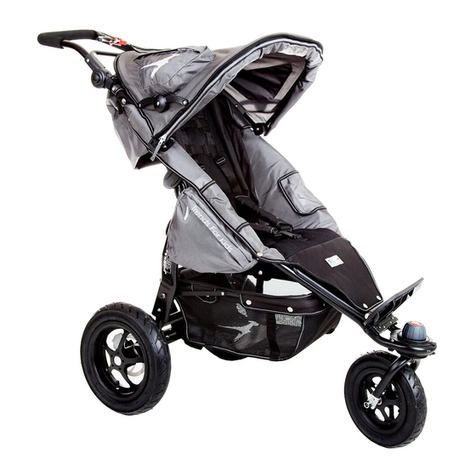
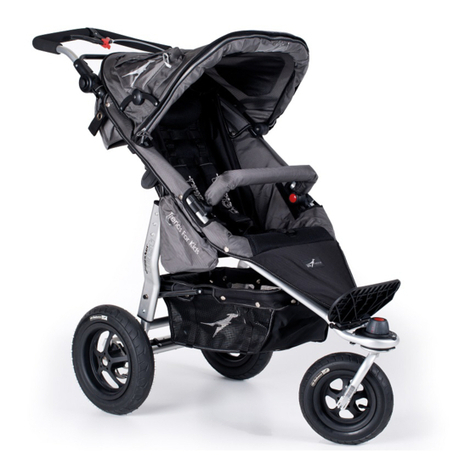
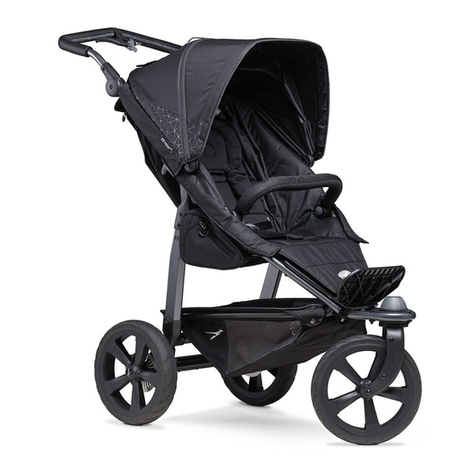
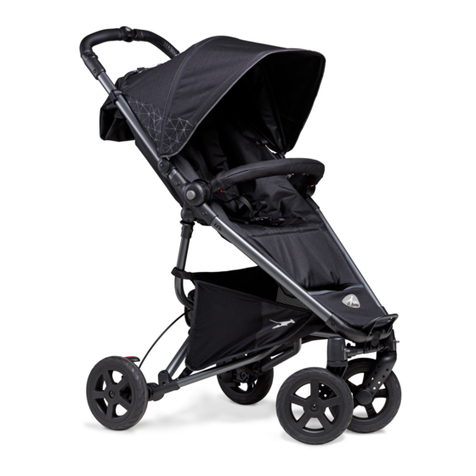
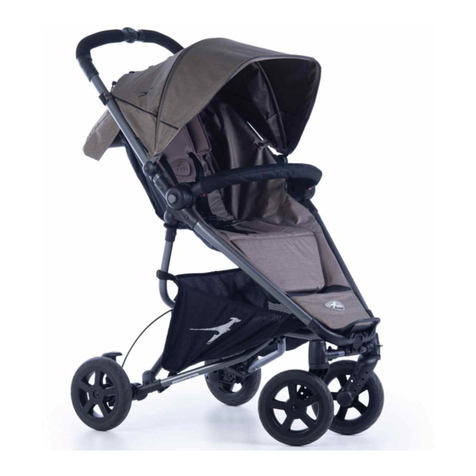
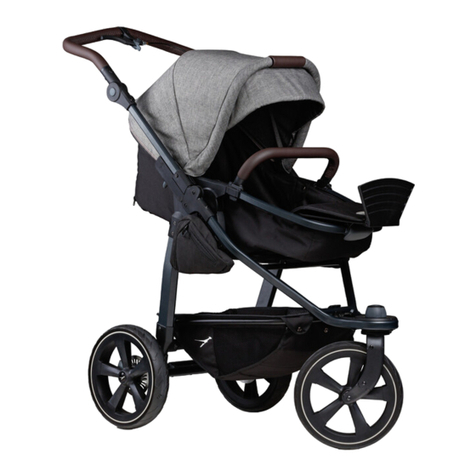
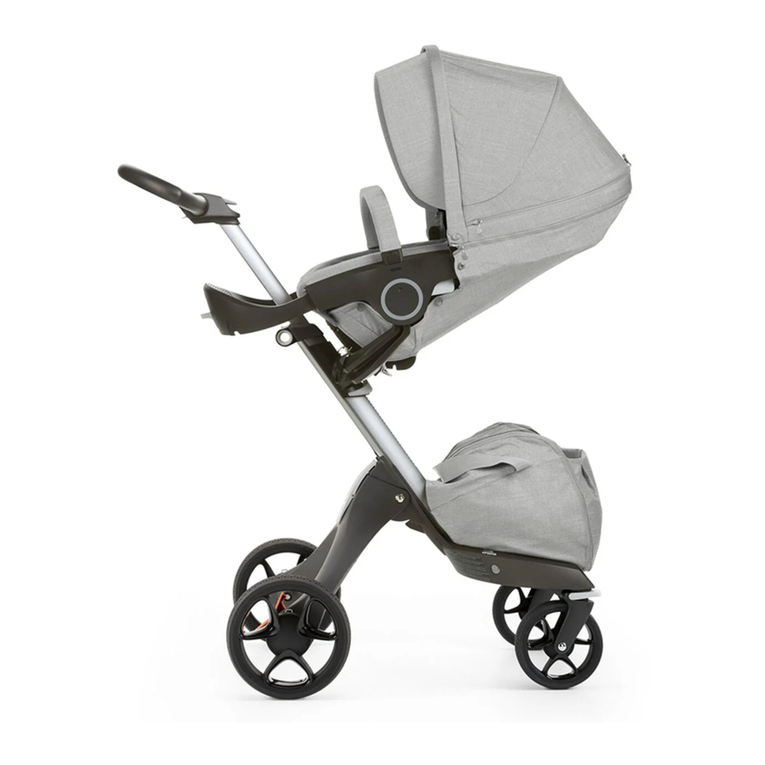
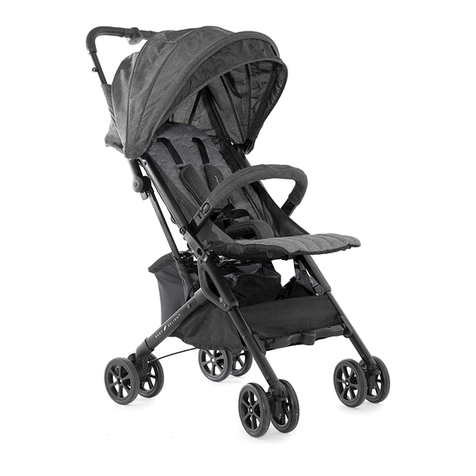
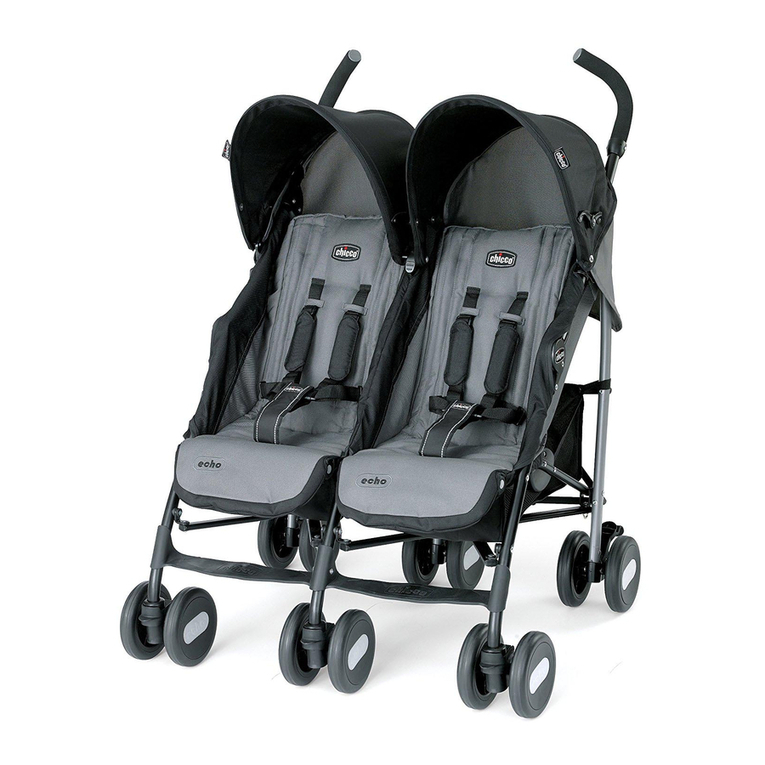
TFK mono combi User manual

1
Gebrauchsanleitung
Operating Manual
Notice d’utilisation
Istruzioni d’uso
Instrucciones de uso
Gebruiksaanwijzing
Návod k obsluze
Návod na použitie
Instrukcja obsługi
Инструкция по эксплуатации

2

3
DE Gebrauchsanleitung und Garantiebestimmungen 4
GB operating manual and warranty conditions 8
FR Notice d’utilisation et dispositions de garantie 12
IT Istruzioni d’uso e condizioni di garanzia 16
ES Instrucciones de uso y condiciones de garantía 20
NL Gebruiksaanwijzing en garantiebepalingen 24
CZ Návod k obsluze a zàruční podmínky 28
SK Návod na použitie a podmienky záruky 32
PL Instrukcja obsługi oraz warunki gwarancji 36
RU Инструкция по эксплуатации и гарантийные условия 40

4
Gebrauchsanleitung und Garantiebestimmungen
Herzlich willkommen in der Welt von TFK.
Bitte nehmen Sie sich ein Paar Minuten Zeit und lesen Sie die folgenden
Hinweise vor der Benutzung sorgfältig durch.
WICHTIG: BITTE SORGFÄLTIG LESEN UND FÜR SPÄTERES NACHLESEN UNBEDINGT
AUFBEWAHREN.Wenn Sie diese Hinweise nicht beachten, kann die Sicherheit
Ihres Kindes beeinträchtigt werden!
WARNUNG Dieses Erzeugnis ist nicht zum Joggen oder Skaten geeignet.
WARNUNG Beachten Sie auch die Anleitung zur Benutzung des Gestells.
Warnungen und Hinweise zur Verwendung als Wanne
-WARNUNG Dieses Produkt ist nur für ein Kind geeignet, das nicht
selbstständig sitzen, sich herumdrehen und sich nicht auf seine Hände und
Knie hochstemmen kann. Max. Gewicht des Kindes in Liegeposition: 9kg.
-WARNUNG Nur auf einem festen, waagerechten und trockenen
Untergrund verwenden.
-WARNUNG Lassen Sie andere Kinder nicht unbeaufsichtigt in der Nähe der
Tragetasche spielen.
-WARNUNG Verwenden Sie die Tragetasche nicht, wenn ein Teil gebrochen
oder eingerissen ist oder fehlt.
-Höchstgewicht des Kindes bei Benutzung in Liegeposition: 9 kg.
-Bitte greifen Sie den Griff der Kombieinheit so, dass der Kopf des Kindes in
der Tragetasche niemals niedriger als dessen Körper ist.
-Bringen Sie den Boden der Kombieinheit in seine niedrigste Stellung vor
dem Anheben oder Tragen der Tasche.
-Verwenden sie keine zusätzliche Matratze!
-Untersuchen Sie regelmäßig die Griffe und den Boden auf
Beschädigungen und Abnutzungserscheinungen.
-Stellen Sie sicher, dass sich die Griffe in der richtigen Nutzungsstellung
befinden, wenn sie die Wanne tragen oder anheben.
-Platzieren Sie die Kombieinheit NICHT in der Nähe eines offenen Feuers und
anderer Hitzequellen.
-Keine TFK - fremden Zubehörteile montieren!
Warnungen und Hinweise zur Verwendung als Sitz
-WARNUNG Lassen Sie das Kind nie unbeaufsichtigt.
-WARNUNG Vergewissern Sie sich vor Gebrauch, dass alle Verriegelungen
eingerastet sind.

5
-WARNUNG Vergewissern Sie sich, dass das Kind beim Aufklappen und
Zusammenklappen des Wagens außer Reichweite ist, um Verletzungen zu
vermeiden.
-WARNUNG Lassen Sie das Kind nicht mit dem Produkt spielen.
-WARNUNG Diese Sitzeinheit ist für Kinder unter 6 Monaten nicht geeignet.
-WARNUNG Verwenden Sie immer das Rückhaltesystem.
-WARNUNG Vergewissern Sie sich vor der Verwendung, dass der
Kinderwagenaufsatz oder der Sitzeinheit oder die Befestigungselemente
des Autositzes korrekt eingerastet sind.
-Höchstgewicht des Kindes bei Benutzung in Sitzposition: 22 kg.
-Platzieren Sie die Kombieinheit NICHT in der Nähe eines offenen Feuers und
anderer Hitzequellen.
-Keine TFK - fremden Zubehörteile montieren!
Bitte überprüfen Sie in regelmäßigen Abständen die Bremsen und
Verbindungen auf ihre Funktion! Verwenden Sie im Reparaturfall nur originale
Ersatzteile von TFK!
GEBRAUCHS- UND MONTAGEANLEITUNG
Die Bedienung der Kombieinheit ist identisch für den Mono und den Duo.
Einzig die Breite der Wanne ist unterschiedlich. Die genaue Bezeichnugn und
Artikelnummer finden sie am Boden der Kombieinheit.
Abb. 1: Nachdem sie die Wanne aus dem Karton entnommen haben,
klappen sie beide Gelenke (1) auf und stecken Sie die Standfußbügel (2) ein.
Abb. 2: Positionieren Sie die Wanne über die Pins (3) an den Rahmenstreben
und stecken Sie sie auf, bis sie hörbar einrastet. Um die Wanne wieder
abzunehmen, halten Sie sie mit einer Hand am Trage-/Verdeckgriff (4) und mit
der anderen lösen Sie die Verriegelung (5) am Kopfende der Wanne durch
drehen des Entriegelungsgriffs. Nehmen Sie sie nun nach oben ab. Sie können
die Wanne in beide Richtungen aufstecken. Auch in der Sitzposition.
Abb. 3: Bis zu einem Alter von ca. neun Monaten benutzen Sie die Wanne
ausschließlich in der Liegeposition. Um den Liegekomfort für ihr Kind zu verbessern,
knöpfen sie den 5-Punkt-Gurt aus und legen Sie die Matratze (6) ein.
Abb. 4: Über den offenen Fußbereich können Sie die mitgelieferte Winddecke
(7) mit dem Reißverschluß und zwei Druckknöpfen befestigen. Um das
Verdeck aufzuklappen, drücken sie beide Knöpfe (8) und klappen sie das
Verdeck nach hinten.

6
Abb. 5: Die Lehne der Wanne kann durch zusammendrücken der Arretierung
(9) und gleichzeitigem ziehen des Bandes (10) stufenlos eingestellt werden.
Das Bandende können Sie mit dem Klettverschluss an der Rückenlehne
befestigen. Für die Entwicklung ihres Kindes ist es aber wichtig, dass Sie die
Liegefläche der Wanne so lange wie möglich waagerecht lassen.
Abb. 6: Wenn Sie die Wanne in Sitzposition bringen möchten, entfernen Sie die
Matratze und befestigen Sie den 5-Punkt-Gurt (11) und den Bauchbügel (12). Der
Sicherheitsgurt (11) wird an den 5 Enden mit einem Klips am Sitz befestigt. Den Gurt
schließen Sie, indem sie die beiden Teile (13) an den Gurtbändern (links und
rechts) zusammenfügen und in das Gurtschloss (14) stecken, bis hörbar einrasten.
Zum Öffnen drücken Sie einfach den Knopf in der Mitte des Gurtschlosses (14). Die
Gurte können an die Größe ihres Kindes mit dem Spannsystem und der
Höhenarretierung angepasst werden. Um den Einstieg zu erleichtern, können Sie
die Gurte links und rechts an den Schlaufen (15) einhängen. Der Bauchbügel (12)
wird links und rechts unter dem Drehgelenk auf dem Rahmen befestigt.
Positionieren Sie ihn und schließen Sie die Verriegelungen (a).
Abb. 7: Um die Wanne in die zwei verschiedenen Positionen zu schwenken,
betätigen Sie die Schiebeknöpfe (16) und bringen Sie sie in die gewünschte Position.
ACHTUNG: Schwenken Sie die Wanne nur ohne Kind! Sie können die Wanne
mit oder ohne zusätzliches Fußbrett in der Sitzposition verwenden.
Abb. 8: Befestigen Sie das zusätzliche Fußbrett (17), indem sie die
Teleskopstange in den zwei dafür vorgesehenen Aufnahmen im Rahmen
einrasten lassen. Auf der Rückseite des Fußbretts können Sie die zwei
Schieberegler der Teleskopstange zusammendrücken, das erleichtert das
Anbringen und ist nötig um das Fußbrett abzunehmen. Abschließend
befestigen Sie den Bezug mit den Druckknöpfen (a) auf dem Fußbrett.
Entfernen Sie die Markierungen am Rahmen, sie dienen nur der Kenntlich-
machung dieser Position.
Abb. 9: Sie können eine integrierte Sonnenblende (18) aus dem Verdeck
schwenken. Zur besseren Belüftung der Wanne, können Sie am Kopfende des
Verdecks und der Wanne durch öffnen der Reißverschlüsse (19) für
Frischluftzufuhr sorgen. Klappen Sie die geöffneten Bezüge nach oben. Am
Fußende sichern zwei Magnete die geöffnete klappe in dieser Position. Wenn
Sie den Reißverschluss der Fußdecke nicht komplett öffnen, können Sie diese
zur Seite wegklappen.

7
PFLEGEHINWEISE
-Reinigen Sie alle Teile mit einem feuchten Tuch.
-Benutzen Sie keine aggressiven Reinigungs- oder Schmiermittel!
-Ölspray an den Faltgelenken und Radlagern stellt die Leichtgängigkeit sicher.
-Sie können den Sitzbezug mit der Hand bei 30° waschen. Nicht in die
Waschmaschine oder Trockner geben
-Die Bereifung kann unter Umständen zur Verfärbung des Bodenbelags führen.
Fremdkörper (z.B. Steinchen) in den Reifen müssen entfernt werden um eine
eventuelle Beschädigung von Bodenbelägen zu vermeiden.
GARANTIEBEDINGUNGEN
Bei berechtigten Beanstandungen gelten die gesetzlichen Bestimmungen. Zum
Nachweis des Erwerbes, bewahren Sie bitte den Kaufbeleg für die Dauer der
gesetzlichen Verjährungsfrist auf. Diese beträgt 2 Jahre *) und beginnt mit der Übergabe
des Produkts an Sie. Falls bei diesem Produkt Mängel bestehen, beziehen sich diese auf
sämtliche Material- und Herstellungsfehler, die zum Zeitpunkt der Übergabe vorliegen.
Keine Ansprüche bestehen für:
• Natürlicher Verschleiß und Schäden durch übermäßige Beanspruchung.
• Schäden durch ungeeignete oder unsachgemäße Verwendung.
• Schäden durch fehlerhafte Montage und Inbetriebnahme.
• Schäden durch nachlässige Behandlung oder Wartung.
• Schäden durch unsachgemäße Änderungen am Wagen.
Fehler müssen unverzüglich gemeldet werden, damit keine Folgeschäden entstehen!
Reklamationsfall oder nicht?
TFK Produkte sind meist zu einem hohen Teil aus Aluminium gefertigt und somit rostfrei.
Manche Teile sind jedoch auch lackiert, verzinkt oder haben eine sonstigen
Oberflächenschutz. Je nach Wartung oder Beanspruchung können diese Teile auch
rosten. Hierbei handelt es sich dann um keinen Mangel.
•Kratzer sind normale Verschleißerscheinungen und kein Mangel.
•Feuchte Textilien, die nicht getrocknet und ausreichend gelüftet werden, können
schimmeln und stellen keinen produktionsbedingten Mangel dar.
•Durch Sonneneinstrahlung, Schweiß, Reinigungsmittel, Abrieb oder zu häufiges
Waschen ist ein Ausbleichen nicht auszuschließen und somit kein Mangel.
•Bitte prüfen Sie beim Kauf genau, ob alle Stoffteile, Nähte, Druckknöpfe und
Reisverschlüsse ordnungsgemäß vernäht sind und funktionell in Ordnung sind.
•Abgefahrene Räder sind natürliche Verschleißerscheinungen. Schäden durch äußere
Einwirkungen sind kein Mangel. Leichte Unwucht ist nicht vermeidbar und stellt keinen
Mangel dar.
Der Übergabe-Check soll immer durchgeführt werden, um Reklamationen schon im
Vorfeld zu vermeiden. Wenn Sie später einen Fehler feststellen, melden Sie diesen
unverzüglich bei Ihrem Händler. Dieser wird sich bei uns melden, um die weitere
Vorgehensweise zu besprechen. Unangemeldete oder unfreie Sendungen bei TFK
werden nicht akzeptiert.
*) gültig nur in der EU. In anderen Ländern sind die jeweils gesetzlichen Fristen gültig.

8
Instructions for use and warranty conditions
Welcome to the world of TFK.
Please take a few minutes to read the following instructions carefully
before use. IMPORTANT: PLEASE READ CAREFULLY AND KEEP FOR FUTURE
REFERENCE. If you do not follow these instructions, the safety of your
child may be compromised!
WARNING This product is not suitable for jogging or skating.
WARNING Also observe the instructions for using the frame.
Warnings and instructions for use as a carry cot
- WARNING This product is only suitable for a child who cannot sit up
independently, roll over and stand up on his/her hands and
knees. Max. Weight of child in lying position: 9kg.
- WARNING Use only on a firm level and dry surface.
- WARNING Do not allow other children to play unsupervised near the
carrycot.
- WARNING Do not use the carrycot if any part is broken, torn or missing.
- Maximum weight of the child when used in the lying position: 9 kg.
- Please grasp the handle of the combi unit so that the child's head is
never lower than his/her body in the carrycot.
- Place the bottom of the combi unit in its lowest position before
lifting or carrying the bag.
- Do not use an additional mattress!
- Regularly inspect the handles and the floor for damage and signs of wear.
- Make sure that the handles are in the correct position for use when
carrying or lifting the tub.
- DO NOT place the combi unit near an open fire or other sources of heat.
- Do not fit any TFK - foreign accessories!
Warnings and instructions for use as a seat
- WARNING Never leave the child unattended.
- WARNING Make sure that all locks are engaged before use.
- WARNING Make sure the child is out of reach when unfolding and
folding the stroller to avoid injury.
- WARNING Do not allow the child to play with the product.

9
- WARNING This seat unit is not suitable for children under 6 months.
- WARNING Always use the restraint system.
- WARNING Before use, make sure that the pushchair attachment or
the seat unit or the car seat fasteners are correctly engaged.
- Maximum weight of the child when used in the sitting position: 22 kg.
- DO NOT place the combi unit near an open fire or other sources of heat.
- Do not fit any TFK - foreign accessories!
Please check the brakes and connections for proper function at regular
intervals! In case of repair, only use original spare parts from TFK!
OPERATING AND ASSEMBLY INSTRUCTIONS
Fig. 1: After taking the combi-unit out of the box, open both joints (1)
and insert the foot stirrups (2).
Fig. 2: Position the combi-unit over the pins (3) on the frame struts and
push it on until it audibly clicks into place. To remove the combi-unit
again, hold it with one hand on the carrying/cover handle (4) and with
the other release the lock (5) at the head end of the combi-unit by
pressing the release handle. Now remove it upwards. You can attach
the combi-unit in both directions. Even in the sitting position.
Fig. 3: Up to an age of approx. nine months, use the combi-unit
exclusively in the reclining position. To improve the lying comfort for
your child, unbutton the 5-point belt and insert the mattress (6).
Fig. 4: Via the open foot area, you can attach the supplied wind cover
(7) with the zipper and two press studs. To open the canopy, press both
buttons (8) and fold the canopy back.
Fig. 5: The backrest of the combi-unit can be adjusted continuously by
pressing the locking device (9) together and simultaneously pulling the
strap (10). You can attach the end of the strap to the backrest using
the hook & loop fastener. However, it is important for the development
of your child that you leave the lying surface of the combi-unit
horizontal for as long as possible.

10
Fig. 6: If you want to bring the combi-unit into the sitting position,
remove the mattress and attach the 5-point belt (11) and the
abdominal support (12). Always secure your child with the 5-point belt.
Close the belt by joining the two buckles (13) at the belt straps (left
and right) and inserting them into the belt buckle (14) until you hear a
click. To open it, simply press the button in the middle of the belt buckle
(14). The straps can be adjusted to the size of your child with the
tensioning system and the height lock. To make it easier to get in, you
can attach the straps to the loops (15) on the left and right. The
bumper bar (12) is attached to the frame on the left and right under
the swivel joint. Position it and close the locks (a). *To make it easier for
your child to get on, open only one lock and swing the bar to the side.
Fig. 7: To swivel the combi-unit to the two different positions, operate
the sliding buttons (16) and move it to the desired position.
ATTENTION: Only swivel the combi-unit without a child! You can use the
combi-unit with or without an additional footplate in the sitting
position.
Fig. 8: Attach the additional foot board (17) by engaging the
telescopic rod in the two slots provided in the frame. At the back of
the footrest you can press the two sliders of the telescopic pole
together, this makes it easier to attach and is necessary to remove the
footrest. Finally, fasten the cover to the footplate with the press studs
(a).
Remove the markings on the frame, they only serve to indicate this
position.
Fig. 9: You can pull an integrated sun visor (18) out of the canopy. For
better ventilation of the combi-unit, you can provide fresh air at the
head end of the canopy and tub by opening the zippers (19). Fold the
open covers upwards. Two magnets at the foot end secure the open
flap in this position. If you do not fully open the zipper of the foot cover,
you can fold it to the side.

11
CARE INSTRUCTIONS
- Clean all parts with a damp cloth.
- Do not use any caustic cleaning or lubricating agents!
- An oil spray on the folding joints and the wheel bearings will guarantee
smooth running.
- You can wash the seat cover by hand at 30°.
Not suitable for a washing machine or tumble dryer!
WARRANTY CONDITIONS
The statutory provisions shall apply for justified complaints. As proof of
purchase, please keep the till receipt for the duration of the statutory period
of limitation. This term is 2 years *) and starts with the handover of the
product to you. Should any faults arise in relation to this product, they shall
involve any faults of material and manufacture that exist at the date of
transfer. Any claims shall be excluded for:
• Natural wear and damage due to excessive stress
• Damage due to unsuitable or improper use
• Damage due to faulty assembly and commissioning
• Damage due to negligent handling or maintenance
• Damage due to improper modifications to the pushchair
Faults must be notified immediately, so that no subsequent damage can be
caused!
A case for complaint or not?
• Most TFK products are produced to a large extent from aluminium and so
are rust-proof. However, some parts are also painted, galvanized or have
other surface protection. These parts may rust, depending on the level of
maintenance and stress. This can therefore not be regarded as a fault.
• Scratches are normal signs of wear and are not a fault.
• Moist textiles that are not dried can moulder and so can not be considered
as a production-related fault.
• The fading of colours due to sunshine, perspiration, cleaning agents,
abrasion or excessively frequent washing cannot be ruled out and so does
not represent a fault.
• Please check carefully at the time of purchase whether all the fabric parts,
seams, press studs and zips are sewn and function properly.
• Worn-down wheels are of course a sign of wear. Damage due to external
influences is not a fault. Slight imbalances are inevitable and do not
represent a fault.
The handover check must always be carried out to prevent inconvenient
problems right at the outset. If you find a fault at a later date, please notify
your authorised dealer immediately. He will then contact us to discuss the
subsequent procedure. Any deliveries to TFK that are unnotified or not
prepaid will not be accepted.
*) valid only in the EU. In other countries according to the respective
warrenty terms.

12
Instructions d'utilisation et conditions de garantie
Bienvenue dans le monde de TFK.
Veuillez prendre quelques minutes et lire attentivement les instructions
suivantes avant l'utilisation. IMPORTANT : Conservez le manuel pour pouvoir
vous y référer ultérieurement. Si vous ne suivez pas ces instructions, la sécurité
de votre enfant risque d'être compromise !
INSTRUCTIONS DE SÉCURITÉ + AVERTISSEMENTS
- AVERTISSEMENT Ne laissez pas votre enfant sans surveillance !
- AVERTISSEMENT Ne portez qu'un seul enfant à la fois !
- AVERTISSEMENT Ce produit ne convient qu'en position couchée pour un
enfant qui n'est pas encore capable de s'asseoir ou de se rouler sur le
côté par lui-même ou qui n'est pas encore capable de se soutenir à
quatre pattes.
- AVERTISSEMENT Cet appareil combiné ne doit pas être utilisé sur un stand.
- AVERTISSEMENT Ne placez l'appareil combiné que sur des surfaces fermes,
horizontales et sèches.
- AVERTISSEMENT Ne laissez pas d'autres enfants jouer sans surveillance à côté
de l'unité combinée.
- AVERTISSEMENT N'utilisez pas la nacelle si une pièce est cassée, déchirée ou
manquante.
- AVERTISSEMENT Utilisez une ceinture de sécurité dès que votre enfant peut
s'asseoir seul.
- AVERTISSEMENT Utilisez toujours la sangle d'entrejambe en combinaison avec
la ceinture abdominale.
- Poids maximal de l'enfant en position couchée : 9 kg.
- Poids maximal de l'enfant en position assise : 15 kg.
- NE placez PAS la nacelle près d'un feu ouvert ou d'une autre source de
chaleur.
- Veuillez saisir la poignée de l'unité combinée de manière à ce que la tête
de l'enfant ne soit jamais plus basse que son corps lorsqu'il est dans la
nacelle.
- N'utilisez pas de matelas supplémentaire !
- Inspectez régulièrement les poignées et le sol pour vérifier s'ils sont
endommagés et usés.
- Veillez à ce que les poignées soient dans la bonne position pour pouvoir
porter ou soulever le transporteur.
Veuillez vérifier régulièrement si les poignées, la base et les connexions
présentent des signes d'usure et de détérioration. Utilisez uniquement des
pièces de rechange d'origine en cas de réparation!

13
LES INSTRUCTIONS D'UTILISATION ET DE MONTAGE
Fig. 1 :
près avoir retiré la nacelle de la boîte, ouvrez les deux joints (1) et insérez les
supports du support (2).
Fig. 2 :
Positionnez la nacelle sur les goupilles (3) des montants du cadre et fixez-la
jusqu'à ce que vous entendiez un déclic. Pour retirer à nouveau la nacelle,
tenez-le d'une main sur la poignée supérieure de transport / convertible (4)
et de l'autre, déverrouillez le verrou (5) à la tête de la nacelle en tournant la
poignée de déverrouillage. Maintenant, retirez-le vers le haut. Vous pouvez
fixer la nacelle dans les deux sens. Même en position assise.
Fig. 3 :
Jusqu'à l'âge d'environ neuf mois, utilisez la nacelle exclusivement en
position couchée. Pour améliorer le confort de couchage de votre enfant,
déboutonnez la ceinture à 5 points et insérez le matelas (6).
Fig. 4 :
Vous pouvez fixer le couvre-vent fourni (7) avec la fermeture à glissière et
deux boutons-poussoirs sur la zone de pied ouverte. Pour ouvrir la capote,
appuyez sur les deux boutons (8) et rabattez la capote.
Fig. 5 :
Le dossier de la naccelle peut être réglé en continu en appuyant sur le
dispositif de verrouillage (9) et en tirant simultanément sur la sangle (10).
Vous pouvez attacher l'extrémité de la sangle au dossier à l'aide de la
fermeture Velcro. Cependant, il est important pour le développement de
votre enfant que vous laissiez le plan de couchage de la nacelle horizontal
aussi longtemps que possible.
Fig. 6 :
Si vous voulez mettre la nacelle en position assise, retirez le matelas et
attachez la ceinture à 5 points (11) et le support abdominal (12). Attachez
toujours votre enfant avec la ceinture à 5 points. Fermez la ceinture en
joignant les deux parties (13) aux sangles de la ceinture (gauche et droite) et
en les insérant dans la boucle de ceinture (14) jusqu'à ce que vous
entendiez un clic. Pour l'ouvrir, il suffit d'appuyer sur le bouton situé au milieu
de la boucle de ceinture (14). Les sangles peuvent être ajustées à la taille de
votre enfant grâce au système de tension et au verrouillage de la hauteur.

14
Pour faciliter l'entrée, vous pouvez attacher les sangles aux boucles (15) à
gauche et à droite. La barre ventrale (12) est fixée au cadre à gauche et à
droite sous l'articulation pivotante. Positionnez-le et fermez les serrures (a). *
Pour faciliter l'accès à votre enfant, n'ouvrez qu'une seule serrure et faites
pivoter la barre sur le côté.
Fig. 7 :
Pour faire pivoter la nacelle dans les deux positions différentes, actionnez les
boutons coulissants (16) et déplacez-la dans la position souhaitée.
ATTENTION : Ne faites pivoter la nacelle que sans enfant ! Vous pouvez utiliser
le bain avec ou sans repose-pieds supplémentaire en position assise.
Fig. 8 :
Fixez le repose-pieds supplémentaire (17) en engageant la tige télescopique
dans les deux fentes prévues à cet effet dans le cadre. À l'arrière du repose-
pieds, vous pouvez presser les deux coulisses de la tige télescopique
ensemble, ce qui facilite la fixation et est nécessaire pour retirer le repose-
pieds. Enfin, fixez le couvercle à la semelle à l'aide des boutons-pression (a).
Enlevez les marquages sur le cadre, ils ne servent qu'à indiquer cette
position.
Fig. 9 :
Vous pouvez faire pivoter un pare-soleil intégré (18) hors de l'auvent. Pour
une meilleure ventilation de la nacelle, vous pouvez fournir de l'air frais à
l'extrémité supérieure du baldaquin et de la nacelle en ouvrant les
fermetures éclair (19). Rabattez les couvercles ouverts vers le haut. Deux
aimants situés à l'extrémité du pied maintiennent le volet ouvert dans cette
position. Si vous n'ouvrez pas complètement la fermeture éclair du couvre-
pied, vous pouvez le replier sur le côté.

15
CONSIGNES D’ENTRETIEN
- Nettoyez tous les éléments avec un chiffon humide.
- N’utilisez pas de détergents ou lubrifiants agressifs !
- Un aérosol lubrifiant permet d’assurer la souplesse des articulations de
pliage.
- Vous pouvez laver les housses à 30° à la main. Ne mettez pas la housse
dans la machine à laver ou le sèche-linge !
CONDITIONS DE GARANTIE
Les dispositions légales en vigueur s’appliquent aux réclamations justifiées.
Veuillez conserver le justificatif d’achat pendant toute la durée de garantie
légale comme preuve de votre achat. La durée de garantie légale est de 2
ans *) et débute avec la remise de la voiture entre vos mains. Si ce produit
présente des défauts, ceux-ci concernent l’ensemble des défauts de
matériels et de fabrication présents au moment de la remise. Les dommages
suivants ne sont pas couverts par la garantie :
• l’usure naturelle et les dommages dus à une utilisation excessive
• les dommages dus à une utilisation inadaptée ou non conforme
• les dommages dus à un montage et une mise en service erronés
• les dommages dus à un manque d’entretien et de maintenance
• les dommages dus à des modifications inadaptées de la voiture
Les défauts doivent être signalés immédiatement, afin d’éviter tous
dommages consécutifs !
Cas de réclamation ou non ?
Les produits TFK sont fabriqués essentiellement en aluminium, et ne rouillent
donc pas. Cependant, certains éléments sont laqués, galvanisés ou
protégés par un autre type de revêtement. En fonction de l’entretien ou de
l’utilisation, ces éléments peuvent rouiller. Il ne s’agit alors pas d’un défaut.
• Les griffures sont des signes d’usure normaux et ne constituent pas un défaut.
• Les tissus humides qui ne sont pas séchés correctement et aérés
suffisamment peuvent moisir, ce qui ne constitue également pas un défaut
de fabrication.
• L’exposition à la lumière directe du soleil, la transpiration, les produits de
nettoyage, le frottement ou des lavages fréquents peuvent entraîner une
décoloration du tissu, ce qui ne constitue alors pas un défaut.
• Lors de l’achat, veuillez vérifier soigneusement si tous les éléments en tissus,
les coutures, les boutons à pression et fermetures à glissière sont cousus
correctement et fonctionnent sans problèmes.
Le contrôle de remise doit toujours être effectué, afin d‘éviter toute
réclamation ultérieure. Si vous constatez ultérieurement un défaut, vous
devez le signaler immédiatement à votre revendeur. Celui-ci nous
contactera pour convenir de la marche à suivre. Les envois non annoncés
ou contre remboursement ne sont pas acceptés par TFK.
*) applicable uniquement en Union européenne. En dehors de l’Union
européenne s’appliquent les délais légaux du pays respectif.

16
Istruzioni per l'uso e condizioni di garanzia
Benvenuti nel mondo di TFK.
Si prega di prendersi qualche minuto e di leggere attentamente le seguenti
istruzioni prima dell'uso. IMPORTANTE: Conservare il manuale per riferimento
futuro. Se non seguite queste istruzioni, la sicurezza del vostro bambino
potrebbe essere compromessa!
ISTRUZIONI DI SICUREZZA + AVVERTENZE
- ATTENZIONE Non lasciate il vostro bambino incustodito!
- ATTENZIONE Portare un solo bambino alla volta!
- ATTENZIONE Questo prodotto è adatto solo in posizione sdraiata per un
bambino che non è ancora in grado di sedersi o di rotolare di lato da solo
o che non è ancora in grado di sostenersi sulle mani e sulle ginocchia.
- ATTENZIONE Questa unità combinata non deve essere utilizzata su un
supporto.
- ATTENZIONE Posizionare l'unità combinata solo su superfici solide, orizzontali
e asciutte.
- ATTENZIONE Non permettere ad altri bambini di giocare incustoditi
accanto all'unità combinata.
- ATTENZIONE Non utilizzare il sacchetto di trasporto se una qualsiasi parte è
rotta, strappata o mancante.
- ATTENZIONE Utilizzare una cintura di sicurezza non appena il bambino è in
grado di sedersi autonomamente.
- ATTENZIONE Utilizzare sempre la cinghia inguinale in combinazione con la
cintura addominale.
- Peso massimo del bambino in posizione reclinata: 9 kg.
- Peso massimo del bambino in posizione seduta: 15 kg.
- NON posizionare la vasca vicino a un fuoco aperto o ad altre fonti di
calore.
- Si prega di afferrare l'impugnatura dell'unità combinata in modo che la
testa del bambino non sia mai più bassa del suo corpo quando è nella
navicella.
- Non utilizzare un materasso aggiuntivo!
- Ispezionare regolarmente le maniglie e il pavimento per verificare la
presenza di danni e usura.
- Assicurarsi che le maniglie siano nella posizione corretta per l'uso quando si
trasporta o si solleva il trasportatore.
Si prega di controllare regolarmente le maniglie, la base e i collegamenti per
verificare la presenza di segni di usura e danni. In caso di riparazione
utilizzare solo pezzi di ricambio originali!

17
ISTRUZIONI PER L'USO E IL MONTAGGIO
Fig. 1:
Dopo aver tolto la vasca dalla scatola, aprire entrambe i collegamenti (1) e
inserire le staffe del piede (2) in modo che quella con la traversa punti
all'estremità del piede.
Fig. 2:
Posizionare la vasca sopra i perni (3) sui montanti del telaio e spingerla fino a
quando non scatta in posizione. Per rimuovere di nuovo la vasca, tenerla
con una mano sulla maniglia di trasporto/copertura (4) e con l'altra
sbloccare la serratura (5) all'estremità della testa della vasca ruotando la
maniglia di sblocco. Ora rimuovetelo verso l'alto. È possibile fissare la vasca
in entrambe le direzioni. Anche in posizione seduta.
Fig. 3:
Fino ad un'età di circa nove mesi, utilizzare la vasca esclusivamente in
posizione reclinata. Per migliorare il comfort di riposo del vostro bambino,
sbottonate la cintura a 5 punti e inserite il materasso (6).
Fig. 4:
Attraverso la zona aperta del piede è possibile fissare la copertura antivento
in dotazione (7) con la cerniera lampo e due chiusure a scatto. Per aprire il
tettuccio, premere entrambi i pulsanti (8) e ripiegare il tettuccio.
Fig. 5:
Lo schienale del piatto può essere regolato in continuo premendo il
dispositivo di bloccaggio (9) e contemporaneamente tirando la cinghia
(10). È possibile fissare l'estremità del cinturino allo schienale utilizzando la
chiusura in velcro. Tuttavia, è importante per lo sviluppo del vostro bambino
che lasciate la superficie sdraiata della vasca in posizione orizzontale il più a
lungo possibile.
Fig. 6:
Se si desidera portare la vasca in posizione seduta, rimuovere il materasso e
fissare la cintura a 5 punti (11) e il supporto addominale (12). Assicurare
sempre il bambino con la cintura a 5 punti. Chiudere la cintura unendo le
due parti (13) in corrispondenza delle cinghie della cintura (sinistra e destra)
e inserendole nella fibbia della cintura (14) fino a sentire un clic. Per aprirla è
sufficiente premere il pulsante al centro della fibbia della cintura (14). Le
cinghie possono essere adattate alle dimensioni del vostro bambino con il
sistema di tensionamento e il blocco dell'altezza. Per facilitare l'ingresso, è

18
possibile fissare le cinghie ai passanti (15) a sinistra e a destra. La barra del
ventre (12) è fissata al telaio a sinistra e a destra sotto il giunto girevole.
Posizionarlo e chiudere le serrature (a). *Per facilitare la salita del vostro
bambino, aprite una sola serratura e ruotate la barra di lato.
Fig. 7:
Per far ruotare la vasca nelle due diverse posizioni, azionare i pulsanti
scorrevoli (16) e spostarlo nella posizione desiderata.
ATTENZIONE: Ruotare la vasca solo senza un bambino! È possibile utilizzare
con o senza pedana supplementare in posizione seduta.
Fig. 8:
Fissare il poggiapiedi aggiuntivo (17) agganciando l'asta telescopica nelle
due fessure previste nel telaio. Nella parte posteriore del poggiapiedi è
possibile premere i due cursori dell'asta telescopica insieme, questo rende
più facile il fissaggio ed è necessario rimuovere il poggiapiedi. Infine, fissare il
coperchio alla pedana con i bottoni a pressione (a).
Rimuovere le marcature sul telaio, servono solo ad indicare questa posizione.
Fig. 9:
È possibile ruotare un parasole integrato (18) fuori dal tettuccio. Per una
migliore ventilazione della vasca, è possibile fornire aria fresca all'estremità
superiore del baldacchino e della vasca aprendo le cerniere (19). Piegare i
coperchi aperti verso l'alto. Due magneti all'estremità del piede fissano il
lembo aperto in questa posizione. Se non si apre completamente la cerniera
del coperchio del piede, è possibile piegarla di lato.

19
INDICAZIONI DI MANUTENZIONE
- Pulire tutti gli elementi con un panno umido.
- Non utilizzare detergenti o lubrificanti aggressivi!
- Olio lubrificante sui giunti pieghevoli assicura il facile utilizzo.
- La fodera del seggiolino può essere lavata a mano a 30°. Non lavare a
macchina o mettere nell’asciugabiancheria!
CONDIZIONI DI GARANZIA
In caso di reclami giustificati, vengono applicate le disposizioni di legge.
Conservare lo scontrino come prova d’acquisto per l’intera durata della
garanzia. Essa ha una durata di due anni *) ed inizia con la consegna del
prodotto all’acquirente. Se il prodotto presenta difetti, si tratta di vizi del
materiale o errori di produzione già presenti al momento della consegna. La
garanzia non è valida per
• normale usura e danni causati da eccessiva sollecitazione;
• danni causati da uso improprio o incuria;
• danni causati da montaggio e messa in funzione errati;
• danni causati da uso o manutenzione negligenti;
• danni causati da modifiche improprie al prodotto.
I difetti devono essere comunicati immediatamente al fine di evitare ulteriori danni!
È un caso di reclamo?
I prodotti TFK sono fabbricati in gran parte con alluminio e quindi inossidabili.
Alcuni componenti sono però smaltati, zincati o hanno una protezione
superficiale. A seconda della manutenzione o della sollecitazioni a cui sono
sottoposti, questi componenti possono anche arrugginirsi. In questo caso non
si tratta di difetti del prodotto.
• I graffi sono normali segni d’usura e non rappresentano un vizio del
prodotto.
• Sui tessuti umidi che non vengono asciugati e ben arieggiati si può formare
della muffa, che non rappresenta un difetto di produzione.
• Non è possibile escludere uno scolorimento del materiale dovuto
all’esposizione ai raggi solari, al sudore, ai detergenti di pulizia, all‘usura o a
lavaggi troppo frequenti; non si tratta dunque di vizi del prodotto.
• Si prega di controllare al momento dell’acquisto che tutte le parti in stoffa,
le cuciture, i bottoni e le chiusure lampo siano cucite e funzionino
correttamente.
Controllare il prodotto al momento dell’acquisto per evitare possibili reclami
successivi. Se successivamente si dovessero presentare dei difetti,
comunicarli immediatamente al proprio rivenditore di fiducia. Questi si
metterà in contatto con TFK per discutere le misure da adottare. TFK non
accetta spedizioni senza preavviso o non affrancate.
*) valida solo nell’UE. Negli altri Paesi valgono le rispettivi norme vigenti in
materia.

20
Instrucciones de uso y condiciones de garantía
Bienvenido al mundo de TFK.
Por favor, tómese unos minutos y lea cuidadosamente las siguientes
instrucciones antes de usarlas. IMPORTANTE: Guarde el manual para futuras
consultas. Si no sigue estas instrucciones, la seguridad de su hijo puede verse
afectada.
INSTRUCCIONES DE SEGURIDAD + ADVERTENCIAS
- ADVERTENCIA ¡No deje a su hijo desatendido!
- ADVERTENCIA ¡Sólo lleva un niño a la vez!
- ADVERTENCIA Este producto sólo es adecuado en posición acostada para
un niño que aún no es capaz de sentarse o rodar a un lado por sí
mismo o que aún no es capaz de apoyarse en sus manos y rodillas.
- ADVERTENCIA Esta unidad combinada no debe ser usada en un soporte.
- ADVERTENCIA Sólo coloque la unidad de combinación en superficies
firmes, horizontales y secas.
- ADVERTENCIA No permita que otros niños jueguen sin supervisión junto a la
unidad combinada.
- ADVERTENCIA No utilice la bolsa de transporte si alguna pieza está rota,
desgarrada o falta.
- ADVERTENCIA Use el cinturón de seguridad tan pronto como su hijo pueda
sentarse de forma independiente.
- ADVERTENCIA Utilice siempre la correa de la entrepierna en combinación
con el cinturón de regazo.
- Peso máximo del niño cuando se usa en posición reclinada: 9 kg.
- Peso máximo del niño cuando se usa en posición sentada: 15 kg.
- NO coloque la bañera cerca de un fuego abierto u otras fuentes de calor.
- Por favor, agarre el asa de la unidad combinada para que la cabeza del
niño nunca esté más baja que su cuerpo cuando esté en el capazo.
- ¡No uses un colchón adicional!
- Inspeccione regularmente las manijas y el piso para ver si hay daños y
desgaste.
- Asegúrese de que las asas estén en la posición correcta para su uso al
transportar o levantar el portador.
Por favor, compruebe regularmente los mangos, la base y las conexiones
para ver si hay signos de desgaste o daños. En caso de reparación, use sólo
piezas de repuesto originales.
This manual suits for next models
1
Table of contents
Languages:
Other TFK Stroller manuals

TFK
TFK Joggster Sport User manual

TFK
TFK Twin Adventure User manual
TFK
TFK Multiboard User manual
TFK
TFK Multi X User manual
TFK
TFK T-DOT-1506 User manual
TFK
TFK QUICKFIX User manual
TFK
TFK TWIN TRAIL User manual
TFK
TFK Joggster velo User manual
TFK
TFK Twinner Twist Duo User manual

TFK
TFK Multiboard User manual
