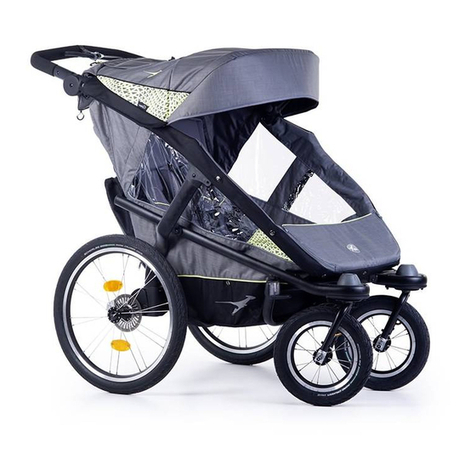
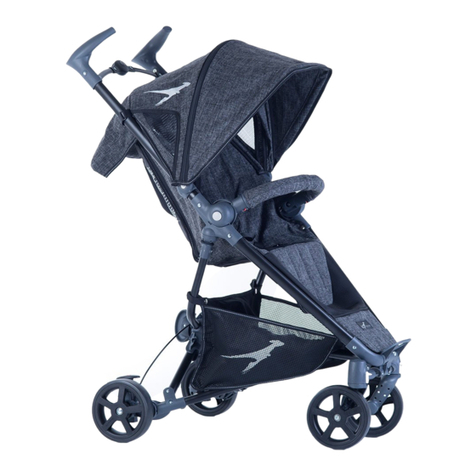
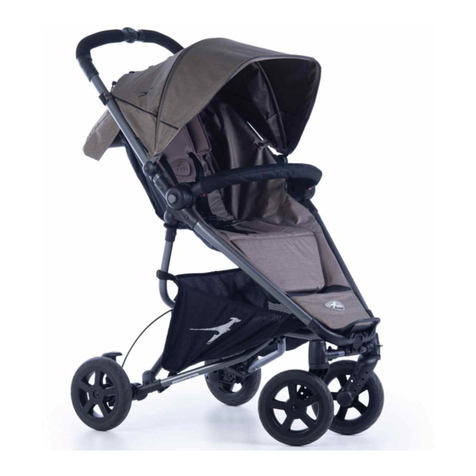
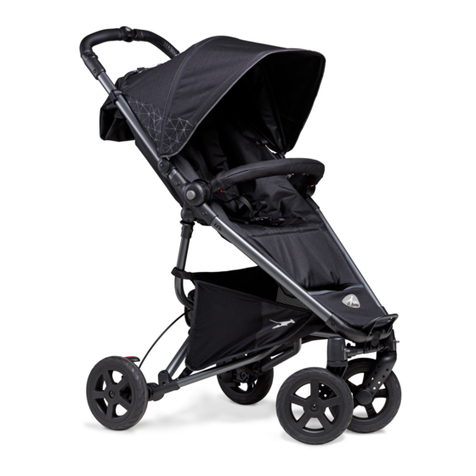
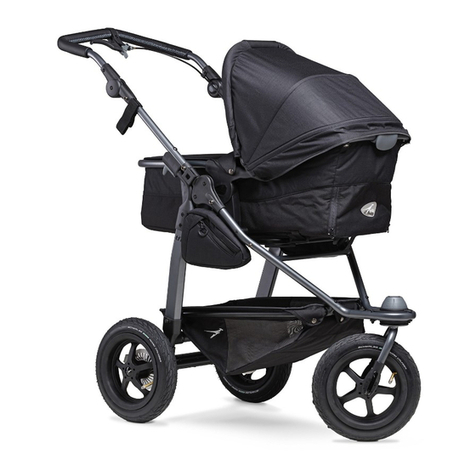
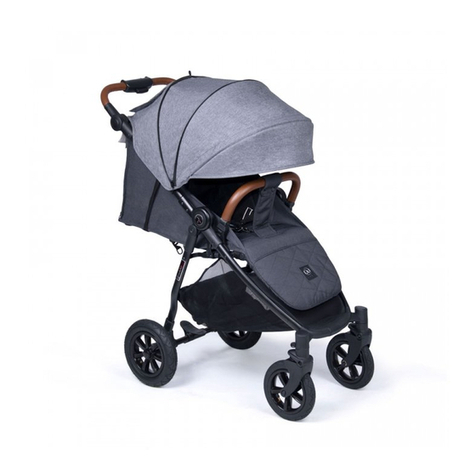
TFK Buggster-S Air User manual

1
Gebrauchsanleitung
Operating manual
Istruzioni d’uso
Instrucciones de uso
Notice d’utilisation
Gebruiksaanwijzing
Instruções de uso
Használati utasítás
Instrukcja obsługi
Návod k obsluze
Návod na použitie
Pripročnik
Instrucţiuni de Utilizare
Инструкции за употреба
Product video on
www.buggy.de
or QR Code

2
XV
for Quickfix carry cot
XVI
21
21

3
DE Gebrauchsanleitung und Garantiebestimmungen 4
GB operating manual and warranty conditions 8
IT Istruzioni d’uso e condizioni di garanzia 12
ES Instrucciones de uso y condiciones de garantía 16
FR Notice d’utilisation et dispositions de garantie 20
NL Gebruiksaanwijzing en garantiebepalingen 24
PT Instruções de uso e condições de garantia 28
HU Használatiútmutatóésgaranciával kapcsolatosrendelkezések 32
PL Instrukcja obsługi oraz warunki gwarancji 36
CZ Návod k obsluze a zàruční podmínky 40
SK Návod na použitie a podmienky záruky 44
SL Pripročnik in garancijski pogoji 48
RO Instrucţiuni de Utilizare şi Condiţii de acordare a Garanţiei 52
BG Инструкции за употреба и гаранция 56

4
Gebrauchsanleitung und Garantiebestimmungen
Herzlich willkommen in der Welt von TFK.
Bitte nehmen Sie sich ein Paar Minuten Zeit und lesen Sie die folgenden
Hinweise vor der Benutzung sorgfältig durch und bewahren Sie diese auf.
Wenn Sie diese Hinweise nicht beachten, kann die Sicherheit Ihres Kindes
beeinträchtigt werden!
SICHERHEITSHINWEISE + WARNUNGEN
-WARNUNG: Lassen Sie Ihr Kind nicht unbeaufsichtigt!
-WARNUNG: Dieser Wagen ist für Kinder mit einem Gewicht bis maximal 15 kg
bestimmt! Befördern Sie immer nur ein Kind!
-WARNUNG: Diese Sitzeinheitist für Kinder unter 6 Monaten nicht geeignet.
-WARNUNG: Vergewissern Sie sich, dass Ihr Kind beim Aufklappen und
Zusammenklappen des Wagens außer Reichweite ist, um Verletzungen zu vermeiden.
-WARNUNG: Vergewissern Sie sich vor Gebrauch, dass alle Verriegelungen
geschlossen sind!
-WARNUNG: Am Schieber befestigte Lasten beeinträchtigen die
Standfestigkeit des Wagens!
-WARNUNG: Verwenden Sie einen Sicherheitsgurt, sobald Ihr Kind selbständig
sitzen kann. - auch mit Fußsack! Verwenden Sie den Schrittgurt immer in
Verbindung mit dem Beckengurt!
-WARNUNG: Es ist vor Gebrauch zu überprüfen, dass der Kinderwagenaufsatz
oder die Sitzeinheit korrekt eingerastet ist.
-WARNUNG Es ist zu überprüfen, dass der Kinderwagenaufsatz oder die
Sitzeinheit oder der Autokindersitz vor Gebrauch korrekt eingerastet ist.
-WARNUNG: Lassen Sie Ihr Kind nicht mit dem Wagen spielen.
-WARNUNG: Dieses Erzeugnis ist nicht geeignet zum Joggen oder Skaten.“
-Autokindersitze, die in Verbindung mit einem Fahrgestell verwendet werden,
ersetzten weder eine Wiege noch ein Kinderbett. Sollte Ihr Kind Schlaf
benötigen, sollte es dafür in einen geeigneten Kinderwagenaufsatz, eine
geeignete Wiege oder ein geeignetes Bett gelegt werden!
-Den Wagen nie ohne gesicherte Parkbremse abstellen!
-Heben Sie den Wagen niemals mit einem Kind darin hoch!
-Benutzen Sie keine (Roll-) Treppen, wenn sich ein Kind im Wagen befindet!
-Beim Tragen über Treppen und sonstige Hindernisse, unbedingt die
Arretierungen überprüfen!
-Den Wagen nur an festen Rahmenteilen anheben!
-Keine TFK - fremden Zubehörteile montieren!
-Die maximale Beladung im Korb ist 5 kg! Jede andere Tasche darf mit max
1kg beladen werden.
Bitte überprüfen Sie in regelmäßigen Abständen die Bremsen und
Verbindungen auf ihre Funktion! Verwenden Sie im Reparaturfall nur
originale Ersatzteile!5

5
Gebrauchs- und Montageanleitung
Radmontage
-(Abb.I) Hinterräder (1) einstecken und dabei den roten
Schiebeknopf (2) gedrückt halten. Wenn das Rad bis zum Anschlag
positioniert ist, den Knopf (2) loslassen und den Sitz des Rades
kontrollieren. Zum lösen den roten Knopf (2) gedrückt halten und das
Rad abziehen.
-(Abb.II) Das Vorderrad (3) im die Aufnahme einstecken, bis es
hörbar einrastet. Zum lösen den roten Knopf (4) drücken und das Rad
abziehen. Das Vorderrad kann entweder starr (Pos.1) oder drehbar
(Pos.2) benutzt werden. Bringen Sie dazu die Ziffern auf dem
Drehknopf (4) mit dem Pfeil zur Deckung.
Aufbau
-(Abb.III) Ziehen Sie die zwei Handgriffe (5) nach oben, bis die
Gelenke (6) hörbar einrasten.
- (Abb.IV) Ziehen Sie den Rahmen hinten links und rechts etwas
auseinander und drücken Sie dann das Gelenk (7) hinten nach
unten, bis die Klappsicherung einhakt.
-(Abb.V) Schwenken Sie nun den Bauchbügel (8) nach oben. Dafür
drücken Sie beide roten Knöpfe links und rechts und bringen Sie den
Bauchbügel (8) in diese Position.
-(Abb.VI) Die Feststellbremse betätigen Sie, indem Sie den Kipphebel
(9) nach unten drücken. Zum Lösen ziehen ziehen Sie den Hebel (9)
nach oben.
-Bitte blockieren Sie die Hinterräder immer, wenn Sie Ihr Kind in den
Wagen setzten und anschnallen.
-(Abb.VII) Das Gurtschloß (10) des 5-Punkt-Gurtes öffnen Sie, indem
Sie die zentrale Taste auf dem Gurtschloß drücken und die
Steckverschlüsse (11) der Schulterriemen nach oben abziehen.
Setzen Sie nun Ihr Kind in den Wagen und legen Sie Ihm die
Schulterriemen korrekt an. Legen Sie dann die beiden Verschlüße
(11) übereinander und stecken Sie diese in das Gurtschloß (10)
zwischen den Beinen, bis dieses hörbar einrastet. Die Gurtlänge
können Sie mit hilfe der Schnallen (12) verändern und so der Größe
Ihres Kindes anpassen.
-(Abb.VIII) Das Verdeck wird durch zwei Schiebeverschlüße (13) am
Rahmen (14) befestigt. Zusätzlich können Sie das Verdeck hinten an
der Rückenlehne und links und rechts oben am Sitzbezug je mit zwei
Druckknöpfen befestigen. Wenn Sie den Reißverschluss in der Mitte
des Verdeckes öffnen, können Sie es um einen Position weiter öffnen.

6
-(Abb.IX) Mit dem Gurt an der Rückseite der Rückenlehne (15)
können Sie den Sitz in Liegeposition und wieder zurück bringen.
Drücken Sie dazu die Verriegelung und verändern den Sitzwinkel
stufenlos.
Transport
-(Abb.X) Zum Zusammenklappen des Buggster, schließen Sie
zunächst das Verdeck und schwenken Sie den Bauchbügel (8),
durch drücken der beiden roten Knöpfe nach unten.
-(Abb.XI) Schwenken Sie den roten Griff (16) nach oben und drücken
Sie ihn nach unten. Schwenken Sie ihn noch ein bisschen weiter zu
sich, damit lösen Sie die Klappsicherung.
-Ziehen Sie mit diesem Griff (16) das Gelenk (7) so weit wie möglich
nach oben. Dadurch schwenken die Hinterräder (1) nach innen.
-(Abb.XII) Ziehen Sie nun die Gelenksicherungen (17) vor den
Handgriffen (5) zu sich und klappen Sie den Rahmen nach vorne
zusammen.
-(Abb.XIII) Mit der Transportsicherung (18) können Sie den Wagen
gegen unbeabsichtigtes aufklappen beim Transport durch einhaken
der Öse an der Vorderradaufnahme (19) sichern. Sitzbezugpflege
-(Abb.XIV) Um den Sitzbezug (20) vom Rahmen zu lösen, schwenken
Sie bitte zunächst die Hinterräder zusammen, wie unter Abb.XI
beschrieben. Jetzt ist der Sitzbezug „entspannt“ und lässt sich leichter
abnehmen. Jetzt müssen Sie die Gummibänder aus den Ösen am
Rahmen entfernen, mit denen die Reißverschlußenden gegen
unbeabsichtigtes Öffnen gesichert sind. Danach können Sie die
Reißverschlüße in Richtung der Rahmengelenke öffnen. Öffnen Sie
nun noch die Druckknopfbefestigungen im Bereich des Faltgelenks
und die Abspannung am hinteren Rahmenrohr und ziehen Sie den
Bezug seitlich aus der kurzen Führung an der Vorderradaufnahme
(19).
Quickfixwanne
-(Abb.XV) An der gezeigten Niete wird die Stabilisierung der
Quickfixwanne befestigt.
Geradeauslauf einstellen
-(Abb.XVI) Durch drehen der beiden Schrauben an der
Vorderradaufnahme der Geradeauslauf eingestellt werden. Drehen
Sie hierzu die Schrauben (21) immer entgegengesetzt zueinander.

7
PFLEGEHINWEISE
-Reinigen Sie alle Teile mit einem feuchten Tuch.
-Benutzen Sie keine aggressiven Reinigungs- oder Schmiermittel!
-Ölspray an den Faltgelenken und Radlagern stellt die Leichtgängigkeit sicher.
-Sie können den Sitzbezug mit der Hand bei 30° waschen. Nicht in die
Waschmaschine oder Trockner geben
-Die Bereifung kann unter Umständen zur Verfärbung des Bodenbelags führen.
Fremdkorper (z.B. Steinchen) in den Reifen müssen entfernt werden um eine
eventuelle Beschädigung von Bodenbelägen zu vermeiden.
GARANTIEBEDINGUNGEN
Bei berechtigten Beanstandungen gelten die gesetzlichen Bestimmungen. Zum
Nachweis des Erwerbes, bewahren Sie bitte den Kaufbeleg für die Dauer der
gesetzlichen Verjährungsfrist auf. Diese beträgt 2 Jahre *) und beginnt mit der
Übergabe des Produkts an Sie. Falls bei diesem Produkt Mängel bestehen, beziehen
sich diese auf sämtliche Material- und Herstellungsfehler, die zum Zeitpunkt der
Übergabe vorliegen. Keine Ansprüche bestehen für:
• Natürlicher Verschleiß und Schäden durch übermäßige Beanspruchung.
• Schäden durch ungeeignete oder unsachgemäße Verwendung.
• Schäden durch fehlerhafte Montage und Inbetriebnahme.
• Schäden durch nachlässige Behandlung oder Wartung.
• Schäden durch unsachgemäße Änderungen am Wagen.
Fehler müssen unverzüglich gemeldet werden, damit keine Folgeschäden entstehen!
Reklamationsfall oder nicht?
TFK Produkte sind meist zu einem hohen Teil aus Aluminium gefertigt und somit rostfrei.
Manche Teile sind jedoch auch lackiert, verzinkt oder haben eine sonstigen
Oberflächenschutz. Je nach Wartung oder Beanspruchung können diese Teile auch
rosten. Hierbei handelt es sich dann um keinen Mangel.
Kratzer sind normale Verschleißerscheinungen und kein Mangel.
Feuchte Textilien, die nicht getrocknet und ausreichend gelüftet werden, können
schimmeln und stellen keinen produktionsbedingten Mangel dar.
Durch Sonneneinstrahlung, Schweiß, Reinigungsmittel, Abrieb oder zu häufiges
Waschen ist ein Ausbleichen nicht auszuschließen und somit kein Mangel.
Bitte prüfen Sie beim Kauf genau, ob alle Stoffteile, Nähte, Druckknöpfe und
Reisverschlüsse ordnungsgemäß vernäht sind und funktionell in Ordnung sind.
Abgefahrene Räder sind natürliche Verschleißerscheinungen. Schäden durch
äußere Einwirkungen sind kein Mangel. Leichte Unwucht ist nicht vermeidbar und
stellt keinen Mangel dar.
Der Übergabe-Check soll immer durchgeführt werden, um Reklamationen schon im
Vorfeld zu vermeiden. Wenn Sie später einen Fehler feststellen, melden Sie diesen
unverzüglich bei Ihrem Händler. Dieser wird sich bei uns melden, um die weitere
Vorgehensweise zu besprechen. Unangemeldete oder unfreie Sendungen bei TFK
werden nicht akzeptiert.
*) gültig nur in der EU. In anderen Ländern sind die jeweils gesetzlichen Fristen gültig.

8
Operating Manual and Warranty Conditions
Welcome to the world of TFK
Please take a few minutes to read the following guidance carefully
before using the product and retain this information for future
reference. Failure to observe this guidance could compromise your
child’s safety!
SAFETY INSTRUCTIONS + WARNINGS
-WARNING: Do not leave your child unsupervised!
-WARNING: This buggy is intended for children aged 6 months or
above up to a maximum weight of 15 kg! Only ever transport one
child at a time!
-WARNING: Make sure all connections are secure before use!
-WARNING: Loads suspended from the handle reduce the stability of
the buggy!
-WARNING: Always strap your child in with the 5-point harness, even
when using the foot-muff!
-WARNING: Always use the crotch strap in conjunction with the lap
belt!
-Never park the buggy without applying the parking brake!
-Never lift the buggy with a child inside!
-Do not use stairs or escalators when a child is in the buggy!
-When lifting the buggy up and down stairs or across other obstacles,
always check the catches!
-Only lift the buggy by the rigid frame!
-Only use accessories from TFK!
-The basket can hold a maximum weight of 5 kg!
-Adjust the air pressure of the Buggster S Air tyres to 1.3 bar.
-Only use the buggy for its intended purpose!
Please test the brakes and connections at regular intervals! Only use
original spare parts to carry out repairs!

9
OPERATING AND ASSEMBLY MANUAL
Fitting the wheels
-(Fig. I) Insert the rear wheels (1), holding down the red sliding button
(2) as you do so. When the wheel is inserted as far as it will go, release
the button (2) and check its fit. To release, hold down the red button
(2) and pull the wheel off.
-(Fig. II) Insert the front wheel (3) into the support, until you hear it
click into place. To release, press the red button (4) and pull the
wheel off. The front wheel can be either fixed (Pos. 1) or swivelling
(Pos. 2). Rotate the knob (4) until the numbers are aligned with the
arrow.
Getting ready for use
-(Fig. III) Pull the two handles (5) upwards until you hear the joints (6)
click into place.
(Fig. IV) Pull the rear frame apart slightly on the left and right and
then press the rear joint (7) downwards, until the safety lock engages.
-(Fig. V) Push the bumper bar (8) up. To do this, press the two red
buttons on the left and right and move the bumper bar (8) upwards.
-(Fig. VI) Activate the parking brake by pushing the rocker lever (9)
down. To release, pull the lever (9) up.
-Please always lock the rear wheels when placing your child in the
buggy and strapping it in.
-(Fig. VII) Open the buckle (10) of the 5-point harness by pressing the
button in the centre and pulling out the tongues (11) of the shoulder
straps. Now sit your child in the buggy and position the shoulder
straps correctly. Place the two tongues (11) on top of each other
and insert them into the buckle (10) between the child’s legs, until
you hear the buckle engage. You can alter the length of the strap to
suit the size of your child using the fasteners (12).
9

10
-(Fig. VIII) The hood is attached to the frame with two slide closures
(13). You can also attach the hood to the backrest and left and right
to the top of the seat cover using two press studs. When opening the
zipper (14) in the middle of the hood you can open it for an extra
position.
-(Fig. IX) The backrest can be moved to the horizontal position with
the belt while pushing the buttons on the backside of the backrest.
To move the seat back into the upright position, push the button
again and pull the strap.
Transport
-(Fig. X) To fold up the Buggster, fold up the hood and push the
bumper bar (8) down by pressing the two red buttons. -(Fig. XI) Turn
the red handle (16) upwards (and a little further towards you) to
release the safety lock.
-With this handle (16), pull the joint (7) upwards as far as it will go so
that the rear wheels (1) are turned inwards.
-(Fig. XII) Now pull the joint lock levers (17) in front of the handles (5)
towards you and fold up the frame by pushing the handles forward.
-(Fig. XIII) You can use the transport lock (18) to prevent the buggy
from accidentally unfoldingduring transport, by hooking the loop on
to the front wheel mount (19).
Caring for the seat cover
-(Fig. XIV) To remove the seat cover (20) from the frame, turn the rear
wheels inwards as described in Fig. XI. The seat cover is now
“slackened” to make it easier to remove. Unfasten the elastic straps
from the thread guides on the frame which prevent the zip ends from
being opened accidentally. You can now open the zips in the
direction of the frame joints. Unfasten the press studs near the folding
joint and the restraint on the rear frame to pull the cover sideways
out of the short guide on the front wheel mount (19).
Setting the directional stability
-(Fig. XVI) As of model year 2012, the directional stability can be set
by turning the two screws on the front wheel mount. Always turn the
screws (21) in opposite directions.10

11
TECHNICAL DATA
Dimensions when pushchair is folded: 103 x 35 x 25 cm
Weight: 6,95 kg
Please find a detailed parts list on our homepage www.buggy.de
CARE INSTRUCTIONS
- Clean all parts with a damp cloth.
- Do not use any caustic cleaning or lubricating agents!
- An oil spray on the folding joints and the wheel bearings will guarantee
smooth running.
- You can wash the seat cover by hand at 30°.
Not suitable for a washing machine or tumble dryer!
WARRANTY CONDITIONS
The statutory provisions shall apply for justified complaints. As proof of
purchase, please keep the till receipt for the duration of the statutory period
of limitation. This term is 2 years *) and starts with the handover of the
product to you. Should any faults arise in relation to this product, they shall
involve any faults of material and manufacture that exist at the date of
transfer. Any claims shall be excluded for:
• Natural wear and damage due to excessive stress
• Damage due to unsuitable or improper use
• Damage due to faulty assembly and commissioning
• Damage due to negligent handling or maintenance
• Damage due to improper modifications to the pushchair
Faults must be notified immediately, so that no subsequent damage can be
caused!
A case for complaint or not?
• Most TFK products are produced to a large extent from aluminium and so
are rust-proof. However, some parts are also painted, galvanized or have
other surface protection. These parts may rust, depending on the level of
maintenance and stress. This can therefore not be regarded as a fault.
• Scratches are normal signs of wear and are not a fault.
• Moist textiles that are not dried can moulder and so can not be considered
as a production-related fault.
• The fading of colours due to sunshine, perspiration, cleaning agents, abrasion or
excessively frequent washing cannot be ruled out and so does not represent a fault.
• Please check carefully at the time of purchase whether all the fabric parts,
seams, press studs and zips are sewn and function properly.
• Worn-down wheels are of course a sign of wear. Damage due to external
influences is not a fault. Slight imbalances are inevitable and do not
represent a fault.
The handover check must always be carried out to prevent inconvenient
problems right at the outset. If you find a fault at a later date, please notify
your authorised dealer immediately. He will then contact us to discuss the
subsequent procedure. Any deliveries to TFK that are unnotified or not
prepaid will not be accepted.
*) valid only in the EU. In other countries according to the respective
warrenty terms.

12
Istruzioni d’uso e condizioni di garanzia
Benvenuti nel mondo di TFK.
Si consiglia di leggere attentamente le seguenti istruzioni prima di
utilizzare il prodotto e di conservarle per una futura consultazione.
Non attenendosi alle presenti indicazioni, la sicurezza del bambino
potrebbe essere pregiudicata!
INDICAZIONI DI SICUREZZA + AVVISI
- ATTENZIONE! Non lasciare mai il bambino incustodito!
- ATTENZIONE! Questo passeggino è omologato per bambini di età
superiore ai 6 mesi e con un peso corporeo di massimo 15 kg!
Trasportare sempre solo un bambino alla volta!
- ATTENZIONE! Prima dell’uso assicurarsi che tutti i dispositivi di blocco
siano chiusi correttamente!
- ATTENZIONE! Ogni peso attaccato al maniglione può
compromettere la stabilità del passeggino!
- ATTENZIONE! Legare sempre il bambino con la cintura a 5 punti di
ancoraggio, anche quando si utilizza il sacco coprigambe!
- ATTENZIONE! Utilizzare lo spartigambe sempre in combinazione con
la cintura girovita!
- Non parcheggiare mai il passeggino senza azionare il freno di
stazionamento!
- Non sollevare mai il passeggino con un bambino a bordo!
- Non utilizzare mai scale o scale mobili con il bambino a bordo del
passeggino!
- Se si trasporta il passeggino su scale o si devono superare altri
ostacoli, controllare assolutamente i meccanismi di blocco!
- Sollevare il passeggino solo impugnandolo dalle parti fisse del
telaio!
- Utilizzare solo accessori TFK!
- Il carico massimo del cestello portaoggetti è di 5 kg!
- Utilizzare il passeggino solo per l’uso previsto!
Controllare ad intervalli regolari il corretto funzionamento di freni e
giunti! In caso di riparazione utilizzare solo elementi di ricambio
originali!
12

13
ISTRUZIONI D’USO E DI MONTAGGIO
Montaggio delle ruote
- (Fig. I) Inserire le ruote posteriori (1) tenendo premuto il pulsante a
spinta (2). Quando la ruota è completamente inserita, rilasciare il
pulsante (2) e controllare che sia ben montata. Per smontare la
ruota premere il pulsante rosso (2) e rimuoverla.
- (Fig. II) Inserire la ruota anteriore (3) nell’apposito alloggiamento
fino a quando si blocca con uno scatto udibile. Per smontare la
ruota premere il pulsante rosso (4) e rimuoverla. La ruota anteriore
può essere utilizzata sia fissa (pos. 1), che piroettante (pos. 2).
Affinché la ruota sia piroettante, i numeri sulla manopola (4) devono
essere rivolti con la freccia verso la copertura.
Montaggio
- (Fig. III) Aprire il telaio tirando i due manici (5) verso l’alto, fino a
quando i giunti (6) non si bloccano con uno scatto udibile.
(Fig. IV) Allargare leggermente il telaio posteriormente a sinistra e a
destra, quindi fare pressione sul giunto posteriore (7) verso il basso,
fino a quando non si aggancia il dispositivo di sicurezza.
- (Fig. V) Sollevare il frontalino (8), premendo i due pulsanti rossi che si
trovano sulle sue estremità sinistra e destra (8).
- (Fig. VI) Il freno di stazionamento viene azionato premendo il
pedale (9) verso il basso. Per sbloccare il freno tirare il pedale (9)
verso l’alto.
- Bloccare sempre le ruote posteriori mentre si mette il bambino nel
passeggino e lo si lega con le cinture.
- (Fig. VII) Per aprire la fibbia (10) della cintura di sicurezza a 5 punti di
ancoraggio premere sul suo tasto rosso ed estrarre le forchette (11)
degli spallacci. Mettere quindi il bambino nel passeggino e regolare
gli spallacci. Unire le due forchette (11) ed inserirle nella fibbia (10)
dello spartigambe fino a quando non si blocca con uno scatto
udibile. Regolare la lunghezza della cintura con l’ausilio delle fibbie
(12) e in base alle dimensioni del bambino.
13

14
- (Fig. VIII) La capottina viene fissata al telaio con due agganci
scorrevoli (13) e fissata al lato posteriore dello schienale e al
rivestimento della seduta con due bottoni. Se si desidera fissarla in
posizione di totale apertura, fare pressione sugli archetti laterali (14).
Per richiuderla allentare di nuovo gli archetti.
- (Fig. IX) Per portare lo schienale in posizione orizzontale, aprire le
chiusure lampo (15) a sinistra e a destra della fodera del sedile. Per
riportare lo schienale in posizione verticale, richiudere le chiusure
lampo (15).
Trasporto
- (Fig. X) Per richiudere il Buggster, chiudere innanzitutto la capottina
ed abbassare il frontalino (8) premendo i due pulsanti rossi. –
(Fig. XI) Tirare la maniglia rossa (16) verso l‘alto (e leggermente verso
l’esterno) per sbloccare i meccanismi di sicurezza.
- Tirare il più possibile il telaio (7) verso l’alto utilizzando questa
maniglia (16). Le ruote posteriori (1) si gireranno verso l’interno.
- (Fig. XII) Tirare quindi verso di sé il dispositivo di sicurezza dei giunti
(17) davanti alle maniglie (5) e richiudere il telaio.
- (Fig. XIII) Per assicurare il passeggino contro il rischio di apertura
involontaria durante il trasporto, attaccare il gancio di sicurezza (18)
all’alloggiamento della ruota anteriore (19).
Manutenzione della fodera
- (Fig. XIV) Per staccare la fodera del sedile (20) dal telaio, avvicinare
le ruote posteriori come descritto alla fig. XI. In questo modo la
fodera non è più “in tensione” e può essere rimossa facilmente.
Rimuovere i nastri elastici dagli occhielli del telaio, che impediscono
l’apertura involontaria delle estremità delle chiusure lampo. Aprire
quindi le chiusure lampo in direzione dei giunti del telaio. Sganciare i
fissaggi a bottone sul giunto di chiusura e l‘ancoraggio sulla barra
posteriore del telaio e rimuovere la fodera facendola scorrere sulla
guida dell‘alloggiamento della ruota anteriore (19).
Impostazione della corsa rettilinea
-(fig. XVI) A partire dai modelli dell'anno 2012 sarà possibile regolare
la corsa rettilinea girando le due viti sull'alloggiamento della ruota
anteriore. A tal fine girare le viti (21) sempre in direzione opposta tra
di loro.
14

15
DATI TECNICI
Dimensioni del passeggino chiuso: 103 x 35 x 25 cm - Peso 6,95 kg
Una lista dettagliata dei componenti è disponibile sul nostro sito www.buggy.de
INDICAZIONI DI MANUTENZIONE
- Pulire tutti gli elementi con un panno umido.
- Non utilizzare detergenti o lubrificanti aggressivi!
- Olio lubrificante sui giunti pieghevoli e sui cuscinetti delle ruote assicura il
facile azionamento.
- La fodera può essere lavata a mano ad una temperatura di 30°. Non
lavare a macchina o mettere nell’asciugabiancheria!
CONDIZIONI DI GARANZIA
In caso di reclami giustificati, vengono applicate le disposizioni di legge.
Conservare lo scontrino come prova d’acquisto per l’intera durata della
garanzia. Questa ha una durata di due anni *) ed inizia con la consegna del
passeggino all’acquirente. Se il prodotto presenta difetti, si tratta di vizi del
materiale o errori di produzione già presenti al momento della consegna. La
garanzia non è valida per
• normale usura e danni causati da eccessiva sollecitazione;
• danni causati da uso improprio o incuria;
• danni causati da montaggio e messa in funzione errati;
• danni causati da uso o manutenzione negligenti;
• danni causati da modifiche improprie al prodotto.
I difetti devono essere comunicati immediatamente al fine di evitare ulteriori danni!
È un caso di reclamo?
I prodotti TFK sono fabbricati in gran parte con alluminio e quindi inossidabili.
Alcuni componenti sono però smaltati, zincati o hanno una protezione
superficiale. A seconda della manutenzione o della sollecitazioni a cui sono
sottoposti, questi componenti possono anche arrugginirsi. In questo caso non
si tratta di difetti del prodotto.
• I graffi sono normali segni d’usura e non rappresentano un vizio del prodotto.
• Sui tessuti umidi che non vengono asciugati e ben arieggiati si può formare
della muffa, che non rappresenta un difetto di produzione.
• Non è possibile escludere uno scolorimento del materiale dovuto
all’esposizione ai raggi solari, al sudore, ai detergenti di pulizia, all‘usura o a
lavaggi troppo frequenti; non si tratta dunque di vizi del prodotto.
• Si prega di controllare al momento dell’acquisto che tutte le parti in stoffa, le
cuciture, i bottoni e le chiusure lampo siano cucite e funzionino correttamente.
• Ruote consumate sono normali conseguenze dell’usura. Danni dovuti a
cause esterne non rappresentano difetti del prodotto. Un leggero
sbilanciamento non può essere evitato e pertanto non rappresenta un
difetto del prodotto. Controllare il prodotto al momento dell’acquisto per
evitare possibili reclami successivi. Se successivamente si dovessero
presentare dei difetti, comunicarli immediatamente al proprio rivenditore di
fiducia. Questi si metterà in contatto con TFK per discutere le misure da
adottare. TFK non accetta spedizioni senza preavviso o non affrancate.
*) valida solo nell’UE. Negli altri Paesi valgono le rispettivi norme vigenti in
materia.

16
Instrucciones de uso y condiciones de garantía
Bienvenido al mundo de TFK
Tómese un par de minutos para leer detenidamente las siguientes
instrucciones antes de utilizar el producto y téngalas siempre a
mano. Tenga en cuenta que si no sigue estas instrucciones puede
poner en peligro la seguridad del niño.
INDICACIONES DE SEGURIDAD Y ADVERTENCIAS
-ADVERTENCIA: no deje nunca al bebé sin vigilancia.
-ADVERTENCIA: este cochecito es apto para niños a partir de los 6
meses y admite un peso máximo de 15 kg. Utilícelo siempre para un
niño únicamente.
-ADVERTENCIA: antes de utilizarlo, asegúrese de que todos los
mecanismos de bloqueo están cerrados.
-ADVERTENCIA: si se coloca alguna carga en el manillar, el
cochecito perderá estabilidad.
-ADVERTENCIA: utilice siempre el cinturón de 5 puntos para sujetar al
niño, aunque lleve saco.
-ADVERTENCIA: utilice siempre el cinturón de entrepierna en
combinación con el de pelvis.
-No deje nunca el cochecito parado sin el freno de estacionamiento
puesto.
-No levante nunca el cochecito con el niño dentro.
-No utilice escaleras (mecánicas) para subir el cochecito con el niño
dentro.
-Para subir escaleras o sortear algún obstáculo compruebe
previamente los bloqueos.
-Levante el cochecito sólo por las piezas fijas del chasis.
-No utilice ninguna pieza de otro fabricante que no sea TFK.
-La carga máxima que admite el capazo es de 5 kg.
-El cochecito sólo puede ser utilizado conforme a su uso
reglamentario.
Compruebe con regularidad si los frenos y las uniones funcionan
correctamente. Si tiene que reparar el producto, utilice sólo piezas
de repuesto originales.
16

17
INSTRUCCIONES DE USO Y MONTAJE
Montaje de las ruedas
-(Figura I) Encaje las ruedas traseras (1) manteniendo pulsado el
botón deslizante rojo (2). Una vez insertada la rueda hasta el tope ,
suelte el botón (2) y asegúrese de que está bien colocada. Para
desmontarla, mantenga pulsado el botón rojo (2) y extraiga la
rueda.
-(Figura II) Introduzca la rueda delantera (3) en su eje hasta que
haga clic. Para desmontarla, mantenga pulsado el botón rojo (4) y
extraiga la rueda. La rueda delantera puede mantenerse recta
(pos. 1) o girar (pos. 2). Para ello, coloque la flecha del botón
giratorio (4) en el número que desee.
Montaje
-(Figura III) Tire de las dos empuñaduras (5) hacia arriba hasta que
oiga que las articulaciones (6) queden encajadas. (Figura IV) Separe
los laterales traseros del bastidor hacia la derecha y la izquierda y
presione la articulación (7) por la parte posterior hasta que
enganche el seguro de bloqueo.
-(Figura V) Levante la barra de protección (8) hacia arriba. Para ello,
pulse los dos botones rojos situados a izquierda y derecha y mueva
la barra de protección (8) hacia esa posición.
-(Figura VI) Para accionar el freno, presione la palanca (9). Para
soltarlo, eleve la palanca (9).
-Para sentar al niño en el cochecito y abrocharle el cinturón
bloquee siempre las ruedas traseras.
-(Figura VII) El cierre del cinturón (10) de 5 puntos se abre
presionando la tecla central y extrayendo las pestañas (11)
integradas en la cinta de los hombros. A continuación, siente al niño
en la silla y coloque correctamente el cinturón de los hombros.
Seguidamente, superponga las pestañas (11) e introdúzcalas en el
cierre del cinturón (10) entre las piernas hasta que oiga que han
encajado. El cinturón se puede ajustar mediante la hebilla (12) para
adaptarlo al niño.17
-(Figura VIII) La capota se fija al chasis por medio de dos cierres
deslizantes (13). Además, la capota se puede fijar al respaldo por
detrás y a la funda del asiento por la parte superior izquierda y
derecha con dos botones a presión. Cuando abra la capota por
completo puede fijarla en esa posición presionando hacia abajo los
estribos laterales (14). Para plegar la capota debe soltarlos de
nuevo.

18
-(Figura IX) Para reclinar el asiento abra los cierres de cremallera (15)
de la parte exterior derecha e izquierda de la funda del asiento.. Si
desea volver a enderezar el respaldo, cierre los dos cierres de
cremallera (15).
Transporte
-(Figura X) Para plegar el Buggster, cierre primero la capota y
levante la barra de protección (8) presionando los dos botones rojos.
-(Figura XI) Tire del aro rojo (16) hacia arriba (y un poco hacia sí)
para soltar el seguro.
-Con ayuda de este aro (16) levante la articulación (7) hasta el tope.
De ese modo las ruedas traseras se girarán (1) hacia dentro.
-(Figura XII) A continuación, tire hacia sí de los seguros de la
articulación (17) situados delante de las empuñaduras (5) y pliegue
el chasis hacia delante.
-(Figura XIII) Con el seguro de transporte (18) se puede evitar que el
cochecito se despliegue al transportarlo (19). Para ello se fijael
gancho en el alojamiento de la rueda delantera.
Cuidado de la funda del asiento
-(Figura XIV) Para soltar la funda del asiento (20) del chasis, pliegue
primero las ruedas traseras como se ha indicado en la figura XI. La
funda del asiento quedará suelta y se podrá retirar fácilmente. A
continuación, retire las gomas de los corchetes del chasis que sirven
para que los extremos del cierre de cremallera no se abran sin
querer. Seguidamente, abra las cremalleras en la dirección de la
articulación del chasis. Desabroche los botones a presión de la
articulación, retire el anclaje del tubo trasero del chasis y extraigala
funda lateralmente de la guía corta en el eje de la rueda delantera
(19).
Ajuste de la estabilidad direccional
-(Fig.XVI) A partir del modelo de 2012, se puede ajustar la estabilidad
direccional girando ambos tornillos del alojamiento de la rueda
delantera. Para ello, gire los tornillos (21) en sentido contrario.
18

19
DATOS TÉCNICOS
Medidas del carrito plegado: 103 x 35 x 25 cm - Peso: 6,95 kg
En nuestra página Web www.buggy.de encontrará una lista de piezas detallada.
INSTRUCCIONES DE MANTENIMIENTO
-Para limpiar todas las piezas utilice un paño húmedo.
-No utilice detergentes ni lubricantes agresivos.
-Aplique aceite en spray en las articulaciones y los apoyos de las ruedas
para que funcionen con suavidad.
-La funda del asiento se puede lavar a mano a 30 ºC. No la lave a máquina
ni la introduzca en la secadora.
CONDICIONES DE GARANTÍA
En caso de reclamación justificada, se aplicará la normativa legal. Conserve el
recibo de la compra como comprobante durante el período de garantía legal.
La garantía es de 2 años *) y empieza cuando se le entrega el cochecito. Las
deficiencias del producto quedan limitadas a los defectos de material y
fabricación existentes en el momento de la entrega. La garantía no cubre:
• El desgaste natural ni los daños ocasionados por cargas excesivas.
• Daños derivados de una utilización inadecuada o incorrecta.
• Daños derivados de un montaje y la puesta en funcionamiento inadecuados.
• Daños derivados de un manejo o mantenimiento negligentes.
• Daños derivados de alteraciones improcedentes del cochecito.
Notifique los defectos inmediatamente para evitar daños mayores.
Motivos de reclamación
Los productos de TFK se fabrican principalmente a base de aluminio y, por
tanto, son inoxidables. Sin embargo algunas piezas están lacadas, galvanizadas
o disponen de otro tipo de protección superficial. Según el mantenimiento y el
uso, estas piezas se pueden oxidar. De ser así, esto no se considera un defecto.
• Los rasguños son manifestaciones normales de desgaste y no se
consideran un defecto.
• Lostejidoshúmedos que nose sequen niventilen losuficientepuedenenmohecerse.
Esto no se considera un defecto de fabricación.
• La luz del sol, el sudor, los detergentes, el roce o un lavado muy frecuente
pueden decolorar el tejido, lo cual no se considera un defecto.
• Al comprar el producto, le recomendamos que compruebe si el tejido, las
costuras y las cremalleras están bien cosidos y funcionan correctamente.
• El desgaste de las ruedas es una manifestación normal de desgaste. Los
daños derivados de acciones externas no se consideran un defecto. Es
inevitable que pueda haber algún desequilibrio en el cochecito, lo cual no
se considera un defecto. Compruebe por norma el producto al recibirlo
para evitar posteriores reclamaciones. Si detecta una tara posteriormente,
diríjase a su distribuidor lo antes posible. Éste se pondrá en contacto con
nosotros para saber cómo proceder. TFK no acepta envíos sin previo aviso y
sin autorización.
*) Válido sólo en la UE. En los demás países regirán los plazos legales que
estipule la normativa vigente.

20
Notice d’utilisation et dispositions de garantie
Bienvenue dans le monde de TFK.
Nous vous prions de bien vouloir consacrer quelques minutes à la
lecture des consignes suivantes avant la première utilisation.
Conservez les ensuite pour vous y reporter ultérieurement en cas de
besoins. Si vous ne respectez pas ces consignes, la sécurité de votre
enfant peut être mise en danger !
CONSIGNES DE SECURITE + AVERTISSEMENTS
- AVERTISSEMENT : ne laissez pas votre enfant sans surveillance !
- AVERTISSEMENT : cette voiture est destinée aux enfants de 6 mois au
moins, et dont le poids maximal n’est pas supérieur à 15 kg ! Ne
transportez toujours qu’un seul enfant !
- AVERTISSEMENT : assurez-vous avant l’utilisation que tous les
blocages sont bien fermés !
- AVERTISSEMENT : les charges fixées à la poignée nuisent à la stabilité
de la voiture !
- AVERTISSEMENT : attachez toujours votre enfant avec le harnais
d’attache à cinq points, même lorsque la voiture est équipée de la
housse pour les jambes.
- AVERTISSEMENT : utilisez la sangle d’entrejambe toujours en
combinaison avec la sangle de bassin !
- ne garez jamais la voiture sans avoir serré le frein de stationnement !
- ne soulevez jamais la voiture lorsque votre enfant y est assis !
- n’utilisez pas d’escaliers (mécaniques) si votre enfant est assis dans
la voiture !
- vérifiez impérativement les blocages lorsque vous portez la voiture
dans les escaliers ou par-dessus d’autres obstacles !
- ne soulevez la voiture que par les parties fixes du châssis !
- n’utilisez pas d’accessoires de fabricants autres que TFK !
- la charge maximale du panier est de 5 kg !
- servez-vous de la voiture uniquement dans le cadre d’une utilisation
conforme !
Veuillez vérifier à des intervalles réguliers le bon fonctionnement des
freins et des assemblages ! En cas de réparation, n’utilisez que des
pièces de rechange d’origine !
20
Table of contents
Languages:
Other TFK Stroller manuals
