manuals.online logo
Brands
  1. Home
  2. •
  3. Brands
  4. •
  5. Toro
  6. •
  7. Lawn And Garden Equipment
  8. •
  9. Toro TR-34D Installation and operating instructions

Toro TR-34D Installation and operating instructions

Other manuals for TR-34D

2

This manual suits for next models

1

Other Toro Lawn And Garden Equipment manuals
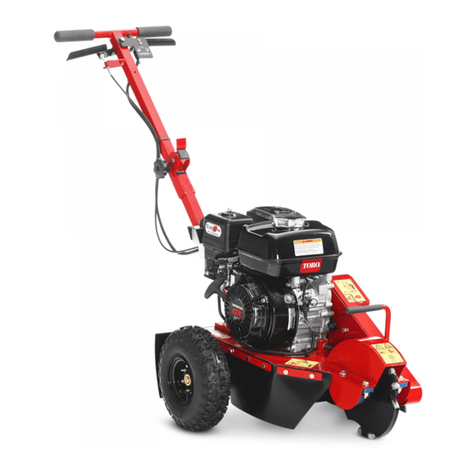
Toro T7 Series User manual

Toro

Toro T7 Series User manual

Toro 66000T User manual

Toro

Toro 66000T User manual

Toro 44911 User manual

Toro

Toro 44911 User manual

Toro 39514 User manual

Toro

Toro 39514 User manual

Toro Greens Aerator User manual

Toro

Toro Greens Aerator User manual

Toro Sand Pro 3040 User manual

Toro

Toro Sand Pro 3040 User manual

Toro 44922 User manual

Toro

Toro 44922 User manual

Toro Bullseye QuickGroom 700 User manual

Toro

Toro Bullseye QuickGroom 700 User manual

Toro Groundsmaster 7200 Series User manual

Toro

Toro Groundsmaster 7200 Series User manual

Toro 686 User manual

Toro

Toro 686 User manual

Toro Reelmaster 7000-D User manual

Toro

Toro Reelmaster 7000-D User manual

Toro 54610 User manual

Toro

Toro 54610 User manual

Toro 58630 User manual

Toro

Toro 58630 User manual

Toro 22473 User manual

Toro

Toro 22473 User manual

Toro procore sr54 User manual

Toro

Toro procore sr54 User manual

Toro TRX-19 User manual

Toro

Toro TRX-19 User manual

Toro 22472 User manual

Toro

Toro 22472 User manual

Toro 140-4508 User manual

Toro

Toro 140-4508 User manual

Toro 02720 User manual

Toro

Toro 02720 User manual

Toro 58630 User manual

Toro

Toro 58630 User manual

Toro Bullseye QuickGroom 710 User manual

Toro

Toro Bullseye QuickGroom 710 User manual

Toro PROCORE 440 User manual

Toro

Toro PROCORE 440 User manual

Toro ProCore 864 User manual

Toro

Toro ProCore 864 User manual
Toro ProLine 139-7860 User manual

Toro

Toro ProLine 139-7860 User manual

Popular Lawn And Garden Equipment manuals by other brands

Sunforce SOLAR user manual

Sunforce

Sunforce SOLAR user manual

GARDEN OF EDEN 55627 user manual

GARDEN OF EDEN

GARDEN OF EDEN 55627 user manual

Goizper Group MATABI POLMINOR instruction manual

Goizper Group

Goizper Group MATABI POLMINOR instruction manual

Rain Bird 11000 Series Operation & maintenance manual

Rain Bird

Rain Bird 11000 Series Operation & maintenance manual

Cub Cadet BB 230 brochure

Cub Cadet

Cub Cadet BB 230 brochure

EXTOL PREMIUM 8891590 Translation of the original user manual

EXTOL PREMIUM

EXTOL PREMIUM 8891590 Translation of the original user manual

Snapper 690179 installation instructions

Snapper

Snapper 690179 installation instructions

Exmark SAR481KA30 Operator's manual

Exmark

Exmark SAR481KA30 Operator's manual

Yazoo/Kees Z12 Operator's manual

Yazoo/Kees

Yazoo/Kees Z12 Operator's manual

Makita EM408MP Original instruction manual

Makita

Makita EM408MP Original instruction manual

Exmark Quest Bagger Setup instructions

Exmark

Exmark Quest Bagger Setup instructions

Manitou Systems AS960 Operator's manual

Manitou Systems

Manitou Systems AS960 Operator's manual

Vertex 1/3 HP Maintenance instructions

Vertex

Vertex 1/3 HP Maintenance instructions

GHE AeroFlo 80 manual

GHE

GHE AeroFlo 80 manual

Land Pride Post Hole Diggers HD25 Operator's manual

Land Pride

Land Pride Post Hole Diggers HD25 Operator's manual

Yazoo/Kees Z9 Commercial Collection System Z9A Operator's & parts manual

Yazoo/Kees

Yazoo/Kees Z9 Commercial Collection System Z9A Operator's & parts manual

Premier designs WindGarden 26829 Assembly instructions

Premier designs

Premier designs WindGarden 26829 Assembly instructions

Snapper 1691351 installation instructions

Snapper

Snapper 1691351 installation instructions

manuals.online logo
manuals.online logoBrands
  • About & Mission
  • Contact us
  • Privacy Policy
  • Terms and Conditions

Copyright 2025 Manuals.Online. All Rights Reserved.

FormNo.3388-998RevA
TR-34DTrenchRoller
ModelNo.68039—SerialNo.314000001andUp
Addendum
WARNING
CALIFORNIA
Proposition65Warning
ThisproductcontainsachemicalorchemicalsknowntotheStateofCaliforniato
causecancer,birthdefects,orreproductiveharm.
TheengineexhaustfromthisproductcontainschemicalsknowntotheStateofCalifornia
tocausecancer,birthdefects,orotherreproductiveharm.
Important:Thisaddendumdescribeshowtoconnectthebatterycableofyourmachine.
1
OpeningtheFrontandRear
HoodsoftheMachine
NoPartsRequired
OpeningtheFrontHood
1.Atthefronthood,pivotthelatchhandleforthehood
totheverticalposition(Figure1).
G019041
1
4
5
7
2
3
6
Figure1
1.Fronthood5.Rearhood
2.Latchhandle(stowed)6.Hoodclip
3.Latchhandle(vertical)7.Rearhoodopening
4.Fronthoodopening
2.Rotatethelatchhandleclockwise(Figure1).
3.Graspthelatchhandletightlyandpulluprmlyto
unseatthehoodfromthehoodclips(Figure1).
4.Rotatethehoodup(Figure1).
©2014—TheToro®Company
8111LyndaleAvenueSouth
Bloomington,MN55420
Registeratwww.T oro.com.OriginalInstructions(EN)
PrintedintheUS
AllRightsReserved*3388-998*A
OpeningtheRearHood
Note:Ensurethattheforwardhoodisopenbeforeopening
therearhood.
1.Graspthefrontedgeoftherearhood.
2.Pulluprmlyonthehoodtounseatitfromthehood
clips(Figure1).
3.Rotatethehoodup(Figure1).
2
ConnectingtheBatteryCable
NoPartsRequired
Procedure
1.Verifythatthepositive(red)cableclampissecurely
connectedtothepositivepostofthebattery(Figure2).
Figure2
1.Negativecableclamp5.Nut
2.Negativebatterypost6.T-bolt
3.Negativebatterycable
(black)
7.Positivecableclamp(red
cable)
4.Frontofthemachine
2.Aligntheclampofthenegative(black)cabletothe
negativepostofthebattery(Figure2).
3.Fullyseattheterminalontothepost(Figure2).
4.Torquethenut(Figure2)andtheT-boltforthe
negativecableclampto678to791N-cm(60to70
in-lb).
3
CheckingtheBatteryVoltage
NoPartsRequired
Procedure
1.Insertthemachinekeyintothekeyswitchandrotate
thekeyswitchtotheRunposition.
2.Wait5minutesandnotethevoltageshownonthe
LEDdisplay.
Note:Refertothebatterychargetabletodetermine
thechargestateofthebattery.
3.Ifthechargestateofthebattery(indicatedintheLED
display)islessthan12.6volts,chargethebattery;refer
totheOperator’sManualforcharginginstructions.
BatteryCharge-stateTable
VoltsBatteryState
12.7andabove100%charge
12.7to12.685to100%charge
12.6to12.475to85%charge
12.4to12.250to75%charge
12.2to12.025to50%charge
Below12.0Fullydischarged
2
4
ClosingtheRearandFront
HoodsontheMachine
NoPartsRequired
ClosingtheRearHood
Note:Iftherearhoodandthefronthoodareopen,therear
hoodmustbeclosedbeforeclosingthefronthood.
1.Grasptheforwardedgeoftherearhood.
2.Rotatethehooddown(Figure1).
3.Pushdownrmlyonthehoodtoseatitintothehood
clips.
ClosingtheFrontHood
Note:Ensurethattherearhoodisclosedbeforeclosing
thefronthood.
1.Graspthelatchhandle,androtatethehooddown
(Figure1).
2.Pushdownrmlyonthehoodtoseatitintothehood
clips.
3.Rotatethelatchhandlecounterclockwise(Figure1).
4.Pivotthehandledowntothestowedposition(Figure
1).
3