manuals.online logo
Brands
  1. Home
  2. •
  3. Brands
  4. •
  5. Trixie
  6. •
  7. Pet Care Product
  8. •
  9. Trixie 39345 User manual

Trixie 39345 User manual

Other Trixie Pet Care Product manuals

Trixie Polygon User manual

Trixie

Trixie Polygon User manual

Trixie REPTILAND Manual

Trixie

Trixie REPTILAND Manual

Trixie TX8 Smart User manual

Trixie

Trixie TX8 Smart User manual

Trixie Vital Flow User manual

Trixie

Trixie Vital Flow User manual

Trixie TX9 User manual

Trixie

Trixie TX9 User manual

Trixie 39335 User manual

Trixie

Trixie 39335 User manual

Trixie TX1 User manual

Trixie

Trixie TX1 User manual

Trixie REPTILAND Fogger XL User manual

Trixie

Trixie REPTILAND Fogger XL User manual

Trixie Fun Circle User manual

Trixie

Trixie Fun Circle User manual

Trixie TX8 Smart User manual

Trixie

Trixie TX8 Smart User manual

Trixie 39343 User manual

Trixie

Trixie 39343 User manual

Trixie Automatic Pet Feeder User manual

Trixie

Trixie Automatic Pet Feeder User manual

Trixie Flower User manual

Trixie

Trixie Flower User manual

Trixie TX9 User manual

Trixie

Trixie TX9 User manual

Trixie 62324 Datasheet

Trixie

Trixie 62324 Datasheet

Trixie TX9 User manual

Trixie

Trixie TX9 User manual

Trixie TX9 User manual

Trixie

Trixie TX9 User manual

Trixie TX8 Smart User manual

Trixie

Trixie TX8 Smart User manual

Trixie natura 44117 User manual

Trixie

Trixie natura 44117 User manual

Trixie Reptiland Reptile Rain User manual

Trixie

Trixie Reptiland Reptile Rain User manual

Trixie REPTILAND User manual

Trixie

Trixie REPTILAND User manual

Trixie Fresh Flow Deluxe User manual

Trixie

Trixie Fresh Flow Deluxe User manual

Trixie Le Bistro User manual

Trixie

Trixie Le Bistro User manual

Trixie TX7 User manual

Trixie

Trixie TX7 User manual

Popular Pet Care Product manuals by other brands

PitPat PP02 user manual

PitPat

PitPat PP02 user manual

Schwinn Rascal owner's manual

Schwinn

Schwinn Rascal owner's manual

K&H Small Animal quick start guide

K&H

K&H Small Animal quick start guide

SHOR-LINE 006.3230.00 Product guide

SHOR-LINE

SHOR-LINE 006.3230.00 Product guide

Petsafe Stubborn Dog Receiver Collar operating guide

Petsafe

Petsafe Stubborn Dog Receiver Collar operating guide

juwel Rio 240 instruction manual

juwel

juwel Rio 240 instruction manual

Datamars OMNI MAX user manual

Datamars

Datamars OMNI MAX user manual

Roverpet 30DDPP Assembly instructions

Roverpet

Roverpet 30DDPP Assembly instructions

SportDOG SD-105S-C manual

SportDOG

SportDOG SD-105S-C manual

Staywell 400 Series Magnetic user guide

Staywell

Staywell 400 Series Magnetic user guide

Dogtek Sonic Birdhouse user guide

Dogtek

Dogtek Sonic Birdhouse user guide

Togfit Deluxe Trigger Lock Door Gate Instructions for use

Togfit

Togfit Deluxe Trigger Lock Door Gate Instructions for use

Girafus 227PA user manual

Girafus

Girafus 227PA user manual

ubbink KoiFeeder Solar operating instructions

ubbink

ubbink KoiFeeder Solar operating instructions

Petsafe ST-100 operating guide

Petsafe

Petsafe ST-100 operating guide

CADOCA Deuba 106911 instructions

CADOCA

CADOCA Deuba 106911 instructions

Dogtra RR Deluxe owner's manual

Dogtra

Dogtra RR Deluxe owner's manual

Carson CONVERTIBLE PET YARD 2200 owner's manual

Carson

Carson CONVERTIBLE PET YARD 2200 owner's manual

manuals.online logo
manuals.online logoBrands
  • About & Mission
  • Contact us
  • Privacy Policy
  • Terms and Conditions

Copyright 2025 Manuals.Online. All Rights Reserved.

TRIXIE Heimtierbedarf GmbH & Co. KG · D-24963 Tarp · www.trixie.de
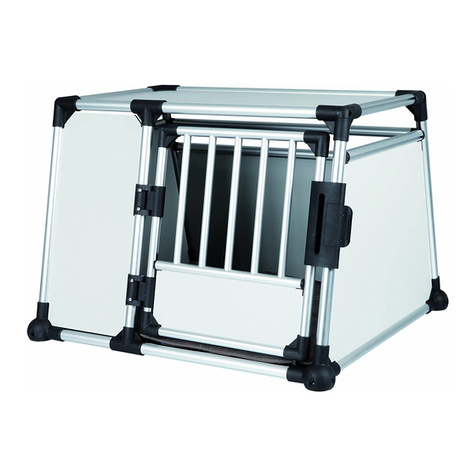
Doppel-Transportkäfig/Double Transport Crate
Art.-Nr./Item 39345
 Inhalt  Content
1
Rechte
Seitenwand/
Right Side Panel
Linke
Seitenwand/
Left Side Panel 2 Türen/2 Doors
2 Rückwände/2 Back Panels 2 Dachplatten/2 Top Plates 2 Bodenplatten/2 Base Plates
Trennwand/Divider
Rückwand-Profilstreben/Back Panel Profiles (4 ×)
(2 ×)
(1+1 ×)
A
Stangen oben/Bars for Top
B
Stangen unten/Bars for Base
C
Metallstifte
für Tür/
Metal Pins
for Door
Schrauben/
Screws Schutzkappen/
Protective Caps
(8 ×) (4 ×) (4 ×)
Trennstange Dach/Dividing Bar Top
Trennstange Boden/Dividing Bar Base
Türstrebe/Door Bar
Trennstange Rückwand/Dividing Bar Back Panel
D
E
F
G
C
*
TRIXIE Heimtierbedarf GmbH & Co. KG · D-24963 Tarp · www.trixie.de
Doppel-Transportkäfig/Double Transport Crate
Art.-Nr./Item 39345
 Aufbauanleitung  Assembling Instructions
Um maximale Stabilität und Sicherheit zu erreichen, sind alle Teile der
Transportbox sehr genau aufeinander abgestimmt. Dies erfordert
absolut präzises Arbeiten bei der Montage. Nur so können Sie die Box
problemlos aufbauen und ihre hohe Qualität später voll nutzen. Für den
Aufbau werden mindestens zwei Personen benötigt. Bitte planen Sie für
den Aufbau 1–2 Stunden Zeit ein. Sollten Sie beim Zusammensetzen
einen Gummihammer zur Hilfe nehmen, schützen Sie die Box bitte mit
Polstermaterial.
For maximum stability and safety all parts of the transport box have been
compatibly matched with high precision. This requires utmost precision
during assembly. Only that way can the box be assembled without
problems and its high quality will be available to you once it is finished.
You need at least two people for the assembly. Please reserve 1-2 hours
for the assembly. If you use a rubber mallet during assembly, protect the
box with padded material.
1
B
B
C
C
*
2
3
Legen Sie die rechte Seiten-
wand auf den Boden und
stecken Sie die vier Stangen (B
und C) ein.
Die geschlossene Seite der vor-
deren Stange C* muss nach vor
-
ne zeigen, die der hinteren nach
hinten. Die geschlossene Seite
der Stangen B muss nach oben
zeigen.
Die Winkel zwischen den Rillen
sind nicht gleich. Achten Sie bei
allen vier Stangen besonders
auf die richtige Ausrichtung.
Orientieren Sie sich hierfür an
den markierten Kanten.
Place the right side panel on
the floor and insert the four
bars (B and C).
The closed sides of the bars C*
have to face one towards the
front and one towards the back.
The closed sides of the bars B
have to point upwards.
The angles between the
grooves are not identical. Pay
special attention to the correct
alignment of all bars. Use the
marked edge as orientation.
Richten Sie die Box auf, um alle vier Stangen lose
anzuschrauben. Verzichten Sie zunächst auf die
Schutzkappen.
Turn the box upright to loosely screw in the four bars.
Do not place the protective caps on the bars yet.
Die Verbinder für die Rückwand-Profilstreben sitzen
eventuell noch nicht in der richtigen Position.
Schieben Sie sie, falls nötig, in die richtige Richtung
und stecken Sie die Rückwand-Streben (A) ein.
The connectors for the back panel profiles might not
be in the right position. If necessary, push them in the
right direction and fit in the bars for the back panel (A).
4
A
A
2
oben/above
unten/below
vorne/front
hinten/back
TRIXIE Heimtierbedarf GmbH & Co. KG · D-24963 Tarp · www.trixie.de
Doppel-Transportkäfig/Double Transport Crate
Art.-Nr./Item 39345
5
6
7
Setzen Sie nun die erste
Dachplatte ein.
Now insert the first top plate.
8 9
Entfernen Sie den Transport-
schutz von den Ecken der
Platten. Wichtig: Arbeiten Sie
beim Einsetzen von Boden,
Rückwand und Dach sehr
genau. Setzen Sie die Platten
ganz gerade ein und drücken
Sie sie fest in die Profile, um
spätere Probleme beim
Aufbau oder mit dem fertigen
Produkt zu vermeiden.
Setzen Sie als erstes die erste
Bodenplatte ein. Beachten Sie
dabei die korrekte Ausrich-
tung der Platte.
Remove the transport protection from the
corners of the panels. Important: work precise-
ly when inserting base plate, back panel and
top plate. Insert the panels absolutely straight
and press them tightly into the profiles to avoid
problems later on either with the assembly or
the finished product.
Start by inserting the first base plate. Pay
attention to the correct alignment of the panel.
Setzen Sie dann die erste Rückwand ein.
Achten Sie auch hier auf die richtige Ausrich-
tung der Platte.
Next insert the first back panel.
Please again pay attention to
the correct alignment.
Schieben Sie dann die Trenn-
stangen (D, E, F) an allen drei
Seiten vorsichtig und gleich-
mäßig nach unten.
Setzen Sie die Trennwand und
die Türstrebe (G) ein. Das
obere schwarze Verbindungs-
element der Türstrebe ist mit
einem B graviert. Setzen Sie
diese Seite an Stange B an. Die
Gravur zeigt dabei nach außen.
Push the particular dividing bars
(D, E, F) for all three sides down
carefully and evenly.
Insert the divider and the door
bar (G). The upper black con-
necting element of the door
bar has a 'B' engraved. Fit this
side to barB,with the engra-
ving facing to the outside.
3
D
E
F
G
TRIXIE Heimtierbedarf GmbH & Co. KG · D-24963 Tarp · www.trixie.de
Doppel-Transportkäfig/Double Transport Crate
Art.-Nr./Item 39345
10 11
12
13
14
15 16
Stecken Sie die verbliebenen
beiden Rückwand-Profilstreben
(A) auf die Steckverbindungen
und fügen Sie die zweite
Bodenplatte, die zweite Rück-
wand und das zweite Dach ein.
Insert the remaining two back
panel profiles (A) into the con-
nectors and add the second
base plate, the second back
panel and the second top plate.
Zuletzt setzen Sie das linke Seitenelement auf.
Drücken Sie bei diesem Arbeitsschritt alle vier
Ecken kräftig und ganz gleichmäßig hinunter. Es ist
normal, dass die Transportbox bei der Montage
dieses Teils stark unter Spannung steht. Dies ist
notwendig, um ein späteres Klappern während der
Fahrt zu verhindern. Sollte sich die letzte Wand
nicht korrekt aufsetzen lassen, ist es hilfreich die
vormontierten Schrauben dieses Elements an den
Ecken zu lockern.
Last add the left side panel. For this press all four
corners down evenly and with force. It is normal that
the transport box is under high tension for this step.
This is necessary to prevent rattling when you are
driving later. If you cannot fit this last panel correct-
ly, it might be helpful to loosen the pre-mounted
screws of this panel at the corners.
Ziehen Sie alle Schrauben, auch die ggf. zuvor
gelockerten, schrittweise und reihum an den
verschiedenen Ecken wieder fest. Durch das
Verschrauben nehmen alle Teile ihre endgültige
Position ein, und die ca. 1–1,5 cm großen Lücken
zwischen Verbindern und Gitterstreben schließen
sich. Für den geraden und lückenlosen Aufbau ist es
sehr wichtig, die Schrauben schrittweise und an
allen Seiten gleichmäßig anzuziehen. Schließlich
sollten alle Schrauben sehr fest angezogen sein.
Tighten all the screws, including the ones you have
loosened, step by step going round from corner to
corner. When everything has been screwed together
tightly, all parts will be in their final position, and the
1–1.5 cm gaps between connectors and lattice bars
close. To achieve a straight result without gaps it is
vital to tighten the screws step by step and evenly on
all sides. At the end all screws should be securely
tightened.
Erst wenn alle Schrauben fest sitzen und die Box
gerade und stabil zusammengefügt ist, lösen Sie
die Schrauben an den oberen Ecken wieder und
setzen diese mit Schutzkappen erneut ein.
Once all screws are tight and the box is fully
assembled and straight and stable, loosen the screws
in the upper corners and fit them in again with the
protective caps.
Setzen Sie die Türen in die
Scharniere ein und schrauben
Sie die Metallstifte fest. Die
Türen sitzen dann korrekt,
wenn sie sich mit leichtem
Druck vorne auf den Ver-
schluss öffnen lassen. Dies ist
eine Sicherheitsmaßnahme,
um ungewolltes Öffnen (z.B.
von innen durch den Hund)
sowie Klappern zu verhindern.
Öffnet oder schließt eine Tür
nur schwer, ist dies ein Hinweis darauf, dass die
Schrauben nicht fest genug angezogen sind oder
eine der Wände nicht ganz gerade sitzt.
Fit the doors into the hinges
and screw the pins tight. The
doors are fitted correctly if
they can be opened by lightly
pressing on the fastener at the
front. This is a security feature
to prevent undesired opening
(e.g. through the dog from
the inside) and rattling. If
one door is difficult to open
or to close, this indicates
that the screws have not
been tightened enough or one of the panels is not
quite straight.