manuals.online logo
Brands
  1. Home
  2. •
  3. Brands
  4. •
  5. Ultra-safe
  6. •
  7. Safety Equipment
  8. •
  9. Ultra-safe 96805 Operator's manual

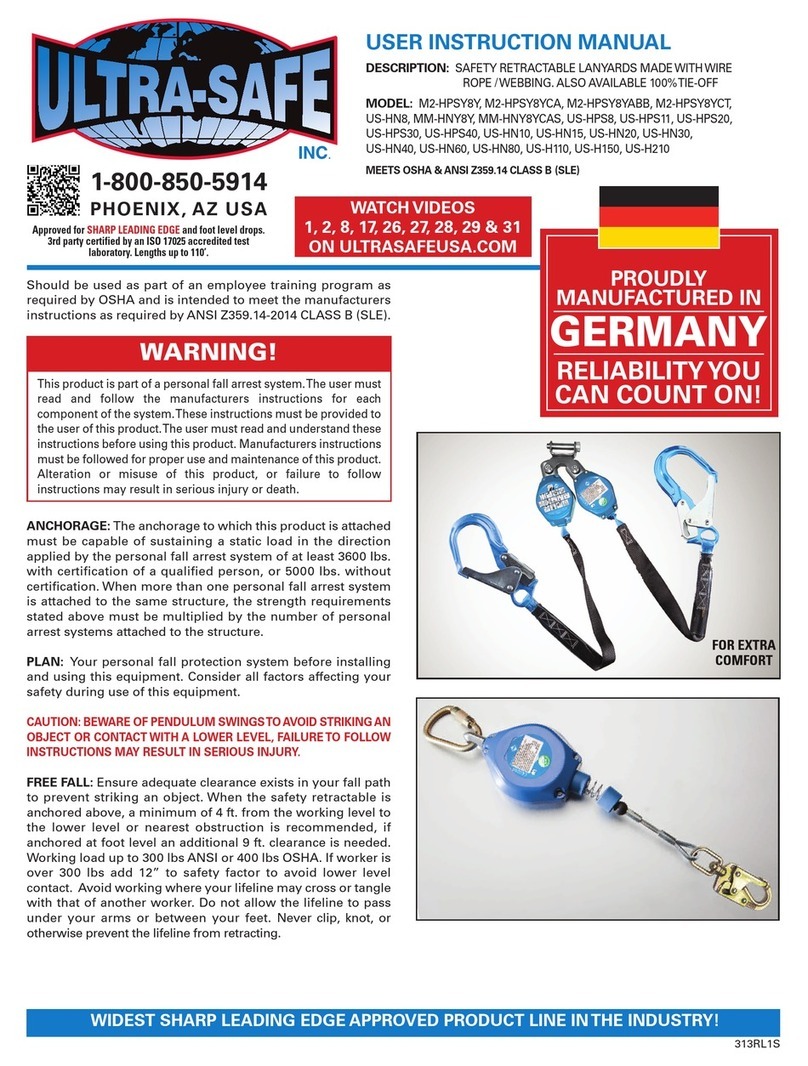
Ultra-safe 96805 Operator's manual

WARNING!
Items subjected to fall arrest or impact
forces must be immediately removed
from service and destroyed. Any item
showing excessive wear or deterioration
should be destroyed. Inspect all equip-
ment before each use. Failure to observe
proper inspection and usage procedures
could result in injury or death. Environ-
mental hazards must be considered in
selecting the appropriate lifeline, har-
ness and lanyard. ecommendations
where chemicals, high temperature or
other unusual conditions exist may be
addressed to ULT A-SAFE, INC. at 1-800-
850-5914.
F EE FALL CONSIDE ATIONS
Free fall distance should be kept to a
minimum, and as required by OSHA, in
no case shall be greater than 6 feet. To
help assure this, tie-off attachment point
to the lifeline or anchor should be lo-
cated at or above the connection point of
the fall arrest equipment to the harness.
1
MODEL:
_________________________
_
SIZE: ____________________
DATE: __________________
_
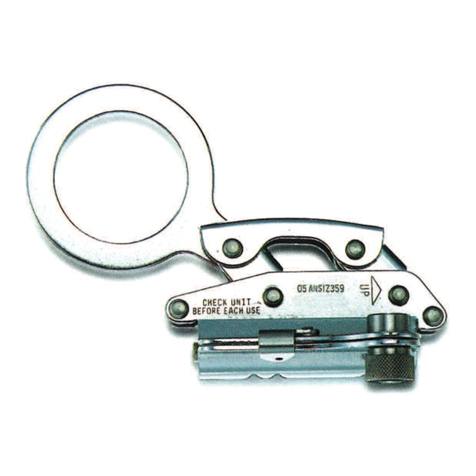
US-5000C OPE G AB
Made of durable non-corrosive stainless steel, brass &
bronze. They 100% inspected for function, construction
and material integrity and are designed to meet the per-
formance requirements of ANSI Z359.1, OSHA 1926
(maximum 3 ft (0.9m) shock absorbing lanyard) and (a
permanently attached 3 ft (0.6m) lanyard) when used with
5/8” Poly-Dac or be positioned not to exceed 6’ free fall.
See Instructions 313 G1
US-5000 OPE G ABS
To be used with 5/8" or 3/4" diameter Poly-Dac rope lifeline
with minimum tensile strength of 6,100 lbs. The US-5000
is a rope grabbing device that follows a worker's movement
up and down a vertical lifeline. If a fall occurs, the rope grab
locks on the rope and absorbs much of the force generated
during the free fall.The unique energy absorbing design of
the US-5000 allows the user to use web lanyard with no
shock absorber (max length 3 feet) and still meet OSHA's
maximum force requirements. See Instructions 313 G2
313LL
USE INST UCTION MANUAL
DESC IPTION: LIFELINE DOUBLE LOCK SNA ONE END
AND CROWN S LICE OTHER END
MODELS: 96805 - 5/8” x 50’ 96905 - 3/4” x 50’
96810 - 5/8” x 100’ 96910 - 3/4” x 100’
96815 - 5/8” x 150’ 96915 - 3/4” x 150’
MEETS OSHA & ANSI Z359.1-07
1-800-850-5914
PHOENIX, AZ USA
FO USE WITH US-5000C O US-5000 OPE G ABS. (SOLD SEPA ATELY)
ATTACH ENE GY AB-
SO BE
ONLY TO DO SAL
D- ING
MAXIMUM ATTACHMENT DISTANCE
WITH HOOK WITHOUT HOOK
ACCEPTABLE DESIGNED ETAINE
DO NOT
ATTACH ENE GY
ABSO BE
TO ANCHO
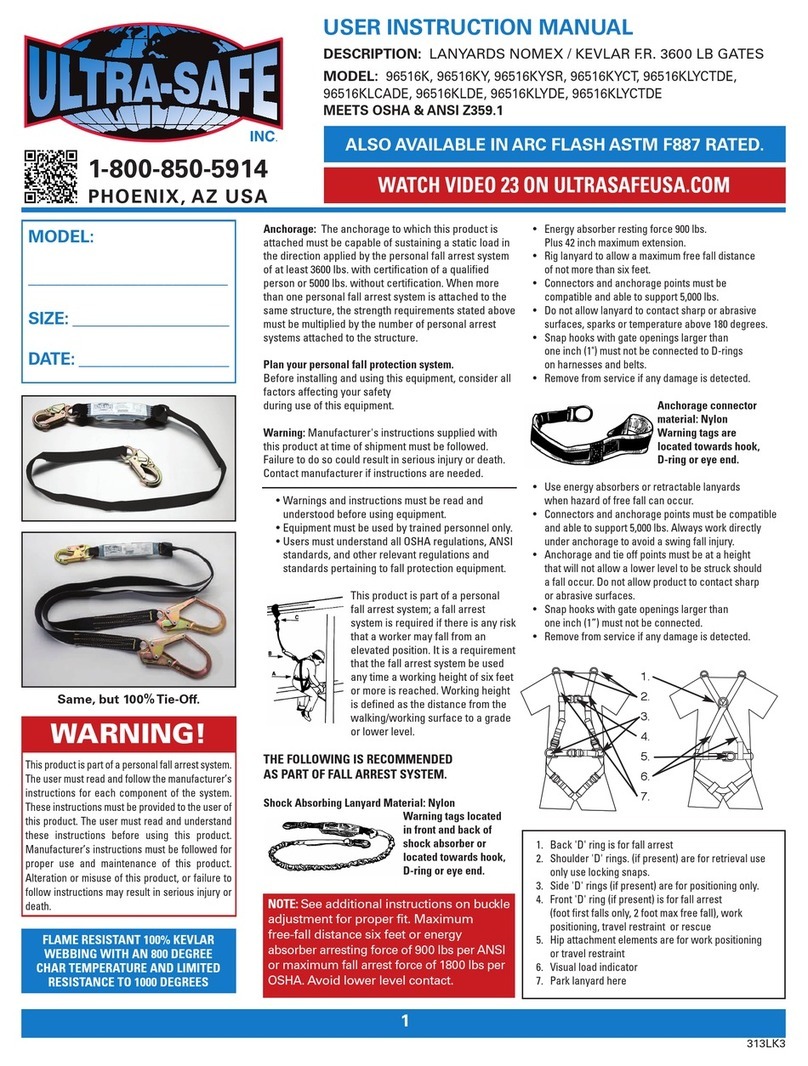
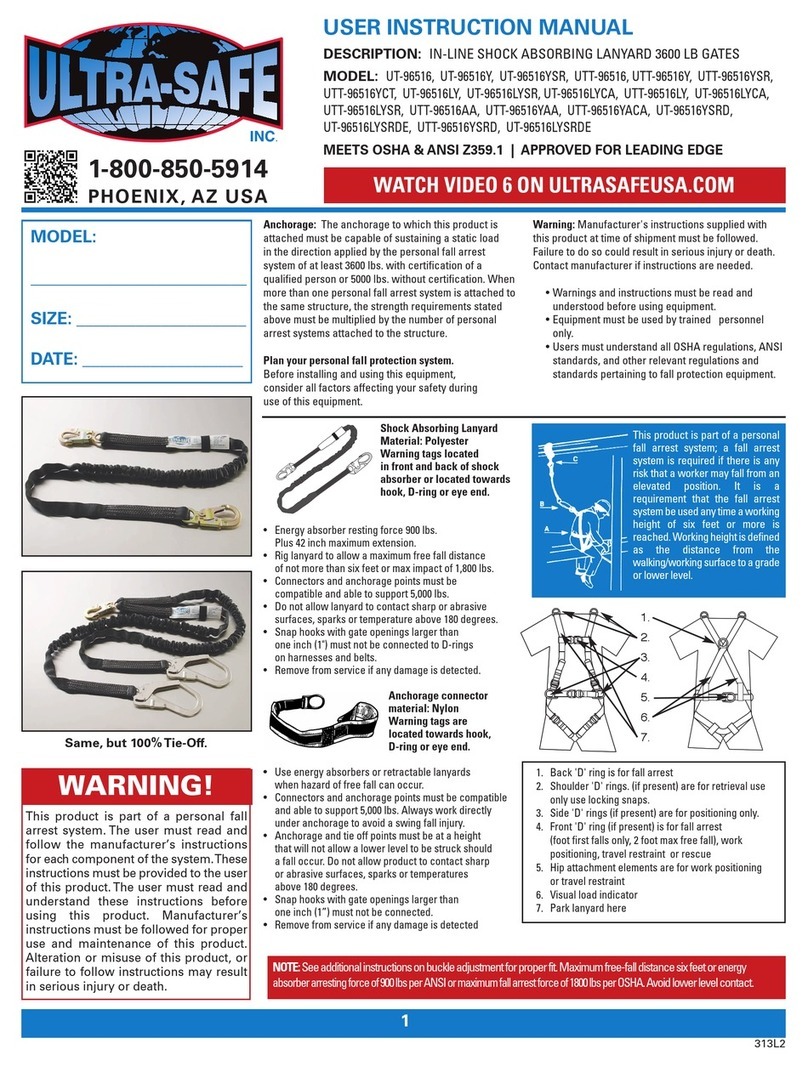
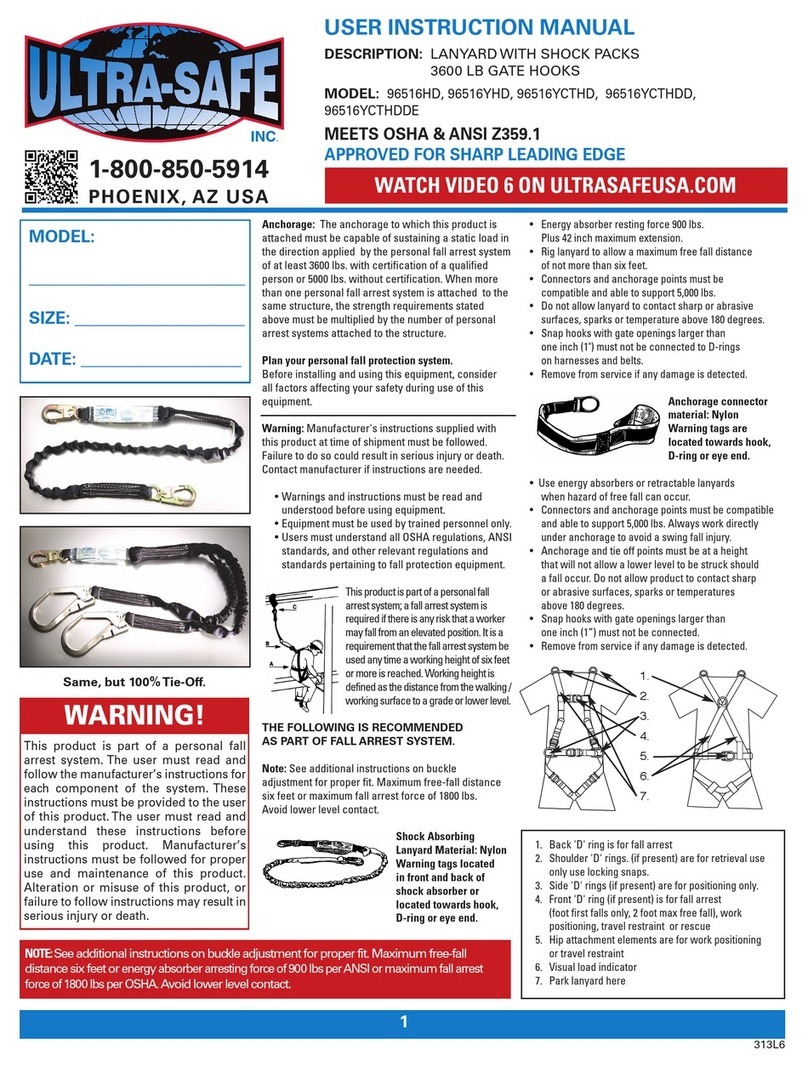
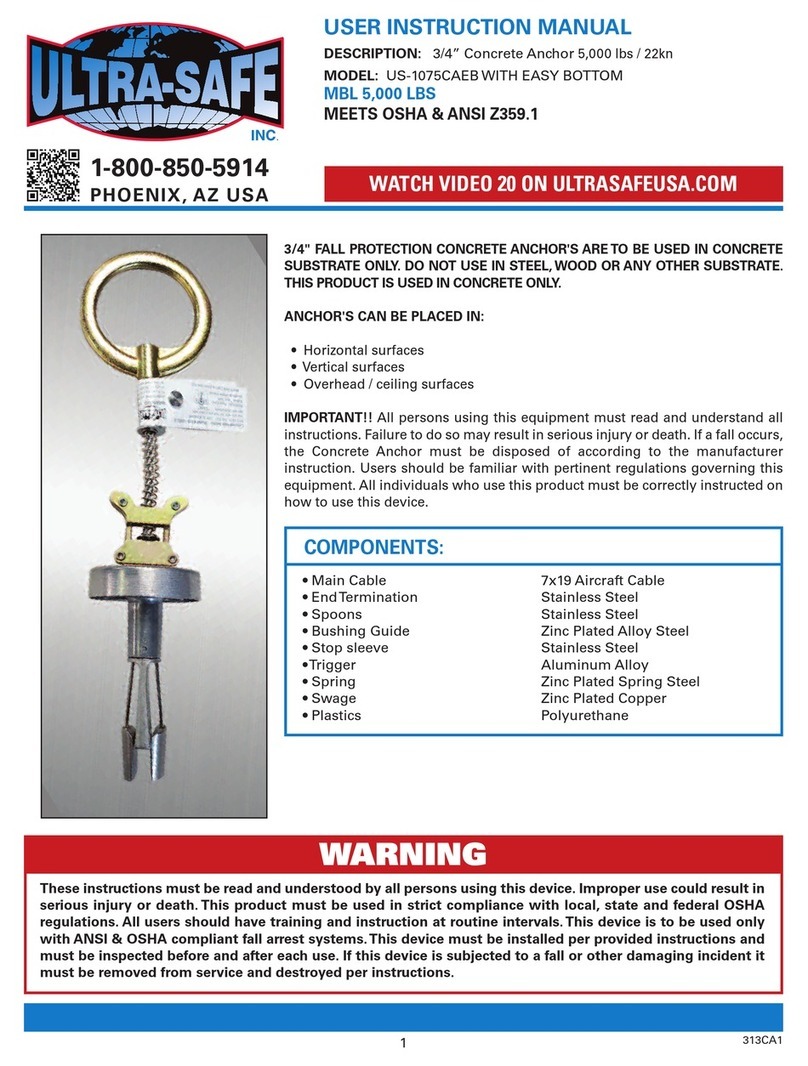
When using lanyards commonly referred to
as "100% tie-off”, "Y" type, "double" or "twin
leg" shock absorbing lanyards. This supple-
ment provides additional information on the
use of these types of lanyards that are used
with a personal fall arrest systems.
ractices that must be followed in order to
use a 100% tie-off lanyard safely.
1. The shock absorber pack portion of the
lanyard assembly MUST be connected
to the back dorsal D-ring ONLY, by way
of a double locking lanyard snap hook
(other connectors provided, consult
ULTRA-SAFE, INC.) connect shock ab-
sorber directly to the dorsal D-ring.
2. Do not connect shock absorber to the
anchorage point at any time.
3. Do not connect the unused leg of the
lanyard assembly to any portion of the
full body harness, unless a specifically
designed lanyard snap hook loop re-
tainer is provided for this purpose.
4. When connecting from one anchorage
point to the next (traversing a vertical or
horizontal structure) do not connect to
an anchorage point further apart than,
the length of the lanyard.
5. When using a 100% tie-off lanyard as-
sembly, do not allow any part of the lan-
yard to pass under arms or legs.
6. Connection of both lanyard legs to sep-
arate anchorage points is acceptable,
as long as anchorage points are within
the length of the lanyard.
2
ANCHORAGE: Select a rigid anchorage point that is capable of supporting the required loads. The an-
chorage location must be carefully selected to reduce possible free fall and swing fall hazards and to
avoid striking an object during a fall. The anchorage should be generally level (horizontal) to prevent
the anchorage connector from sliding down an incline when in use, which could cause serious injury
to the user.
FREE FALL: Maximum free-fall distance six feet or maximum fall arrest force of 1800 lbs.
Avoid lower level contact.
CONNECTING TO ANCHORAGE OR ANCHORAGE
CONNECTOR: Always connect the energy ab-
sorber end of the lanyard to the body support (har-
ness). Connect the lanyard end to the anchorage
or anchorage connector. Component style energy
absorbers should be connected to the' body support first, then coupled to the rest of
the system. Some anchorage connector devices may be supplied with permanently
attached energy absorber. Use of an additional energy absorber or energy absorbing
lanyard with these types of subsystems is not recommended.
FALL CLEARANCE: Should a fall occur, there
must be sufficient clearance in the fall area
to arrest the fall before striking the ground or other object. Energy absorbers can extend the fall
arrest distance by up to 42 inches (106.7 cm). The illustration to the right shows how to estimate
fall clearance distance when using an energy absorbing lanyard or energy absorber subsystem.
Other factors may influence the required clearance distances. For example, using an energy ab-
sorbing lanyard or energy absorber with a rope grab (fall arrestor) may require additional clear-
ance due to stretch in the lifeline or sliding of the rope grab on the lifeline during fall arrest. Some
full body harness models incorporate a sliding (positional) D-ring in the back as the fall arrest
attachment, movement of this D-ring during fall arrest can increase the fall clearance distance
required. Use caution when assembling system components that could act to extend the fall ar-
rest distance (and therefore fall clearance required). Refer to manufacturer's instructions for
each part of the system for more information on fall clearance.
Energy
Absorbing Lan-
yard
Energy
Absorbing
Lanyard
Connecting
Subsystem
Anchorage
Connector
Anchorage
Connector
Anchorage
Connector
CHEST LOOPS AND Y-LANYA DS
Anchor
oint
Nearest Ob-
struction
(Lower Level)
NOTE:
Allow a minimum of
17’ from anchor
point to lower level.
Clearance to Obstruction
1 1/2ft (.5m) Min Allowed
3
General -
1. Check or wear deterioration.
Before each use, carefully inspect your
complete Ultra-Safe system for signs of wear
or deterioration, or evidence of impact loading. Vi-
sually inspect for loose threads, pulled rivets,
burns, cuts, distortions, abrasions, or other evi-
dence of chemical or physical deterioration that
may have weakened the material or assembly.
2. Inspect hardware or mal unctions and cracks.
Check all snap hooks, buckles and D-Rings.
3. Destroy and replace all worn
or damaged equipment.
Immediately destroy and replace any component
which does not pass inspection.
Speci ic -
1. Stitching and webbing.
Check stitching for broken, burned, cut or pulled
stitches. Broken strands of webbing appear as
tufts on the webbing surface. To visually check for
damage caused by corrosives, heat, chemicals
and other conditions, hold the connecting device
with your hands six to eight inches apart. Bend
the webbing in an inverted "U" to cause surface
tension and expose problem areas. Inspect entire
length. For deceleration units, check the stitching
for broken, burned, cut or pulled stitches, and the
breakaway jacket for cuts, tears, broken stitches,
stretch marks or other evidence of impact load.
For aircraft-cable lanyards, check the full length
for breaks, burns or cuts in the vinyl covering and
the aircraft cable.
2. Check or broken strands.
Inspect rope lanyards for broken strands by twist-
ing the rope slightly to undo the braiding. Inspect
the entire lanyard in this manner. Lanyards with
broken strands must be discarded.
3. Inspect all snap hooks, D-Rings and
other metal parts.
Hardware must be checked for sharp edges and
cracks. Rollers should not be distorted in shape
and should roll freely. Check all parts, especially
corners and attachments points, for wear and
cracks.
4. Destroy and replace all worn or damaged
Ultra-Sa e equipment.
If evidence of excessive wear, deterioration or
mechanical malfunction is observed, replace the
equipment immediately. Never work with worn or
damaged Ultra-Sa e equipment. Using damaged
or worn equipment can cause injury or death.
5. The inspector is the most important part
o any inspection procedure.
Check all equipment thoroughly and follow all
safety procedures and guidelines. Do not take
any shortcuts', they could result in injury or death.
NOTE: Twisted rope, such as the nylon filament
and polyplus rope used in Ultra-Safe lanyards,
is subject to a condition known as "hockling",
which is similar to the twisting we often see
in a telephone handset cord. This can be
caused by a repetitive twisting movement
such as normal hand rotation in hooking
and unhooking, a lanyard dangling freely,
or by using the lanyard to suspend equipment.
Preventive measures include:
1) Never using a lanyard for towing or hoisting,
2) Inspection and smoothing out after each use,
3) Storing neatly. Some hockling is normal,
and in itself is not cause to discard
the lanyard.
Inspection Procedures
Serial Number:
Model Number:
Date Purchased:
Inspection Date Inspection Items Noted Corrective Action Maintenance Per ormed
Date o First Use:
INSPECTION AND MAINTENANCE LOG
IMPORTANT NOTE: OSHA specifies that all employers covered by the Occupational Safety and Health Act are responsible for inspection and
maintenance of all tools and equipment used by employees, whether owned by the employees or by the company. All Ultra-Safe equipment
should be inspected before each use, and immediately removed from service if equipment does not pass inspection.
Approved By:
Approved By:
Approved By:
Approved By:
Approved By:
Approved By:
Approved By:
Approved By:
4
Inspection Date Inspection Items Noted Corrective Action Maintenance Per ormed
Approved By:
Approved By:
Approved By:
Approved By:
Approved By:
Approved By:
Approved By:
Approved By:
EXAMPLE OF TAGS
MATERIAL POL ESTER & POL PROP LENE BLEND
- SEE SEPARATE INSTRUCTIONS EMPHASIZING MAXIMUM ELONGA-
TION CHARACTERISTICS AND PROPER
INSTALLATION AND LOWER END TERMINATION.
- DO NOT ALLOW PRODUCT TO CONTACT SHARP OR
ABRASIVE SURFACES, SPARKS OR TEMPERATURES
ABOVE 180º F.
- INSPECT BEFORE EACH USE.
WARNING
MANUFACTURER’S INSTRUCTIONS SUPPLIED WITH THIS PRODUCT AT
TIME OF SHIPMENT MUST BE FOLLOWED. FAILURE TO DO SO COULD
RESULT IN SERIOUS INJUR OR DEATH. CONTACT MANUFACTURER IF
INSTRUCTIONS ARE NEEDED. DO NOT EXPOSE TO CHEMICAL AND
CORROSIVES WHICH COULD WEAKEN THE MATERIAL AND/OR HARD-
WARE. CONSULT MANUFACTURER IF IN DOUBT.
MANUFACTURERED IN THE U.S.A.

This manual suits for next models

5

Other Ultra-safe Safety Equipment manuals

Ultra-safe MM-HNY8Y Operator's manual

Ultra-safe

Ultra-safe MM-HNY8Y Operator's manual

Ultra-safe UT-96516 Operator's manual

Ultra-safe

Ultra-safe UT-96516 Operator's manual

Ultra-safe US-HN8 Operator's manual

Ultra-safe

Ultra-safe US-HN8 Operator's manual

Ultra-safe US-5082ACSS Operator's manual

Ultra-safe

Ultra-safe US-5082ACSS Operator's manual

Ultra-safe US-1075CAEB Operator's manual

Ultra-safe

Ultra-safe US-1075CAEB Operator's manual

Ultra-safe 96426SR Operator's manual

Ultra-safe

Ultra-safe 96426SR Operator's manual

Ultra-safe UT-97516 Operator's manual

Ultra-safe

Ultra-safe UT-97516 Operator's manual

Ultra-safe 96305NK Operator's manual

Ultra-safe

Ultra-safe 96305NK Operator's manual

Ultra-safe 96516K Operator's manual

Ultra-safe

Ultra-safe 96516K Operator's manual

Ultra-safe US-5000C User manual

Ultra-safe

Ultra-safe US-5000C User manual

Ultra-safe 97424S Operator's manual

Ultra-safe

Ultra-safe 97424S Operator's manual

Ultra-safe TORINO LIGHT User manual

Ultra-safe

Ultra-safe TORINO LIGHT User manual

Ultra-safe 96516HD Operator's manual

Ultra-safe

Ultra-safe 96516HD Operator's manual

Ultra-safe 96305NTM Operator's manual

Ultra-safe

Ultra-safe 96305NTM Operator's manual

Ultra-safe 96305QL Operator's manual

Ultra-safe

Ultra-safe 96305QL Operator's manual

Ultra-safe M2-HPSY8Y Operator's manual

Ultra-safe

Ultra-safe M2-HPSY8Y Operator's manual

Popular Safety Equipment manuals by other brands

Lanex PB-20 instruction manual

Lanex

Lanex PB-20 instruction manual

SKYLOTEC ANCHOR ROPES Instructions for use

SKYLOTEC

SKYLOTEC ANCHOR ROPES Instructions for use

Besto Buoyancy Aid 50N Instructions for use

Besto

Besto Buoyancy Aid 50N Instructions for use

TEUFELBERGER NODUS Manufacturer's information and instructions for use

TEUFELBERGER

TEUFELBERGER NODUS Manufacturer's information and instructions for use

Troy Lee Designs Tbone Product owners manual

Troy Lee Designs

Troy Lee Designs Tbone Product owners manual

Innova Xtirpa Instruction and safety manual

Innova

Innova Xtirpa Instruction and safety manual

bolle SAFETY B810 quick start guide

bolle SAFETY

bolle SAFETY B810 quick start guide

SHENZHEN FANHAI SANJIANG ELECTRONICS A9060T instruction manual

SHENZHEN FANHAI SANJIANG ELECTRONICS

SHENZHEN FANHAI SANJIANG ELECTRONICS A9060T instruction manual

Hiltron security POWER8E Installation and use manual

Hiltron security

Hiltron security POWER8E Installation and use manual

Salewa MTN SPIKE user manual

Salewa

Salewa MTN SPIKE user manual

Hatco B-950P installation guide

Hatco

Hatco B-950P installation guide

Sitec TX MATIC operating manual

Sitec

Sitec TX MATIC operating manual

TEUFELBERGER GRIP 12 Manufacturer's information and instructions for use

TEUFELBERGER

TEUFELBERGER GRIP 12 Manufacturer's information and instructions for use

MSA PremAire System Operation and instructions

MSA

MSA PremAire System Operation and instructions

AMC 1022M Series instruction manual

AMC

AMC 1022M Series instruction manual

Trinity CASS S3 Assembly manual

Trinity

Trinity CASS S3 Assembly manual

CMC Helitack HotSeat quick guide

CMC

CMC Helitack HotSeat quick guide

ACM SAFETY D200 Instructions and warnings

ACM

ACM SAFETY D200 Instructions and warnings

manuals.online logo
manuals.online logoBrands
  • About & Mission
  • Contact us
  • Privacy Policy
  • Terms and Conditions

Copyright 2025 Manuals.Online. All Rights Reserved.