manuals.online logo
Brands
  1. Home
  2. •
  3. Brands
  4. •
  5. VeEX
  6. •
  7. Test Equipment
  8. •
  9. VeEX VePAL TX300 User manual

VeEX VePAL TX300 User manual

The Verification Experts
Quick Reference Guide
VePAL TX300
DS1 LOOP
TRANSPORT
VePAL TX300
Quick Reference Guide
DS1 LOOP
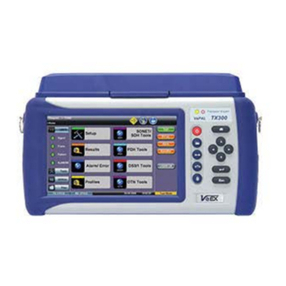
TX300 Test Set
OTN/10GE/SDH/
PDH test ports
10/100/1000Base-T and
1000Base-X test ports Navigation
Control
Field Replaceable Smart
Li-Ion Battery
7” Color
Touch Screen
Quick Keys
DC
Input
Ethernet
USB
VePAL TX300
Quick Reference Guide
DS1 LOOP
The Home menu can be accessed at anytime during operation
by pressing the Home key on the rubber keypad. The screen is
divided into three presentation areas:
Left
Middle
Right
Home Menu
LEDs: Displays soft LEDs associated with Errors
and Alarms
Tools: IP connection status, Advanced IP features
(Net Wiz, WiFi Wiz, VoIP, and IPTV applications),
Fiber Scope, ReVeal EZ Connect
Utilities: Applications (Help, Settings, Files) which
are common to all VePAL handheld test sets
Test Applications specic to the test set (DS1, DS3,
SONET, Ethernet, Fiber Channel, 3.072G Testing,
Advanced Mode)
Start/Stop
Err Inj/Alarm: Tap to insert an error or alarm
Alarm/Err: Pull down menu with buttons for alarm
generation and error injection
DS1 Loop: Activate the loopback



  
VePAL TX300
Quick Reference Guide
DS1 LOOP
Allows the user to set up the DS1 interfaces and associated test
parameters prior to running a test.
DS1 Home Menu
Setup – congure
Interface,
Measurement and
General settings;
Framing, Line
code, Pattern,
Clock source and
Offset options are
also congured in
this screen
Results – view Summary, Analysis, Errors/Alarms, Histogram,
Graph, Signal, and Event Log
Alarm/Error – select the Alarms and Errors type/ow
Tools – Pulse Mask, View Rx Data, Round Trip Delay, ISDN,
VF Tasks
CSU/NIU Emulation – emulate DS1 customer premises
equipment, simulating a CSU or NIU
DS1 Monitor – a search for Line Code, Framing, and Test
Pattern in Rx DS1 signal
Proles – all have the ability to save proles
DS1 Tools Menu
DS1 Pulse Mask
DS1 RX Data
Round Trip Delay
DS1 ISDN PRI
DS1 VF Tasks
DS1 Home
VePAL TX300
Quick Reference Guide
DS1 LOOP
1. Connect to the DS1 test interface using the Bantam connectors
2. Power on the unit
3. From the DS1 Home menu, tap on the Setup menu
4. Congure the Measurements and General settings
Conguration
5. Tap the Interface tab to set up the DS1 interfaces and
associated test parameters prior to running a test.
External Clock: The clock for the transmitter is derived from a 1.5Mbit/s
signal or 1.5MHz BITS clock present on the SMA connector and 1.5Mbit/s
signal present on the RX2 balanced or AUX BNC unbalanced.
Offset: The clock for the transmitter is derived from the internal clock
generator. It can change the offset while measurements are running. Use
numeric keys to increase/decrease the frequency shift up to 0.01 ppm.
Frequency offset: ±50 ppm with 1, 0.1, 0.01 ppm resolution.
Measurements:
Mode - xed duraon or
delayed start
Performance Analysis-
None, G.821, G.826, M.2100
Jier - ON or OFF
General: Audible Alarm
and Auto Save sengs
Line Code: line code
opons are B8ZS or AMI
Clock Src: Internal,
External (SMA or 2nd RX
for balanced or AUX RX
for unbalanced), From
RX, Oset (±50 ppm)
VePAL TX300
Quick Reference Guide
DS1 LOOP
6. Congure the DS1 Loop. Press the button.
The Loopback can operate many kinds of loopback
devices on a DS1 line. With the circuit looped back, it is
possible to measure the transmission performance on the
transmission path between the TX300 and the loopback
device.
Select the Loop Mode
and Loop Type
Loop Up: Use to loop
up the circuit before
tesng.
Loop Down: Use to
restore the circuit to
normal once tesng is
complete
Conguration (DS1 Loop)
In-band: CSU, NIU FAC1, NIU FAC2
NIU: This code is used for an industry-standard network interface unit
(smart jack) if it is set to respond to in-band loopback codes. This
loopback regenerates only the signal and should pass both BPVs
and bit errors. The telephone company generally installs this unit at
the customer premises.
CSU: Use this code for looping the customer-owned CSU.
*ESF DFL (Out-of-band): Line, Payload
LINE: This code operates a line loopback at a CSU. This loopback
regenerates only the signal. Bit errors and BPVs should pass through
this loopback.
PAYLOAD: This code operates a payload loopback at a CSU. In this
loopback, the 192-channel bits pass through, but the framing bits
and line code are regenerated. Only bit errors will pass through.
VePAL TX300
Quick Reference Guide
DS1 LOOP
Conguration (DS1 Loop)
*Note: This determines the type of sent loopback code. Sent in the ESF
framing data link are ESF-DFL codes; therefore, ESF framing must be used
to select ESF. IN-BAND is the most common type deployed in networks.
INBAND can be transmitted with any type of framing. However, some
loopback devices will not respond to IN-BAND loopback codes when
transmitted with ESF framing. When in doubt, select IN-BAND when using
SF framing and ESF-DFL when using ESF framing.
HDSL:
NLOC – 1111000, DSX-1 signal is looped back to the network at the HLU.
NDU1 – 110000, DSX-1 signal is looped back to the network at doubler1.
NDU2 – 111000, DSX-1 signal is looped back to the network at doubler2.
NREM – 1110000, DSX-1 signal is looped back to the network at the HRU.
CREM – 1111110, Customer Remote. Invokes HLU loopback towards
the customer.
CDU1 – 111100, Signal from the customer is looped back to the customer
at doubler1.
CDU2 – 111110, Signal from the customer is looped back to the customer
at doubler2.
CLOC – 1111100, Signal from the customer is looped back to the customer
at the HRU
Generic
Loopback
Commands
USER: Select the desired loopback code with keypad.
VePAL TX300
Quick Reference Guide
DS1 LOOP
8. Loop Down - Press the Loop down button.
Tap . A
“Loop up in progress”
message will be
displayed followed by
a “ Loop up success”
message.
Tap . A
“Loopdown in
progress” message
wil l be displ a y ed
followed by a “Loop
d o w n s u c c e s s ”
message.
7. Loop Up testing - Press the Loop up button.
Conguration (DS1 Loop)
VePAL TX300
Quick Reference Guide
DS1 LOOP
Summary screen: Provides an overview of any alarms, errors
or signal failures.
Analysis screen: ES, SES, AS, UAS are evaluated and a
Pass/Fail result is displayed in conjunction with path allocation
of between 0.1 and 100%.
Results
9. Once the OK button is pressed in Loop Up, the screen
automatically moves to the Results, Summary screen.
−Results can be viewed by selecting the following tabs:
Summary, Analysis, Errors/Alarms, Histogram, Graph,
Signal, and Event Log
VePAL TX300
Quick Reference Guide
DS1 LOOP
Errors/Alarms screen: The soft LEDs on screen are arranged
logically and depend on signal hierarchy, structure, payload and
framing selected. The soft LEDs have a tri-color function.
Results (cont’d)
Note: Tapping the individual soft LED will automatically link you to
the applicable results screen, which provides detailed information.
Green: No error or
alarm is present
Red: An error or
alarm condition
is detected and is
currently present
Yellow: Indicates a
history condion
VePAL TX300
Quick Reference Guide
DS1 LOOP
Signal screen: Tap the Signal tab to bring up the Frequency
and Level results.
Results (cont’d)
FREQUENCY – the received signal frequency and offset is
measured and displayed.
−1.5M current: Indicates the frequency of the input
signal
−Offset: Indicates the difference between the standard
rate and the rate of the input signal
−Min (ppm): Indicates the difference between the
standard rate and the minimum deviation detected in
the input signal
−Max (ppm): Indicates the difference between the
standard rate and the maximum deviation detected
in the input signal
LEVEL – measures the Peak and Peak-Peak voltage
values of the incoming signal.
VePAL TX300
Quick Reference Guide
DS1 LOOP
The Verification Experts
VeEX Inc.
2827 Lakeview Court
Fremont, CA 94538 USA
Tel: +1.510.651.0500
Fax: +1.510.651.0505
www.veexinc.com
[email protected]
© 2011 VeEX Inc. All rights reserved.
VeEX is a registered trademark of VeEX Inc. The
information contained in this document is accurate.
However, we reserve the right to change any
contents at any time without notice. We accept no
responsibility for any errors or omissions. In case of
discrepancy, the web version takes precedence over
any printed literature. D02-00-028P A00 2011/07
Results (cont’d)
Event Log screen: Tap the Event Log tab to display a listing of
the Error and Alarm events recorded during a test.
EVENTS – presented in chronological sequence - number,
type of event, start time and duration, duration (alarms)
and ratio/count (errors) are displayed. Scroll through the
pages depending on the number of events recorded.
10. To save the test results, press the store key on the
rubber keypad. The results le can be viewed in the FILES/
SAVED results index.

Other manuals for VePAL TX300

6

Other VeEX Test Equipment manuals

VeEX VePAL TX300 User manual

VeEX

VeEX VePAL TX300 User manual

VeEX VePAL TX320s User manual

VeEX

VeEX VePAL TX320s User manual

VeEX CX100 Series User manual

VeEX

VeEX CX100 Series User manual

VeEX FX120 User manual

VeEX

VeEX FX120 User manual

VeEX FL41 User manual

VeEX

VeEX FL41 User manual

VeEX RXT-6200 User manual

VeEX

VeEX RXT-6200 User manual

VeEX MTTplus User manual

VeEX

VeEX MTTplus User manual

VeEX VePAL BX100A Series Guide

VeEX

VeEX VePAL BX100A Series Guide

VeEX CX380C User manual

VeEX

VeEX CX380C User manual

VeEX MTX150 Series User manual

VeEX

VeEX MTX150 Series User manual

VeEX VePAL TX300 User manual

VeEX

VeEX VePAL TX300 User manual

VeEX OTDR FX150+ Series User manual

VeEX

VeEX OTDR FX150+ Series User manual

VeEX MTT-14B User manual

VeEX

VeEX MTT-14B User manual

VeEX MX100 Series Guide

VeEX

VeEX MX100 Series Guide

VeEX WiFi Air Expert Series User manual

VeEX

VeEX WiFi Air Expert Series User manual

VeEX MTTplus-420 User manual

VeEX

VeEX MTTplus-420 User manual

VeEX V-SAM VePAL V300 User manual

VeEX

VeEX V-SAM VePAL V300 User manual

VeEX TX300s User manual

VeEX

VeEX TX300s User manual

VeEX VePAL TX300M User manual

VeEX

VeEX VePAL TX300M User manual

VeEX NET-BOX User manual

VeEX

VeEX NET-BOX User manual

VeEX RTU-300 User manual

VeEX

VeEX RTU-300 User manual

VeEX VePAL TX300 User manual

VeEX

VeEX VePAL TX300 User manual

VeEX LX100 Guide

VeEX

VeEX LX100 Guide

VeEX RXT-1200 User manual

VeEX

VeEX RXT-1200 User manual

Popular Test Equipment manuals by other brands

Megger OTS100AF user guide

Megger

Megger OTS100AF user guide

AEMC instruments CA7024 user manual

AEMC instruments

AEMC instruments CA7024 user manual

Tektronix TDS 200-Series user manual

Tektronix

Tektronix TDS 200-Series user manual

Fluke 9100S user guide

Fluke

Fluke 9100S user guide

Testboy TV 431 manual

Testboy

Testboy TV 431 manual

Philips PM3055 Service manual

Philips

Philips PM3055 Service manual

Agilent Technologies 85056K manual

Agilent Technologies

Agilent Technologies 85056K manual

HP 16533A Programmer's guide

HP

HP 16533A Programmer's guide

Sealey TA131 quick start guide

Sealey

Sealey TA131 quick start guide

Innoquest SPOTON MINI-PATTERNATOR product manual

Innoquest

Innoquest SPOTON MINI-PATTERNATOR product manual

Galaxy SED-MON-IT-860 user manual

Galaxy

Galaxy SED-MON-IT-860 user manual

BGS technic 2072 quick start guide

BGS technic

BGS technic 2072 quick start guide

AlkoHAWK AlkoHAWK Beacon owner's manual

AlkoHAWK

AlkoHAWK AlkoHAWK Beacon owner's manual

Kimo CAL 200 user manual

Kimo

Kimo CAL 200 user manual

Sibata FLD-1 Operation manual

Sibata

Sibata FLD-1 Operation manual

OPTOKON OFT-920 user manual

OPTOKON

OPTOKON OFT-920 user manual

Fluke 1535 user manual

Fluke

Fluke 1535 user manual

Macmesin MultiTest-xt Assembly and installation

Macmesin

Macmesin MultiTest-xt Assembly and installation

manuals.online logo
manuals.online logoBrands
  • About & Mission
  • Contact us
  • Privacy Policy
  • Terms and Conditions

Copyright 2025 Manuals.Online. All Rights Reserved.