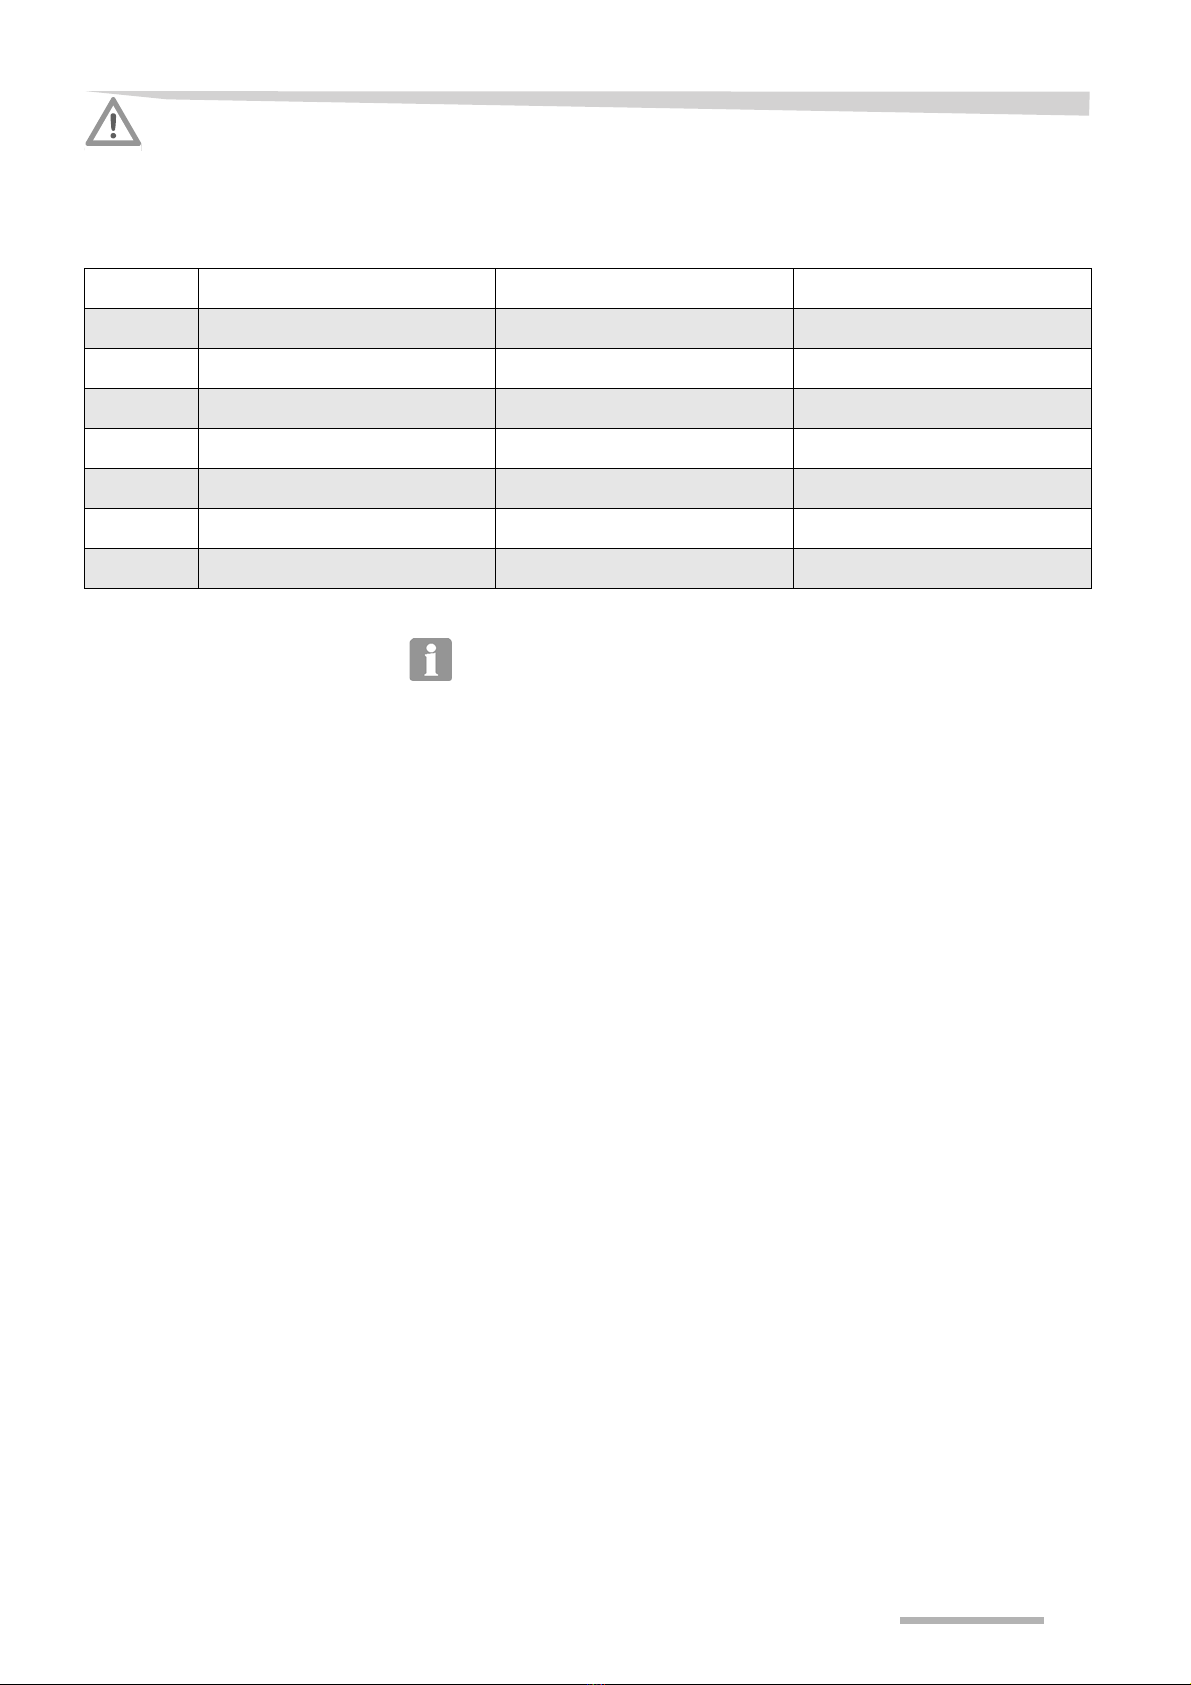
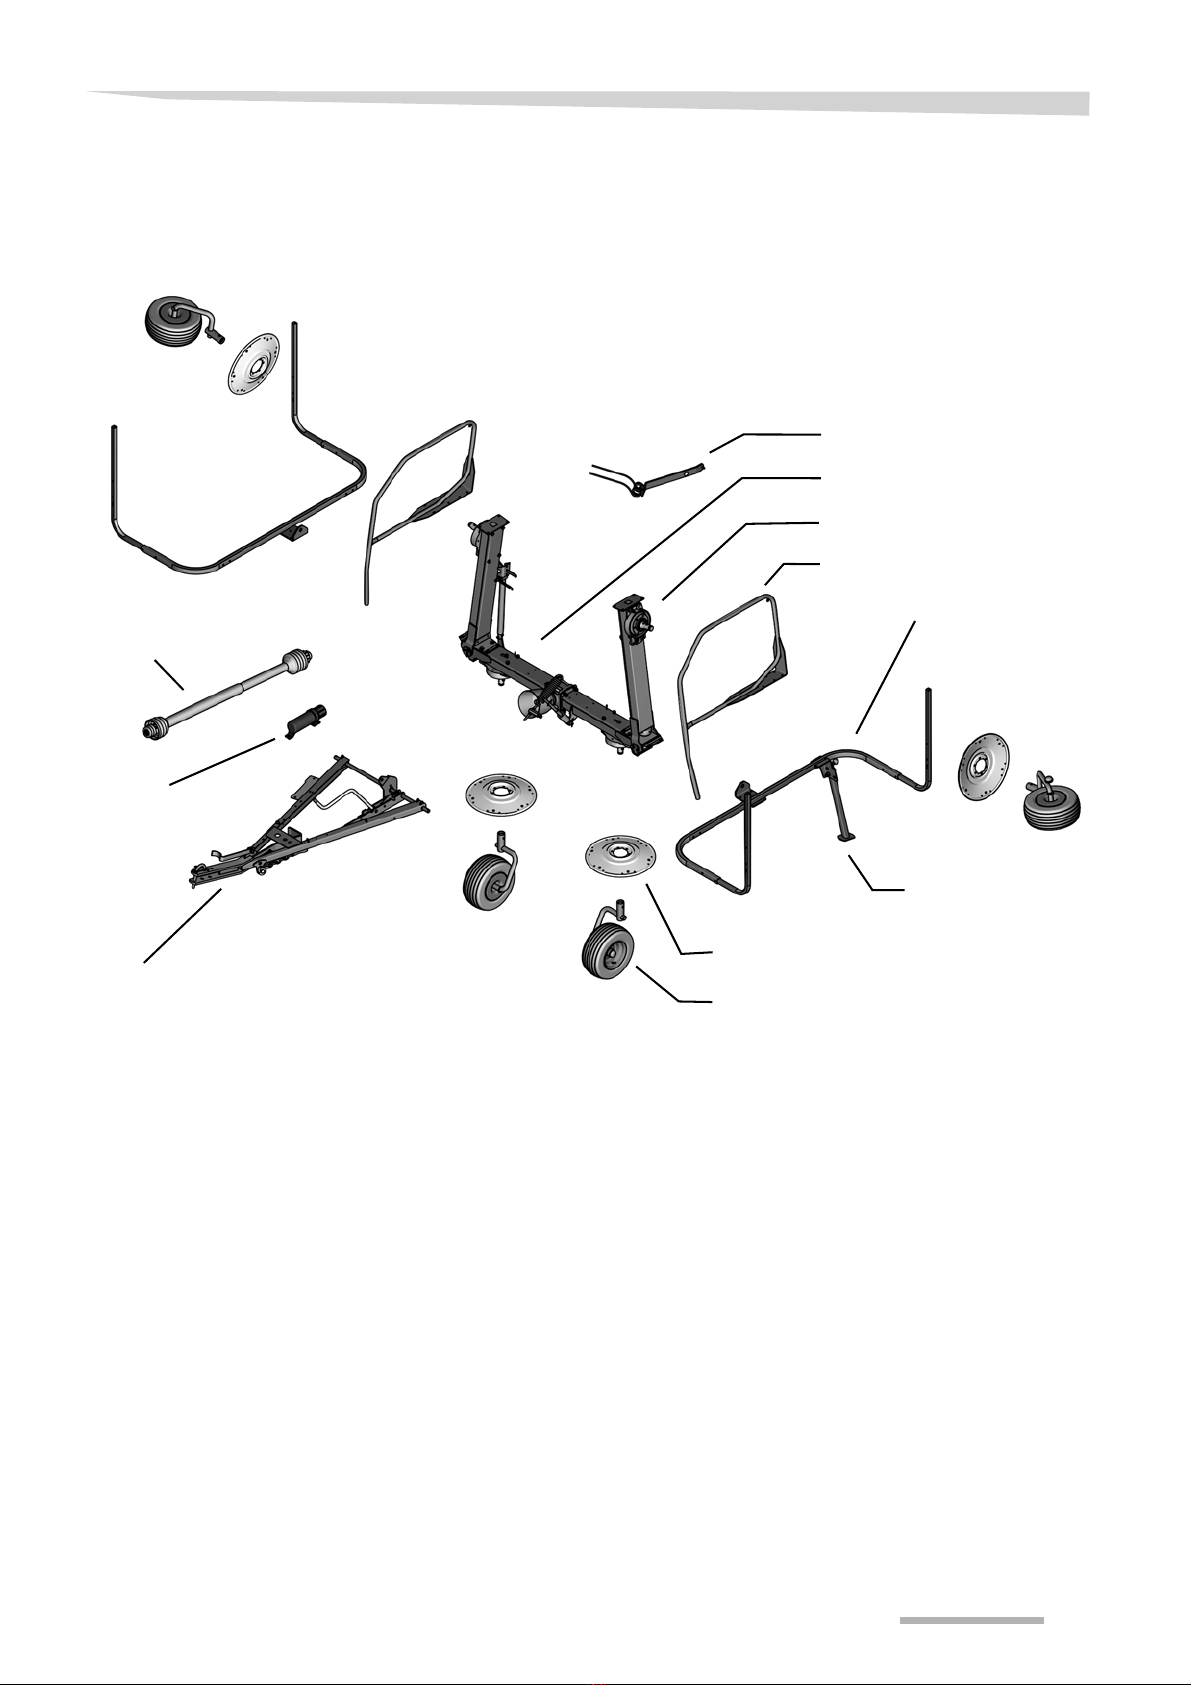
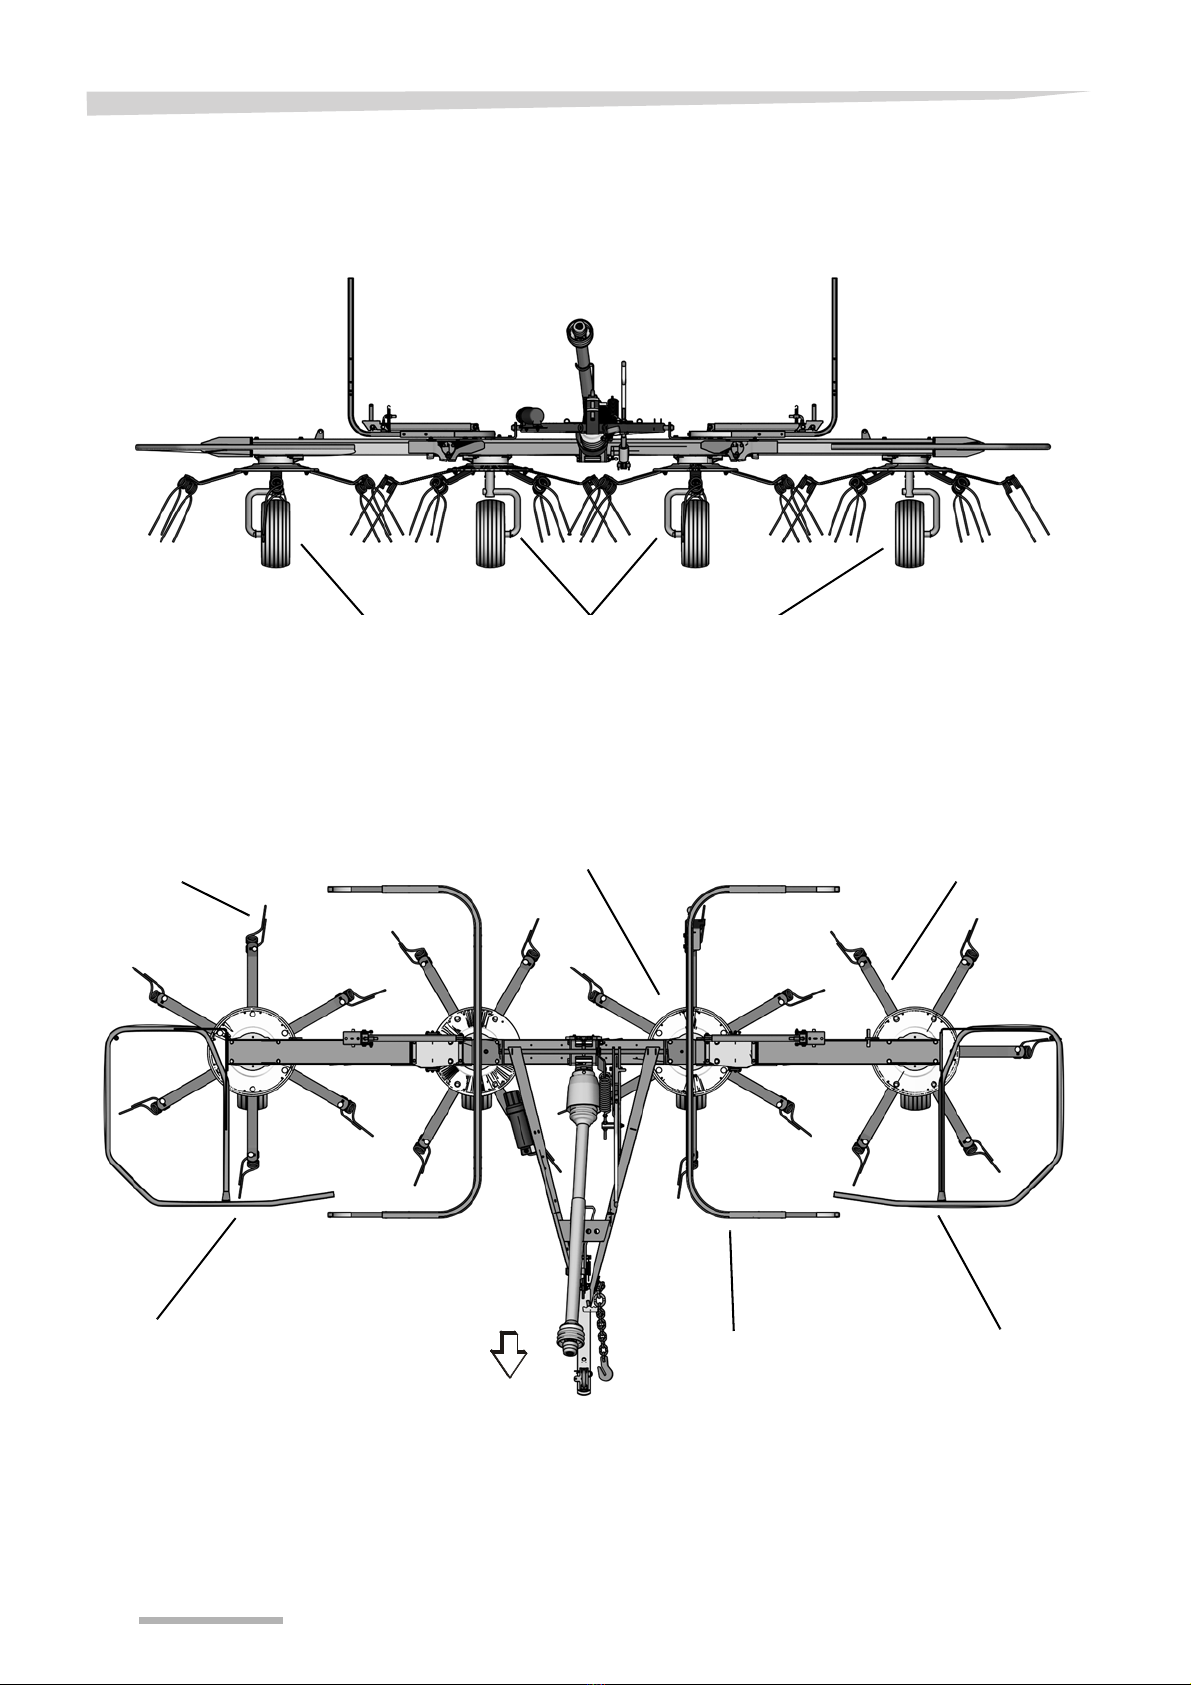
Vicon Fanex 524 T User manual

Fanex 524 T
Assembly instructions
Original assembly instructions
Edition 04.2013
Date of print 12.2013
Language EN
Machine number VF69152000 –
Model VF6915
Document number VF16660677.EN

Kverneland Group Kerteminde AS
Taarupstrandvej 25
DK-5300 Kerteminde
Denmark
Tel: +45 65 19 19 00
Copyright by Kverneland Group Gottmadingen N. V., Germany. Reproduction, transfer to other media, translation or the use of extracts or parts
of this manual without the explicit permission of Kverneland, is not permitted. All rights reserved. The contents of this operating manual are subject
to change without notice. The right to technical revision is reserved.

Table of contents
3
Table of contents
Preliminary information ........................... 4
Target group for
these assembly instructions 4
Meaning of the symbols 4
Safety ......................................................... 5
For your safety 5
Screw and bolt tightening torques 7
Direction and rotary direction 7
Overview .................................................... 8
Designation of components 8
Crate packaging ........................................ 9
Assembly groups in crate packaging 9
Basic machine 12
Fitting the wheels 13
Fitting the drawbar 14
Fitting attachment parts for the drawbar 18
Fitting the protective pot 20
Laying the control cables 21
Routing the hydraulic lines 22
Fitting the tine supports 23
Assembling the protective equipment 25
Safety chain for USA and Canada 27
Fitting the document box 27
Final assembly with crate packaging 28
Circuit diagrams ....................................... 29
Hydraulic diagram 29
Final tasks ................................................. 30
Trial run 30
Environment 30

Preliminary information
4
Prelimi nary inform ation
Target group for
these assembly
instructions
These instructions are intended for authorised dealers, workshops
and agents qualified in the field of agricultural mechanical engi-
neering.
For your safety
You must familiarise yourself with the contents of these assembly
instructions before assembly or operating the machine. In this way,
you will achieve optimum work results and operational safety. The
assembly instructions form an integral part of the machine and must
always be kept to hand. This will allow:
•accidents to be avoided,
•warranty requirements to be met.
For the employer:
Untrained or unauthorised individuals are not permitted to assemble
the machinery.
Meaning of the
symbols
In these assembly instructions, the following symbols and terms have
been used:
•A bullet point accompanies each item in a list.
A triangle indicates operating functions which must be performed.
We have also used pictograms to help you find instructions more
quickly:
The "Information" pictogram indicates tips and additional information.
The grease gun indicates lubrication points.
The brush indicates that grease must be applied.
Switch on the tractor.
Switch off the tractor and secure it against rolling away.
The arrow in the diagram shows the direction of travel.
The warning triangle indicates important safety information and
danger. Failure to observe this safety information can result in:
•Serious faults in the correct operation of the machine,
•Damage to the machine,
•Personal injury or accidents.

Safety
5
Safety
For your safety
Please carefully read and observe the safety information in this
chapter prior to assembly. All persons involved in assembling or
setting up this machine must read and pay close attention to the
assembly instructions that follow.
Correct assembly
Non-compliance with the following rules amounts to gross negligence.
As a result, the manufacturer cannot be held liable for any damage
caused by negligence. The risk is then borne solely by the operator.
This machine must only be assembled by trained technicians. in
accordance with the current version of the assembly instructions.
Before the implement is coupled to a tractor, transported, or initially
operated, the operating manual and its safety instructions must be
thoroughly read and observed.
It is the responsibility of the operator to ensure that all personnel
involved in the assembly are provided with the relevant accident
prevention regulations, as well as generally applicable health and
safety and road safety regulations. All personnel involved in the
assembly must be aware of these rules and regulations and adhere to
them; they must also be instructed on the potential risks and dangers.
Unauthorised alterations to the machine invalidate any liability of the
manufacturer for resultant damage.
The following rules and regulations must be observed:
•The locally applicable accident prevention regulations,
•The recognised safety regulations, occupational health require-
ments and road traffic regulations
•The functional limits and safety regulations as set out in the
technical operating instructions.
Danger indicators signify the risk of serious injury or death.
Whenever you see this sign in the assembly instructions, please
make sure that you implement all appropriate safety measures.
Moreover, danger indicators warn of damage to machinery as well
as of financial and legal consequences (e.g. invalidation of
warranty, legal liabilities, etc.).
Faulty assembly or misuse results in:
•Risks to life and limb of the operator, third parties, and animals
in the vicinity of the machine.
•Risks for the machine and other property belonging to the
operator or third parties.
•Impairment of the efficient and damage-free operation of the
machine.

Safety
6
General safety and
accident prevention
regulations
•Responsibilities for the various activities on the machine must be
clearly defined and maintained. There must not be any confusion
regarding responsibilities, otherwise the safety of the assembly
personnel is put at risk.
•Before you start work, familiarise yourself with all the fittings and
actuation elements and their functions.
•For all work on the machine, use only appropriate tools and
implements in perfect condition.
•You must only use parts (accessories, lubricants etc.) which
comply with at least the manufacturer's specifications; you must
use them in accordance with instructions (including specified
torques).
•A part conforms to the requirements only if it is an original part or if
it is expressly approved by the manufacturer.
•Wear close-fitting clothes when operating the machine. Wear
sturdy footwear and prescribed protective equipment.
•Support and secure the machine carefully during assembly.
•Particular care must be taken in dealing with energy accumulators
such as springs and hydraulic or compressed-air assemblies.
•Dispose of oils, grease, and filters in accordance with regulations.
•Protective equipment must be properly attached and swung into its
protective position.
•Actuation elements (cords, chains, and rod assemblies) of
remotely controlled equipment must be fitted in such a way that
they cannot cause unintended movement in any transport or work
position.
•Do not leave the engine running in enclosed spaces.
•All remote-powered and all other movable parts (e.g. hydraulics)
have crush or shear points.
•Pay close attention to the markings on reversible connections and
be aware of the risk of installing a part the wrong way round.
•Always disconnect the power supply before working on the
electrical system.
•When carrying out electric welding on the machine, always
disconnect electric cables from the alternator and battery.

Safety
7
Screw and bolt
tightening torques
Note the tightening torques that are shown in the table or specified in
the text. The torque specifications refer to a dry coefficient of friction
(0.12).
Tighten safety bolts and lock nuts to a 10% higher value.
Direction and
rotary direction
All directions ("right", "left", "front", "back") are always as viewed in the
direction of travel.
Rotary direction is defined as follows:
•Rotary direction right = clockwise.
•Rotary direction left = counterclockwise.
•Rotation about a vertical axis, viewed from top to bottom.
•Rotation about a horizontal axis, viewed at right angles to the
direction of travel, from left to right.
•The rotation of screws and nuts, etc. is always viewed from the
operating side.
8.8 10.9 12.9
M6 9.9 Nm (7.3 ft.lbs) 14 Nm (10.3 ft.lbs) 17 Nm (12.5 ft.lbs)
M8 24 Nm (17.7 ft.lbs) 34 Nm (25 ft.lbs) 41 Nm (30.3 ft.lbs)
M10 48 Nm (35.4 ft.lbs) 68 Nm (50.2 ft.lbs) 81 Nm (59.8 ft.lbs)
M12 85 Nm (62.7 ft.lbs) 120 Nm (88.6 ft.lbs) 145 Nm (104 ft.lbs)
M14 135 Nm (99.6 ft.lbs) 190 Nm (140 ft.lbs) 230 Nm (166 ft.lbs)
M16 210 Nm (155 ft.lbs) 290 Nm (214 ft.lbs) 350 Nm (258 ft.lbs)
M20 410 Nm (302 ft.lbs) 580 Nm (428 ft.lbs) 690 Nm (509 ft.lbs)

Overview
8
Overview
Designation of
components
Tines
Rotor Running wheel
axle
Running
wheel
Tine support
Rotor gear
Drawbar
Central trans-
mission
Front parking
stand
Rear parking
stand
Foldable hydraulic
cylinder
Guard bar Guard bar
Outer device
Centre device

Crate packaging
9
Crate packaging
Assembly groups
in crate packaging
Tine support
Drawbar
Rear parking
stand
Guard bar for the centre device
Guard bar for the outer device
Outer device
Centre device
Document box
PTO shaft
Rotor disc
Wheels with wheel axles

Crate packaging
10
Wheels and wheel
axles
Guard bars and
tine supports
WheelsWheel axlesWheels
Guard bar for right-hand
side device Guard bar for the left-
hand side device
Guard bar for the centre
device
Tines Tine support
Rotor

Crate packaging
11
Requirements
•Suitable flat surface approx. 10 x 10 m as assembly space.
•Lifting gear with lifting accessories for at least 900 kg.
•Floor conveyor (pallet truck or fork lift) with a fork length of at least
1,800 mm.
•Stands for safely depositing implement parts.
•Spanners for tightening bolts.
Preparations for
assembly
Place the wooden crate on level ground (with the pallet floor at the
bottom) and open it without damaging the parts inside.
Take out loose parts (wheels, axles, boxes etc.).
Clear plenty of space around larger components to make access
easier.
Checking the scope
of delivery
Check that the scope of delivery is complete.
In the event of missing, incorrect or damaged parts, fill in the
"REPORT MISSING PARTS" form and send it to the "ORDER
DESK" in Kerteminde straight away.
Removing the
surface protection
Remove the surface protection (e.g. Tectyl) with which the bare
surfaces (such as tine arms, tine supports and bearing shafts)
have been coated.
Grease the bare surfaces using a brush.
Observe the safety information
Observe the safety information when carrying out all work.
Disregard for safety information can lead to serious or fatal injury.
Ensure that hydraulic connections are correct
Before lowering the implement, you must check that the hydraulic
lines are correctly connected. Wrongly connected hydraulic hoses
can trigger unpredictable movements of the machine. Serious or
fatal injury may be caused as a result.
No persons within the slewing range
There is an acute risk of injury within the slewing range from
machine parts which are slewing or folding. Serious or fatal injury
would be caused as a result.

Crate packaging
12
Basic machine
The basic machine consists of the preassembled centre and side
device combination.
Use suitable lifting accessories to remove the machine elements from
the crate.
Loosen all fastenings (wires, lashing straps).
Use a crane to place the basic machine on stands and secure in
place.
Carefully fold down the outer devices and secure using supports.
No. Quantity Part
1 1 Preassembled basic machine
2Assembly stands
3 Lifting accessories
Outer device
Centre device
Assembly stands

Crate packaging
13
Fitting the wheels
Secure the folded-out basic machine using suitable lifting accessories.
Fit the rotor discs and the wheel axles with wheels. Pay attention to
the position of the wheel axles.
Slightly fasten the rotor discs in place using two serrated flange
bolts.
Fit the wheel axles with wheels and secure them using dowel pins.
Rotor disc
Serrated flange bolt
Dowel pin
Wheel axle
No. Quantity Part
1 1 Basic machine
2 4 Rotor disc
3 24 Serrated flange bolts
(Only 8 are required for preassembly).
4 4 Wheel axles with preassembled wheels
5 4 14 x 55 dowel pin
6 4 8 x 55 dowel pin
Wheel axles with wheel
Rotor disc
Basic machine

Crate packaging
14
Fitting the
drawbar
When fitting the drawbar, the guard bars for the centre device are fitted
in order for the drawbar to be connected to the basic machine.
The drawbar is fitted in several steps:
»Fitting the guard bar«, page 15
»Connecting the drawbar to the centre device«, page 16
Thread into the elongated hole
Nut
Guard bar for the centre device
M10 x 30
Basic machine
Drawbar
B
D
Guard bar for the
centre device
A
C

Crate packaging
15
Fitting the guard bar
Remove the two M16 x 200 bolts from the centre device/gear box
(top).
Remove the four pre-fitted M12 x 130 bolts from the fastening
positions on the guard bar.
Loosely pre-fit the M10 x 30 bolts on the guard bar.
Thread the M10 x 30 bolts into the elongated holes on the centre
device and align the guard bar.
Using an M10 nut and two M12 x 130 bolts with M12 washers, fit
the right-hand guard bar (A) tightly to the centre device.
For the left-hand guard bar (C), the M10 nut must not be tightened
too tightly as the guard bar must still be able to move on the centre
device.
M16 x 200
M12 x 130
M10 x 30
Elongated
hole
M10 nut
No. Quantity Part
1 2 M10 x 30 bolt
2 2 M10 lock nut
3 2 M10 washer
4 2 Guard bar with bearing shaft holder
Guard bar for the
centre device
Bearing shaft holder
Fit the right-hand
guard bar tightly.
Fit the left-hand
guard bar loosely.
A
C

Crate packaging
16
Connecting the
drawbar to the centre
device
Connect the drawbar to the basic machine:
Bring the drawbar to the centre device.
First, insert the drawbar's bearing shaft into the bearing shaft
holder on the guard bar (A).
Push the guard bar (C) onto the drawbar.
Insert the drawbar's bearing shaft into the bearing shaft holder on
the guard bar (C).
Fit an M16 x 200 bolt and M16 nut and two M16 washers to the
centre device/gear box (top/front) in conjunction with the spring
bearing plate on the drawbar.
Fit an M16 x 200 bolt and M16 nut without M16 washers to the
centre device/gear box (top/rear) in conjunction with the spring
bearing plate on the drawbar and the hydraulics holder.
Bearing shaft
holder
WashersM16 x 200
No. Quantity Part
1 2 M16 x 200 bolts
2 2 M16 washers
3 2 M16 nut
Washer
M16 x 200
Washer
Spring bearing plate
Hydraulics holder

Crate packaging
17
Align the drawbar centrally.
Secure the drawbar's bearing shaft with an 8 x 36 dowel pin.
Using an M10 nut and two M12 x 130 bolts with M12 washers, fit the
left-hand guard bar (C) tightly to the centre device.
Dowel pin
M12 x 130
Nut
Washer
No. Quantity Part
1 4 M12 x 130 bolts
2 4 M12 washers
3 2 8 x 36 dowel pin
A
C
B
M12 x 130

Crate packaging
18
Fitting attachment
parts for the
drawbar
Fit the drawbar cylinder and the necessary attachment parts as
follows:
»Fitting the drawbar cylinder«, page 19
»Fitting the crank«, page 19
»Fitting the hexagonal profile«, page 19
»Fitting the drawbar spring«, page 20
Overview
No. Quantity Part
1 1 Drawbar cylinder
2 2 5 x 32 split pin
3 1 Crank with end cap
4 1 8 x 50 dowel pin
5 1 Drawbar spring
6 1 M12 x 150 eye bolt
7 1 27 x 85 hexagonal profile
8 1 M12 x 55 bolt
9 3 M12 washers
10 2M12 nuts
Split
Drawbar spring
Drawbar cylinder
End cap
Hexagonal profile
Crank
M12 x 150 eye bolt
Nuts and M12 washers
Dowel pin
Spindle nut

Crate packaging
19
Fitting the drawbar
cylinder
Using suitable lifting accessories, raise the drawbar until the
attachment point is approx. 400 mm above the ground.
Screw the drawbar cylinder into the spindle nut from below.
Distance from the upper edge of the spindle nut to the hole for the
dowel pin: 53 mm.
Hook the drawbar cylinder under the centre device.
Insert the pin and secure on both sides with split pins.
Fitting the crank
Place the crank onto the spindle for the drawbar cylinder.
Secure the crank with a dowel pin.
Fitting the hexagonal
profile
Fit the hexagonal profile for the eye bolt.
53 mm
Pin
Spindle nut
Split pin
No. Quantity Part
1 1 Drawbar cylinder
2 2 5 x 32 split pin
3 1 20 x 72 pin
Crank
Dowel pin
No. Quantity Part
1 1 Crank
2 1 8 x 50 dowel pin
Hexagonal profile
M12 x 55 bolt
No. Quantity Part
1 1 27 x 85 hexagonal profile
2 1 M12 x 55 bolt
3 1 M12 washer

Crate packaging
20
Fitting the drawbar
spring
Hook the drawbar spring into the upper plate.
Hook the eye bolt into the spring.
Turn the upper nut on the eye bolt and, with the washer, guide it
through the hexagonal profile.
Secure the eye bolt using a washer and the lower nut.
Distance from the hexagonal profile to the end of the eye bolt:
38 mm
Fitting the
protective pot
Fit the protective pot onto the PTO stub shaft and fasten with a
jubilee clip.
Eye bolt
Drawbar spring
38 mm
No. Quantity Part
1 1 Drawbar spring
2 1 M12 x 150 eye bolt
3 2 M12 washers
4 2 M12 nuts
1 2
No. Quantity Part
1 1 Protective pot
2 1 Jubilee clip
Table of contents
Other Vicon Farm Equipment manuals

Vicon
Vicon Andex 764 User manual

Vicon
Vicon VP8RK User guide

Vicon
Vicon Extra 390 User manual

Vicon
Vicon Andex 694 EVO User manual

Vicon
Vicon V8612H User guide

Vicon
Vicon Extra 328 User manual

Vicon
Vicon Andex 844 User manual

Vicon
Vicon Extra 228 User manual

Vicon
Vicon Fanex 523 T User manual

Vicon
Vicon KM 2800 User manual

Vicon
Vicon Fanex 833 T User manual

Vicon
Vicon Andex 323 User manual

Vicon
Vicon Andex 1104 User manual

Vicon
Vicon Fanex 763 CD User manual

Vicon
Vicon EXTRA 632 T User manual

Vicon
Vicon CM 299 User manual

Vicon
Vicon EXTRA 690 T User manual

Vicon
Vicon EXTRA 628 FT User manual

Vicon
Vicon Extra 828T PRO User manual

Vicon
Vicon Fanex 834 T User manual