manuals.online logo
Brands
  1. Home
  2. •
  3. Brands
  4. •
  5. Viega
  6. •
  7. Control Unit
  8. •
  9. Viega PureFlow Crimp Zero Lead Instruction sheet

Viega PureFlow Crimp Zero Lead Instruction sheet

Product
Instructions
PI-PF 560573 0518 PureFlow Crimp ZL x Compression Valves (EN ES FR) 1 of 2
Viega LLC, 12303 Airport Way, Ste. 395 • Broomfield, CO 80021 • Ph: 800-976-9819 • Fax: 800-976-9817
Viega PureFlow®Crimp Zero Lead
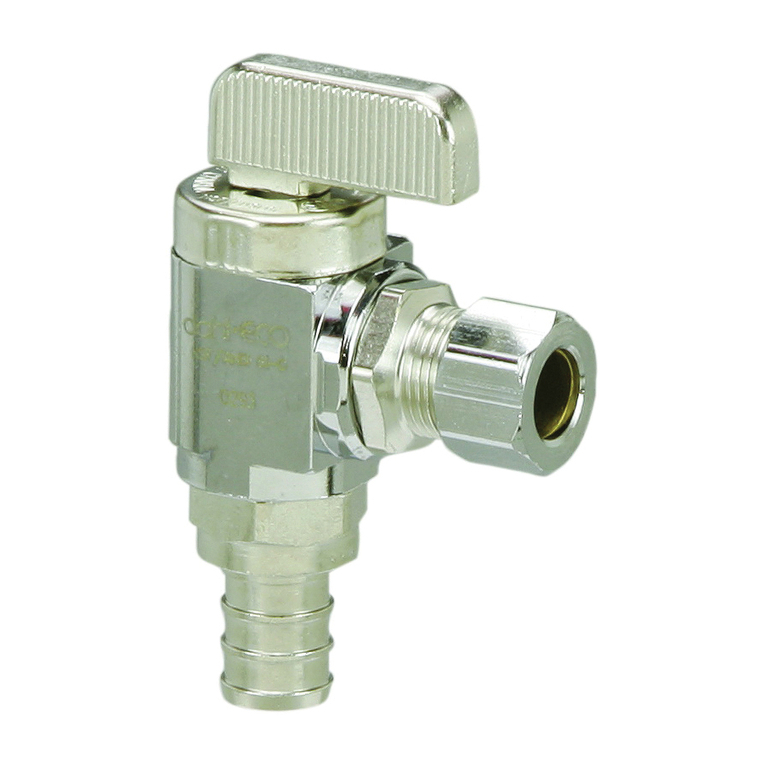
PureFlow Crimp x Compression Straight and Angled Stop Valves
56
78
3 4
12
1/8" to 1/4"
Turn off main water supply.
1. Slide crimp ring onto supply tube. Insert valve into
tubing and engage fully.
2. Position crimp ring ⅛" to ¼" from end of tubing.
3. Center the crimp tool jaw over the ring. Keep the
tool at 90° and close the handles completely.
DO NOT CRIMP TWICE.
4. Check crimp connections with a GO/NO GO gauge.
A crimp is acceptable if the GO gauge fits the ring
and the NO GO does not. See current Viega PureFlow
Water System Installation Manual for additional
crimping information.
5. Slide compression nut onto riser tube with threads
facing toward end of tubing that will connect to valve.
6. Slide plastic ferrule onto PureFlow riser tube with
longer tapered portion of ferrule towards valve.
Note: Use included brass ferrule when connecting
to copper risers only. Plastic riser ferrule is
directional and must be installed in the correct
direction to ensure a proper seal.
7. Insert tube into valve and bottom tube in socket.
8. While holding tube fully inserted in bottom of
compression fitting, slide ferrule and nut to valve and
thread nut onto valve hand tight. Tighten nut one full
turn using a suitable wrench.
This document subject to updates. For the most current Viega technical literature please visit www.viega.us.
Viega products are designed to be installed by licensed and trained plumbing and mechanical professionals who are familiar
with Viega products and their installation. Installation by non-professionals may void Viega LLC’s warranty.
*Zero Lead identies Viega®products meeting the lead free requirements of NSF 61-G through
testing under NSF/ANSI 372 (0.25% or less maximum weighted average lead content).
Instrucciones del
Producto
Directives du
Produit
PI-PF 560573 0518 PureFlow Crimp ZL x Compression Valves (EN ES FR) 2 of 2
Viega LLC, 12303 Airport Way, Ste. 395 • Broomfield, CO 80021 • Ph: 800-976-9819 • Fax: 800-976-9817
PureFlow®Zero Lead
Válvulas de cierre por compresión
rectas y acodadas PureFlow Crimp
Ver las ilustraciones en la página 1
PureFlow® Zero Lead
Vannes d’arrêt droites et à angle Pure-
Flow Crimp x Compression
Reportez-vous aux images de la page 1
Cortar el suministro principal de agua.
1. Deslizar el anillo de engarce en el tubo de suministro.
Insertar la válvula en la tubería y acoplarla por
completo.
2. Posicionar el anillo de engarce de ⅛" a ¼" desde el
extremo de la tubería.
3. Centrar la mordaza de la herramienta de engarce sobre
el anillo. Mantener la herramienta a 90° y cerrar los
mangos completamente. NO ENGARZAR DOS VECES.
4. Comprobar las uniones de engarce con una galga
de PASA/NO PASA. Un engarce es aceptable si el
elemento "PASA" se ajusta a el anillo y el elemento
"NO PASA" no lo hace. Para más información sobre
el engarce ver el manual actual de instalación de los
sistemas de agua Viega PureFlow.
5. Deslizar la tuerca de compresión en el tubo vertical con
las roscas orientadas al extremo de la tubería que se
conectará con la válvula.
6. Deslizar el casquillo de plástico sobre el tubo vertical
PureFlow con la parte cónica más larga del casquillo
hacia la válvula.
Nota: usar el casquillo de latón incluido únicamente
al conectar a verticales de cobre. El casquillo de
plástico para verticales es direccional y se debe
instalar en la dirección correcta para garantizar un
sellado correcto.
7. Insertar el tubo en la válvula y el tubo inferior en la
toma.
8. Mientras se sujeta el tubo completamente insertado en
la parte inferior del accesorio de compresión, deslizar
el casquillo y la tuerca en la válvula y enroscar la tuerca
en la válvula apretando a mano. Apretar la tuerca una
vuelta completa con una llave adecuada.
Couper l'alimentation d'eau principale.
1. Faites glisser l'anneau de sertissage sur le tuyau
d'alimentation. Insérer la vanne dans le tuyau et
enfoncer complètement.
2. Placez l'anneau de sertissage de ⅛ po à ¼ po de
l'extrémité du tuyau.
3. Centrez les mâchoires de l'outil de sertissage au-
dessus de l'anneau. Gardez l'outil à 90° et fermez les
poignées complètement. NE PAS SERTIR À DEUX
REPRISES.
4. Vérifier les connexions serties à l'aide d'une jauge
GO / NO GO (accepté/non accepté). Un sertissage
est acceptable si la jauge GO (accepté) s'intègre à
l'anneau et la partie NO GO (non accepté) ne s'intègre
pas. Se reporter au manuel d'installation actuel des
systèmes d'eau Viega PureFlow pour de plus amples
informations sur le sertissage.
5. Faire glisser l'écrou de compression sur le tuyau
d’alimentation avec le côté fileté tourné vers l'extrémité
du tuyau qui sera connecté à la vanne
6. Faire glisser la bague en plastique sur le tuyau
d’alimentation PureFlow avec la partie plus longue et
effilée de la bague orientée vers la vanne.
Remarque : Utiliser la bague en laiton comprise
lors de la connexion à des tuyaux d’alimentation
en cuivre uniquement. La bague en plastique est
directionnelle et doit être installée dans le bon sens,
pour assurer une bonne étanchéité.
7. Insérer le tuyau dans la vanne et le tuyau inférieur dans
la douille.
8. Tout en maintenant le tube complètement inséré dans
le fond du raccord à compression, faire glisser la bague
et l'écrou sur la vanne et serrer l'écrou sur la vanne à
la main. Serrer l'écrou d'un tour complet à l'aide d'une
clé appropriée.
Este documento está sujeto a actualizaciones. Para consultar la más reciente literatura
técnica de Viega visitar www.viega.us.
Los productos de Viega están diseñados para ser instalados por plomeros y
mecánicos profesionales, capacitados y con licencia, que estén familiarizados
con los productos Viega y su instalación. La instalación realizada por personal no
profesional puede anular los términos y condiciones del producto de Viega LLC.
Les produits Viega sont conçus pour être installés par des plombiers et
mécaniciens professionnels agréés et dûment formés qui en connaissent bien les
méthodes d’utilisation et d’installation. L’installation par des non-professionnels est
susceptible d’entraîner l’annulation des modalités de Viega LLC.
Ce document est soumis à des mises à jour. Pour consulter les manuels techniques Viega les
plus récents, consultez notre site www.viega.us.
La mention LEAD ZERO identie les produits Viega®qui répondent aux exigences des
normes relatives à l’absence de plomb selon l’annexe G de la norme NSF- 61, tels que
testés et homologués selon NSF/ANSI 372 (teneur moyenne pondérée maximale en
plomb de 0,25 % ou moins).
*ZERO LEAD identica a los productos Viega®que cumplen los requisitos de la NSF
61-G mediante la realización de pruebas de acuerdo a NSF/ANSI 372 (contenido de
plomo promedio ponderado máximo de 0.25 % o menos).
Other Viega Control Unit manuals

Viega 2243.10 User manual

Viega

Viega 2243.10 User manual

Viega ProPress 304 Stainless User manual

Viega

Viega ProPress 304 Stainless User manual

Viega Easytop 2170 User manual

Viega

Viega Easytop 2170 User manual

Viega Grundfix 4987 User manual

Viega

Viega Grundfix 4987 User manual

Viega 8310.76 User manual

Viega

Viega 8310.76 User manual

Viega 1252.1 User manual

Viega

Viega 1252.1 User manual

Viega ManaBloc Instruction sheet

Viega

Viega ManaBloc Instruction sheet

Viega PureFlow Crimp Instruction sheet

Viega

Viega PureFlow Crimp Instruction sheet

Viega Multiplex Trio E User manual

Viega

Viega Multiplex Trio E User manual

Viega 8332.3 User manual

Viega

Viega 8332.3 User manual

Viega 8133.3 User manual

Viega

Viega 8133.3 User manual

Viega 2275.2 User manual

Viega

Viega 2275.2 User manual

Viega Easytop 2282 User manual

Viega

Viega Easytop 2282 User manual

Viega 2337.5 User manual

Viega

Viega 2337.5 User manual

Viega 1247.4 User manual

Viega

Viega 1247.4 User manual

Viega 8310.0 User manual

Viega

Viega 8310.0 User manual

Viega 56160 Instruction sheet

Viega

Viega 56160 Instruction sheet

Viega PureFlow 2842.3ZL Instruction sheet

Viega

Viega PureFlow 2842.3ZL Instruction sheet

Viega Easytop 2275.10 User manual

Viega

Viega Easytop 2275.10 User manual

Viega 2281.7 User manual

Viega

Viega 2281.7 User manual

Viega 8655.11 User manual

Viega

Viega 8655.11 User manual

Viega 2235.2 User manual

Viega

Viega 2235.2 User manual

Viega 8127.3 User manual

Viega

Viega 8127.3 User manual

Viega 8461.18 User manual

Viega

Viega 8461.18 User manual

Popular Control Unit manuals by other brands

VALCOBABY Vpro AE1-120 Series instruction manual

VALCOBABY

VALCOBABY Vpro AE1-120 Series instruction manual

KEBCO COMBIVERT F4-S/1.2 Applications manual

KEBCO

KEBCO COMBIVERT F4-S/1.2 Applications manual

B+K precision 6010 operating manual

B+K precision

B+K precision 6010 operating manual

IBC control F21018201 manual

IBC control

IBC control F21018201 manual

Blu Stream ACM500 Quick reference guide

Blu Stream

Blu Stream ACM500 Quick reference guide

Krom Schroder JSAV operating instructions

Krom Schroder

Krom Schroder JSAV operating instructions

PROPOINT 8689499 Assembly

PROPOINT

PROPOINT 8689499 Assembly

i-See IGEP DM3730 Hardware reference manual

i-See

i-See IGEP DM3730 Hardware reference manual

Keyautomation 900CT-24M instruction manual

Keyautomation

Keyautomation 900CT-24M instruction manual

B meters IR-MB-PULSE manual

B meters

B meters IR-MB-PULSE manual

red lion PX2FCA manual

red lion

red lion PX2FCA manual

Power-Tronics SE2000BX manual

Power-Tronics

Power-Tronics SE2000BX manual

Ublox EVA-M8E Hardware Integration Manual

Ublox

Ublox EVA-M8E Hardware Integration Manual

Krom Schroder JSAV 50 operating instructions

Krom Schroder

Krom Schroder JSAV 50 operating instructions

Delta MultiChoice T24859 Series owner's manual

Delta

Delta MultiChoice T24859 Series owner's manual

1010music Fxbox v 2.0 user manual

1010music

1010music Fxbox v 2.0 user manual

DF ROBOT TEL0097 manual

DF ROBOT

DF ROBOT TEL0097 manual

Tripp Lite AG-0514 Series owner's manual

Tripp Lite

Tripp Lite AG-0514 Series owner's manual

manuals.online logo
manuals.online logoBrands
  • About & Mission
  • Contact us
  • Privacy Policy
  • Terms and Conditions

Copyright 2025 Manuals.Online. All Rights Reserved.