manuals.online logo
Brands
  1. Home
  2. •
  3. Brands
  4. •
  5. Whalen
  6. •
  7. Indoor Furnishing
  8. •
  9. Whalen AVFC54-12BT User manual

Whalen AVFC54-12BT User manual

THIS INSTRUCTION BOOKLET CONTAINS IMPORTANT SAFETY INFORMATION.
PLEASE READ AND KEEP FOR FUTURE REFERENCE.
Whalen Furniture Manufacturing Page 1 Factory No. 16434
Date 2014-09-02 Rev. 1 Factory: SUHOCO
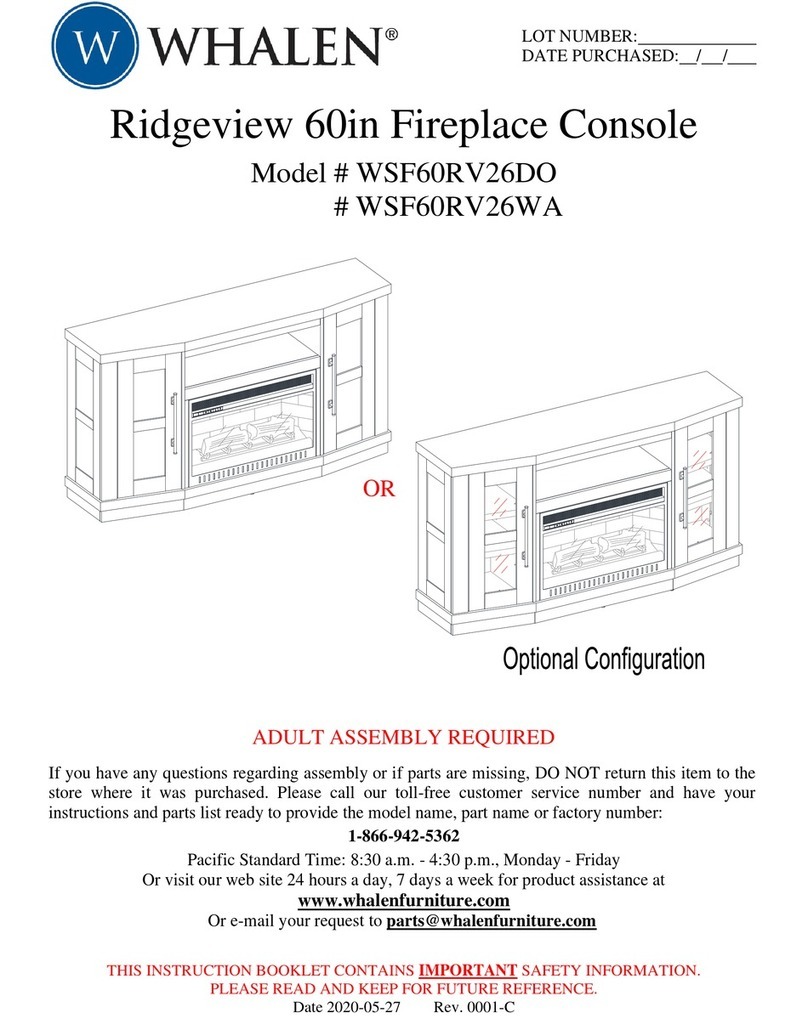
Industria Fireplace Console
Model # AVFC54-12BT
ADULT ASSEMBLY REQUIRED
If you have any questions regarding assembly or if parts are missing, DO NOT return this item to the
store where it was purchased. Please call our toll-free customer service number and have your
instructions and parts list ready to provide the model name, part name or factory number:
1-866-942-5362
Pacific Standard Time: 8:30 a.m. - 4:30 p.m., Monday to Friday
Or visit our website 24 hours a day, 7 days a week for product assistance at
www.whalenstyle.com
Or e-mail your request to [email protected]
LOT NUMBER:
DATE PURCHASED: / /
Model # AVFC54-12BT
Please call for replacement parts or assistance: 1-866-942-5362
Whalen Furniture Manufacturing Page 2 Factory No. 16434
MANUFACTURER: Whalen Furniture Manufacturing
CATALOG: Industria Fireplace Console (AVFC54-12BT)
DATE OF MANUFACTURE: September 2014
MADE IN CHINA
1. Please read the Assembly Instructions prior to assembling this product.
2. Remove all hardware from the box and sort by size.
3. Check to see that all hardware and parts are present BEFORE assembling.
4. Ask a friend to assist you with the assembly of this furniture.
5. To avoid damage, assemble the product on a sturdy, level and protective surface.
6. Please wait until all steps are completed before fully tightening Bolts.
7. Make sure all bolts are tightly fastened before the unit is used.
MAXIMUM RECOMMENDED WEIGHT LOADS
MAXIMUM LOAD 50 lb. (22.6 kg)
GENERAL INFORMATION
,
TIPS and TRICKS
This product is sold with two sets of Tipping Restraint Hardware Kits. You must install the
Tipping Restraint Hardware between the wall and the TV console to prevent any accidents or
damages. When properly installed, this restraint can provide protection against the
unexpected tipping of the unit due to small tremors, bumps or climbing. The restraint is only a
deterrent and is not a substitute for proper adult supervision. Use of tip-over restraints may
only reduce, but not eliminate, the risk of tip-over.
FITS UP TO MOST 65” FLAT PANEL TVs
MAXIMUM LOAD 135 lb. (61.2 kg)
PLACE TV BEHIND THE STOPPER
THIS UNIT IS NOT INTENDED FOR USE WITH CRT TVS. USE ONLY WITH
FLAT PANEL TVS AND AUDIO/VIDEO EQUIPMENT MEETING RECOMMENDED SIZE AND
WEIGHT LIMITS. NEVER USE WITH LARGER/HEAVIER THAN RECOMMENDED FLAT PANEL
TVS OR EQUIPMENT. TO AVOID INSTABILITY, PLACE FLAT PANEL TV IN THE CENTRE OF
THE UNIT; DO NOT ALLOW TV TO OVERHANG UNIT IN ANY DIMENSION. IMPROPERLY
POSITIONED FLAT PANEL TVS, OR FLAT PANEL TVS OR OTHER EQUIPMENT THAT EXCEED
RECOMMENDED SIZE AND WEIGHT LIMITS COULD FALL OFF OR BREAK THE UNIT,
CAUSING POSSIBLE SERIOUS INJURY.
Model # AVFC54-12BT
Please call for replacement parts or assistance: 1-866-942-5362
Whalen Furniture Manufacturing Page 3 Factory No. 16434
Parts and Hardware List
Please read completely through the instructions and verify that all listed parts and hardware
are present before beginning assembly.
A- Top Panel (1) B- Fixed Shelf (1) C- Bottom Shelf (1)
D- Left Leg (1) E- Right Leg (1) F- Left Partition Panel (1)
G- Right Partition Panel (1) I- Removable Shelf (2) J- Firebox Support (1)
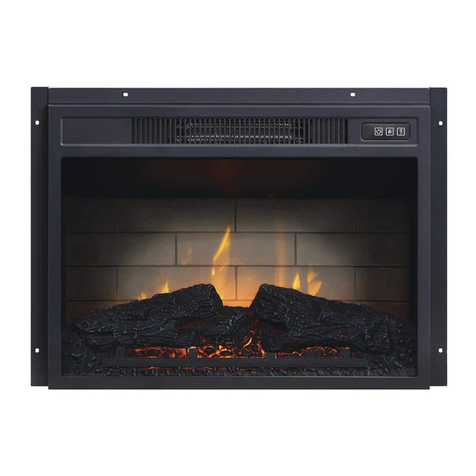
K- Metal Bracket (2) L- Fireplace Insert (1) M- Remote Control with Battery (1)
(1) 5/8” Bolt (2) 1-3/8” Bolt (3) Lock Washer (4) Flat Washer
(20+1 extra) (9+1 extra) (24+1 extra) (24+1 extra)
(5) 1-1/2” Wood Screw (6) 1/2” Wood Screw (7) Shelf Support w/Hole (8) Acrylic Stopper
(4+1 extra) (8+1 extra) (4+1 extra) (1)
Allen Wrench Touch-up Pen Tipping Restraint Hardware Kit (2)
(2) (1) (Inside Plastic Bag)
Tools required: Allen wrench (provided) and Phillips screwdriver (not provided).
Model # AVFC54-12BT
Please call for replacement parts or assistance: 1-866-942-5362
Whalen Furniture Manufacturing Page 4 Factory No. 16434
Assembly Instructions
NOTE: Please do not fully tighten all bolts until you finish assembling all parts. Once assembled,
go back and fully tighten all bolts. This will make the assembly easier.
1. Unpack the unit and confirm that you have all the hardware and required parts.
2. Using the end wood dowels as a guide, fasten Left and Right Partition Panels (F and G) to the
Bottom Shelf (C) with four 1-1/2” Wood Screws (5). As shown. Make sure that the front
moldings are even with each other and the drilled holes for Removable Shelves (I) on Partition
Panels face outward.
NOTE: Press the Partition Panels (F and G) to Bottom Shelf (C) while tightening the screws.
C
F
G
5
5
5
5
1-1/2” Wood Screw
(4 used in this step)
⑦
Model # AVFC54-12BT
Please call for replacement parts or assistance: 1-866-942-5362
Whalen Furniture Manufacturing Page 5 Factory No. 16434
Assembly Instructions
3. Align and attach the Fixed Shelf (B) to the top of both Partition Panels (F and G) by inserting
four 5/8” Bolts (1) with Lock Washers (3) and Flat Washers (4) through the metal brackets and
screw into the threaded inserts on partition panels. As shown. Make sure that the front
moldings are even with each other.
C
F
G
B
BF/G
134
Lock Washer
(4 used in this step)
③
5/8” Bolt
(4 used in this step)
①
Flat Washer
(4 used in this step)
④
Model # AVFC54-12BT
Please call for replacement parts or assistance: 1-866-942-5362
Whalen Furniture Manufacturing Page 6 Factory No. 16434
Assembly Instructions
4. Align and attach Left Leg (D) to the Bottom Shelf (C) by using two 1-3/8” Bolts (2) with the
Washers (3 and 4) through the bottom metal frame and screw into place. As shown.
5. Fasten the Left Leg (D) to the Fixed Shelf (B) with two 5/8” Bolts (1). As shown.
6. Repeat the same procedure to attach Right Leg (E) at the opposite end.
E
B
D/E
B
1
C
234
C
F
G
D
D/E
5/8” Bolt
(4 used in this step)
①
Lock Washer
(4 used in this step)
③
Flat Washer
(4 used in this step)
④
1 3/8” Bolt
(4 used in this step)
②
Model # AVFC54-12BT
Please call for replacement parts or assistance: 1-866-942-5362
Whalen Furniture Manufacturing Page 7 Factory No. 16434
Assembly Instructions
7. Align and attach the Top Panel (A) to both Legs (D and E) by inserting the 1-3/8” Bolts (2) with
the Washers (3 and 4) through the inner tubes and inserting the 5/8” Bolts (1) with the
Washers (3 and 4) through the outer holes on the top plate and screw into place. As shown.
E
B
A
C
D
D/E
A
1
3
4
2
3
4
Inside
Outside
5/8” Bolt
(4 used in this step)
①
Lock Washer
(8 used in this step)
③
Flat Washer
(8 used in this step)
④
1 3/8” Bolt
(4 used in this step)
②
Model # AVFC54-12BT
Please call for replacement parts or assistance: 1-866-942-5362
Whalen Furniture Manufacturing Page 8 Factory No. 16434
Assembly Instructions
8. Fasten 2 Metal Brackets (K) to connect the Bottom Shelf (C) with both Legs (D and E), using
four 5/8” Bolts (1) and four Washers (3 and 4) per bracket. As shown.
Flat Washer
(8 used in this step)
④
Lock Washer
(8 used in this step)
③
E
A
C
D
K
D/E
C
1
3
4
1
3
4
5/8” Bolt
(8 used in this step)
①
Model # AVFC54-12BT
Please call for replacement parts or assistance: 1-866-942-5362
Whalen Furniture Manufacturing Page 9 Factory No. 16434
Assembly Instructions
9. Go back and tighten all the bolts. Ask for assistance to stand the unit upright.
10.Insert two Shelf Supports (7) into the outer holes on each Partition Panel (F and G). Tilt and
set the Removable Shelves (I) onto the Shelf Supports (7) and the metal brackets on the Legs
(D and E). Secure the shelves in place with the 1/2” Wood Screws (6) for extra support.
I
D/E
6
I
A
E
F
G
D
I
I
F/G 6
7
7
Shelf Support
(4 used in this step)
⑦
1/2” Wood Screw
(8 used in this step)
⑥
Model # AVFC54-12BT
Please call for replacement parts or assistance: 1-866-942-5362
Whalen Furniture Manufacturing Page 10 Factory No. 16434
Assembly Instructions
11.Carefully set the Fireplace Insert (L) into the back of the assembled unit and center it in the
opening. Use care not to scratch the wood. Check the alignment, and then attach the Firebox
Support (J) to the Bottom Shelf (C) with the end wood dowel fully inserted by using one 1-3/8”
Bolt (2). Tighten the bolt with the enclosed Allen wrench.
C
2
A
B
C
B
A
C
J
L
L
1 3/8” Bolt
(1 used in this step)
②
Model # AVFC54-12BT
Please call for replacement parts or assistance: 1-866-942-5362
Whalen Furniture Manufacturing Page 11 Factory No. 16434
Assembly Instructions
12.Remove the tape from the back of Acrylic Stopper (8), then properly align the Acrylic Stopper
into the cut-out on the acrylic stopper template on the front of the Top Panel (A). Press down
on the Acrylic Stopper.
13.Carefully remove the acrylic stopper template from the Top Panel (A).
NOTE: When you place the TV on the stand, make sure that the base of the TV is behind the
Acrylic Stopper (8). This will help prevent the TV from sliding off your stand if your stand is
accidently bumped or tipped.
Acrylic Stopper
(1 used in this step)
⑧
A
A
A
Model # AVFC54-12BT
Please call for replacement parts or assistance: 1-866-942-5362
Whalen Furniture Manufacturing Page 12 Factory No. 16434
Assembly Instructions
14.Position the assembled console at the desired location against a wall. If necessary, adjust the
pre-attached Floor Levelers at the bottom of the Legs (D and E) to level the unit. Now, follow
the instructions printed on the plastic bag containing the Tipping Restraint Hardware to attach
the tip-over restraint to the Top Panel and the wall.
NOTE: Young children can be seriously injured by tipping furniture. You must install the
Tipping Restraint Hardware with the unit to prevent the unit from tipping, causing any
accidents or damage. The tipping restraints are intended only as a deterrent, they are not
a substitute for proper adult supervision. The tipping restraints are not earthquake
restraints. If you wish to add the extra security of earthquake restraints, they must be
purchased and installed separately.
15.The console is now ready for use. Be sure to position your TV in the center of the console,
behind the Acrylic Stopper (8).
Tools required: Allen wrench (provided), Phillips screwdriver, Mallet, Power Drill, and 3/8” Drill Bit.
D/E
A
E
D
Model # AVFC54-12BT
Please call for replacement parts or assistance: 1-866-942-5362
Whalen Furniture Manufacturing Page 13 Factory No. 16434
Care and Maintenance
Use a soft, clean cloth that will not scratch the surface when dusting.
Use of furniture polish is not necessary. Should you choose to use polish, test first in an
inconspicuous area.
Using solvents of any kind on your furniture may damage the finish.
Never use water to clean your furniture as it may cause damage to the finish.
Always use coasters under beverage glasses and flowerpots.
Liquid spills should be removed immediately. Using a soft clean cloth, blot the spill gently. Avoid
rubbing.
Always use protective pads under hot dishes and plates. Heat can cause chemical changes that
may create spotting within the furniture finish.
Stains or marks from crayons or ink markers will be difficult to remove.
In the event that your furniture is stained or otherwise damaged during use, we recommend that
you call a professional to repair your furniture.
Check bolts/screws periodically and tighten them if necessary.
Further advice about wood furniture care
It is best to keep your furniture in a climate-controlled environment. Extreme temperature and
humidity changes can cause fading, warping, shrinking and splitting of wood. It is advised to keep
furniture away from direct sunlight as sun may damage the finish.
Proper care and cleaning at home will extend the life of your purchase. Following these important
and helpful tips will enhance your furniture as it ages.
Cleaning trim for fireplace
Clean the metal trim using a soft cloth, slightly dampened with citrus oil based product and buff with a
clean soft cloth. DO NOT use brass polish or household cleaners as these products will damage the
metal trim. Citrus oil based products can be obtained at supermarkets or hardware stores.
A Touch-up Pen has been provided to repair any small nicks or scratches that may occur
during assembly or shipping.
We hope you enjoy your purchase for many years.
Thank you for your purchase!
QUALITY GUARANTEE
We are confident that you will be delighted with your Whalen Furniture purchase.
Should this product be defective in workmanship or materials or fail under normal use, we will
repair or replace it for up to one (1) year from date of purchase. Every Whalen Furniture product is
designed to meet your highest expectations. We guarantee that you will immediately see the value
of our fine furniture.
This warranty gives you specific legal rights and you may also have other rights which vary from
State to State. Customer Service: 1-866-942-5362
8:30 a.m. - 4:30 p.m., PST, Monday to Friday
www.whalenstyle.com
IF YOU NEED TO ORDER ANY REPLACEMENT PARTS, PLEASE USE THE LIST BELOW
Industrial Fireplace Console (AVFC54-12BT)
*AVFC54-12BT-1-LL Left Leg *AVFC54-12BT-20-AS Acrylic Stopper
*AVFC54-12BT-2-RL Right Leg *AVFC54-12BT-21-M4AW 4 mm Allen Wrench
*AVFC54-12BT-3-TP Top Panel *AVFC54-12BT-22-TUP Touch-up Pen
*AVFC54-12BT-4-FS Fixed Shelf *AVFC54-12BT-23-TRHK Tipping Restraint Hardware Kit
*AVFC54-12BT-5-BS Bottom Shelf *AVFC54-12BT-CH Complete Hardware
*AVFC54-12BT-6-LPP Left Partition Panel *AVFC54-12BT-24-RC6B Remote Control 6 Buttons (FP26-1A-RC6B)
*AVFC54-12BT-7-RPP Right Partition Panel *AVFC54-12BT-25-H Heater (FP26-1A-H)
*AVFC54-12BT-9-RS Removable Shelf *AVFC54-12BT-26-B Blower (FP26-1A-B)
*AVFC54-12BT-10-FS Firebox Support *AVFC54-12BT-27-FGDM Flame Generator Drive Motor (FP26-1A-FGDM)
*AVFC54-12BT-11-MB Metal Bracket *AVFC54-12BT-28-RS Reflector Spindle (FP26-1A-RS)
*AVFC54-12BT-12-FL Floor Leveler *AVFC54-12BT-29-MPCBN Main PCB (FP26-1A-MPCBN)
*AVFC54-12BT-13-5/8B 5/8" Bolt *AVFC54-12BT-30-CPPCBN Control Panel PCB (FP26-1A-CPPCBN)
*AVFC54-12BT-14-1 3/8B 1-3/8" Bolt *AVFC54-12BT-31-LLPCBN Logs Light PCB (FP26-1A-LLPCBN)
*AVFC54-12BT-15-LW Lock Washer *AVFC54-12BT-32-EBLPCBN Ember Bed Light PCB (FP26-1A-EBLPCBN)
*AVFC54-12BT-16-FW Flat Washer *AVFC54-12BT-33-FLPCBN Flame Light PCB (FP26-1A-FLPCBN)
*AVFC54-12BT-17-1/2WS 1/2” Wood Screw *AVFC54-12BT-34-FIGF Fireplace Insert Glass with Frame (FP26-1A-FIGF)
*AVFC54-12BT-18-1 1/2WS 1-1/2” Wood Screw *AVFC54-12BT-35-EBLN Ember Bed/Logs (FP26-1A-EBLN)
*
AVFC54
-
12BT
-
19
-
SSH
Shelf Support w/Hole
*
AVFC54
-
12BT
-
36
-
T
Thermostat (FP26
-
1A
-
T)
AVFC54 12BT 19 SSH
Shelf
Support
w/Hole
AVFC54 12BT 36 T
Thermostat
(FP26 1A T)

Other Whalen Indoor Furnishing manuals
Whalen MainStays Parsons User manual

Whalen

Whalen MainStays Parsons User manual

Whalen Bayside Furnishing 1644994 User manual

Whalen

Whalen Bayside Furnishing 1644994 User manual

Whalen Luke Twin over Twin Loft Bunk Bed with Desk User manual

Whalen

Whalen Luke Twin over Twin Loft Bunk Bed with Desk User manual

Whalen Tustin Parsons ECOM-PARS1 User manual

Whalen

Whalen Tustin Parsons ECOM-PARS1 User manual

Whalen Bayside CUS72LBK-5C User manual

Whalen

Whalen Bayside CUS72LBK-5C User manual

Whalen Fallbrook SPUS-FBBK-GM User manual

Whalen

Whalen Fallbrook SPUS-FBBK-GM User manual

Whalen OD-LA60LD User manual

Whalen

Whalen OD-LA60LD User manual

Whalen AVC78H-13AX User manual

Whalen

Whalen AVC78H-13AX User manual

Whalen Midland Twin over Full Bunk Bed User manual

Whalen

Whalen Midland Twin over Full Bunk Bed User manual

Whalen Bayside CSC72LC-1 User manual

Whalen

Whalen Bayside CSC72LC-1 User manual

Whalen Bayside MLDR User manual

Whalen

Whalen Bayside MLDR User manual

Whalen Hendricks Series User manual

Whalen

Whalen Hendricks Series User manual

Whalen Laminate 44" High Console User manual
Whalen

Whalen Laminate 44" High Console User manual

Whalen Barkston Lane SPUS-BLDH User manual

Whalen

Whalen Barkston Lane SPUS-BLDH User manual

Whalen AVCEC65-TC User manual

Whalen

Whalen AVCEC65-TC User manual

Whalen WSC72-MW User manual

Whalen

Whalen WSC72-MW User manual

Whalen WF60CVG User manual

Whalen

Whalen WF60CVG User manual

Whalen Bayside CSC9PD-6 User manual

Whalen

Whalen Bayside CSC9PD-6 User manual

Whalen Trimble Bookcase ECOM-TR30BK User manual

Whalen

Whalen Trimble Bookcase ECOM-TR30BK User manual

Whalen WF24AVG User manual

Whalen

Whalen WF24AVG User manual

Whalen Pecan pier w/Hutch User manual

Whalen

Whalen Pecan pier w/Hutch User manual

Whalen Emergent SPUS-EGDB User manual

Whalen

Whalen Emergent SPUS-EGDB User manual

Whalen Evans Creek CTCDC-1 User manual

Whalen

Whalen Evans Creek CTCDC-1 User manual

Whalen BJAVCL65-3 User manual

Whalen

Whalen BJAVCL65-3 User manual

Popular Indoor Furnishing manuals by other brands

Regency LWMS3015 Assembly instructions

Regency

Regency LWMS3015 Assembly instructions

Furniture of America CM7751C Assembly instructions

Furniture of America

Furniture of America CM7751C Assembly instructions

Safavieh Furniture Estella CNS5731 manual

Safavieh Furniture

Safavieh Furniture Estella CNS5731 manual

PLACES OF STYLE Ovalfuss Assembly instruction

PLACES OF STYLE

PLACES OF STYLE Ovalfuss Assembly instruction

Trasman 1138 Bo1 Assembly manual

Trasman

Trasman 1138 Bo1 Assembly manual

Costway JV10856 manual

Costway

Costway JV10856 manual

moss DESIGN Caisson Credenza Assembly instructions

moss DESIGN

moss DESIGN Caisson Credenza Assembly instructions

Aquaglide FULL DECK 15.0 owner's manual

Aquaglide

Aquaglide FULL DECK 15.0 owner's manual

AREBOS AR-HE-SW30 user manual

AREBOS

AREBOS AR-HE-SW30 user manual

Till-Hilft Fulda 87005.330 Assembly instructions

Till-Hilft

Till-Hilft Fulda 87005.330 Assembly instructions

Twoey Outside 2010 quick start guide

Twoey Outside

Twoey Outside 2010 quick start guide

Hettich Easys 200 operating instructions

Hettich

Hettich Easys 200 operating instructions

The bedboss RELAX 404 Series owner's manual

The bedboss

The bedboss RELAX 404 Series owner's manual

Oeseder Möbelindustrie Bern 991 720 Assembly instructions

Oeseder Möbelindustrie

Oeseder Möbelindustrie Bern 991 720 Assembly instructions

Costway HW68469 user manual

Costway

Costway HW68469 user manual

Next ALIX A27743 Assembly instructions

Next

Next ALIX A27743 Assembly instructions

BROSA Hans Assembly guide

BROSA

BROSA Hans Assembly guide

Prodigg MINIKA PBA015T-FUR installation manual

Prodigg

Prodigg MINIKA PBA015T-FUR installation manual

manuals.online logo
manuals.online logoBrands
  • About & Mission
  • Contact us
  • Privacy Policy
  • Terms and Conditions

Copyright 2025 Manuals.Online. All Rights Reserved.