3
Robinet infrarouge sans
contact pour lavabo,
sans ou avec mélangeur
pour réglage manuel de
la température de l‘eau.
Ecoulement automatique
pendant l‘activation par
l‘utilisateur.
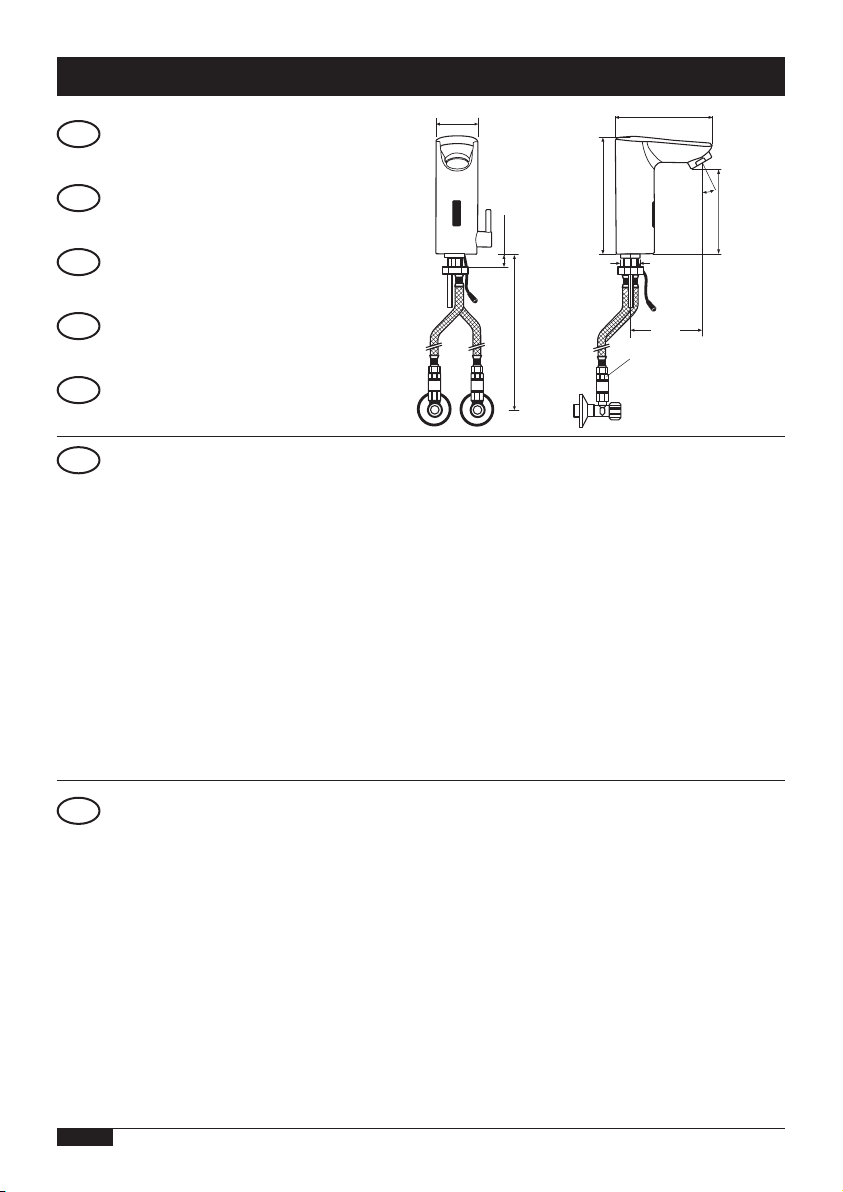
Comprend:
Corps du robinet avec
module électronique
et pile module ou avec
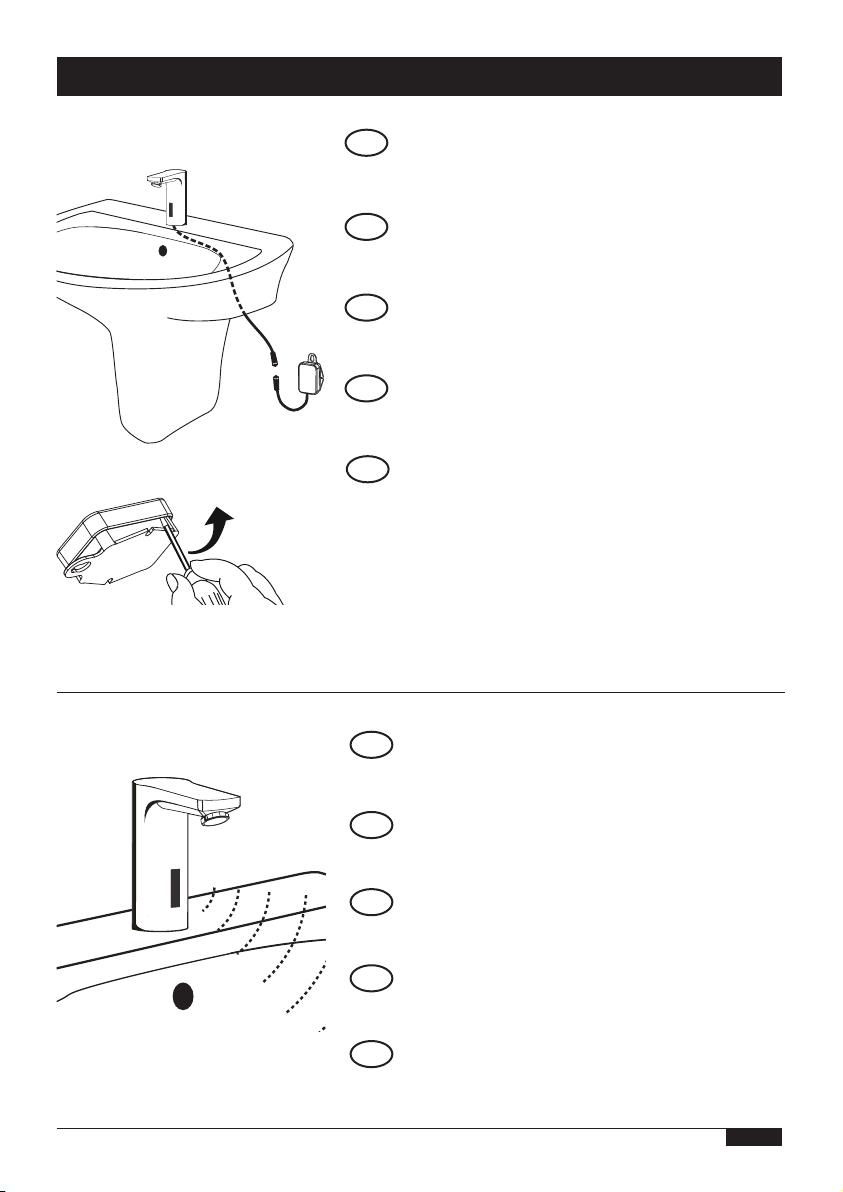
module d‘alimentation 230
V, électro-vanne, tuyaux
souples de raccordement,
cartouches de filtre pour les
soupapes
d’équerre, matériel de
fixation et clapet anti-retour
pour modèle mélangeur
Le montage et l’installation
ne doivent être effectués
que par une entreprise spé-
cialisée agréée suivant DIN
1988.
Lors de la planification
et de la mise en place
d’installations sanitaires,
il est indispensable de
respecter les standards et
prescriptions applicables
au niveau local, national et
international!
Attention!
Please pay attention to our
technical notes regarding
infrared washbasin controls!
For receiving this informati-
on please call 0043 (0)7473
- 5000-0 or email at
Directives d’installation
F
Torneira de lavatório por
infravermelhos, sem
contacto, sem ou com
misturadora para temperar
manualmente a água quen-
te e fria. Descarga automáti-
ca durante a activação pelo
utilizador.
Composto por:
Corpo da torneira com
módulo electrónico e pilha
modulo or módulo electróni-
co 230V, válvula magnética,
bichas flexíveis, filtro de lim-
peza para torneira de esqua-
dria, material de fixaćčo e
mecanismo de impedimen-
to do refluxo no modelo de
água misturada.
Os trabalhos de montagem
e instalação devem ser rea-
lizados apenas por técnicos
devidamente autorizados,
de acordo com as normas
DIN 1988.
Aquando do planeamento e
da montagem de
instalações sanitárias,
devem ser cumpridas as
normas e disposições
locais, nacionais e interna-
cionaisrelevantes!
Atenção!
P.f. respeite as instruções
técnicas respeitantes
às torneiras electrónicas
por I.V.! Para receber
esta informação telefone
para 0043(0)7473 - 5000-0
ou envie email para
Instruções para a Instalação
P
Grifo de lavabo sin contacto
por infrarrojos sin o con
mezclador para la regulación
de la temperatura del agua
caliente y fría.
Flujo de agua automático
durante la activación por el
usuario.
Constando de:
Caja de grifería con módulo
electrónico y pila de modulo
or módulo de red de 230V,
válvula magnética, latiguillos
de conexión, filtros de lodos
para válvula angular, mate-
rial de fijación y válvula de
retención en el modelo con
agua de mezcla.
El montaje y la instalación
deben ser efectuados exclu-
sivamente por una empresa
especialista autorizada
según DIN 1988.
Al diseñar e instalar siste-
mas sanitarios deben
tenerse en cuenta las cor-
respondientes normas y
disposiciones locales, nacio-
nales e internacionales.
Atención !
Ponga atención por favor a
los datos técnicos referente
grifos de lavabo sin contac-
to por infrarrojos ! Para reci-
bir esta información llame
0043-(0)7473-5000-0 o por
correo electrónico a
E
Instrucciones para el montaje