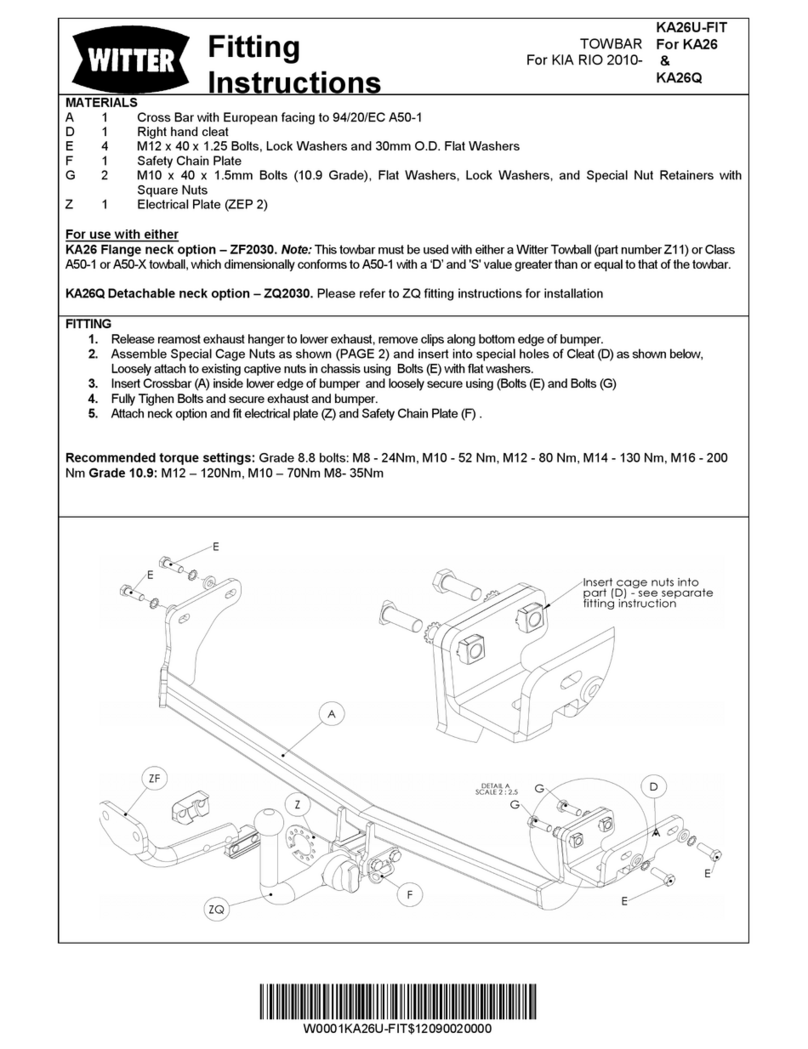
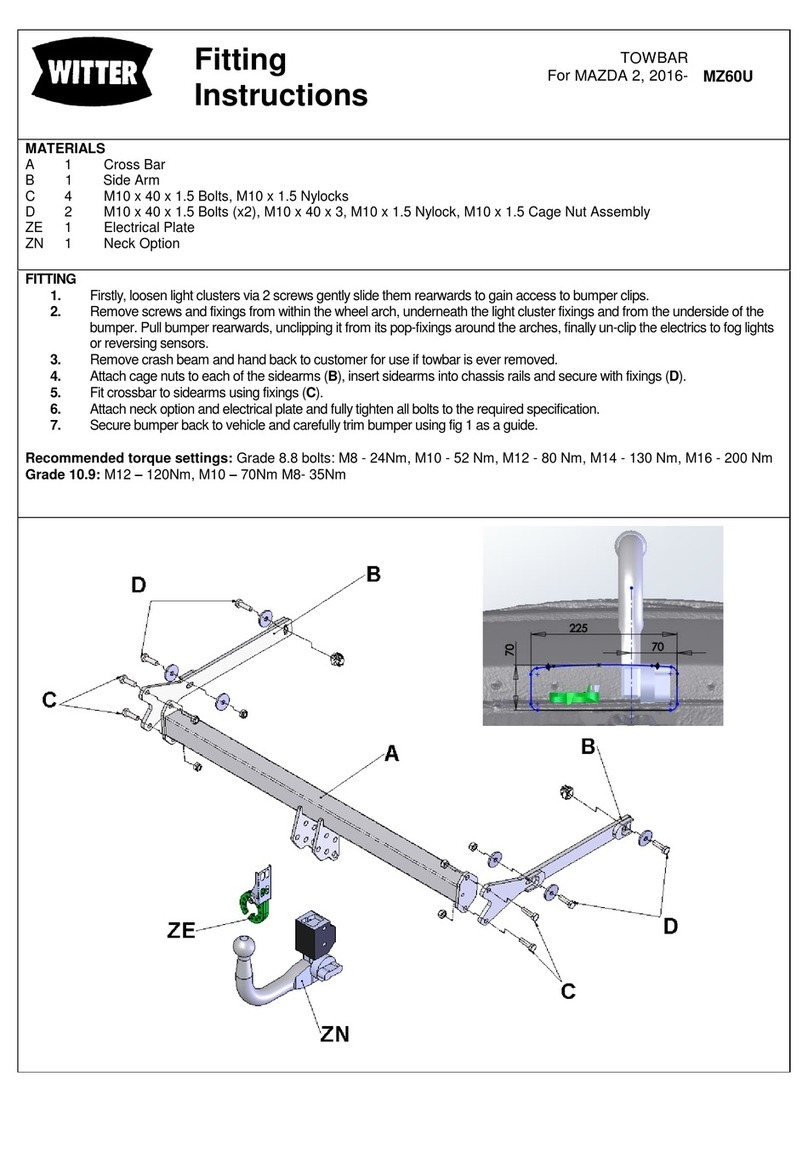
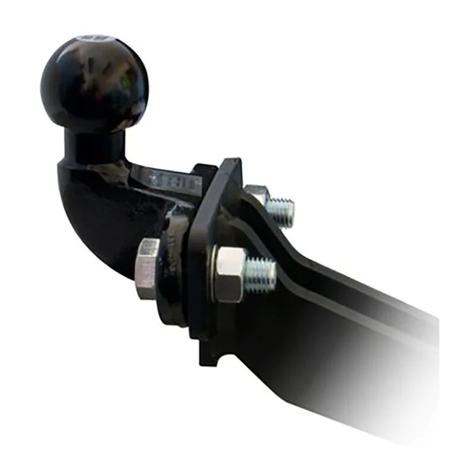
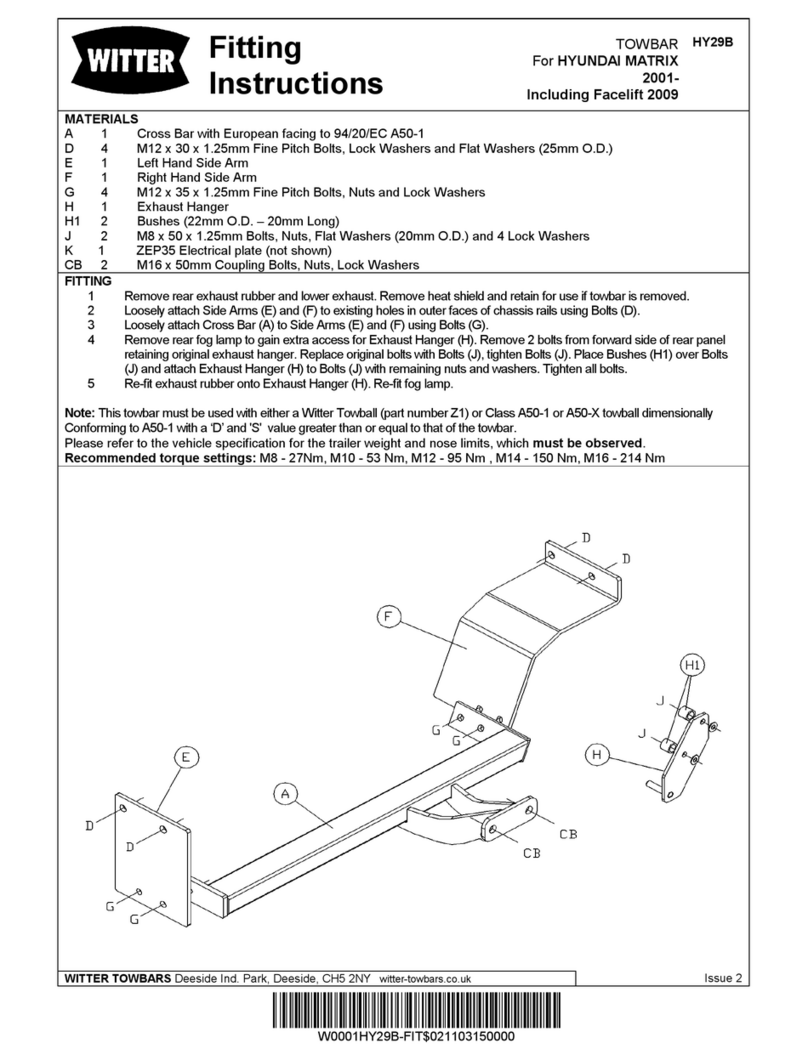
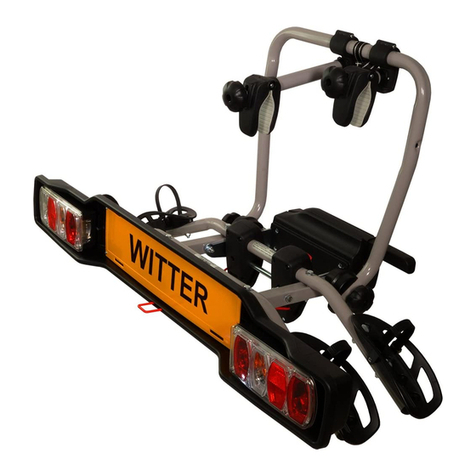
Witter ZX302/EU User manual

EN
DE
FR
Fitting instructions
Montageanleitung
Instructions de montage
THE REAR CYCLE RACK FOR MOUNTING ON TOW BAR
FAHRRADTRÄGER ZUR MONTAGE AUF DER ANHÄNGERKUPPLUNG
PORTE VELOS ARRIERE POUR DISPOSITIF D’ATTELAGE
ZX303/EU = 15,10 Kg
ZX304/EU = 17,50 Kg
x4
x3
ZX302/EU = 13,50 Kg
x2

ATTENTION – SAFETY REQUIREMENTS
-The correct installation and use of this cycle carrier is the sole responsibility of the user.
-Weight and maximum capacity of “ZX200” series cycle carrier:
-Model ZX204 (17.50 kg) - 4 cycles, max. capacity 60 kg. Max individual cycle weight 15 kg.
-Model ZX203 (14, 74 kg) - 3 bikes, max. capacity 51 kg. Max individual bike weight 17 kg.
-Model ZX202 (11, 63 kg) - 2 bikes, max. capacity 34 kg. Max individual bike weight 17 kg.
-Never exceed the vehicle manufacturer’s static nose weight.
The combined weight of the cycle carrier and the load must never exceed the permitted
capacity. Keep the towball ball surface clean from dirt and oil.
-Remove from the transported cycles children’s seats, transport baskets, rain covers or
other elements that could get lost or increase the air resistance.
-The cycle carrier is only suitable for transporting bicycles.
-Before leaving, check that the rear lights function correctly.
Also check that the indicator lights work correctly.
-Ensure that the cycle carrier is fitted correctly on the towball and that the cycles
are secured as instructed.
When on the road, respect the highway code speed limits and pay attention to
the road conditions to prevent jolts.
-Be aware that the loaded cycle carrier may change the driving characteristics of the
car while braking, during windy conditions and whilst cornering.
-To avoid damage, if the boot lid is equipped with an automatic opening function,
use this function with care.
-Check all the cycle carrier fixing elements after a short while, then at regular intervals
whilst on your journey.
-Take care when reversing and parking because of the greater length of the car.
-Check the distance between the cycle carrier, the cycles and the exhaust pipe(s) to
avoid heat damage.
-To increase road safety and to reduce fuel consumption, remove the cycle carrier
when not in use.
-Modifications to the cycle carrier and its components are not permitted.
-Immediately replace any worn or damaged parts using only original spare parts.
-The cycle carrier can be cleaned using warm water and/or car shampoo.
-Store the cycle carrier in dry conditions at moderate temperatures.
The manufacturer is not responsible for damage caused by improper use of this
product, nor for any objection made by the competent authorities with regard to
the highway code.
The manufacturer shall only be responsible for manufacturing defects in the cycle
carrier and accessory components.
13mm x 1 +
10mm x 2
8mm x 1
Tools required for initial assembly:
GB
ASSEMBLY AND USER INSTRUCTIONS v1
Whenever this product is used the following information must be taken
into consideration:
The cycle carrier is a safe product IF used correctly, whereas if it is used
incorrectly it can cause damage to you, your vehicle and anyone driving
behind you.
2,3 or 4 x
UK - Models
EU - Models
CYCLE CARRIER SYSTEMS
ASSEMBLY AND USER INSTRUCTIONS
ZX300Cycle Carrier
Rear cycle carrier for
mounting onto a towball.
km/h
130
6mm x1
ZX302/EU ZX303/EU ZX304/EU

page 2
x 2
Self
Tapper M6
x 4x 2
x 4 x 4
M6 x 75 M8 x 40
B C DH
EFG
x 2
x 4
A
N
M
KV
T
Q
X
J
x 8x 2
S
P
Replacement Parts: When ordering please prex with the model number
Example:
Prex Part Amount
ZX302/EU D x4
UK
EU
W

page 3
x 2
Self
Tapper M6
x 6x 2
x 4
x 12x 2
x 4
M6 x 75 M8 x 40
BCDH
EFG
x 2
x 6
A
N
M
K
V
T
Q
X
S
P
R
J
Replacement Parts: When ordering please prex with the model number
Example:
Prex Part Amount
ZX303/EU D x4
UK
EU
W

Replacement Parts: When ordering please prex with the model number
Example:
Prex Part Amount
ZX304/EU D x4
page 4
x 2
Self
Tapper M6
x 8x 2
x 4
x 16x 2
x 2
x 8
x 4
x 2 x 2 x 2 x 2 x 2
UK
EU
W
A
M6 x 75 M8 x 40
B C DH
N
J
E
M
K
FG
V
T
Q
X
Z
Z1Z2Z3Z4
S
P
R
L

2. Insert Square plugs.
1.
page 5
x 2
F
? KG
Vehicle Handbook IMPORTANT!
Check towbar nose weight in your vehicle handbook(s-vertical
static mass). The sum of weights of cycles and carrier (17.50kg)
must not exceed this amount. Never exceed this limit.

page 6
G
Gently knock the end plugs into the tube. Use a rubber mallet.
You may want to mount the base unit at this point onto the
towball to aid access and stabilise the assembly.
If so, please follow the mounting instructions on page 13& 14.
3.
Fitting the Wheel Locators.
Please Note:
Adjust the locators to
the length of the cycles
to be tted.
4.
Insert Round plugs.

Fitting the wheel locators to the cycle carrier bars.
C
page 7
ZX302/EU -
12 x M8 x 40mm bolt,
12 x M8 Nyloc nuts,
12 x M8 flat washers,
ZX303/EU -
12 x M8 x 40mm bolt,
12 x M8 Nyloc nuts,
12 x M8 flat washers,
ZX304/EU -
16 x M8 x 40mm bolt,
16 x M8 Nyloc nuts,
16 x M8 flat washers,
Torque settings M8 = 8 Nm

page 8
5. Light board assembly -
Attach the light units using the spacer tube and Nyloc nut “E” (x4).
Ensure the light units are the correct way round (UK/EU).
Guide rear bolts of each light unit through the light board xing slots.
rear view
Do not over tighten.
x 4
E
IMPORTANT
UK - Light Conguration
EU - Light Conguration
M6
LH RH

page 9
Push the 13 pin plug through the centre
hole, route wires into the cable channels.
Ensure wires are not trapped ! Mount number plate frame using screws .D
Self
Tapper
x 4 D
Red handle hooks in
Guide the
red handle
through lightboard slot.
Carefully attach the release handle .
X
V

page 10
Locate the red handle
through the
lightboard slot.
x 2
M6 x 75
B
Secure the lightboard
to the carrier with bolts
“B” placing a washer at
the top and bottom.
Tighten the Nyloc nut
to 4 Nm.
Tighten
Ensure the hooks
are still engaged!

page 11
6. Assemble cam buckle and attach to cycle support frame.
The cam buckle assembly once fully tightened should be able to pivot
freely.
Route the cable carefully down the
sub frame. Cable tie in position and
ensure the cable length is correct.
Ensure the carrier can tilt freely without
trapping or causing stress to the cable!

page 12
Ensure teeth engage
fully home.
Assemble the xing arms as per instructions within the arm
packaging.
7. Mount the cycle support frame.
The support frame is best tted at 900to the platform.
90o

page 13
8.
Ensure the ball is clean
and free of grease.
Mount the cycle carrier. To mount the cycle carrier safely and to avoid
damaging the vehicle, you should request the help of another person.
Lift the clamp lever until the towball locator is completely open. To lift the lever
turn the key anti-clockwise and hold the key until the lever is released.
Fully Open!
Fully Close!
Remove key!
IMPORTANT!
It may be necessary to tension the clamp lever
for the initial tting and at subsequent intervals
during the life of the carrier.
If the clamp lever is fully closed and the carrier
has excess movement on the ball or the lever
will not close due to the clamp being to tight,
the tension screw needs adjusting accordingly.
Fully open the handle to make adjustments,
then try tment again.
+_
Open
Closed
Watch Fingers!

page 14
IMPORTANT:
Once level, attach and tension the support straps.
Level
Check the main cycle platform is level before closing the clamp.
Check the towball locator is secured to the hitch ball.
Z
2Attach the protective plastic cover Z
4to the strap hook .
Attach hooks to vehicle tailgate/boot at a suitable
point ensuring the position is stable and strong
enough to hold the weight of the carrier and cycles.
Do Not attach to plastic trimming or glass window!
Ensure the strap is
correctly routed
through the cambuckle .
Plastic
Glass
Rubber
Metal
Tailgate
Boot
Level

page 15
IMPORTANT: Check light function! Check all xtures and bolts!
bike to bike clamp arm
L
10. Positioning and xing the cycles on the carrier.
As an extra safety precaution the cycle carrier is tted with a belt
Q
P
Cycle 1:
Place the biggest/heaviest cycle on the carrier rst, closest to the vehicle.
Position the wheels into the wheel locators with the xing arm attached at
one end to the cycle support frame and to the cycle frame at the other.
.
attached at one end
Secure the wheels in the wheel locators using the ratchet straps
Cycle 2:
Fits in the 2nd set of wheel locators with the xing arm
S
to the cycle support frame and to the cycle frame at the other.
Secure the wheels in the wheel locators using the ratchet straps .
T
attached at one end
to the cycle support frame and to the cycle frame at the other.
Secure the wheels in the wheel locators using the ratchet straps .
T
Cycle 4:
Fits in the outer locators (this should be the smallest/lightest bike) using the
attached to the bike frame from the previous
T
.
bike frame.
Secure the wheels in the wheel locators using the ratchet straps
CHECK ALL FIXING ARMS ARE SECURE!
IMPORTANT:
for
anchoring all the cycles to the cycle support frame. Ensure this belt is used
and check it is mounted correctly by pulling on it.
Cycle 3:
Fits in the 3rd set of wheel locators with the xing arm
R
T
9.
Attach the plug to the vehicle using the appropriate 7 or 13 pin electrical
connection. Ensure the plug is fully inserted and that the cable cannot touch
the oor. Fit the protective cap to the end not being used.
Please Note: If using the 7 pin connection
the reversing light will not function.
or

page 16
Ensure the strap is correctly
routed through the cambuckle .
outer cycles.
cycle 1
cycle 2
cycle 3
cycle support frame.
cycle 4
Secure wheels into the wheel locators by feeding the strap into the buckle and
pulling down until tight.
Note:
To release the strap push in the strap retainer
lever on the buckle.
CHECK! cycles & carrier are secure before your
journey, then at regular intervals whilst on your
journey.
Route arms through inner cycles to reach
34
Ensure the cycle tube is FULLY
home within the arm jaws !
cycles 3 & 4

Optional Locks available:
Order Ref:
ZXL/1 (1 Lockable hand wheels)
ZXL/2 (2 Lockable hand wheels)
ZXL/3 (3 Lockable hand wheels)
ZXL/4 (4 Lockable hand wheels)
page 17
To tilt the cycle carrier rst loosen the support straps and un-hook from the vehicle.
Hold up/take the weight of the carrier with one hand while you pull the red release handle
with the other.
To avoid injury or damage, this operation of tilting the cycle carrier should be carried out
with assistance.
To close the cycle carrier lift until the red release handle and mechanism click and engage
securely in the transit position.
release
position
CARE MUST BE TAKEN WHEN TILTING THE CARRIER - WATCH YOUR HEAD AND FINGERS!
Re-a Z4
ttach the 2 hooks and pull the support straps to tension.
Support straps -
MUST be used in transit!
transit
position
Please Note: The Cycle support arm conveniently folds at to aid storage
of the carrier when not in use.
TILT CAREFULLY & LOWER SLOWLY!
DUE TO THE HEIGHT OF CERTAIN
VEHICLES THE CARRIER MAY TOUCH
THE GROUND WHEN TILTED.

ATTENTION – SAFETY REQUIREMENTS
-The correct installation and use of this cycle carrier is the sole responsibility of the user.
-Weight and maximum capacity of “ZX300” cycle carrier:
- ZX304/EU (17.50 kg) - 4 cycles, max. capacity 60 kg. Max individual cycle weight 15 kg.
- ZX303/EU (15.1 kg) - 3 cycles, max. capacity 51 kg. Max individual cycle weight 17 kg.
- ZX302/EU (13.5 kg) - 2 cycles, max. capacity 34 kg. Max individual cycle weight 17 kg.
-Never exceed the vehicle manufacturer’s static nose weight.
The combined weight of the cycle carrier and the load must never exceed the permitted
capacity. Keep the towball ball surface clean from dirt and oil.
-Remove from the transported cycles children’s seats, transport baskets, rain covers or
other elements that could get lost or increase the air resistance.
-The cycle carrier is only suitable for transporting bicycles.
-Before leaving, check that the rear lights function correctly.
Also check that the indicator lights work correctly.
-Ensure that the cycle carrier is fitted correctly on the towball and that the cycles
are secured as instructed.
When on the road, respect the highway code speed limits and pay attention to
the road conditions to prevent jolts.
-Be aware that the loaded cycle carrier may change the driving characteristics of the car
while braking, during windy conditions and whilst cornering.
-To avoid damage, if the boot lid is equipped with an automatic opening function,
use this function with care.
-Check all the cycle carrier fixing elements after a short while, then at regular intervals
whilst on your journey.
-Take care when reversing and parking because of the greater length of the car.
-Check the distance between the cycle carrier, the cycles and the exhaust pipe(s) to
avoid heat damage.
-To increase road safety and to reduce fuel consumption, remove the cycle carrier when
not in use.
-Modifications to the cycle carrier and its components are not permitted.
-Immediately replace any worn or damaged parts using only original spare parts.
-The cycle carrier can be cleaned using warm water and/or car shampoo.
-Store the cycle carrier in dry conditions at moderate temperatures.
The manufacturer is not responsible for damage caused by improper use of this
product, nor for any objection made by the competent authorities with regard to
the highway code.
The manufacturer shall only be responsible for manufacturing defects in the cycle
carrier and accessory components.

ATTENTION – SAFETY REQUIREMENTS
-The correct installation and use of this cycle carrier is the sole responsibility of the user.
-Weight and maximum capacity of “ZX200” series cycle carrier:
-Model ZX204 (17.50 kg) - 4 cycles, max. capacity 60 kg. Max individual cycle weight 15 kg.
-Model ZX203 (14, 74 kg) - 3 bikes, max. capacity 51 kg. Max individual bike weight 17 kg.
-Model ZX202 (11, 63 kg) - 2 bikes, max. capacity 34 kg. Max individual bike weight 17 kg.
-Never exceed the vehicle manufacturer’s static nose weight.
The combined weight of the cycle carrier and the load must never exceed the permitted
capacity. Keep the towball ball surface clean from dirt and oil.
-Remove from the transported cycles children’s seats, transport baskets, rain covers or
other elements that could get lost or increase the air resistance.
-The cycle carrier is only suitable for transporting bicycles.
-Before leaving, check that the rear lights function correctly.
Also check that the indicator lights work correctly.
-Ensure that the cycle carrier is fitted correctly on the towball and that the cycles
are secured as instructed.
When on the road, respect the highway code speed limits and pay attention to
the road conditions to prevent jolts.
-Be aware that the loaded cycle carrier may change the driving characteristics of the
car while braking, during windy conditions and whilst cornering.
-To avoid damage, if the boot lid is equipped with an automatic opening function,
use this function with care.
-Check all the cycle carrier fixing elements after a short while, then at regular intervals
whilst on your journey.
-Take care when reversing and parking because of the greater length of the car.
-Check the distance between the cycle carrier, the cycles and the exhaust pipe(s) to
avoid heat damage.
-To increase road safety and to reduce fuel consumption, remove the cycle carrier
when not in use.
-Modifications to the cycle carrier and its components are not permitted.
-Immediately replace any worn or damaged parts using only original spare parts.
-The cycle carrier can be cleaned using warm water and/or car shampoo.
-Store the cycle carrier in dry conditions at moderate temperatures.
The manufacturer is not responsible for damage caused by improper use of this
product, nor for any objection made by the competent authorities with regard to
the highway code.
The manufacturer shall only be responsible for manufacturing defects in the cycle
carrier and accessory components.
13mm x 1 +
10mm x 2
8mm x 1
Zur Erstmontage benötigte Werkzeuge:
DE
Montageanleitung und Nutzerhandbuch
Folgende Informationen müssen beachtet werden, wenn das Produkt benutzt
wird:
Das Produkt ist sicher, wenn es richtig benutzt wird. Inkorrekte Benutzung kann
zu Personen-und Sachschäden führen, die sowohl Sie selbst als auch hinter Ihnen
fahrende Fahrzeuge betreffen kann.
2,3 oder 4 x
UK-Modelle
EU-Modelle
Fahrradträgersysteme
Montageanleitung und Nutzerhandbuch
ZX300 Fahrradträgerreihe
Heckfahrradträger für die
Anhängerkupplung
km/h
130
6mm x1
ZX302/EU ZX303/EU ZX304/EU
This manual suits for next models
2
Table of contents
Languages:
Other Witter Automobile Accessories manuals

Witter
Witter KA47U User manual

Witter
Witter ZX702 User manual

Witter
Witter TY135BU User manual

Witter
Witter MHA10U User manual

Witter
Witter F129AU User manual

Witter
Witter MR49U User manual

Witter
Witter F161U User manual

Witter
Witter FT74AU User manual

Witter
Witter F159 Install guide

Witter
Witter CL114BU User manual

Witter
Witter F99CU User manual

Witter
Witter VW82U Install guide

Witter
Witter RN89 Install guide

Witter
Witter F81A User manual

Witter
Witter F144 User manual

Witter
Witter DT144AU User manual

Witter
Witter SK29U User manual

Witter
Witter F174 User manual

Witter
Witter VW48C User manual

Witter
Witter HY55U User manual