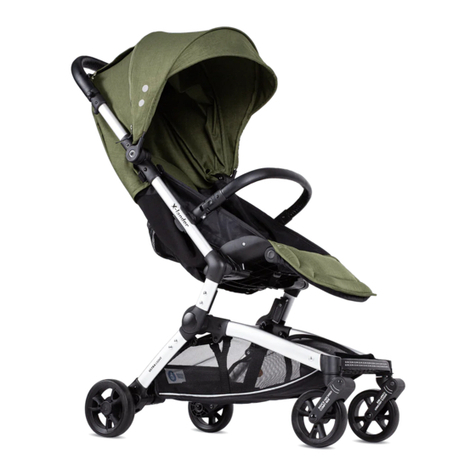
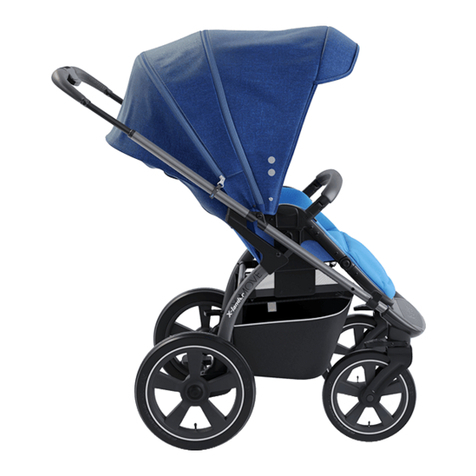
X-lander X-cite User manual

POLSKI
ENGLISH
DEUTSCH
ÐÓÑÑÊÈÉ
ÈESKÝ
SLOVENSKÝ
LATVIEŠU
LIETUVIŠKAI
MAGYARUL
ÁÚËÃÀÐÑÊÈ
ROMÂNÃ
ITALIANO
ESPAÑOL
DANSK
FRANÇAIS
9
13
17
22
27
31
35
39
43
47
51
56
60
64
68

15 6
12
2
3 4
aa
bb
7 8
9
12
3
2
1
2
2
3

15 6
12
2
3 4
aa
bb
7 8
9
12
3
2
1
2
2
3

10
4
13
14 15
16 17
5
11 12
aa
bb

10
4
13
14 15
16 17
5
11 12
aa
bb

19
6
18
a
b
d
c
20
21
e
7

19
6
18
a
b
d
c
20
21
e
7

9
POLSKI
22
23
12
12
1. ROZK£ADANIE STELA¯A
Odepnij blokadê spinaj¹c¹ (1.1). Roz³ó¿ wózek unosz¹c r¹czkê ku górze, a¿
do zatrzaœniêcia zamków (1.2)
OSTRZE¯ENIE: Przed u¿yciem wózka upewnij siê, ¿e mechanizmy sk³adania
zosta³y zablokowane.
2. SK£ADANIE STELA¯A
Zdejmij gondolê, spacerówkê lub fotelik ze stela¿a. Zwolnij blokadê sk³adania
i odci¹gnij uchwyty na r¹czce (2.1). Z³ó¿ wózek trzymaj¹c za r¹czkê w sposób
pokazany na rysunku (2.2).
3. MONTA¯ I DEMONTA¯ KÓ£ TYLNYCH
Aby zdj¹æ lub za³o¿yæ ko³o nale¿y nacisn¹æ gumowy przycisk na œrodku
ko³a.
4. MONTA¯ KO£A PRZEDNIEGO
Aby zamontowaæ ko³o wsuñ je na oœ a¿ do zatrzaœniêcia blokady.
5. DEMONTA¯ KO£A PRZEDNIEGO
Aby zdj¹æ ko³o naciœnij pokazany na rysunku przycisk (a) i œci¹gnij je z osi (b).
6. BLOKADA KO£A PRZEDNIEGO
Wózek posiada obrotowe ko³a przednie. Do blokady obrotu s³u¿y przycisk. Na-
ciœniêcie go powoduje zablokowanie ko³a do jazdy na wprost. Aby odblokowaæ
ko³o naciœnij przycisk ponownie.
7. REGULACJA WYSOKOŒCI R¥CZKI
Wciœnij oba przyciski znajduj¹ce siê na przegubach r¹czki, zmieñ jej
po³o¿enie.
8. HAMULEC
Aby zahamowaæ ko³a naciœnij peda³ hamulca . Aby zwolniæ hamulec, unieœ
peda³ koñcem stopy.
9. REGULACJA SZELEK
Przesuwaj¹c regulator w jedn¹ lub drug¹ stronê zmieñ d³ugoœæ pasków w szel-
kach dopasowuj¹c do tu³owia dziecka.
10. MONTA¯ KOSZA NA ZAKUPY
Zapnij napy oraz przypnij zaczepy kosza na stela¿ w sposób pokazany na
rysunkach.
11. ZAK£ADANIE SPACERÓWKI NA STELA¯
Wsuñ zaczepy spacerówki w gniazda monta¿owe w stela¿u a¿ do zatrzaœniê-
cia blokad.
12. ZDEJMOWANIE SPACERÓWKI ZE STELA¯A
Wciœnij przyciski odblokowuj¹ce zaczepy spacerówki (a) i wyci¹gnij j¹ z gniazd
monta¿owych (b).
14. REGULACJA PODNÓ¯KA
Naciœnij przyciski po obu stronach podnó¿ka i zmieñ jego po³o¿enie.
15. ZAK£ADANIE BARIERKI
Wciœnij koñce barierki w otwory monta¿owe a¿ do zatrzaœniêcia blokad.
16. ZDEJMOWANIE BARIERKI
Wciœnij przyciski blokad barierki i wysuñ jej koñce z otworów monta¿owych.
Barierkê mo¿na odchyliæ odpinaj¹c j¹ tylko z jednej strony.
17. ZAK£ADANIE POKROWCA
Aby za³o¿yæ pokrowiec prze³ó¿ paseczki z nap¹ przez plastikowe pó³kole i
zapnij napê.
13. MONTA¯ I DEMONTA¯ BUDKI DO SPACERÓWKI
Aby za³o¿yæ budkê wsuñ jej zaczepy w otwory monta¿owe (a). Aby zdj¹æ
budkê wciœnij blokady zaczepów i wysuñ budkê z otworów monta¿owych (b).
8

11
POLSKI
18. ZAK£ADANIE DODATKOWEJ WK£ADKI
Rozpi¹æ klamrê szelek i wysun pasy z regulatorów (a). Po³o¿yæ wk³adkê na
siedzisku spacerówki i prze³o¿yæ pasy przez otwory w sposób pokazany na
rysunku (b, c). Zapiaæ na pasach naramiennych ochraniacze na szelki (d,e).
19. KLAMRA
Aby rozpi¹æ klamrê naciœnij przyciski i wysuñ czêœci spinaj¹ce z obudowy.
Aby spi¹æ klamrê wciœnij czêœci spinaj¹ce w obudowê do momentu
zatrzaœniêcia.
20. MONTA¯ FOTELIKA
Aby zamontowaæ fotelik u¿yj specjalnych adapterów. Umieœæ adaptery w
gniazdach monta¿owych stela¿a i za³ó¿ fotelik zatrzaskuj¹c go na adapterach.
Uwaga: Przed u¿yciem sprawdŸ poprawnoœæ zamocowania fotelika.
21. DEMONTA¯ FOTELIKA
Aby zdj¹æ fotelik wciœnij przyciski odblokowuj¹ce po obu jego stronach równo-
czeœnie wyci¹gaj¹c go z gniazd monta¿owych. Zdejmij adaptery wciskaj¹c
przycisk odblokowuj¹cy.
22. MONTA¯ GONDOLI
Aby zamontowaæ gondolê u¿yj specjalnych adapterów. Umieœæ adaptery w
gniazdach monta¿owych stela¿a i za³ó¿ gondolê zatrzaskuj¹c j¹ na adapterach.
23. DEMONTA¯ GONDOLI
Aby zdj¹æ gondolê wciœnij przyciski odblokowuj¹ce zaczepy (a) i wyci¹gnij j¹
z gniazd monta¿owych (b). Zdejmij adaptery wciskaj¹c przycisk odblokowuj¹cy.
OSTRZE¯ENIA I UWAGI
Wa¿ne - Zachowaj te instrukcje do póŸniejszego wykorzystania.
Na podstawie przeprowadzonych testów firma Deltim deklaruje, ¿e dostar-
czony wózek dzieciêcy jest produktem bezpiecznym spe³niaj¹cym wszystkie
wymagania normy PN-EN1888:2012.
UWAGA: Wszelkie dodatkowe wyposa¿enie nie wymienione przez producen-
ta nie powinno byæ stosowane.
Na podwozie X cite mo¿na montowaæ jedynie przystosowane produkty:
gondolê - Xlander, spacerówkê - X cite oraz fotelik - przy u¿yciu odpowiednich
adapterów.
- Stela¿ w po³¹czeniu z gondol¹ X lander stanowi wózek dzieciêcy przezna-
czony dla dzieci w wieku od momentu urodzenia do momentu kiedy zacznie
samodzielnie siadaæ - do 9 kg.
- Stela¿ w po³¹czeniu ze spacerówk¹ X cite stanowi wózek dzieciêcy
przeznaczony dla dziecka, które zaczyna samodzielnie siadaæ ( powy¿ej 6-go
miesi¹ca ¿ycia, do 15 kg).
- Stela¿ w po³¹czeniu z fotelikiem (tylko przy u¿yciu adapterów) s³u¿y dla dzie-
cka od momentu urodzenia do 13 kg. ( zgodnie z instrukcj¹ obs³ugi fotelika).
W ka¿dej opcji mo¿na przewoziæ tylko jedno dziecko.
1. OSTRZE¯ENIE: Nigdy nie u¿ywaj produktu, gdy jego czêœæ jest zu¿yta lub
uszkodzona. U¿ytkowanie niesprawnego produktu zagra¿a bezpieczeñstwu
dziecka. Nale¿y skontaktowaæ siê z punktem serwisowym celem usuniêcia
usterki.
2. OSTRZE¯ENIE: Produkt powinien byæ regularnie sprawdzany pod k¹tem
oznak zu¿ycia lub uszkodzeñ.
3. OSTRZE¯ENIE: Nigdy nie zostawiaj dziecka bez opieki.
4. OSTRZE¯ENIE: Upewnij siê przed u¿yciem wózka, ¿e mechanizmy sk³a-
dania zosta³y zablokowane.
10
POLSKI
5. OSTRZE¯ENIE: W celu unikniêcia skaleczenia upewnij siê ¿e twoje dzie-
cko jest trzymane z dala, kiedy produkt jest sk³adany b¹dŸ rozk³adany.
6. OSTRZE¯ENIE: Nie pozwól dziecku na zabawê z tym produktem.
7. OSTRZE¯ENIE: U¿ywaj uprzê¿y zawsze, gdy twoje dziecko zacznie sa-
modzielnie siadaæ.
8. OSTRZE¯ENIE: Ta spacerówka jest nie odpowiednia dla dzieci poni¿ej
6-go miesi¹ca ¿ycia.
9. OSTRZE¯ENIE: Zawsze u¿ywaæ paska krokowego w po³¹czeniu z pas-
kiem biodrowym.
10. OSTRZE¯ENIE: Przed u¿yciem wózka sprawdŸ prawid³owoœæ zamoco-
wañ gondoli lub siedziska lub fotelika samochodowego do podwozia.
11. OSTRZE¯ENIE: Ten produkt nie jest odpowiedni do biegania i jazdy na
rolkach.
12. OSTRZE¯ENIE: Ka¿de obci¹¿enie zawieszone na prowadnicy, z ty³u
oparcia i/lub na bokach wózka narusza jego statecznoœæ. Maksymalne obci¹-
¿enie torby:1,5kg; Maksymalne obci¹¿enie kieszeni 1kg; max obci¹¿enie
kosza 3kg.
13. OSTRZE¯ENIE: Nie dopuszczaæ do zabawy dzieci w pobli¿u tego pro-
duktu bez opieki.
14. Nigdy nie zje¿d¿aj/wje¿d¿aj wózkiem po schodach i schodach rucho-
mych zw³aszcza gdy jest w nim dziecko. Mo¿e to zagra¿aæ bezpieczeñstwu
dziecka i uszkodziæ produkt.
15. Produkt ten nie jest zabawk¹, wiêc nie pozwól dziecku bawiæ siê nim /
wspinaæ siê na niego. Przewrócenie wózka na dziecko mo¿e spowodowaæ
powa¿ne obra¿enia.
16. Nie u¿ywaj i nie pozostawiaj wózka/gondoli w pobli¿u otwartego ognia
lub innych Ÿróde³ ciep³a takich jak grzejniki.
17. Nigdy nie ci¹gnij wózka, gdy przednie obrotowe ko³a znajduj¹ siê za
Tob¹ i nie s¹ zablokowane. W takiej sytuacji wózek mo¿e samoczynnie skrê-
ciæ, co mo¿e prowadziæ do zagro¿enia dla bezpieczeñstwa, jeœli nie postêpu-
jesz ostro¿nie i uwa¿nie.
18. W trakcie transportu œrodkami publicznymi (autobus, metro, poci¹g itp.)
niewystarczaj¹ce jest u¿ywanie tylko hamulca tylnych kó³ wózka. Wózek
mo¿e byæ wystawiony na dzia³anie warunków (nag³e hamowanie, zakrêty i
wyboje w nawierzchni drogi, przyspieszanie itp.), na dzia³anie których nie
zosta³ przetestowany zgodnie z aktualn¹ norm¹ dla wózków (EN1888). Sto-
suj siê do zaleceñ i instrukcji dotycz¹cych bezpiecznego przewo¿enia dzieci
w wózkach w œrodkach transportu publicznego, których zamieszczanie jest
obowi¹zkiem operatorów transportu publicznego.
19. Zalecenia dotycz¹ce bezpieczeñstwa zawarte w tej instrukcji nie dotycz¹
wszystkich mo¿liwych warunków i nieprzewidywalnych sytuacji, które mog¹
wyst¹piæ. Nale¿y zrozumieæ, ¿e zdrowy rozs¹dek, ostro¿noœæ i uwa¿noœæ s¹
czynnikami, które nie mog¹ zostaæ wbudowane w produkt. Czynniki te pozo-
staj¹ obowi¹zkiem osoby u¿ywaj¹cej wózek.
20. Niniejszy produkt zosta³ zaprojektowany i wyprodukowany zgodnie z nor-
m¹ EN1888. Niniejszy produkt nie powinien byæ u¿ywany jako urz¹dzenie
medyczne. Jeœli Twoje dziecko podczas transportu wymaga specjalistycznej
opieki medycznej, skonsultuj siê ze swoim lekarzem.
21. Nie modyfikuj niniejszego produktu, poniewa¿ mo¿e to zagroziæ bezpie-
czeñstwu Twojego dziecka. Producent nie ponosi odpowiedzialnoœci za jakie-
kolwiek modyfikacje produktu wprowadzone przez u¿ytkownika.


22. Tory kolejowe/tramwajowe stanowi¹ szczególne zagro¿enie, gdy¿ kó³ka
mog¹ utkn¹æ w nich podczas przeje¿d¿ania.
Zalecamy zablokowanie skrêtnych kó³. Zachowaj ostro¿noœæ.
23. Nale¿y zwróciæ szczególn¹ uwagê, aby nó¿ki dziecka nie znajdowa³y siê
w bezpoœredniej bliskoœci kó³ek gdzie mog¹ zostaæ otarte przez obracaj¹ce
siê ko³a.
24. Prosimy o szczególne zwrócenie uwagi na to, ¿e na stacjach kolejowych
i stacjach metra mo¿liwe s¹ nag³e zmiany ciœnienia powietrza. Nigdy nie po-
zostawiaj niniejszego produktu w pobli¿u torów bez obu r¹k na r¹czce wózka,
jako ¿e samo u¿ycie hamulca mo¿e nie byæ wystarczaj¹ce do bezpiecznego
utrzymania wózka w miejscu.
25. Nigdy nie pozostawiaj wózka/gondoli na zboczu, na nierównej czy œliskiej
powierzchni.
26. Nie stawiaj ani nie sadzaj na podnó¿ku dziecka. Podnó¿ek mo¿e byæ
u¿ywany wy³¹cznie jako podpora dla nóg i stóp jednego dziecka. U¿ycie go
w jakikolwiek inny sposób mo¿e prowadziæ do powa¿nego uszczerbku na
zdrowiu. Maksymalne obci¹¿enie podnó¿ka to 3 kg.
27. Upewnij siê, czy wszystkie suwaki i zapiêcia s¹ bezpiecznie zapiête
przed u¿yciem.
28. Zawsze wyjmuj dziecko z wózka przed jego z³o¿eniem.
29. Podczas u¿ytkowania wózka dla dziecka nowonarodzonego oparcie po-
winno byæ roz³o¿one do najbardziej poziomej pozycji a¿ do momentu, kiedy
zacznie samodzielnie siadaæ. Czyli ok. 6-go miesi¹ca ¿ycia.
30. Hamulec postojowy powinien byæ w³¹czony, kiedy wk³adasz lub wyci¹-
gasz dziecko (dzieci) do/z wózka
31. U¿ywaj tylko tych czêœci zamiennych które s¹ dostarczane lub rekomen-
dowane przez producenta.
32. Trzymaj plastikowe opakawania z dala od dziecka, aby unikn¹æ niebez-
pieczeñstwa uduszenia.
33. Zawsze, gdy chcesz zaparkowaæ u¿ywaj hamulca postojowego.
34. Unikaj sytuacji, w których u¿ywasz wózka ekstremalnie i zmniejszasz
kontrolê nad dzieckiem i wózkiem.
35. Nie przenoœ dziecka w wózku.
36. Upewnij siê, ¿e rêce twojego dziecka pozostaj¹ poza zasiêgiem miejsc,
w których mog¹ zostaæ przyszczypniête lub zakleszczone np., kiedy czêœci
wózka takie jak budka czy barierka s¹ montowane lub od³¹czane lub w inny
sposób zmieniane.
37. Chowaj¹c wózek w baga¿niku samochodu zwróæ uwagê, ¿eby klapa
kufra nie wywiera³a nacisku na wózek, gdy¿ mo¿e to spowodowaæ jego uszko-
dzenie.
38. Miej na uwadze to, ¿e ma³e czêœci takie jak nak³adki zabezpieczaj¹ce
osie kó³ w czasie transportu, mog¹ zostaæ po³kniête przez dziecko i doprowa-
dziæ do jego uduszenia.
Konserwacja: Wózek nale¿y osuszaæ delikatn¹ œciereczk¹ po u¿ywaniu
podczas deszczowej pogody. Regularnie czyœæ ko³a i metalowe czêœci
u¿ywaj¹c tylko delikatnych detergentów i letniej wody. Okresowo smaruj
czêœci ruchome wózka, szczególnie osie kó³ skrêtnych, aby zapewniæ p³ynne
funkcjonowanie wózka. Tapicerka i kosz na zakupy nie powinny byæ prane w
pralce. Nie nale¿y wystawiaæ wózka na d³ugotrwa³e dzia³anie promieni s³one-
cznych. Ze wzglêdów bezpieczeñstwa u¿ywaj tylko oryginalnych czêœci.
12
POLSKI
1. UNFOLDING THE FRAME
Unclip the linking interlock (1.1). Unfold the pram by lifting its handle up until
the locks (1.2) are engaged.
WARNING: Prior to assembling the baby carriage make sure that folding gears
have been locked.
2. FOLDING THE FRAME
Detach the pram, stroller seat or safety seat from the frame. Release the lock
preventing the frame from folding accidentally and pull the grips on the handle
upwards (2.1). Fold the frame holding the handle as shown in the picture (2.2).
3. ASSEMBLY AND DISASSEMBLY OF REAR WHEELS
To assembly or disassembly the wheel, push rubber button, which is in the
middle of the wheel.
4. MOUNTING OF THE FRONT WHEEL
In order to mount the wheel, slide it onto the axle until the lock is engaged.
5. DISMOUNTING OF FRONT WHEEL
In order to take the wheel off, push the button shown on the figure, and pull
the wheel off the axis.
6. WHEEL BLOCKADE
The stroller is provided with swivelling front wheels. A special button blocks
the wheel swivelling movement. After the button has been pressed, the wheels
are blocked straight. To release the blockade, press the lever.
7. PUSH BAR
Press both buttons on the handle of the push bar to adjust the height.
8. BRAKE
To apply the brake: push the pedal down with your foot. To release the brake
pick its bar up.
9. ADJUSTING OF HARNESS
Change of straps length in the harness by sliding the regulator to the one side
or the other, adapting it to the child's body.
10. SHOPPING BASKET INSTALLATION
Fasten the snap fasteners and attach the basket to the chassis as shown in
the pictures.
11. INSTALLING STROLLER COT ON THE CAR FRAME
Slide the catches of the stroller cot into mounting seats in the frame, until locks
are engaged.
12. DISMOUNTING STROLLER COT FROM THE CAR FRAME
Push the buttons unlocking catches of stroller cot in (a), then pull it out from
mounting seats (b).
13. ASSEMBLY AND DISMANTLING OF THE CANOPY
To assemble the canopy, insert its clamps into the assembly openings (a).
To remove the canopy, press in the interlocks of clamps and bring out the
canopy from assembly openings (b).
14. FOOTREST ADJUSTMENT
Press the buttons on both sides of footrest and adjust it to the required position.
15. INSTALLING OF GUARD-RAIL
Push in the ends of the guard-rail into mounting holes, until locks are snapped.
16. TAKING THE GUARD-RAIL OFF
Push in the buttons of the guard-rail locks and slide its end out of the moun-
ting holes. The guard-rail may be tilted, when undone only from single side.
17.
ATTACHING THE COVER
To attach the cover, put the straps with snap fasteners through the plastic
semi-circle and fasten the snap.
ENGLISH
13

18.PLACING AN ADDITIONAL SEAT PAD
Unfasten the straps buckle (a). Place the seat pad on the stroller's seat and
move the seatbelts through the openings as shown in (b, c). Add the shoulder
pads on the shoulder belts as shown in (d,e)
19. BUCKLE
To unfasten the buckle, press the buttons and pull the fastening part out
of the casing. To fasten the buckle, insert the fastening part into the casing
until it has engaged.
20. MOUNTING THE CAR SEAT
Special adapters are needed in order to mount the baby car seat. Place the
adapters in mounting seats of the frame and attach the car seat by catching it
on the adapters.
Attention: Ensure proper fitting of the armchair before using it.
21. REMOVING THE CAR SEAT
In order to take the car seat off, push in the unlocking pushbuttons on both its
sides, while simultaneously pulling it out of mounting seats. Remove adapters
by pushing in the unlocking pushbutton.
22. MOUNTING OF CARRYCOT
Special adapters are needed in order to mount the carrycot. Place the adapters
in mounting carrycot of the frame and attach the carrycot by catching it on the
adapters.
23. DISMOUNTING OF CARRYCOT
To take the carrycot off, push in the buttons unlocking the catches (a) and pull
it out from mounting seats (b). Remove adapters by pushing in the unlocking
pushbutton.
WARNINGS AND POINT OF ATTENTION
Important - keep these instructions for future reference.
Having conducted required tests Deltim declares that the stroller complies
with all the requirements of PN-EN1888:2012 standard.
ATTENTION: Do not use any other additional accessories not listed by the
manufacturer.
Only products fitted for the purpose can be installed on theX cite frame chassis,
i.e. X lander carrycot, X cite stroller and baby seat, by means of adequate
adapters.
- The frame combined with the X lander carrycot constitutes baby carriage
intended for babies starting from their birth until the moment when they are
able to sit on their own - to 9 kg.
- The frame combined with the X cite stroller constitutes baby carriage inten-
th
ded for babies who are able to sit on their own (over 6 month old, - to 15 kg).
- The frame combined with the baby seat (only when used with adapters) ser-
ves for babies starting from their birth until they reach 13 kg of body weight
(according to seat handling instruction).
Carrying only one child is allowed in each option.
1. WARNING: Never use the product if any of its parts is faulty or damaged.
The use of a defective product endangers the safety of the child. Please con-
tact the service center in order to eliminate/remove the fault.
2. WARNING:Product should be inspected regularly for signs of damage and
wear.
3. WARNING: Never leave your child unattended.
4. WARNING: Ensure that all the locking devices are engaged before use.
5. WARNING: To avoid injury ensure that your child is kept away when un-
folding and folding this product.
14
ENGLISH
6. WARNING: Do not let your child play with this product.
7. WARNING: Use the safety harness as soon as your child can sit unaided.
8. WARNING: This seat unit is not suitable for children under 6 months.
9.WARNING: Always use the crotch strap in combination with the waist belt.
10. WARNING: Check that the carry cot or seat unit or car seat attachment
devices are correctly engaged onto the chassis before use.
11. WARNING: This product is not suitable for running or skating.
12. WARNING: Any load attached to the handle and/or on the back of the
backrest and/or on the sides of the vehicle will affect its stability. Maximum
weight of the changing bag should not exceed 1,5 kg; Maximum weight in the
pocket should not exceed 1 kg ; Shopping basket maximum load should not
exceed 3 kg.
13. WARNING: Do not allow children to play near this product unattended.
14. Never use the pram/stroller on stairs or escalators, especially when there
is a child in it. This could endanger the safety of the child and damage the
product.
15. This product is not a toy so do not allow your child to play with it or climb
on it. Serious injury can be caused if the stroller falls over on the child.
16. Do not use or leave the vehicle/carry cot close to open fires or other sour-
ces of heat such as radiators or others.
17. Never pull the stroller behind you with unlocked front swivel wheels. The
stroller might self turn, which can lead to a safety risk if you are not cautious
and attentive.
18. When using public transport (bus, underground, train, etc.) it is not enough
only to engage the stroller's parking brake. The stroller can be exposed to con-
ditions (harsh braking, turns and bumps in the road surface, acceleration, etc.)
for which it has not been tested according to the current stroller standard EN
1888. Follow the recommendations and instructions regarding safe transport
of children in strollers, which public transport operators are obliged to provide.
19. The safety instructions in this manual do not cover all possible conditions
and unforeseeable situations which may occur. It must be understood that
common sense, caution and care are factors that cannot be built into a product.
These factors are the responsibility of the carer using the stroller.
20. This product is designed and manufactured according to standard EN1888.
This product should not be used as a medical treatment device. If your child
has special health needs relating to transport, you should consult your doctor.
21. Do not modify this product as it may compromise the safety of your child.
The manufacturer is not liable for any modifications to the product.
22. Crossing train/tramway rails can pose a particular threat because the wheels
of the stroller can get stuck in them. We recommend locking the swivel wheels.
Be cautious.
23. Make sure child is kept clear of all moving parts (e.g. wheels) risk of injury.
24. Remember that at underground or train stations sudden pressure changes
in the air may occur. When close to platform edge make sure you hold the
handle with both hands as the applied braking device may not be sable to keep
the stroller safely in place.
25.Never park the stroller on a hill, uneven or slippery surface.
26. Do not stand or sit the child on the footrest. The footrest is designed to
support legs and feet of one child only. Any other usage may lead to serious
personal injury. The maximum load for the footrest is 3 kg.
ENGLISH
15

ENGLISH
27. Check that all zips, snaps and locking devices are securely fastened before
use.
28. Always remove the child before folding the stroller.
29. Use the most reclined position of the backrest for new born babies until the
child can sit up unaided, i.e. usually about 6 months of age.
30.The parking device should be engaged when child is being placed in or
removed from the stroller.
31. Use only replacement parts supplied or recommended by the manufacturer/
distributor.
32. Keep plastic packaging materials out of reach of children to avoid the
danger of suffocation.
33. When parking always use the parking brake.
34. Avoid situations of extreme use which reduce your control over the child
and the stroller.
35. Do not carry a child in a stroller.
36. Make sure that the child's hands stay clear of possible pinching areas when
the stroller or its parts are being folded, unfolded, changed or adjusted.
37. When transporting the stroller in a car trunk make sure that the trunk lid
does not exert pressure on the product as this may damage the stroller.
38. Remember that small parts, such as the caps protecting axles in transport,
can be swallowed by your child, and may cause your child to choke.
Maintenance: Stroller should be cleaned with a soft cloth after use in wet
weather. Clean the wheels and metal parts using only a mild detergent and
warm water. Periodically lubricate the moving parts of the vehicle, especially
axles steering wheels to ensure its smooth functioning. Upholstery and
shopping basket are not machine washable. Do not overexpose the stroller
to sunlight. For safety reasons use original parts only.
16
1. AUFKLAPPEN DES GESTELLS
Die Sperre öffnen (1.1) Den Wagen durch nach oben ziehen des Griffs öffnen,
bis die Schlösser einrasten (1.2)
WARNUNG: Vor dem Zusammenlegen sicherstellen, dass die Klappmechani-
smen gesperrt wurden.
2. ZUSAMMENLEGEN DES GESTELLS
Nehmen Sie die Tragewanne, den Buggyaufsatz oder den Kindersitz vom Ge-
stell. Lösen Sie die Sperre für das Zusammenlegen und ziehen Sie an den
Griffen am Schieber (2.1). Legen Sie den Kinderwagen zusammen, indem
Sie ihn am Schieber auf die auf der Zeichnung gezeigte Weise halten (2.2).
3. MONTAGE UND DEMONTAGE DER HINTERRÄDER
Um die Räder zu antfernen, müssen Sie den Knopf in der Mitte des Rades
drücken.
4. MONTAGE DES VORDERRADES
Zur Montage das Rad auf die Achse schieben, bis die Sperre einrastet.
5. DEMONTAGE DES VORDERRADES
Um das Rad abzunehmen, den auf der Abbildung dargestellten Druckknopf (a)
drücken und das Rad von der Achse ziehen (b).
6. BLOCKIERUNG DES VORDERRADES
Der Wagen verfügt über drehbare Vorderräder. Zur Blockierung der Drehbewe-
gung dient der Druckknopf. Durch Drücken des Knopfes wird das Rad für die
Geradeausfahrt arretiert. Um die Blockierung aufzuheben, ist der Knopf
erneut zu drücken.
7 HÖHENVERSTELL
Drücken Sie die Druckknöpfe an den Gelenkstellen des Griffes und verändern
Sie die Höhe nach Bedarf.
8. BREMSE
Um die Räder zu blockieren, muss das Bremspedal zu betätigt werden. Um
die Bremse freizugeben, das Pedal mit der Fußspitze anheben.
9. REGULIEREN DER GURTE
Durch Verschieben des Regulierelements in die eine oder andere Richtung
kann die Gurtlänge geändert und an den Körper des Kindes angepasst
werden.
10. MONTAGE DES EINKAUFSKORBS
Schließen Sie die Druckknöpfe und befestigen Sie die Haken des Korbs am
Gestell auf die auf den Zeichnungen dargestellte Weise.
11. AUFSETZEN DES KORBES AUF DAS GESTELL
Die Kupplungshaken des Körbchens in die Montagesitze am Rahmen einfüh-
ren, bis sie einrasten.
12. ABNEHMEN DES KORBES VOM GESTELL
Die Druckknöpfe hineindrücken und so die Kupplungshaken freigeben (a).
Danach das Körbchen aus den Montageöffnungen herausziehen (b).
13. MONTAGE UND DEMONTAGE DES VERDECKS AM SPORTWAGEN
Um das Verdeck aufzusetzen, ist der Kupplungshaken in die Montageöffnung
einzuführen (a). Um das Verdeck zu entfernen, muss die Verriegelung
hereingedrückt und das Verdeck aus den Montageöffnungen herausgezogen
werden (b).
14. VERSTELLUNG DER FUßSTÜTZE
Drücken Sie die Knöpfe auf beiden Seite der Fußstütze, um ihre Lage zu verän-
dern.
.
17
DEUTSCH

15. ANBRINGEN DES SICHERHEITSBÜGELS
Die Enden des Sicherheitsbügels in die Montageöffnungen einführen, bis sie
einrasten.
16. ENTFERNEN DES SICHERHEITSBÜGELS
Die beiden Tasten der Sperrvorrichtung des Sicherheitsbügels hinein drücken
und die Enden aus den Montageöffnungen herausziehen. Durch die Entriege-
lung von nur einer Seite, kann der Sicherheitsbügel aufgeklappt werden.
17. MONTAGE DES BEZUGS
Um den Bezug zu befestigen, ziehen Sie bitte die Bänder mit dem Druck-
knopf durch die Kunststoff-Halbringe und schließen Sie den Druckknopf.
18. EINSETZEN EINER ZUSATZEINLAGE
Öffnen Sie die Gurtklammer (a). Legen Sie die Einlage auf dem Sitz des
Kinderwagens und führen Sie die Gurte durch die Öffnungen, wie in der
Abbildung dargestellt wurde (b, c). Befestigen Sie auf den Schulterguten
die Schutzpolster (d,e).
19. KLAMMER
Um eine Klammer zu lösen, drücken Sie die Knöpfe und ziehen Sie den
Klemmteil aus dem Gehäuse. Um die Klammer einrasten zu lassen, drücken
Sie den Klemmteil in das Gehäuse, bis es einrastet.
20. SITZMONTAGE
Zur Montage des Sitzes müssen die Spezialadapter verwendet werden. Die
Adapter in den Montagesitzen am Gestell befestigen und den Sitz aufsetzten,
sodass er in den Adaptern einrastet.
Achtung: Vor Gebrauch muss geprüft werden, ob der Sitz richtig befestigt ist.
21. DEMONTAGE DES SITZES
Um den Sitz abzunehmen, müssen die Druckknöpfe auf beiden Seiten gleich-
zeitig gedrückt und somit der Sitz freigegeben werden. Danach den Sitz aus
der Montageöffnungen herausziehen. Die Adapter durch Drücken der Druck-
knöpfe abnehmen.
22. MONTAGE DER GONDEL
Um die Gondel auf dem Gestell zu montieren, müssen die Kupplungshaken in
die Montagesitze eingeführt werden, bis sie einrasten.
23. DEMONTAGE DER GONDEL
Zum Abnehmen der Gondel die Druckknöpfe hineindrücken und so die Kup-
plungshaken freigeben (a). Danach die Gondel aus den Montageöffnungen
herausziehen (b).
WARNUNGEN UND HINWEISE
Wichtiger Hinweis: Bewahren Sie diese Gebrauchsanweisung für späteren
Gebrauch auf.
Die Firma Deltim erklärt auf der Grundlage durchgeführter Prüfungen, dass
der gelieferte Kinderwagen ein sicheres Produkt ist und alle Anforderungen
der Norm PN-EN1888:2012 erfüllt.
WARNUNG: Zusätzliche Zubehörteile, die vom Hersteller nicht zugelassen
sind, dürfen nicht verwendet werden.
18
DEUTSCH
Am X cite frame Wagengestell können ausschließlich die folgenden passenden
Produkte befestigt werden.
Gondola X lander, Sportwagenaufsatz X cite stroller sowie der Sitz - unter
Verwendung der entsprechenden Adapter.
- Das Gestell in Verbindung mit dem Liegeaufsatz Xlander bildet einen Kin-
derwagen für Kinder im Säuglingsalter bis sie anfangen selbstständig zu sitzen,
bis 9 kg.
- Das Gestell in Verbindung mit dem Sportwagenaufsatz bildet einen Kinderwa-
gen der für Kinder die anfangen selbstständig zu sitzen geeignet ist (ab dem
6 Lebensmonat, bis 15 kg).
- Das Gestell in Verbindung mit dem Sitz (nur unter Verwendung der Adapter)
eignet sich für Kinder im Säuglingsalter und für Kinder mit einem Gewicht von
bis zu 13 kg. (gemäß der Gebrauchsanweisung des Sitzes).
Jede der Optionen ist für den Transport von nur einem Kind geeignet.
1. WARNUNG: Benutzen Sie niemals das Produkt, wenn ein Teil von ihm man-
gelhaft oder beschädigt ist.Die Nutzung von defektem Produkt gefährdet die
Sicherheit des Kindes. Wenden Sie sich bitte an den Kundendienst, um den
Mangel beheben zu lassen.
2. WARNUNG: Das Produkt sollte regelmäßig auf Abnutzungserscheinungen
und Beschädigungen überprüft werden.
3. WARNUNG: Lassen Sie Ihr Kind niemals unbeaufsichtigt.
4. WARNUNG: Vergewissern Sie sich vor dem Gebrauch, dass alle Verriege-
lungen eingerastet sind.
5. WARNUNG: Um Verletzungen zu vermeiden achten Sie auf einen sicheren
Abstand zu Ihrem Kind, wenn das Produkt zusammengelegt oder aufgestellt wird.
6. WARNUNG: Lassen Sie Ihr Kind nicht mit dem Produkt spielen.
7. WARNUNG: Verwenden Sie das Gurtgeschirr immer, wenn Ihr Kind selb-
ständig zu sitzen beginnt.
8. WARNUNG: Dieser Sitzaufsatz ist für Kinder unter 6 Monaten nicht geeignet.
9. WARNUNG: Verwenden Sie den Schrittgurt immer in Verbindung mit dem
Beckengurt.
10. WARNUNG: Vergewissern Sie sich vor jedem Gebrauch, dass die Befesti-
gungen von Tragewanne, Sitzeinheit oder Autokindersitz am Gestell richtig
eingerastet sind.
11. WARNUNG: Dieses Erzeugnis ist nicht geeignet zum Rennen oder Skaten.
12. WARNUNG: Jedes Gewicht, das an der Schiebegriffstange, hinten an der
Sitzrückseite und / oder an den Seiten des Kinderwagens gehängt wird, gefähr-
det dessen Standsicherheit. Max. Zuladung der Tache: 1,5kg; Max. Zuladung
der Stauraumtasche 1 kg; Max. Zuladung des Stauraumkorbes: 3 kg.
13. WARNUNG: Man darf die Kinder nie in der Nähe dieses Produktes unbeau-
fsichtigt spielen lassen.
14. Man darf niemals mit dem Kinderwagen die Treppe oder Rolltreppe hoch-
oder runterfahren, insbesondere dann nicht, wenn das Kind darin sitzt.
15. Das Produkt ist kein Spielzeug, deswegen darf man nicht das Kind damit
spielen oder darauf klettern lassen. Ein Umkippen des Kinderwagens auf das
Kind kann ernsthafte Verletzungen nach sich ziehen.
16. Benutzen Sie den Kinderwagen nicht in der Nähe von offenem Feuer oder
anderen Hitzequellen und lassen Sie ihn dort nicht stehen.
DEUTSCH
19

17. Ziehen Sie niemals den Kinderwagen mit schwenkbaren Vorderrädern
hinter - sichher, wenn die Räder nicht festgestellt sind. In einem solchen Fall
kann der Wagen eigenmächtig abbiegen, was zur Sicherheitsgefährdung füh-
ren kann, wenn Sie nicht vorsichtig und achtsam sind.
18. Beim Transport des Kinderwagens in öffentlichen Verkehrsmitteln (Bus,
U-Bahn, Zug etc.) ist es nicht ausreichend, nur die Feststellbremse der Hinter-
räder zu benutzen. Der Kinderwagen kann dabei Einwirkungen ausgesetzt sein
(abruptes Bremsen, Kurven, Schlaglöcher auf der Fahrbahn, Beschleunigun-
gen u.s.w.) , auf die er nicht gemäß der gültigen Kinderwagennorm EN 1888
getestet worden war. Folgen Sie den Anweisungen und Instruktionen für
sichere Beförderung der Kinder in Kinderwagen, die der Betreiber von öffentli-
chen Verkehrsmitteln zur Verfügung stellen muss.
19. Die Sicherheitshinweise in der Gebrauchsanweisung können nicht alle
möglichen Bedingungen und unvorhersehbare Fälle abdecken, die auftreten
können. Es versteht sich von selbst, dass gesunder Menschenverstand,
Vorsicht und Sorgfalt Faktoren sind, die nicht in dieses Erzeugnis eingebaut
werden können. Diese Faktoren liegen in der Verantwortung der Person, die
den Kinderwagen nutzt.
20. Dieses Produkt wurde nach der Norm EN1888/EN1466 konstruiert und
hergestellt. Das Produkt soll nicht als medizinisches Gerät verwendet werden.
Sollte Ihr Kind spezieller medizinischer Betreuung im Zusammenhang mit dem
Transport bedürfen, konsultieren Sie bitte Ihren Arzt.
21. Nehmen Sie keine Veränderungen am Produkt vor, da dies die Sicherheit
Ihres Kindes gefährden könnte. Für Veränderungen am Produkt trägt der Her-
steller keine Verantwortung. Der Hersteller trägt keine Verantwortung für
Produktmodifikationen, die der Benutzer vorgenommen hat.
22. Bahn- oder Straßenbahngleise stellen eine besondere Gefahr dar, da die
Räder darin beim Überqueren hängenbleiben können. Es ist ratsam, die
Schwenkräder festzustellen. Seien Sie vorsichtig.
23. Man sollte besonders aufpassen, dass sich die Beine des Kindes nicht in
unmittelbarer Nähe der Räder befinden, wo sie durch sich drehende Räder
abgeschürft werden können.
24. Bitte beachten Sie, dass Zug- oder Bahnstationen plötzliche Druckverän-
derungen in der Luft verursachen können. Stellen Sie niemals das Produkt in
die Nähe von Gleisen ohne beide Hände am Schieber zu halten, da die Brem-
se alleine möglicherweise nicht ausreichend sein kann um ihren Wagen sicher
am Platz zu halten.
25. Kinderwagen niemals an einer Böschung oder auf unebener Fläche abstellen.
26. Niemals auf die Fußstütze setzen oder stellen. Die Fußstütze darf nur als
Unterstützung für die Füße und Beine eines (1)
Kindes genutzt werden. Jegliche andere Nutzung kann zu ernsthaften Gesun-
dheitsschäden führen. Die maximale Belastung der Fußstütze beträgt 3 kg.
27. Vor Verwendung die sichere Befestigung aller Reißverschlüsse und Druck-
knöpfe kontrollieren.
28. Vor dem Zusammenklappen des Kinderwagens stets das Kind herausheben.
29. Wenn Sie den Kinderwagen für Neugeborene verwenden, sollte die Rü-
ckenlehne in der niedrigsten Liegeposition einstellt werden, bis das Kind selb-
ständig sitzen kann. Es erfolgt ungefähr im 6. Lebensmonat.
DEUTSCH
20
30. Beim Hineinsetzen oder Herausnehmen Ihres Kindes aus dem Wagen,
sollte die Bremsen immer festgestellt sein.
31. Verwenden Sie nur Ersatzteile die vom Hersteller geliefert oder genehmigt
sind.
32. Halten Sie alle Kunststoffverpackungen von Kindern fern, um Ersticukung-
gefahr zu vermeiden.
33. Benutzen Sie immer die Feststellbremse, wenn Sie den Kinderwagen
abstellen.
34. Vermeiden Sie Situationen, in denen Sie den Wagen extrem benutzen und
die Ihre Kontrolle über Kind und Wagen beeinträchtigen.
35. Der Kinderwagen darf nicht getragen werden, wenn sich ein Kind darin
befindet.
36. Vergewissern Sie sich, dass die Hände Ihres Kindes außerhalb der Reich-
weite von Stellen bleiben, an denen sie eingequetscht oder eingeklemmt
werden könnten, z. B. wenn Teile des Wagens wie Haube oder Bauchbügel
montiert, abgenommen oder auf andere Weise geändert werden.
37. Beim Verstauen des Wagens im Kofferraum ist darauf zu achten, dass die
Kofferraumklappe nicht auf den Wagen drückt, da dies eine Beschädigung des
Wagens zur Folge haben kann.
38. Bedenken Sie, dass Kleinteile wie die abgenommenen Transportsicherung-
skappen für die Achsen von einem Kind verschluckt und zu seiner Erstickung
führen können.
Pflegehinweise: Nach einem Spaziergang im Regen ist der Wagen mit einem
weichen Tuch trocken zu reiben. Die Räder und Metallteile müssen in regel-
mäßigen Abständen mit einem sanften Reinigungsmittel und warmem Wasser
gesäubert werden. Schmieren Sie regelmäßig bewegliche Teile, insbesondere
die Achsen von Schwenkrädern, um eine problemlose Funktion des Wagens
sicherzustellen. Die Polsterung und der Staukorb sollten nicht in der Wasch-
maschine gewaschen werden. Setzen Sie Ihren Wagen nicht über längere
Zeit dem Sonnenlicht aus. Aus Sicherheitsgründen verwenden Sie nur
Original-Ersatzteile.
DEUTSCH
21
Other manuals for X-cite
2
Table of contents
Languages:
Other X-lander Stroller manuals

X-lander
X-lander X-RUN User manual

X-lander
X-lander X-cite User manual

X-lander
X-lander X-GO User manual

X-lander
X-lander X-cite User manual

X-lander
X-lander X-PULSE User manual

X-lander
X-lander X-Follow User manual

X-lander
X-lander X-MOVE User manual

X-lander
X-lander X-MOVE User manual

X-lander
X-lander BOOSTER2 User manual

X-lander
X-lander X-Twin User manual