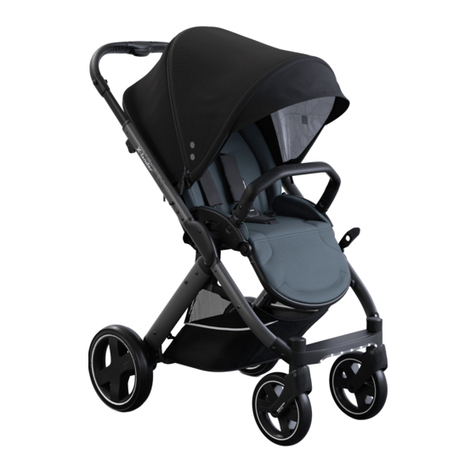
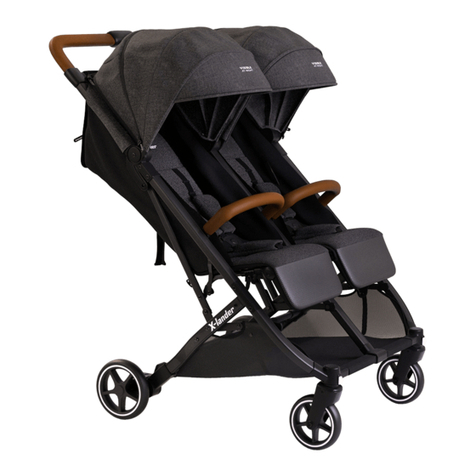
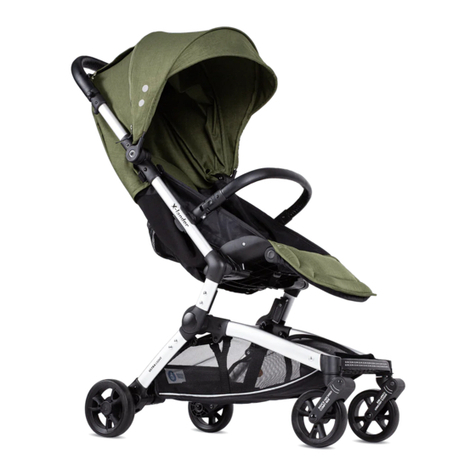
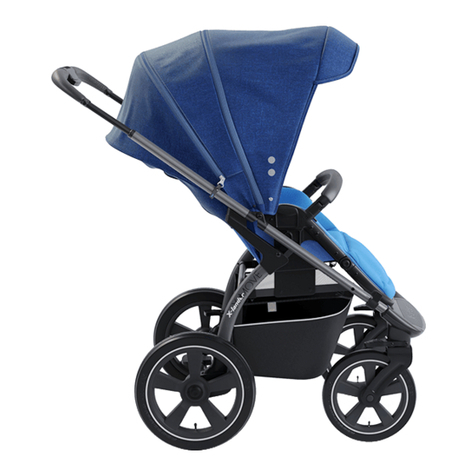
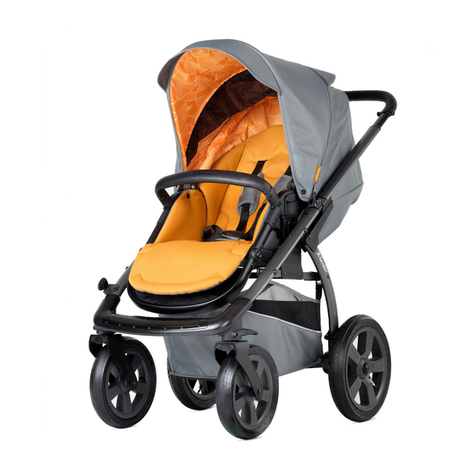
X-lander X-MOVE User manual

89
b
a
b
ac
New adventure ahead
X- MOVE
USER MANUAL
PL EN DE RU CZ SK ES
x-lander.com
Dziękujemy, że wybraliście X-lander!
Thank you for choosing X-lander!
Vielen Dank für Ihr X-lander!
Благодарм Вас за выбор X-lander!
Děkujeme, že jste si vybrali X-lander!
Ďakujeme, že ste si vybrali X-lander!
Gracias por elegir la X-lander usted!
1 – 12

b
a
ba c
New adventure ahead
explore
13 – 20 21 – 28
a
a
25
26
b
a
abcd

POLSKI 2
ENGLISH 7
DEUTSCH 11
ČESKÝ 16
SLOVENSKÝ 21
ESPAÑOL 25
РУССКИЙ 30

2
POLSKI
ROZKŁADANIE STELAŻA
Odepnij blokadę spinającą (a). Rozłóż wózek unosząc rączkę ku górze, aż do zatrzaśnię-
cia zamków (b). OSTRZEŻENIE: Przed użyciem wózka upewnij się, że mechanizmy
składania zostały zablokowane.
SKŁADANIE STELAŻA
Zdejmij gondolę, spacerówkę lub fotelik ze stelaża. Odblokuj zamki po obu stronach
wózka naciskając kolejno na pedały oznaczone numerem 1 (a) i 2 (b). Złóż wózek tak jak
pokazuje rysunek (c).
MONTAŻ KOŁA PRZEDNIEGO
Aby zamontować koło wsuń je na oś aż do zatrzaśnięcia blokady.
DEMONTAŻ KOŁA PRZEDNIEGO
Aby zdjąć koło naciśnij pokazany na rysunku przycisk i ściągnij je z osi .
MONTAŻ I DEMONTAŻ KÓŁ TYLNYCH
Aby zdjąć lub założyć koło należy nacisnąć gumowy przycisk na środku koła.
BLOKADA KÓŁ
Wózek posiada obrotowe koła przednie. Do blokady obrotu służy dźwignia. Naciśnięcie
jej powoduje zablokowanie kół do jazdy na wprost. Aby odblokować koła unieś dźwignię.
POMPOWANIE KÓŁ
Aby napompować koło odkręć zawleczkę wentyla. Przyłóż pompkę do końcówki wen-
tyla i napompuj koło. Maksymalne ciśnienie w oponie nie może przekroczyć 1,5 atm.
ZAKŁADANIE BARIERKI
Wciśnij końce barierki w otwory montażowe aż do zatrzaśnięcia blokad.
ZDEJMOWANIE BARIERKI
Wciśnij przyciski blokad barierki i wysuń jej końce z otworów montażowych. Barierkę
można odchylić odpinając ją tylko z jednej strony.
REGULACJA PODNÓŻKA
Naciśnij przyciski po obu stronach podnóżka i zmień jego położenie.
REGULACJA OPARCIA SPACERÓWKI
Pociągnij cięgno do góry i ustaw oparcie w żądanej pozycji.
MONTAŻ KOSZA NA ZAKUPY
Na bolce mocujące wciśnij plastikowe zaczepy kosza.
HAMULEC
Aby zahamować koła naciśnij pedał hamulca. Aby zwolnić hamulec, unieś pedał końcem stopy.
MONTAŻ GONDOLI LUB SPACERÓWKI
Aby zamontować gondolę lub spacerówkę rozłóż adaptery zamocowane po bokach
stelaża. Należy obrócić je do góry w sposób pokazany na rysunku aż do zatrzaśnię-
cia blokady. Na rozłożone adaptery załóż gondolę lub spacerówkę zatrzaskując ją na
adapterach. Uwaga: Przed użyciem sprawdź poprawność zamocowania gondoli lub
spacerówki.
DEMONTAŻ GONDOLI LUB SPACERÓWKI
Aby zdjąć gondolę lub spacerówkę wciśnij przyciski (1) odblokowujące zaczepy i wycią-
gnij ją z gniazd montażowych (2). Złóż adaptery obracając je na dół w sposób pokazany
na rysunku (b).
MONTAŻ FOTELIKA
Aby zamontować fotelik rozłóż adaptery obracając je do góry aż do zatrzaśnięcia
blokady. Umieść dodatkowe adaptery w gniazdach montażowych stelaża i załóż fotelik
1
2
3
4
5
6
7
8
9
10
11
12
13
14
15
16

3
POLSKI
zatrzaskując go na adapterach. Uwaga: Przed użyciem sprawdź poprawność zamoco-
wania fotelika.
DEMONTAŻ FOTELIKA
Aby zdjąć fotelik wciśnij przyciski odblokowujące po obu jego stronach równocześnie
wyciągając go z gniazd montażowych (a). Wyciągnij dodatkowe adaptery z gniazd mon-
tażowych (b). Złóż adaptery obracając je na dół w sposób pokazany na rysunku (c).
ŚWIATEŁKA LED
Na ramie wózka umieszczone są światełka LED, służące do oświetlania drogi przed wóz-
kiem. Przycisk do włączania znajduje się na stelażu wózka w miejscu pokazanym na rysunku.
Miejsce na baterie do zasilania światełek znajduje się w spodniej części podnóżka. Aby
zainstalować baterie LR 44 należy odkręcić śrubkę pokazaną na rysunku i zdjąć osłonkę.
REGULACJA SZELEK
Regulator umieszczony jest w tylnej części oparcia spacerówki (a). Aby poluzować pasy
naciśnij regulator i pociągnij za szelki (b). Aby pasy dolegały do dziecka pociągnij pasek
przy regulatorze (c). Długość szelek można dodatkowo zwiększyć wypinając końcówkę
pasa biodrowego z dodatkowego zaczepu.
KLAMRA
Aby rozpiąć klamrę naciśnij przyciski i wysuń części spinające z obudowy. Aby spiąć
klamrę wciśnij części spinające w obudowę do momentu zatrzaśnięcia.
ZWIĘKSZANIE KĄTA POCHYLENIA BUDKI
Budkę można powiększyć o dodatkową cześć. W tym celu należy rozsunąć zamek znaj-
dujący się pomiędzy dolną i górną częścią budki.
MONTAŻ I DEMONTAŻ BUDKI
Aby założyć budkę wsuń elementy montażowe w prowadnice (a). Aby zdjąć budkę
wciśnij przycisk odblokowujący i wysuń budkę z prowadnic (b).
ZAKŁADANIE POKROWCA
Aby założyć pokrowiec przełóż paseczki z napą przez plastikowe półkole i zapnij napę.
REGULACJA DŁUGOŚCI RĄCZKI
Wciśnij przycisk na środku rączki i zmień jej wysokość pociągając lub pchając do/od
siebie.
PRZECHOWYWANIE PODWOZIA
Złożone podwozie można ustawiać pionowo. W tym celu należy ustawić długość rączki
w położeniu zaznaczonym na profilu rączki białymi liniami (1) i zablokować blokadę
przeciw rozłożeniu wózka (2). Podwozie należy przechowywać w miejscu niedostęp-
nym dla dzieci.
ZAKŁADANIE ŚPIWORA
Śpiwór posiada klapę z gumką, którą należy założyć za oparcie spacerówki (a). Paski
z napą przełożyć przez plastikowe półkola i zapiąć je.
MOSKITIERA
Moskitiera znajduje się w kieszeni w spodniej części podnóżka (a). Należy założyć ja na pod-
nóżek i budkę (b,c) a następnie zapiąć paski na rurce stelaża, tak jak pokazuje rysunek (d).
MOCOWANIE TORBY XBAG ORAZ UCHWYTU NA KUBEK XMUG
Do prowadnicy wózka można dołączyć torbę X-Bag oraz uchwyt na kubek X-Mug korzy-
stając z punktów mocowania pokazanych na rysunku.
17
18
19
20
21
22
23
24
25
26
27
28

4
POLSKI
OSTRZEŻENIA I UWAGI
Ważne – Zatrzymaj te instrukcje do przyszłego zastosowania.
Na podstawie przeprowadzonych testów firma Deltim deklaruje, że dostarczony wózek
dziecięcy jest produktem bezpiecznym spełniającym wszystkie wymagania normy PN-
-EN1888:2012.
UWAGA: Wszelkie dodatkowe wyposażenie nie wymienione przez producenta nie
powinno być stosowane.
Na podwozie X-Move można montować jedynie przystosowane produkty:
gondolę -
X -lander, spacerówkę - X-Move oraz fotelik - przy użyciu odpowiednich adapterów.
- Stelaż w połączeniu z gondolą X-lander stanowi wózek dziecięcy przeznaczony dla dzieci
w wieku od momentu urodzenia do momentu kiedy zacznie samodzielnie siadać - do 9 kg.
- Stelaż w połączeniu ze spacerówką X-Move stanowi wózek dziecięcy przeznaczony
dla dziecka, które zaczyna samodzielnie siadać ( powyżej 6-go miesiąca życia, do 15 kg).
- Stelaż w połączeniu z fotelikiem (tylko przy użyciu adapterów) służy dla dziecka od
momentu urodzenia do 13 kg. (zgodnie z instrukcją obsługi fotelika).
W każdej opcji można przewozić tylko jedno dziecko.
Do wózka można dołączyć platformę X–Board do przewozu starszego dziecka.
1. OSTRZEŻENIE: Nigdy nie używaj produktu, gdy jego część jest zużyta lub uszko-
dzona. Użytkowanie niesprawnego produktu zagraża bezpieczeństwu dziecka.
Należy skontaktować się z punktem serwisowym celem usunięcia usterki.
2. OSTRZEŻENIE: Produkt powinien być regularnie sprawdzany pod kątem oznak
zużycia lub uszkodzeń.
3. OSTRZEŻENIE: Nigdy nie zostawiaj swojego dziecka bez opieki.
4. OSTRZEŻENIE: Upewnij się przed użyciem, czy wszystkie urządzenia blokujące są
włączone.
5. OSTRZEŻENIE: Aby uniknąć obrażeń, upewnij się, czy twoje dziecko jest odsunięte
kiedy rozkłada się lub składa niniejszy wyrób.
6. OSTRZEŻENIE: Nie pozwalaj dziecku bawić się niniejszym wyrobem.
7. OSTRZEŻENIE: To siedzisko nie jest odpowiednie dla dzieci w wieku poniżej
8. 6 miesiąca życia.
9. OSTRZEŻENIE: Zawsze używaj systemu zapięć. Zawsze używać paska krokowego
w połączeniu z paskiem biodrowym.
10. OSTRZEŻENIE: Sprawdź, czy urządzenia mocujące gondolę lub siedzisko lub fote-
lik samochodowy są prawidłowo załączone przed użyciem.
11. OSTRZEŻENIE
:Niniejszy wyrób nie jest odpowiedni do biegania ani jazdy na rolkach.
12. OSTRZEŻENIE: Każde obciążenie zawieszone na prowadnicy, z tyłu
13. oparcia i/lub na bokach wózka narusza jego stateczność. Maksymalne obciążenie
torby:1,5kg; Maksymalne obciążenie kieszeni 1kg; max obciążenie kosza 3kg.
14. Nigdy nie zjeżdżaj/wjeżdżaj wózkiem po schodach i schodach ruchomych zwłaszcza
gdy jest w nim dziecko. Może to zagrażać bezpieczeństwu dziecka i uszkodzić produkt.
15. Produkt ten nie jest zabawką, więc nie pozwól dziecku bawić się nim / wspinać się
na niego. Przewrócenie wózka na dziecko może spowodować poważne obrażenia.
16. Nie używaj i nie pozostawiaj wózka/gondoli w pobliżu otwartego ognia lub innych
źródeł ciepła takich jak grzejniki.
17. Nigdy nie ciągnij wózka, gdy przednie obrotowe koła znajdują się za Tobą i nie są za-
blokowane. W takiej sytuacji wózek może samoczynnie skręcić, co może prowadzić
do zagrożenia dla bezpieczeństwa, jeśli nie postępujesz ostrożnie i uważnie.
!

5
POLSKI
18. W trakcie transportu środkami publicznymi (autobus, metro, pociąg itp.) niewystar-
czające jest używanie tylko hamulca tylnych kół wózka. Wózek może być wysta-
wiony na działanie warunków (nagłe hamowanie, zakręty i wyboje w nawierzchni
drogi, przyspieszanie itp.), na działanie których nie został przetestowany zgodnie z
aktualną normą dla wózków (EN1888). Stosuj się do zaleceń i instrukcji dotyczących
bezpiecznego przewożenia dzieci w wózkach w środkach transportu publicznego,
których zamieszczanie jest obowiązkiem operatorów transportu publicznego.
19. Zalecenia dotyczące bezpieczeństwa zawarte w tej instrukcji nie dotyczą wszyst-
kich możliwych warunków i nieprzewidywalnych sytuacji, które mogą wystąpić.
Należy zrozumieć, że zdrowy rozsądek, ostrożność i uważność są czynnikami, które
nie mogą zostać wbudowane w produkt. Czynniki te pozostają obowiązkiem osoby
używającej wózek.
20. Niniejszy produkt nie powinien być używany jako urządzenie medyczne. Jeśli Twoje
dziecko podczas transportu wymaga specjalistycznej opieki medycznej, skonsultuj
się ze swoim lekarzem.
21. Nie modyfikuj niniejszego produktu, ponieważ może to zagrozić bezpieczeństwu
Twojego dziecka. Producent nie ponosi odpowiedzialności za jakiekolwiek modyfi-
kacje produktu wprowadzone przez użytkownika.
22. Tory kolejowe/tramwajowe stanowią szczególne zagrożenie, gdyż kółka mogą
utknąć w nich podczas przejeżdżania. Zalecamy zablokowanie skrętnych kół.
Zachowaj ostrożność.
23. Należy zwrócić szczególną uwagę, aby nóżki dziecka nie znajdowały się w bezpo-
średniej bliskości kółek gdzie mogą zostać otarte przez obracające się koła.
24. Prosimy o szczególne zwrócenie uwagi na to, że na stacjach kolejowych i stacjach
metra możliwe są nagłe zmiany ciśnienia powietrza. Nigdy nie pozostawiaj niniejsze-
go produktu w pobliżu torów bez obu rąk na rączce wózka, jako że samo użycie ha-
mulca może nie być wystarczające do bezpiecznego utrzymania wózka w miejscu.
25. Nigdy nie pozostawiaj wózka/gondoli na zboczu, na nierównej czy śliskiej powierzchni
.
26. Nie stawiaj ani nie sadzaj na podnóżku dziecka. Podnóżek może być używany
wyłącznie jako podpora dla nóg i stóp jednego dziecka. Użycie go w jakikolwiek
inny sposób może prowadzić do poważnego uszczerbku na zdrowiu. Maksymalne
obciążenie podnóżka to 3 kg.
27. Zawsze wyjmuj dziecko z wózka przed jego złożeniem.
28. Wózek dziecięcy jest przeznaczony do przewożenia jednego dziecka wtedy, gdy
zacznie samodzielnie siadać (powyżej 6-go miesiąca życia). Maksymalna masa
dziecka do 15 kg.
29. Hamulec postojowy powinien być włączony, kiedy wkładasz lub wyciągasz dziecko
(dzieci) do/z wózka.
30. Używaj tylko tych części zamiennych które są dostarczane lub rekomendowane
przez producenta.
31. Trzymaj plastikowe opakowania z dala od dziecka, aby uniknąć niebezpieczeństwa
uduszenia.
32. Zawsze, gdy chcesz zaparkować używaj hamulca postojowego.
33. Unikaj sytuacji, w których używasz wózka ekstremalnie i zmniejszasz kontrolę nad
dzieckiem i wózkiem.
34. Nie przenoś dziecka w wózku.
35. Upewnij się, że ręce twojego dziecka pozostają poza zasięgiem miejsc, w których
mogą zostać przyszczypnięte lub zakleszczone np., kiedy części wózka takie jak
budka czy barierka są montowane lub odłączane lub w inny sposób zmieniane.
36. Chowając wózek w bagażniku samochodu zwróć uwagę, żeby klapa kufra nie wy-
wierała nacisku na wózek, gdyż może to spowodować jego uszkodzenie.
37. Miej na uwadze to, że małe części takie jak nakładki zabezpieczające osie kół w
czasie transportu, mogą zostać połknięte przez dziecko i doprowadzić do jego
uduszenia.
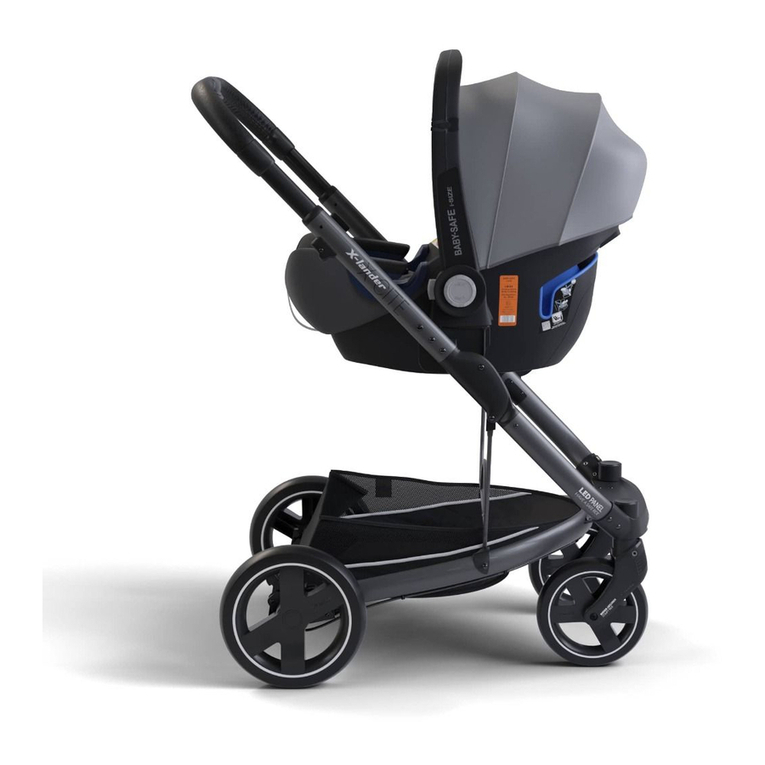
6
38. Dla właściwej amortyzacji wózka należy utrzymywać odpowiednie ciśnienie w
oponach. Minimalne ciśnienie w oponie - 0,8 atm. Maksymalne ciśnienie w oponie
nie może przekroczyć 1,5 atm.
39. Należy utrzymywać stałe ciśnienie (ok. 1÷1,2atm) we wszystkich kołach, aby zapew-
nić właściwy komfort manewrowania wózkiem podczas jazdy.
40. Wózek w konfiguracji podwozie – fotelik samochodowy nie zastępuje gondoli czy
łóżeczka. Twoje dziecko potrzebuje snu, więc po spacerze powinno być położone
w odpowiedniej gondoli, kołysce czy łóżeczku. Przebywanie dziecka w foteliku
samochodowym należy ograniczyć do minimum.
KONSERWACJA:
Wózek należy osuszać delikatną ściereczką po używaniu podczas deszczowej pogody.
Regularnie czyść koła i metalowe części używając tylko delikatnych detergentów i let-
niej wody. Okresowo smaruj części ruchome wózka, szczególnie osie kół skrętnych, aby
zapewnić płynne funkcjonowanie wózka. Tapicerka i kosz na zakupy nie powinny być
prane w pralce. Nie należy wystawiać wózka na długotrwałe działanie promieni słonecz-
nych. Ze względów bezpieczeństwa używaj tylko oryginalnych części. Unikaj sytuacji,
w których używasz wózka ekstremalnie i zmniejszasz kontrolę nad dzieckiem i wózkiem.
POLSKI

7
UNFOLDING THE FRAME
Undo the folding blockade (a). Unfold the frame by lifting the handle until the locks click into
position (b). WARNING: Before use, make sure that the folding mechanisms are blocked.
FOLDING THE FRAME
Take the carrycot or seat unit off the frame. Unblock the locks on both sides of the stroller by
pressing the pedals marked as 1 (fig. a) and 2 (fig. b) in sequence. Fold the frame as shown below
(fig. c).
MOUNTING OF THE FRONT WHEEL
In order to mount the wheel, slide it onto the axle until the lock is engaged.
DISMOUNTING OF FRONT WHEEL
In order to take the wheel off, push the button shown on the figure, and pull the wheel
off the axis.
ASSEMBLY AND DISASSEMBLY OF REAR WHEELS
To assembly or disassembly the wheel, push rubber button, which is in the middle of the wheel.
WHEEL BLOCKADE
The stroller is provided with swiveling front wheels. A special lever blocks the wheel
swiveling movement. After the lever has been pressed, the wheels will only move for-
ward. To release the blockade, lift the lever.
INFLATING WHEELS
To inflate a wheel, unscrew the valve’s cotter. Place the pump on the valve and inflate
the wheel. The maximum allowed wheel pressure is 1.5 bar.
INSTALLING OF THE BUMPER BAR
Push in the ends of the bumper bar into mounting holes, until locks are snapped.
TAKING THE BUMPER BAR OFF
Push in the buttons of the bumper bar locks and slide its end out of the mounting holes.
The bumper bar may be tilted, when undone only from single side.
FOOTREST ADJUSTMENT
Press the buttons on both sides of footrest and adjust it to the required position.
BACKREST ADJUSTMENT
Pick up the tie and put up the backrest in required position.
ATTACHING THE SHOPPING BASKET
Push the plastic latches on the basket into the assembly bolts.
BRAKE
To apply the brake: push the pedal down with your foot. To release the brake pick its bar up.
FITTING THE CARRYCOT OR SEAT UNIT
To fit the carrycot or seat unit open the adapter locks on both sides of the chassis. You
need to pull them upwards as shown in picture (a) until they click open. When the locks
are open, align the carrycot or seat unit with the locks and push it until the locks have
engaged (picture b). Caution: Before using the attached carrycot or seat unit you need
to ensure that it is properly fitted into place.
REMOVING THE CARRYCOT OR SEAT UNIT
To remove the carrycot or seat unit press the notch-unlocking buttons (1 picture a) and
pull it up out of the locking devices (a). Fold the locks by pushing the open part down as
shown in picture (b).
FITTING THE CAR SEAT
In order to fit the car seat open the adapter locks by pulling them upwards until they
1
2
3
4
5
6
7
8
9
10
11
12
13
14
15
16
ENGLISH

8
click open (picture a). Place the additional adapters in the locking devices of the chassis
(picture b) and push the car seat until the locks have clicked into place. Caution: Befo-
re using the attached car seat you need to ensure that it is properly fitted into place.
REMOVING THE CAR SEAT
To remove the car seat press the notch-unlocking buttons (1) on both sides of the car
seat at the same time pulling it up out of the locking devices (a). Pull the additional
adapters out of the locking devices (picture b). Fold the locks by pushing the open part
down as shown in picture (c).
LED LIGHTS
The stroller frame features LED lights which light the way in front of the stroller. The ON
button is located on the stroller frame as shown in the picture below. The batteries are
located on the bottom of the footrest. In order to install the batteries LR 44, unscrew the
screw shown in the picture and take off the casing.
ADJUSTING THE SAFETY HARNESS
The length adjusting device is on the back side of the seat unit backrest (a). To loosen
the straps press the device button and pull the safety harness (b). To tighten the straps
pull the strap coming out of the device (c).The length of the harness can be increased by
removing the tip of the hip harness from the extra hook.
BUCKLE
To unfasten the buckle, press the buttons and pull the fastening part out of the casing.
To fasten the buckle, insert the fastening part into the casing until it has engaged.
INCREASING THE HOOD INCLINATION ANGLE
The hood may be expanded by an additional part. In order to do this, undo the zipper
between the upper and lower part of the hood.
ASSEMBLING AND REMOVING THE HOOD
To mount the hood, slide the end plastic elements through the fence (a). To remove the
hood, press the locking element and slide from the fence (b)
ATTACHING THE COVER
To attach the cover, put the straps with snap fasteners through the plastic semi-circle
and fasten the snap.
ADJUSTING THE HANDLE HEIGHT
Press the button in the central part of the handle and adjust its height by pulling or
pushing it towards/away from you.
STORING THE CHASSIS
When folded the chassis is free standing in a vertical position. To stand it set the length
of the handle in the position marked on the handle bar with white lines (1) and lock the
folding device in place to prevent the chassis from opening (2). The chassis must be
kept in a place inaccessible to children.
FITTING THE SLEEPING BAG
Roll the elasticated flap of the sleeping bag over the top of the seat unit backrest (a). Next,
pass the strap ends with snap fasteners on them through the D-rings and do the snaps.
MOSQUITO NET
The mosquito net is in the pocket under the footrest (a). Place it over the footrest and
the hood (b,c) and then fasten the straps round the frame bars as shown in figure (d).
ATTACHING XBAG NURSERY BAG AND XMUG HOLDER
X-Mug and X-Bag nursery bag can be attached to the frame using the holders shown in
the picture
17
18
19
20
21
22
23
24
25
26
27
28
ENGLISH

9
WARNINGS AND POINT OF ATTENTION
Important - keep these instructions for future reference.
Having conducted required tests Deltim declares that the stroller complies with all the
requirements of PN-EN1888:2012 standard.
Only products fitted for the purpose can be installed on the X-Move chassis, i.e. X-lan-
der carrycot, X-Move stroller and baby seat, by means of adequate adapters.
- The frame combined with the X-lander carrycot constitutes baby carriage intended for ba-
bies starting from their birth until the moment when they are able to sit on their own - to 9 kg.
- The frame combined with the X-Move seat unit constitutes baby carriage intended for
babies who are able to sit on their own (over 6th month old, to 15 kg).
- The frame combined with the baby seat (only when used with adapters) serves for
babies starting from their birth until they reach 13 kg of body weight (according to seat
handling instruction).
Carrying only one child is allowed in each option.
X-Board riding platform can be added to transport an older child.
ATTENTION: Do not use any other additional accessories not listed by the manufacturer.
1. WARNING: Never use the product if any of its parts is faulty or damaged. The use
of a defective product endangers the safety of the child. Please contact the service
center in order to eliminate/remove the fault.
2. WARNING: Product should be inspected regularly for signs of damage and wear.
3. WARNING: Never leave your child unattended.
4. WARNING: Ensure that all the locking devices are engaged before use.
5. WARNING: To avoid injury ensure that your child is kept away when unfolding and
folding this product.
6. WARNING: Do not let your child play with this product.
7. WARNING: This seat unit is not suitable for children under 6 months.
8. WARNING: Always use the restraint system. Always use the crotch strap in combi-
nation with the waist belt.
9. WARNING: Check that the carrycot or seat unit or car seat attachment devices are
correctly engaged onto the chassis before use.
10. WARNING: This product is not suitable for running or skating.
11. WARNING: Any load attached to the handle and/or on the back of the backrest
and/or on the sides of the vehicle will affect its stability. Maximum weight of the
changing bag should not exceed 1,5 kg; Maximum weight in the pocket should not
exceed 1 kg ; Shopping basket maximum load should not exceed 3 kg.
12. Never use the pram/stroller on stairs or escalators, especially when there is a child
in it. This could endanger the safety of the child and damage the product.
13. This product is not a toy so do not allow your child to play with it or climb on it.
Serious injury can be caused if the stroller falls over on the child.
14. Do not use or leave the vehicle/carry cot close to open fires or other sources of
heat such as radiators or others.
15. Never pull the stroller behind you with unlocked front swivel wheels. The stroller
might self turn, which can lead to a safety risk if you are not cautious and attentive.
16. When using public transport (bus, underground, train, etc.) it is not enough only to-
engage the stroller’s parking brake. The stroller can be exposed to conditions (harsh
braking, turns and bumps in the road surface, acceleration, etc.)
17. For which it has not been tested according to the current stroller standard EN 1888.
Follow the recommendations and instructions regarding safe transport of children in
!
ENGLISH

10
strollers, which public transport operators are obliged to provide.
18. The safety instructions in this manual do not cover all possible conditions and unforese-
eable situations which may occur. It must be understood that common sense, caution and
care are factors that cannot be built into a product. These factors are the respo sibility of
the carer using the stroller.Follow the recommendations and instructions regarding safe
transport of children in strollers, which public transport operators are obliged to provide.
19. The safety instructions in this manual do not cover all possible conditions and unfo-
reseeable situations which may occur. It must be understood that common sense,
caution and care are factors that cannot be built into a product.
20. These factors are the responsibility of the carer using the stroller.
21. This product should not be used as a medical treatment device. If your child has
special health needs relating to transport, you should consult your doctor.
22. Do not modify this product as it may compromise the safety of your child. The manu-
facturer is not liable for any modifications to the product.
23. Crossing train/tramway rails can pose a particular threat because the wheels of the
stroller can get stuck in them. We recommend locking the swivel wheels. Be cautious.
24. Make sure child is kept clear of all moving parts (e.g. wheels) risk of injury.
25. Remember that at underground or train stations sudden pressure changes in the air may
occur. When close to platform edge make sure you hold the handle with both hands as
the applied braking device may not be sable to keep the stroller safely in place.
26. Never park the stroller on a hill, uneven or slippery surface.
27. Do not stand or sit the child on the footrest. The footrest is designed to support legs
and feet of one child only. Any other usage may lead to serious personal injury. The
maximum load for the footrest is 3 kg.
28. Always remove the child before folding the stroller.
29. The stroller is designed to transport one child who can sit up unassisted (over 6
months). Maximum weight of the child: 15 kg.
30. The parking device should be engaged when child is being placed in or removed
from the stroller.
31. Use only replacement parts supplied or recommended by the manufacturer/distributor.
32. Keep plastic packaging materials out of reach of children to avoid the danger of suffocation.
33. When parking always use the parking brake.
34. Avoid situations of extreme use which reduce your control over the child and the stroller.
35. Do not carry a child in a stroller.
36. Make sure that the child’s hands stay clear of possible pinching areas when the
stroller or its parts are being folded, unfolded, changed or adjusted.
37. When transporting the stroller in a car trunk make sure that the trunk lid does not
exert pressure on the product as this may damage the stroller.
38. Remember that small parts, such as the caps protecting axles in transport, can be
swallowed by your child, and may cause your child to choke.
39. Appropriate air pressure in the wheels ensures correct shock absorption.
40. Minimum air pressure - 0.8 atm. Maximum air pressure must not exceed 1.5 atm.
41. Keep correct pressure (about 1 ÷ 1.2 atm) in the wheels to ensure proper maneuve-
ring of the vehicle.
42. The travel system chassis+car seat does not replace a carrycot or bed. Your child
needs sleep, in consequence, after a walk outside, they should be placed in a carry-
cot, bed or cot. Please keep the time of the child in a car seat to a minimum.
MAINTENANCE:
Stroller should be cleaned with a soft cloth after use in wet weather. Clean the wheels
and metal parts using only a mild detergent and warm water. Periodically lubricate the
moving parts of the vehicle, especially axles steering wheels to ensure its smooth func-
tioning. Upholstery and shopping basket are not machine washable. Do not overexpose
the stroller to sunlight. For safety reasons use original parts only.
ENGLISH

11
AUFKLAPPEN DES GESTELLS
Lösen Sie die Blockade (a). Klappen Sie den Kinderwagen auf, indem Sie den Schieber
bis zum Einrasten der Verschlüsse nach oben ziehen (b). WARNUNG: Vergewissern
Sie sich bitte vor der Verwendung des Kinderwagens, dass die ein Zusammenklappen
verhindernden Mechanismen aktiviert worden sind.
ZUSAMMENKLAPPEN DES GESTELLS
Nehmen Sie bitte die Tragewanne, den Buggy-Aufsatz oder den Kindersitz vom Gestell.
Lösen Sie die Verschlüsse auf beiden Seiten des Wagens, indem Sie nacheinander die
Hebel Nummer 1 (a) und 2 (b) betätigen. Klappen Sie den Kinderwagen bitte so zusam-
men, wie es auf der Zeichnung gezeigt wird (c).
MONTAGE DES VORDERRADES
Zur Montage das Rad auf die Achse schieben, bis die Sperre einrastet.
DEMONTAGE DES VORDERRADES
Um das Rad abzunehmen, den auf der Abbildung dargestellten Druckknopf (a) drücken
und das Rad von der Achse ziehen (b).
MONTAGE UND DEMONTAGE DER HINTERRÄDER
Um die Räder zu entfernenn, müssen Sie den Knopf in der Mitte des Rades drücken.
RADBLOCKADE
Der Wagen besitzt drehbare Vorderräder. Zur Blockade des Drehmechanismus dient ein
Hebel. Seine Betätigung führt zur Blockade der Räder, so dass diese nur eine Fahrt gera-
deaus ermöglichen. Um die Radblockade zu entfernen, ziehen Sie den Hebel nach oben.
AUFPUMPEN DER RÄDER
Um die Räder aufzupumpen, drehen Sie den Verschluss des Ventils auf. Setzen Sie die
Pumpe an das Ventilende an und pumpen Sie das Rad auf. Der maximale Druck im Reifen
darf 1,5 ATÜ nicht überschreiten.
ANBRINGEN DES SICHERHEITSBÜGELS
Die Enden des Sicherheitsbügels in die Montageöffnungen einführen, bis sie einrasten.
ENTFERNEN DES SICHERHEITSBÜGELS
Die beiden Tasten der Sperrvorrichtung des Sicherheitsbügels hineindrücken und die
Enden aus den Montageöffnungen herausziehen. Durch die Entriegelung von nur einer
Seite, kann der Sicherheitsbügel aufgeklappt werden.
VERSTELLUNG DER FUSSSTÜTZE
Drücken Sie die Knöpfe auf beiden Seite der Fußstütze, um ihre Lage zu verändern.
REGULIERUNG DER RÜCKENLEHNE
Um die Rückenlehne in die gewünschte Position zu bringen, muss an dem vorgesehenen
Griff gezogen werden.
MONTAGE DES EINKAUFSKORBS
Drücken Sie bitte die Kunststoffhalterungen des Korbs auf die Montagebolzen.
BREMSE
Um die Räder zu blockieren, muss das Bremspedal betätigt werden. Um die Bremse
freizugeben, das Pedal mit der Fußspitze anheben.
MONTAGE DER TRAGEWANNE ODER DES SPORTWAGENAUF
SATZES
Um die Tragewanne oder den Sportwagenaufsatz zu montieren, klappen Sie die an den
Seiten des Gestells befestigten Adapter hoch. Dies zu erreichen, ziehen Sie die Adapter
nach oben so, wie auf dem Bild (a) zu sehen ist, bis
1
2
3
4
5
6
7
8
9
10
11
12
13
14
DEUTSCH

12
sie einrasten. Dann setzen Sie auf die hochgeklappten Adapter die Tragewanne oder
den Sportwagenaufsatz auf, bis sie einrasten (Bild b). Achtung: Bevor Sie Ihr Kind in den
Kinderwagen setzen, prüfen Sie die Richtigkeit der Anbringung von Tragewanne/Spor-
twagenaufsatz.
DEMONTAGE DER TRAGEWANNE ODER DES SPORTWA
GENAUFSATZES
Um die Tragewanne oder den Sportwagenaufsatz zu lösen, drücken Sie die Knöpfe 1 (a),
die die Adaptergriffe entblocken und ziehen Sie die Tragewanne bzw. den Sportwa-
genaufsatz heraus 2 (b). Klappen Sie die Adapter zusammen, indem Sie sie nach unten
ziehen, wie auf dem Bild (b) zu sehen ist.
MONTAGE DER BABYSCHALE
Um die Babyschale zu montieren, klappen Sie die Adapter hoch, indem Sie sie nach
oben ziehen, bis sie einrasten (a). Stecken Sie die zusätzlichen Adapter in die Montage-
teile des Gestells (b) und setzen Sie die Babyschale auf die Adapter auf, bis sie einrastet
(c). Achtung: Bevor Sie Ihr Kind in die Babyschale setzen, prüfen Sie die Richtigkeit ihrer
Anbringung.
DEMONTAGE DER BABYSCHALE
Um die Babyschale zu lösen, drücken Sie die Knöpfe (1), die sich beidseitig der Baby-
schale befinden und ziehen Sie sie gleichzeitig heraus (2 Bild a). Ziehen Sie die zusät-
zlichen Adapter aus den Montageteilen des Gestells (Bild b). Klappen Sie die Adapter
zusammen, indem Sie sie nach unten ziehen, wie auf dem Bild (c) zu sehen ist.
LEDLAMPE
Am Kinderwagenrahmen sind LEDs angebracht, die den Bereich vor dem Kinderwa-
gen ausleuchten. Der Schalter befindet sich am Kinderwagenrahmen an der auf der
Zeichnung gezeigten Stelle. Die Batterien zur Stromversorgung der LEDs befindet sich
im unteren Teil der Fußstütze. Um die Batterien LR 44, zu installieren ist die auf der Zeich-
nung dargestellte Schraube zu lösen und die Abdeckung abzunehmen.
VERSTELLEN DER GURTE
Der Mechanismus zur Regelung der Gurte befindet sich am hinteren Teil der Rücklehne
(a). Drücken Sie den Knopf am Mechanismus und ziehen Sie an der Gurte, um sie zu
lösen (b). Ziehen Sie die Gurte am Mechanismus, um sie zu straffen (c). Die Länge der
Gurte lässt sich noch weiter vergrößern, indem man das Ende des Hüftgurtes aus den
zusätlichen Klammern zieht.
KLAMMER
Um eine Klammer zu lösen, drücken Sie die Knöpfe und ziehen Sie den Klemmteil aus
dem Gehäuse. Um die Klammer einrasten zu lassen, drücken Sie den Klemmteil in das
Gehäuse, bis es einrastet.
ERHÖHUNG DES NEIGUNGSWINKELS DES VERDECKS
Das Verdeck kann man um einen zusätzlichen Teil vergrößern. Zu diesem Zweck ist der
Reißverschluss zu öffnen, der sich zwischen dem unteren und oberen Teil des Verdecks
befindet.
MONTAGE UND DEMONTAGE DES VERDECKS
Um das Verdeck zu montieren, setzen Sie das Verdeckgestänge auf die Führungsschie-
nen (a). Um es zu demontieren, drücken Sie den Löseknopf und ziehen Sie das Verdeck
aus den Führungsschienen heraus (b).
MONTAGE DES BEZUGS
Um den Bezug zu befestigen, ziehen Sie bitte die Bänder mit dem Druckknopf durch die
Kunststoff-Halbringe und schließen Sie den Druckknopf.
24. REGELUNG DER SCHIEBERLÄNGE
15
16
17
18
19
20
21
22
23
24
DEUTSCH

13
Drücken Sie den Knopf in der Mitte des Schiebers und ändern Sie seine Länge indem Sie
ihn ziehen oder schieben.
AUFBEWAHRUNG DES GESTELLS
Das zusammengeklappte Gestell kann vertikal gestellt werden. Um das Gestell zu
klappen, stellen Sie die Länge des Schiebers in die Position, die am Schieber mit weißen
Linien markiert ist (1) und betätigen Sie die Blockade, die es verhindert, dass das Gestell
von selbst auseinanderklappt. (2). Das zusammengeklappte Gestell vor Kindern schützen.
MONTAGE DES SCHLAFSACKS
Der Schlafsack hat eine Klappe mit Gummi, das man hinter die Rücklehne ziehen muss
(a). Die Gurte mit dem Druckknopf durch die Plastikhalbkreise ziehen und anschnallen.
MOSKITONETZ
Das Moskitonetz befindet sich in der Tasche im unteren Teil der Fußstütze (a). Ziehen Sie
das Moskitonetz über die Fußstütze und das Dach (b,c) und befestigen Sie den Gurt an
das Rohr des Gestells wie auf dem Bild (d)
BEFESTIGUNG DER XBAGTASCHE UND DES XMUGBECHER
HALTERS
An dem Schiebegriff lassen sich auch die Tasche (X-Bag) und der Becherhalter (X-Mug)
anbringen. Zur Montage dienen die auf dem Bild markierten Befestigungsstellen.
WARNUNGEN UND HINWEISE
Wichtiger Hinweis: Bewahren Sie diese Gebrauchsanweisung für späteren Gebrauch auf.
Die Firma Deltim erklärt auf der Grundlage durchgeführter Prüfungen, dass der gelieferte
Kinderwagen ein sicheres Produkt ist und alle Anforderungen der Norm PN-EN1888:2012
erfüllt. WARNUNG: Zusätzliche Zubehörteile, die vom Hersteller nicht zugelassen sind,
dürfen nicht verwendet werden.
Am X-Move frame Wagengestell können ausschließlich die folgenden passenden Pro-
dukte befestigt werden.
Tragewanne X-lander, Sportwagenaufsatz X-Move stroller sowie der Sitz - unter Ver-
wendung der entsprechenden Adapter.
- Das Gestell in Verbindung mit dem Liegeaufsatz X-lander bildet einen Kinderwagen für
Kinder im Säuglingsalter bis sie anfangen selbstständig zu sitzen, bis 9 kg.
-
Das Gestell in Verbindung mit dem Sportwagenaufsatz bildet einen Kinderwagen der für
Kinder die anfangen selbstständig zu sitzen geeignet ist (ab dem 6 Lebensmonat, bis 15 kg).
- Das Gestell in Verbindung mit dem Sitz (nur unter Verwendung der Adapter) eignet
sich für Kinder im Säuglingsalter und für Kinder mit einem Gewicht von bis zu 13 kg.
(gemäß der Gebrauchsanweisung des Sitzes).
Jede der Optionen ist für den Transport von nur einem Kind geeignet.
An dem Kinderwagen lässt sich euch die X-Board-Plattform für ein älteres Kind montieren.
1. WARNUNG: Benutzen Sie niemals das Produkt, wenn ein Teil von ihm mangelhaft
oder beschädigt ist. Die Nutzung von defektem Produkt gefährdet die Sicherheit
des Kindes. Wenden Sie sich bitte an den Kundendienst, um den Mangel beheben
zu lassen.
2. WARNUNG: Das Produkt sollte regelmäßig auf Abnutzungserscheinungen und
Beschädigungen überprüft werden.
3. WARNUNG: Lassen Sie Ihr Kind niemals unbeaufsichtigt.
25
26
27
28
!
DEUTSCH

14
4. WARNUNG: Vergewissern Sie sich vor dem Gebrauch, dass alle Verriegelungen
eingerastet sind.
5. WARNUNG: Um Verletzungen zu vermeiden achten Sie auf einen sicheren Abstand
zu Ihrem Kind, wenn das Produkt zusammengelegt oder aufgestellt wird.
6. WARNUNG: Lassen Sie Ihr Kind nicht mit dem Produkt spielen.
7. WARNUNG: Dieser Sitzaufsatz ist für Kinder unter 6 Monaten nicht geeignet.
8. WARNUNG: Verwenden Sie immer das Rückhaltesystem. Verwenden Sie den
Schrittgurt immer in Verbindung mit dem Beckengurt.
9. WARNUNG: Vergewissern Sie sich vor jedem Gebrauch, dass die Befestigungen
von Tragewanne, Sitzeinheit oder Autokindersitz am Gestell richtig eingerastet sind.
10. WARNUNG: Dieses Erzeugnis ist nicht geeignet zum Rennen oder Skaten.
11. WARNUNG: Jedes Gewicht, das an der Schiebegriffstange, hinten an der Sitzrück-
seite und / oder an den Seiten des Kinderwagens gehängt wird, gefährdet dessen
Standsicherheit. Max. Zuladung der Tache: 1,5kg; Max. Zuladung der Stauraumtasche
1 kg; Max. Zuladung des Stauraumkorbes: 3 kg.
12. Man darf niemals mit dem Kinderwagen die Treppe oder Rolltreppe hoch- oder
runterfahren, insbesondere dann nicht, wenn das Kind darin sitzt.
13. Das Produkt ist kein Spielzeug, deswegen darf man nicht das Kind damit spielen
oder darauf klettern lassen. Ein Umkippen des Kinderwagens auf das
14. Kind kann ernsthafte Verletzungen nach sich ziehen.
15. Benutzen Sie den Kinderwagen nicht in der Nähe von offenem Feuer oder anderen
Hitzequellen und lassen Sie ihn dort nicht stehen.
16. Ziehen Sie niemals den Kinderwagen mit schwenkbaren Vorderrädern hinter -
sichher, wenn die Räder nicht festgestellt sind. In einem solchen Fallkann der Wagen
eigenmächtig abbiegen, was zur Sicherheitsgefährdung führen kann, wenn Sie nicht
vorsichtig und achtsam sind.
17. Beim Transport des Kinderwagens in öffentlichen Verkehrsmitteln (Bus, U-Bahn, Zug
etc.) ist es nicht ausreichend, nur die Feststellbremse der Hinter-räder zu benutzen.
Der Kinderwagen kann dabei Einwirkungen ausgesetzt sein (abruptes Bremsen,
Kurven, Schlaglöcher auf der Fahrbahn, Beschleunigungen u.s.w.) , auf die er nicht
gemäß der gültigen Kinderwagennorm EN 1888 getestet worden war. Folgen Sie den
Anweisungen und Instruktionen für sichere Beförderung der Kinder in Kinderwagen,
die der Betreiber von öffentlichen Verkehrsmitteln zur Verfügung stellen muss.
18. Die Sicherheitshinweise in der Gebrauchsanweisung können nicht alle möglichen
Bedingungen und unvorhersehbare Fälle abdecken, die auftreten können. Es ver-
steht sich von selbst, dass gesunder Menschenverstand, Vorsicht und Sorgfalt Fak-
toren sind, die nicht in dieses Erzeugnis eingebaut werden können. Diese Faktoren
liegen in der Verantwortung der Person, die den Kinderwagen nutzt.
19. Das Produkt soll nicht als medizinisches Gerät verwendet werden. Sollte Ihr Kind
spezieller medizinischer Betreuung im Zusammenhang mit dem Transport bedürfen,
konsultieren Sie bitte Ihren Arzt.
20. Nehmen Sie keine Veränderungen am Produkt vor, da dies die Sicherheit Ihres
Kindes gefährden könnte. Für Veränderungen am Produkt trägt der Hersteller keine
Verantwortung. Der Hersteller trägt keine Verantwortung für Produktmodifikationen,
die der Benutzer vorgenommen hat.
21. Bahn- oder Straßenbahngleise stellen eine besondere Gefahr dar, da die Räder darin
beim Überqueren hängenbleiben können. Es ist ratsam, die Schwenkräder festzu-
stellen. Seien Sie vorsichtig.
22. Man sollte besonders aufpassen, dass sich die Beine des Kindes nicht in unmittelba-
rer Nähe der Räder befinden, wo sie durch sich drehende Räder abgeschürft werden
können.
23. Bitte beachten Sie, dass Zug- oder Bahnstationen plötzliche Druckveränderungen
in der Luft verursachen können. Stellen Sie niemals das Produkt in die Nähe von
Gleisen ohne beide Hände am Schieber zu halten, da die Bremse alleine möglicher-
DEUTSCH

15
weise nicht ausreichend sein kann um ihren Wagen sicher am Platz zu halten.
24. Kinderwagen niemals an einer Böschung oder auf unebener Fläche abstellen.
25. Niemals auf die Fußstütze setzen oder stellen. Die Fußstütze darf nur als Unter-
stützung für die Füße und Beine eines (1) Kindes genutzt werden. Jegliche andere
Nutzung kann zu ernsthaften Gesundheitsschäden führen. Die maximale Belastung
der Fußstütze beträgt 3 kg.
26. Vor dem Zusammenklappen des Kinderwagens stets das Kind herausheben.
27. Dieser Wagen ist für die Beförderung eines Kindes, wenn es selbständig zu sitzen
beginnt (älter als 6 Monate), bestimmt. Das maximale Gewicht des Kindes kann 15
kg betragen.
28. Beim Hineinsetzen oder Herausnehmen Ihres Kindes aus dem Wagen, sollte die
Bremsen immer festgestellt sein.
29. Verwenden Sie nur Ersatzteile die vom Hersteller geliefert oder genehmigt sind.
30. Halten Sie alle Kunststoffverpackungen von Kindern fern, um Erstickungsgefahr zu
vermeiden.
31. Benutzen Sie immer die Feststellbremse, wenn Sie den Kinderwagen abstellen.
32. Vermeiden Sie Situationen, in denen Sie den Wagen extrem benutzen und die Ihre
Kontrolle über Kind und Wagen beeinträchtigen.
33. Der Kinderwagen darf nicht getragen werden, wenn sich ein Kind darin befindet.
34. Vergewissern Sie sich, dass die Hände Ihres Kindes außerhalb der Reichweite von
Stellen bleiben, an denen sie eingequetscht oder eingeklemmt werden könnten, z.
B. wenn Teile des Wagens wie Haube oder Bauchbügel montiert, abgenommen oder
auf andere Weise geändert werden.
35. Beim Verstauen des Wagens im Kofferraum ist darauf zu achten, dass die Koffer-
raumklappe nicht auf den Wagen drückt, da dies eine Beschädigung des Wagens zur
Folge haben kann.
36. Bedenken Sie, dass alle Kleinteile sowie die abgenommenen Transportsicherung-
skappen an den Achsen von einem Kind verschluckt werden und zu seiner Erstic-
kung führen können.
37. Reifenluftdruck - 0,8 bar. Der max. Reifenluftdruck darf nicht höher als 1,5 bar sein.
38. Um einen komfortablen Fahrbetrieb des Kinderwagens zu gewärleisten, ist auf einen
konstanten Luftdruck (ca. 1÷1,2 bar) in allen Rädern zu achten.
39. Der Kinderwagen in der Konfiguration Gestell und Autokindersitz - der Autositz
ersetzt die Tragewanne oder das Bett nicht. Dein Kind braucht viel Schlaf, deswe-
gen soll man es nach dem Spaziergang in eine entsprechende Tragewanne, Wiege
oder ins Bettchen legen. Das Liegen des Kindes im Autokindersitz soll man auf ein
Minimum reduzieren.
PFLEGEHINWEISE:
Nach einem Spaziergang im Regen ist der Wagen mit einem weichen Tuch trocken zu
reiben. Die Räder und Metallteile müssen in regelmäßigen Abständen mit einem sanften
Reinigungsmittel und warmem Wasser gesäubert werden. Schmieren Sie regelmäßig
bewegliche Teile, insbesondere die Achsen von Schwenkrädern, um eine problemlose
Funktion des Wagens sicherzustellen. Die Polsterung und der Staukorb sollten nicht in
der Waschmaschine gewaschen werden. Setzen Sie Ihren Wagen nicht über längere Zeit
dem Sonnenlicht aus. Aus Sicherheitsgründen verwenden Sie nur Original-Ersatzteile.
DEUTSCH

16
ROZKLÁDÁNÍ KONSTRUKCE
Odepněte pojistku (a). Rozložte konstrukci zvednutím madla směrem vzhůru,dokud
nedojde k zajištění (b). UPOZORNĚNÍ: Před použitím kočárku se vždy ujistěte, že je
kočárek správně rozložen a všechna zajišťovací a připevňovací zařízení jsou správně
zapojená a funkční.
SKLÁDÁNÍ KONSTRUKCE
Sundejte korbu, sportovní sedačku nebo autosedačku z konstrukce. Odblokujte pojist-
ky na obou stranách kočárku postupným sešlápnutím „pedálů” označených číslem 1 (a) a
2 (b). Složte kočárek, jak je uvedeno na obrázku (c).
MONTÁŽ PŘEDNÍHO KOLA
Pokud chcete namontovat kolo, zasuňte ho na osu dokud nedojde k zajištění mechanismu.
DEMONTÁŽ PŘEDNÍHO KOLA
Pokud chcete sundat kolo, stiskněte tlačítko zobrazené na obrázku (a) a vytáhněte ho z osy (b)
.
MONTÁŽ A DEMONTÁŽ ZADNÍCH KOL
Před montáží či demontáží kol stiskněte gumový střed kola.
ZAJIŠTĚNÍ KOL
Kočárek je vybaven otočnými koly. K zajištění kol do přímého směru slouží pojistka, po jejímž
stlačení dojde k zablokování kol. Pro zpětné odblokování kol vytáhněte pojistku směrem
vzhůru. Kočárek je určen převážně k jízdě s otočnými koly. Při jízdě ve ztíženém terénu po-
užívejte vždy pouze otočná kola.
HUSTĚNÍ KOL
Chcete-li nahustit kolo, odšroubujte čepičku ventilu. Přiložte pumpičku ke koncovce
ventilu a nahustěte kolo. Maximální tlak v pneumatice nesmí překročit 1,5 atm.
PŘIPEVNĚNÍ MADÉLKA
Zatlačte konce madélka do montážních otvorů dokud, nezapadnou blokovací prvky.
SUNDÁNÍ MADÉLKA
Stiskněte tlačítko blokování madélka a vytáhněte jeho konce z montážních otvorů.
Madélko můžete naklonit odepnutím jen na jedné straně.
NASTAVENÍ NOŽNÍ OPĚRKY
Při polohování nožní opěrky stiskněte pojistky na spodní straně opěrky. Nastavte opěr-
ku do požadované polohy.
NASTAVENÍ OPĚRKY ZAD
Odjistěte pojistku opěrky zad a zvolte požadovanou polohu.
MONTÁŽ KOŠÍKU
Košík připněte ke konstrukci pomocí plastových držáků a patentů.
BRZDA
Pokud chcete zabrzdit kola, sešlápněte nohou brzdu. Pokud chcete odbrzdit kola,
nadzdvihněte brzdu špičkou nohy (nártem).
NASAZENÍ HLUBOKÉ KORBY NEBO SPORTOVNÍ SEDAČKY
Před nasazením hluboké korby, nebo sportovní sedačky, otevřete adaptéry umístěné na
bocích konstrukce. Otočte jejich pohyblivou část směrem nahoru podle obrázku (a), až
dojde k zajištění. Hlubokou korbu nebo sportovní sedačku nasaďte na takto připrave-
né adaptéry, a zaklapněte ji do nich (obr. b). Pozor: Před použitím zkontrolujte, zda je
hluboká korba nebo sportovní sedačka správně nasazena a zajištěna.
VYJMUTÍ HLUBOKÉ KORBY NEBO SPORTOVNÍ SEDAČKY
Pro vyjmutí hluboké korby nebo sportovní sedačky stiskněte tlačítka (obr. a poz. 1)
dojde k uvolnění pojistek, a vytáhněte ji z montážních úchytů (obr. a poz. 2). Uzavřete
1
2
3
4
5
6
7
8
9
10
11
12
13
14
15
ČESKÝ

17
adaptéry tak, že jejich pohyblivou část otočíte směrem dolů způsobem znázorněným na
obrázku (obr. b).
NASAZENÍ AUTOSEDAČKY
Před nasazením autosedačky otevřete adaptéry tak, že jejich pohyblivou část otočíte
směrem nahoru podle obrázku (obr. a), až dojde k zajištění. Do montážních úchytů na
konstrukci vložte přídavné adaptéry (obr. b), a zaklapněte do nich autosedačku (obr. c).
Pozor: Před použitím zkontrolujte, je-li autosedačka správně nasazena a zajištěna.
VYJMUTÍ AUTOSEDAČKY
Pro vyjmutí autosedačky stiskněte tlačítka pro uvolnění (obr. a poz. 1), která jsou na
bocích autosedačky, a současně ji vytáhněte z montážních úchytů (obr. a poz. 2). Vytáh-
něte z montážních úchytů přídavné adaptéry (obr. b). Uzavřete adaptéry tak, že jejich
pohyblivou část otočíte směrem dolů způsobem znázorněným na obrázku (obr. c).
LED SVĚTÝLKA
Na rámu kočárku jsou umístěny LED světýlka, která zlepšují viditelnost v noci. Tlačít-
ko zapnutí/vypnutí se nachází na konstrukci kočárku v místě, uvedeném na obrázku:
K napájení světélek slouží 3 baterie typu LR 44, které senacházejí na spodní straně nožní
opěrky. Orientace baterií (polarita) je vyznačena na plastovém krytu. Pro nainstalování
baterie LR 44 je potřeba nejprve odšroubovat šroubek, jak je uvedeno na obrázku a
sundat kryt.
NASTAVENÍ POPRUHŮ
Regulátor nastavení popruhů je umístěn v zadní části opěradla sportovního kočárku (a).
Pro povolení popruhů stiskněte tlačítko regulátoru, a zatáhněte za popruhy (b). Aby po-
pruhy správně doléhaly k tělu dítěte, zatáhněte popruh u regulátoru (c). Délku bočních
pásů je možné dodatečně prodloužit vyháknutím z plastového úchytu.
BEZPEČNOSTNÍ POPRUHY
Přezku bezpečnostních popruhů rozepnete po stisknutí pojistky přezky. Bezpečnostní
popruhy se zapnou obráceným postupem. Po zapnutí pásů se vždy přesvědčete, zda je
přezka pásů zajištěna.
PRODLOUŽENÍ BOUDY
Boudu je možné zvětšit o dodatečnou část. Abyste tak učinili, je potřeba rozepnout zip
nacházející se mezi dolní a horní části boudy.
MONTÁŽ A DEMONTÁŽ BOUDY
Pro nasazení boudy ji nasuňte do montážních otvorů na konstrukci (a). Pro vyjmutí boudy
stiskněte pojistky a boudu vyjměte (b).
NASAZENÍ NÁNOŽNÍKU
Abyste připevnili nánožník, protáhněte pásky skrz plastová oka a zapněte patenty.
(Nánožník není v základní výbavě kočárku)
NASTAVENÍ DÉLKY RUKOJETI
Stiskněte tlačítko uprostřed rukojeti a změňte její délku tahem nebo tlakem k sobě / od
sebe.
SKLADOVÁNÍ PODVOZKU
Složený podvozek může být skladován svisle. Délku rukojeti je nutno nastavit v poloze
označené bílými čárami na jejím profilu (1), a poté je třeba zajistit pojistku proti rozložení
kočárku (2). Takto složený podvozek uchovávejte na místě mimo dosah dětí.
UCHYCENÍ FUSAKU
Fusak je vybaven vrchní klopou s gumičkou, kterou je nutné natáhnout na opěradlo spor-
tovního kočárku (a). Pásky s druky protáhněte plastovými půlkruhy a zapněte je.
16
17
18
19
20
21
22
23
24
25
26
ČESKÝ

18
MOSKYTIÉRA
Moskytiéra je umístěna v kapse ve spodní části nožní opěrky (a). Nasadí se na nožní
opěrku a na boudičku (b, c), a následně se zapnou pásky na trubce podvozku, jak je to
znázorněno na obrázku (d).
UCHYCENÍ TAŠKY XBAG A DRŽÁKU NA NÁPOJE XMUG
Ke kočárku je možné přichytit tašku X-bag a držák nápojů X-mug při použití úchytů na
obrázku.
BEZPEČNOSTNÍ UPOZORNĚNÍ
Důležité - uschovejte tento návod pro pozdější využití.
Na základě provedených testů deklaruje Firma Deltim, že dodaný dětský kočárek
je bezpečným výrobkem, který splňuje všechny požadavky normy PN-EN 1888:2012
POZOR: Veškeré přídavné příslušenství, které není určeno výrobcem, by nemělo být
používáno.
Na podvozek X-Move je možné montovat pouze přizpůsobené výrobky: postýlku X-lan-
der, vycházkový kočárek X-Move stroller jak rovněž automobilovou sedačku při použití
odpovídajících parametrů.
- Podvozek ve spojení s postýlkou X-lander je dětským kočárkem určeným pro děti ve věku
od okamžiku narození do okamžiku, kdy začínají samostatně sedat, hmotnosti až 9 kg.
- Podvozek ve spojení s vycházkovým kočárkem X-Move stroller je dětským kočárkem
určeným pro děti, které začínají samostatně sedat (starší než 6 měsíců, hmotnosti až 15 kg).
- Podvozek ve spojení s automobilovou sedačkou (pouze při použití adaptérů) je určený
pro děti od okamžiku narození do 13 kg. (v souladu s návodem k obsluze sedačky).
V každém případě je možné převážet pouze jedno dítě.
Ke kočárku je možné přichytit stupátko X-Board pro převoz staršího dítěte.
1. VÝSTRAHA: Nikdy nepoužívejte výrobek, je-li jeho část opotřebená nebo poško-
zená. Používání nefunkčního výrobku ohrožuje bezpečnost dítěte. Pro odstranění
závady kontaktujte servis.
2. VÝSTRAHA: Výrobek by měl být pravidelně kontrolován z hlediska opotřebení
nebo poškození.
3. VÝSTRAHA: Nikdy nenechávejte dítě v kočárku bez dozoru.
4. VÝSTRAHA: Před použitím kočárku se ujistěte, že jsou všechny skládací prvky
správně zajištěny.
5. VÝSTRAHA: Předejděte úrazu dítěte tím, že jej při skládání a rozkládání kočárku
ponecháte v bezpečné vzdálenosti.
6. VÝSTRAHA: Nedovolte dítěti hrát si s kočárkem.
7. VÝSTRAHA: Tento sportovní kočárek není vhodný pro děti mladší než 6 měsíců.
8. VÝSTRAHA: Vždy používejte bezpečnostní prvky a postroj. Vždy používejte
popruhy v rozkroku dítěte současně s bederními popruhy
9. VÝSTRAHA: Před použitím kočárku zkontrolujte, je-li korbička, nebo sedačka,
nebo autosedačka správně uchycena k podvozku.
10. VÝSTRAHA: Tento výrobek není vhodný pro běh a jízdu na kolečkových bruslích.
11. VÝSTRAHA: Každé závaží zavěšené na rukojeti za opěradlem a / nebo na bocích
kočárku narušuje jeho stabilitu. Maximální zatížení tašky: 1,5 kg; maximální zatížení
kapsy: 1 kg; maximální zatížení košíku: 3 kg.
12. Nikdy nevyjíždějte / nesjíždějte s kočárkem po schodech nebo eskalátorech,
obzvláště, je-li v něm dítě. Může to ohrožovat bezpečnost dítěte, nebo poškodit
27
28
!
ČESKÝČESKÝ
Other manuals for X-MOVE
1
Table of contents
Languages:
Other X-lander Stroller manuals

X-lander
X-lander X-PRAM LIGHT User manual

X-lander
X-lander X-GO User manual

X-lander
X-lander Around The World Asia User manual

X-lander
X-lander X-PULSE User manual

X-lander
X-lander X-RUN User manual

X-lander
X-lander X-Follow User manual

X-lander
X-lander X-Twin User manual

X-lander
X-lander X-FLY User manual

X-lander
X-lander X-DOUBLE User manual

X-lander
X-lander X-cite User manual