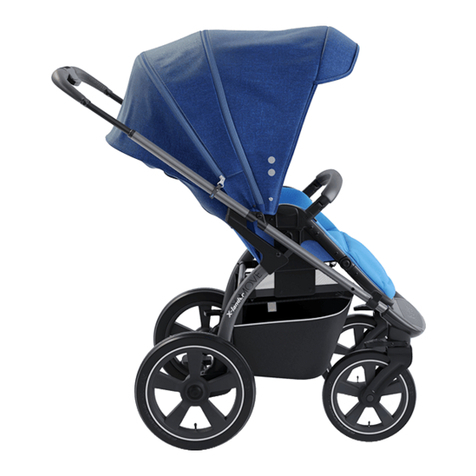
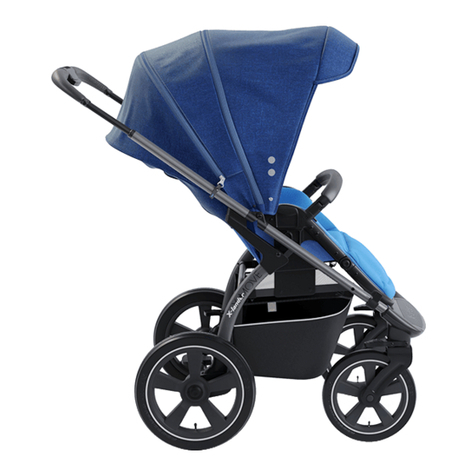
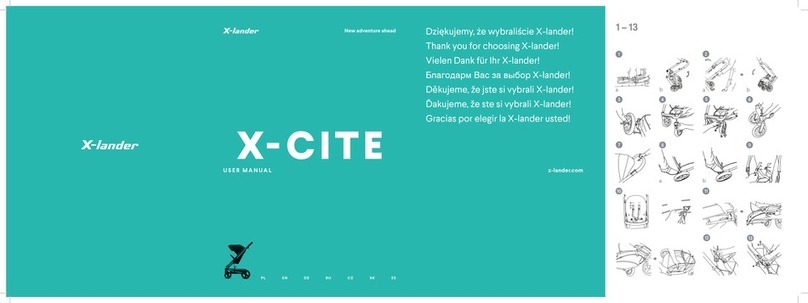
X-lander X-cite User manual

8 9
I
II
III
ab
ab
a
b
a
New adventure ahead
X- CITE
USER MANUAL
PL EN DE KR CZ SK ES
x-lander.com
Dziękujemy, że wybraliście X-lander!
Thank you for choosing X-lander!
Vielen Dank für Ihr X-lander!
X-lander를 선택해 주셔서 고맙습니다!
Děkujeme, že jste si vybrali X-lander!
Ďakujeme, že ste si vybrali X-lander!
Gracias por elegir la X-lander usted!
1 – 13

ab
ab
A
B
New adventure ahead
express
14 – 22 23 – 28
24
23
a b c
ab
25
26
27 28

POLSKI 2
ENGLISH 7
DEUTSCH 11
ČESKÝ 16
SLOVENSKÝ 20
ESPAÑOL 24
한국어 28

2
POLSKI
ROZKŁADANIE STELAŻA
Odepnij blokadę spinającą (a). Rozłóż wózek unosząc rączkę ku górze, aż do zatrzaśnięcia
zamków (b). OSTRZEŻENIE: Przed użyciem wózka upewnij się, że mechanizmy składania
zostały zablokowane.
SKŁADANIE STELAŻA
Złóż wózek trzymając za rączkę w sposób pokazany na rysunku aż do zatrzaśnięcia
blokady (b).
MONTAŻ I DEMONTAŻ KÓŁ TYLNYCH
Aby zamontować koło naciśnij przycisk na środku koła i wsuń ośkę w gniazdo montażowe.
Pociągnij za koło sprawdzając poprawność zamocowania.
Aby zdemontować koło naciśnij przycisk na środku koła i wysuń oś z gniazda montażowego.
MONTAŻ KOŁA PRZEDNIEGO
Aby zamontować koło wsuń je na oś, aż do momentu zatrzaśnięcia blokady.
DEMONTAŻ KOŁA PRZEDNIEGO
Aby zdjąć koło naciśnij pokazany na rysunku przycisk (a) i ściągnij je z osi (b).
BLOKADA KOŁA PRZEDNIEGO
Wózek posiada obrotowe koła przednie. Do blokady obrotu służy przycisk. Naciśnięcie
go powoduje zablokowanie koła do jazdy na wprost. Aby odblokować koło naciśnij
przycisk ponownie.
REGULACJA WYSOKOŚCI RĄCZKI
Wciśnij przycisk na środku rączki i zmień jej wysokość pociągając lub pchając do / od siebie.
HAMULEC
Aby zablokować koła naciśnij dźwignię hamulca w jego bliższej części (a).
Aby zwolnić hamulec, naciśnij dźwignię hamulca w jego dalszej części (b).
REGULACJA DŁUGOŚCI SZELEK
Aby dostosować długość szelek, przesuń pasek względem regulatora. Regulatory ukryte
są pod osłonkami ochronnymi.
REGULACJA POŁOŻENIA WYSOKOŚCI SZELEK NARAMIENNYCH
Wysokość położenia szelek naramiennych można regulować w zależności od wzrostu
dziecka. Aby zmienić położenie, przełóż regulator przez odpowiednie otwory umiesz-
czone w oparciu siedziska.
MONTAŻ KOSZA NA ZAKUPY
Zapnij napy oraz przypnij zaczepy kosza na stelaż w sposób pokazany na rysunkach.
ZAKŁADANIE SPACERÓWKI NA STELAŻ
Wsuń zaczepy spacerówki w gniazda montażowe w stelażu aż do zatrzaśnięcia blokad.
Wkład spacerowy można wpinać do stelaża przodem lub tyłem do kierunku jazdy.
ZDEJMOWANIE SPACERÓWKI ZE STELAŻA
Wciśnij przyciski odblokowujące zaczepy spacerówki (a) i wyciągnij ją z gniazd montażowych (b)
.
MONTAŻ I DEMONTAŻ BUDKI DO SPACERÓWKI
Aby założyć budkę wsuń jej zaczepy w otwory montażowe (a). Aby zdjąć budkę wciśnij
blokady zaczepów i wysuń budkę z otworów montażowych (b).
REGULACJA PODNÓŻKA
Naciśnij przyciski po obu stronach podnóżka i zmień jego położenie.
REGULACJA POŁOŻENIA SIEDZISKA SPACERÓWKI
Pociągnij cięgno do góry i ustaw siedzisko w żądanej pozycji.
1
2
3
4
5
6
7
8
9
10
11
12
13
14
15
16

3
POLSKI
ZWIĘKSZENIE ROZMIARU BUDKI
Budkę można powiększyć o dodatkową cześć. W tym celu należy rozsunąć zamek znaj-
dujący się pomiędzy dolną i górną częścią budki.
ZAKŁADANIE BARIERKI
Wciśnij końce barierki w otwory montażowe aż do zatrzaśnięcia blokad.
ZDEJMOWANIE BARIERKI
Wciśnij przyciski blokad barierki i wysuń jej końce z otworów montażowych. Barierkę
można odchylić odpinając ją tylko z jednej strony.
ZAKŁADANIE POKROWCA
Aby założyć pokrowiec przełóż go pod barierką i zapnij na rzep (a) i napę (b).
KLAMRA
Aby zapiąć klamrę pasów wsuń zaczep w gniazdo i dociśnij go do dołu aż do momentu
zatrzaśnięcia się blokady (b). Czynność tą powtórz dla wszystkich zaczepów.
Aby rozpiąć klamrę wciśnij okrągły przycisk aż do momentu rozłączenia się części
spinających z obudową klamry (a).
MONTAŻ FOTELIKA
Aby zamontować fotelik użyj specjalnych adapterów. Umieść adaptery w gniazdach
montażowych stelaża i załóż fotelik zatrzaskując go na adapterach. Uwaga: Przed użyciem
sprawdź poprawność zamocowania fotelika.
DEMONTAŻ FOTELIKA
Aby zdjąć fotelik wciśnij przyciski odblokowujące po obu jego stronach równocześnie
wyciągając go z gniazd montażowych. Zdejmij adaptery wciskając przycisk odblokowujący.
MONTAŻ GONDOLI
Aby zamontować gondolę użyj specjalnych adapterów. Umieść adaptery w gniazdach
montażowych stelaża i załóż gondolę zatrzaskując ją na adapterach.
DEMONTAŻ GONDOLI
Aby zdjąć gondolę wciśnij przyciski odblokowujące zaczepy (a) i wyciągnij ją z gniazd
montażowych (b). Zdejmij adaptery wciskając przycisk odblokowujący.
MOSKITIERA
Moskitiera znajduje się w kieszeni w spodniej części podnóżka (a). Należy założyć ją na
podnóżek i budkę (b,) a następnie zapiąć paski na rurce stelaża, tak jak pokazuje rysunek (c).
OŚWIETLENIE LED
Na ramie wózka umieszczone jest oświetlenie LED, przycisk do włączania znajduje się na
stelażu wózka w miejscu pokazanym na rysunku (a). Miejsce na baterie zasilające znajduje
się w spodniej części podnóżka (b). Aby zainstalować baterie LR 44 należy odkręcić wkręt
pokazany na rysunku i zdjąć osłonkę, prawidłowy montaż baterii pokazany jest na osłonce.
MOCOWANIE TORBY X-BAG ORAZ UCHWYTU NA KUBEK X-MUG
Do prowadnicy wózka można dołączyć torbę X-Bag oraz uchwyt na kubek X-Mug korzy-
stając z punktów mocowania pokazanych na rysunku.
17
18
19
20
21
22
23
24
25
26
27
|
28

4
POLSKI
OSTRZEŻENIA I UWAGI
Na podstawie przeprowadzonych testów firma Deltim deklaruje, że dostarczony wózek
dziecięcy jest produktem bezpiecznym spełniającym wszystkie wymagania normy
PN-EN1888:2012.
Na podwozie X-Cite można montować jedynie przystosowane produkty:
gondolę -
X-lander, spacerówkę - X-Cite oraz fotelik - przy użyciu odpowiednich adapterów.
- Stelaż w połączeniu z gondolą X-lander stanowi wózek dziecięcy przeznaczony dla dzieci
w wieku od momentu urodzenia do momentu kiedy zacznie samodzielnie siadać - do 9 kg.
- Stelaż w połączeniu ze spacerówką X-Cite stanowi wózek dziecięcy przeznaczony dla
dziecka, które zaczyna samodzielnie siadać (powyżej 6-go miesiąca życia, do 15 kg).
- Stelaż w połączeniu z fotelikiem (tylko przy użyciu adapterów) służy dla dziecka od
momentu urodzenia do 13 kg. (zgodnie z instrukcją obsługi fotelika).
Do wózka można dołączyć platformę X–Board do przewozu starszego dziecka.
Ważne – Zatrzymaj te instrukcje do przyszłego zastosowania.
1. OSTRZEŻENIE: Nigdy nie zostawiaj swojego dziecka bez opieki.
2. OSTRZEŻENIE: Upewnij się przed użyciem, czy wszystkie urządzenia
blokujące są włączone.
3. OSTRZEŻENIE: Aby uniknąć obrażeń, upewnij się, czy twoje dziecko
jest odsunięte kiedy rozkłada się lub składa niniejszy wyrób.
4. OSTRZEŻENIE: Nie pozwalaj dziecku bawić się niniejszym wyrobem.
5. OSTRZEŻENIE: To siedzisko nie jest odpowiednie dla dzieci
w wieku poniżej 6 miesiąca życia.
6. OSTRZEŻENIE: Zawsze używaj systemu zapięć.
7. OSTRZEŻENIE
:
Sprawdź, czy urządzenia mocujące gondolę lub
siedzisko lub fotelik samochodowy są prawidłowo załączone przed
użyciem.
8. OSTRZEŻENIE
:Niniejszy wyrób nie jest odpowiedni do biegania ani
jazdy na rolkach.
9. Hamulec postojowy powinien być włączony, kiedy wkładasz lub wyciągasz dziecko
(dzieci) do/z wózka.
10. Zawsze, gdy chcesz zaparkować używaj hamulca postojowego.
11. Zawsze wyjmuj dziecko z wózka przed jego złożeniem.
12. Nigdy nie pozostawiaj wózka na zboczu, na nierównej czy śliskiej powierzchni.
13. Nie przenoś dziecka w wózku.
14. Każde obciążenie zawieszone na prowadnicy, z tyłu oparcia i/lub na bokach wózka naru-
sza jego stateczność. Maksymalne obciążenie torby:1,5kg; max obciążenie kosza 3kg.
15. Nigdy nie używaj produktu, gdy jego część jest zużyta lub uszkodzona. Użytkowanie
niesprawnego produktu zagraża bezpieczeństwu dziecka. Należy skontaktować się
z punktem serwisowym celem usunięcia usterki.
16. Używaj tylko tych części zamiennych które są dostarczane lub rekomendowane
przez producenta.
17. Produkt powinien być regularnie sprawdzany pod kątem oznak zużycia lub uszkodzeń.
18. Nie modyfikuj niniejszego produktu, ponieważ może to zagrozić bezpieczeństwu
Twojego dziecka. Producent nie ponosi odpowiedzialności za jakiekolwiek modyfikacje
produktu wprowadzone przez użytkownika.
19. Upewnij się, że ręce twojego dziecka pozostają poza zasięgiem miejsc, w których
mogą zostać przyszczypnięte lub zakleszczone np., kiedy części wózka takie jak
budka czy barierka są montowane lub odłączane lub w inny sposób zmieniane.
!

5
POLSKI
20. Nie stawiaj ani nie sadzaj na podnóżku dziecka. Podnóżek może być używany
wyłącznie jako podpora dla nóg i stóp jednego dziecka. Użycie go w jakikolwiek
inny sposób może prowadzić do poważnego uszczerbku na zdrowiu. Maksymalne
obciążenie podnóżka to 3 kg.
21. Należy zwrócić szczególną uwagę, aby nóżki dziecka nie znajdowały się w bezpo-
średniej bliskości kółek gdzie mogą zostać otarte przez obracające się koła.
22. Produkt ten nie jest zabawką, więc nie pozwól dziecku bawić się nim / wspinać się
na niego. Przewrócenie wózka na dziecko może spowodować poważne obrażenia.
23. Upewnij się, czy wszystkie suwaki i zapięcia są bezpiecznie zapięte przed użyciem.
24. Unikaj sytuacji, w których używasz wózka ekstremalnie i zmniejszasz kontrolę nad
dzieckiem i wózkiem.
25. Nigdy nie zjeżdżaj/wjeżdżaj wózkiem po schodach i schodach ruchomych zwłaszcza
gdy jest w nim dziecko. Może to zagrażać bezpieczeństwu dziecka i uszkodzić produkt.
26. Nigdy nie ciągnij wózka, gdy przednie obrotowe koła znajdują się za Tobą i nie są
zablokowane. W takiej sytuacji wózek może samoczynnie skręcić, co może prowadzić
do zagrożenia dla bezpieczeństwa, jeśli nie postępujesz ostrożnie i uważnie.
27. W trakcie transportu środkami publicznymi (autobus, metro, pociąg itp.) niewystar-
czające jest używanie tylko hamulca tylnych kół wózka. Wózek może być wystawiony
na działanie warunków (nagłe hamowanie, zakręty i wyboje w nawierzchni drogi,
przyspieszanie itp.), na działanie których nie został przetestowany zgodnie
z aktualną normą dla wózków (EN1888). Stosuj się do zaleceń i instrukcji dotyczących
bezpiecznego przewożenia dzieci w wózkach w środkach transportu publicznego,
których zamieszczanie jest obowiązkiem operatorów transportu publicznego.
28. Tory kolejowe/tramwajowe stanowią szczególne zagrożenie, gdyż kółka mogą utknąć
w nich podczas przejeżdżania. Zalecamy zablokowanie skrętnych kół. Zachowaj ostrożność.
29. Prosimy o szczególne zwrócenie uwagi na to, że na stacjach kolejowych i stacjach
metra możliwe są nagłe zmiany ciśnienia powietrza. Nigdy nie pozostawiaj niniejszego
produktu w pobliżu torów bez obu rąk na rączce wózka, jako że samo użycie hamulca
może nie być wystarczające do bezpiecznego utrzymania wózka w miejscu.
30. Nie używaj i nie pozostawiaj wózka w pobliżu otwartego ognia lub innych źródeł
ciepła takich jak grzejniki.
31. Chowając wózek w bagażniku samochodu zwróć uwagę, żeby klapa kufra nie wywierała
nacisku na wózek, gdyż może to spowodować jego uszkodzenie.
32. Trzymaj plastikowe opakowania z dala od dziecka, aby uniknąć niebezpieczeństwa
uduszenia.
33. Niniejszy produkt nie powinien być używany jako urządzenie medyczne. Jeśli Twoje
dziecko podczas transportu wymaga specjalistycznej opieki medycznej, skonsultuj
się ze swoim lekarzem.
34. Zalecenia dotyczące bezpieczeństwa zawarte w tej instrukcji nie dotyczą wszystkich
możliwych warunków i nieprzewidywalnych sytuacji, które mogą wystąpić. Należy zrozu-
mieć, że zdrowy rozsądek, ostrożność i uważność są czynnikami, które nie mogą zostać
wbudowane w produkt. Czynniki te pozostają obowiązkiem osoby używającej wózek.
KONSERWACJA
Wózek należy osuszać delikatną ściereczką po używaniu podczas deszczowej pogody.
Regularnie czyść koła i metalowe części używając tylko delikatnych detergentów i letniej
wody. Tapicerka i kosz na zakupy nie powinny być prane w pralce. Nie należy wystawiać
wózka na długotrwałe działanie promieni słonecznych. Ze względów bezpieczeństwa
należy używać tylko części zamiennych dostarczonych lub zalecanych przez producenta.
6
POLSKI

7
ENGLISH
UNFOLDING THE FRAME
Unclip the linking interlock (a). Unfold the pram by lifting its handle up until the locks (b)
are engaged . WARNING: Prior to assembling the baby carriage make sure that folding
gears have been locked.
FOLDING THE FRAME
Detach the pram, seat unit or car seat from the frame. Pull the grips on the handle
upwards (a). Fold the frame holding the handle until the automatic lock is engaged
as shown in the picture(b).
ATTACHING AND DISASSEMBLY OF REAR WHEELS
To attach the wheel, press the button in the centre of the wheel and slide the wheel axle
into the mounting socket. Pull on the wheel to check that it is securely attached. In order
to remove the wheel press the button in the centre of the wheel and pull it out of the
mounting socket.
ATTACHING AND REMOVING THE FRONT WHEEL
In order to attach the wheel, slide it onto the axle until the moment you hear it lock into place.
DISMOUNTING OF FRONT WHEEL
In order to take the wheel off, push the button shown on the figure (a), and pull the wheel
off the axis (b)
WHEEL BLOCKADE
The stroller is provided with swiveling front wheels. A special button blocks the wheel
swiveling movement. After the button has been pressed, the wheels are blocked to go
straight. To release the blockade, press the lever.
PUSHBAR
Press the button in the middle of the handle and adjust its height by pulling it towards
you to lengthen it or pushing it away from you to shorten it.
BRAKE
To lock the wheels, press the brake lever in its closer part (a). To release the brake, press
the brake lever in its distant part (b).
BELT ADJUSTMENT
To adjust the belt length, move the belt towards a regulator. Regulators are hidden under
protective covers.
SHOULDER BELT ADJUSTMENT
The height of the shoulder belt position may be adjusted based on the child’s height.
To change the position, insert the regulator through appropriate holes located in the
reclining seat.
SHOPPING BASKET INSTALLATION
Fasten the snap fasteners and attach the basket to the chassis as shown in the pictures.
INSTALLING SEAT UNIT ON THE FRAME
Slide the catches of the seat unit nto mounting seats in the frame, until locks are engaged.
The seat unit can be mounted facing front or rear.
DISMOUNTING SEAT UNIT FROM THE FRAME
Push the buttons unlocking catches of seat unit in (a), then pull it out from mounting seats (b).
ASSEMBLY AND DISMANTLING OF THE CANOPY
To assemble the canopy, insert its clamps into the assembly openings (a). To remove the canopy,
press in the interlocks of clamps and bring out the canopy from assembly openings (b).
1
2
3
4
5
6
7
8
9
10
11
12
13
14

8
FOOTREST ADJUSTMENT
Press the buttons on both sides of footrest and adjust it to the required position.
ADJUSTING THE STROLLER SEAT POSITION
Pull the lever upwards and adjust the seat to the desired position.
INCREASING THE HOOD INCLINATION ANGLE
The hood may be expanded by an additional part. In order to do this, undo the zipper
between the upper and lower part of the hood.
INSTALLING OF BUMPER BAR
Push in the ends of the bumper bar into mounting holes, until locks are snapped.
TAKING THE BUMPER BAR OFF
Push in the buttons of the guard-rail locks and slide its end out of the mounting holes.
The bumper bar may be tilted, when undone only from single side.
ATTACHING THE COVER
To attach the footcover put it under the bumper bar and attach to Velcro (a) and snap (b).
BUCKLE
To fasten the belt buckle, slide the belt lock into the slot and press it down until it snaps
into place (b). Repeat this procedure for all locks. To unfasten, press the round button
until the moment when the locks are released from the buckle latch (a).
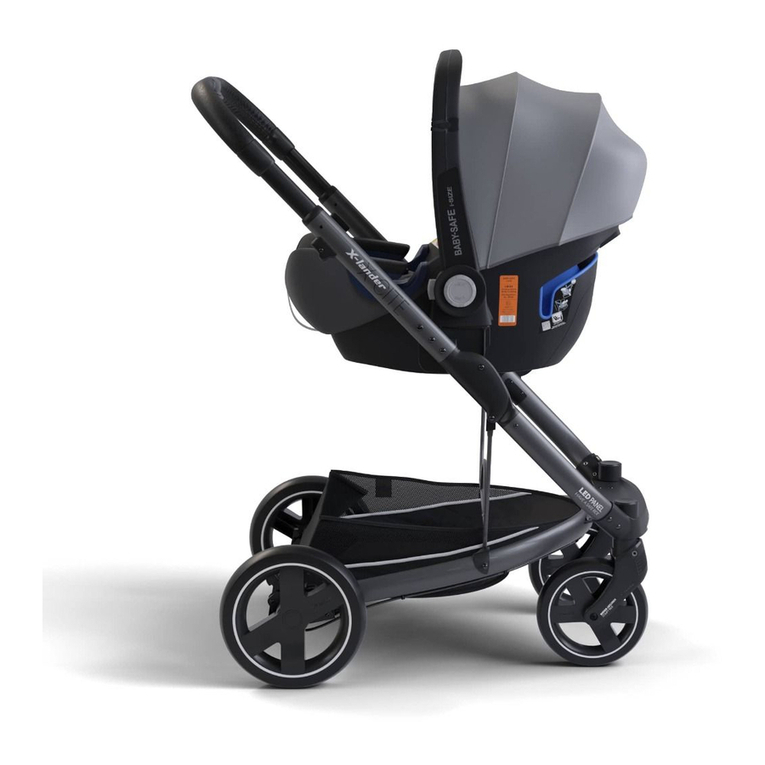
MOUNTING THE CAR SEAT
Special adapters are needed in order to mount the baby car seat. Place the adapters
in mounting seats of the frame and attach the car seat by catching it on the adapters.
Attention: Ensure proper fitting of the armchair before using it.
REMOVING THE CAR SEAT
In order to take the car seat off, push in the unlocking pushbuttons on both its sides,
while simultaneously pulling it out of mounting seats. Remove adapters by pushing in the
unlocking pushbutton.
MOUNTING OF CARRYCOT
Special adapters are needed in order to mount the carrycot. Place the adapters in mounting
carrycot of the frame and attach the carrycot by catching it on the adapters.
DISMOUNTING OF CARRYCOT
To take the carrycot off, push in the buttons unlocking the catches (a) and pull it out from
mounting seats (b). Remove adapters by pushing in the unlocking pushbutton.
MOSQUITO NET
The mosquito net is in the pocket under the footrest (a). Place it over the footrest and
the hood (b) and then fasten the straps round the frame bars as shown in Figure (c).
LED LIGHTENING
The LED lightening is placed on the stroller frame, the switch is located on the stroller
frame in the place shown in figure (a). The place for the power batteries is in the bottom
part of the footrest (b). To install the LR 44 batteries, unscrew the bolt shown in figure
and remove the cover. The right battery assembly is presented on the cover.
ATTACHING X-BAG NURSERY BAG AND X-MUG HOLDER
X-Mug and X-Bag nursery bag can be attached to the frame using the holders shown
in the picture.
15
16
17
18
19
20
21
22
23
24
25
26
27
28
ENGLISH

9
WARNINGS AND POINT OF ATTENTION
Having conducted required tests Deltim declares that the stroller complies with all the
requirements of PN-EN1888:2012 standard.
- The frame combined with the X-lander carrycot constitutes baby carriage intended
for babies starting from their birth until the moment when they are able to sit on their
own - to 9 kg.
- The frame combined with the X-Cite stroller constitutes baby carriage intended for
babies who are able to sit on their own (over 6th month old, - to 15 kg).
- The frame combined with the baby seat (only when used with adapters) serves for
babies starting from their birth until they reach 13 kg of body weight (according to seat
handling instruction).
X-Board riding platform can be added to transport an older child.
Important - keep these instructions for future reference.
1. WARNING: Never leave your child unattended.
2. WARNING: Ensure that all the locking devices are engaged before use.
3. WARNING: To avoid injury ensure that your child is kept away
when unfolding and folding this product.
4. WARNING: Do not let your child play with this product.
5. WARNING: This seat unit is not suitable for children under 6 months.
6. WARNING: Always use the restraint system.
7. WARNING: Check that the carry cot or seat unit or car seat attach-
ment devices are correctly engaged onto the chassis before use.
8. WARNING: This product is not suitable for running or skating.
9. The parking device should be engaged when child is being placed in or removed
from the stroller.
10. When parking always use the parking brake.
11. Always remove the child before folding the stroller.
12. Never park the stroller on a hill, uneven or slippery surface.
13. Do not carry a child in a stroller.
14. Any load attached to the handle and/or on the back of the backrest and/or on the
sides of the vehicle will affect its stability. Maximum weight of the changing bag
should not exceed 1,5 kg; Shopping basket maximum load should not exceed 3 kg.
15. Never use the product if any of its parts is faulty or damaged. The use of a defective
product endangers the safety of the child. Please contact the service center in order
to eliminate/remove the fault.
16. Use only replacement parts supplied or recommended by the manufacturer/distributor.
17. Product should be inspected regularly for signs of damage and wear.
18. Do not modify this product as it may compromise the safety of your child. The
manufacturer is not liable for any modifications to the product.
19. Make sure that the child’s hands stay clear of possible pinching areas when the
stroller or its parts are being folded, unfolded, changed or adjusted.
20. Do not stand or sit the child on the footrest. The footrest is designed to support
legs and feet of one child only. Any other usage may lead to serious personal injury.
The maximum load for the footrest is 3 kg.
21. Make sure child is kept clear of all moving parts (e.g. wheels) risk of injury.
22. This product is not a toy so do not allow your child to play with it or climb on it. Serious
injury can be caused if the stroller falls over on the child.
!
ENGLISH

10
23. Check that all zips, snaps and locking devices are securely fastened before use.
24. Avoid situations of extreme use which reduce your control over the child and the stroller.
25. Never use the pram/stroller on stairs or escalators, especially when there is a child
in it. This could endanger the safety of the child and damage the product.
26. Never pull the stroller behind you with unlocked front swivel wheels. The stroller
might self turn, which can lead to a safety risk if you are not cautious and attentive.
27. When using public transport (bus, underground, train, etc.) it is not enough only
to engage the stroller’s parking brake. The stroller can be exposed to conditions
(harsh braking, turns and bumps in the road surface, acceleration, etc.) For which
it has not been tested according to the current stroller standard EN 1888. Follow the
recommendations and instructions regarding safe transport of children in strollers,
which public transport operators are obliged to provide.
28. Crossing train/tramway rails can pose a particular threat because the wheels of the
stroller can get stuck in them. We recommend locking the swivel wheels. Be cautious.
29. Never park the stroller on a hill, uneven or slippery surface.
30. Do not use or leave the vehicle cot close to open fires or other sources of heat such
as radiators or others.
31. When transporting the stroller in a car trunk make sure that the trunk lid does not
exert pressure on the product as this may damage the stroller.
32. Keep plastic packaging materials out of reach of children to avoid the danger of suffocation.
33. This product should not be used as a medical treatment device. If your child has
special health needs relating to transport, you should consult your doctor.
34. The safety instructions in this manual do not cover all possible conditions and
unforeseeable situations which may occur. It must be understood that common
sense, caution and care are factors that cannot be built into a product. These
factors are the responsibility of the carer using the stroller.
MAINTENANCE:
Stroller should be cleaned with a soft cloth after use in wet weather. Clean the wheels
and metal parts using only a mild detergent and warm water. Upholstery and shopping
basket are not machine washable. Do not overexpose the stroller to sunlight. For safety
reasons use original parts only.
ENGLISH
Other manuals for X-cite
2
Table of contents
Languages:
Other X-lander Stroller manuals

X-lander
X-lander X-PRAM LIGHT User manual

X-lander
X-lander X-MOVE User manual

X-lander
X-lander X-cite User manual

X-lander
X-lander X-MOVE User manual

X-lander
X-lander BOOSTER2 User manual

X-lander
X-lander X-PULSE User manual

X-lander
X-lander X-Follow User manual

X-lander
X-lander X-RUN User manual

X-lander
X-lander X-FLY User manual

X-lander
X-lander Around The World Asia User manual