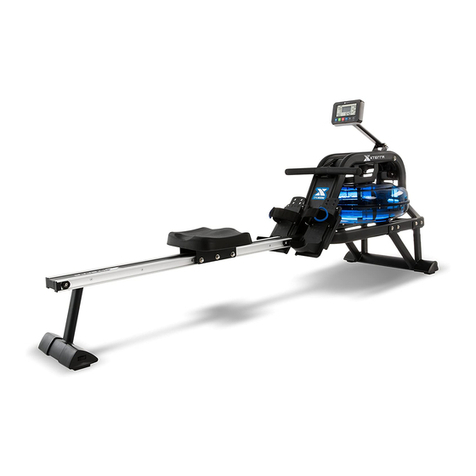
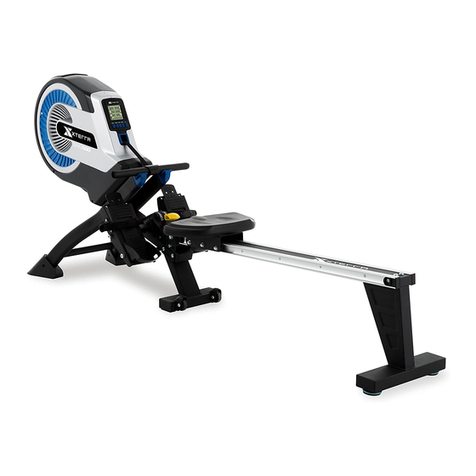
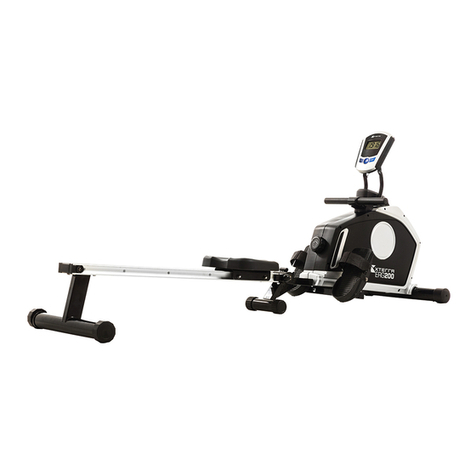
Xterra 16804836000 User manual

Model: 16804836000
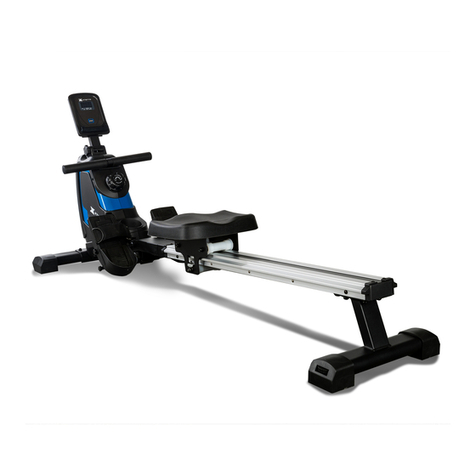
ERG600W WATER ROWER
OWNER’S MANUAL
PLEASE
CAREFULLY
READ
THIS ENTIRE
MANUAL
BEFORE
OPERATING
YOUR
NEW WATER
ROWER

2
TA B L E OF
CONTENTS
BeforeYouBegin..............................................................................................3
ImportantSafetyInstructions................................................................................4
ERG600WAssemblyInstructions............................................................................8
TankGuide............................................................................................................13
AdjustmentGuide.................................................................................................14
OperationofYourRower......................................................................................18
GeneralMaintenance........................................................................................22
ExplodedViewDiagram.....................................................................................23
PartsList.............................................................................................................24
Manufacturer’sLimitedWarranty
......................................................................32
ATTENTION
THISROWERISINTENDEDFORRESIDENTIALUSEONLYANDISWARRANTEDFORTHEAPPLICATION.
ANYOTHERAPPLICATIONVOIDSTHISWARRANTYINITSENTIRETY.

3
BEFOREYOUBEGIN
ThankyouforchoosingtheXterraERG600WRower.Wetakegreatprideinproducingthisquality
productandhopeitwillprovidemanyhoursofqualityexercisetomakeyoufeelbetter,lookbetter,and
enjoylifetoitsfullest.It'saprovenfactthataregularexerciseprogramcanimproveyourphysicaland
mentalhealth.Toooften,ourbusylifestyleslimitourtimeandopportunitytoexercise.TheXterra
ERG600WRowerprovidesaconvenientandsimplemethodtobeginyourassaultongettingyourbody
inshapeandachievingahappierandhealthierlifestyle.Beforereadingfurther,pleasereviewthe
drawingbelowandfamiliarizeyourselfwiththepartsthatarelabeled.
ReadthismanualcarefullybeforeusingtheXterraERG600WRower.AlthoughDyacoCanadaInc.
constructsitsproductswiththefinestmaterialsandusesthehigheststandardsofmanufacturingand
qualitycontrol,therecansometimesbemissingpartsorincorrectlysizedparts.Ifyouhaveany
questionsorproblemswiththepartsincludedwithyourXterraERG600WRower,pleasedonotreturn
theproduct.ContactusFIRST!Ifapartismissingordefectivecallustollfreeat1‐888‐707‐1880.Our
CustomerServiceStaffareavailabletoassistyoufrom8:30A.M.to5:00P.M . (EasternTime)Monday
throughFriday.Besuretohavethenameandmodelnumberoftheproductavailablewhenyoucontact
us.

4
IMPORTANTSAFETY
INSTRUCTIONS
WARNIN G‐Readallinstructionsbeforeusingthisequipment.
Donotoperatetherowerondeeplypadded,plushorshagcarpet.Damagetobothcarpetand
rowermayresult.
Beforebeginningthis,consultaphysician.Thisisespeciallyimportantforpersonsovertheageof
35orpersonswithpre‐existinghealthconditions.
Keepchildrenundertheageof13awayfromthismachine.Thereareobviouspinchpointsand
othercautionareasthatcancauseharm.
Keephandsawayfromallmovingparts.
Neverdroporinsertanyobjectintoanyopenings.
Donotuseoutdoors.
Wearpropershoes.Highheels,dressshoes,sandalsorbarefeetarenotsuitableforuseonyour
rower.Qualityathleticshoesarerecommendedtoavoidlegfatigueorinjury.
Thisequipmentisnotintendedforusebypersonswithreducedphysical,sensoryormental
capabilities,orlackofexperienceandknowledge,unlesstheyhavebeengivensupervisionor
instructionconcerninguseoftheequipmentbyapersonresponsiblefortheirsafety.
Userweightshouldnotexceed:300lbs(136kgs)
SAVETHESEINSTRUCTIONS‐THINKSAFETY!
CAUTION!!Pleasebecarefulwhenunpackingthecarton.

5
WARNINGDECALREPLACEMENT
Thedecalshownbelowhasbeenplacedontherower.Ifthedecalismissingorillegible,pleasecallour
CustomerServiceDepartmenttoll‐freeat1‐888‐707‐1880toorderareplacementdecal.

6
ERG600W
PRE‐ASSEMBLYCHECKLIST
PARTNO.DESCRIPTIONQ’TY
1MainFrame1
2FrontStabilizer1
4RearStabilizer1
3SlideRail1
25LeftEndCap1
26RightEndCap1
46Console1
82RailEndcapL1
83RailEndcapR1
35Stopper 2
36Seat1
77Funnel1
76SiphonPump 1
Water‐purificationtablet1
Usermanual1
Hardwareparts1

7
ERG600W
ASSEMBLYPAC K CHECKLIST
#75 S13-17 1pc
#74 S5 1pc
#66 M8*15 4pcs
#58 M8*15 4pcs
#60 M8*15 14pcs
#71 OD20*ID8.5*1.5 16pcs
#68 M4*12 2pcs
#35 Stopper2pcs
#82 Rail endcap L1pc
#83 Rail endcap R1pc
#87 OD16*ID8.5*1.5 2pcs
Note:Abovepartsareallthepartsneededtoassemblethismachine.Beforeyoustarttoassemble,
pleasecheckthehardwarepackingtomakesuretheyareincluded.

8
ERG600W
ASSEMBLYINSTRUCTIONS
71
4
66
71
3
66
#66 M8*15 4pcs
#71 OD20*ID8.5*1.5 4pcs
#75 S13-17
STEP1:
NOTE:Werecommendhaving2peopletoassembletheproduct.
1. TurnovertheSlideRail(No.3)asabove.
2. AttachtheRearStabilizer(No.4)totheSlideRail(No.3)with4Washers(No.71)and4OuterHex
Screws(No.66).
3. TightenwithSpanner(No.75).

9
ERG600W
ASSEMBLYINSTRUCTIONS
26
68
225
68
#75 S13-17
#68 M4*12 2pcs
STEP2:
1. AttachL&REndCaps(No.25&26)toFrontStabilizer(No.2).
2. Thentightenwith2CrossScrews(No.68)usingSpanner(No.75).

10
ERG600W
ASSEMBLYINSTRUCTIONS
2
71
60
1
#60 M8*15 8pcs
#74 S5
#71 OD20*ID8.5*1.5 8pcs
60
60
60
71
71
71
STEP3:
1. KeeptheMainFrame(No.1)upright.
2. AttachFrontStabilizer(No.2)toMainFrame(No.1)using8Washers(No.71)and8Screws
(No.60).
3. TightenwithAllenWrench(No.74).
Note:Youcanput3~4screwsintotheholesfirstandstarttighteningbyhand.Afterallthescrewsare
putin,thentightenwiththetool.

11
ERG600W
ASSEMBLYINSTRUCTIONS
#60 M8*15 2pcs
#74 S5
#87 OD16*ID8.5*1.5 2pcs
#58 M8*15 4pcs
#35 Stopper 2pcs
#82 Rail endcap L 1pc
#83 Rail endcapR 1pc
3
608735
358760
3683
82
1
58
STEP4:
1. SlidetheSeat(No.36)ontotheSlideRail(No.3).
2. AttachtheSlideRail(No.3)totheMainFrame(No.1)using4FlatScrews(No.58).
3. SecuretheStoppers(No.35)with2Screws(No.60)andWashers(No.87).Insertall6screwspartially
intotheholesfirst,andthentightenwithAllenWrench(No.74).
4. AttachRailendcapL(No.82)andRailendcapR(No.83)totheSlideRail(No.3).

12
ERG600W
ASSEMBLYINSTRUCTIONS
1
71
60
46
60
71
#60 M8*15 4pcs
#74 S5
#71 OD20*ID8.5*1.5 4pcs
STEP5:
1. AttachtheConsole(No.46)toMainFrame(No.1)using4Washers(No.71)and4Screws(No.60).
2. TightenwithAllenwrench(No.74).
Theassemblyiscomplete!

13
TANKGUIDE‐HOWTOFILLANDEMPTYTHETANK
1. RemovetheFillPlug(No.33)fromtheUpperTankCover(No.12).
2. Tofilltankwithwater,refertoFig.A.InserttheFunnel(No.77)intothetank,thenuseacuporthe
SiphonPump(No.76)andabuckettofillthetank.Usethewaterlevelgaugeonthesideofthe
tanktomeasuredesiredwaterlevelinthetank.
3. Toemptythetank,refertoFig.B.Placeabucketnexttotherower,andusetheSiphonPump
(No.76)topumpoutthewaterfromthetankintothebucket.
4. InserttheFillPlug(No.33)intotheUpperTankCover(No.12).Wipeexcesswateroffoftheframe.
NOTE:
Fillthetankonlywithtapwater.Add1water‐purificationtablet(1packetisincluded.).Neveruse
poolchlorineorchlorinebleach.Thiswilldamagethetankandvoidthewarranty.
Addawaterpurificationtabletevery6monthsorasneeded.Ifwaterremainscloudy,replacethe
waterinthetank.
Waterfromthetankisnotsuitableforconsumption.Disposethewaterafterpumpingitoutfrom
thetank.
WATERLEVEL
SeeFig.A.Thewaterlevelgaugeisonthesideofthetank.Themaximumfilllevelis6.Neverfillit
overthislimit.Fillingthetankoverthislimitwillvoidthewarranty.
Theresistancedependsonthewaterlevelinthetank.Waterlevel1isthelowestresistance.Level
6isthehighestresistance.
33
33
12
76
77
76
Fig.A Fig.B
Water level label

14
ADJUSTMENTGUIDE
A
B
C
1
Thereare3hooks(A,B,C)forthebungeecord,locatedontheinsideoftheframeunderthewatertank.
IfyouhookthebungeecordontoBorC,itincreasestheassistedreturnofthemeshbelt.Cisthe
fastestreturn.
Usecautionwhenadjustingthebungeecord.

15
ADJUSTMENTGUIDE
PEDALADJUSTMENT
MOVINGTHEMACHINE
The pedal strap is adjustable and can be
personalized to fit the user’s foot size.
To adjust the pedal strap, remove the Velcro
end of the strap from the mesh side by
pulling it upward then to the left.
Once removed, you may increase the
opening of the pedal strap by pulling the
mesh end up and to the right.
To tighten, pull the Velcro end of the pedal
strap upward then to the right and down to
secure it to the mesh side of the strap.
To mo ve the ro we
r
, lift up the rear stabilizer until
the transportation wheels on the front stabilizer
touches the ground. With the wheels on the
ground, you can transport the rower to the
desired location with ease.

16
ADJUSTMENTGUIDE
4
ADJUSTINGTHEBALANCE
AdjusttheEndCapsontheRearStabilizer(No.4)ofthemachineifthemachineisunbalanced
duringuse.
CAUTION!
Movingparts,suchastheseat,cancrushandcut.KeephandsclearoftheSliderailduringuse!

17
ADJUSTMENTGUIDE
STORAGE
36
3
4
36
3
4
When not in use, you can
save space by storing the
rower vertically. Lift by the
Rear Stabilizer (No.4) to
raise the rower to vertical
position.
If not using the rower for
more than a month, empty
the tank before storing.
CAUTION!
Move with caution when
you raise the rower up, as
your head may touch the
Rear Stabilizer (No. 4).
CAUTION!
Move the Seat (No.36) to front
of Slide Rail (No.3) first or it will
glide down when raising the
rower up!

18
OPERATIONOFYOURROWER
GETTINGFAM ILI AR WITHTHECONTROLPA N E L
ERG600WCONSOLE
OurcomputerizeddisplayconsoleontheWaterRowerallowstheusertotailorapersonalized
workoutbymonitoringtheirprogress.Duringaworkout,thedisplayconsolewillalternatelyand
repeatedlydisplaytheTime,Time/500M,SPM,Distance,Strokes,TotalStrokes,CaloriesBurnedand
Pulse(alloftheabove).
KeyFunctions
FUNCTIONALBUTTON:
UP▲/DOWN▼:Pressthesetwobuttonstoscrollthroughavailableselection.
Toadjustthefunctionvalueupwardanddownward.
ENTER:Toconfirmyourselection
Duringtraining,pressthebuttontoscaneachdisplayfunction.
START/STOP:Tostartandstopyourselectedworkoutprogram.
RESET:Toreturnthecomputerbacktothemainmenu.Pressandholdtoresetvalues.
RECOVERY:ToactivatetheRECOVERYPROGRAMthatwillautomaticallyevaluateyourfitness
immediatelyafteryourworkout.
【FUNCTIONS】
TIME: SettargettimebypressingUPandDOWNbuttons(1min~99min),in1minute
increments.
TIME/500M:Youraverage500Mtimeisautomaticallydisplayed.
SPM:Strokesperminute.
DISTANCE:PresettargetvaluebypressingUPandDOWNbuttons(0~99900meters),100meters
increments.
STROKES:SettargetvaluebypressingUPandDOWNbuttons(0~9990strokes).10strokes
increments.

19
TOTALSTROKES:Accumulatestotalstrokesfrom0upto9999.
CALORIES:SettargetCALORIESbypressingUPorDOWNbuttons(10Cal~9990Cal),10Cal
increments.
PULSE:InManualMode,Settargetvaluebypressingup/downmodefrom30to240,1
BPMincrements.Thecomputerwilldisplayuser’sheartrateduringtraining.When
reachtargetvalue,computerwillbeepuntilchangetoothermodeortakeoffChest
belt,alsothePulsewillblink.Thepulsemeasurementfunctionisonlyusedbychest
strapsystem.
CALENDAR:Thecomputerwilldisplayyear,month,anddaywhencomputerisinsleepmode.
TEMPERATURE:Thecomputerwilldisplaycurrentroomtemperaturewhenthecomputerisinsleep
mode.
CLOCK:Thecomputerwilldisplaycurrentclockwhenthecomputerisinsleepmode.
【OPERATION】
1. Install2PCSAAbatteries(included)andcomputerwillbeepfor2seconds(Fig.1).
Then,thecomputerentersintotheCLOCK&CALENDARMODE(Fig.2).
2. TheCLOCKwillflash.PressUPtosetthehour.PressENTERtoconfirm.
PressUPtosettheminutes.PressENTERtoconfirm.ContinuetosetupYEAR(intheSTROKES
window);MONTH(intheCALORIESwindow);DAY(inthePULSEwindow)bypressingUPorDOWN.
Eachtime,pressENTERtoconfirm.
Afteryouconfirmit,ALARMwillblink.Toskipsettingupanalarm,pressENTER.
Tosetupanalarm,pressUPKEYtoturnonALARM.AnarrowwillappearnexttoALARM.
PressENTER.CLOCKwindowwillflash.PressUPorDOWNtosetthealarmtime.PressENTERto
confirm.ComputerwillgointotheSPORTscreen(Fig.3).

20
3. WhenyouenterintotheSPORTscreen,MANUALandRACEwillblink.PressUPorDOWNtoselect
MANUALorRACE.PressENTERtoconfirmyourselection.
(1) MANUAL(Fig.4):Thereare2optionsinMANUALmode.
A.Thecomputercanbesettocountdown.WhenyouselectMANUAL,thevalueofTIMEwill
starttoflash.PressUPtosetthevalueofTIMEtocountdown.PressENTERtoconfirmit.If
youdonotwanttosetthevalueoftimetoCOUNTDOWN,pressENTERtogotothenext
function.YoucansetthevaluesforDISTANCE,STROKES,CALORIES,orPULSE.(Youcanonly
setthevalueforonefunctiontocountdown.Forexample,ifyouhavesetthetargetvalue
forTIME,thenDISTANCEcan’tbeset.)
PressSTARTbuttontostart.TheSTOPiconwilldisappear.
WhenthefunctionyouhaveselectedcountsdowntozerooryoupressSTOPbutton,the
computerwillstopanddisplaytheaveragevalue.
B.Thecomputercountsthevalueofyourworkout.PressSTARTtostart.
(2) RACE(Fig.5):
SelectRACEmodeandL9willflash.TheTIME/500Mwilldisplay4:00.Then,pressUPorDOWNto
selectL1~L15.PressENTERtoconfirm.Then,youcansetthedistanceoftherace500M~10000M)
whilethevalueofDISTANCEisblinking.
PressENTERandthepictureoftheracewilldisplayonthescreen.
TheTIME/500Moftheprogramsareasfollows:
A. PressSTARTbuttontostartandSTOPwilldisappear.USERandPCwilldisplayinthematrix
(Fig.6).Thecomputerwillstopwheneitheruserorcomputerhasreachedtheracedistancethat
wasset.Thenthematrixdisplays“PCWIN”or“USERWIN”(Fig.7).
L1L2L3L4L5L6 L7 L8 L9 L10 L11 L12L13L14 L15
8:007:307:006:306:005:30 5:00 4:30 4:00 3:30 3:00 2:302:001:30 1:00
This manual suits for next models
1
Table of contents
Other Xterra Fitness Equipment manuals
Xterra
Xterra ERG600W User manual

Xterra
Xterra FSX3500 User manual

Xterra
Xterra ERG160 User manual

Xterra
Xterra 16468201US User manual

Xterra
Xterra ERG600W User manual
Xterra
Xterra EGR200 ROWER User manual

Xterra
Xterra FS380 ELLIPTICAL User manual

Xterra
Xterra ERG700 ROWER User manual

Xterra
Xterra Elliptical XE 78 User manual

Xterra
Xterra FS5.8e User manual

Xterra
Xterra FS380 ELLIPTICAL User manual

Xterra
Xterra FB350 User manual
Xterra
Xterra ERG500 ROWER User manual

Xterra
Xterra MBX1500 User manual

Xterra
Xterra 16804936500US User manual
Xterra
Xterra ERG600W User manual
Xterra
Xterra 16414870 User manual

Xterra
Xterra 1640250 User manual
Xterra
Xterra ERG400 User manual