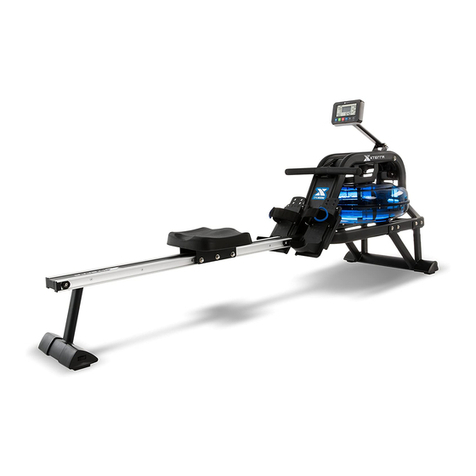
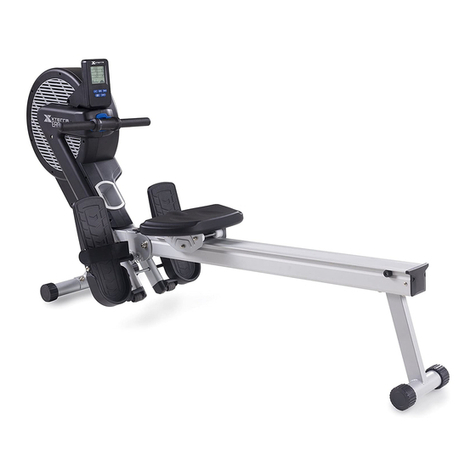
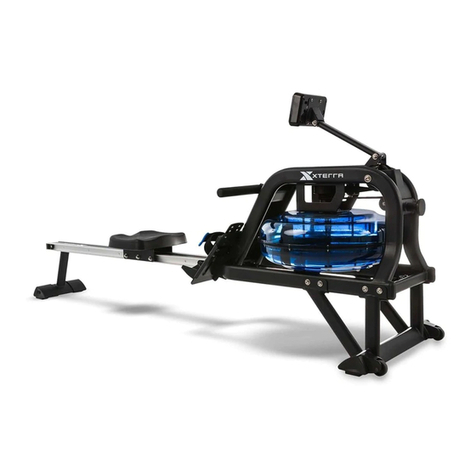
Xterra ERG700 ROWER User manual

ERG700 ROWER
OWNER’S MANUAL
PLEASE CAREFULLY READ THIS ENTIRE MANUAL BEFORE OPERATING YOUR NEW ROWER
FITNESS


Table Of Contents
1
2
4
8
22
ATTENTION
THIS ROWER IS INTENDED FOR RESIDENTIAL USE ONLY AND IS WARRANTED FOR THE
APPLICATION. ANY OTHER APPLICATION VOIDS THIS WARRANTY IN ITS ENTIRETY.
Product Registration
Important Safety Instructions
ERG700 Assembly Instructions
Console Operation
Manufacturer’s Limited Warranty
Thank you for your purchase of this quality rower from XTERRA Fitness. Your new
rower has been manufactured by one of the leading tness manufacturers in the world.
XTERRA Fitness will do all we can to make your ownership experience as pleasant as
possible for many years to come. If you have questions, or if parts are missing or damaged,
or you require customer service, call (870) 336 - 4286. Please have your model number and
serial number handy when you call.
Please take a moment to record where you purchased your machine, as well as the date of
purchase for future reference. We appreciate your condence in XTERRA Fitness and we
will always remember that you are the reason that we are in business. Please complete and
mail your registration card today and enjoy your new rower.
Yours in Health,
XTERRA Fitness
Congratulations On Your New Rower and Welcome to the XTERRA Fitness Family!
ERG700_VER2_20180214
WARNING
THIS PRODUCT MAY CONTAIN A CHEMICAL KNOW TO THE STATE OF CALIFORNIA TO CANCER, BIRTH
DEFECTS, OR OTHER REPRODUCTIVE HARM.

ERG700 Rower
1
Record Your Serial Number
Please record the Serial Number of this tness product
in the space provided below.
Serial Number
Register Your Purchase
The self-addressed product registration card must be completed in full and returned to
XTERRA Fitness. You can also go to www.xterratness.com/warrantyreg.html
to register online.
Product Registration
Purchase Location
Purchase Date

2
ERG700 Rower
• Do not operate equipment on deeply padded, plush or shag carpet. Damage to both carpet and
equipment may result.
• Before beginning this or any exercise program, consult a physician. This is especially important for
persons over the age of 35 or persons with pre-existing health conditions.
• Keep hands away from all moving parts.
• Do not attempt to use your equipment for any purpose other than for the purpose it is intended.
• Wear proper shoes. High heels, dress shoes, sandals or bare feet are not suitable for use on your
equipment. Quality athletic shoes are recommended to avoid leg fatigue.
• Wear proper clothing for exercising, loose clothing could become caught in the machine.
• Only one person at a time should use the machine.
• If the user experiences dizziness, nausea, chest pain, or any other abnormal symptoms, STOP the workout
at once. CONSULT A PHYSICIAN IMMEDIATELY.
• Do not place any sharp object around the machine.
Important Safety Instructions
When using an appliance, basic precautions should always be followed, including the following:
Read all instructions before using this appliance.
WARNING - To reduce the risk of burns, re electric shock, or injury to persons:
1. Do not operate under blanket or pillow. Excessive heating can occur and cause re, electric shock, or injury
to persons.
2. Close supervision is necessary when this appliance is used by, on, or near children, invalids, or disabled
persons.
3. Keep children and pets away from the machine at all times. DO NOT leave children unattended in the same
room with the machine.
4. Use this appliance only for its intended use as described in this manual. Do not use attachments not
recommended by the manufacturer.
5. Never operate this appliance is not working properly, if it has been dropped or damaged, or dropped into
water. Return the appliance to a service center for examination and repair.
6. Keep the appliance away from heated surfaces.
7. Never operate the appliance with the air openings blocked. Keep the air openings free of lint, hair, and the
like.
8. Never drop or insert any object into any opening.
9. Do not use outdoors.
10. Do not operate where aerosol (spray) products are being use or where oxygen is being administered.
11. The appliance is intended for household use.
SAVE THESE INSTRUCTIONS - THINK SAFETY!
Fitness Equipment Safety Instructions
CAUTION!! Please be careful when unpacking the carton.
Failure to follow all guidelines may compromise the effectiveness of the exercise experience, expose
yourself (and possibly others) to injury, and reduce the longevity of the equipment.
ERG700 Rower
3
Before you begin
Thank you for selecting our revolutionary XTERRA ERG700 Fitness Rower. A rower is an effective exercise
for increasing cardiovascular tness, building endurance, and toning the body. Our tness rower provides an
impressive selection of features designed to make your workouts at home more effective and enjoyable.
For your benet, read this manual carefully before you use the ERG700 Fitness Rower. To help us assist
you, note the product model number and serial number before contacting us. Before reading further, please
familiarize yourself with the parts that are labeled in the drawing below.
Console
Handle Bar
Pedals
Seat
Rear Stabilizer
Sliding Rail
Front Stabilizer

4
ERG700 Rower
1. Use the WRENCH (130) to tighten 3 BOLTS (120) together
with 3 FLAT WASHERS (109) to secure the MAIN FRAME
(1) and FRONT STABILIZER (2) together. There is a bolt on
each side and one on the front.
ERG700 Assembly Instructions
Attaching the Front Stabilizer
13 Flat Washer (#109)
3 Bolt (#120)
Hardware Step 1

ERG700 Rower
5
2 Flat Head Socket
Bolts (#135)
2 Flat Washers
(#109)
2 Spring Washers
(#137)
2 Cap Nuts (#136)
Attaching the Rear Stabilizer
2Hardware Step 2
1. Use the WRENCH (139) to tighten 2 BOLTS (135) through where
the ALUMINUM TRACK (51) meets the REAR STABILIZER (3)
and secure with 2 WASHERS (109), 2 WASHERS (137), and 2
NUTS (136).

6
ERG700 Rower
1. Attach the other end of the ALUMINUM TRACK (51) to
FOLDING END ASSEMBLY (6) of the Main Frame (1) and use
ALLEN WRENCH (130) to tighten the 6 BOLTS (123) together
with 6 WASHERS (116).
6 Split Washer (#116)
6 Bolt (#123)
Attaching the Slide Rail
3Hardware Step 3

ERG700 Rower
7
1. Use ALLEN WRENCH & SCREW DRIVER (127) to
tighten 6 BOLTS(129) and 6 WASHERS (121) to install
then LEFT AND RIGHT PEDALS (4,5) on the MAIN
FRAME(1). Use again ALLEN WRENCH & SCREW
DRIVER (127) to tighten 4 SCREWS (124) together
with 4 WASHERS (125) to install the SEAT (49) onto
the SEAT ATTACHING BOARD (16).
6 Flat Washer (#121)
4 Philips Head Screw
(#124)
4 Spring Washers (#125)
6 Button Head Socket
Bolts (#129)
Hardware Step 4
Attaching the Seat and Pedals
4

8
ERG700 Rower
DOWNMODES TA R T UP
WAT T LEVELCALORIESHEARTRATE
DISTANCETIMESTROKES MIN
STOP
RESET
Operation of Your Console
ERG700 Console
When Pressing any key button wakes up the console which has been turned off, the console LCD
will turn on with full display and beeps for 2 seconds then enters idle mode. When there is speed
signal input with the speed sensors or detected, it directly enters Manual workout mode.
Power off: In any mode during turning on, if there is not any button activated or no rowing activity
lasts for 1 minute, it turns off automatically.
Window Functions:
Stroke/min
• S/M value shows the equivalent strokes per minute.
Time
• It shows the time elapsed.3.
• Range of time: 00:00~99:59(minute: second)
• The time is accumulated for each workout mode.
• When time is set to count down, it shows the time remaining.
Distance
• The distance range is 0~9999 and switches to the format of 1X.XX when the value is over
9999.
Power:

ERG700 Rower
9
• The distance will be accumulated for each workout mode.
• When the distance is set to count down, it shows the remaining distance.
Heart Rate
• The heart rate range is 40~220 bpm
• When the heart rate signal is detected, the small dot at lower right corner of the heart rate
window will be blinking together with heart rate value showing.
• When there is no heart rate signal detected, the heart rate window shows nothing.
Calories
• The calorie window shows the value of calories burned.
• The calorie range is 0~999.
• The calorie value is based on built in estimates of the average user and may not reect
accuracy. To have a more accurate basis of caloric burn - please contact your physician
and they can assist you.
Watts
• The Watts window shows Watt value for each stroke.
• The Watt range is 0 ~ 2000.
• When the numbers show over 999 (four digits), the display uses a decimal to show in
thousands. E.g. 1000 shows as 1.00, 1240 reads as 1.24, 1250 as 1.25, 2000 as 2.00,
etc.
Level
• The level window shows the current resistance level.
• The level range is 1~16
• Level 1 and 2 would light the rst dot, level 3 and 4 would light the second dot, etc.
500M/Time
• Only workout modes of Manual, Distance, Time and Calorie are with this display function.
• For Manual workout mode as an example: When the console starts, Matrix in the middle
of LCD will show the wave pattern then switch to 500M/TIME 00:00 across center display
after 5 seconds then switch again back to the wave pattern after another 5 seconds and
continue to repeat the cycle. This is the function of SCAN.
• The console goes directly into SCAN mode after start. If MODE button is pressed, it shows
the wave pattern. Pressing the MODE button again, it displays 500M/TIME and repeat
again by pressing “MODE” button it goes back with “SCAN” function (recyclable).
RESET: Press and hold this button for 2 seconds to reset all of the value to Zero.
UP:Increase the setting value of the following functions.
TIME, COUNT, DISTANCE, CALORIES, and PULSE.
DOWN: Decrease the setting value of the following functions.
TIME, COUNT, DISTANCE, CALORIES, and PULSE.

10
ERG700 Rower
Key button Function:
• Any valid key button pressed will generate a beep sound.
• When in power off mode, pressing any key button turns on the console.
Mode Key
• Under idle mode, pressing MODE key each time switches the workout mode with the
following sequence:
• MANUAL » DISTANCE » TIME » CALORIES » 20/10 INTERVAL » 10/20 INTERVAL »
CUSTOM INTERVAL » Fat Burn » Cardio » Strength » Game
• The default workout mode after turning on the unit is Manual mode.
• To choose the target workout mode, when the matrix window shows the desired workout
pattern and parameter window value to be set will be blinking each second.
Up Key
• Under the setting mode of the target workout, the parameter is will be counted up.
• The value increases one increment when “UP” key is pressed once.
Down Key
• Under the setting mode of the target workout, the parameter is will be counted down.
• The value decreases one increment when DOWN key is pressed once.
Start/Stop Key
• Under idle mode, pressing Start/Stop key button enters Manual workout mode.
• To conrm the value the window is showing when setting the parameter under each target
workout mode and to start the workout mode.
• Press to end the current workout mode and all message windows stop counting.
Reset Key
• Pressing this key button under stopping mode, the image switches to the idle mode.
• The reset key button is valid only in stopping mode.
• Under any mode, pressing this key button for 3 seconds turns on the console again.

ERG700 Rower
11
Operating Instruction:
The screen is with full display and the buzzer beeps for two seconds after turning on.
Pressing Start button goes directly to Manual workout mode or pressing MODE button to
switch and select a workout mode with the workout sequence shown as below:
MANUAL » DISTANCE » TIME » CALORIES » 20/10 INTERVAL » 10/20 INTERVAL »
CUSTOM INTERVAL » Fat Burn » Cardio » Strength » Game
The program name will scroll from left to right to tell the user what it is.
Manual
20/10 Interval
Cardio
Distance
10/20 Interval
Strength
Time
Custom Interval
Game
Calories
Fat Burn

12
ERG700 Rower
Manual Mode
To choose MANUAL mode (Fig. 1-1)
Pressing Start/Stop button begins the workout mode or pulling the handlebar under the idle
mode enters directly into Manual workout mode.
The image at the center of LCD will scan every 5 seconds to show the stroke speed with
wave pattern (Fig. 1-2) and 500M/TIME (Fig. 1-3) or pressing MODE button to cancel
scanning with wave pattern only. Pressing MODE again switches the image to show 500M/
TIME.
Pressing UP or DOWN button and adjusts the resistance level which is shown at bottom right
corner of LEVEL window.
Target Distance
To choose target distance count-down Distance workout mode (Fig. 2-1)
Use UP/DOWN buttons to adjust and set the workout distance. The default distance is 100M
with increment of 50M up or down. Press Start/Stop button to conrm the setting and start
the workout mode.
The image at the center of LCD will scan every 5 seconds to show the stroke speed with
wave pattern (Fig. 2-2) and 500M/TIME (Fig. 2-3) or pressing MODE button to cancel
scanning with wave pattern only. Pressing MODE again switches the image to show 500M/
TIME.
Distance window counts down from target distance setting value and shows the remaining
distance of the workout.
Under the workout mode, pressing UP or DOWN key button adjusts the resistance level.
When the distance is counted down to 0, the workout completes and the buzzer sounds with
a long beep. If rowing continues, the distance count-down repeats.
Fig 1-1 Fig 1-2 Fig 1-3
Fig 2-1 Fig 2-2 Fig 2-3

ERG700 Rower
13
Target Time
To choose target time count-down Time workout mode (Fig. 3-1)
Use UP/DOWN buttons to adjust and set the workout time. The default distance is 1:00 with
1-minute increment of up or down (99:00 maximum). Press Start/Stop button to conrm the
setting and start the workout mode.
The image at the center of LCD will scan every 5 seconds to show the stroke speed with
wave pattern (Fig. 3-2) and 500M/TIME (Fig. 3-3) or pressing MODE button to cancel
scanning with wave pattern only. Pressing MODE again switches the image to show 500M/
TIME.
Under the workout mode, pressing UP or DOWN key button adjusts the resistance level.
Time window counts down from the setting time value and shows the remaining time of the
workout.
When time is counted down to 0:00, the workout completes and the buzzer sounds with a
long beep. If rowing continues, the time count-down repeats.
Target Calorie
To choose target calorie count-down Calories workout mode (Fig. 4-1)
Use UP/DOWN buttons to adjust and set the target calorie. The default value is 100 with
increment of 10 up or down. Press Start/Stop button to conrm the setting and start the
workout mode.
The image at the center of LCD will scan every 5 seconds to show the stroke speed with
wave pattern (Fig. 4-2) and 500M/TIME (Fig. 4-3) or pressing MODE button to cancel
scanning with wave pattern only. Pressing MODE again switches the image to show 500M/
TIME.
Calorie window counts down from the setting target calorie value and shows the remaining
calorie of the workout.
Under the workout mode, pressing UP or DOWN key button adjusts the resistance level.
When calorie is counted down to 0, the workout completes and the buzzer sounds with a long
beep. If rowing continues, the time count-down repeats.
Fig 3-1 Fig 3-2 Fig 3-3
Fig 4-1 Fig 4-2 Fig 4-3

14
ERG700 Rower
20/10 Interval
To choose 20/10 INTERVAL workout mode (Fig. 5-1)
The image at the center of LCD: 20 seconds (Exercise)/10 seconds (Rest)
Pressing Start/Stop button starts the workout mode.
The image at the center of LCD shows time count-down of current workout and wave
(Fig. 5-2) or rest time count-down and mark (Fig. 5-3).
Under the workout mode, pressing UP or DOWN key button adjusts the resistance level.
There are 10 Exercise/Rest cycles for each workout time.
When workout completes, the buzzer sounds with a long beep. If rowing continues, the
time count-down repeats.
10/20 Interval
To choose 10/20 INTERVAL workout mode (Fig. 6-1)
The image at the center of LCD: 10 seconds (Exercise)/20 seconds (Rest)
Pressing Start/Stop button starts the workout mode.
The image at the center of LCD shows time count-down of current workout and wave (Fig.
6-2) or rest time count-down and mark (Fig. 6-3).
Under the workout mode, pressing UP or DOWN key button adjusts the resistance level.
There are 10 Exercise/Rest cycles for each workout time.
When workout completes, the buzzer sounds with a long beep. If rowing continues, the time
count-down repeats.
Fig 5-1 Fig 5-2 Fig 5-3
Fig 6-1 Fig 6-2 Fig 6-3

ERG700 Rower
15
Custom Interval
To choose CUSTOM INTERVAL workout mode (Fig. 7-1)
User-dene time (Exercise)/time (Rest): the default is 10 seconds (Exercise)/10 seconds
(Rest)
The value at left side of the matrix window ashes for setting the exercise time. Use UP/
DOWN buttons to adjust and set the workout time. The default time is 10 seconds with
1-second increment of up or down. Press Start/Stop button to conrm the setting and start
the workout mode.
The value at right side of the matrix window ashes for setting the rest time. Use UP/DOWN
buttons to adjust and set the workout time. The default time is 10 seconds with 1-second
increment of up or down. Press Start/Stop button to conrm the setting and start the workout
mode.
The image at the center of LCD: 10 seconds (Exercise)/10 seconds (Rest)
Pressing Start/Stop button starts the workout mode.
The image at the center of LCD shows time count-down of current workout and wave (Fig.
7-2) or rest time count-down and mark (Fig. 7-3).
Under the workout mode, pressing UP or DOWN key button adjusts the resistance level.
There are 10 Exercise/Rest cycles for each workout time.
When workout completes, the buzzer sounds with a long beep. If rowing continues, the time
count-down repeats.
Fig 7-1 Fig 7-2 Fig 7-3

16
ERG700 Rower
Fat Burn
To choose Fat Burn workout mode (Fig. 8-1)
Pressing Start/Stop button and begins the workout mode or setting the workout time. Use
UP/DOWN buttons to adjust the time. The increment of adjustment is 5-minute (99:00
maximum). Press Start/Stop button to start the workout mode.
The image at the center of LCD shows the fat burn prole (Fig. 8-2)
Under the workout mode, pressing UP or DOWN key button adjusts the resistance level.
Time window starts count-down from the setting time and shows the remaining workout time.
When time is counted down to 0:00, the workout completes and the buzzer sounds with a
long beep. If rowing continues, the time count-down repeats.
Cardio Workout
To choose cardio workout mode (Fig. 9-1)
Pressing Start/Stop button and begins the workout mode or setting the workout time. Use
UP/DOWN buttons to adjust the time. The increment of adjustment is 5-minute (99:00
maximum). Press Start/Stop button to start the workout mode.
The image at the center of LCD shows the cardio prole (Fig. 9-2)
Under the workout mode, pressing UP or DOWN key button adjusts the resistance level.
Time window starts count-down from the setting time and shows the remaining workout time.
When time is counted down to 0:00, the workout completes and the buzzer sounds with a
long beep. If rowing continues, the time count-down repeats.
Fig 8-1 Fig 8-2
Fig 9-1 Fig 9-2

ERG700 Rower
17
Strength Workout
To choose Strength workout mode (Fig. 10-1)
Pressing Start/Stop button and begins the workout mode or setting the workout time. Use
UP/DOWN buttons to adjust the time. The increment of adjustment is 5-minute (99:00
maximum). Press Start/Stop button to start the workout mode.
The image at the center of LCD shows the strength prole (Fig. 10-2)
Time window starts count-down from the setting time and shows the remaining workout time.
When time is counted down to 0:00, the workout completes and the buzzer sounds with a
long beep. If rowing continues, the time count-down repeats.
Fig 10-1 Fig 10-2
Game Workout
To choose GAME workout mode (Fig. 11-1)
Pressing Start/Stop button and begins the GAME workout mode (11-2). Game mode is a bit
different from the other workout modes because it is an actual game!
Three dots at left side represents the user position and the image shift one prole left per
second and continue to scroll.
The position of the user will not shift. However, the faster the user rows, the higher the user’s
position. When there is no input, the position of the user goes down to the lowest. The height
of the user’s position is equivalent to the speed the user strokes.
Avoid obstacles by rowing faster and slower to move the user block up and down.
The time for the game workout starts counting down from 5 minutes and ends when time is
up.
Fig 11-1 Fig 11-2
Table of contents
Other Xterra Fitness Equipment manuals

Xterra
Xterra 1640250 User manual

Xterra
Xterra 16414870 User manual

Xterra
Xterra ERG500 ROWER User manual

Xterra
Xterra EGR200 ROWER User manual

Xterra
Xterra ERG600W User manual

Xterra
Xterra 16804836000 User manual

Xterra
Xterra FB350 User manual

Xterra
Xterra FS5.8e User manual

Xterra
Xterra FS380 ELLIPTICAL User manual

Xterra
Xterra 16468201US User manual

Xterra
Xterra 16804936500US User manual

Xterra
Xterra MBX1500 User manual

Xterra
Xterra ERG600W User manual

Xterra
Xterra ERG600W User manual

Xterra
Xterra Elliptical XE 78 User manual

Xterra
Xterra FS380 ELLIPTICAL User manual

Xterra
Xterra ERG400 User manual

Xterra
Xterra ERG160 User manual

Xterra
Xterra FSX3500 User manual