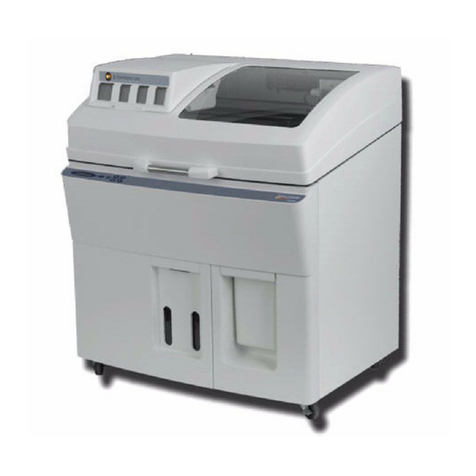
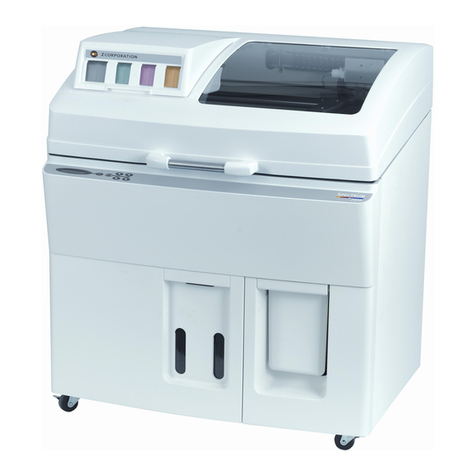
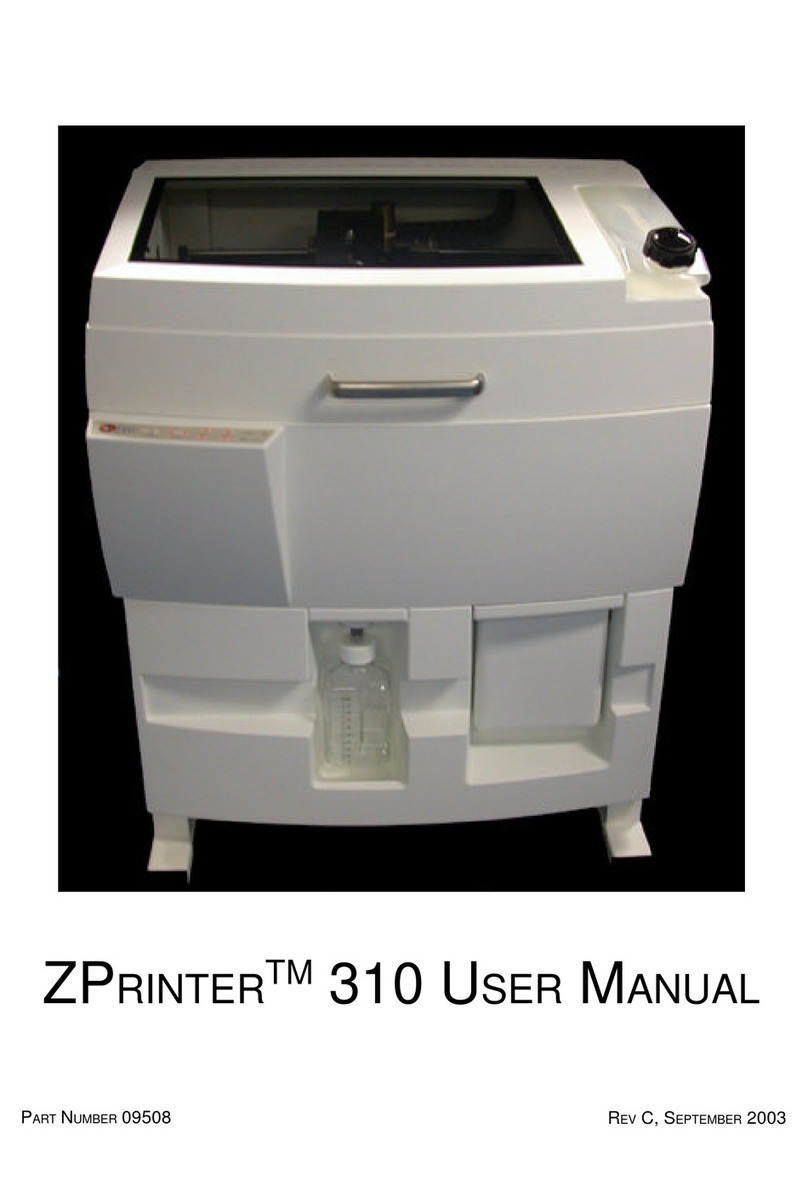
Zcorporation ZPRINTER 310 PLUS User manual

©2002 - 2009 Z Corporation All Rights Reserved
2/11/09
ZPRINTER®310 PLUS
HARDWARE MANUAL
Part Number 09548
Rev D, December 2008

ZPrinter®310 Plus Hardware Manual
zcentral.zcorp.com i All Rights Reserved
2/11/09
Notices
Copyright and Trademarks
Copyright © Z Corporation 1995-2009. All rights reserved. The information in this document may not be
duplicated or transmitted in any way without the express written consent of Z Corporation. The information
contained herein is for the use of Z Corporation customers, who are permitted to create brief excerpts for
the purposes of training and review. This information may not be incorporated in any commercial pro-
grams, books, databases, or in any kind of software without the consent of Z Corporation.
Z, Z Corporation, zp, zb, ZMap, ZPhoto, Z-Cure, Z Prints, ZPrinter, ZCast, ZScanner, ZScan and the Z
Corp. logo and design are pending/registered trademarks of Z Corporation.
ZPrint® 7.8 System Software Copyright (c) 1996-2008 Z Corporation.This software is based in part on the
work of the Independent JPEG Group.
PNG library libpng version 1.2.2 Copyright (c) 1998-2002 Glenn Randers-Pehrson, (Version 0.96 Copy-
right (c) 1996, 1997 Andreas Dilger), (Version 0.88 Copyright (c) 1995, 1996 Guy Eric Schalnat, Group 42,
Inc.)
ZLIB general purpose compression library version 1.1.4, Copyright (C) 1995-2002 Jean-loup Gailly and
Mark Adler.
Microsoft Windows is a trademark of Microsoft Corporation.
Z Corporation acknowledges the trademarks of other organizations for their respective products or ser-
vices mentioned in this documentation.
Proprietary Information
Information contained in this document is the confidential property of Z Corporation. Recipient shall not dis-
close such Information to any third party, and shall not use it for any purpose whatsoever other than what is
required to install and use the ZPrinter® 310.
Use of Equipment
Z Corporation's Equipment, and use of the Equipment, may be subject to limitations imposed under
patents licensed to or owned by Z Corp., and is to be used solely for the fabrication of appearance models
and prototypes using new Z Corporation-supplied consumable from Z Corporation or its authorized
distributors in the original packaging. Other uses may be restricted; contact Z Corporation for further
information. Consult the User's Manual before operation of any Z Corporation Equipment. The Equipment
may be covered by the following U.S. Patents and/or U.S. Patent Applications:
5,204,055 5,340,656 5,387,380 6,007,318 6,375,874 5,902,441
6,416,850 6,610,429 6,403,002 5,660,621 5,851,465 6,397,922
6,036,777 6,989,115 7,037,382 7,291,002 7,387,359 7,087,109
7,332,537 11/335,282 11/860,087 60/558,940 12/118,899 11/000,100
11/606,960 60/808,721 11/807,325 11/807,329 11/807,175 11/807,237
09/706,350 09/835,292 11/453,695 60/472,221 60/499,220 11/732,490
60/879,703 11/952,727 12/035,743.
The Equipment is designed to be used by design engineers and other professionals in the production of
early-stage 3D appearance models and prototypes. The Equipment is not to be used to produce, either
directly or indirectly, medical or other products that may require precise dimensions or tolerances to ensure
the safe and effective operation of such products. You agree to indemnify, defend and hold Z Corporation
and its officers, directors and employees harmless from and against any and all claims, losses, damages,
ZPrinter®310 Plus Hardware Manual
zcentral.zcorp.com ii All Rights Reserved
2/11/09
costs and expenses resulting from any use of the Equipment other than for the production of early-stage
appearance models and prototypes.
Warranty
Your ZPrinter® is guaranteed to be free of defects in materials and workmanship, when used for produc-
tion of early-stage appearance models and prototypes and with Z Corporation consumables, for the period
described below under WARRANTY PERIOD. All consumables and materials are guaranteed to perform
as described in their specifications when stored and used as directed, up to the expiry date printed on the
label. THE COMPANY MAKES NO WARRANTIES, EXPRESS OR IMPLIED, AND DISCLAIMS ALL WAR-
RANTIES INCLUDING, BUT NOT LIMITED TO, IMPLIED WARRANTIES OF MERCHANTABILITY AND
FITNESS FOR A PARTICULAR PURPOSE AND ANY OTHER OBLIGATIONS OR LIABILITIES
WHETHER IN CONTRACT, WARRANTY, NEGLIGENCE OR OTHERWISE. THE COMPANY IS NOT LIA-
BLE FOR ANY DIRECT, INDIRECT, SPECIAL, PUNITIVE, CONSEQUENTIAL OR INCIDENTAL DAM-
AGES INCLUDING, WITHOUT LIMITATION, DAMAGES FOR LOSS OF BUSINESS PROFITS OR
BUSINESS INTERRUPTION ARISING OUT OF THE USE OR INABILITY TO USE PRODUCTS OR SER-
VICES SOLD HEREUNDER. IN NO EVENT WILL THE COMPANY'S LIABILITY EXCEED THE TOTAL
CHARGE OF THIS ZPRINTER® 310.
WARRANTY PERIOD: In the U.S., warranty is for 90 days and covers service, parts and training material.
In the EU, warranty is for 1 year and covers service, parts and training material.
Symbols
The following symbols are used on the ZPrinter 310 and in this manual.
Change History
Rev. D 1/27/2009
General Caution: User should use care to avoid
possible damage to equipment.
Hot Surface: User should use care when working
near or on the labelled item.
High Voltage: User should use appropriate electri-
cal safety precautions.

ZPrinter®310 Plus Hardware Manual
zcentral.zcorp.com i All Rights Reserved
2/11/09
ZPrinter 310 Plus Hardware Manual
Table of Contents
1 Overview . . . . . . . . . . . . . . . . . . . . . . . . . . . . . . . . . . . . . . . . . . . . . . . . . . . . . . . . . . . . 1
1.1 How the ZPrinter 310 Plus Works . . . . . . . . . . . . . . . . . . . . . . . . . . . . . . . . . . . . . 1
1.2 System Components . . . . . . . . . . . . . . . . . . . . . . . . . . . . . . . . . . . . . . . . . . . . . . . 4
1.3 ZPrinter 310 Plus Subcomponents. . . . . . . . . . . . . . . . . . . . . . . . . . . . . . . . . . . . . 4
1.4 Gantry (Top View) . . . . . . . . . . . . . . . . . . . . . . . . . . . . . . . . . . . . . . . . . . . . . . . . . 6
1.5 Control Panel . . . . . . . . . . . . . . . . . . . . . . . . . . . . . . . . . . . . . . . . . . . . . . . . . . . . . 7
2 Quick Start Guide. . . . . . . . . . . . . . . . . . . . . . . . . . . . . . . . . . . . . . . . . . . . . . . . . . . . . 9
2.1 Printer Preparation . . . . . . . . . . . . . . . . . . . . . . . . . . . . . . . . . . . . . . . . . . . . . . . . . 9
2.2 Print A Part. . . . . . . . . . . . . . . . . . . . . . . . . . . . . . . . . . . . . . . . . . . . . . . . . . . . . . . 11
2.3 Post-Processing . . . . . . . . . . . . . . . . . . . . . . . . . . . . . . . . . . . . . . . . . . . . . . . . . . . 12
2.4 Useful Tips . . . . . . . . . . . . . . . . . . . . . . . . . . . . . . . . . . . . . . . . . . . . . . . . . . . . . . . 13
2.4.1 Part Setup, Orientation and Print Settings . . . . . . . . . . . . . . . . . . . . . . . . . . . 13
2.4.2 Gross and Fine Depowdering. . . . . . . . . . . . . . . . . . . . . . . . . . . . . . . . . . . . . 13
2.4.3 Use of the Removable Build Plate . . . . . . . . . . . . . . . . . . . . . . . . . . . . . . . . . 14
2.4.4 Oven Dry the Part. . . . . . . . . . . . . . . . . . . . . . . . . . . . . . . . . . . . . . . . . . . . . . 14
2.4.5 Part Infiltration . . . . . . . . . . . . . . . . . . . . . . . . . . . . . . . . . . . . . . . . . . . . . . . . 14
3 EZ Print Mode . . . . . . . . . . . . . . . . . . . . . . . . . . . . . . . . . . . . . . . . . . . . . . . . . . . . . . . . 16
4 Prepare the 3D Printer . . . . . . . . . . . . . . . . . . . . . . . . . . . . . . . . . . . . . . . . . . . . . . . . . 21
4.1 Start the Printer . . . . . . . . . . . . . . . . . . . . . . . . . . . . . . . . . . . . . . . . . . . . . . . . . . . 21
4.2 Prepare the Build . . . . . . . . . . . . . . . . . . . . . . . . . . . . . . . . . . . . . . . . . . . . . . . . . . 21
4.2.1 Fill the Feed Box With Powder . . . . . . . . . . . . . . . . . . . . . . . . . . . . . . . . . . . . 21
4.2.2 Remove Air from the Powder and Pack the Feed Box. . . . . . . . . . . . . . . . . . 23
4.2.3 Prepare the Build Area. . . . . . . . . . . . . . . . . . . . . . . . . . . . . . . . . . . . . . . . . . 23
4.2.4 Insert the Removable Build Plate . . . . . . . . . . . . . . . . . . . . . . . . . . . . . . . . . . 23
4.2.5 Clean Up. . . . . . . . . . . . . . . . . . . . . . . . . . . . . . . . . . . . . . . . . . . . . . . . . . . . . 25
4.2.6 Clean the Service Station. . . . . . . . . . . . . . . . . . . . . . . . . . . . . . . . . . . . . . . . 25
4.2.7 Refill the Binder Bottle . . . . . . . . . . . . . . . . . . . . . . . . . . . . . . . . . . . . . . . . . . 27
4.2.8 Change the Print Head. . . . . . . . . . . . . . . . . . . . . . . . . . . . . . . . . . . . . . . . . . 28
4.2.9 Empty the Waste Bottle . . . . . . . . . . . . . . . . . . . . . . . . . . . . . . . . . . . . . . . . . 28
4.2.10 Place the Printer Online . . . . . . . . . . . . . . . . . . . . . . . . . . . . . . . . . . . . . . . . 28
5 Setup The Build In ZPrint® . . . . . . . . . . . . . . . . . . . . . . . . . . . . . . . . . . . . . . . . . . . . . 29
5.1 Open or Import a File . . . . . . . . . . . . . . . . . . . . . . . . . . . . . . . . . . . . . . . . . . . . . . . 29
5.2 Part Orientation . . . . . . . . . . . . . . . . . . . . . . . . . . . . . . . . . . . . . . . . . . . . . . . . . . . 29
5.2.1 Parts Containing an Opening or Hollow Area. . . . . . . . . . . . . . . . . . . . . . . . . 29
5.2.2 Parts Containing Overhangs . . . . . . . . . . . . . . . . . . . . . . . . . . . . . . . . . . . . . 30
5.3 Check The Build Settings . . . . . . . . . . . . . . . . . . . . . . . . . . . . . . . . . . . . . . . . . . . . 30
5.3.1 Print the Build. . . . . . . . . . . . . . . . . . . . . . . . . . . . . . . . . . . . . . . . . . . . . . . . . 31
6 Post-Processing. . . . . . . . . . . . . . . . . . . . . . . . . . . . . . . . . . . . . . . . . . . . . . . . . . . . . . 33
6.1 Depowder the Part . . . . . . . . . . . . . . . . . . . . . . . . . . . . . . . . . . . . . . . . . . . . . . . . . 35
6.2 Using the External Vacuum Bag Liner . . . . . . . . . . . . . . . . . . . . . . . . . . . . . . . . . . 36
6.3 Dry the Part . . . . . . . . . . . . . . . . . . . . . . . . . . . . . . . . . . . . . . . . . . . . . . . . . . . . . . 39
6.4 Post-Processing Tools . . . . . . . . . . . . . . . . . . . . . . . . . . . . . . . . . . . . . . . . . . . . . . 39

ZPrinter®310 Plus Hardware Manual
zcentral.zcorp.com ii All Rights Reserved
2/11/09
6.5 Infiltrate the Part. . . . . . . . . . . . . . . . . . . . . . . . . . . . . . . . . . . . . . . . . . . . . . . . . . . 41
6.6 Using Z-Max™ Epoxy. . . . . . . . . . . . . . . . . . . . . . . . . . . . . . . . . . . . . . . . . . . . . . . 41
6.6.1 Safety Precautions . . . . . . . . . . . . . . . . . . . . . . . . . . . . . . . . . . . . . . . . . . . . . 41
6.6.2 Mixing Instructions . . . . . . . . . . . . . . . . . . . . . . . . . . . . . . . . . . . . . . . . . . . . . 42
6.6.3 General Application . . . . . . . . . . . . . . . . . . . . . . . . . . . . . . . . . . . . . . . . . . . . 42
6.6.4 Spraying Instructions . . . . . . . . . . . . . . . . . . . . . . . . . . . . . . . . . . . . . . . . . . . 42
6.6.5 Curing Information . . . . . . . . . . . . . . . . . . . . . . . . . . . . . . . . . . . . . . . . . . . . . 43
6.6.6 Painting Parts. . . . . . . . . . . . . . . . . . . . . . . . . . . . . . . . . . . . . . . . . . . . . . . . . 44
6.7 Using Z-Bond™ Cyanoacrylate . . . . . . . . . . . . . . . . . . . . . . . . . . . . . . . . . . . . . . . 44
6.7.1 Safety Precautions . . . . . . . . . . . . . . . . . . . . . . . . . . . . . . . . . . . . . . . . . . . . . 44
6.7.2 General Application . . . . . . . . . . . . . . . . . . . . . . . . . . . . . . . . . . . . . . . . . . . . 44
6.7.3 Curing Information . . . . . . . . . . . . . . . . . . . . . . . . . . . . . . . . . . . . . . . . . . . . . 45
6.7.4 Tips. . . . . . . . . . . . . . . . . . . . . . . . . . . . . . . . . . . . . . . . . . . . . . . . . . . . . . . . . 45
6.8 Using Paraplast® X-TRA Wax . . . . . . . . . . . . . . . . . . . . . . . . . . . . . . . . . . . . . . . . 45
6.8.1 Safety Precautions . . . . . . . . . . . . . . . . . . . . . . . . . . . . . . . . . . . . . . . . . . . . . 45
6.8.2 General Application . . . . . . . . . . . . . . . . . . . . . . . . . . . . . . . . . . . . . . . . . . . . 45
6.8.3 Curing Information . . . . . . . . . . . . . . . . . . . . . . . . . . . . . . . . . . . . . . . . . . . . . 46
7 Material Systems . . . . . . . . . . . . . . . . . . . . . . . . . . . . . . . . . . . . . . . . . . . . . . . . . . . . . 47
7.1 Material Storage Precautions . . . . . . . . . . . . . . . . . . . . . . . . . . . . . . . . . . . . . . . . . 47
7.2 Using ZCast Powder. . . . . . . . . . . . . . . . . . . . . . . . . . . . . . . . . . . . . . . . . . . . . . . . 47
7.2.1 General Information . . . . . . . . . . . . . . . . . . . . . . . . . . . . . . . . . . . . . . . . . . . . 47
7.3 Using ZCast With Your ZPrinter 310 Plus . . . . . . . . . . . . . . . . . . . . . . . . . . . . . . . 48
7.3.1 Temporarily Remove the Scraper Blade When Using ZCast . . . . . . . . . . . . . 48
7.3.2 Load ZCast Powder . . . . . . . . . . . . . . . . . . . . . . . . . . . . . . . . . . . . . . . . . . . . 53
7.3.3 Spread Over The Build Bed and Print . . . . . . . . . . . . . . . . . . . . . . . . . . . . . . 53
7.3.4 Set Up ZCast Builds . . . . . . . . . . . . . . . . . . . . . . . . . . . . . . . . . . . . . . . . . . . . 53
7.3.5 Post-Processing . . . . . . . . . . . . . . . . . . . . . . . . . . . . . . . . . . . . . . . . . . . . . . . 53
7.3.6 Recycling . . . . . . . . . . . . . . . . . . . . . . . . . . . . . . . . . . . . . . . . . . . . . . . . . . . . 54
7.3.7 Storage. . . . . . . . . . . . . . . . . . . . . . . . . . . . . . . . . . . . . . . . . . . . . . . . . . . . . . 54
7.3.8 Disposal . . . . . . . . . . . . . . . . . . . . . . . . . . . . . . . . . . . . . . . . . . . . . . . . . . . . . 54
7.3.9 Questions and Support. . . . . . . . . . . . . . . . . . . . . . . . . . . . . . . . . . . . . . . . . . 54
8 Maintenance and the Service Menu . . . . . . . . . . . . . . . . . . . . . . . . . . . . . . . . . . . . . . 55
8.1 Unpark . . . . . . . . . . . . . . . . . . . . . . . . . . . . . . . . . . . . . . . . . . . . . . . . . . . . . . . . . . 55
8.2 Change Print Head. . . . . . . . . . . . . . . . . . . . . . . . . . . . . . . . . . . . . . . . . . . . . . . . . 55
8.3 Purge Print Heads . . . . . . . . . . . . . . . . . . . . . . . . . . . . . . . . . . . . . . . . . . . . . . . . . 57
8.4 Check Powder Level. . . . . . . . . . . . . . . . . . . . . . . . . . . . . . . . . . . . . . . . . . . . . . . . 57
8.5 Drop Feed Piston . . . . . . . . . . . . . . . . . . . . . . . . . . . . . . . . . . . . . . . . . . . . . . . . . . 57
8.6 Fill Bed . . . . . . . . . . . . . . . . . . . . . . . . . . . . . . . . . . . . . . . . . . . . . . . . . . . . . . . . . . 57
8.7 Preheat Printer . . . . . . . . . . . . . . . . . . . . . . . . . . . . . . . . . . . . . . . . . . . . . . . . . . . . 58
8.8 Maintenance. . . . . . . . . . . . . . . . . . . . . . . . . . . . . . . . . . . . . . . . . . . . . . . . . . . . . . 58
8.8.1 Clean The Pogo Pins . . . . . . . . . . . . . . . . . . . . . . . . . . . . . . . . . . . . . . . . . . . 58
8.8.2 When To Oil/Not Oil 310 Fast Axis Assemblies . . . . . . . . . . . . . . . . . . . . . . . 59
8.8.3 Fast Axis Rails and Bearings Lubrication. . . . . . . . . . . . . . . . . . . . . . . . . . . . 60
8.8.4 Refill the Wash Fluid Reservoir . . . . . . . . . . . . . . . . . . . . . . . . . . . . . . . . . . . 62
8.8.5 Slow Axis Lubrication . . . . . . . . . . . . . . . . . . . . . . . . . . . . . . . . . . . . . . . . . . . 63
8.8.6 Piston Screws Lubrication . . . . . . . . . . . . . . . . . . . . . . . . . . . . . . . . . . . . . . . 64
8.8.7 Change the Binder Tank. . . . . . . . . . . . . . . . . . . . . . . . . . . . . . . . . . . . . . . . . 65
8.8.8 Change the Binder Color . . . . . . . . . . . . . . . . . . . . . . . . . . . . . . . . . . . . . . . . 66
8.8.9 Bleed Air from the Binder Line . . . . . . . . . . . . . . . . . . . . . . . . . . . . . . . . . . . . 67
8.9 Service Print Head . . . . . . . . . . . . . . . . . . . . . . . . . . . . . . . . . . . . . . . . . . . . . . . . . 68
8.10 Stripe Test . . . . . . . . . . . . . . . . . . . . . . . . . . . . . . . . . . . . . . . . . . . . . . . . . . . . . . 68
8.11 Toggle Roller On/Off. . . . . . . . . . . . . . . . . . . . . . . . . . . . . . . . . . . . . . . . . . . . . . . 68

ZPrinter®310 Plus Hardware Manual
zcentral.zcorp.com iii All Rights Reserved
2/11/09
8.12 Check Status . . . . . . . . . . . . . . . . . . . . . . . . . . . . . . . . . . . . . . . . . . . . . . . . . . . . 68
8.13 Print Head Report. . . . . . . . . . . . . . . . . . . . . . . . . . . . . . . . . . . . . . . . . . . . . . . . . 68
8.14 View Printer Log . . . . . . . . . . . . . . . . . . . . . . . . . . . . . . . . . . . . . . . . . . . . . . . . . . 68
8.15 Upload New Firmware . . . . . . . . . . . . . . . . . . . . . . . . . . . . . . . . . . . . . . . . . . . . . 69
8.16 Upload New Printer Configuration . . . . . . . . . . . . . . . . . . . . . . . . . . . . . . . . . . . . 69
8.17 Edit .INI File, Send File and Receive File. . . . . . . . . . . . . . . . . . . . . . . . . . . . . . . 69
8.18 Machine Status . . . . . . . . . . . . . . . . . . . . . . . . . . . . . . . . . . . . . . . . . . . . . . . . . . 69
9 System Details . . . . . . . . . . . . . . . . . . . . . . . . . . . . . . . . . . . . . . . . . . . . . . . . . . . . . . . 70
9.1 Symbols Used . . . . . . . . . . . . . . . . . . . . . . . . . . . . . . . . . . . . . . . . . . . . . . . . . . . . 70
9.2 System Specifications . . . . . . . . . . . . . . . . . . . . . . . . . . . . . . . . . . . . . . . . . . . . . . 70

ZPrinter®310 Plus Hardware Manual Overview
zcentral.zcorp.com 1 All Rights Reserved
2/11/09
1 Overview
Welcome to the exciting world of 3D Printing!
This manual will instruct you on how to take care of your printer and give you an introduction to 3D Printing.
In addition, you can find information about 3D printing and its many applications and techniques on our
3DP User Web site at zcentral.zcorp.com.
This Web site is tailored to both beginner and advanced customers. We recommend that you register
immediately to receive free, unlimited access to this excellent resource.
1.1 How the ZPrinter 310 Plus Works
Z Corporation 3D Printer processes are based on the Massachusetts Institute of Technology’s patented
3DP™ (Three-Dimensional Printing) technology.
The proprietary ZPrint Software first converts a three-dimensional design file (built using 3D CAD) into
cross-sections or slices that are between 0.0035" – .008" (0.0889 - 0.2032 mm) thick. The printer then
prints these cross-sections, one after another, from the bottom of the design to the top.
Inside the ZPrinter 310 Plus there are two pistons. In the diagram below the feed piston is on the left and is
shown in the ‘down’ position filled with powder. The build piston is the piston on the right, shown below in
the ‘up’ position. Also represented in the diagrams is the roller (drawn as a circle) and the print assembly
(drawn as a square). On the printer, the roller and the print assembly are mounted together on the gantry
which moves horizontally across the build area.
To begin the 3D printing process, the printer first spreads a layer of zp®series powder in the same thick-
ness as the cross section to be printed. The print head then applies a binder solution to the powder, caus-
ing the powder particles to bind to one another and to the printed cross-section one level below.
To print the next layer, the feed piston moves up and the build piston moves down, each by the thickness of
one layer. The roller then spreads the powder from the feed piston over onto the build piston, and the print
assembly prints the pattern of the next layer using binder.
The printer keeps repeating this same process over and over until a 3-dimensional part is created in the
powder.

ZPrinter®310 Plus Hardware Manual Overview
zcentral.zcorp.com 2 All Rights Reserved
2/11/09
During printing, binder is first applied with a higher saturation to the edges of the part, creating a strong
“shell” for the part exterior. Next, an infrastructure that works like strong scaffolding is created for the part
walls, which are also built with a higher saturation of binder for added strength. The remaining interior
areas are printed with a lower binder saturation, which gives the part its stability.
After printing, the part is removed from the powder, depowdered, and dried. The part can then be infiltrated
with wax, or other performance resins, to increase strength and durability. For more information regarding
infiltrants, see “Post-Processing” on page 33.

ZPrinter®310 Plus Hardware Manual Overview
zcentral.zcorp.com 3 All Rights Reserved
2/11/09
There are several important characteristics of the printer that will help you print the best parts for your
intended purpose.
Part Placement. ZPrint will place the parts within the build box to maximize build speed, the most impor-
tant criteria for the majority of our users. The software positions the parts with the smallest dimension in the
Z (vertical) Axis. In addition to part placement, however, the following other characteristics should be con-
sidered.
Strength. This discussion only applies to untreated parts; once parts are infiltrated, they uniformly take on
the strength characteristics of the infiltrating material. The ultimate strength of the part will be affected by
its orientation within the build envelope. The part will be strongest along the Y-Axis and the X-Axis and less
strong along the Z-Axis. This is because the cross sections are printed in continuous strips along the Y-
Axis (the binder cartridge direction of travel), prints in bands across the X-Axis (the gantry direction of
travel) and prints in laminated layers along the Z-Axis.
Accuracy. The accuracy of the part depends on the materials you choose. You can use features in ZPrint
like Anisotropic Scaling to adjust for expected shrinkage and bring your parts into true scale. Fore informa-
tion see “Prepare the 3D Printer” on page 21.

ZPrinter®310 Plus Hardware Manual Overview
zcentral.zcorp.com 4 All Rights Reserved
2/11/09
1.2 System Components
ZPrinter 310 Plus ZD5 Powder Recycling Station
1.3 ZPrinter 310 Plus Subcomponents
Top Cover
Binder Bottle (on top
of the Top Cover)
Service Station
Gantry
Build Piston
Feed Piston
Control Panel
Waste Bottle Overflow Bin

ZPrinter®310 Plus Hardware Manual Overview
zcentral.zcorp.com 7 All Rights Reserved
2/11/09
Heater
1.5 Control Panel
ZPrinter 310 Control Panel Detail
Online/Offline.
Enables and
disables printer
communication.
Spread. This button allows you to
move the gantry from left to right
and allows you to spread powder
over the build box. Holding down
this button will result in continuous
spreading of powder.
Feed Up/Feed Down. Allows
the user to raise or lower the
piston in the feed box. A light
tap raises or lowers a small
distance; holding down causes
continuous motion.
Build Up/Build Down.
Allows the user to raise or
lower the build box. A light
tap raises or lowers a small
distance; holding down
causes continuous motion.

ZPrinter®310 Plus Hardware Manual Quick Start Guide
zcentral.zcorp.com 9 All Rights Reserved
2/11/09
2Quick Start Guide
This chapter provides an overview of the setup, part removal, and post-processing steps required to com-
plete a print. For a detailed step-by-step guide to printer setup, please refer to the following sections:
•“Prepare the 3D Printer” on page 21
•“Setup The Build In ZPrint®” on page 29
•“Post-Processing” on page 33.
For additional information on post-processing techniques visit the Z Corp. 3DP User Web site at
zcentral.zcorp.com.
2.1 Printer Preparation
1. Fill the feed box with powder. Recycle any
powder in the overflow bin or add fresh pow-
der as needed. (See Section 4.2.)
2. Spread powder over the build area and use
the tamper to gently compress the powder.
(See Section 4.2.2.) Vacuum any excess
powder from the top deck.
3. Clean and wipe the squeegees and parking
cap on the Service Station with distilled water.
(See Section 4.2.6.)

ZPrinter®310 Plus Hardware Manual Quick Start Guide
zcentral.zcorp.com 10 All Rights Reserved
2/11/09
4. Clean the squeegee scraper with a damp
paper towel. (See Section 4.2.6 - Steps 9 and
10.)
5. Check the binder level and fill if necessary.
Fill the binder fluid to the neck of the binder
bottle. (See Section 4.2.7.)
6. Check the waste bottle. Remove and dispose
of liquid in accordance with local disposal
regulations. (See Section 4.2.9.)
7. Place the printer Online.

ZPrinter®310 Plus Hardware Manual Quick Start Guide
zcentral.zcorp.com 11 All Rights Reserved
2/11/09
2.2 Print A Part
1. Launch the ZPrint Software. Open or import
the file for the build. (See Section 5.1.)
2. Select File >3D Print Setup or click the 3D
Print Setup icon on the ZPrint Toolbar.
3. In the 3D Print Setup dialog, click Select
Printer to check that the software is commu-
nicating with the printer. Confirm whether the
printer is connected through either a Serial
Port or Network connection. The printer will
show up as an option in the text field if the
software is properly communicating with the
printer.
4. Check your powder settings to ensure the
selected Powder Type is the powder you are
currently using in the printer.
5. Click the 2D icon on the Toolbar to view the
build in 2D View and examine the cross-sec-
tions of the part before printing.
IMPORTANT: Before starting the build, run Colli-
sion Detection, (found on the ZPrint View
menu), when the build contains multiple parts, or
when you are printing a part with a Fixture.

ZPrinter®310 Plus Hardware Manual Quick Start Guide
zcentral.zcorp.com 12 All Rights Reserved
2/11/09
2.3 Post-Processing
6. Select File > 3D Print, or click the 3D icon on
the Toolbar, to initiate the build. The printer
will display the Printing dialog where the sta-
tus of the build is reported for the duration of
the print. Click OK to start the build.
1. Get a tray for transporting the part and
place it beside the build box. Use the
tools that ship with your printer to
remove excess powder from the part.
Gently remove the part from the build
box.
2. Place the part in the depowdering sta-
tion and turn the compressor on. Test
the air pressure from the air wand
against your hand and adjust as nec-
essary. Use low pressure for fine, deli-
cate part features so they do not break
when air is applied.

ZPrinter®310 Plus Hardware Manual Quick Start Guide
zcentral.zcorp.com 13 All Rights Reserved
2/11/09
2.4 Useful Tips
2.4.1 Part Setup, Orientation and Print Settings
• Do not tightly pack parts into the build. Keep in mind that you will need to depowder and remove
them from the build box. Allow a little room around the part so you can vacuum the powder away
and get your fingers around or under the part.
• Orient parts so delicate features are supported in the Z-Axis. If a delicate feature is only supported
by unprinted powder the chances of breaking that small feature during depowdering is greatly
increased.
• When building delicate parts always use a Fixture (see theZPrint Software Manual). Raise the part
0.25" (6.4 mm) from the bottom of the build and generate a Fixture under the part. With a Fixture,
the part can easily be handled, or transported to an oven or a depowder station.
• Do not enable the Bleed Compensation if you are building a part with features under 0.050" (1.27
mm). Go to zcentral.zcorp.com, or see the ZPrint Software Manual for additional information
regarding this important feature.
• Parts printed with the High Performance Composite powders can be reliability printed to be within
+/- 1.0% or +/- 0.005” dimensional tolerance.
• To increase the strength of thin parts, you can decrease the layer thickness to 0.0035" (0.089 mm)
if you are using one of the High Performance Composite materials. As you increase the strength of
the part in this manner you are also increasing the amount of time to dry the part. Use of the
removable build plate (see Section 2.4.3) and oven drying the part are recommended. Remove the
part from the removable build plate before placing in the oven.
2.4.2 Gross and Fine Depowdering
• Use ZPrint to check where printed parts are located and oriented in the build box so you do not
accidentally bump or brush against a fragile part when removing parts from the printer.
• When removing powder from around the part, do not plunge the vacuum nozzle into the powder
bed. Begin at the outer perimeter of the build box, slowly work your way into the build. Hold the tip
3. After the part is depowdered, you can
allow it dry longer or you can infiltrate
the part with the material of your
choice. See Post-Processing for com-
plete information regarding different
options for infiltration.

ZPrinter®310 Plus Hardware Manual Quick Start Guide
zcentral.zcorp.com 14 All Rights Reserved
2/11/09
of vacuum nozzle approximately 0.25" (6.4 mm) to .375" (9.5 mm) away from the powder and
allow the vacuum to pull the powder up. Slanting the vacuum nozzle will enable you to control the
suction. This will decrease the chance of breaking a part during removal.
• When fine depowdering, always start with low air pressure to minimize the chance of breaking fine
details on the part. When the top and sides of the part are completely depowdered, tilt the part
onto one of its sides. Handle the part carefully as it may be fragile and brittle before infiltration. If
none of the sides of the part can support the weight of the part, you can apply a small amount of
resin or epoxy to those areas to strengthen it. When doing this, be careful not to let any of the infil-
trant come into contact with any powder that may still be on the part. Let the infiltrant dry before
continuing to depowder process.
2.4.3 Use of the Removable Build Plate
The removable build plate is an excellent tool. It allows you to quickly remove the part from the build
bed, clean up the printer, and start printing again. The removable build plate also helps the user easily
transport the part to an oven or a depowdering station without ever having to handle the part.
2.4.4 Oven Dry the Part
Although a part printed with one of the High Performance Composite materials can be handled when it
is not completely dried, the part reaches full strength when it is completely dried. Placing the part in an
oven at temperatures less than 200oF (93oC) for 2-4 hours will greatly increase the strength of the
part. This is only recommended for parts printed with the High Performance Composite materials.
Remove the part from the removable build plate before placing it in an oven.
2.4.5 Part Infiltration
Go to our ZCentral Web site at zcentral.zcorp.com for complete information on materials and applica-
tions.
When using Z-Bond™:
• Always infiltrate the most delicate features of the part first. Z-Bond immediately strengthens the
part areas it is applied to. Let the detailed areas cure for a couple of minutes and then continue
applying Z-Bond to the remainder of the part. Do not apply Z-Bond to the same area twice.
• Try to avoid infiltrating the part by applying Z-Bond from spot to spot. When drizzling Z-Bond onto
a part, pick a good starting place and hold that area upward relative to the rest of the part. With
your free hand, place the tip of the Z-Bond bottle against the part and allow the cyanoacrylate (CA)
to flow from the bottle. It is important that the CA flows at a uniform rate and to see how quickly Z-
Bond wicks into the part. By seeing how quickly Z-Bond wicks into the part, it will be easier to
judge where and how quickly to apply it.
• Keep the part moving in your hand when you apply Z-Bond. Doing this will prevent Z-Bond from
sticking to your gloves.
When Using Z-Max™ Epoxy:
Table of contents
Other Zcorporation 3D Printer manuals

Zcorporation
Zcorporation ZPrinter 650 User manual

Zcorporation
Zcorporation ZPrinter 450 User manual

Zcorporation
Zcorporation zprinter 450 User manual

Zcorporation
Zcorporation Spectrum Z 510 User manual

Zcorporation
Zcorporation Spectrum Z 510 User manual

Zcorporation
Zcorporation ZPrinter 650 User manual

Zcorporation
Zcorporation Z 406 User manual

Zcorporation
Zcorporation D4 User manual

Zcorporation
Zcorporation Z810 User manual

Zcorporation
Zcorporation ZPrinter 310 User manual