3M Adflo 35-5401-01 User manual

FOREWARD
Contact Information
Read all instructions and warnings before using. Keep these User Instructions for reference. If you have questions
regarding these products contact 3M Technical Service.
System Description
The 3M™ Ado™ PAPR Assembly is designed to be used with certain 3M™ Headgear to form a complete NIOSH
approved respiratory system. When used in accordance with its NIOSH approval, 3M™ Ado™ PAPR Assemblies can
help provide respiratory protection against certain particulates, organic vapors and acid gases. Refer to the 3M™ Ado™
NIOSH Approval Label for specic components of an approved system.
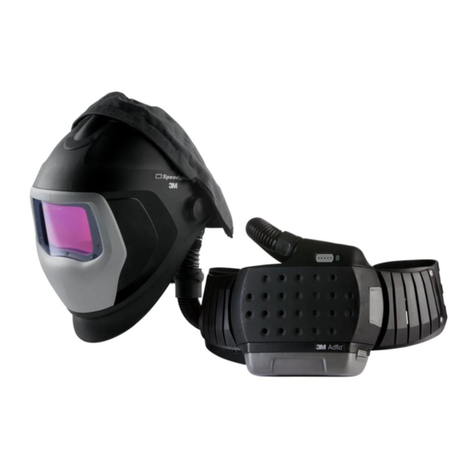
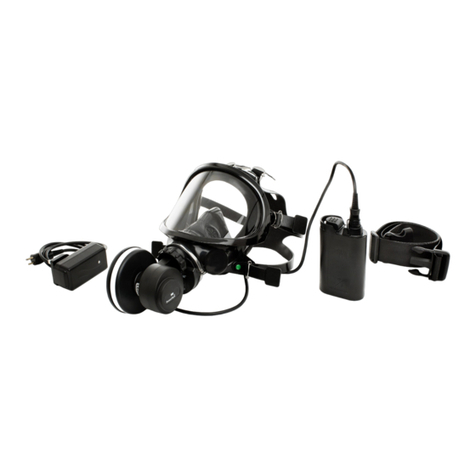
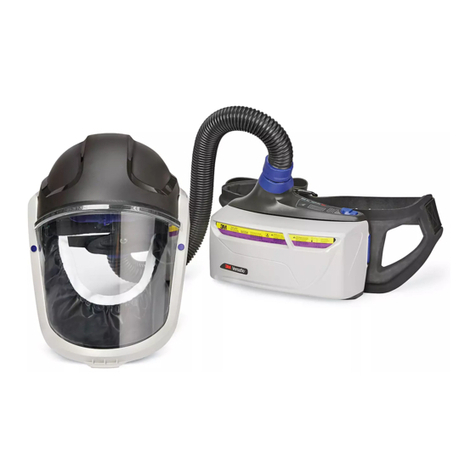
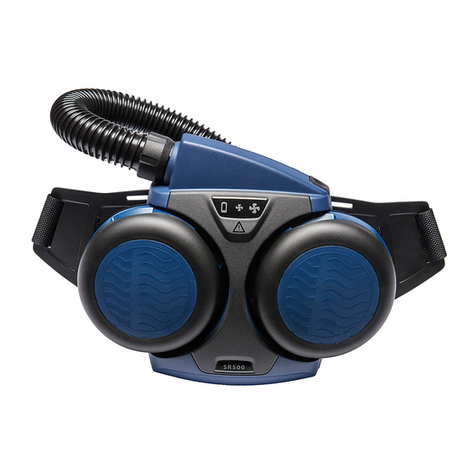
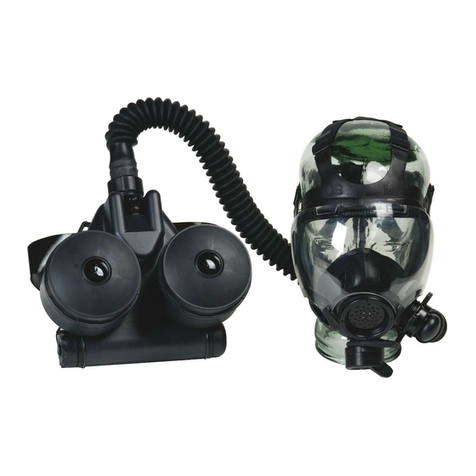
The 3M™ Ado™ PAPR Assembly consists of a blower unit, high efciency lter, waist belt, breathing tube and lithium
ion battery pack. An optional nuisance odor* pad assembly and acid gas/organic vapor cartridge are available. The motor/
blower unit draws ambient air through its lter/cartridge and supplies ltered air to the headgear via a breathing tube.
The blower motor speed is automatically regulated during operation to compensate for the charge state of the battery
and increasing airow resistance caused by particle lter loading, and higher altitudes when using the high altitude
model. Should the airow fall below the minimum design ow rate, an audible alarm will sound and the red LED on the
on/off switch will light to warn the user to immediately leave the contaminated environment. Similarly, an audible alarm
and visual low battery alarm will activate when the battery pack has approximately 15-30 minutes, or approximately 5%
of the charge remaining to warn the user to leave the contaminated area. See the Specications section for additional
information on the alarms.
* NOTE: Nuisance odor refers to concentrations of organic vapors not exceeding the OSHA permissible exposure limit (PEL)
or applicable government occupational exposure limits, whichever is lower.
Consult the Listing of Components, Accessories and Replacement Parts in this User Instruction for a listing of 3M™
Ado™ PAPR part numbers.
WARNING
Properly selected, used, and maintained respirators help protect against certain airborne contaminants by reducing
concentrations in the wearer’s breathing zone below the Occupational Exposure Limit (OEL). It is essential to follow all
instructions and government regulations on the use of this product, including wearing the complete respirator system
during all times of exposure, in order for the product to help protect the wearer. Misuse of respirators may result
in overexposure to contaminants and lead to sickness or death.
LIST OF WARNINGS WITHIN THESE USER INSTRUCTIONS
WARNING
1. This 3M™ Ado™ PAPR Assembly is one component of an approved respiratory protection system. Always read
and follow all User Instructions supplied with your 3M™ headgear and other system components in order to ensure
correct system operation. Failure to do so may result in injury, sickness, or death.
2. The 3M™ Ado™ PAPR System is not intrinsically safe. Do not use in ammable or explosive atmospheres, doing
so may result in serious injury or death.
3. Always correctly use and maintain the lithium-ion battery packs. Failure to do so may cause re or explosion or
could adversely affect respirator performance and result in injury, sickness, or death.
a. Do not charge batteries with unapproved chargers, in enclosed cabinets without ventilation, in hazardous
locations, or near sources of high heat.
b. Do not use charge or store batteries outside of the recommended temperature limits.
c. Charge in an area free of combustible material and readily monitored.
d. Charge only with 3M™ Ado™ PAPR Battery Smart Charger for Lithium Ion Battery 35-0099-08.
e. Do not allow water to enter battery case.
4. Dispose of lithium ion battery packs according to local environmental regulations. Do not crush, disassemble,
dispose of in standard waste bins, in a re or send for incineration. Failure to properly dispose of battery packs may
lead to environmental contamination, re or explosion.
5. Do not repair or modify any component of this system. Do not use with parts or accessories other than those
manufactured by 3M as described in these User Instructions or on the NIOSH approval label for this respirator.
Failure to do so may adversely affect respirator performance and result in sickness or death.
6. Always correctly use and maintain the lter assembly. Failure to do so may reduce respirator performance,
overexpose you to contaminants, and may result in sickness or death.
a. Inspect lter and lter seal before each use and immediately replace if damaged.
b. Do not press on the lter grill when installing the lter into the lter cover. This may result in damage to the
lter membrane allowing hazardous particles to enter the breathing zone.
c. Keep lter seal clean.
d. Never attempt to clean lters by knocking or blowing out accumulated material. This may result in damage to
the lter membrane allowing hazardous particles to enter the breathing zone.
7. The lter-loading indicator reects particle clogging only. It does not provide any information about gas & vapor
service life. Attempting to use the lter loading indicator for gases and vapors may result in sickness or death.
8. The nuisance odor pad should only be used for concentrations of organic vapors not exceeding the OSHA
permissible exposure limit (PEL) or applicable government occupational exposure limits, whichever is lower.
Replace if smell or taste is detected. Use of the nuisance pad for concentrations exceeding applicable exposure
limits may result in sickness or death.
9. The service life of the optional organic vapor/acid gas cartridge must be pre-determined before use. The organic
vapor/acid gas cartridge must be replaced according to an established change-out schedule, regulations, or sooner
if smell, taste, or irritation from contaminants is detected. Failure to do so may result in sickness or death.
10. Do not use the 3M™ Ado™ PAPR system with a heavily loaded spark arrestor or without the spark arrestor
screen properly installed. Exposing a heavily loaded spark arrestor, or lter assembly to direct contact with sparks
or molten metal spatter may damage the lter, allowing unltered air into the breathing zone, which may result in
sickness or death, and may cause the lter or blower housing to ignite, resulting in serious injury, sickness
or death.
LIMITATIONS OF USE
Do not use this respirator to enter areas where:
• Atmospheres are oxygen decient
• Contaminant concentrations are unknown
• Contaminant concentrations are Immediately Dangerous to Life or Health (IDLH)
• Contaminant concentrations exceed the maximum use concentration (MUC) determined using the Assigned Protection
Factor (APF) for the specic respirator system or the APF mandated by specic government standards, whichever is
lower.
Immediately exit the contaminated area if any of the low battery or low airow alarms activate.
The OV/AG cartridge and nuisance odor pad assembly must always be used with the HE lter, pre-lter and spark arrestor.
Do not use the OV/AG cartridge or nuisance odor pad assembly alone or in combination with one another.
Due to lower air density at higher elevations, the 3M™ Ado™ PAPR automatic ow control may activate the Filter
Service Life Indicator prematurely in models without altitude compensation electronics. 3M makes the following
recommendations for use of the 3M™ Ado™ PAPR models without altitude compensation electronics:
• Below 2500 feet (800 meters) mean sea level (MSL), the 3M™ Ado™ PAPR can be used with the 3M™ Ado™
PAPR HE Particulate Filter by itself or in combination with the 3M™ Ado™ PAPR Nuisance Odor Pad Assembly or
Organic Vapor/Acid Gas Cartridge.
• Between 2500 feet and 3500 feet (800 meters to 1200 meters) MSL, the 3M™ Ado™ PAPR should only be used
with the 3M™ Ado™ PAPR HE Particulate Filter.
•Over 3500 feet (1200 meters) MSL, 3M recommends the use of the 3M™ Ado™ PAPR altitude compensation,
model 35-3099-01, or another 3M™ PAPR.
Refer to the User Instructions provided with the applicable headgear and the additional cautions and limitations under the
NIOSH Cautions and Limitations in this User Instructions.
Ado™
Powered Air Purifying Respirator (PAPR) Assembly
User Instructions for 3M™ Ado™ PAPR Assembly 35-5401-01, 34-5401-02SG and
35-3099-01.
IMPORTANT: Before use, the wearer must read and understand these User Instructions.
Keep these User Instructions for reference.
WARNING
This product is part of a system that helps protect against certain airborne contaminants.
Misuse may result in sickness or death.
335-5401-01 / 34-5401-02SG / 35-3099-01
RESPIRATOR PROGRAM MANAGEMENT
Occupational use of respirators must be in compliance with applicable health and safety standards. By United States
regulation, the employer must establish a written respirator protection program meeting the requirements of the
Occupational Safety and Health Administration (OSHA) Respiratory Protection standard 29 CFR 1910.134 and any
applicable OSHA substance specific standards.
Major Sections of OSHA 29 CFR 1910.134
Section Description
A Permissible Practice
B Denitions
C Respiratory Protection Program
D Selection of Respirators
E Medical Evaluation
F Fit Testing
G Use of Respirators
H Maintenance and Care of Respirators
I Breathing Air Quality and Use
J Identication of Cartridges, Filters, and Canisters
K Training and Information
L Program Evaluation
M Recordkeeping
NIOSH – APPROVAL, CAUTIONS AND LIMITATIONS
NIOSH Approval
The 3M™ Ado™ PAPR Assembly is one component of a NIOSH approved respiratory system. Refer to the User
Instructions and/or the NIOSH approval label provided with the 3M™ Ado™ PAPR for a listing of components that can be
used to assemble a complete NIOSH approved respirator system or contact 3M Technical Service.
NOTE: The SG-50W breathing tube can only be used with 9100 Air, 9100 FX Air, 9100 MP and M-series headgear. The
SG-50W breathing tube must be used when using the 9100 Air or 9100 MP welding helmets with HE lter-OV/AG cartridge
combination and must be used with M-400 headgear when used with any Ado PAPR conguration.
NIOSH Cautions and Limitations
A – Not for use in atmospheres containing less than 19.5 percent oxygen.
B – Not for use in atmospheres immediately dangerous to life or health.
C – Do not exceed maximum use concentrations established by regulatory standards.
F – Do not use powered air-purifying respirators if airow is less than four cfm (115 lpm) for tight tting facepieces or six
cfm (170 lpm) for hoods and/or helmets.
H – Follow established cartridge and canister change schedules or observe ESLI to ensure that cartridge and canisters are
replaced before breakthrough occurs.
I – Contains electrical parts that may cause an ignition in ammable or explosive atmospheres.
J – Failure to properly use and maintain this product could result in injury or death.
L – Follow the manufacturer’s User’s Instructions for changing cartridges, canister and/or lters.
M – All approved respirators shall be selected, tted, used, and maintained in accordance with MSHA, OSHA, and other
applicable regulations.
N – Never substitute, modify, add, or omit parts. Use only exact replacement parts in the conguration as specied by the
manufacturer.
O – Refer to User’s Instructions, and/or maintenance manuals for information on use and maintenance of these
respirators.
P – NIOSH does not evaluate respirators for use as surgical masks.
OPERATING INSTRUCTIONS
Unpacking
Inspect the package contents for shipping damage and ensure all components are present. The product should be
inspected before each use following the procedures in the Inspection section of these User Instructions.
Assembly
Battery Pack
WARNING
The 3M™ Ado™ PAPR System is not intrinsically safe. Do not use in ammable or explosive atmospheres, doing so
may result in serious injury or death.
Always correctly use and maintain the battery packs. Failure to do so may cause re or explosion or could adversely
affect respirator performance and result in injury, sickness, or death.
a. Do not charge batteries with unapproved chargers, in enclosed cabinets without ventilation, in hazardous locations,
or near sources of high heat.
b. Do not use, charge or store batteries outside of the recommended temperature limits.
c. Charge in an area free of combustible material and readily monitored.
d. Charge only with 3M™ Ado™ PAPR Battery Smart Charger for Lithium Ion Battery 35-0099-08.
e. Do not allow water to enter battery case.
Dispose of lithium ion battery packs according to local environmental regulations. Do not crush, disassemble, dispose
of in standard waste bins, in a re or send for incineration. Failure to properly dispose of battery packs may lead to
environmental contamination, re or explosion.
New battery packs should be charged upon receipt. The chargers are intended for indoor use where they are protected
from moisture. The battery pack can be charged separately or attached to the 3M™ Ado™ PAPR Assembly. The battery
should charge to 80% capacity in approximately 3 hours and to 100% capacity in approximately 6.5 hours, depending
upon its residual charge.
1. Inspect the battery pack initially and prior to each charge cycle. If any cracks or damage to the case is noted, do not
charge the battery pack. Replace the battery pack and properly dispose of it in accordance with local regulations.
2. Place charger and battery pack in a cool, well ventilated location free of airborne contaminants.
3. Connect the charger output into the battery’s charging socket (Fig. 1).
4. Plug the charger into a suitable source of AC power (110-120V). See Specication – Battery Pack/Charger section for
charger’s LED codes.
NOTE: 3M recommends disconnecting the battery pack from the charger once the battery is fully charged. A fully charged
battery can be left in the trickle-charging mode for a short amount of time (3-4 days). Leaving the battery pack connected
to the charger for prolonged periods of time may damage the battery pack cells. To avoid damage to the battery pack cells,
do not leave it connected to the charger for prolonged durations.
The 3M™ Ado™ PAPR Motor/Blower has a three-bar battery indicator (Fig. 2) that is operational when the unit is turned
on. When all three bars are illuminated, the battery has 80-100% capacity. Two bars indicate 20-80% capacity. One bar
indicates 5-20% capacity. At approximately 15 – 30 minutes of charge remaining (less than 5%), the bottom LED will
begin to ash and the audible alarm will sound.
Installation and Removal of the 3M™ Ado™ PAPR Battery Pack
To install the battery pack:
1. Inspect the hinge and latch on the battery pack and ensure they are clean and undamaged.
2. Hook the left edge of the battery pack into its holder on the bottom of the unit and press the battery pack into the
motor/blower until the catch fully engages with two audible clicks (Fig. 3).
3. Gently tug on the battery pack to verify it is secured to the 3M™ Ado™ PAPR.
To remove the battery pack press the battery pack latch on the right of the battery pack. Pull the battery pack down
and out.

High Efciency (HE) Particulate Filter, Pre-lter and Spark Arrestor
NOTE: The high efciency (HE) lter, pre-lter and spark arrestor must always be used. The pre-lter is designed
to extend the service life of the HE lter by capturing many of the larger particles. The spark arrestor is a metal screen.
Inspect the spark arrestor each time the lters are changed. If it is dirty, remove it and clean with a solution of clean
water and mild detergent. Dry the spark arrestor with a clean cloth and ensure the spark arrestor is completely dry before
reinstalling. If the spark arrestor is damaged, replace with a new spark arrestor. The HE lter and pre-lter CANNOT be
cleaned; do not attempt to remove contamination from the HE lter or pre-lter using compressed air or other means.
WARNING
Always correctly use and maintain the lter assembly. Failure to do so may reduce respirator performance, overexpose
you to contaminants, and may result in sickness or death.
a. Inspect lter and lter seal before each use and immediately replace if damaged.
b. Do not press on the lter grill when installing the lter into the lter cover. This may result in damage to the lter
membrane allowing hazardous particles to enter the breathing zone.
c. Keep lter seal clean.
d. Never attempt to clean lters by knocking or blowing out accumulated material. This may result in damage to the
lter membrane allowing hazardous particles to enter the breathing zone.
The lter-loading indicator reects particle clogging only. It does not provide any information about gas & vapor service
life. Attempting to use the lter loading indicator for gases and vapors may result in sickness, or death.
The nuisance odor pad should only be used for concentrations of organic vapors not exceeding the OSHA permissible
exposure limit (PEL) or applicable government occupational exposure limits, whichever is lower. Replace if smell or
taste is detected. Use of the nuisance pad for concentrations exceeding applicable exposure limits may result in
sickness or death.
The service life of the optional organic vapor/acid gas cartridge must be pre-determined before use. The organic
vapor/acid gas cartridge must be replaced according to an established change-out schedule, regulations, or sooner if
smell, taste, or irritation from contaminants is detected. Failure to do so may result in sickness or death.
Do not use the 3M™ Ado™ PAPR system with a heavily loaded spark arrestor or without the spark arrestor screen
properly installed. Exposing a heavily loaded spark arrestor, or lter assembly to direct contact with sparks or molten
metal spatter may damage the lter, allowing unltered air into the breathing zone, which may result in sickness or
death, and may cause the lter or blower housing to ignite, resulting in serious injury, sickness or death.
1. Inspect the HE lter to be installed. Make sure:
• Filter material is intact and dry with no tears or other damage.
• Filter gasket is present and intact with no particulates, cuts, distortions or indentations. Wipe gasket with clean,
dry cloth, if dirty. Dispose and replace lter if damage is noted.
2. Remove the lter cover (Fig. 4).
3. Place the spark arrestor, pre-lter and HE lter into the lter cover, ensuring that the ribs on the HE lter are aligned
with the slots on the latch side of the lter cover (Fig. 5). Ensure all are squarely seated in the lter cover. Do not press
on the lter grill when installing the lter into the lter cover (Fig 6).
4. To reinstall the lter cover in the 3M™ Ado™ PAPR, hook the left side of the lter cover into the left side of the 3M™
Ado™ PAPR. Press down on the right side of the cover until the catch fully engages with an audible click.
Install the 3M™ Ado™ PAPR Organic Vapor/Acid Gas (OV/AG) Cartridge or Nuisance
Odor Pad Assembly
The 3M™ Ado™ PAPR has a “stackable” chemical cartridge capability that helps provide protection from certain organic
vapors and acid gases and a “stackable” nuisance odor pad assembly to help reduce nuisance odors and nuisance ozone.
NOTE: Nuisance odor refers to concentrations of organic vapors not exceeding the OSHA permissible exposure limit (PEL)
or applicable government occupational exposure limits, whichever is lower.
NOTE: The OV/AG cartridge and nuisance odor pad assembly must always be used with the HE lter, pre-lter and spark
arrestor. Do not use the OV/AG cartridge or nuisance odor pad assembly alone or in combination with one another.
1. Remove the lter cover as noted above (Fig. 4).
2. Inspect the HE lter to be installed. Make sure:
• Filter material is intact and dry with no tears or other damage.
• Filter gasket is present and intact with no particulates, cuts, distortions or indentations. Wipe gasket with a clean,
dry cloth, if dirty. Dispose and replace lter if damage is noted.
3. Inspect the lter cover, the pre-lter and the spark arrestor. Replace as needed (Fig. 5, 6).
4. Inspect the OV/AG cartridge or nuisance odor pad assembly to be installed. Make sure:
• Gasket is present and intact with no particulates, cuts, distortions or indentations. Wipe gasket with a clean, dry
cloth, if dirty. Dispose and replace if damage is noted
5. Place the spark arrestor, pre-lter and HE lter into the lter cover, ensuring that the ribs on the HE lter are aligned
with the slots on the latch side of the lter cover (Fig. 5). Ensure all are squarely seated in the lter cover. Do not press
on the lter grill when installing the lter into the lter cover (Fig 6).
6. Hook the left side of the OV/AG cartridge or nuisance odor pad assembly into the left side of the PAPR and press the
cartridge down until its catch engages with an audible click (Fig. 7).
7. Reinstall the lter cover assembly in the 3M™ Ado™ PAPR, hook the left side of the lter cover into the left side
of the OV/AG cartridge. Press down on the right side of the cover until the catch fully engages with an audible click
(Fig8).
Replacement of the Nuisance Odor Pad
The nuisance odor pad may be replaced by pressing the expired nuisance odor pad out of the nuisance odor pad assembly
from the backside, or side with the gasket or multiple square holes. It is easiest to press the nuisance odor pad out on
the vertical edges, nearest to the frame edge, and then work the entire nuisance odor pad free from the assembly. Install
a new nuisance odor pad by pressing it into the nuisance odor pad assembly. The nuisance odor pad may only be used
to help provide relief from concentrations of organic vapors not exceeding the OSHA permissible exposure limit (PEL) or
applicable government occupational exposure limits, whichever is lower. Replace when smell or taste occurs.
Install the Breathing Tube
Select an approved breathing tube for the headgear to be used. Refer to the 3M™ Ado™ PAPR NIOSH Approval Label for
approved headgear-breathing tube combinations.
NOTE: The SG-50W breathing tube can only be used with 9100 Air, 9100 FX Air, 9100 MP and M-series headgear. The
SG-50W breathing tube must be used when using the 9100 Air or 9100 MP welding helmets with HE lter-OV/AG cartridge
combination and must be used with M-400 headgear when used with any Ado PAPR conguration.
1. Inspect the PAPR end of the breathing tube (2 small prongs) to conrm the rubber “O” ring is in place. Replace if
missing or damaged.
2. Insert the 2 prongs on the PAPR end of the breathing tube into the parallel slots in the air outlet of the motor blower
and twist 1/4 turn to the right to lock into place.
Connect to 3M™ Headgear
Refer to the separate User Instructions provided with the approved headgear for procedures to connect the breathing tube.
Leather Belt Replacement
1. Remove the belt from the 3M™ Ado™ PAPR by unfastening the belt’s two hook and loop straps and pulling the
3M™ Ado™ PAPR away from the unfastened belt.
2. Replace the belt:
• Thread each hook and loop strip through the slot on the back of the unit, and then on through the slot on the
leather belt (Fig. 9). The “UP” arrow should be pointing towards the top of the PAPR.
• Tightly pull the two hook and loop strips prior to fastening them to one another. When attached properly, the 3M™
Ado™ PAPR will sit tight against the belt and will stay in place.
Backpack
The BPK-01 backpack may be used in place of the belt (Fig. 9A):
1. With either end of the motor/blower towards the top of the backpack (end with the drag handle), thread the backpack
strap through the top retaining slot on the motor/blower and the large retaining sleeve (Fig. 9A, #1) on the backpack.
2. Thread the strap through the lower retaining slot on the motor/blower and the small retaining sleeve (Fig. 9A, #2) on
the backpack.
3. Thread the strap through the buckle (Fig. 9A, #3) and tighten down.
4. Don the backpack and adjust the shoulder straps for a comfortable t.
On and Off
To turn the 3M™ Ado™ PAPR Motor/Blower on, press and hold the ON button on the top of the motor/blower for 2
seconds (Fig. 10). The unit will automatically perform a self diagnostic.
• All three LED (2 green, 1 red) on the power switch and the audible alarm will come on for 1 second. The 2 green LED
will remain on (Fig. 10).
• The 3M™ Ado™ PAPR Battery Pack and lter LEDs will light up sequentially and then light and remain on showing
the current status of each.
To turn off the motor/blower, press and hold the OFF button on the top of the motor/blower for 2 seconds. The red LED will
come on and the audible alarm will sound for 1 second as the motor/blower turns off.
INSPECTION
WARNING
Always correctly use and maintain the lter assembly. Failure to do so may reduce respirator performance, overexpose
you to contaminants, and may result in sickness or death.
a. Inspect lter and lter seal before each use and immediately replace if damaged.
b. Always properly install the lter into the blower unit.
c. Keep lter seal clean.
d. Never attempt to clean lters by knocking or blowing out accumulated material. This may result in damage to the
lter membrane allowing hazardous particles to enter the breathing zone.
Do not repair or modify any component of this system. Do not use with parts or accessories other than those
manufactured by 3M as described in these User Instructions or on the NIOSH approval label for this respirator. Failure to
do so may adversely affect respirator performance and result in sickness or death.
This 3M™ Ado™ PAPR Assembly is one component of an approved respiratory protection system. Always read and
follow all User Instructions supplied with your 3M™ headgear and other system components in order to ensure correct
system operation. Failure to do so may result in injury, sickness, or death.
Before each entry into a contaminated area, perform the following pre-use inspection to help ensure proper function of the
respirator system. Refer to the specic Assembly subsection of this User Instructions for proper assembly procedures.
NOTE: There are no serviceable parts inside the 3M™ Ado™ PAPR Assembly. The motor/blower unit must not be opened
to attempt repairs.
Visual Inspection
1. PAPR Assembly: Visually inspect the entire PAPR assembly including the motor/blower, cover, lter/cartridge, breathing
tube, battery pack, belt and headgear. Replace any missing or damaged parts only with 3M™ Ado™ PAPR
Replacement Parts before proceeding.
2. Battery Pack: Conrm that the battery pack is fully charged and charge is sufcient for duration of the work period.
The battery pack must be securely latched to the motor/blower.
3. Breathing Tube: Examine the entire breathing tube for tears, holes or cracks. Bend the tube to verify that it is exible.
Ensure the o-ring located on the PAPR end of the breathing tube is present with no gaps or cracks in the ring. Replace
breathing tube if any damage is noted or suspected.
4. Filter/Cartridge:
• Inspect the pre-lter and spark arrestor. Ensure they are intact, clean and squarely tted into the lter cover.
• Inspect the HE lter and gasket for particles, tears, cuts, distortion or indentations. Do not attempt to clean the HE
lter. Replace the HE lter if any damage is noted or suspected. Ensure it is in place in the lter cover.
• Ensure the lter cover is securely latched to the PAPR motor/blower.
•
If used, ensure the nuisance odor pad assembly or chemical cartridge is securely attached to the PAPR and lter cover.
Air ow check
1. Ensure the ball in the 15-0099-05 or 15-0099-21 ow indicator moves freely in its tube. Rinsing with clean water
may help free a stuck ball. Allow the tube and ball to dry completely prior to using.
• For all 3M™ Ado™ Breathing Tubes (except L-122SG) follow Steps 2 – 7 with the 15-0099-05 ow
indicator.
• For L-122SG approved breathing tube, follow Steps 8 – 13 with the 15-0099-21 ow indicator adapter.
All 3M™ Ado™ PAPR Approved Breathing Tubes, Except L-122SG (15-0099-05 Indicator)
2. Insert the breathing tube into the air outlet as noted above.
3. Turn the 3M™ Ado™ PAPR on.
4. Insert the airow indicator (15-0099-05) onto the end of the breathing tube (Fig. 11).
5. Allow the 3M™ Ado™ PAPR to run for 2 minutes to stabilize air ow prior to reading air ow indicator.
6. With the airow indicator in a vertical position, ensure that the bottom of the ball rests at or above, the minimum ow
mark (Fig. 11). If the airow indicator ball fails to rest at or above the minimum ow level, refer to the trouble-shooting
guide at the end of these User Instructions.
7. Check the low airow alarm:
• With 3M™ Ado™ PAPR turned on, remove the air ow indicator and tightly cover the end of the breathing tube
with the palm of your hand.
• The motor will automatically speed up to compensate for the low air ow condition.
• Continue to press your palm tightly against the end of the breathing tube, making a tight seal. After approximately
15-30 seconds, the unit will sound an audible alarm and the center, red LED on the ON/OFF switch will come on
(Fig. 10). Proceed to Step 14.
NOTE: If the oating ball of the air ow indicator fails to rest at or above the minimum ow level, refer to the
trouble-shooting guide at the end of these User Instructions.
L-122SG breathing tube (use ow indicator rubber adapter 15-0099-20 with ow
indicator 15-0099-05 or 15-0099-21 assembly)
8. Insert the air ow indicator adapter onto the end of the 3M™ Ado™ PAPR Air Flow Indicator (Fig. 12).
9. Insert air ow indicator adapter unit into the outow port on the 3M™ Ado™ PAPR (Fig. 13).
10. Turn the 3M™ Ado™ PAPR on.
11. Allow the 3M™ Ado PAPR to run for 2 minutes to stabilize air ow prior to reading air ow indicator.
12. Hold the air ow indicator vertically at eye level, ensure that the bottom of the oating ball rests at or above, the
minimum ow mark (Fig. 14).
13. Check the low air ow alarm:
• With 3M™ Ado™ PAPR on, remove the air ow indicator and tightly cover the end of the 3M™ Ado™ PAPR
outow port with the palm of your hand.
•The motor will automatically speed up to compensate for the low air ow condition.
• Continue to press your palm tightly against the end of the breathing tube, making a tight seal. After approximately
15-30 seconds, the unit will sound an audible alarm and the center, red LED on the ON/OFF switch will come on
(Fig. 10). Continue to Step 14.
NOTE: If the oating ball of the air ow indicator fails to rest at or above the minimum ow level, refer to the
trouble-shooting guide at the end of these User Instructions.
Continued from Step 7 and 13
14. Remove your hand from the end of the breathing tube or air outlet port. The audible alarm and red LED should both
stop, while the motor returns to a slower speed.
15. If the PAPR does not operate as described in all of the above procedures, refer to the trouble-shooting guide at the end
of these User Instructions.
16. Turn the unit off.
17. Attach breathing tube (if previously removed) and headgear to 3M™ Ado™ PAPR system.
ENTERING AND EXITING A CONTAMINATED AREA
Prior to entering the contaminated area, complete the inspection procedures listed in this User Instructions.
1. Turn the motor/blower on.
2. Check air ow and alarms. NOTE: High environmental noise levels or use of hearing protection may interfere with the
user hearing the audible alarms. User should check for the visual alarms more frequently in high noise environments.
3. Don the 3M™ Ado™ PAPR Assembly and headgear. Enter the work area.
4. Leave the contaminated area immediately if any of the following conditions occur:
a. Any part of the system becomes damaged.
b. Air ow into the respirator decreases or stops.
c. The low air ow or low battery alarms trigger:
• The air ow alarm activates when air ow falls below 6 CFM (170 lpm) for greater than 15-30 seconds. The
3M™ Ado™ PAPR will shut down 2 minutes after continuous alarm activation.
• The battery alarm - during approximately the last 15 to 30 minutes of charge, the bottom bar on
motor/blower battery LED will ash continuously one second ON, one second OFF. The audible alarm will
beep four times in two seconds, repeating every 30 seconds. The nal 15 to 60 seconds the alarm will fast
beep every 1/2 second. 3M™ Ado™ PAPR will shut down 30 seconds after the quick beep starts.
d. In the event only an audible or only a visual alarm triggers, the user should still immediately leave the
contaminated area.
e. Breathing becomes difcult.
f. You feel dizzy or your vision is impaired.
g. You taste or smell contaminants.
h. Your face, eyes, nose or mouth become(s) irritated.
i. You suspect that the concentration of contaminants may have reached levels at which this respirator may no
longer provide adequate protection.
5. Do not remove the respirator or reach your hand into the headgear in areas where the air is contaminated.
6. Follow exiting and decontamination procedures specic to your workplace for turning off the motor/blower and
removing the respirator system.
WARNING
The 3M™ Ado™ PAPR is not intrinsically safe. Do not use in ammable or explosive atmospheres, doing so may
result in serious injury or death.
Do not enter a contaminated area until properly donning the respirator system. Do not remove or turn off the respirator
before leaving the contaminated area. Doing so may result in sickness or death.
Do not use the 3M™ Ado™ PAPR system with a heavily loaded spark arrestor or without the spark arrestor screen
properly installed. Exposing a heavily loaded spark arrestor, or lter assembly to direct contact with sparks or molten
metal spatter may damage the lter, allowing unltered air into the breathing zone, which may result in sickness or
death, and may cause the filter or blower housing to ignite, resulting in serious injury, sickness or death.
CLEANING AND STORAGE
WARNING
Dispose of lithium ion battery packs according to local environmental regulations. Do not crush, disassemble, dispose
of in standard waste bins, in a re or send for incineration. Failure to properly dispose of battery packs may lead to
environmental contamination, re or explosion.
The 3M™ Ado™ PAPR Assembly should be cleaned and inspected after each use and prior to storage.
NOTE: To avoid damage, do not use solvents for cleaning. Do not immerse in water or spray directly with water.
Cleaning
Detach the battery pack, breathing tube and headgear from the motor/blower. Inspect all parts for damage or other signs
of excessive wear. Replace all damaged parts prior to storage or next use.
1.
Motor/blower and battery pack: Clean the outer surfaces of the 3M™ Ado™ PAPR Assembly and battery pack with a soft
cloth dampened in a solution of water and mild, pH neutral detergent. Do not immerse the motor/blower or battery pack in
water. Do not use solvents or abrasive cleaners. Do not attempt to clean the interior of the motor/blower with compressed
air or vacuum. Dust accumulation in the motor/blower could indicate possible lter leakage or improper storage and must
be addressed prior to next use. Ensure the electrical contacts of the motor/blower and battery pack are dry.
2. Breathing tube: Clean the exterior and connection sites on the breathing tube with the water and detergent solution.
Optional breathing tube covers can also be used to facilitate cleaning. Ensure the breathing tube is completely dry
before using or storing. The L-122SG and SG-50W breathing tube interiors contain sound absorbing material. They
cannot be immersed in liquids for cleaning and must be replaced if wet. Wiping the exterior is insufcient.
3. HE lter: Open the lter cover and inspect the HE lter, pre-lter and spark arrestor. Replace if excessively dirty, wet or
damaged. The HE and pre-lters cannot be cleaned. The spark arrestor can be cleaned using a clean, soft cloth dipped
in a solution of water and a mild pH neutral detergent. Completely dry the spark arrestor with a clean cloth. If the spark
arrestor cannot be cleaned or is damaged, replace with a new spark arrestor.
Inspection
Follow inspection procedures listed in this User Instructions.
Motor/Blower Storage
The 3M™ Ado™ PAPR system should be stored at a temperature between -4°F to 131°F (-20°C to 55°C). The motor/
blower should be stored in a clean environment out of direct sunlight.
Battery Pack Storage
To help maximize battery pack service life:
• Store the battery pack at -4°F (-20°C) to 115°F (45°C). R.H. < 85%. Storage of the battery pack outside of this range
will shorten service life of the battery.
• The 3M™ Ado™ PAPR Battery Pack may remain on the charger for 3 to 4 days after completion of charging, but for
maximum battery life, disconnect the charger after a full charge has been received.
• Battery packs for long-term storage should be disconnected from the motor/blower.
• Battery packs not intended for immediate or regular use should be charged upon receipt and placed on regular
recharge schedule (every 3 months of non-use). Prolonged storage of battery packs without regular recharge may
damage the battery pack cells.
SPECIFICATIONS
Technical
Air ow Greater than 6 CFM (170 lpm)
Weight (approximate)
1. Assembly (motor/blower; HE lter; belt;
battery pack and SG-30W breathing tube)
2. OV/AG Cartridge
3. Nuisance Odor Pad Assembly
1. 3.6 lbs (1.65 kg)
2. 1.72 lbs. (0.78 kg)
3. 0.320 lbs (0.145kg)
Motor/Blower Assembly
1. Operating Temperature
2. Storage Temperature (RH <90%)
3. Operating Altitude and Limitation
4. Noise level
1. 23ºF to 131ºF (-5º to 55ºC)
2. -4°F to 131°F (–20°C to 55°C)
If 3M™ Ado™ PAPR system is stored at temperatures below
32°F (0°C), the battery pack must be allowed to warm up to
achieve optimal battery performance.
3. Altitude*:
• Less than 2500 feet (800 meters) MSL –HE lter and
OV/AG Cartridge, HE lter and nuisance odor pad assembly,
or HE lter alone may be used.
• 2500 to 3500 feet (800 to 1200 meters) MSL – HE lter
alone may be used.
• Greater than 3500 feet (1200 meters) MSL – not
recommended. Use the high altitude version of the 3M™
Ado™ PAPR (35-3099-01) or a different 3M™ PAPR.
* If you have questions regarding these products contact 3M
Technical Service.
4. Noise levels – less than 80 dBA at user’s ear excluding external
noise.
Belt Size (Approximate)
Belt Extender
29.5 to 45.25 inches (75 to 115 cm)
Approximately 26 inches (66 cm)
Battery Pack/Charger
1. Chemistry
2. Run Time
3. Charging Temperatures
4. Storage Temperatures
5. Battery Pack Service Life
1. Lithium Ion (Li)
2. • 10-12 hours*
• 5.5 hours with OV/AG cartridge*
*New battery pack and HE lter, battery life will be reduced if using
at altitudes greater than 3500 feet.
3. 32°F to 104°F (0°C to 40°C). If the charger’s LED blinks rapidly
during charging, the battery pack is either too hot or too cold to
charge.
4. -4°F (-20°C) to 115°F (45°C). R.H. < 85%. Storage of the
battery pack outside of this range will shorten service life of the
battery.
5. Approximately 500 charges.
6. Charger Codes 6. Charger Code Table:
Mode Description LED Indication
Standby
Pre-Charge
f
Waiting
tempera
or correct
ture
Rapid charge
charge
Maintenance
Ready
Error
Yellow Permanent on
Yellow flashing slow
Y
alterna
ellow and g
ting reen
Green flashing fast
Green flashing slow
Green permanent on
Yellow flashing fast
Yellow
Green
Yellow
Green
Yellow
Green
Yellow
Green
Yellow
Green
Yellow
Green
Yellow
Green
Motor/Blower Alarms
Low air ow
Low battery pack voltage
Activates when air ow falls below 6 CFM (170 lpm) for greater
than 15-30 seconds. 3M™ Ado™ PAPR will shut down 2 mins.
after continuous alarm activation.
During approximately the last 15 to 30 minutes of charge, the
bottom bar on motor/blower battery LED will ash continuously one
second ON, one second OFF. The audible alarm will beep four times
in two seconds, repeating every 30 seconds. The nal 15 to 60
seconds the alarm will fast beep every 1/2 second. 3M™ Ado™
PAPR will shut down 30 seconds after quick beep starts.
Hazardous Location (Intrinsic Safety) The 3M™ Ado™ PAPR Assembly is not approved for use in
hazardous or intrinsically safe locations.
Shelf Life – HE Filter, Nuisance Odor Pad
Assembly and OV/AG Cartridge
5 years from date of manufacture.
Assigned Protection Factor
Refer to the User Instructions for the specific head gear to be used to determine the assigned protection factor (APF) for
the 3M™ Adflo™ PAPR system. Consult 3M™ Technical Data Bulletin #175 for additional information on APFs and
supporting test data.
Service Life
Chemical Cartridges
The useful service life of the 3M™ Ado™ PAPR Organic Vapor/Acid Gas Cartridge, 15-0399-99 or 15-0499-99, will
depend on the specic type, volatility and concentration of the contaminants and environmental conditions such as
humidity and temperature. Replace cartridges in accordance with an established change schedule, regulations, or
sooner if smell, taste, or irritation from contaminants are detected.
Nuisance Odor Pad Assembly
The useful service life of the 3M™ Ado™ PAPR Nuisance Odor Pad will depend on the environmental conditions and
concentration of the contaminants and environmental conditions such as humidity and temperature. The nuisance odor
pad should only be used for concentrations of organic vapors not exceeding the OSHA permissible exposure limit (PEL) or
applicable government occupational exposure limits, whichever is lower. Replace if smell or taste is detected.
Particle Filter
The 3M™ Ado™ PAPR Motor/Blower Assembly is equipped with a ve-step particle lter-loading indicator. There are three
green and two red indicators. The illumination of each indicator light signies increased lter clogging and a reduction in
battery run time. When the red indicator(s) are illuminated, battery run time will be signicantly reduced and HE particle lter
and pre-lter replacement is recommended. When using a chemical cartridge or nuisance odor pad assembly with a fresh
particle lter, the rst two LEDs of the scale will be illuminated due to the additional resistance to air ow.
The HE lter should also be changed if it becomes wet or damaged. The pre-lter should be changed at least as frequently
as the HE lter. The pre-lter and HE lter should be changed if the battery pack operating time becomes shortened or if
the low air ow alarm is activated.
LISTING OF COMPONENTS, ACCESSORIES AND REPLACEMENT PARTS
Part Number Description
Battery Packs and Chargers
35-1099-07 Battery Pack, Li
35-0099-08 Lithium Ion Battery Smart Charger
Belts
15-0099-16 Belt, Leather
15-0099-06 Belt Tongue Extender Replacement, Leather
35-0099-14 Belt, Nylon webbing with quick connection
TR-325 Belt, Versao, Standard
TR-326 Belt, Versao, High Durability
BPK-01 Backpack
Breathing Tubes
15-0099-10
L-122SG
SG-30W
SG-40W
Breathing tube - 9000 HWR, 9000 Flexview and ClearVisor only
Breathing tube - L-SG series headgear only
Breathing tube - Self adjusting - 9100 series and M-100/300 headgear
Breathing tube - Heavy duty - 9100 series and M-100/300-series headgear
SG-50W Breathing tube – Sound dampening – 9100 series helmets. Required when used with
3M™ Ado™ PAPR with HE Filter and OV/AG Cartridge and Welding Helmet 9100-Air,
9100 MP, and must be used with M-400 headgear when used with any 3M™ Ado™
PAPR conguration.
Filters and Cartridges – Refer to the NIOSH approval label for proper lter/cartridge/headgear combinations
15-0099-99X06 Pre-lter, 6-pack
15-0099-99X12 Pre-lter, 12-pack
15-0299-99X02 High Efciency Particulate Filter, 2/case
15-0299-99X06 High Efciency Particulate Filter, 6/ case
15-0299-99X36 High Efciency Particulate Filter, 36/case

35-0699-99X01 Nuisance Odor Pad Assembly, 1/Case
35-0799-99X01 Nuisance Odor Pad, 1/case
35-0799-99X10 Nuisance Odor Pad, 10/case
15-0399-99X02 Organic Vapor/Acid Gas* Cartridge, 2/case
15-0399-99X06 Organic Vapor/Acid Gas* Cartridge, 6/case
15-0499-99X02 Organic Vapor/Acid Gas* Cartridge, 2/case
15-0499-99X06 Organic Vapor/Acid Gas* Cartridge, 6/case
15-0009-99X02 Spark Arrestor, 2/case
* Acid gas: NIOSH approved for sulfur dioxide, chlorine, hydrogen chloride
TROUBLESHOOTING
Use the table below to help identify possible causes and corrective action for problems you may experience. There are no
user serviceable parts inside the 3M™ Ado™ PAPR Assembly. The motor/blower unit should not be opened to attempt
repairs. Consult the 3M™ Ado™ PAPR Trouble Shooting Guide or contact 3M Technical Service to help identify additional
possible causes and corrective actions for other problems you may experience.
Fault Probable Cause(s) Possible Solution(s)
Low air ow alarm (audible
and all three LEDs on
power button are lit)
1. Breathing tube is blocked.
2. Filter is blocked.
3. Filter is fully loaded with
particles.
4. PAPR is being used above
recommended altitude
limitation.
1. Check & remove blockage or obstruction.
2. Check air lter & remove obstruction.
3. Change HE lter and pre-lter. If using a
chemical cartridge, check that the scrim
fabric behind the inlet holes is clean and
white. Any sign of particle loading on the
chemical cartridge indicates improper
installation or damaged particle lter
assembly.
4. Consider 3M™ High Altitude Compensation
Ado™ PAPR or an alternative 3M™ PAPR.
Bottom bar of battery
indicator ashes; battery
alarm sounds
Low battery voltage. 1. Fully charge the battery pack.
2. Install a new, fully-charged 3M™ Ado™
PAPR Battery Pack.
No air ow, no alarm(s) 1. Battery contact on battery
pack is damaged.
2. Battery is completely
discharged.
3. Damaged circuit board.
4. Damaged motor.
1. Check that the battery contact is not bent or
broken.
2. Fully charge the battery pack.
3 and 4. Contact 3M Warranty and Repair.
Low air ow per indicator
but no alarm(s)
1. Damaged circuit board.
2. Damaged motor.
Contact 3M Warranty and Repair.
User detects odor or taste
of contaminants or feels
eye or throat irritation
1. Incorrect
respirator
for application and/or
environment.
2. Chemical cartridge exhausted.
3. Nuisance odor pad.
4. Particle lter damaged.
1. Consult on-site industrial hygienist or safety
director.
2. Change cartridge & develop a cartridge
replacement schedule with your on-site
industrial hygienist or safety director.
3. Replace nuisance odor pad.
4. Replace particle lter.
Battery pack’s charge lasts
less than expected
1. Inadequate charging.
2. HE lter is loaded with
particles, making the motor
run harder.
3. Chemical cartridge being
used.
4. Motor blower is being used at
high elevations.
1. Check the lter-loading indicator.
2. Replace the HE lter & pre-lter as indicated,
and examine the spark arrestor.
3. Battery pack will normally have shorter run
time with chemical cartridge in place.
4. Consider 3M™ High Altitude Compensation
Ado™ PAPR or an alternative 3M™ PAPR.
The motor runs “faster than
normal”
1. The HE lter is loaded with
particles.
2. Recent user change from just
HE lter to HE and Nuisance
Odor Pad Assembly or HE and
OV/AG cartridge.
1. Check the lter-loading indicator. Replace
the HE lter & pre-lter as indicated, and
examine the spark arrestor.
2. Normal operation. Let the unit run for 2
minutes so it can automatically adjust to new
conguration.
The motor runs “slower
than normal”
1. Recent user change from
HE and Nuisance Odor Pad
Assembly or HE lter and
OV/SD/CL/HC cartridge to just
the HE lter.
1. Normal operation. Let the unit run for 2
minutes so it can automatically adjust to the
new lter conguration.
Fig. 1
Fig. 12
ON
O F
E1
Fig. 13
Fig. 2
Fig. 14
Fig. 3
Fig. 7 Fig. 8 Fig. 9
Fig. 9A Fig. 10 Fig. 11
Fig. 5
1- Cover; 2 - Spark Arrestor; 3-Pre-lter; 4 - HE Filter
1- Protège-ltre; 2- Pare-étincelles; 3- Préltre;
4- Filtre à haute efcacité
Fig. 4 Fig. 6

GENERAL SAFETY INFORMATION
Intended Use
The 3M™ V-Series Air Control Devices are designed to be used with certain 3M headgear, breathing tube and supplied air hose to form a
complete NIOSH approved respiratory system.
3M headgear (respiratory inlet covering) may include a tight fitting facepiece, loose fitting facepiece, hood, helmet or some combination of these
that serves as a respiratory protective covering for the nose and mouth area. Refer to the enclosed 3M™ V-Series Air Control Device NIOSH
approval label for approved system configurations.
List of Warnings and Cautions within these User Instructions
This product helps protect against certain airborne contaminants. Misuse may result in sickness or death.
The length of compressed air hose W-3020 used depends on the specifications of the low-pressure air pump utilized. Some pumps specify
a minimum of 50 or 100 feet of hose to allow adequate cooling of the air heated by the pump's mechanism. Read the pump’s instructions
thoroughly before selecting the compressed air hose W-3020 length that will be used. NO PUMP IS TO BE USED WHICH COULD CAUSE AIR
HOTTER THAN 160ºF (71ºC) TO ENTER THE COMPRESSED AIR HOSE W-3020. Air hotter than 160ºF (71ºC) will cause the hose to degrade,
which would adversely affect respirator performance and may result in sickness or death.
To meet the NIOSH requirement in 42 CFR 84, subpart 84.150 for minimum and maximum airflow (6 to 15 scfm, 170 to 425 lpm), the air
control devices approved for use with 3M headgear must be operated within the supply pressure ranges and hose lengths stated in the
Special or Critical Use Instructions. Failure to do so may adversely affect respirator performance and result in sickness or death.
You must comply with OSHA Standard 29 CFR 1910.134, which states that, “Airline couplings shall be incompatible with outlets for other gas
systems to prevent inadvertent servicing of airline respirators with nonrespirable gases or oxygen.” In Canada, refer to the requirements of
CSA Standard Z180.1 or the authority having jurisdiction in your region. Failure to do so may result in sickness or death.
Your employer must provide breathing air that meets at least the requirements of the specification for Grade D breathing air, as described in
the Compressed Gas Association Commodity Specification G-7.1-1997 in the United States. In Canada, refer to CSA Standard Z180.1, table
for the quality of compressed breathing air. Failure to do so may result in sickness or death.
The line pressure must be kept within safe limits, 125 psig (8.75 kg/cm2) maximum. Dirt, oil and water, unless trapped or filtered out, may
continue downstream in concentrated form and adversely affect the performance of the respirator and result in sickness or death.
Use of equipment described in these User Instructions must be in accordance with applicable health and safety standards, respirator selection
tables contained in such publications as ANSI Z88.2-1992, CSA Standard Z94.4, or pursuant to the recommendations of an industrial
hygienist. Before occupational use of these respirators, a written respiratory protection program must be implemented meeting all the
requirements of OSHA 29 CFR 1910.134 such as training, fit testing, medical evaluation, and applicable OSHA substance specific standards.
In Canada, CSA standard Z94.4 requirements must be met and/or requirements of the applicable jurisdiction, as appropriate.
Each person using this respirator must read and understand the information in these User Instructions before use. Use of this respirator by
untrained or unqualified persons, or use not in accordance with these User Instructions may adversely affect product performance and result
in sickness or death.
Do not use if any parts are missing or damaged.
Do not use with parts or accessories other than those approved by 3M as described in these User Instructions or on the NIOSH approval label
for the respirator that you are using. Failure to do so may adversely affect respirator performance and result in sickness or death.
Use of this respirator in atmospheres for which it is not NIOSH certified or designed may result in sickness or death. Do not wear this
respirator where:
– Atmospheres are oxygen deficient.
– Contaminant concentrations are unknown.
– Contaminant concentrations are Immediately Dangerous to Life or Heath (IDLH).
– Contaminant concentrations exceed the maximum use concentration (MUC) determined using the assigned protection factor (APF)
recommended for the applicable headgear or the APF mandated by specific government standards, whichever is lower. Refer to the User
Instructions provided with the applicable headgear.
Contaminants that are dangerous to your health include those that you may not be able to see or smell. Leave the contaminated area
immediately if any of the following conditions occur. Failure to do so may result in sickness or death.
– Any part of the system becomes damaged.
– Airflow into the respirator decreases or stops.
– Breathing becomes difficult.
– You feel dizzy or your vision is impaired.
– You taste or smell contaminants.
– Your face, eyes, nose or mouth become(s) irritated.
– You suspect that the concentration of contaminants may have reached levels at which this respirator may no longer provide adequate
protection.
Never alter or modify this assembly.
Air supply piping, fittings, and compressors must have the capacity to deliver sufficient air volume (6 to 15 scfm, 170 to 425 lpm) to operate
the air control device at the recommended pressure.
USE INSTRUCTIONS AND LIMITATIONS
IMPORTANT
Before use, the wearer must read and understand these User Instructions. Keep these User Instructions for reference.
General Description
The 3M Air Control Valve Assemblies are designed to be used with approved 3M headgear (respiratory inlet covering), breathing tube and
supplied air hose to form a complete NIOSH approved Type C or CE supplied air system.
3M™ Vortex Cooling Assembly V-100
The 3M™ Vortex Cooling Assembly is designed to provide those 3M headgear which are approved for use with it, a continuous airflow ranging
between 6 and 15 cfm (170 to 425 lpm). This air control device also provides the ability to cool the compressed air supply by as much as 50ºF
(28ºC). The device cools the air as supplied by the compressed air source – not the ambient air. The control knob may be adjusted manually
between upper and lower limits to suit the cooling comfort requirements of the user.
3M™ Vortemp™ Heating Assembly V-200
The 3M™ Vortemp™ Heating Assembly is designed to provide those 3M headgear which are approved for use with it, a continuous airfl o w
ranging between 6 and 15 cfm (170 to 425 lpm). This air control device also provides the ability to warm the compressed air supply by as much
as 50ºF (28ºC). The device warms the air as supplied by the compressed air source – not the ambient air. The control knob is set manually
between upper and lower limits to suit the warming comfort requirements of the user.
3M™ Air Regulating Valve Assembly V-300
The 3M™ Air Regulating Valve Assembly is designed to provide those 3M headgear which are approved for use with it, a continuous airflow
ranging between 6 and 15 cfm (170 to 425 lpm). The control knob (airflow) is set manually between upper and lower limits to suit the comfort
requirements of the user.
3M™ Low Pressure Connector Assembly V-400
The 3M™ Low Pressure Connector Assembly is designed to provide those 3M headgear which are approved for use with it, a continuous airflow
ranging between 6 and 15 cfm (170 to 425 lpm). When used as part of an approved system with the 3M™ Supplied Air Hose W-3020, the V-400
will provide airflow within the specified range when the air pressure at the point of connection for the hose is between 4 and 15 psig (0.28 to
1.05 kg/cm2), dependent on hose length.
NIOSH Cautions and Limitations
A– Not for use in atmospheres containing less than 19.5 percent oxygen.
B– Not for use in atmospheres immediately dangerous to life or health.
C– Do not exceed maximum use concentrations established by regulatory standards.
D– Air-line respirators can be used only when the respirators are supplied with respirable air meeting the requirements of CGA G-7.1 Grade D
or higher quality.
E– Use only the pressure ranges and hose lengths specified in the User’s Instructions.
J– Failure to properly use and maintain this product could result in injury or death.
M–All approved respirators shall be selected, fitted, used, and maintained in accordance with MSHA, OSHA, and other applicable regulations.
WWARNING
V-Series Air Control Devices
User Instructions for 3M™ Vortex Cooling Assembly V-100, 3M™
Vortemp™ Heating Assembly V-200, 3M™ Air Regulating Valve Assembly
V-300 and 3M™ Low Pressure Connector Assembly V-400.
IMPORTANT: Keep these User Instructions for reference
N– Never substitute, modify, add, or omit parts. Use only exact replacement parts in the configuration as specified by the manufacturer.
O– Refer to User’s Instructions, and/or maintenance manuals for information on use and maintenance of these respirators.
S– Special or critical User’s Instructions and/or specific use limitations apply. Refer to User’s Instructions before donning.
S- Special or Critical Use Instructions
Each 3M™ V-Series Air Control Device Assembly includes an air regulating device or connector with a quick disconnect plug, a belt clip, and
a belt. The W-2963 cotton fiber belt may be adjusted to accommodate waist sizes between 25 and 42 inches (64 and 107 centimeters). The
W-3217, 520-02-23 and GVP-117 belts may accommodate waist sizes up to 50 inches (127 centimeters).
Air Control Device Quick Disconnect Plug Type
V-100 Industrial Interchange, 1/4” MPT, 1/4” Body Size, Steel
V-200 Industrial Interchange, 1/4” MPT, 1/4” Body Size, Steel
V-300 Industrial Interchange, 1/4” MPT, 1/4” Body Size, Steel
V-400 Industrial Interchange, 1/4” MPT, 3/8” Body Size, Steel
3M™ Supplied Air Hose and Pressure Requirements
All approved 3M headgear except: L-501, L-503, L-505, L-701, L-703, L-705, L-901 and L-905.
3M™ Supplied Air Respirator System approvals allow you to combine up to three W-9435 or W-9445 hoses (25, 50, 100 feet or 7.6, 15.2, 30.5 meters)
in any combination not to exceed 300 feet (91.4 meters). Refer to Table 1 for the supply air pressure requirements for all 3M approved headgear
except those listed above.
For all 3M headgear, the W-3020 and W-2929 (coiled) hoses can only be used in single lengths of 25, 50, or 100 feet (7.62, 15.2, or 30.5 meters). No
connections are allowed.
Table 1: Pressure Schedule Table for 3M™ V-Series Air Control Devices
(All approved 3M headgear except L-501, L-503, L-505, L-701, L-703, L-705, L-901, L-905)
Air Control
Device
High Pressure Hoses
W-9435 and W-9445
(3/8” ID)
High Pressure Hose
W-2929 (Coiled, 3/8" ID)
Low Pressure Hose W-3020
(1/2" ID)
Supply Pressure Range
V-100
25 - 100 ft
(7.6 - 30.5 meters)
25, 50 or 100 ft
(7.6, 15.2, 30.5 m)
N/A 62 - 72 psig
(4.4 - 5.0 kg/cm2)
125 - 200 ft
(38.1 - 61.0 meters)
N/A N/A 69 - 82 psig
(4.9 - 5.7 kg/cm2)
225 - 300 ft
(68.6 – 91.4 meters)
N/A N/A 75 - 91 psig
(5.3 - 6.4 kg/cm2)
V-200
25 - 100 ft
(7.6 - 30.5 meters)
25, 50 or 100 ft
(7.6 – 30.5 meters)
N/A 64 - 68 psig
(4.5 - 4.8 kg/cm2)
125 - 200 ft
(38.1 – 61.0 meters)
N/A N/A 71 - 78 psig
(5.0 - 5.5 kg/cm2)
225 - 300 ft
(68.6 – 91.4 meters)
N/A N/A 77 - 88 psig
(5.4 - 6.2 kg/cm2)
V-300
25 - 100 ft
(7.6 – 30.5 meters)
25, 50 or 100 ft
(7.6, 15.2, 30.5 m)
N/A 30 - 35 psig
(2.1 - 2.5 kg/cm2)
125 - 200 ft
(38.1 – 61.0 meters)
N/A N/A 33 - 50 psig
(2.3 - 3.5 kg/cm2)
225 - 300 ft
(68.6 – 91.4 meters)
N/A N/A 38 - 63 psig
(2.7 - 4.4 kg/cm2)
V-400
N/A N/A 25 ft (7.6 m) 6 - 11 psig
(0.4 - 0.8 kg/cm2)
N/A N/A 50 ft (15.2 m) 7 - 13 psig
(0.5 - 0.9 kg/cm2)
N/A N/A 100 ft (30.5 m) 8 - 15 psig
(0.6 - 1.0 kg/cm2)
3M headgear: L-501, L-503, L-505, L-701, L-703, L-705, L-901 and L-905
3M™ Supplied Air Respirator System approvals allow you to combine up to three 100-foot lengths of W-9435 or W-9445 hoses. The total
combined hose length not to exceed 300 feet (91.4 meters). You may not combine 25 or 50-foot (7.6 or 15.2 meter) lengths of W-9435 and
W-9445 hoses. Refer to Table 2 for the supply air pressure requirements for these approved headgear.
For all 3M headgear, the W-3020 and W-2929 (coiled) hoses can only be used in single lengths of 25, 50, or 100 feet (7.6, 15.24, or 30.5
meters). No connections are allowed.
Table 2: Pressure Schedule Table for 3M™ V-Series Air Control Devices Used With 3M Headgear L-501, L-503, L-505, L-701, L-703,
L-705, L-901, L-905
Air Control
Device
High Pressure Hoses
W-9435 and W-9445
(3/8” ID)
High Pressure Hose
W-2929
(Coiled, 3/8” ID)
Low Pressure Hose
W-3020
(1/2” ID)
Supply Pressure Range
V-100
25 ft (7.6 m) 25 ft (7.6 m) N/A 60-65 psig
(4.2-4.6 kg/cm2)
50 ft (15.2 m) 50 ft (15.2 m) N/A 65-70 psig
(4.6-4.9 kg/cm2)
100 ft (30.5 m) 100 ft (30.5 m) N/A 70-75 psig
(4.9-5.3 kg/cm2)
200 ft (60.9 m) N/A N/A 80-85 psig
(5.6-6.0 kg/cm2)
300 ft (91.4 m) N/A N/A 85-90 psig
(6.0-6.3 kg/cm2)
V-200
25 ft (7.6 m) 25 ft (7.6 m) N/A 60-65 psig
(4.2-4.6 kg/cm2)
50 ft (15.2 m) N/A N/A 60-68 psig
(4.2-4.8 kg/cm2)
100 ft (30.5 m) N/A N/A 70-72 psig
(4.9-5.1 kg/cm2)
200 ft (60.9 m) N/A N/A 75-80 psig
(5.3-5.6 kg/cm2)
300 ft (91.4 m) N/A N/A 85-90 psig
(6.0-6.3 kg/cm2)
3

V-300
25 ft (7.6 m) 25 ft (7.6 m) N/A 25-30 psig
(1.8-2.1 kg/cm2)
50 ft (15.2 m) 50 ft (15.2m) N/A 30-35 psig
(2.1-2.5 kg/cm2)
100 ft (30.5 m) 100 ft (30.5 m) N/A 35-40 psig
(2.5-2.8 kg/cm2)
200 ft (60.9 m) N/A N/A 45-50 psig
(3.2-3.5 kg/cm2)
300 ft (91.4 m) N/A N/A 50-55 psig
(3.5-3.9 kg/cm2)
V-400
N/A N/A 25 ft (7.6 m) 6-11 psig
(0.4-0.8 kg/cm2)
N/A N/A 50 ft (15.2 m) 7-13 psig
(0.5-0.9 kg/cm2)
N/A N/A 100 ft (30.5 m) 8-15 psig
(0.6-1.0 kg/cm2)
Compressor Volume
Requirements – Approximately 20 CFM (566 lpm) per 3M™ Air Control Device.
Noise Level – Less than 80 dBA within the headgear; excluding external noise.
The length of compressed air hose W-3020 used depends on the specifications of the low-pressure air pump utilized. Some pumps specify
a minimum of 50 feet (15.2 meters) or 100 feet (30.5 meters) of hose to allow adequate cooling of the air heated by the pump's mechanism.
Read the pump’s instructions thoroughly before selecting the compressed air hose W-3020 length that will be used. NO PUMP IS TO BE USED
WHICH COULD CAUSE AIR HOTTER THAN 160ºF (71ºC) TO ENTER THE COMPRESSED AIR HOSE W-3020. Air hotter than 160ºF (71ºC) will
cause the hose to degrade, which would adversely affect respirator performance and may result in sickness or death.
Discussion on Respirable Air
Many older compressed air systems may provide air that is unfit for human respiration without secondary air treatment. This is due largely to the
presence of objectionable oil vapors and odors. Rules and regulations governing air quality when using compressed air for respiration are quite
specific.
Precautions must be observed when using compressed air for breathing purposes.
Oil mist from the compressor lubricating oil must not be present when the air reaches the air control device. Excessive amounts of water vapor and
any particulate matter should also be removed as they may affect performance of the air control devices. The schematic diagram of the air purifier
and pressure regulator equipment shows what should be installed in the main airline ahead of the connection for the breathing air hoses (Fig. 1).
If a pre-assembled air filtering and regulating device is desired, 3M offers several compressed air filter and regulator panel assemblies. These
assemblies contain a specially designed filter cartridge to help remove oil mist and vapors, condensed moisture, particulates, odors and vapors.
They come completely assembled and are ready for connection between the compressor and supplied air respirator system. These air filtering
and regulating devices do not ensure Grade D breathing air as required.
Note: Carbon monoxide- Although it is theoretically possible that oil lubricated compressors can create carbon monoxide (CO) if the compressor
overheats, studies have shown that the location of the compressor’s air intake is the most likely source of carbon monoxide contamination.1
According to OSHA regulation [29 CFR (1910.134)(i)], periodic CO monitoring, rather than continuous CO monitoring with an alarm, is acceptable
if the oil lubricated compressor is equipped with a high temperature alarm and automatic shut-down. In Canada, follow CSA Z180.1 regarding oil
lubricated compressors.
1Formation of carbon monoxide in air compressors, Am. Ind. Hyg. Assoc. J (40), June 1979, pp. 548-551.
Fig. 1: Air purification and regulation equipment.
To meet the NIOSH requirement 42 CFR 84, subpart 84.150 for minimum and maximum airflow (6 to 15 cfm, 170 to 425 lpm), the air control
devices approved for use with 3M headgear must be operated within the supply pressure ranges and hose lengths stated in the Special or
Critical Use Instructions. Failure to do so may adversely affect respirator performance and result in sickness or death.
You must comply with OSHA standard 29 CFR 1910.134, which states that, “Airline couplings shall be incompatible with outlets for other gas
systems to prevent inadvertent servicing of airline respirators with nonrespirable gases or oxygen.” In Canada, refer to the requirements of
CSA Standard Z180.1 or the authority having jurisdiction in your region. Failure to do so may result in sickness or death.
Your employer must provide breathing air that meets at least the requirements of the specification for Grade D breathing air, as described in
the Compressed Gas Association Commodity Specification G-7.1in the United States. In Canada, refer to CSA standard Z180.1, table for the
quality of compressed breathing air. Failure to do so may result in sickness or death.
The line pressure must be kept within safe limits, 125 psig (8.75 kg/cm2) maximum. Dirt, oil and water, unless trapped or filtered out, may
continue do
wnstream in concentrated form and adversely affect the performance of the respirator and may result in sickness or death.
SYSTEM COMPONENTS AND REPLACEMENT PARTS
3M™ V-100 Illustrated Parts List (Fig. 2)
Item Number Part Number Description Quantity Required
1 V-111 Vortex muffler kit 1
2 --- Retainer (included in item 1) 1
3 --- Turbine cap**
1
4 --- O-ring 1
5 --- Special washer 1
6 --- Generator 1
7 --- Screw 6/32 x 3/16 1
8 --- Washer-lock #6 1
9 W-1279-2 Plug-quick disconnect (Ind. Interchange)
W-3186-2 Plug-quick disconnect (Schrader)
10 W-1403 Elbo connectorw 1
11 --- Foam pad and fastener 1
12 --- Body tube** 1
13 --- Control knob** 1
14 --- T assembly**ube 1
15 --- O-ring 1
16 W-2963 Waist belt, cotton 42 in x 1.5 in
W-3217 Waist belt, decontaminable 54 in x 1.5 in
17 --- Holder 1
18 --- Cable tie 1
19 --- Slide 1
20 --- O-ring 1
V-150 Vortex Cooling Tube (no belt)21
--- V-115 Vortex spare parts kit-includes item 4, 5, 6, 7, 8, 11, 15
**Cannot be ordered. Must be returned to distributor for factory repair.
Fig. 2: V-100
3M™ V-200 Illustrated Parts List (Fig. 3)
Item Number Description Quantity Required
1 1
2
Part Number
V-211
--- 1
31
4 1
5 1
6 1
7
---
---
---
---
--- 1
8 1
9
10
W-1403
W-1279-2
W-3186-2
--- 1
11 1
12 1
13 1
14 1
15
---
---
---
---
--- 1
16 W-2963
W-3217
17 1
18 1
19
---
---
--- 1
20
---
V-250
V-215
Vortemp™ muffler kit
Retainer (included in item 1)
Thousing**
ube
Screw 6/32 x 3/16
Washer - lock #6
O-ring
T assembly**ube
Elbo connectorw
Plug-quick disconnect (Ind. Interchange)
Plug-quick disconnect (Schrader)
Generator
Special washer
O-ring
Turbine cap**
Valve-ball**
Vortemp™‚ cold muffler
Waist belt, cotton 42 in x 1.5 in
Waist belt, decontaminable 54 in x 1.5 in
Holder
Cable tie
Slide
Vortemp™ Heating Tube (no belt)
Vortemp™ spare parts kit-includes item 4, 5, 6, 10, 11, 12, 15
**Cannot be ordered. Must be returned to distributor for factory repair.
Fig. 3: V-200
3M™ V-300 Illustrated Parts List (Fig. 4)
Item Number Part Number Description Quantity Required
1 V-211 Vortemp™ muffler kit 1
2 --- Retainer (included in item 1) 1
3 --- Retaining ring 1
4 --- Screen 1
5W
-3135-10 Muffler Disc 2
6 --- Nut 1
7 --- O-ring 1
8 --- O-ring 1
9 W-1279-2 Plug-quick disconnect (Ind. Interchange)
W-3186-2 Plug-quick disconnect (Schrader)
10 W-2963 Waist belt, cotton 42 in x 1.5 in
W-3217 Waist belt, decontaminable 54 in x 1.5 in
520-02-23 Waist belt, decontaminable 50 in x 2 in
GVP-117 Waist belt, decontaminable 50 in x 2 in
11 V-350 Air regulating valve (no belt)
--- W-3036 Spare parts kit-includes Item 3, 4, 5, 6, 7, 8
Fig. 4: V-300
3M™ V-400 Illustrated Parts List (Fig. 5)
Item Number Part Number Description Quantity Required
1 V-211 Vortemp™ muffler kit 1
2 --- Retainer (included in item 1) 1
3 --- Retaining Ring 1
4 --- Screen 1
5 W-3135-10 Muffler Disc (10 pk) 2
6 W-3252-2 Plug-quick disconnect (Ind. Interchange)
W-3251-2 Plug-quick disconnect (Schrader)
7 W-2963 Waist belt, cotton 42 in x 1.5 in
Shut-off Valve
From Compressor
Pressure Regulator
Pressure Gauge Pressure Relief Valve
Check Valve Hose
Small Particle Air Line Filter
WWARNING
1
16
17
18
23456 9
21
14 10 15 11 13 7 8 12
19 20
20
1
23678101112131415
9
4
5
16 17 18 19
11
1
235 7
8
9
610
4
WWARNING

W-3217 Waist belt, decontaminable 54 in x 1.5 in
520-02-23 Waist belt, decontaminable 50 in x 2 in
GVP-117 Waist belt, decontaminable 50 in x 2 in
8 --- Low pressure connector (no belt)
--- W-3036 Spare parts kit-includes item 3, 4, 5
Fig. 5 : V-400
3M™ V-Series Air Control Devices – optional parts not shown
- Adapter V-199 for approved BT series breathing tubes
OPERATING INSTRUCTIONS
Use of equipment described in these User Instructions must be in accordance with applicable health and safety standards, respirator
selection tables contained in such publications as ANSI Z88.2, CSA Standard Z94.4, or pursuant to the recommendations of an industrial
hygienist. Before occupational use of these respirators, a written respiratory protection program must be implemented meeting all the
requirements of OSHA 29 CFR 1910.134 such as training, fit testing, medical evaluation, and applicable OSHA substance specific standards.
In Canada, CSA standard Z94.4 requirements must be met and/or requirements of the applicable jurisdiction, as appropriate.
Each person using this respirator must read and understand the information in these User Instructions before use. Use of this respirator by
untrained or unqualified persons, or use not in accordance with these User Instructions may adversely affect product performance and result
in sickness or death.
Do not use if any parts are missing or damaged.
Do not use with parts or accessories other than those manufactured by 3M as described in these User Instructions or on the NIOSH approval
label for the respirator that you are using. Failure to do so may adversely affect respirator performance and result in sickness or death.
Use of this respirator in atmospheres for which it is not NIOSH certified or designed may result in sickness or death. Do not wear this
respirator where:
– Atmospheres are oxygen deficient.
– Contaminant concentrations are unknown.
– Contaminant concentrations are Immediately Dangerous to Life or Heath (IDLH).
– Contaminant concentrations exceed the maximum use concentration (MUC) determined using the assigned protection factor (APF)
recommended for the applicable headgear or the APF mandated by specific government standards, whichever is lower. Refer to the User
instructions provided with the applicable headgear.
Contaminants that are dangerous to your health include those that you may not be able to see or smell. Leave the contaminated area
immediately if any of the following conditions occur. Failure to do so may result in sickness or death.
– Any part of the system becomes damaged.
– Airflow into the respirator decreases or stops.
– Breathing becomes difficult.
– You feel dizzy or your vision is impaired.
– You taste or smell contaminants.
– Your face, eyes, nose or mouth become(s) irritated.
– You suspect that the concentration of contaminants may have reached levels at which this respirator may no longer provide adequate protection.
Never alter or modify this assembly.
Air supply piping, fittings, and compressors must have the capacity to deliver sufficient air volume (6 to 15 cfm, 170 to 425 lpm) to operate
the air control device at the recommended pressure.
V-100, V-200, and V-300
To use these 3M air control devices with approved 3M headgear, breathing tube and supplied air hose proceed as follows:
1. Connect one end of the breathing tube to the selected headgear. (Follow the directions in the specific headgear User Instructions.)
Note: If the H-115 Breathing Tube Assembly is used, the tube length may be trimmed to suit the user. Trim only the end that will be
connected to the headgear. The tube must not be adjusted to a length less than 12 inches (30.5 cm).
2. Connect the breathing tube to the air control device. Connect the threaded end of the breathing tube to the threaded outlet on the air control
device by screwing the two units together.
Note: If using a BT series breathing tube, first screw the 3M™ V-199 adapter into the outlet port of the air control device. Position the breathing
tube so that the two locking studs are aligned with the openings of the two L-shaped slots on the adapter outlet. Press in straight and twist so
that the locking studs are engaged at the end of the L-shaped slots (Fig. 6).
3. Adjust and buckle the waist belt with air control device comfortably around your waist.
4. Connect the supplied air hose to the air supply and the 3M™ air control device. Adjust the air pressure to within the acceptable range
for the appropriate air control device, hose, and headgear. See the Special or Critical Use Instructions section of this User Instruction for
acceptable air pressure ranges.
5. Don the headgear and adjust for maximum comfort in a non-contaminated area per the specific headgear User Instructions.
6. Adjust the airflow for maximum comfort by rotating the control knob on the air control device.
7. Recheck the air pressure setting to ensure it is still in the acceptable range.
V-400
To use this 3M air control device with approved 3M headgear, breathing tube and supplied air hose proceed as follows:
1. Connect one end of the breathing tube to the selected headgear. (Follow the directions in the specific headgear
User’s Instructions.)
Note: If the H-115 Breathing Tube Assembly is used, the tube length may be trimmed to suit the user. Trim only the end
that will be connected to the headgear. The tube must not be adjusted to a length less than 12 inches (30.5 cm).
2. Connect the breathing tube to the air control device. Connect the threaded end of the breathing tube to the threaded
outlet on the air control device by screwing the two units together.
Note: If using a BT series breathing tube, first screw the 3M™ V-199 adapter into the outlet port of the air control
device. Position the breathing tube so that the two locking studs are aligned with the openings of the two L-shaped
slots on the adapter outlet. Press in straight and twist so that the locking studs are engaged at the end of the
L-shaped slots (Fig. 6).
3. Adjust and buckle the waist belt with low pressure connector assembly comfortably around your waist.
4. Connect the supplied air hose W-3020 between the air pump and the 3M™ Low Pressure Connector Assembly.
Adjust the pressure to within the acceptable range as per the Special or Critical Use Instructions Pressure section of
this User Instructions.
5. Don the headgear and adjust for maximum comfort in a non-contaminated area per the specific headgear User
Instructions.
6. Recheck the air pressure setting to ensure it is still in the acceptable range.
CLEANING, INSPECTION AND STORAGE
These air control devices have no moving parts except the control knob, so there is little to wear out. If proper filtration of compressed air is
maintained, the muffler will stay clean and maintain its acoustic efficiency.
Additional maintenance and care of respirators should be followed per ANSI Standard Z88.2-1992, Practices for Respiratory Protection. In
Canada, follow CSA Standard Z94.4 or the requirements of the authority having jurisdiction in your region.
Cleaning
Waist Belt (W-2963) and Decontaminable Waist Belts (W-3217, 520-02-23, and GVP-117)
The waist belt may be hand laundered with a mild detergent, a clean rinse and air-drying.
V-100
DUE TO THE NEED FOR INSTRUMENTATION TO CALIBRATE FOR PROPER AIRFLOW, THE VORTEX AIR COOLER IS TO BE DISASSEMBLED ONLY
TO THE EXTENT SHOWN IN FIG. 2. DO NOT LOOSEN OR REMOVE THE SET SCREWS IN THE CONTROL KNOB (ITEM 13) BECAUSE OF CRITICAL
POSITIONING OF THE VALVE AND THE NEED TO USE INSTRUMENTATION FOR PROPER ADJUSTMENT OF THE AIRFLOW. RETURN TO THE FACTORY
FOR REPAIR IF THE CONTROL KNOB COMES OFF.
To clean the tube assembly, simply flush with soap and water followed with a water rinse. Do not insert a brush in the tube.
It is important to keep the slots of the generator (item 6) clean.
Over tightening of the turbine cap (item 3) on re-assembly can cause the generator slots to restrict, thereby reducing airflow.
To replace the acoustic foam pad (item 11) proceed as follows:
– Remove the machine screw (item 7) and slide off the body tube (item 12) from the vortex air cooler with a slight twisting motion.
– Remove the acoustic foam pad (item 11).
– Position one end of new acoustic foam pad halfway between the exhaust holes and wrap it around the 3M™ Scotchmate™ strips. Make sure
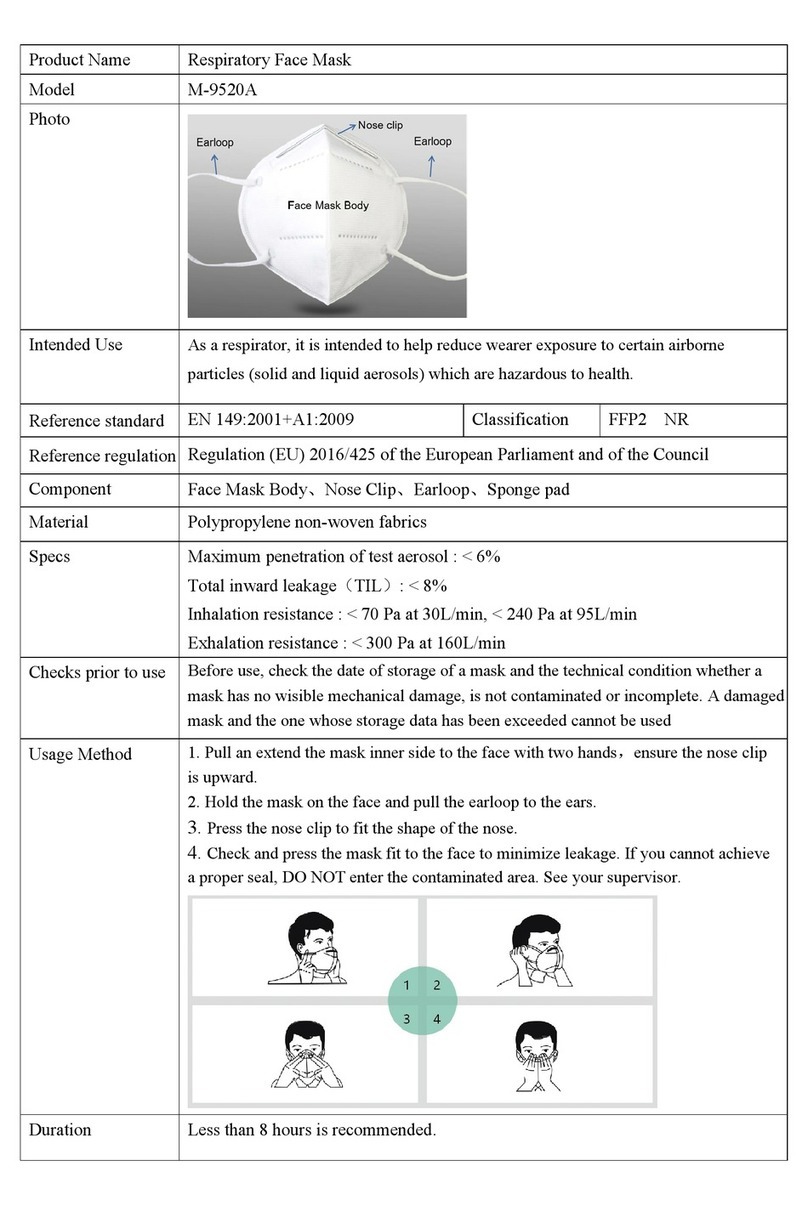
that the ends of the acoustic foam pad do not overlap, but rather form a snug butt fit.
– Holding the acoustic foam pad in place with two fingers of one hand, use the other hand to carefully slide the body tube over acoustic foam
and the tube assembly with a slight twisting motion. Apply a small amount of medium strength thread locker to the machine screw. Secure the
body tube with the machine screw.
V-200
DUE TO THE NEED FOR INSTRUMENTATION TO CALIBRATE FOR PROPER AIRFLOW, THE VORTEMP™ HEATING TUBE IS TO BE DISASSEMBLED
ONLY TO THE EXTENT SHOWN IN FIG. 3. DO NOT LOOSEN OR REMOVE THE SET SCREWS IN THE TUBE ASSEMBLY (ITEM 7) BECAUSE OF CRITICAL
POSITIONING OF THE VALVE AND THE NEED TO USE INSTRUMENTATION FOR PROPER ADJUSTMENT OF THE AIRFLOW. RETURN TO THE FACTORY
FOR REPAIR.
To clean the tube assembly, simply flush with soap and water followed with a water rinse. Do not insert a brush in the tube.
It is important to keep the slots of the generator (item 10) clean.
Over tightening of the turbine cap (item 13) on reassembly can cause the generator slots to restrict, thereby reducing airflow.
V-300 and V-400
Daily cleaning should be performed on the exterior of the air control device. Blow clean with compressed air.
After extended use, the two disks (item 5, Fig. 4 and 5) inside of the low pressure adapter may become dirty from contaminants in the
compressed air supply. They may be replaced by removing the retaining ring with the proper tool.
Storage
All 3M air control devices should be stored at ambient temperature in a dry environment that is protected against atmospheric contaminants.
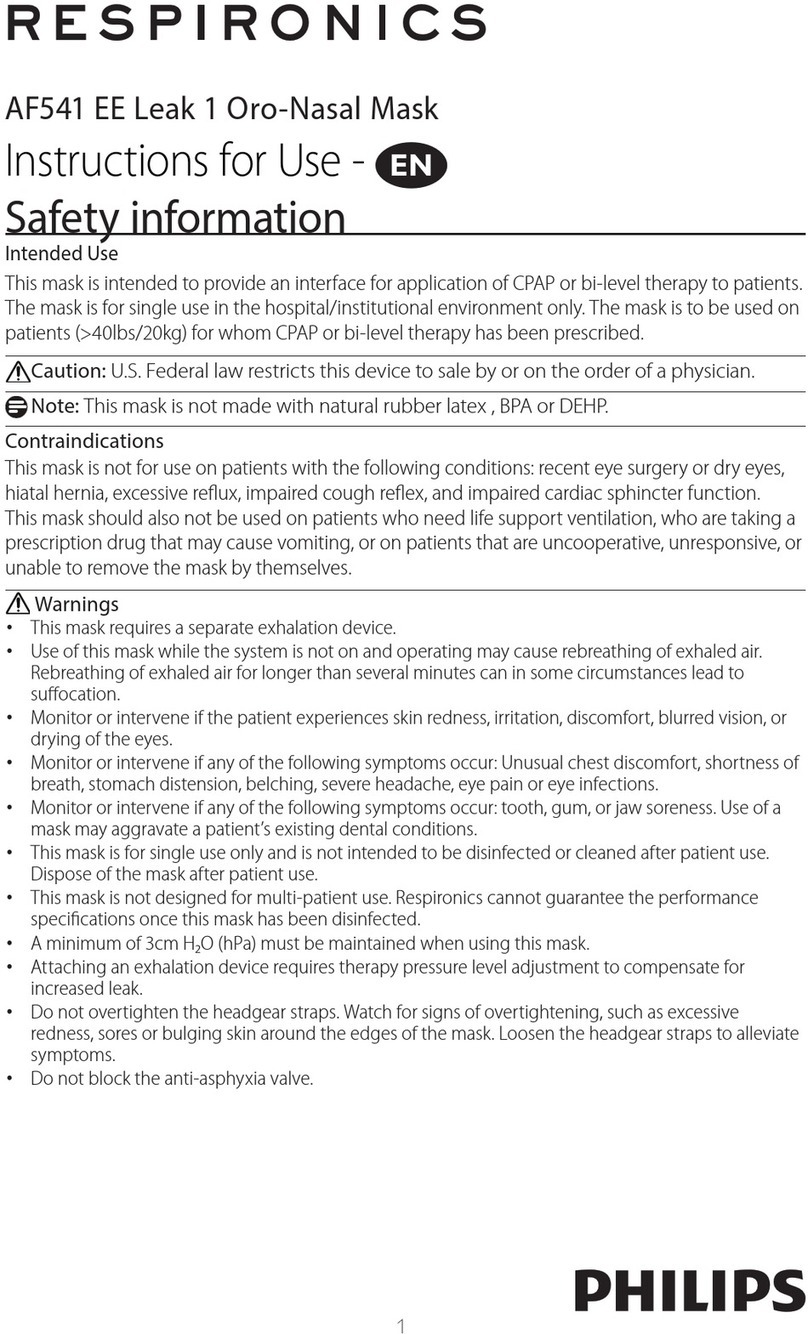
DISPOSAL
3M™ V-Series Air Control Devices can be disposed of as normal waste or scrap metal unless contaminated with a hazardous material as a result
of use. If contaminated, the air control device must be disposed of according to local environmental regulations.
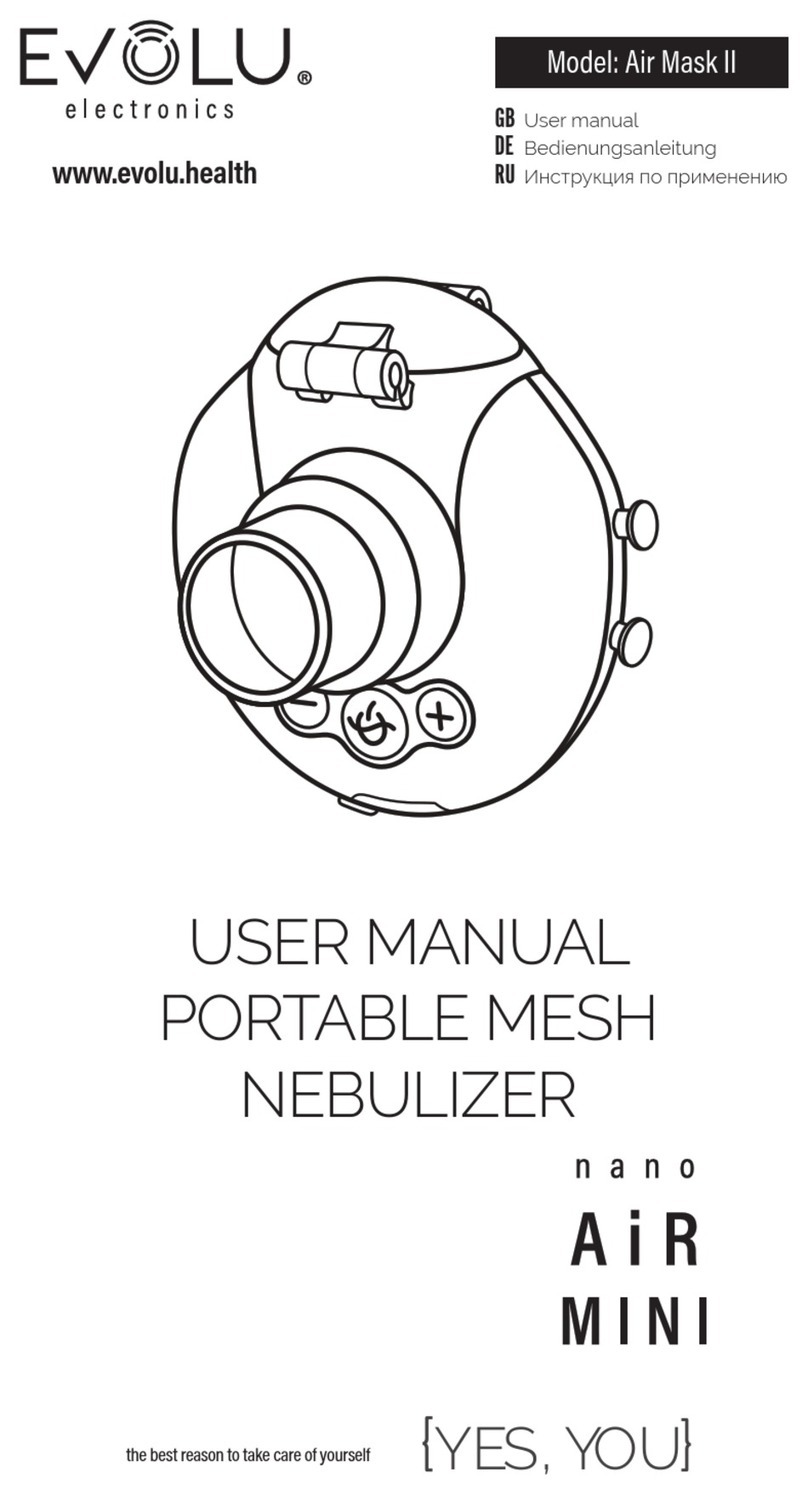
TROUBLESHOOTING
Troubleshooting Chart V-100 and V-200
Symptom Possible Causes Remedy
Vortex freezes up. Excessive water in compressor air line. Add air drier to compressor.
Inadequate airflow.
Inadequate warming or cooling.
Not enough air pressure.
Dirty on inside.
Compressed airline pipe too small.
Compressor has insufficient capacity.
Incoming air temperature too high or too low.
Increase air pressure within appropriate pressure
schedule in this User Instruction.
Clean and provide adequate filtration of supplied air.
Increase airline pipe size.
Use larger compressor.
Check compressor for overheating.
Insulate or move any hoses or pipes, which are heating up
due to ambient conditions.
Too much warming or cooling. Control knob not adjusted.
Air pressure too high.
Adjust control knob.
Lower air pressure within appropriate pressure schedule
in this User Instruction.
Excessive airflow to headgear. Air pressure too high. Lower air pressure within appropriate pressure schedule
in this User Instruction.
Troubleshooting Chart V-300
Symptom Possible Causes Remedy
Inadequate airflow. Compressor filters plugged.
Muffler plugged with oil.
Air pressure too low.
F&R panel filter plugged.
Kink in air hose.
Change filters.
Replace muffler discs.
Increase air pressure within appropriate pressure
schedule in this User Instruction.
Change filter.
Straighten hose out and inspect for damage.
Control knob won't turn. Valve mechanism dirty. Clean with blast of air.
No airflow. Compressor off.
F&R panel valve closed.
F&R panel closed.
Compressed air hose not connected.
Turn compressor on.
Open F&R panel valve.
Open F&R panel regulator.
Connect compressed air hose.
Troubleshooting Chart V-400
Symptom Possible Causes Remedy
Inadequate airflow. Compressor filters plugged.
Muffler plugged with oil.
Air pressure too low.
F&R panel filter plugged.
Kink in air hose.
Change filters.
Replace muffler discs.
Increase air.
Change filter.
Straighten hose out.
No airflow. Compressor off.
F&R panel valve closed.
F&R panel closed.
Compressed air hose not connected.
Turn compressor on.
Open F&R panel valve.
Open F&R panel regulator.
Connect compressed air hose.
WWARNING
21345 67
8
Fig. 6: V-199 Adapter
This manual suits for next models
2
Table of contents
Other 3M Respiratory Product manuals

3M
3M Versaflo PAPR TR-300N+ User manual

3M
3M Versaflo BT-60 Series User manual

3M
3M 4082 User manual

3M
3M 7500 Series User manual

3M
3M 7800S Small User manual

3M
3M 9205 Plus User manual

3M
3M Secure Click HF-800 Series User manual

3M
3M N95 Assembly instructions

3M
3M Strap Respirator User manual

3M
3M Powerflow 7900PF User manual
Popular Respiratory Product manuals by other brands

Dräger
Dräger FPS 7000 Instructions for use

Parweld
Parweld XR940A Assembly

peaklife 360
peaklife 360 NB1 instruction manual

AW
AW BREATH-CLEAN PAPR Installation, operation, and parts manual

MSA
MSA 3S small quick start guide

Trudell Medical International
Trudell Medical International AeroEclipse XL owner's manual