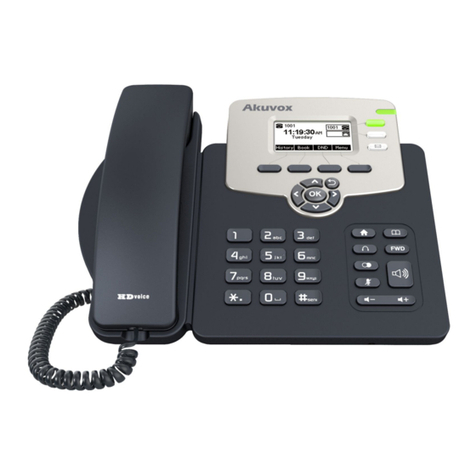
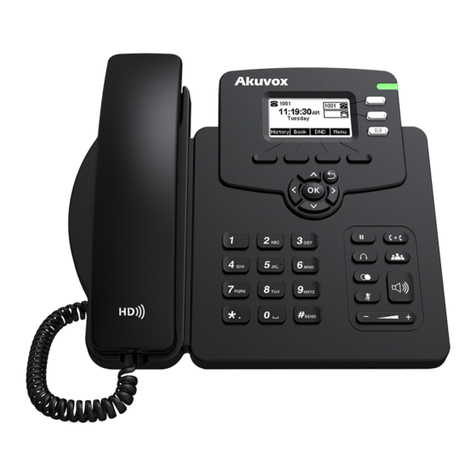
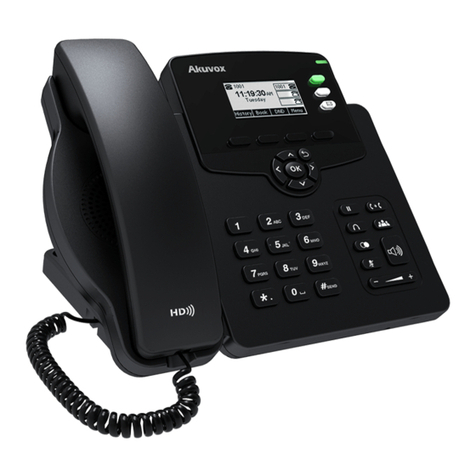
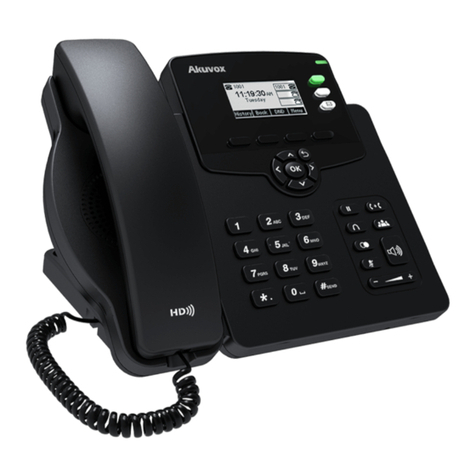
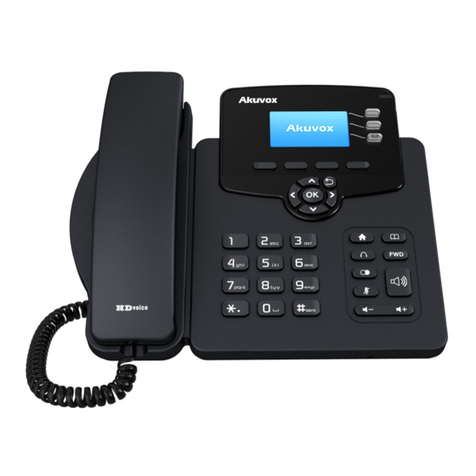
Akuvox R63G User manual

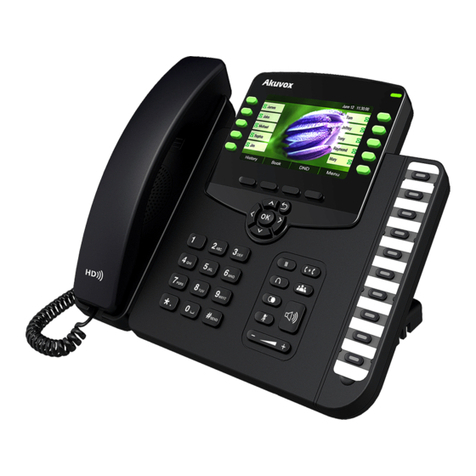
R63G IP Phone User Manual
Content

1 Overview....................................................................................4
1.1. Introduction......................................................................................................5
1.2. Features............................................................................................................5
1.3. Keypad..............................................................................................................8
1.4. Icon Introduction............................................................................................11
1.5. Installation......................................................................................................12
1.5.1 Check package contents........................................................................12
1.5.2Installation steps....................................................................................12
2 Function...................................................................................14
2.1 Make a call.......................................................................................................14
2.1.1 Call De ice.............................................................................................14
2.1.2 Call Method...........................................................................................14
2.2 Answer the call................................................................................................15
2.3 Mute................................................................................................................15
2.4 Call Hold/Resume............................................................................................15
2.5 DND.................................................................................................................16
2.6 Call Waiting......................................................................................................16
2.7 Call Completion...............................................................................................17
2.8 Call Forward.....................................................................................................17
2.9 Call Transfer.....................................................................................................18
2.9.1 Bind Transfer.................................................................................................18
2.9.2 Consultation Transfer............................................................................19
2.10 Conference....................................................................................................19
2.10.1 Create Local Conference......................................................................19
2.11 Call Park.........................................................................................................20
2.12 Pickup............................................................................................................20
2.12.1 Specified pickup..................................................................................21
2.12.2 Group pickup.......................................................................................21
2.13 Speed Dial......................................................................................................21
2.14 Auto-redial.....................................................................................................22
2.15 Hot-line..........................................................................................................22
2.16 Intercom........................................................................................................23
2.17 HotDesking....................................................................................................23
2.18 XML Broswer.................................................................................................24
2.19 Call Recording................................................................................................24
2.20 Keypad Lock...................................................................................................25
2.21 BLF.................................................................................................................25
2.22 BLFListCode...................................................................................................26
2.23 ACD................................................................................................................26
2.24 Hoteling.........................................................................................................27

2.25 Application.....................................................................................................27
2.25.1 Text Message.......................................................................................27
2.25.2 Voice Message.....................................................................................29
2.26 Simple Menu.................................................................................................29
3 Setting.....................................................................................30
3.1 Basic setting.....................................................................................................30
3.1.1 Language...............................................................................................30
3.1.2 Date &Time............................................................................................30
3.1.3 Ring Tones..............................................................................................31
3.1.4 Phone Volume.......................................................................................31
3.1.5 Backlight................................................................................................32
3.1.6 Password Setting...................................................................................32
3.2 Phone Book.....................................................................................................32
3.2.1 Local Phone Book..................................................................................32
3.2.1.1 Add contact manually..................................................................32
3.2.1.2 Add contact from all call history..................................................33
3.2.1.3 Search Contacts...........................................................................33
3.2.2 Blacklist..................................................................................................34
3.2.3 Remote Phone Book..............................................................................34
3.2.4 LDAP......................................................................................................35
3.3 History Management.......................................................................................35
3.4 System Customizations...................................................................................35
3.4.1 Programmable Key................................................................................35
3.5 SIP Account Management...............................................................................36
3.5.1 Register an account...............................................................................36
3.5.2 Disable an account................................................................................36
3.6 Basic Network Settings....................................................................................37
3.6.1 DHCP Mode...........................................................................................37
3.6.2 Static IP Mode.......................................................................................37
3.6.3 PPPOE Mode..........................................................................................37
3.6.4 Configure PC Port..................................................................................38
3.6.5 Configure VLAN.....................................................................................38
3.7 WebSer er.......................................................................................................39
3.8 Reset to Factory...............................................................................................39
3.9 Reboot.............................................................................................................39
4 WEB Interface..........................................................................40
4.1 Status-> Basic...................................................................................................40
4.2 Account->Basic................................................................................................41
4.3 Account->Ad anced........................................................................................43
4.4 Network->basic...............................................................................................47
4.5 Network-Ad anced..........................................................................................48
4.6 Phone->Time/Lang..........................................................................................51
4.7 Phone-> Preference.........................................................................................53
4.8 Phone-> Call Feature.......................................................................................54
4.9 Phone->Voice...................................................................................................58
4.10 Phone->Key/Display......................................................................................60
4.11 Phone->Ext Key..............................................................................................62
4.12 Phone->Ringtone...........................................................................................64
4.13 Phone->Tones................................................................................................65
4.14 Phone->Dial Plan-> Replace Rule..................................................................65
4.15 Phone->Dial Plan-> Dial Now........................................................................66
4.16 Phone-> Action URL.......................................................................................67
4.17 Phone->Multicast..........................................................................................70
4.18 PhoneBook->Local Book................................................................................71
4.19 PhoneBook->Remote Book...........................................................................72
4.20 PhoneBook->Call Log.....................................................................................73
4.21Phone Book->LDAP.........................................................................................74
4.22 Phone Book-> Broadsoft...............................................................................76
4.23 Upgrade-Basic................................................................................................77
4.24 Upgrade->Ad anced......................................................................................78
4.25 Security->Basic..............................................................................................81
4.26 Security->Ad anced.......................................................................................81
5 Trouble hooting.......................................................................83
6 Appendix : Time Zone ..............................................................84

1 Overview
1.1. Introduction
The Aku ox R63G is a featured 3-line IP phone with full duplex hands-free
speakerphone. It can be directly connected to an Internet Telephony Ser ice Pro ider
or to an IP PBX.
Based on the SIP standard, the Aku ox R63G has been tested to ensure
comprehensi e interoperability with equipment from VOIP infrastructure leaders
enabling ser ice pro iders to quickly roll-out competiti e, feature rich ser ices to

their customers.
Aku ox R63G is ery easy to understand, configure, and deploy. The web interface is
designed to pro ide a clean and user-friendly configuration window so that users
won’t get lost in complicated menus and maintenance.
1.2. Features
Highlights
HD Voice
Dual-port Gigabit Ethernet, PoE
Up to 3 SIP accounts
2.8" 320 *240 pixel color display with backlight
Supports Expansion Modules
Full Compatible with Asterisk, BroadSoft Platform
Phone Features
3 Lines (Support 3 SIP accounts)
Support Call Waiting, Call Forward, Call Transfer
Call on Hold, Mute, Auto-answer, Redial,
DND
Local 3-Way Conference
Volume Adjustable, Ring tones
Selectable/Import/Delete
Speed Dial, Hotline
Daylight Sa ing Time
Network Packet Capture
Country Ringtone Signal
Direct IP call
Auto Redial, Call Return
Dial Plan
XML Browser
Hot Desking
Keypad Lock
Action URL/URI
Phonebook (1000 groups), Blacklist (200groups),Call logs (200 entries)

5 Remote Phone Book URL Supported
LDAP
Multi-Languages Support
Support up to 6 Expansion Modules
Support Wireless Headset Adapter
IP-PBX Features
SMS.Voicemail.MWI Message
Notication
Music on hold, Intercom, Paging
BLF (Busy Lamp Field)
Call Pickup, Group Call Pickup
Call Recording
Call Completion
Anonymous Call, Anonymous Call
Rejection
Network Features
SIP V1(RFC2543), V2(RFC3261)
NAT Trans erse: STUN Mode
Static IP/DHCP for IP Configuration
3 DTMF modes: In-Band, RFC2833, SIP INFO
HTTP/HTTPS Web Ser er for Management
Proxy Mode and Peer-to-peer SIP Link Mode
NTP for Auto Time Setting
UDP/TCP/DNS-SRV(RFC 3263)
TFTP/FTP/HTTP/HTTPS Protocols
802.1 VLAN
Administration Features
Auto pro isioning using
FTP/TFTP/HTTP/HTTPS/PnP
Dial through IP PBX Using Phone Number
Dial through IP PBX Using URL Address
Configuration Managements with web,
keypad on the phone,and Auto Pro isioning
SNMP
TR069
Package Tracing Export, System Log

Security Features
Support HTTPS (SSL)
Support SRTP for Voice Data Encryption
Support Login for Administration
OpenVPN, IEEE802.1X
Digest Authentication Using MD5/MD5-sess
AES Encryption for Configuration file
SIP O er TLS
1.3. Keypad

Keypad Description
Key Key name Function escription
Na igation Assists you in selecting an item that you want to process
under the menu by pressing the Up, Down, Right or Left
key. Press the center key to sa e.
Soft Keys 1/2/
3/4
Key combination includes functions such as
History/Fa orites/Redial/CallReturn/HotDesking/XML
Browser/DND/Menu/MSG/Status/Book/FWD/PickUp/Gr
oup PickUp/Intercom/Speed Dial/and so on.
Line Keys 1/
2/3/4/5/6
Key combination includes functions such as
History/Fa orites/Redial/Account/ACD/BLF/BLFList/CallRe
turn/HotDesking/Record/XML Browser/DTMF/DND/
Menu/MSG/Status/Book/Fwd/PickUp/Group
PickUp/Intercom/Speed Dial/and so on.
Home Back to the Home page
Book View Local Phone Book/Blacklist/Remote Phone Book
Headset Use the headset to call out or call in
Forward Forward the call to the third part
Redial View the Missed Calls, Incoming Calls and Dialed Calls.
Mute Press this key in calling mode and you can hear the other
side, but the other side cannot hear you.
Volume -/+ Turn down or turn up the olume by pressing the “-“ key
or the “+” key.
Handfree Make the phone into hands-free mode.
Digital
keyboard
Inputting the phone number or DTMF.
Indicator light Blinking light indicates there is an incoming call.
Voice Message Voice Message iew

Rear iew and panel descriptions
Port Port name escription
Power switch Input: 5V DC 2A
Internet 10/100M Connect it to Network
PC 10/100M Connect it to PC
Ext Port type: RJ-12 connector
Handset Port type: RJ-9 connector
Headset Port type: RJ-9 connector

1.4. Icon Introduction

1.5. Installation
1.5.1 Check package contents
Please refer to the package list below to check the completeness of package
Name Quantity
SIP IP Phone unit 1
handset 1
RJ-9 Cable 1
Power Adapter 1
RJ-45 Cable 1
Stand 1
Quick installation guide 1
1.5.2Installation steps
Step 1 – Connect the power
Connect the pro ided power adapter to the Power port and plug the adapter into an
a ailable power outlet. The LCD will display “Initializing, Please Wait…”

-------------------------------------------------------------------------------------------------------
Note1: Ne er use a power adapter other than the one pro ided with Aku ox R63G
Note2: Only Internet port supports POE.
-------------------------------------------------------------------------------------------------------
Step 2 – Connect to the Internet
Connect one end of the RJ-45 Ethernet cable to the Internet port at the back of the
Aku ox R63G and the other end to wall network jack.
Step 3 – Connect the computer
Connect one end of the RJ-45 Ethernet cable to the PC port at the back of the Aku ox
R63G
and the other end to the Ethernet port on you computer.
Step 4 – Configure the de ice
Launch the web browser on your computer, and enter the IP address of the phone
into the address bar. The login screen will appear if the address is correct. Enter the
user name and password to log into the web console.
NOTE: Each phone has its own IP address, you can check it by press the OK key on
the keyboard when the phone is idle

2 Function
2.1 Make a call
2.1.1 Call evice
User can make a phone call ia the following methods:
1. Pick up the handset, icon will be shown on the idle screen.
2. Press the Handfree key, icon will be shown on the idle screen.
3. Press the Headset key if the headset is connected to the Headset Port in ad ance.
The icon will be shown on the idle screen.
User can also dial the number first, and then choose the method user will use to
speak to the other party.

2.1.2 Call Method
User can press an a ailable line key if there is more than one account, then
1. Dial the number User wants to call.
2. Press History softkey. Use the na igation keys to highlight User choice
Left/Right key to choose Missed Calls, Incoming Calls and Outgoing Calls.
3. Press the Redial key twice to call the last number called or press Redial key to
enter All Calls interface to choose the number to dial out.
4. Press the programmable keys which are set as speed dial key.Then press the speed
dial programmable key to make the call if necessary.
2.2 Answer the call
1. If User is not on another phone, lift the handset to use, or press the Speaker key/
Answer softkey to answer using the speaker phone, or press the headset key to
answer the headset.
2. If User is on another call, press the answer softkey to answer new incoming and
hold the current talking. During the con ersation, User can alternate between
Headset, Handset and Handfree by pressing the corresponding keys.
Note: The will flash during the Incoming interface
2.3 Mute
You can press the Mute key to make the user NOT be heard by the other party,
but User can hear the other party, icon will be shown on the LCD, and press the
Mute key again to reco er.

2.4 Call Hold/Resume
1. Press the Hold button or Hold softkey to put User acti e call on hold.
2. If there is only one call on hold, press the hold softkey to retrie e the call.
3. If there are more than one call on hold, press the line button, and the Up/Down
button to highlight the call, and then press the Resume button to retrie e the call.
2.5 N
If you enable DND mode, the phone will reject to answer all calls automatically and
play busy tone, the UI will present missed calls at the same time.
Mode Custom: There are two types Phone and Custom. Users can remote setup
the status of DND from SIP ser er in Custom mode. The default mode is Phone
that setup form local side.
DND Code: User can setup the specified account to be DND in custom mode.
But if users in phone mode, all account should be DND when it is enabled.
DND On Code: The Code used to turn on DND on ser er’s side, if configured, IP
phone will send a SIP message to ser er to turn on DND on ser er side if you
press DND when DND is off.
DND Off Code: The Code used to turn off DND on ser er’s side, if configured, IP
phone will send a SIP message to ser er to turn off DND on ser er side if you
press DND when DND is on.

2.6 Call Waiting
To configure Call Forward ia Phone interface:
1. Press Menu -->Features-->Call Waiting-->Enter.
2. Use the Left or Right key to enable or disable call waiting status and tone.
3. Then press the Sa e key to sa e the changes.
2.7 Call Completion
To monitor the status of the other phone and send a prompt when the status
changing. For instant, if users make a call and the callee is una ailable to answer the
call, the feature will notify the user when the callee is a ailable to recei e the call.
This function only can be triggered when recei ing 486 Busy message. Moreo er, if
the phone enable the oice message, the function is also una ailable.
To configure Call completion ia Phone interface.
1. Press MenuFeature Call Completion->Enter
2. Use the Left or Right key to enable or disable call completion.
3. Then press the Sa e key to sa e the changes.
Note: Not all ser ers can support call completion.

2.8 Call Forward
You can set the static forward to switch all the incoming calls to specified number;
Also you can use dynamic forward to switch all the incoming calls forward to the
number inputted when the phone is ringing.
Mode Custom: There are two types Phone and Custom. Users can remote setup
the status of DND from SIP ser er in Custom mode. The default mode is Phone
that setup form local side.
Always forward: All the incoming calls will be the Switched unconditionally to
specified number.
Busy Forward: The incoming calls will be the Switched to specified number when
the phone is busy.
No answer Forward: The incoming calls will be the Switched to the specified
number when the ring tone is time out without answer.
To configure Call Forward ia Phone interface:
1. Press Menu -->Features-->Call Forward-->Enter, or just press FWD key to enter Call
Forward interface;
2. There are 3 options: Always, Busy, and No Answer.
3. If User chooses one of them, enter the phone number User wants to forward to
recei ing party. Press Sa e to sa e the changes.
2.9 Call Transfer
You can use the following two ways to transfer talking to the other party:
Blind Transfer: Transfer talking directly to the other party without any

negotiation.
Consultation Transfer: Transfer talking to the other person in ol ed after the
other person in ol ed answer the incoming and with consultation.
2.9.1 Bind Transfer
1. Press the Trans softkey during the talking;
2. Enter the Trans number interface, and then Input the number you will transfer to;
3. Press the FWD key or the Trans softkey to transfer the hold talking to the number
you want to transfer to;
4. Return to the Idle automatically ;
Note: The UI will display Hold status interface when the number you want to transfer
to is not existed.
2.9.2 Consultation Transfer
1. Press the Trans softkey to enter the number you want to transfer to during the
talking; Input the number you want to transfer to;
2. Press the OK key on the phone keyboard or the Dial key to make a call;
3. Press the Trans softkey to finish transfer after the other person in ol ed answer
the incoming and with consultation; You can finish transfer ia putting down the
handset or press the Cancel softkey to cancel transfer if you currently use handset to
make or answer a call.

2.10 Conference
You can use the local conference feature to hold a 3-way conference by pressing the
Conference softkey to in ite the current talking and one line talking held to attend
conference. The Network conference feature allows you to add or delete the party
who attend the conference.
The local conference feature of IP phone Aku ox R63G can in ite two parties at most
to attend conference. The conference type of IP phone Aku ox R63G is Local
conference with default.
2.10.1 Create Local Conference
1. Create talking with first party;
2. Press the New softkey to create a new talking;
3. Press the Back softkey of dial interface to hold talking with first party;
4. Input the number of second party and press the OK key on the phone keyboard or
the Dial key or the Send softkey to make a call; When the second party answers your
call, inquire whether they want to attend conference;
5. Press the Conference softkey to start 3-way conference;
6. Press the Split softkey to split to two lines standalone talking, then this two parties
talking are under Hold status;
7. HOLD Press the Resume softkey to resume the current talking;
8. Press the Cancel softkey or the Return key to cancel the conference talking and
return to Idle .
Table of contents
Other Akuvox IP Phone manuals

Akuvox
Akuvox SP-R5xP Service manual

Akuvox
Akuvox R55P User manual

Akuvox
Akuvox VP-R48G User manual

Akuvox
Akuvox VP-R47P User manual

Akuvox
Akuvox R67G User manual

Akuvox
Akuvox SP-R55G User manual

Akuvox
Akuvox SP-R52 User manual

Akuvox
Akuvox SP-R53P User manual

Akuvox
Akuvox SP-R52P User manual

Akuvox
Akuvox R15P User manual