manuals.online logo
Brands
  1. Home
  2. •
  3. Brands
  4. •
  5. Anova
  6. •
  7. Outdoor Furnishing
  8. •
  9. Anova Courtyard F1030 User manual

Anova Courtyard F1030 User manual

anovafurnishings.com
888.535.5005 tel
TOOLS NEEDED:
• 1/2" Open-end or box-end wrench
• Ratchet with 1/2" socket
• Rubber mallet
• Level
Assembly Instructions
Courtyard
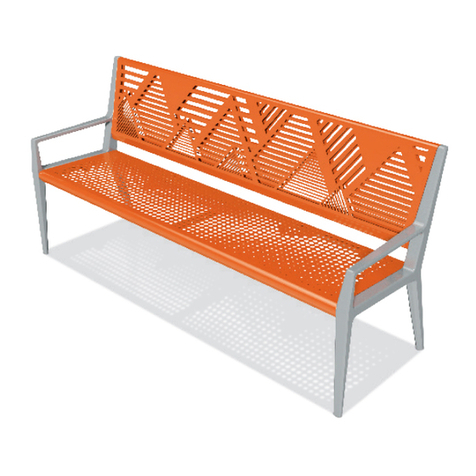
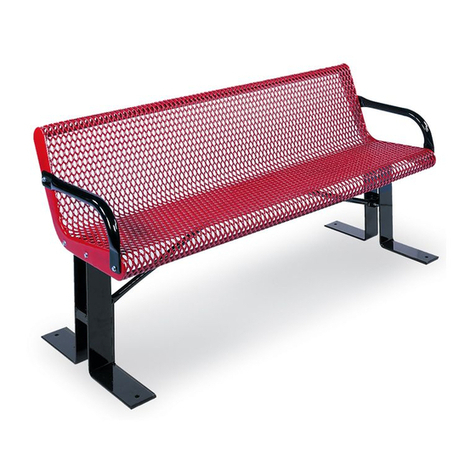
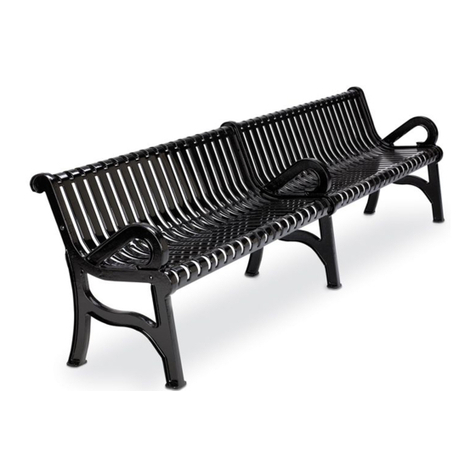
F1030 - Courtyard 4' Bench, Portable Frame
F1034 - Courtyard 6' Bench, Portable Frame
BENCH COMPONENTS:
ASSEMBLY HARDWARE: All hardware is stainless steel.
(2) Bench Supports (2) Cross Braces (1) Bench Seat(2) Arm Rests
(12) 5/16" - 18 X 1 1/4"
Hex Head Bolts
(24) 5/16" Flat
Washers
(12) 5/16" - 18
Nylock Nuts
(4) Rubber Feet
ASSEMBLY:
Inspect the shipping container contents for damage
and to determine that all components and hardware
are present.
1.
2. Lay all parts on a so work surface or on the shipping
packaging to prevent damage to nish.
3. Place the bench seat upside down on the shipping
packaging or other so surface. Locate one of the
bench supports and position it near the end of the seat.
NOTE: Before assembling the nuts to the bolts, it is
recommended that a light oil or petroleum jelly be
applied to the screw threads.
1
Courtyard 4' Bench Courtyard 6' Bench
Bench Seat
Bench Support
Support
Bracket
5/16" Flat
Washer
5/16" Flat Washer
5/16" - 18 X 1 1/4"
Hex Head Bolt
5/16" - 18
Nylock Nut
Bench
Seat
The assembly is a two-person operation.
4. Align the mounting holes in the support bracket with the mounting holes in the end of the bench seat. Place a at washer
onto one of the 1 1/4" hex head bolts and insert the bolt through both parts, with the bolt head on the outside surface of
the bench seat. Place a at washer and nylock nut on the inside end of the bolt and tighten it nger tight.
Insert a 1 1/4" hex head bolt and a at washer through the other set of mounting holes in that end of the bench seat and
support bracket and place a at washer and nylock nut on the end of the bolt and tighten it nger tight.
Repeat this step on the opposite side to install the remaining bench support.
NOTE: Installing the bolt in this direction reduces the risk of scratching during use.
2
5.
6.
7.
8.
9.
10.
11.
Locate a cross brace and position it so that the mounting
hole in one end aligns with the mounting hole in the bracket
in the center of the seat support. Place it on the back side
of the bracket. Place a at washer on a 1 1/4" hex head bolt
and insert the bolt through the cross brace and seat support
bracket and place a at washer and nylock nut on the end of
the bolt.
Leave the hardware nger tight so that adjustments can be
made while assembling and leveling.
Insert a bolt and at washer through the mounting holes in the
other end of the cross brace and seat center bracket and place
a at washer and nylock nut on the end of the bolt. Again,
leave the hardware nger tight.
Attach the other cross brace to the seat and other seat
support in the same manner. Leave the hardware nger tight.
Locate the four rubber feet and place them in the outermost
holes on the bottom of the supports. Use the rubber mallet to
set the feet into place.
Turn the bench upright. Locate an arm rest and position it at
one end of the bench seat. Line up the holes in the arm rest
with the mounting holes in the bench seat end. Place a at
washer on a 1 1/4" hex head bolt and insert the bolt through
the arm rest and through the mounting hole in the bench seat.
Place a at washer and nylock nut on the end of the bolt and
tighten nger tight.
Repeat this step for the other end of the arm rest. Aer both
sets of hardware are installed, tighten with the 1/2" open-end
or box-end wrench and the ratchet with the 1/2" socket.
Attach the other arm rest on the other end of the bench seat
in the same manner.
Tighten all hardware while checking with a level.
Move the assembled bench to the desired location.
Retighten hardware two weeks aer initial assembly.
NOTE: Hold down kits are available to keep the bench from being moved.
5/16" - 18 X 1 1/4"
Hex Head Bolt
5/16" Flat Washer
5/16" Flat
Washer
Cross Brace
5/16" - 18
Nylock Nut
Rubber Foot
5/16" - 18 X 1 1/4"
Hex Head Bolt and
5/16" Flat washer
5/16" Flat Washer and
5/16" - 18 Nylock Nut
Cross Brace
Arm Rest
5/16" - 18
Nylock Nut
5/16" Flat Washer
5/16" - 18 X 1 1/4"
Hex Head Bolt
5/16" Flat
Washer
Copyright 2018 ANOVA® Made in USA. 3
Note: Please contact Customer Care at 1-866-797-1761 when ordering replacement parts.
02/06/2018
Cross Brace
Bench Support
Arm Rest
Bench Seat
Assembly and Replacement Parts

This manual suits for next models

1

Other Anova Outdoor Furnishing manuals
Anova Signature L1501 User manual

Anova

Anova Signature L1501 User manual

Anova F1030 User manual

Anova

Anova F1030 User manual

Anova F1030R User manual

Anova

Anova F1030R User manual

Anova L1392S User manual

Anova

Anova L1392S User manual

Anova Airi AE2690LF User manual

Anova

Anova Airi AE2690LF User manual

Anova L1364 User manual

Anova

Anova L1364 User manual

Anova F2030 User manual

Anova

Anova F2030 User manual

Anova L1369A User manual

Anova

Anova L1369A User manual

Anova D1111 User manual

Anova

Anova D1111 User manual

Anova D1007 User manual

Anova

Anova D1007 User manual

Anova F1032 User manual

Anova

Anova F1032 User manual

Anova Infinity Modular Seating System User manual

Anova

Anova Infinity Modular Seating System User manual

Anova Perforated Steel Café Chair D1145 User manual

Anova

Anova Perforated Steel Café Chair D1145 User manual

Anova F1051 User manual

Anova

Anova F1051 User manual

Anova RCPWF6 User manual

Anova

Anova RCPWF6 User manual

Anova F1031 User manual

Anova

Anova F1031 User manual

Anova RCPTC6 User manual

Anova

Anova RCPTC6 User manual

Anova FBW6R User manual

Anova

Anova FBW6R User manual
Anova RCPHEXADA User manual

Anova

Anova RCPHEXADA User manual

Anova L1364 User manual

Anova

Anova L1364 User manual

Anova BRP121 User manual

Anova

Anova BRP121 User manual

Anova L1301S User manual

Anova

Anova L1301S User manual

Anova RCPWF6 User manual

Anova

Anova RCPWF6 User manual
Anova BRP101 User manual

Anova

Anova BRP101 User manual

Popular Outdoor Furnishing manuals by other brands

Belleze 014-HG-20077 owner's manual

Belleze

Belleze 014-HG-20077 owner's manual

Hanover OAKMONT4PCS-ASH manual

Hanover

Hanover OAKMONT4PCS-ASH manual

domi outdoor living LGMF1596 Assembly manual

domi outdoor living

domi outdoor living LGMF1596 Assembly manual

OLT Bayside Assembly manual

OLT

OLT Bayside Assembly manual

OCC Outdoors Products OCC-942S-DV6 manual

OCC Outdoors Products

OCC Outdoors Products OCC-942S-DV6 manual

CASARIA 992841 instructions

CASARIA

CASARIA 992841 instructions

Yardistry YM11895 Installation and operating instructions

Yardistry

Yardistry YM11895 Installation and operating instructions

hanit MIRA Assembly instructions

hanit

hanit MIRA Assembly instructions

sweeek. CARTAMA manual

sweeek.

sweeek. CARTAMA manual

Forever Redwood WOODEN SPA STEP Assembly instructions
Forever Redwood

Forever Redwood WOODEN SPA STEP Assembly instructions

Penguin 41218 MR Assembly instructions

Penguin

Penguin 41218 MR Assembly instructions

Marquee HAVANA Assembly instructions

Marquee

Marquee HAVANA Assembly instructions

Sunnydaze Decor AGR-386 manual

Sunnydaze Decor

Sunnydaze Decor AGR-386 manual

Grange Fencing COLONNADE PERGOLA Assembly instructions

Grange Fencing

Grange Fencing COLONNADE PERGOLA Assembly instructions

Loll Designs ADIRONDACK Assembly instructions

Loll Designs

Loll Designs ADIRONDACK Assembly instructions

Landscape Fusion L1440 Assembly instructions

Landscape Fusion

Landscape Fusion L1440 Assembly instructions

Breezesta PIEDMONT COUNTER PT-0602 Assembly

Breezesta

Breezesta PIEDMONT COUNTER PT-0602 Assembly

Agio 1900600 instructions

Agio

Agio 1900600 instructions

manuals.online logo
manuals.online logoBrands
  • About & Mission
  • Contact us
  • Privacy Policy
  • Terms and Conditions

Copyright 2025 Manuals.Online. All Rights Reserved.