aoyue 2738 User manual

2738
RepairingSystem
INSTRUCTIONMANUAL
Thankyouforpurchasingmodel2738RepairingSystem.
Pleasereadmanualbeforeusingtheunit.
Keepmanualinanaccessibleplaceforfuturereference.
FEATURES:
●Higherpowerandoptimizedtemperaturecontrolofsolderingironforhighermelting
pointrequirementofleadfreesolder.
●Builtinpowerfulsuction,drawingfumesatthesource.
●Betterthermalconductivitytransferringneededheatintothesolderjointwithout
increasingprocesstemperature.
●Easyslipinandoutsolderingirontipcartridge.
●Combinedwithhotairgun,increasingfunctionalityinjustonemachine.

2
TABLEOFCONTENTS
PackageInclusion………………………………….………..3
SafetyInstructions……………………………….…………..3
Specifications…………………………………….…………..4
AssemblyandPreparation…………………………….…….4
Operation
ControlPanel…………………………………….……..5
HotAirGunSoldering…………………………..……..6
SolderingIron…………………………………..……….7
SmokeAbsorber.………………………….….………..8
TroubleshootingGuide……………………………..………..9

3
PACKAGEINCLUSION
SAFETYINSTRUCTIONS
CAUTION
Whenthe power isON, the temperature of the solder iron, hot air gun andthenozzle
ranges from 200 ~ 480 o
C. Injuryto personnel or damage to items in the work area
mightbecausedifnotusedcarefully.Understandhowtousethesystemandobserve
thefollowing:
●Checkevery component afteropeningthepackagewhether everythingisingood
working condition. If there are anydamages suspected , don’t use theitem and
contactyourdealer.
●Whenmovingtheunittoanotherlocation,besuretoturnoffthepowerswitchand
removetheplug.
●Donotstrikeorsubjecttophysicalshockthemainunit,hotairgun,solderingiron
oranypartsofthesystem.Usecarefullyandlightlysoasnottodamageanyparts.
●Besuretheunitisgrounded.Alwaysconnectpowertoagroundedreceptacle.
HotAirGun
2738RepairingSystem B011SolderingIron
withSmokeAbsorber
618Versatile
WorkingPlatform
(soldseparately)
PowerCord AirNozzles
(1124,1130,1197,
1010,1313,1818) 2630SolderingIronStand
withSolderWireHolder
939Vacuum
SuctionPen
G001ICPopper
LF2BSolderingIronTipwith
HeatingElement
30150J
HeatResistantPad
30181XCarbon
Filters(2pieces)

4
SPECIFICATIONS
ASSEMBLYANDPREPARATION
A.SolderingIron
1.Installsolderwiretothesolderironholder.
2.Attachthesolderingirontothe5pinoutputatthebottomrightareaofthemain
unit.
3.Placesolderingirontothesolderingironstandasshownabove.
B.SmokeAbsorber
Attachthesmokeabsorbingpentothesmokeabsorberoutput.Makesurethatthe
cordconnectionsarefreefromanytangles.
C.HotAirGun
Placethehotairguninthesensorcontrolledstandtoprepareforusage.
PowerInput: 220V
StationDimensions: 188(w)x126(h)x250(d)mm
Weight: 6Kg
SOLDERINGIRON
PowerConsumption: 70W
OutputVoltage: 24V
TemperatureRange: 200480
o
C
HeatingElementwithTip: CeramicHeater
TiptoGroundResistance: <2W
TiptoGroundPotential: <2mV
HOTAIR
PowerConsumption: 500W
TemperatureRange: 200480
o
C
HeatingElement: MetalHeatingCore
NozzletoGroundResistance: <2W
MotorType: DiaphragmPump
AirCapacity: 23 l /min(max)
SMOKEABSORBER
VacuumPressure: 600mmHg

5
OPERATION
CONTROLPANEL
1—Hotairguntemperaturedisplay.Thefirstcharacterindicatesthe
functionmode.
actualtemperature
temperaturebeingset
coolingdown
sleep(standby)andoffmode
2— Airflow.Thefirstcharacterindicatesthefunctionmode.
actualairflow
airflowbeingset
3— Hotairgunairflowadjustmentbutton
4— Hotairguntemperatureadjustmentbutton
5— Hotairgunconnectingoutlet
6— Smokeabsorberoutput
7— Solderingiron5pinoutput
8— Airflowgauge
9— Mainpowerswitch
10— Smokeabsorberswitch
11— Solderingirontemperatureadjustmentbutton
12— Solderingironheaterlamp
13— Solderingirontemperature(actualandset)
1
2
3
4
5 6 7 8 9
10
11
12
13

6
OPERATION
I.HOTAIRGUNSOLDERINGPROCEDURE
A.Hotairgunairflowandtemperaturesetting
1. Check whether all the function buttons are not pressed. Turn on the power
switch.Thedigitaldisplaywillindicateblanklines.
When power switch is turned on and one of the display shows numbers, this
meansthatthefunctionisalreadyturnedonandisreadyforuse.
2.Pressbuttontoturnonthehotairsolderingfunction.
3.Settheairflowlevel.Pressbutton“3”fromControlPanelFigure.Airflowrangeis
from15100.
Be sure to set the airflow accordingly. Never set the airflow low especially
whenthetemperatureishighasthiswillnotcirculatethehotairandburnthe
heatingelement.
4.Setthetemperature.Pressbutton“4”fromControlPanelFigure.
IMPORTANT:Setairflowlevelfirstbeforesettingthetemperature.Thiswould
help lengthentheusagelifespanofthemainunitandtheheatingelement.
5. When airflow and temperature has been set, wait until the real temperature
reachesthesettemperatureandstabilizes.Ifso,thehotairguncannowbe
used.
IMPORTANT:Donotimmediatelyturnoffthepowerswitchafterusage.Turn
offtheHOTAIRbuttonfirst.Thetemperaturewilldecreaseslowlyreleasing
coolerairtocooldowntheunit.Whenatemperatureof100
o
Cisreached,air
willstopblowing.Thepowerswitchcannowbeturnedoff.
Note: When HOT AIR is pressed and not put to use after fifteen minutes,
temperature automatically decreases below 100 and turns to sleepmode. When
thehandleisheldagaintheunitwillgobacktoitsprevioussetting.
B.Replacingtheheatingelement
1.Removethescrewswhichsecurethehandleandslidethecordtube.
2.Openthehandle.Disconnectthegroundwiresleeveandremovethepipe.
3.Removetheheatingelementbydisconnectingtheterminal.
4.Insertanewheatingelementandreconnecttheterminal.Handletheheating
element with care. Never rub its wire. Reconnect the ground wire after
replacingtheelement.
5.Assemblethehandleinthereverseorderofdisassembly.
HOTAIR

7
OPERATION
II.SOLDERINGIRONOPERATINGPROCEDURE
A.Changingthetemperaturesetting
1.Turnonthepowerswitch.
2.Pressthebutton.Makesurethatthesolderingironisattached
properly to the 5pin output.When error signal beep is heard, pressthereset
button.
Thesolderirontemperaturedisplaywillshowthesolderiron’scurrenttemperature,
thistemperaturewillriseto200
O
C.
NOTE:Temperaturecanbesetfrom200 480
o
C.Anincrement/decrementof2
o
C
will be set whenever the temperature adjusting button is pressed. Press button
steadilyforlargedifferenceindesiredtemperature.
The single heater lamp will blink when the station increases and reaches its set
temperature.Noblinkingshallbenoticedwhenthetemperatureisdecreasing.Tip
temperature rises quickly to desired setting. A beep sound will be heard when
desired temperature has been reached. Temperature drop is dependent on the
surroundingenvironmentandtakestimetocooldown.
B.Autosleepmodeshutoff
Thisisanoptionalsetting.Whenitisactivatedandthesolderingironisnotused
or kept idle for 30 minutes, the power to the heating element will be shutoff
automaticallyandthebuzzerwillbeepthreetimes.Toturnonthefunction
1. In a simultaneous manner, press UP and DOWN button of the solder iron
temperaturecontroltogether,then
2.Turnonthebuttonwithoutreleasingthepressedbuttons.
3.The displaywill showindicatingthat the30minuteidletimesleep
modeisturnedon.
4.After30minutesofidletime,thebuzzerbeepsandthetemperaturedecreasesto
roomtemperature.Whenheatingelementpowerhasbeenshutoff,thedisplay
willshow
Note:Thepowerwillbeturnedonifyouhitanybuttonbeforethetemperature
decreasestoroomtemperature.
5.Tobeginsoldering,pressthebutton.
If the solder iron reset button is pressed after setting the auto sleep mode, the
optionwillbevoid.Toturnonthe30minutesleepmodeagain,turnoffthepower
switchandrepeatsteps1&2.
SOLDERIRON
SOLDERIRONRESET
SOLDERIRON

8
OPERATION
C. Replacingthetip
1.AlwaysturnthepowerOFFwhenremovingorinsertingatip.
2.Whenthetipishot,holditwiththeheatresistantpadandpullitout.
3.Insertthenewtipfullyintothehandle.Ifthetipisnotfullyinserted,thedisplay
willshowasensorerrorwhenpoweristurnedon.
III.SmokeAbsorberOperation
1.Waituntilthesolderingironreachesthesettemperatureandstabilizes.
2.Turnonthesmokeabsorberswitch.
When the smoke absorber is on while working with the soldering iron, the dirty
fumes created will be absorbed simultaneously. The fumes will passthrough a
filterandreleasecleanairthroughthehotairgun.
Note:Thefiltermustbecleanedorreplacedregularlysothatdirtwon’tclutter.
Filterpad
Hotairgunandsmokeabsorbingfunctioncannotbeusedatthesametime.

9
TROUBLESHOOTINGGUIDE
●Theunitdoesnotoperatewhenthe
powerswitchisturnedon.
●Thesolderingirontipdoesnotheat
up.Sensorerrordisplayed.
●Solderdoesnotwetthetip.
●Thetiptemperatureistoohigh.
●Thetiptemperaturetoolow
●The smoke absorber is not
functioning effectively.
CHECK: Is the power cord and/or the
connectionplugdisconnected?
ACTION:Connectit.
CHECK:Isthefuseblown?
ACTION: Investigate why the fuse blew
andthenreplacethefuse.Ifthecausecan
notbedetermined,replacethefuse.Ifthe
fuseblowsagain,sendtheunitforrepair.
CHECK: Is the power cord and/or the
connectionplugconnected?
ACTION:Connectit.
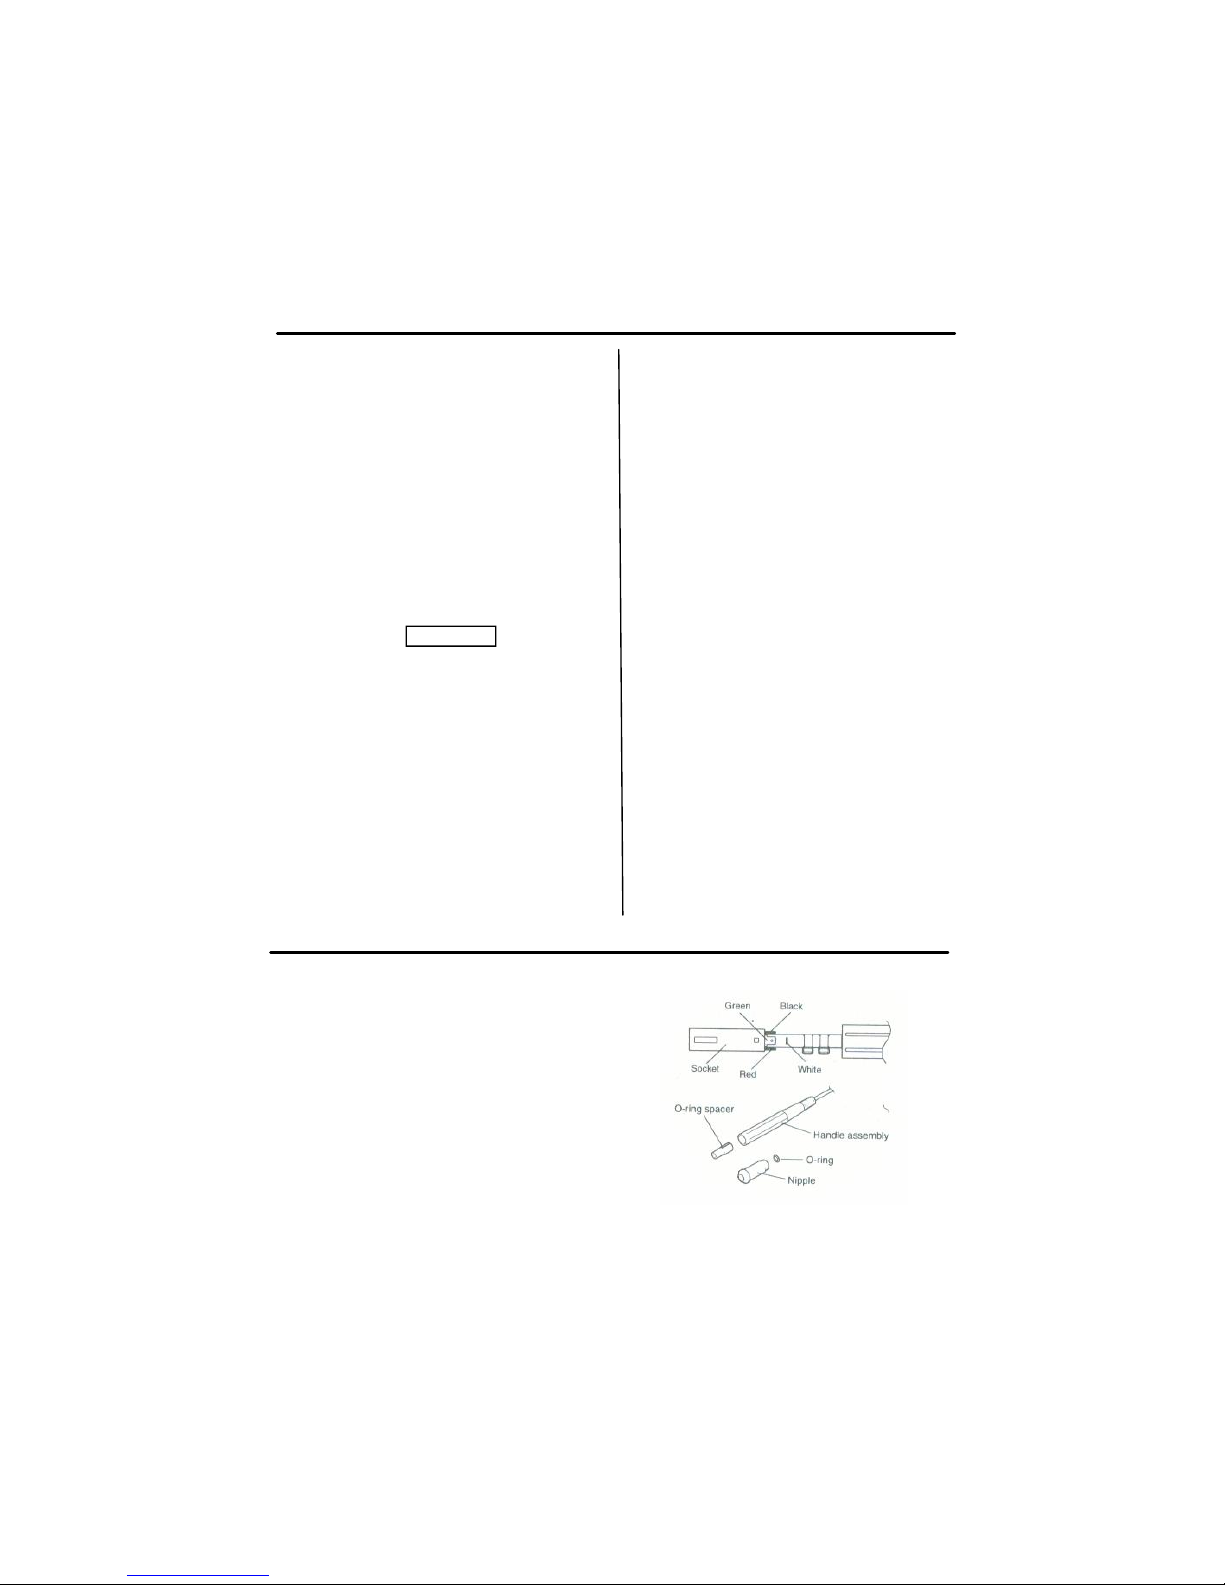
CHECK: Isthetipinsertedproperly?
ACTION:Insertthetipcompletely.
CHECK: Istheconnectioncordand/orthe
heater/sensorbroken?
ACTION: Check the connectioncord and/
ortheheater/sensorforbreakage.(p.10)
CHECK:Isthetiptemperaturetoohigh?
ACTION:Setappropriatetemperature.
CHECK:Isthetipcontaminatedw/oxide?
ACTION:Removetheoxide
CHECK: Istheconnectioncordbroken?
ACTION: Check the connection cord for
breakage.(p.10)
CHECK: Isthetipcontaminatedw/oxide?
ACTION:Removetheoxide.
CHECK:Isthesmokeabsorberpipeorhot
airgunpipetangled?
ACTION: Free up the pipe from any
tangles.
CHECK: Is the smoke absorber opening
strandedorthefilterclutteredwithdirt?
ACTION: Free up the stranded part or
replacethefilterpadwithanewone.
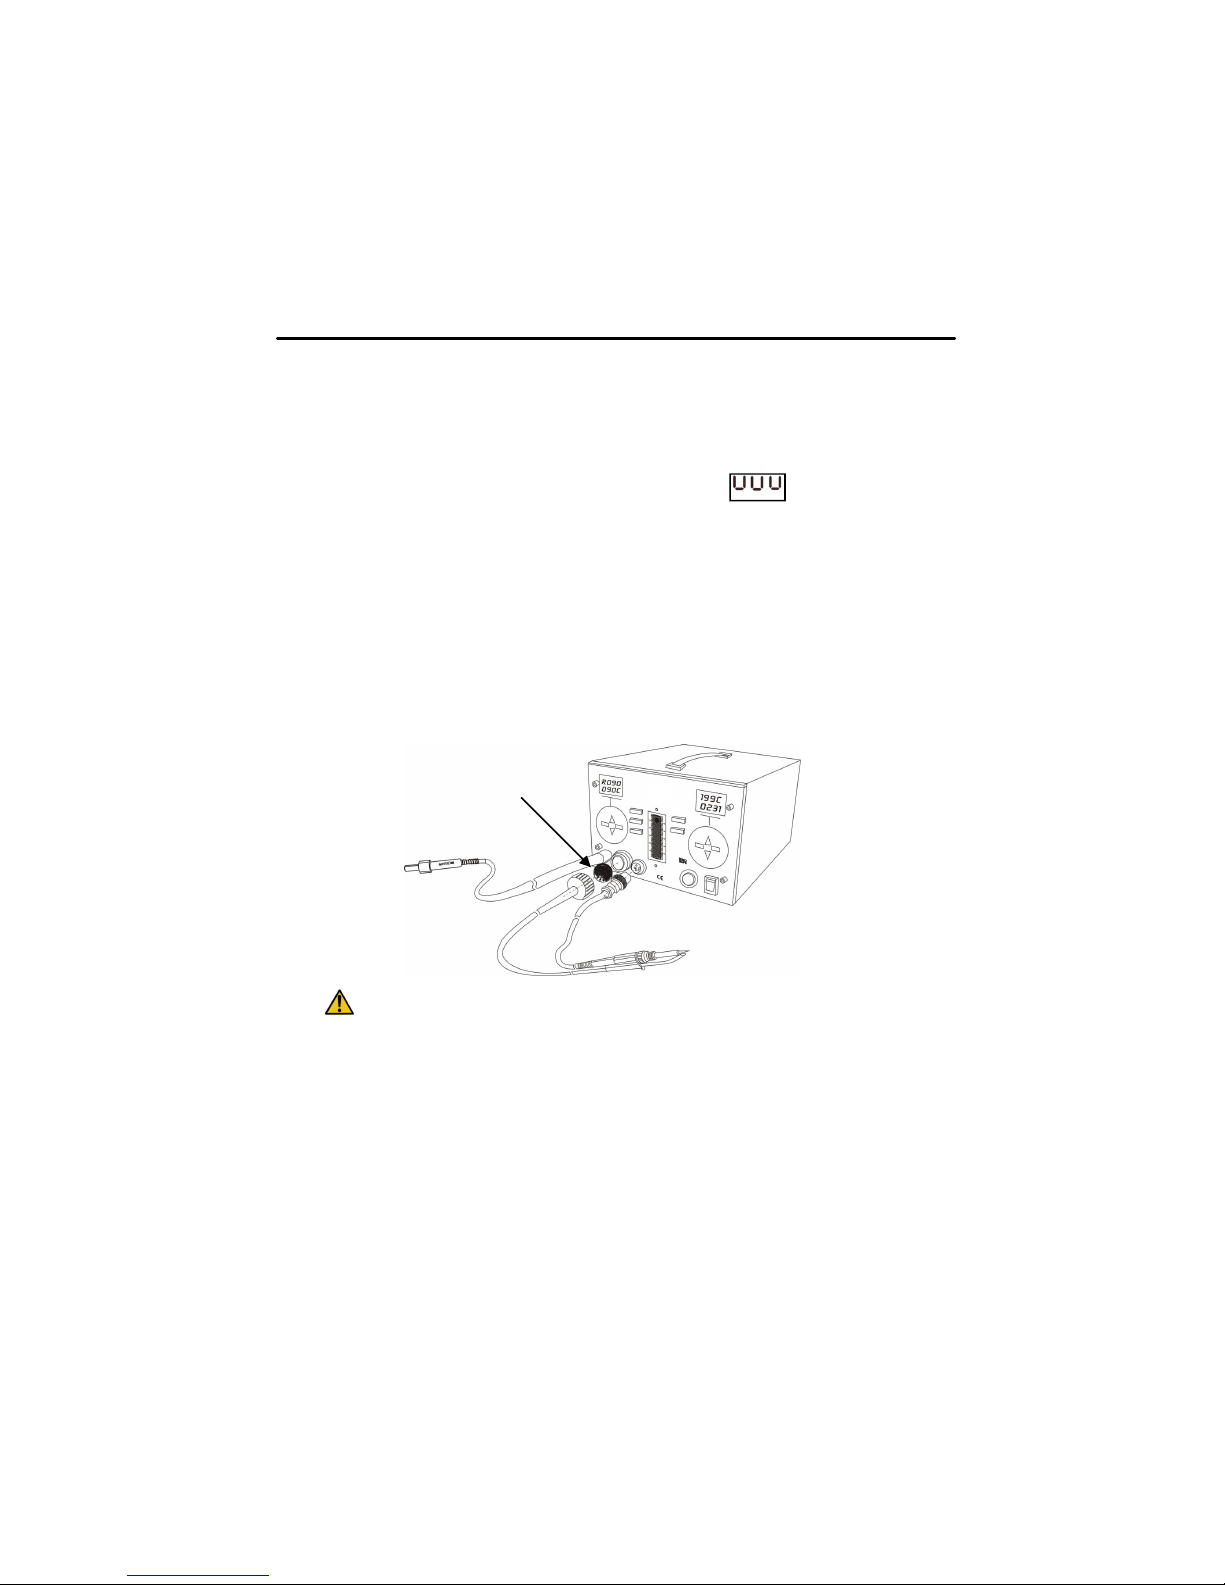
Beforecheckingtheinsidepartofthestationorreplacingparts,besureto
disconnectthepowerplug.Failuretodosomayresultinelectricshock.

10
TROUBLESHOOTINGGUIDE
●Thesolderfluxdoesnotsticktothe
solderingiron.
●Whentheispressed,
there is air coming out but the air
does not heat up. Likewise, both
temperature and airflow cannot be
adjusted.
●While using the hot air gun, the
heating element becomes red hot.
Airflow is set at high level but the
airflowcomingoutisweak.
CHECK: Is the soldering iron’s
temperatureveryhighandablacklayerof
oxidepresent?
ACTION: Decrease temperature to
200
o
C, remove the black layer of oxide
usingacleaningsponge.Reapplyanew
layerofsolderfluxandadjusttemperature
todesireddegree.
Note: To prevent oxidation and lengthen
usage life span, always maintain a layer
of soldering flux in the soldering iron rod
everytime.
CHECK:Doeshotairtemperaturedisplay
anydigitsandthesmokeabsorberswitch
turnedon?
ACTION: Turn off the smoke absorber.
Hot air gun and smoke absorber causes
unstablepowerwhileworking.
CHECK: Is the smoke absorber opening
strandedorthefilterclutteredwithdirt?
ACTION: Free up the stranded part or
replacethefilterpadwithanewone.
HOTAIR
1.Removethesolderingtipandthenipple.
2.Pushthesocketoutfrominsidethehandle
assembly.
3.Measuretheresistancevaluesbetweenthe
connectorandtheleadwiresatthesocket
asfollows:
Pin1Red(+)
Pin3 Blue(ground)
Pin5 Black()
Ifanyvalueexceeds0W oris ¥,replacethe
handleassembly.
CHECKINGSOLDERINGIRONCONNECTIONCORDFORBREAKAGE

11
SOLDERINGIRONTIPSWITHHEATINGELEMENT
SoldSeparately

12
Manufacturer:
AOYUETONGYIELECTRONICEQUIPMENTFACTORY
JishuiIndustrialZone,Nantou,ZhongshanCity,
GuangdongProvince,P.R.China
http://www.aoyue.com
AIRNOZZLES
SoldSeparately
Table of contents
Other aoyue Soldering Gun manuals
Popular Soldering Gun manuals by other brands

Lafayette
Lafayette TURTLE user manual

Fahrenheit
Fahrenheit 28026 manual

ETT Distribution
ETT Distribution MLS-48 owner's manual

Taiyo Electric
Taiyo Electric Goot RX-852AS Operation manual

Bell System Practices
Bell System Practices KS-14582 DESCRIPTION AND USE

Pace
Pace MBT250 Operation, maintenance & instruction manual