manuals.online logo
Brands
  1. Home
  2. •
  3. Brands
  4. •
  5. Assa Abloy
  6. •
  7. Door Lock
  8. •
  9. Assa Abloy 8654 User manual

Assa Abloy 8654 User manual

Top
Auxiliary
Lock
9
8654 Hinged Security Door Lock
3 Point Kit and Standard Lock Installation
Fitting the Actuator Bar and Auxiliary Locks
Note: For ease of fitment remove door from the door frame.
- Assemble the Actuating Bar and Rods as shown prior to
fitting to the door stile. With the “TOP” mark facing the front.
- Keep the locating lugs of the Actuating Bar facing the front edge of
the door.
- Insert the Actuator Bar and rod assembly through the top cut-out
and slide it through the door stile.
- With the Auxiliary locks in the locked position (as shown),
Important: Connect the top Auxiliary lock first to the end of the rod
followed by the bottom Auxiliary lock.
- Then push them both into the door stile.
Rod
Fitting Central Lock
With the central lock in the factory set Deadlock position,
insert into the stile. Locate and engage the lug on
the Actuating Bar with the lock, then secure with screws.
Important: The lock must be installled in the position shown,
product warranty cannot be assured if installed upside down.
Fitting Cylinder & Spindle
- Insert cylinder so cam turns towards front of door.
- Losely fix cylinder with screw.
- Then insert spindle into lock body.
2
Lever Handing
If necessary prepare escutcheon by rotating levers 180 degrees
downwards to required handing position.
6
Fitting Escutcheon
- Fit escutcheon with snib on the inside face of the door.
- Ensure snib is to 90 degrees in the direction of the lever..
- Secure inside and outside escutcheons with screws and
screw hole plugs.
Securing Top and Bottom
Auxiliary Locks
Drill a 3mm hole through bottom hole
in the Auxiliary locks, secure with
fixing screws.
1
Drilling Hole in Top and Bottom Auxiliary Locks
- Gently push the top Auxiliary lock upwards to retract the hook bolt.
- Then drill a 3mm hole in the centre of the slotted hole.
- Repeat this step for the bottom Auxiliary lock.
12
Test Safety Mode:
Important: Release button above hook bolt must be depressed.
Rotate key or snib 90 degrees towards the lever:
- Padlock symbol is visible.
- Inside and outside levers are locked.
- Auxiliary hook bolts are thrown and locked, push hook bolts upwards
to check.
- Repeat STEP 6 to return lock to Passage mode.
Test Deadlock Mode:
Important: Release button above hook bolt must be depressed.
Rotate key 180 degrees towards the lever:
- Snib rotates 90 degrees towards the lever, padlock symbol is visible.
- Inside and outside levers are locked.
- Auxiliary hook bolts are thrown and locked, push hook bolts upwards
to check.
Important: Reposition top and bottom Auxiliary locks if
necessary to achieve Safety and Deadlock modes, then
fully tighten fixing screws in STEP 8.
Bottom
Auxiliary
Lock
3
4
Release
Button
10
Locating Lugs
Actuator Bar
Stile
Spindle
Cylinder
‘o’
Ring
Top
Lug
5
Cam
7
Fixing Screw to Top and Bottom Auxiliary Locks
- Gently push the top Auxiliary lock upwards to retract the hook bolt.
- Lightly fix screw in slotted hole.
- Repeat this step for the bottom Auxiliary lock.
8
Passage Mode
With the central lock in the factory set Deadlock position, insert key
and rotate 90 degrees away from the lever to the unlocked position
or Passage mode. Snib rotates to the vertical position.
Release
Button
Depress Release
Button
Depress Release
Button
11
Snib
Hook
bolt
retracted
Q50083 Iss: A 0312
13
Mounting handle BELOW centreline of door Mounting handle ABOVE centreline of door
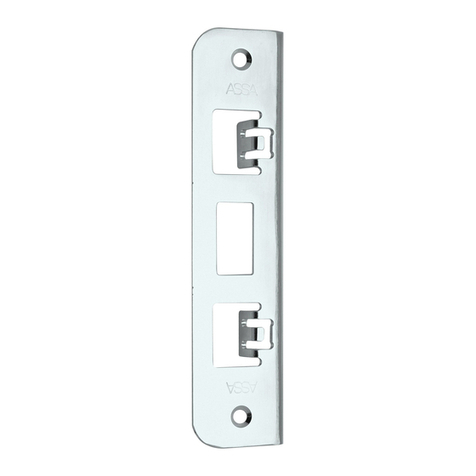
Both sides of the door section must be cut to the dimensions
given. Start with the centre of door (CL OF DOOR) then measure
69.5mm BELOW and mark the (CL OF CUTOUT).
Mark Bolt Recess and Screw
Holes
- Align the bottom of the
Central strike with the mark
just made on the door jamb.
- Face the curved side of the
strike outwards, hold strike
against the door stop and mark
the bolt recess and screw hole
positions.
Fix Screws
Secure the Central strike with fixing
screws. Maximum clearance between
door and jamb should not exceed 4mm.
Door
stop
Exterior
door
face
Mark Central Strike Position
Hold the door against the jamb and mark a line level
with the mark on the front of the central lock body.
Door jamb
Mark on
Central
lock body
Door jamb
20mm Depth
44mm Height
12mm
Width
Base of
strike
hole
8654 Hinged Security Door Lock
Timber Door Central Strike Installation
(Standard 19mm door)
4mm
Timber
jamb Aluminium door
Bolt
recess
Chisel Bolt Recess
For timber door jambs
chisel out bolt recess
and ensure it is at
least 20mm deep
and 44mm high from
the BASE of the strike
hole.
14
15
16
17
18
19
20
Chisel Bolt Recess
For timber door jambs
chisel out bolt recess
and ensure it is at
least 20mm deep
and 44mm high from
the TOP of the strike
hole.
Door jamb
Mark on
Auxiliary
lock body
Door jamb
Mark Auxiliary Strike Position
Hold the door against the jamb and mark the door jamb
level with the mark on the front of the Auxiliary lock body.
Fix Screws
Secure the Auxiliary strike with fixing
screws. Maximum clearance between
door and jamb should not exceed 4mm.
4mm
Timber
jamb Aluminium door
20mm Depth
44mm Height
12mm
Width Top of
strike
hole
Door
stop
Exterior
door
face
Bolt
recess
825.5
682.5
678.5
829.5
Both sides of the door section must be cut to the dimensions
given. Start with the centre of door (CL OF DOOR) then measure
77.5mm ABOVE and mark the (CL OF CUTOUT).
Mark Bolt Recess and Screw
Holes
- Align the bottom of the
Auxiliary strike with the mark
just made on the door jamb.
- Hold strike against the
door stop and mark the bolt
recess and screw hole positions.
Timber Door Auxiliary Strike Installation
(Standard 19mm door) Slot (min)
69.5
77.5
Slot (min)
Mounting
face
Mounting
face
(From the
mounting
face)
(From the
mounting
face)

Other Assa Abloy Door Lock manuals

Assa Abloy HES 9400 Operating instructions

Assa Abloy

Assa Abloy HES 9400 Operating instructions

Assa Abloy Yale Assure Lock YRC256-ZW3 Technical specifications

Assa Abloy

Assa Abloy Yale Assure Lock YRC256-ZW3 Technical specifications

Assa Abloy Liscio User manual

Assa Abloy

Assa Abloy Liscio User manual

Assa Abloy Corbin Russwin CL3800 Series User manual

Assa Abloy

Assa Abloy Corbin Russwin CL3800 Series User manual

Assa Abloy KESO KEK i-handle S Operator's manual

Assa Abloy

Assa Abloy KESO KEK i-handle S Operator's manual

Assa Abloy Yale PBS1 User manual

Assa Abloy

Assa Abloy Yale PBS1 User manual

Assa Abloy Yale Essential Series User manual

Assa Abloy

Assa Abloy Yale Essential Series User manual

Assa Abloy Sargent 10X Line User manual

Assa Abloy

Assa Abloy Sargent 10X Line User manual

Assa Abloy Yale AYRD110 User manual

Assa Abloy

Assa Abloy Yale AYRD110 User manual

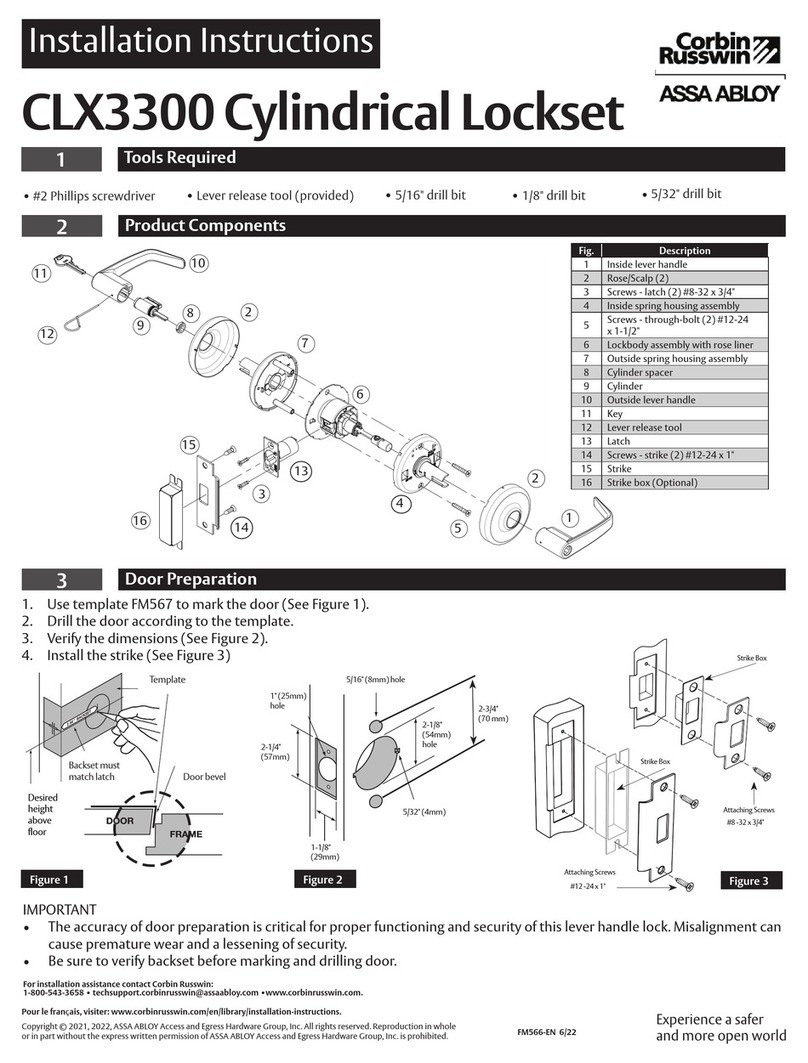
Assa Abloy Corbin Russwin CLX3300 Series User manual

Assa Abloy

Assa Abloy Corbin Russwin CLX3300 Series User manual

Assa Abloy Sargent AD-PE8600 User manual

Assa Abloy

Assa Abloy Sargent AD-PE8600 User manual

Assa Abloy ePED 1386-00 User manual

Assa Abloy

Assa Abloy ePED 1386-00 User manual

Assa Abloy HES 8000 Series User manual

Assa Abloy

Assa Abloy HES 8000 Series User manual

Assa Abloy effeff Security lock 309 Series User manual

Assa Abloy

Assa Abloy effeff Security lock 309 Series User manual

Assa Abloy Corbin Russwin Access 800 TCAC2 Series Installation manual

Assa Abloy

Assa Abloy Corbin Russwin Access 800 TCAC2 Series Installation manual

Assa Abloy HES Aperio ES100-15 Manual

Assa Abloy

Assa Abloy HES Aperio ES100-15 Manual

Assa Abloy LE932 User manual

Assa Abloy

Assa Abloy LE932 User manual

Assa Abloy Emtek F20 User manual

Assa Abloy

Assa Abloy Emtek F20 User manual
Assa Abloy eCLIQ User manual

Assa Abloy

Assa Abloy eCLIQ User manual
Assa Abloy Yale Luna Pro User manual

Assa Abloy

Assa Abloy Yale Luna Pro User manual

Assa Abloy Sargent PE8400 Series User manual

Assa Abloy

Assa Abloy Sargent PE8400 Series User manual

Assa Abloy Valencia Hola User manual

Assa Abloy

Assa Abloy Valencia Hola User manual

Assa Abloy Rixson 73ER User manual

Assa Abloy

Assa Abloy Rixson 73ER User manual

Assa Abloy Lockwood 8816 User manual

Assa Abloy

Assa Abloy Lockwood 8816 User manual

Popular Door Lock manuals by other brands

ArrowVision Shepherd 220A Operation manual

ArrowVision

ArrowVision Shepherd 220A Operation manual

Locksmart LOCKSMART ABODE User guide, installation & maintenance

Locksmart

Locksmart LOCKSMART ABODE User guide, installation & maintenance

Hafele DT 750 operating instructions

Hafele

Hafele DT 750 operating instructions

Denler DFLv3 user manual

Denler

Denler DFLv3 user manual

Digilock Australia DL880 user manual

Digilock Australia

Digilock Australia DL880 user manual

Glutz HZ-lock VB 19000 Assembly and maintenance instructions

Glutz

Glutz HZ-lock VB 19000 Assembly and maintenance instructions

HATO TA-311 operating manual

HATO

HATO TA-311 operating manual

ASPiSYS UNiLOCK instructions

ASPiSYS

ASPiSYS UNiLOCK instructions

ZKTeco LH6500 Installation instruction

ZKTeco

ZKTeco LH6500 Installation instruction

Lock LAL700 Installation instructions and template

Lock

Lock LAL700 Installation instructions and template

Kaba Mas 3750 User operating instructions

Kaba Mas

Kaba Mas 3750 User operating instructions

Lloyd's LC-1331 installation guide

Lloyd's

Lloyd's LC-1331 installation guide

LaGard 8130 installation instructions

LaGard

LaGard 8130 installation instructions

EZ-ON SHS-3120 user guide

EZ-ON

EZ-ON SHS-3120 user guide

Masterlock ProSeries 6230 Technical manual

Masterlock

Masterlock ProSeries 6230 Technical manual

Borglocks BL5000 ECP quick start guide

Borglocks

Borglocks BL5000 ECP quick start guide

Masterlock dialSpeed 1500eD user manual

Masterlock

Masterlock dialSpeed 1500eD user manual

Glutz 51017 Fixing instructions

Glutz

Glutz 51017 Fixing instructions

manuals.online logo
manuals.online logoBrands
  • About & Mission
  • Contact us
  • Privacy Policy
  • Terms and Conditions

Copyright 2025 Manuals.Online. All Rights Reserved.