User’s manual
TL7610
DECT 6.0 cordless headset
Table of contents
Optional accessories ................. 5
Getting started
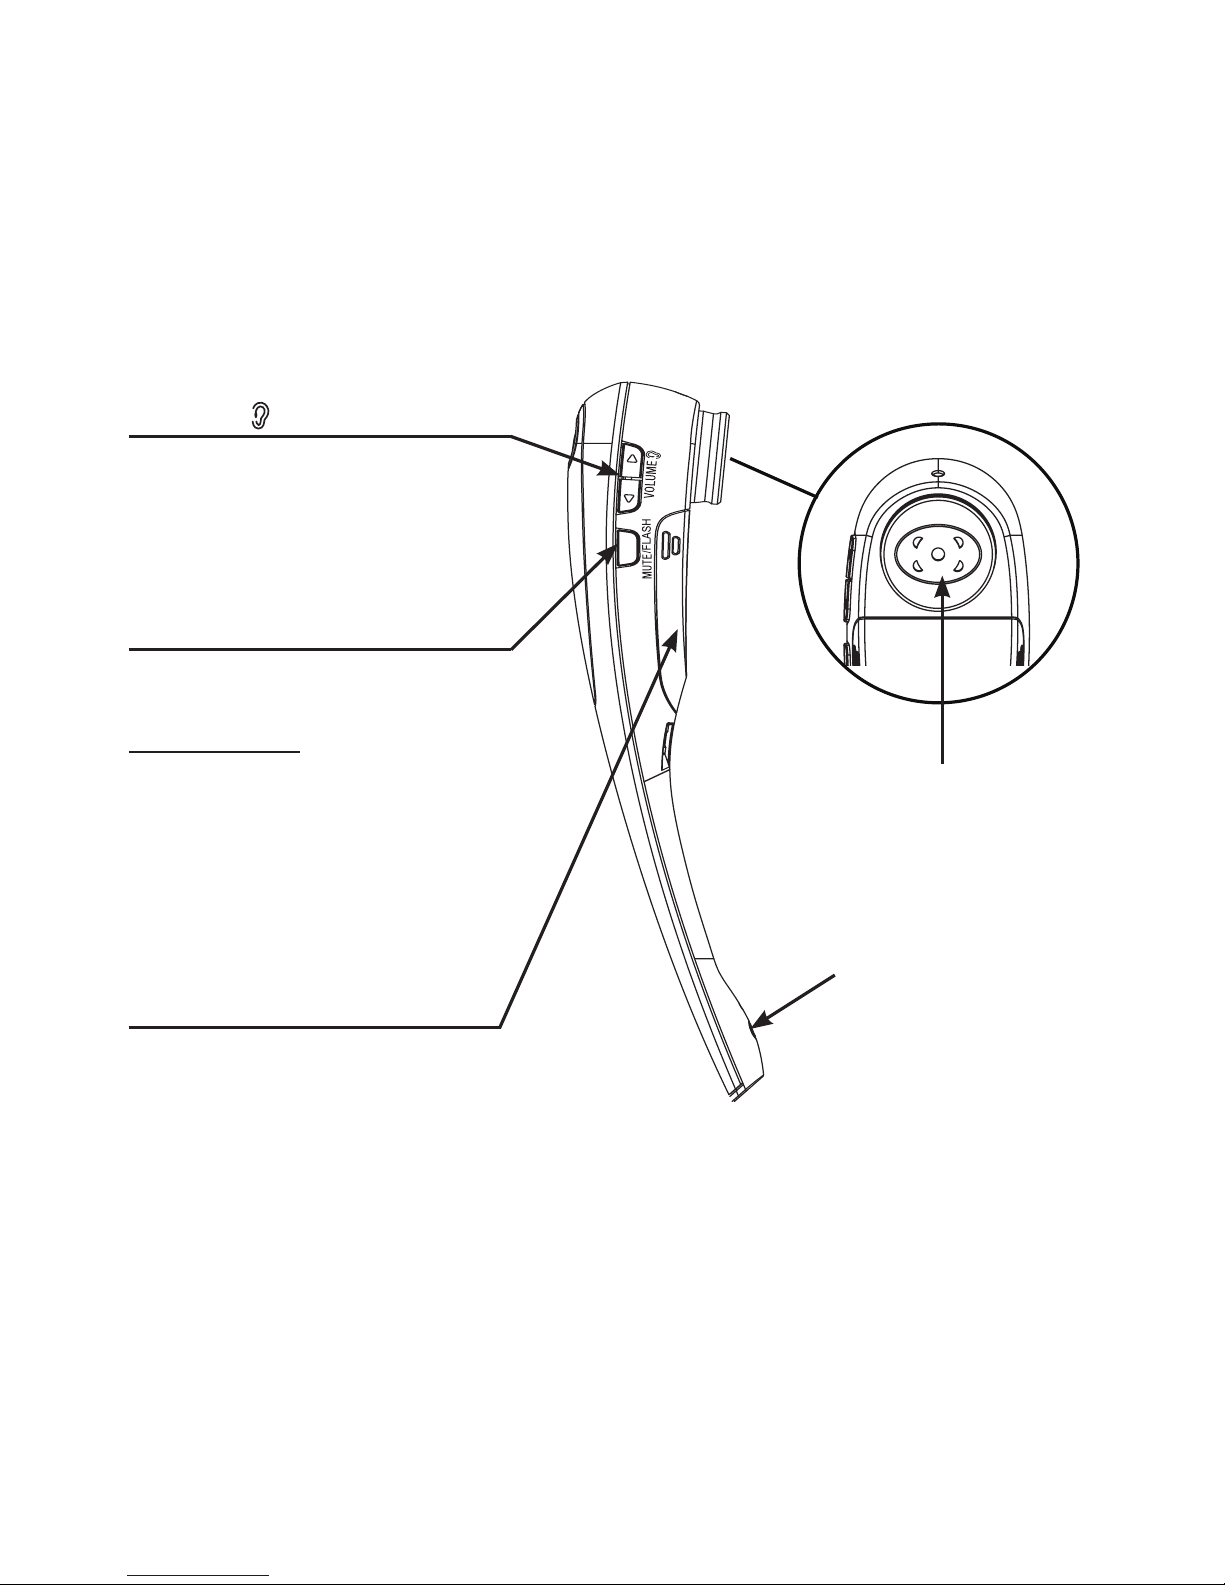
Quick reference guide -
headset......................................... 1
Headset indicator lights........... 1
Alert tones...................................... 3
Headset alert tones................ 3
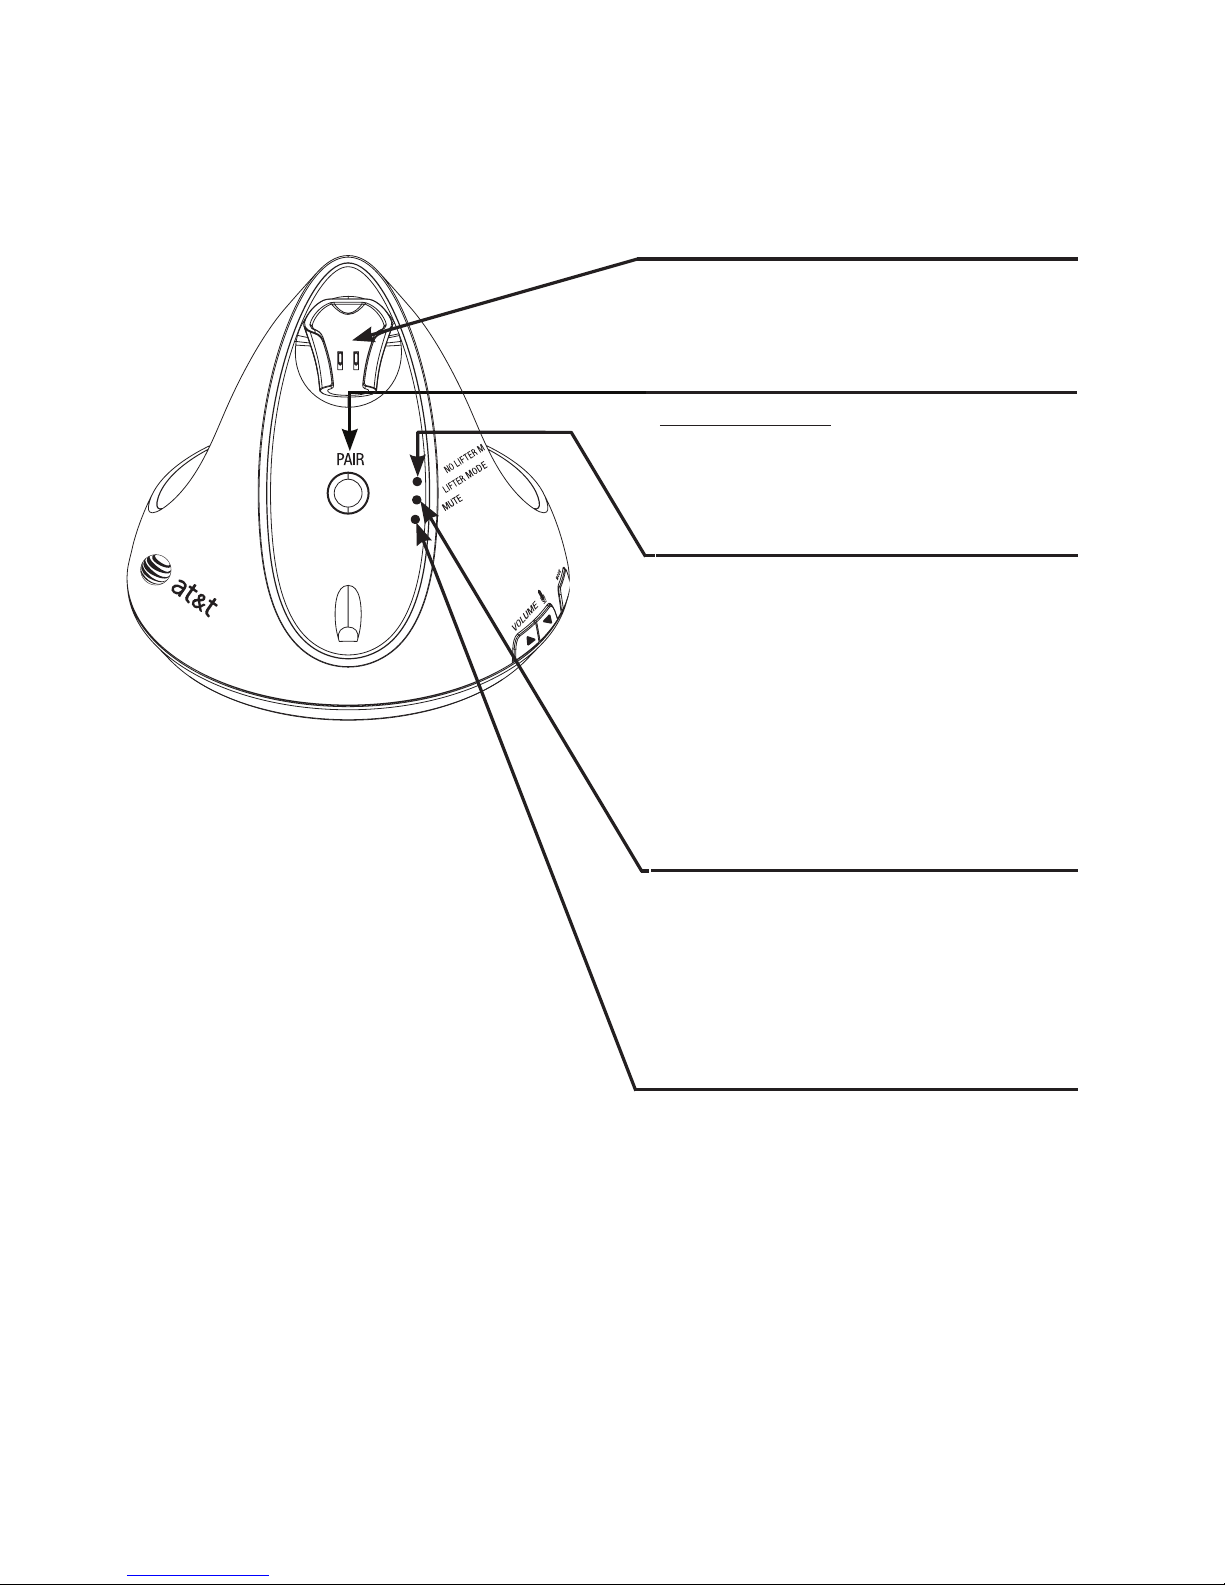
Quick reference guide -
headset base............................. 4
Headset base indicator
lights.............................................. 6
Installation...................................... 7
Battery installation..................... 8
Installation preparation........ 9
Battery charging.........................10
No lifter mode or
lifter mode.................................11
Cord labels.................................12
Digital subscriber line
(DSL)..............................................12
Installation options................13
Option 1: Headset base with
corded or cordless phone
installation.................................14
Option 2: Headset base
stand-alone installation ......15
Option 3: Headset base
with corded phone for
multiple line system or
digital business system
installation.................................16
Adjust the lifter audio..........17
Adding and registering a
headset........................................ 18
Adding and registering a
headset to the headset
base...............................................19
To register a headset to the
headset base............................ 19
Adding and registering a
headset to an AT&T DECT
cordless telephone................20
To register a headset to
an AT&T DECT cordless
telephone base........................20
Replacing a headset ................ 21
To deregister all headsets...21
Headset attachments ...............22
Over the ear hook..................22