manuals.online logo
Brands
  1. Home
  2. •
  3. Brands
  4. •
  5. Axor
  6. •
  7. Bathroom Fixture
  8. •
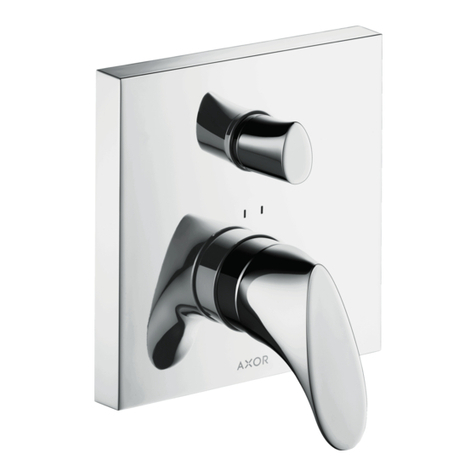
  9. Axor Citterio Select 230 2jet 39867 9 Series Manual

Axor Citterio Select 230 2jet 39867 9 Series Manual

INSTALLATION
EN ⁄ Instructions for use ⁄ Assembly instructions 02
DE ⁄ Gebrauchsanleitung ⁄ Montageanleitung 03
Lesezeichen
English 02
Deutsch 03
AXOR Citterio Select 230 2jet
39867XX9
02EN
ASSEMBLY (see page 05)
SAFETY NOTES
Gloves should be worn during installation to prevent crushing and cutting injuries.
The hot and cold supplies must be of equal pressures.
INSTALLATION INSTRUCTIONS
⁄ Prior to installation, inspect the product for transport damages. After it has been
installed, no transport or surface damage will be honoured.
⁄ The pipes and the fixture must be installed, flushed and tested as per the applicable
standards.
⁄ The plumbing codes applicable in the respective countries must be observed.
⁄ During initial start-up and after servicing, air in the fittings can cause noise. After
switching the jet on and off about 15 times, the noise will stop.
⁄ The mixer can not used together with a continuous flow water heater.
TECHNICAL DATA
Operating pressure: max. 1 MPa
Recommended operating pressure: 0,1 - 0,5 MPa
Test pressure: 1,6 MPa
(1 MPa = 10 bar = 147 PSI)
Hot water temperature: max. 70°C
Recommended hot water temp.: 65°C
Thermal disinfection: max. 70°C / 4 min
The product is exclusively designed for drinking water!
SYMBOL DESCRIPTION
Do not use silicone containing acetic acid!
ADJUSTMENT (see page 09)
MAINTENANCE (see page 10)
The check valves must be checked regularly according to EN 806-5 in
accordance with national or regional regulations (at least once a year).
DIMENSIONS (see page 08)
FLOW DIAGRAM (see page 08)
SPARE PARTS (see page 11)
XX = Colors
00 = Chrome Plated
80 = Stainless Steel Optic
SPECIAL ACCESSORIES (order as an extra)
extension #43333000 (see page 09 / 11)
CLEANING (see page 07)
OPERATION (see page 10)
⁄ Hansgrohe recommends not to use as drinking water the first half liter of
water drawn in the morning or after a prolonged period of non-use.
⁄ Minor leaking may occur briefly at the spout when opening the fitting via
the lever.
⁄ Use the lever to open the tap and set the desired temperature. The water
flow can be paused by pressing the Select button on the face side of the
spout. When the tap is not used for a longer period of time, f.e. when
retiring at night or leaving the house, it must be closed completely by
means of the lever.
FAULT CAUSE REMEDY
⁄ Insufficient water ⁄ Aerator calcified, dirty ⁄ Clean aerator, replace as necessary
⁄ Mixer stiff ⁄ Cartridge defective, calcified ⁄ Exchange cartridge
⁄ Mixer dripping ⁄ Cartridge defective ⁄ Exchange cartridge
⁄ Water escaping at the threaded base ⁄ connection hoses not completely screwed into basic body ⁄ Tighten connection hoses by hand
⁄ O-ring at the connection hose defective. ⁄ Exchange O-ring
⁄ Hot water temperature too low ⁄ Hot water limiter incorrectly set ⁄ Set hot water limiter
⁄ Select button stiff ⁄ Select button soiled ⁄ Clean Select button and grease (14x1,5) O-ring
(see page )
03 DE
MONTAGE (siehe Seite 05)
SICHERHEITSHINWEISE
Bei der Montage müssen zur Vermeidung von Quetsch- und Schnittverletzungen
Handschuhe getragen werden.
Große Druckunterschiede zwischen den Kalt- und Warmwasseranschlüssen müssen
ausgeglichen werden.
MONTAGEHINWEISE
⁄ Vor der Montage muss das Produkt auf Transportschäden untersucht werden. Nach
dem Einbau werden keine Transport- oder Oberflächenschäden anerkannt.
⁄ Die Leitungen und die Armatur müssen nach den gültigen Normen montiert, gespült
und geprüft werden.
⁄ Die in den Ländern jeweils gültigen Installationsrichtlinien sind einzuhalten.
⁄ Bei Erstinbetriebnahme und nach Wartungsarbeiten kann es durch Luft in der
Armatur zu einem Geräusch kommen. Nach ca. 15 Aktivierungen der Armatur ist
das Geräusch verschwunden.
⁄ Die Armatur kann nicht in Verbindung mit einem Durchlauferhitzer verwendet
werden.
TECHNISCHE DATEN
Betriebsdruck: max. 1 MPa
Empfohlener Betriebsdruck: 0,1 - 0,5 MPa
Prüfdruck: 1,6 MPa
(1 MPa = 10 bar = 147 PSI)
Heißwassertemperatur: max. 70°C
Empfohlene Heißwassertemperatur: 65°C
Thermische Desinfektion: max. 70°C / 4 min
Das Produkt ist ausschließlich für Trinkwasser konzipiert!
SYMBOLERKLÄRUNG
Kein essigsäurehaltiges Silikon verwenden!
JUSTIERUNG (siehe Seite 09)
WARTUNG (siehe Seite 10)
Rückflussverhinderer müssen gemäß EN 806-5 regelmäßig in Übereinstim-
mung mit nationalen oder regionalen Bestimmungen auf ihre Funktion geprüft
werden (mindestens einmal jährlich).
MASSE (siehe Seite 08)
DURCHFLUSSDIAGRAMM (siehe Seite 08)
SERVICETEILE (siehe Seite 11)
XX = Farbcodierung
00 = Chrom
80 = Stainless Steel Optic
SONDERZUBEHÖR (nicht im Lieferumfang enthalten)
Verlängerung #43333000 (siehe Seite 09 / 11)
REINIGUNG (siehe Seite 07)
BEDIENUNG (siehe Seite 10)
⁄ Hansgrohe empfiehlt, morgens oder nach längeren Stagnationszeiten den
ersten halben Liter nicht als Trinkwasser zu verwenden.
⁄ Beim Öffnen der Armatur über den Hebelgriff kann kurzzeitig minimal
Wasser am Auslauf austreten.
⁄ Über den Hebelgriff wird die Armatur geöffnet und die gewünschte
Temperatur eingestellt. Durch den stirnseitig am Auslauf befindlichen
Select-Knopf kann der Wasserfluss pausiert werden. Bei längerer
Nichtverwendung, z. B. über Nacht oder bei Verlassen des Hauses, muss
die Armatur über den Hebelgriff vollständig geschlossen werden.
STÖRUNG URSACHE ABHILFE
⁄ Wenig Wasser ⁄ Luftsprudler verkalkt, verschmutzt ⁄ Luftsprudler reinigen / austauschen
⁄ Armatur schwergängig ⁄ Kartusche defekt, verkalkt ⁄ Kartusche austauschen
⁄ Armatur tropft ⁄ Kartusche defekt ⁄ Kartusche austauschen
⁄ Wasseraustritt am Befestigungsschaft ⁄ Anschlussschläuche nicht ganz in den Grundkörper einge-
schraubt
⁄ Anschlussschläuche von Hand festziehen
⁄ O-Ring am Anschlussschlauch defekt ⁄ O-Ring austauschen
⁄ Zu niedrige Warmwassertemperatur ⁄ Warmwasserbegrenzung falsch eingestellt ⁄ Warmwasserbegrenzung einstellen
⁄ Select-Knopf schwergängig ⁄ Select-Knopf verschmutzt ⁄ Select-Knopf reinigen und O-Ring (14x1,5) fetten
(siehe Seite )
04
max. 35 mm
1a 2
(3 Nm)
max. 60 mm
1b
150°
110°
6a
6b
35
4
150°
75° 75°
45° 105°
45°
105°
24 x 15°
6a
SW 19 mm
(4 Nm)
SW 24 mm
(4 Nm)
1.
SW 10 mm 2.
Montage Montage
05
24 x 15°
6b
110°
55° 55°
25° 85°
25°
85°
110°
!
7
SW 17 mm
(8 Nm)
SW 22 mm
1.
2.
10
SW 17 mm
89
SW 22 mm
SW 19 mm
(4 Nm)
96507000
(450 mm)
1.
Armaturenfett
Grease
䀵滑油
SW 22 mm
2.
3.
1.
11 12
Montage
06
1.
2.
max. 30 mm
max. 30 mm
max. 30 mm
13 14 15
16 17
MAX. ± 20°
18a
18b
MAX. ± 20°
18c
Montage Reinigung
07
07
> 2 min
20
1.
2.
21
1.
2.
19
F12
43333000
MAX. ± 20°
18d
1 2
www.axor-design.com/
cleaning-recommendation
www.axor-design.com/
cleaning-recommendation
www
.axor-design.com
/
cleaning-recommendation
www.axor-design.com/
cleaning-recommendation
www.axor-design.com/
cleaning-recommendation
www
.axor-design.com
/
cleaning-recommendation
www.axor-design.com/
cleaning-recommendation
www.axor-design.com/
cleaning-recommendation
www.axor-design.com/
cleaning-recommendation
www.axor-design.com/
cleaning-recommendation
www.axor-design.com/
cleaning-recommendation
www
.axor-design.com
/
cleaning-recommendation
www
.axor-design.com
/
cleaning-recommendation
www.axor-design.com/
cleaning-recommendation
www.axor-design.com/
cleaning-recommendation
www.axor-design.com/
cleaning-recommendation
EN ⁄ Cleaning recommendation ⁄ Warranty ⁄ Contact
DE ⁄ Reinigungsempfehlung ⁄ Garantie ⁄ Kontakt
Reinigung
08
G3/8
530
520
158
110
38
46
15
25
15
23
3
19
10
29
34
158
250
520
Ø34
840
G1/2
G3/8
28Ø
103
141
159
180
min.190
max. 60
29
64
Ø
69
180
99
133
4
°
225
219
234
c a . 76 0
230
342
bar
4,5
0,0
0,5
1,0
1,5
2,0
2,5
3,0
3,5
4,0
5,0
0,45
0,00
0,05
0,10
0,15
0,20
0,25
0,30
0,35
0,40
0,50
5,50,55
6,00,60
036912151821242730
MPa
00,1 0,2 0,3 0,4 0,5
Q = l/min
Q = l/sec
2
1
1
2
Maße / Durchflussdiagramm Justierung/F12
0,3 MPa
60 °C 10 °C
6
5
3
4
36°C
38°C
43°C
60°C
55°C
50°C
1 2
1.
2.
SW 3 mm
4 x
1.
2.
SW 3 mm
(5 Nm)
09
1
F12
43333000
2
max. 100 mm
Justierung/F12
10
1.
2.
SW 10 mm
SW 19 mm
(4 Nm)
SW 10 mm
SW 19 mm
1 2 3
open ⁄ öffnen
close ⁄ schließen
hot ⁄ warm
cold ⁄kalt
Bedienung/Wartung Serviceteile
11
92566XX0
98201000
(14x1,5)
98112000
(8x2)
96338000
96029000
(M6x10)
93410XX9
98463000
92567000
39861XX0
93342000
95910000
98603XX0
98193000
(32x2)
96461000
98211000
(21x2,5)
92730000
95008000
98365000
(110°⁄150°)
98422000
(7x1,5)
96456000
95291000
95372000
(900 mm)
92634000
(40x3)
97523000
95049000
97548000
96507000
(450 mm)
97827000
(8x1, 75)
95581000
(14,5x9,5x2)
96099000
93191000
(1700 mm)
F12
43333000
92583XX0
Armaturenfett
Grease
䀵滑油
G⅜ / G½
93395000
Serviceteile
12/2020
9.06611.61
AXOR ⁄ Hansgrohe SE
Auestraße 5–9
77761 Schiltach
Deutschland
info@axor-design.com
axor-design.com

Other Axor Bathroom Fixture manuals

Axor Exafill 58300 Series Manual

Axor

Axor Exafill 58300 Series Manual

Axor 300 2jet 35303007 Manual

Axor

Axor 300 2jet 35303007 Manual

Axor Montreux 42066 Series Manual

Axor

Axor Montreux 42066 Series Manual

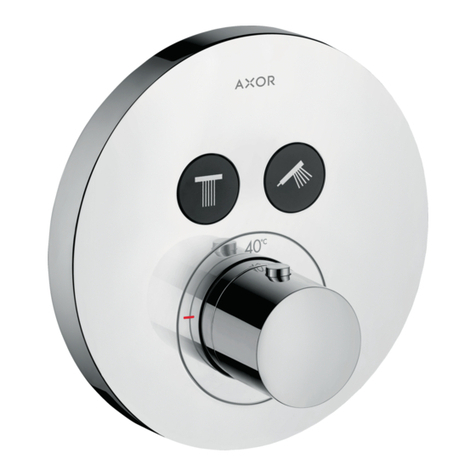
Axor ShowerSelect Round 36723 Series Manual

Axor

Axor ShowerSelect Round 36723 Series Manual

Axor Front 26021000 Manual

Axor

Axor Front 26021000 Manual

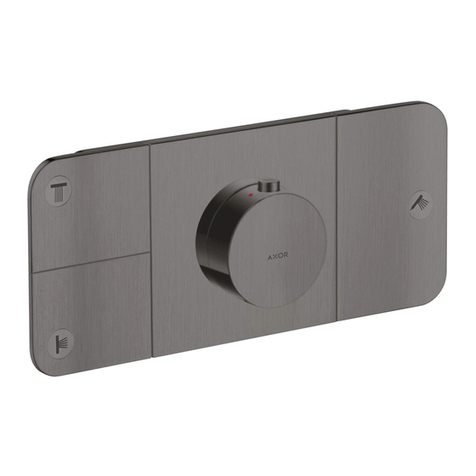
Axor hansgrohe Uno 38120001 Instruction Manual

Axor

Axor hansgrohe Uno 38120001 Instruction Manual

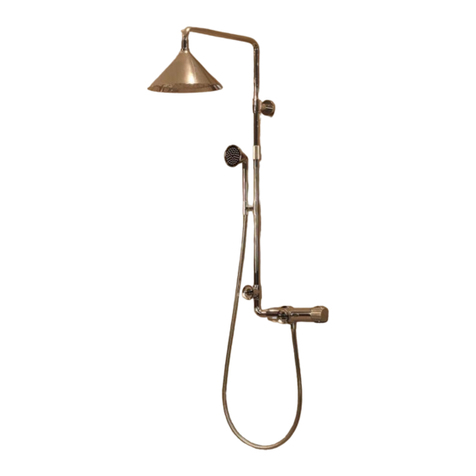
Axor Citterio Showerpipe 39620007 Manual

Axor

Axor Citterio Showerpipe 39620007 Manual

Axor hansgrohe Starck Organic 12680000 User manual

Axor

Axor hansgrohe Starck Organic 12680000 User manual

Axor Uno 27987 Series User manual

Axor

Axor Uno 27987 Series User manual

Axor 250 2jet 35296 Series Manual

Axor

Axor 250 2jet 35296 Series Manual

Axor Uno 45600 Series Manual

Axor

Axor Uno 45600 Series Manual

Axor 460/300 3jet 35281 Series Manual

Axor

Axor 460/300 3jet 35281 Series Manual

Axor MyEdition 47410 0 Series User manual

Axor

Axor MyEdition 47410 0 Series User manual

Axor Citterio Showerpipe 180 1jet 39671009 User manual

Axor

Axor Citterio Showerpipe 180 1jet 39671009 User manual

Axor Uno 45200 Series Manual

Axor

Axor Uno 45200 Series Manual

Axor Starck Organic 12626000 User manual

Axor

Axor Starck Organic 12626000 User manual

Axor MyEdition 70 47050 1 Series Instruction Manual

Axor

Axor MyEdition 70 47050 1 Series Instruction Manual

Axor 35363180 Manual

Axor

Axor 35363180 Manual

Axor 250 1jet User manual

Axor

Axor 250 1jet User manual

Axor Quattro 16930180 Guide

Axor

Axor Quattro 16930180 Guide

Axor Starck 10929007 Manual

Axor

Axor Starck 10929007 Manual

Axor Starck X 10406000 User manual

Axor

Axor Starck X 10406000 User manual

Axor Showerpipe 800 mm 27984 Series Manual

Axor

Axor Showerpipe 800 mm 27984 Series Manual

Axor 460/300 2jet 35275 Series User manual

Axor

Axor 460/300 2jet 35275 Series User manual

Popular Bathroom Fixture manuals by other brands

DURAVIT C.1 Series Instructions for mounting and use

DURAVIT

DURAVIT C.1 Series Instructions for mounting and use

Hans Grohe Axor Massaud Assembly instructions

Hans Grohe

Hans Grohe Axor Massaud Assembly instructions

Pacific Bay JetStream PB-S05 installation manual

Pacific Bay

Pacific Bay JetStream PB-S05 installation manual

Signature Hardware KIRANA 949633 quick start guide

Signature Hardware

Signature Hardware KIRANA 949633 quick start guide

CLEOPATRA Steam Smart Instructions for use/assembly instructions

CLEOPATRA

CLEOPATRA Steam Smart Instructions for use/assembly instructions

Symmons Duro 0630-DPTP installation guide

Symmons

Symmons Duro 0630-DPTP installation guide

Excellent LAVANO BREX.1102 Series installation manual

Excellent

Excellent LAVANO BREX.1102 Series installation manual

Gessi RETTANGOLO J manual

Gessi

Gessi RETTANGOLO J manual

Toto TBN02201U Installation and owner's manual

Toto

Toto TBN02201U Installation and owner's manual

Hewi 802.50.015 installation instructions

Hewi

Hewi 802.50.015 installation instructions

Toto Guinevere TS970AL Installation and owner's manual

Toto

Toto Guinevere TS970AL Installation and owner's manual

Gessi Private Wellness 63211 manual

Gessi

Gessi Private Wellness 63211 manual

Grohe Rainshower 28 778 manual

Grohe

Grohe Rainshower 28 778 manual

Fondovalle Shape Shower tray 150 Assembly instructions

Fondovalle

Fondovalle Shape Shower tray 150 Assembly instructions

GME AKORD installation manual

GME

GME AKORD installation manual

glass 1989 NonSoloDoccia Home 021 Installation, operation & maintenance manual

glass 1989

glass 1989 NonSoloDoccia Home 021 Installation, operation & maintenance manual

antoniolupi INTRECCIO installation manual

antoniolupi

antoniolupi INTRECCIO installation manual

baliv WT-5892 manual

baliv

baliv WT-5892 manual

manuals.online logo
manuals.online logoBrands
  • About & Mission
  • Contact us
  • Privacy Policy
  • Terms and Conditions

Copyright 2025 Manuals.Online. All Rights Reserved.