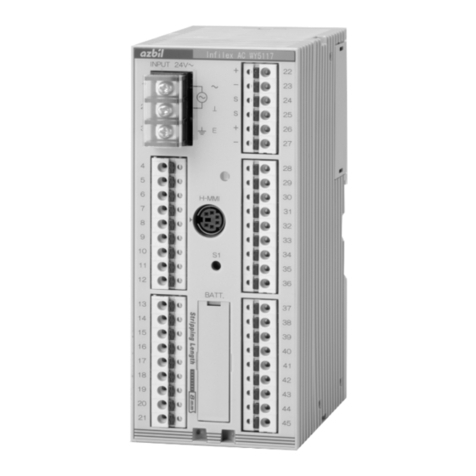
Azbil Infilex VC User manual

AB-6654
Our controller Infilex series: Infilex is named for “Infinity” and “Flexible”.
© 2005-2019Azbil Corporation.All Rights Reserved.
1
Specifications/Instructions
InfilexVC
Variable Air Volume Controller with Actuator
for SC-bus Communication
Overview
Infilex VC (Infilex: named for “Infinity” and “Flexible”) Model
WY5206C is a VAV controller with an actuator that com-
municates via our proprietary protocol, SC-bus. Infilex VC
provides high-performance DDC of VAV unit in a building
air-conditioning system. Thus, Infilex VC, networked even
within a complicated HVAC system, controls VAV unit.
Besides, Infilex VC offers building owners and operators the
flexible and enhanced controls of temperature and VAV for
various VAV units.
Infilex VC sends unique energy-saving information to its
networked SC-bus zone controller, enhancing overall con-
trollability of a building management system.
DDC: Direct digital control
HVAC: Heating, ventilation, and air conditioning
VAV: Variable air volume
Features
●Economical efficiency:
- Temperature and air-volume are controlled by a single
controller.
- VAV controller that resides on an actuator offers great
value.
●Wide range of application:
Most of the major VAV types for industry are preconfig-
ured in the controller.
●Unique energy conservation control:
- VAV damper opens wide to minimize the fan power
consumed by static pressure.
- Network with a zone controller allows supply air tem-
perature to be modified at an optimum level.
●Advanced building management integrated into BMS:
Our digital user terminal Neopanel enables users and
operators to modify the preset setting of temperature and
operating schedule (to extend) and offers flexibility of
temperature control and schedule control.
●CE Marking certified product:
Infilex VC Model WY5206C conforms to all the applica-
ble standards of CE Marking.

AB-6654
2
Safety Precautions
Please read instructions carefully and use the product as specified in this manual. Be sure to keep this manual nearby for quick
reference.
Restrictions on Use
This product was developed, designed, and manufactured for general air conditioning use.
Do not use the product in a situation where human life may be at risk or for nuclear applications in radiation controlled areas.
If you wish to use the product in a radiation controlled area, please contact Azbil Corporation.
Particularly when the product is used in the following applications where safety is required, implementation of fail-safe design,
redundant design, regular maintenance, etc., should be considered in order to use the product safely and reliably.
•Safety devices for protecting the human body
•Start/stop control devices for transportation machines
•Aeronautical/aerospace machines
For system design, application design, instructions for use, or product applications, please contact Azbil Corporation.
Azbil Corporation bears no responsibility for any result, or lack of result, deriving from the customer's use of the product.
Warnings and Cautions
WARNING Alerts users that improper handling may cause death or serious injury.
CAUTION Alerts users that improper handling may cause minor injury or material loss.
Signs
Alerts users possible hazardous conditions caused by erroneous operation or erroneous use. The symbol inside
indicates the specific type of danger. (For example, the sign on the left warns of the risk of electric shock.)
Notifies users that specific actions are prohibited to prevent possible danger. The symbol inside graphically indi-
cates the prohibited action. (For example, the sign on the left notifies that disassembly is prohibited.)
Instructs users to carry out a specific obligatory action to prevent possible danger. The symbol inside graphically
indicates the actual action to be carried out. (For example, the sign on the left indicates general instructions.)
WARNING
Before wiring and maintenance, be sure to turn off the power to the product.
Failure to do so might cause electric shock.
To control a VAV unit with electric heater, be sure to provide a circuit to prevent temperature rise.
Failure to do so might cause fire or overheating.
To control a VAV unit with electric heater, configure the system so that air conditioning unit will not stop when the VAV
unit is turned off. This allows the electric heater to cool down after it is turned off.
Failure to do so might cause fire or device damage.
CAUTION (1/2)
Installation and wiring must be performed by qualified personnel in accordance with all applicable safety standards.
Install and use the product in a location that meets the operating conditions (temperature, humidity, power, vibration,
shock, mounting direction, atmospheric condition, etc.) as listed in the specifications.
Failure to do so might cause fire or device failure.
All wiring must comply with applicable codes and ordinances.
AB-6654
3
CAUTION (2/2)
Make sure all the wires are tightly connected to the corresponding terminals.
Failure to do so might cause device failure or overheating.
For wiring, strip each wire insulation as specified in this manual. If the strip length is longer than the specified, the
stripped part of the wires will be exposed, causing electric shock or short circuit between adjacent terminals. If it is
shorter, the stripped part will not contact the connector.
If more than the rated power voltage is applied to the product, replace the product with new one for your safety.
Failure to do so might cause device failure or overheating.
Be sure to provide a circuit breaker for the power to the product as the product does not have a power switch.
Do not test the withstand voltage of the product.
Doing so might cause accident or device failure.
Do not disassemble the product.
Doing so might cause electric shock or device failure.
Do not touch the moving parts of the product.
Doing so might cause injury.
Do not incinerate the product for waste disposal. The cover will generate toxic gas when being incinerated.
Do not reuse all or part of this product after disposal of the product.
Dispose of the product as industrial waste in accordance with your local regulations.
Do not reuse all or part of this product.

AB-6654
4
System Configuration
Infilex VC integrated into our building management system (BMS): savic-net
FX
Notes:
*1 MIS may be used instead of SMS and DSS for your savic-net FX system. Note that MIS cannot coexist with SMS or DSS in the same
system.
*2 Maximum number of remote units (also known as "controllers") that can be connected to SCS via NC-bus varies depending on the system
configurations.
*3 Maximum of 50 sub remote units (also known as "sub controllers") such as Infilex VC and Infilex FC can be connected to Infilex ZM via
SC-bus.
*4 Up to two Neopanel can be connected to one Infilex VC.
For two Neopanel connection, provide Model QY7205CXXX1 for the address 1 and Model QY7205CXXX2 for the address 2 and connect to
Infilex VC via modular branch unit (Part No. DY7203A0000).
*5 Neopanel and a temperature sensor can be connected to the same Infilex VC.
Figure 1. System configuration example: Infilex VC integrated into savic-net FX BMS
DSS: Data Storage Server
MIS: Management Integration Server
PMX-4: PARAMATRIX4
SCS: System Core Server
SMS: System Management Server
InfilexAC
Model WY5117C
InfilexGC
Model WY5111
InfilexGD
Model WY5110
PMX-4
Model WY5130
InfilexVC
Model WY5206
NC-bus*2(Max. 25 units and 500 m, but extendable up to 1000 m with the repeater module.)
SC-bus*3(Max. 50 units and 1000 m)
BACnet/IP
Neopanel*
5
Model QY7205 Neopanel
Model QY7205
SCS
Temperature
sensor
InfilexVC
Model WY5206
Temperature
sensor*5
Neopanel
Model QY7205
InfilexFC
Model WY5205
Temperature
senso
r
InfilexVC
Model WY5206
Temperature
sensor
InfilexVC
Model WY5206
Neopanel*
4
Model QY7205
Neopanel*
4
Model QY7205
InfilexFC
Model WY5205
SMS DSS
MIS*1
Client PC
InfilexZM
Model WY5122
InfilexZM
Model WY5122
SC-bus*3(Max. 50 units and 1000 m)

AB-6654
5
Model Numbers
Base model
number Power Actuator
Airflow sensor
DO output — Description
WY5206 Infilex VC for SC-bus communication
C 24 V AC
5 Fixed.
1 5 Nm torque
(Note 1) 2 10 Nm torque
(Note 2) 0 Airflow pulse input, DO: 0 pt.
1 With internal airflow sensor, DO: 0 pt.
(Note 3) 2
Airflow pulse input
DO: 3 pts. (2 pts. for reheat control, 1 pt. for fan control)
3
With internal airflow sensor,
DO: 3 pts. (2 pts. for reheat control, 1 pt. for fan control)
0 Fixed.
Note 1: Only model WY5206C5210 is available.
Note 2: Only model WY5206C5100 is available.
Note 3: Only model WY5206C5120 is available.
Part Numbers of Optional Parts and Tools
Item Part number
Universal bracket 12595-00001
Modular branch unit DY7203A0000
Modular relay units (5 pieces/set) DY7202A0000
Adapters for connecting to a Pt100 temperature sensor (10 pieces/set) DY7204A0003
Adapters for connecting to a user terminal (10 pieces/set) DY7204A0008
Modular plugs (100 pieces/set) DY7207A0100
Modular crimper DY7205A0002
Modular cable tester DY7206A0000
Note:
* For details of the optional parts and tools shown above, see the Optional Parts and Optional Tools sections.

AB-6654
6
Specifications
Basic specifications
Item Specification
Power supply 24 V AC 15 % (50 Hz/60 Hz)
Power consumption 5 Nm: 9 VA / 10 Nm: 10 VA
Rated torque 5 Nm / 10 Nm
Operating range To 95
Operating time
(for 95operating angle)
Operation mode 5 Nm torque type 10 Nm torque type
Forced open/close 150 seconds 150 seconds
Synchronisation
(An operation mode to synchronise the actu-
ator position with the damper position.)
75 seconds 86 seconds
Automatic control (with variable speed) 120 to 300 seconds 120 to 300 seconds
Attachable damper shaft 5 Nm torque type 10 Nm torque type
Thickness Φ6 mm toΦ20 mm (circular cross section) Φ8 mm toΦ26.7 mm (circular cross section)
4.5 mm square to 14 mm square
(square cross section)
5.7 mm square to 18.8 mm square
(square cross section)
Length 37 mm or longer 40 mm or longer
Operating environmental
conditions
Temperature 0 C to 50 C
Humidity 10 %RH to 90 %RH (Non-condensing)
Vibration Max. 3.2 m/s² (10 Hz to 150 Hz)
Transport/storage conditions Temperature -20 C to 60 C
Humidity 5 %RH to 95 %RH (Non-condensing)
Vibration Max. 9.8 m/s² (10 Hz to 150 Hz)
Enclosure rating Equivalent to IEC IP30: Dust-proof (in wired, covered, and plugged state)
Sound power level 35 dB or lower
Installation In VAV control box
Address setting Rotary switch 2
Materials Back plate: Zinc plated steel
Clamps and screws : Zinc plated steel
Housing: PC-ABS
Cover of air flow sensor: Thermoplastic elastomer
Cover of nonuse connector (for setting): Thermoplastic elastomer
Universal bracket: Zinc plated steel
Weight 5 Nm torque type: 500 g
10 Nm torque type: 800 g
IEC: International Electrotechnical Commission
PC-ABS: Polycarbonate acrylonitrile butadiene styrene
VAV: Variable air volume

AB-6654
7
Input/output specifications
Unit to be con-
nected Input/output description Input/output specification Connection type Wire/tube specification
VAV unit
Air flow signal input
Air flow pulse Voltage pulse input Terminal connection:
Push-in terminal block
2.0 mm2to 2.5 mm2
Max. 5 m
Voltage: 5 V DC 20 % for high level
0 V DC to 0.5 V DC for low level
Current: Max. 10 mA
Pulse width: 450 s or more for high level
450 s or more for low level
Frequency: Max. 1000 Hz + 10 % or less
100 Hz or higher for full span
Current restriction resistance: 470
Direct air flow
sensor
Differential pressure input sensor
Differential pressure sensing range:
P = 0 Pa to 250 Pa
Temperature characteristics:
0.5 % of full span
C (0 C to 50 C, 1013 hPa)
Tube con-
nection
Length: Max. 1m at each port
Inner diameter (flexible tube):
5.0 mm to 6.0 mm
Inner diameter (inflexible tube):
5.5 mm to 6.5 mm
Outer diameter: Max. 10.0 mm
Material: PVC, silicon rubber
(e.g., TYGONModel R-3603)
Heater and fan Dry contact
30 V AC, 0.8 A or 30 V DC, 0.5 A
Terminal connection:
Push-in terminal block
2.0 mm2to 2.5 mm2
Max. 5 m
Temperature
sensor
Pt100 input Pt100 temperature sensor
Input temperature range: 0 C to 50 C
Connector connec-
tion*1
LAN cable*2
Max. 50 m
User terminal Temperature setting
Air conditioning
ON/OFF
Serial voltage transmission
Transmission speed: 100 bps
Connector connec-
tion*1
LAN cable*2
Max. 50 m
Communication
line
SC-bus Serial voltage transmission
Transmission speed: 4800 bps
Connector connec-
tion*1
LAN cable*2
Max. 1000 m
Power supply
Power supply voltage: 24 V AC 15 % Terminal connection:
Push-in terminal block
2.0 mm2to 2.5 mm2
Notes:
*1 For connector connection, use Bel Stewart Connector’s Plug: Model SS-37000-002.
This plug is also available at Azbil Corporation. (Part No. DY7207A0100, 100 pieces/set)
*2 LAN cable compliant with EIA/TIA-568 Category 3 or over (Φ0.5 mm 4 poles) is required.
For *1 and *2, the connector cable (regular cable: Part No. DY7210, short cable: Part No. DY7220) are available at Azbil Corporation.

AB-6654
8
Dimensions
5 Nm torque type
Figure 2. Dimensions: 5 Nm torque type (mm)
198
22 176
66
67
17
35
99
29 11.5
Φ6–Φ20
85.25
5.2

AB-6654
9
10 Nm torque type
Figure 3. Dimensions: 10 Nm torque type (mm)
Universal bracket (requiring separate order)
Figure 4. Dimensions: Universal bracket (mm)
7
5
179
18
23
35
47
58.25
71
83
89.5
5
R2.2
R2.2
4 4
R2.2
Φ4.4
12
2
2
10
206
80
66
25 181
Φ8–Φ26.7
38
104
30.5
18.5
11.5
68
90.5
5.2

AB-6654
10
Parts Identification
Figure 5. Parts identification
Orange LED
A
ddress switch
Gear release button
Connector (modular jack)
Wire connection indication
(printed on the body)
(See Fig. 6.)
Terminal block (11 pin)
Nonuse connector (for setting)
High pressure port
for differential pressure pickup
Mounting slit
Damper shaft
Low pressure port
for differential pressure pickup
Rotation angle adjuste
r
Rotation angle adjuste
r

AB-6654
11
Wire Connection Indication
Figure 6. Wire connection indication printed on Model WY5206C5X30

AB-6654
12
Wire Connection Examples
Electric heater connection
Notes:
* Operate electric heater and fan by a relay with 24 V AC operating voltage.
* When an electric heater is connected, additionally provide a circuit to prevent temperature rise.
Figure 7. Connection example for two-step electric heater + fan output control (Model WY5206C5X30)
To temperature sensor
To Neopanel
To another Infilex VC
24 V AC
To Infilex ZM or to another Infilex VC
Power supply via safety
isolating transformer.

AB-6654
13
Floating control valve connection
Figure 8. Wiring example for floating control (Model WY5206C5X30)
Two-step control valve connection
Figure 9. Wiring example for two-step control (Model WY5206C5X30)
Notes:
* Operate fan by a relay with 24 V AC operating voltage.
* Rated voltage of reheater output is 30 V AC. If the voltage of reheate
r
output exceeds 30 V AC, operate reheater valve by a relay.
* For accurate control of Infilex VC installed in a 24-hour system, floating
valves are automatically closed when they are kept unclosed for 48 hours.
To temperature sensor
To Neopanel
To another Infilex VC
To Infilex ZM or to another Infilex VC
24 V AC
Notes:
* Operate fan by a relay with 24 V AC operating voltage.
* Rated voltage of reheater output is 30 V AC. If the voltage of reheate
r
output exceeds 30 V AC, operate reheater valve by a relay.
* For ON/OFF valve, use a valve with automatic return or spring return
function.
To temperature sensor
To Neopanel
To another Infilex VC
To Infilex ZM or to another Infilex VC
24 V AC
Power supply via safety
isolating transformer.
Power supply via safety
isolating transformer.

AB-6654
14
Installation
Installation precautions
●Before installation, be sure to turn off the power to the product.
●Leave the maintenance clearance as shown in the figure below.
Note:
* Dimension L must be larger than [size Φof the modular cables to be connected x 4] for the bend radius.
(e.g., Dimension L for Φ6 mm modular cable is larger than 24 mm for bend radius.)
Figure 10. Maintenance clearance (mm)
Installation procedure
1) Fully close the VAV damper shaft.
Actuator
torque type
L: Minimum length
of the shaft (mm)
Diameter of the shaft (mm)
5 Nm 37 6 to 20 4.5 to 14
10 Nm 40 8 to 26.7 5.7 to 18.8
Figure 11. Damper shaft
Rotate to close.
Damper blade
Damper
shaft
L
70
70 70
70
L*

AB-6654
15
2) Fully close the actuator of this product, and mount it to the damper shaft. Finger-tighten the fastening nuts of the shaft
clamp to temporarily fix the actuator.
Figure 12. Temporal installation of the actuator body
3) While pressing the gear release button, manually rotate the shaft clamp until it is in the upright position. Then, insert the
universal bracket (protruding part) into the slit of this product and fix the bracket with the two M4 tapping screws.
Note:
* The universal bracket, required for the installation of this product, is commercially available. The universal bracket is also available at
Azbil Corporation (Universal bracket: Part No. 12595-00001). Be sure to separately order if necessary.
Figure 13. Attaching the universal bracket
1. Mount.
2. Finger-tighten.
Fastening nuts
Shaft clamp
1. Press and hold.
Gear release button
1. Rotate.
2. Insert.
Universal bracket
Sli
t
M4 tapping screws
Shaft clamp

AB-6654
16
1. Press and hold.
Gear release button
1. Rotate.
1 mm
Shaft clamp
Rotation angle adjuste
r
for fully closed position
2. Tighten with a wrench.
4) Manually rotate the shaft clamp back to the fully closed position while pressing the gear release button. At this time, be sure
to leave a clearance (approx. 1 mm) between the shaft clamp and the rotation angle adjuster (mechanical stopper) for the
fully closed position. This will allow the actuator to shut off the damper. Using a wrench, tighten the fastening nuts of the
shaft clamp to completely fix this product. See the following table for the nut fastening torque.
Actuator torque type Nut fastening torque (N·m)
5 Nm 5 to 6
10 Nm 8 to 9
Figure 14. Complete installation of the actuator body
5) Manually rotate the shaft clamp to fully open the damper and set the rotation angle adjuster for the fully open position.
Figure 15. Setting the operating angle for the fully open position
A
djust and set.
Rotation angle adjuste
r
for fully open position

AB-6654
17
High pressure port
for differential pressure pickup
Low pressure port
for differential pressure pickup
Connection of the air flow sensor
For differential pressure pickup, connect the tube for the total pressure measuring port of the air flow sensor to the high pressure
port (indicated with "+") of Infilex VC. Also connect the tube for the static pressure measuring port of the air flow sensor to the
low pressure port (indicated with "-") of Infilex VC.
Figure 16. High and low pressure ports for differential pressure pickup (Model WY5206C5_10 and Model WY5206C5_30)
Required specification of the air flow sensor tube
Type Length Inner diameter Outer diameter Material
Flexible tube Max. 1 m 5 mm to 6 mm Max. 10 mm PVC, silicon rubber
Inflexible tube 5.5 mm to 6.5 mm
PVC: Polyvinyl chloride
Notes:
* Use the tube as specified in the above table.
* If the tube of the differential pressure pickup does not meet the required specification shown in the above table, use a joint to meet the
specification.
* Total tube length must be 1 m max. even if two tubes with different diameters are connected by the joint.

AB-6654
18
Wiring
Push-in terminal connection
Wires of power supply and DO (digital output) are connected to the push-in terminal block. Follow the procedure below for the
wiring connections.
1) Strip the 5-6 mm insulation of the wire end. (If the insulation stripped part is longer than the specified, it will be exposed
causing electric shock or short-circuit between adjacent terminals. If it is shorter, the wire may not contact the terminal.)
2) Make sure that any wire fiber is unbound from the wire end.
3) Insert a slotted screwdriver into a smaller square hole (for clamp release) on the terminal block located on the front surface.
To insert the screwdriver to the deep end (approx. 10 mm deep), push and tilt it (towards the front surface of Infilex VC main
unit) along the curving surface inside the square hole.
When the screwdriver is inserted to the deep end, the clamp is completely released.
Notes:
* A slotted screwdriver with the blade 3.5 mm wide and 0.5 mm thick (straight type) is acceptable. A screwdriver with the blade tip
narrower than the shaft may not be acceptable.
* Appropriate screwdriver (an example):
Model 9900 (3 mm wide ´ 100 mm long) or Model 910 (3 mm wide ´ 75 mm long) manufactured by Vessel Co., Inc.
* Since the terminal block has the inclined surface, required clearance for maintenance varies depending on the length of the screwdriver
to be used.
4) Insert the wire end into a larger square hole. When the wire end is fully inserted, remove the screwdriver.
5) Gently pull out the wire to make sure it is completely held by the clamp.
Wiring to user terminal / temperature sensor
SC-bus wiring
User terminal and temperature sensor are wired to Infilex VC with modular connection. SC-bus line is also connected with
modular connection.
For correctly crimping modular plugs on a LAN cable, refer to the following.
Modular connector connection
Modular connector is composed of a modular plug (male) and a modular jack (female). Modular jacks are provided on Infilex VC,
and modular plugs will be crimped on LAN cables as required. Refer to the following procedure for crimping the modular plugs
on the LAN cables and connecting them to the modular jacks.
Note:
* For modular plugs, refer to Note *1 of the Input/output specifications section.

AB-6654
19
Procedure for modular connector connection
1) Strip the outer sheath of a LAN cable end. Be sure not to scratch or peel off any wire insulation when stripping the sheath.
Figure 17. Stripping the sheath
Make sure there are eight wires inside the sheath.
2) Align the eight wires in the order specified by the LAN cable manufacturer.
An alignment example of the LAN cable wires is shown in the table below.
Figure 18. Alignment of the wires
Note:
* The color alignment shown above may not agree with your LAN cable specification. Ask your LAN cable manufacturer for the latest spec-
ification.
3) Insert the aligned wires into a modular plug.
Figure 19. LAN cable insertion into a modular plug
Pin assignment of the modular plug in Fig. 19 is the image when the contacts and the cable stopper of the modular plug are
viewed from above.
Before inserting the wires into the modular plug, even out the length using a nipper. Note that the modular plug may not be
crimped on wires if the wire insulation is stripped too long.
4) Crimp the modular plug using a crimper. Insert the wires into the modular plug so that the contacts of the modular plug stick
into the wires after crimping. Crimped modular plug is secured on the LAN cable by the cable stopper of the modular plug.
Check the contacts and the cable stopper when crimping the modular plug.
5) Follow 1) to 4) for the other end of the LAN cable.
6) Check continuity of the LAN cable. Modular cable tester (Part No. DY7206A0000) facilitates the continuity check. At the
same time, make sure that the wires are aligned in the specified order, the modular plug contacts stick into the wires, and
that there is no cable damage or disconnection.
7) Connect the modular plugs to the modular jacks.
After successfully finishing the continuity check, insert a modular plug of the LAN cable into the modular jack of Infilex VC
and the other modular plug into the modular jack of the user terminal / temperature sensor / sub remote unit (also known as
"sub controllers") connected via SC-bus.
Insert a modular plug until it clicks and gently pull the cable to check complete connection.
LAN cable
Pin numbers 12345678
8 wires
LAN cable
Modular plug
pin number Wire alignment
Wire color code
1 Line 2 of pair 2 White and orange
2 Line 1 of pair 2 Orange
3 Line 2 of pair 3 White and Green
4 Line 1 of pair 1 Blue
5 Line 2 of pair 1 White and blue
6 Line 1 of pair 3 Green
7 Line 2 of pair 4 Brown and white
8 Line 1 of pair 4 Brown
Cable stoppe
r
Contacts
Insert.
10 mm 3 mm
(For the recommended modular plug)
LAN cable
Modular plug
Pin numbers
8
7
4
5
3
1
2
6
Pin assignment of the modular plug

AB-6654
20
Software Details
(1/2)
Item Function Description Remark
Operation VAV ON/OFF Turns on/ off the variable air volume (VAV) unit by
operating the BMS client PC or the user terminal.
- Each Infilex VC can individually turn
on/off the VAV unit.
- The latest user terminal/BMS client PC
operation is effective.
- VAV ON/OFF function using the user
terminal can be disabled by the BMS
client PC.
- Once VAV ON/OFF function is set, you
can not turn on the Setback function with
the user terminal. (The user terminal
allows you to operate either VAV
ON/OFF or VAV ON/Setback ON.)
Setback Adds/Subtracts the setback value to/from the set
temperature.
Changes the set temperature by operating the
BMS client PC or the user terminal.
The setback value is preset at Infilex VC.
- Each Infilex VC can individually change
the set temperature for the setback
operation.
- The latest user terminal/BMS client PC
operation is effective.
- Setback function using the user terminal
can be disabled by the BMS client PC.
- Once Setback function is set, you can
not turn off the VAV unit with the user
terminal. (The user terminal allows you
to operate either VAV ON/Setback ON or
VAV ON/OFF.)
Temperature setting Changes the set temperature by operating the
BMS client PC or the user terminal.
- The latest user terminal/BMS client PC
operation is effective.
- High/low limit of the setpoint is set by the
BMS client PC.
- Dual setting is available*2.
VAV interlocking
with air conditioning
unit*1
Interlocks the ON/OFF operations of the VAV units
with those of the air conditioning units.
- One Infilex ZM controls up to 4 AHU
groups.
- Do not operate VAV ON/OFF with the
user terminal when you set the VAV
interlocking with air conditioning unit
function.
- Do not set the air conditioning unit
interlocking with VAV function when you
set the VAV interlocking with air
conditioning unit function.
Air conditioning unit
interlocking with
VAV*1
Interlocks the ON/OFF operations of the air condi-
tioning units with those of the VAV units.
- One Infilex ZM controls up to 4 groups.
- Do not set the VAV interlocking with air
conditioning unit function when you set
the air conditioning unit interlocking with
VAV function.
Control (1/2) Temperature control Controls VAV damper to meet the actual (meas-
ured) temperature with the set temperature.
Each Infilex VC can individually controls
the VAV damper.
Fan speed control*1Detects over/short static pressure of the VAV unit
and optimally controls the revolution speed of the
supply air fan to minimize the fan power.
- One Infilex ZM controls up to 4 groups.
- AHU controller and Infilex ZM must be
connected to the same NC-bus line.
AHU: Air handling unit
BMS: Building management system
VAV: Variable air volume
Notes:
*1 These functions are enabled by Infilex VC being combined with Infilex ZM and integrated in our BMS.
*2 Dual setting is the method to have cooling setting and heating setting separately.
Other manuals for Infilex VC
2
Table of contents
Other Azbil Controllers manuals

Azbil
Azbil C35 User manual

Azbil
Azbil BH-101G0W0000 User manual

Azbil
Azbil RA1B User manual

Azbil
Azbil C7G Manual

Azbil
Azbil Infilex BC WY5610 User manual

Azbil
Azbil AUR890 Series User manual

Azbil
Azbil AUR890 Series User manual

Azbil
Azbil Infilex AC WY5117C1 Series User manual

Azbil
Azbil Micro Flow MQV9020 User manual

Azbil
Azbil DCP31 User manual
Popular Controllers manuals by other brands

YASKAWA
YASKAWA PROFINET 1000 Series Technical manual

HIMA
HIMA HIMatrix F10 PCI 03 manual

Gamma Vacuum
Gamma Vacuum SPCe user manual

DZ Custom Innovations
DZ Custom Innovations ShiftSense Pro V2 Installation and operation

NAVITAS
NAVITAS 440A Installation & service manual

valent
valent VX Series reference guide