manuals.online logo
Brands
  1. Home
  2. •
  3. Brands
  4. •
  5. BEGA
  6. •
  7. Outdoor Light
  8. •
  9. BEGA 204 User manual

BEGA 204 User manual

BEGA
BEGA Lichttechnische Spezialfabrik
Hennenbusch · D - 58708 Menden
39.13 · Technische Änderungen vorbehalten · Technical amendments reserved · Modifications techniques réservées
204
Erdspieß
Earth spike
Piquet
Gebrauchsanweisung
Instructions for use
Fiche d’utilisation






Anwendung
Erdspieß für den ortsveränderlichen Betrieb
eines Scheinwerfers mit Anschlussgewinde Gß
nach DIN · ISO 228.
Application
Earth spike for portable operation of a floodlight
with Gßmounting bush according to
DIN · ISO 228.
Utilisation
Piquet pour le montage mobile d'un projecteur
avec raccord fileté Gßselon DIN · ISO 228.
Produktbeschreibung
Erdspieß aus UV-beständigen Kunststoff –
Polyamid, glasfaserverstärkt
Anschlussgewinde G ß· DIN · ISO 228
5 m Anschlussleitung H05RN-F 3G1@
mit Schutzkontaktstecker
1 Leitungsverschraubung Pg 11
mit Biegeschutzspirale
c– Konformitätszeichen
Gewicht: 0,8 kg
Product description
Earth spike made of UV-resistant glass - fibre
reinforced polyamide synthetic
Mounting bush G ß· DIN · ISO 228
5 m mains supply cable H05RN-F 3G1@
with safety plug
1 screw cable gland Pg 11
with antikink spiral top
c– Conformity mark
Weight: 0.8 kg
Description du produit
Piquet en matière synthétique résistant
- Polyamide renforcée à la fibre de verre
Raccord fileté G ß· DIN · ISO 228
5 m de câble H05RN-F 3G1@avec fiche
1 presse-étoupe Pg 11 avec gaine de
protection rigide
c– Sigle de conformité
Poids: 0,8 kg
Sicherheit
Für die Installation und für den Betrieb
dieses Ergänzungsteils sind die nationalen
Sicherheitsvorschriften zu beachten.
Der Hersteller übernimmt keine Haftung für
Schäden, die durch unsachgemäßen Einsatz
oder Montage entstehen.
Werden nachträglich Änderungen an dem
Ergänzungsteil vorgenommen, so gilt derjenige
als Hersteller, der diese Änderungen vornimmt.
Safety indices
The installation and operation of this accessory
are subject to national safety regulations.
The manufacturer is then discharged from
liability when damage is caused by improper
use or installation.
If any accessory is subsequently modified, the
persons responsible for the modification shall
be considered as manufacturer.
Sécurité
Pour l’installation et l’utilisation de cet
accessoire, respecter les normes de sécurité
nationales.
Le fabricant décline toute responsabilité
résultant d'une mise en œuvre ou d'une
installation inappropriée du produit.
Toutes les modifications apportées à cet
accessoire se feront sous la responsabilité
exclusive de celui qui les effectuera.
Montage
LED-Scheinwerfer in Kombination mit dem
Erdspieß werden werkseitig montiert und
anschlussfertig geliefert.
Für Scheinwerfer mit anderen Lampen erfolgt
der elektrische Anschluss bauseits über die
am Erdspieß montierte Anschlussleitung mit
Netzstecker.
Eine ggf. am Scheinwerfer vorhandene Leitung
ist daher zu entfernen.
Scheinwerfer mit Anschlussgewinde G ß
in das Innengewinde des Erdspießes fest
einschrauben. Seitliche Sicherungsschraube
M6 im Erdspieß fest andrehen, um
die Verschraubung gegen Lockern zu
sichern. Beiliegende Anschlussleitung mit
aufgeschobener Verschraubung durch das
Anschlussgewinde Gßführen. Verschraubung
fest in den Erdspieß einschrauben.
Scheinwerferanschluss gemäß
Gebrauchsanweisung des verwendeten
Scheinwerfers vornehmen.
Leitungsverschraubung anziehen.
Erdspieß senkrecht in das Erdreich eindrücken,
bis Standsicherheit erreicht ist, ggf. Erdreich im
Bereich des Erdspießes verdichten.
Scheinwerfereinstellung entsprechend der
Gebrauchsanweisung des verwendeten
Scheinwerfers vornehmen.
Installation
A combination of LED floodlights with the earth
spike will be assembled in factory and will be
shipped ready for connection.
In case of floodlights which are suitable for
different lamps the electrical connection will be
done at site by means of the connecting cable
with safety plug supplied with the earth spike.
The cable connected to the floodlight is to be
removed if applicable.
Screw floodlight with mounting bush G ßfirmly
into the female thread of the earth spike.
Tighten firmly lateral locking screw M6 of the
earth spike to secure the screw connection
against loosening.
Lead the enclosed mains supply cable with
slided on screw connection through the
mounting bush Gß.
Screw screw connection firmly into the earth
spike.
Connect the floodlight according to the
instructions for use of the floodlight.
Tighten screw cable gland firmly.
Push the earth spike vertically into the soil until
stability is achieved. If necessary compact soil
around the earth spike.
Adjust the floodlight according to the
instructions for use of the floodlight.
Installation
Les projectuers à LED à monter sur le
piquet seront assemblés en usine et prêts à
l'utilisation.
Pour les projecteurs utilisant d'autres lampes, le
raccordement électrique sera effectué sur site
au moyen du câble et de la fiche montée sur le
piquet. Le cas échéant, détacher le câble du
projecteur.
Serrer fermement le projecteur avec le raccord
fileté G ßdans le racccord fileté femelle du
piquet. Bien serrer la vis de blocage latérale M6
dans le piquet pour empêcher le desserrage du
raccord. Faire passer le câble de raccordement,
avec le vissage coiffé, fourni à travers le
raccord fileté G ß. Visser fermement le vissage
dans le piquet. Procéder au raccordement du
projecteur conformément à la fiche d'utilisation
du projecteur utilisé.
Bien serrer le presse-étoupe.
Enfoncer le piquet verticalement dans le sol
jusqu'au moment où une bonne stabilité de
l'installation est assurée. Si nécessare bien
fouler et comprimer le sol autour du piquet.
Procéder au réglage du projecteur
conformément à la fiche d'utilisation du
projecteur utilisé.
Wartung
Die Anschlussleitung ist auf äußere
Beschädigungen zu prüfen und darf nur durch
eine Elektro-Fachkraft ersetzt werden.
Maintenance
The mains supply cable has to be inspected
regarding obvious damages and has to be
replaced by a qualified electrician only.
Maintenance
Vérifier que le câble de raccordement n’est pas
endommagé. Le câble ne doit être remplacé
que par un électricien agréé.
Ersatzteile
Bezeichnung Bestellnummer
Kabelverschraubung 165292
Anschlussleitung mit Netzstecker 620137
Spares
Description Part no
Screw cable gland 165292
Connecting cable with mains plug 620137
Pièces de rechange
Désignation No de commande
Presse-étoupe 165292
Câble de raccordement avec fiche 620137

Other BEGA Outdoor Light manuals

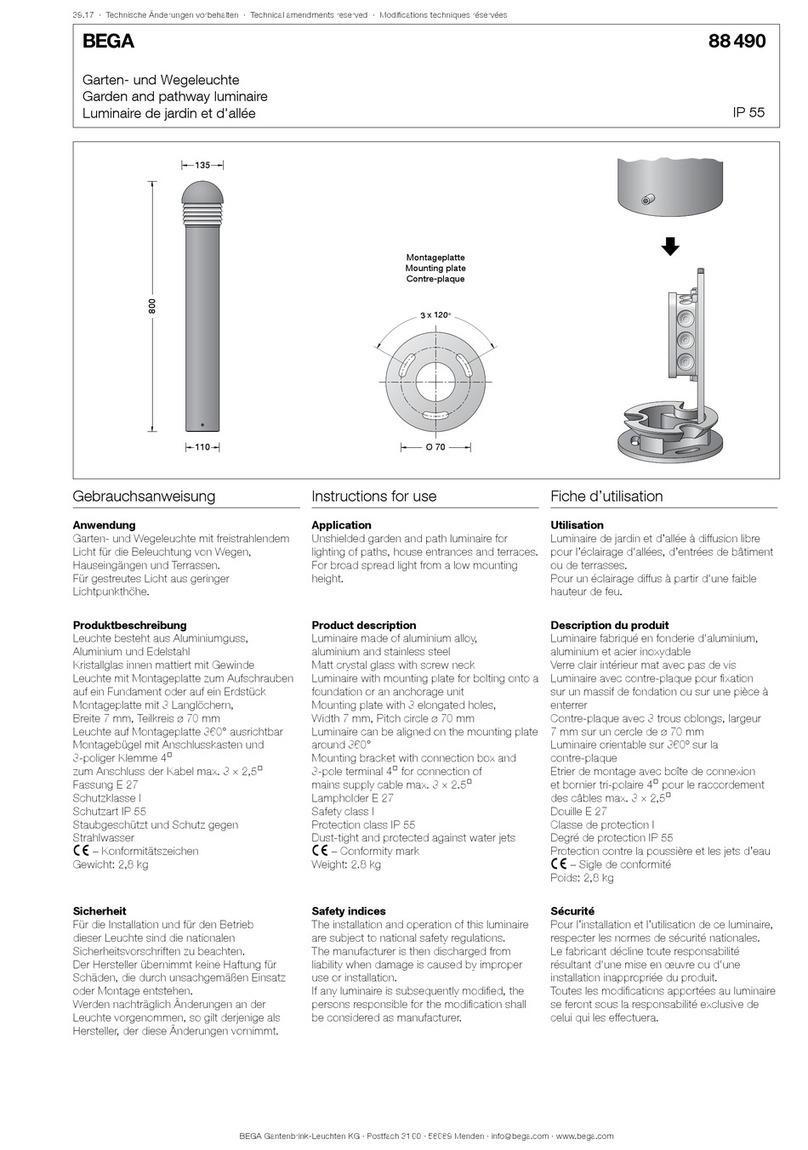
BEGA 88 066 Manual

BEGA

BEGA 88 066 Manual

BEGA 84 696 User manual

BEGA

BEGA 84 696 User manual

BEGA 84 061 Manual

BEGA

BEGA 84 061 Manual

BEGA 7723 User manual

BEGA

BEGA 7723 User manual

BEGA 77 911 Manual

BEGA

BEGA 77 911 Manual

BEGA 84 462 Manual

BEGA

BEGA 84 462 Manual

BEGA 88 674 User manual

BEGA

BEGA 88 674 User manual

BEGA 67 541.3 User manual

BEGA

BEGA 67 541.3 User manual

BEGA 84292 User manual

BEGA

BEGA 84292 User manual

BEGA 84 992 User manual

BEGA

BEGA 84 992 User manual

BEGA 99 282 User manual

BEGA

BEGA 99 282 User manual

BEGA 84 433 User manual

BEGA

BEGA 84 433 User manual

BEGA 84 121 User manual

BEGA

BEGA 84 121 User manual

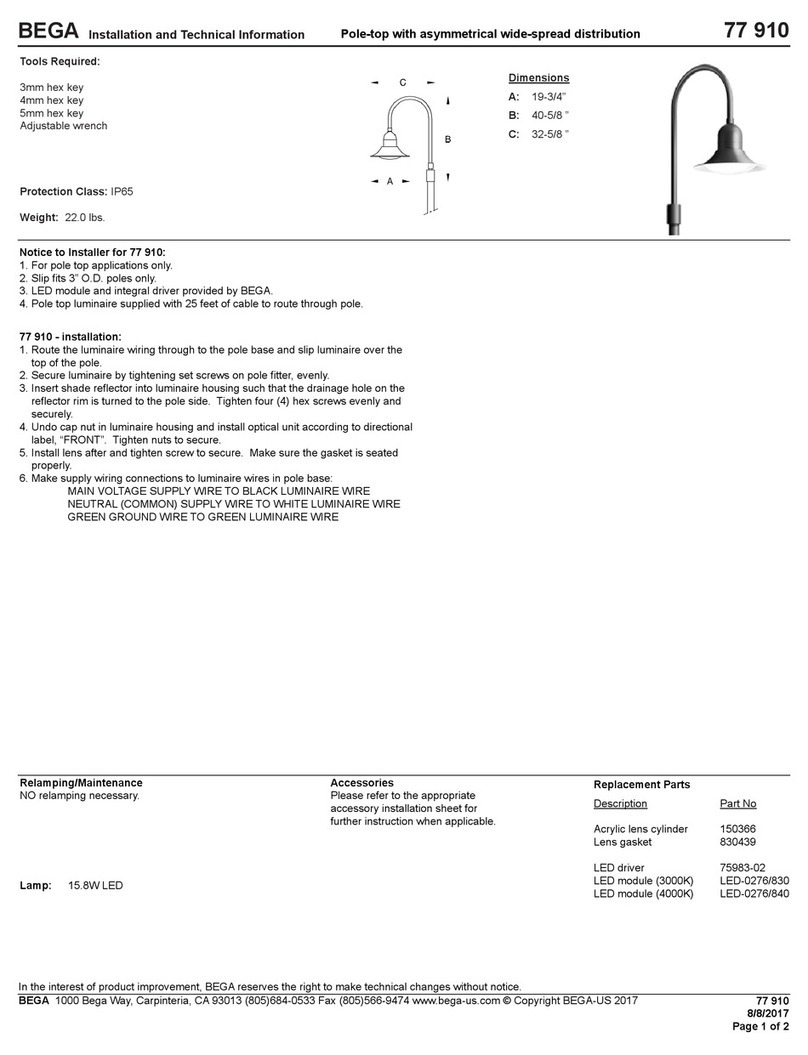
BEGA 77 910 Manual

BEGA

BEGA 77 910 Manual

BEGA 33 200 Manual

BEGA

BEGA 33 200 Manual

BEGA 71 601 User manual

BEGA

BEGA 71 601 User manual

BEGA 84866 User manual

BEGA

BEGA 84866 User manual

BEGA 24 210 Manual

BEGA

BEGA 24 210 Manual

BEGA 24 314 User manual

BEGA

BEGA 24 314 User manual

BEGA 24 110 Manual

BEGA

BEGA 24 110 Manual

BEGA 24 011 Manual

BEGA

BEGA 24 011 Manual

BEGA 84 300 Manual

BEGA

BEGA 84 300 Manual

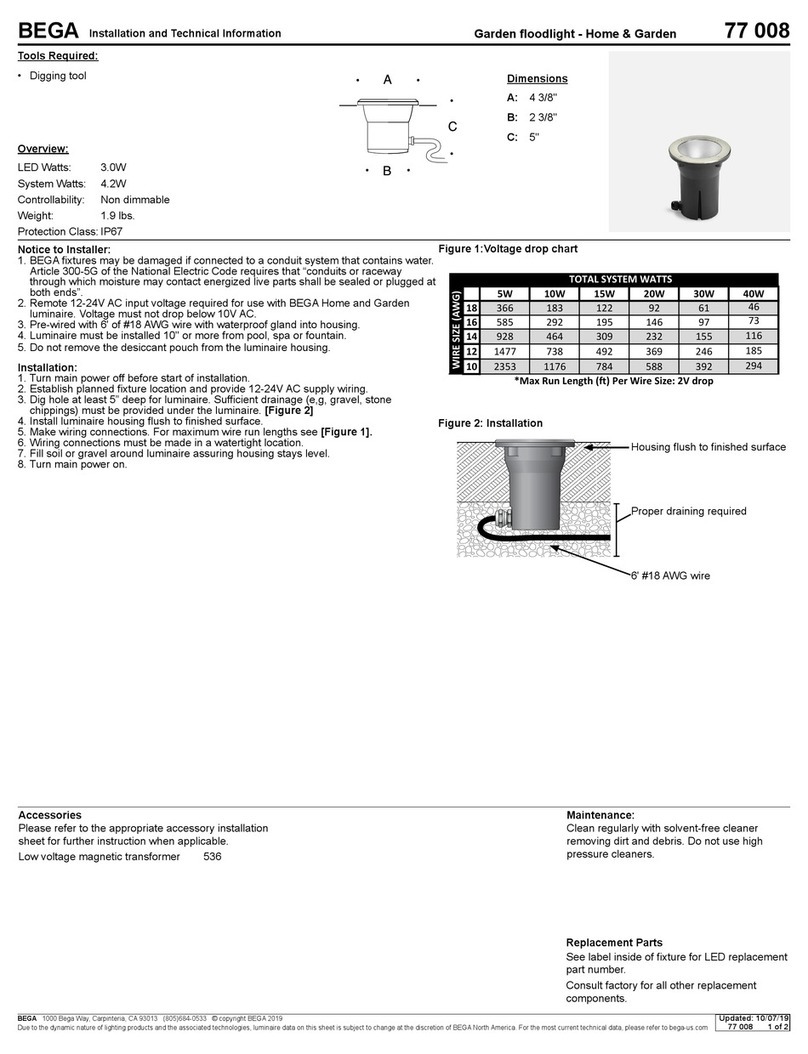
BEGA 77 008 Manual

BEGA

BEGA 77 008 Manual

BEGA Strassburg User manual

BEGA

BEGA Strassburg User manual

Popular Outdoor Light manuals by other brands

leadsun AE3C user manual

leadsun

leadsun AE3C user manual

IKEA SOLVINDEN manual

IKEA

IKEA SOLVINDEN manual

Vista 7216 Landscape Series installation instructions

Vista

Vista 7216 Landscape Series installation instructions

FOCUS-LIGHTING SKY PARK instructions

FOCUS-LIGHTING

FOCUS-LIGHTING SKY PARK instructions

John Lewis Darlington user manual

John Lewis

John Lewis Darlington user manual

AMG BurrowPro Well Light Installation & maintenance guide

AMG

AMG BurrowPro Well Light Installation & maintenance guide

LIGMAN TA-31881 installation manual

LIGMAN

LIGMAN TA-31881 installation manual

DS Produkte PY-F1094 instruction manual

DS Produkte

DS Produkte PY-F1094 instruction manual

LIGMAN TA-31871 installation manual

LIGMAN

LIGMAN TA-31871 installation manual

Hoselink L335 user manual

Hoselink

Hoselink L335 user manual

Springdale Lighting STA11148 Assembly instructions

Springdale Lighting

Springdale Lighting STA11148 Assembly instructions

Life 39.9F0132F user manual

Life

Life 39.9F0132F user manual

VIBIA Mayfair Mini Assembly instructions

VIBIA

VIBIA Mayfair Mini Assembly instructions

urban ambiance UQL1272 installation instructions

urban ambiance

urban ambiance UQL1272 installation instructions

LIGMAN OD-30012 installation manual

LIGMAN

LIGMAN OD-30012 installation manual

Beurer TL 41 Instructions for use

Beurer

Beurer TL 41 Instructions for use

HEPER KREIS C Installation & maintenance instructions

HEPER

HEPER KREIS C Installation & maintenance instructions

Koncept Splitty Assembly instructions

Koncept

Koncept Splitty Assembly instructions

manuals.online logo
manuals.online logoBrands
  • About & Mission
  • Contact us
  • Privacy Policy
  • Terms and Conditions

Copyright 2025 Manuals.Online. All Rights Reserved.