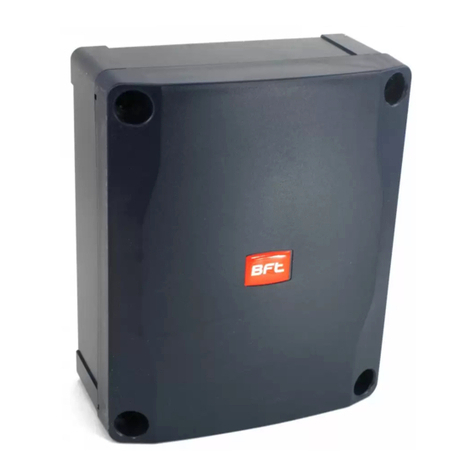
BFT ELBA User manual

QUADRO DI COMANDO
CONTROL UNIT
UNITÉ DE COMMANDE
STEUERZENTRALE
CENTRAL DE MANDO
CENTRAL DO MANDO
D811585_03 22/07/09
I
GB
F
D
E
PELBA
ISTRUZIONI D’USO E DI INSTALLAZIONE
INSTALLATION AND USER’S MANUAL
INSTRUCTIONS D’UTILISATION ET D’INSTALLATION
INSTALLATIONS-UND GEBRAUCHSANLEITUNG
INSTRUCCIONES DE USO Y DE INSTALACION
INSTRUÇÕES DE USO E DE INSTALAÇÃO
Via Lago di Vico 44
36015 Schio (VI) - Italy
Tel. +39 0445 69 65 11
Fax. +39 0445 69 65 22
www.bft.it
e-mail: [email protected]
80 2 7 9 0 8 3 2 1 7 2 5

INSTALLATION MANUAL
ENGLISH
Thank you for buying this product, our company is sure that you will be more
than satised with the performance of the product.
Read the “Instruction Manual” supplied with this product carefully, as it
provides important information about safety, installation, operation and
maintenance. This product complies with recognised technical standards
and safety regulations. We declare that this product is in conformity with
the following European Directives: 2004/108/EEC (amended by RL 91/263/
EEC, 92/31/EEC and 93/68/EEC), 2006/95/EEC, 99/5/EEC.
1) GENERAL OUTLINE
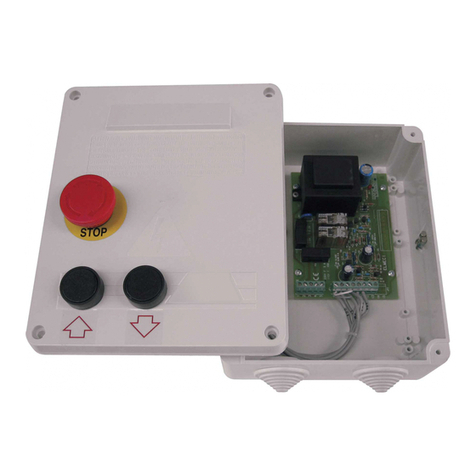
Elba is a control unit for motors having maximum power of 470 W (e.g.
tubular motors for roller shutters and sunshades, roll-up door openers etc.),
compatible with the EElink protocol.
It is provided with the connections for opening (or start), closing and stop
control buttons, for accessories such as the twilight sensor, anemometer
and, when requested, safety devices.
When the key is pressed, a START command is generated.
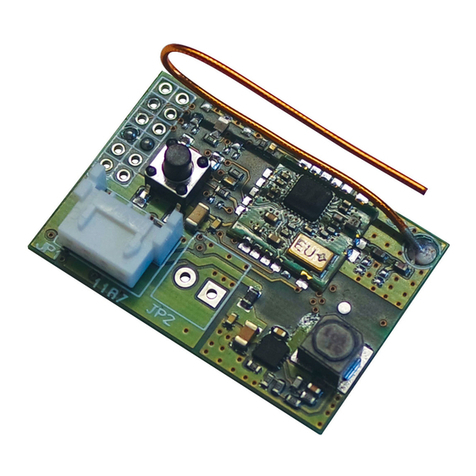
The commands can also be sent via radio through; the transmitters can
directly be memorised by means of the key and the LED present on the
board or by means of the radio self-learning method or using the cloning
mechanism.
If the control unit allows it, set up a centralised control system via wire,
which can be divided into 8 or more zones, without having to interfere with
the wiring.
2) GENERAL SAFETY
WARNING!An incorrect installation or improper use of the product can
cause damage to persons, animals or things.
• The “Warnings” leaet and “Instruction booklet” supplied with this
product should be read carefully as they provide important information
about safety, installation, use and maintenance.
• Scrap packing materials (plastic, cardboard, polystyrene etc) according
to the provisions set out by current standards. Keep nylon or polystyrene
bags out of children’s reach.
• Keep the instructions together with the technical brochure for future
reference.
• This product was exclusively designed and manufactured for the use
specied in the present documentation. Any other use not specied in
this documentation could damage the product and be dangerous.
• The Company declines all responsibility for any consequences resulting
from improper use of the product, or use which is different from that
expected and specied in the present documentation.
• Do not install the product in explosive atmosphere.
• The Company declines all responsibility for any consequences resulting
from failure to observe Good Technical Practice when constructing closing
structures (door, gates etc.), as well as from any deformation which might
occur during use.
• The installation must comply with the provisions set out by the following
European Directives: 2004/108/EEC, 2006/95/EEC, 98/37/ECC and
subsequent amendments.
• Disconnect the electrical power supply before carrying out any work on
the installation. Also disconnect any buffer batteries, if tted.
• Fit an omnipolar or magnetothermal switch on the mains power supply,
having a contact opening distance equal to or greater than 3 mm.
• Check that a differential switch with a 0.03A threshold is tted just before
the power supply mains.
• Check that earthing is carried out correctly: connect all metal parts for
closure (doors, gates etc.) and all system components provided with an
earth terminal.
•
The Company declines all responsibility with respect to the automation safety
and correct operation when other manufacturers’ components are used.
• Only use original parts for any maintenance or repair operation.
• Do not modify the automation components, unless explicitly authorised
by the company.
• Instruct the product user about the control systems provided and the
manual opening operation in case of emergency.
• Do not allow persons or children to remain in the automation operation area.
• Keep radio control or other control devices out of children’s reach, in
order to avoid unintentional automation activation.
• The user must avoid any attempt to carry out work or repair on the automa-
tion system, and always request the assistance of qualied personnel.
• Anything which is not expressly provided for in the present instructions,
is not allowed.
• This application is not meant for use by people (children included) with
impairedmental, physicalorsensorycapacities, orpeoplewho donothave
suitable knowledge, unless they are supervised or have been instructed
by people who are responsible for their safety.
3) TECHINCAL SPECIFICATIONS
Mains power supply:....................................................230V~ ±10%, 50Hz*
Motor current: .......................................................................................... 2A
Motor power:.......................................................................................470W
Number of storable radio-controls: ...........................................................63
Reception frequency:.................................................................433.92MHz
Current for external attachments:....................................................... 70mA
Maximum Number of zones with wire control (master):: ..................8 o 127
Max. connection length:.......................................................................250m
Weight: ....................................................................................350g approx
(* other voltages available on request).
4) WIRING
WARNING! For connection to the mains, use a multipolar cable having
a minimum cross section of 3x1.5 mm2and complying with the current
standards. (For example, if the cable is not protected, it must be at least
equal to H07 RN-F, whereas if it is protected it must be at least equal
to H07 VV-F with a 3x1.5 sq mm2cross section).
WARNING: Wiring must be carried out by qualied, expert personnel in
a professional manner and in accordance with all regulations in force,
using appropriate materials.
Adisconnectingswitch mustbeinstalledupline fromthesystemwith acontact
separation of at least 3 mm and offering a thermal-magnetic and differential
protection capacity that is adequate for the equipment’s power demand. For
wiring, use only cables that meet harmonized or national standards and
have a cross-section coordinated with the safety devices upline, with the
equipment’s power demand and with installation conditions.
When running cables to the motor assembly for connection of accessories,
safety devices and controlgear, keep mains power wiring well separated
from low-voltage accessory wiring. To ensure there are no breaks in the
earth circuit, connect the actuator’s earth wire to the earth wire of the
power supply using the relevant terminal provided.
Serial line connections to produce a hardwired centralized control system
must be made using only twisted pair cabling of the kind used for telephone
systems.Whenusinga telephone cablewithmorethanonepair,it is essential
to use wires from the same pair.
The length of the telephone cable between one unit and the next must
not be greater than 250 m.
Control buttons musthavemarkingstoshowtheactualdirectionof movement.
In the event you are connecting devices to the STOP and PHOTOCELL
terminals, you will need to remove the factory-connected jumpers. If
several devices are to be connected to one of these inputs, they must
be connected in series with each other.
TERMINAL
DESCRIPTION
1-2 Single-phase mains power (1=N, 2=L)
3-4-5
Motor connection:
3 start 1 + capacitor
4 common
5 start 2 + capacitor
6-7 OPEN/START INPUT (N.O.)
6-8 CLOSE INPUT (N.O.)
6-9
STOP/WIND SENSOR INPUT
A STOP control can be connected to this input, or a wind
sensor can be connected to provide automatic closing when
wind speed reaches a settable threshold. The setting is
made by adjusting DIP switches n° 1 and 2.
6-10 PHOT INPUT (N.C.)
The safety device operates locally only.
6-11
TWILIGHT SWITCH INPUT (N.O.)
Atwilight switch can be connected to this input to provide automatic
opening and closing as environmental light conditions change.
Whenthecontactcloses,aclosecommandissenttotheactuator;
when the contact opens again, the actuator is made to open.
12-13 24V~ max. 70mA output - power supply to photocells or
other devices.
14-15 Antenna input for built-in radio-receiver board
(14: SIGNAL. 15: BRAIDING)
5) ADJUSTING PARAMETERS AND OPERATING LOGIC
5.1) ADJUSTING OPERATING TIME AND AUTOMATIC CLOSING TIME
TW trimmer (g. 1): operating time adjustable from a minimum of 10 sec. to
a maximum of 240 sec..
TCA trimmer (g. 1): automatic closing time adjustable from a minimum of 3
sec. to a maximum of 180 sec..
8 - ELBA
D811585_03

INSTALLATION MANUAL ENGLISH
Automatic closing can also be disabled by setting the trimmer to its lowest
setting.
The TCA countdown starts when the operating time ends.
5.2) ADJUSTING OPERATING LOGIC
The board features 12 DIP switches for adjusting operating logic:
DIP 1:
DIP 2:
STOP/WIND input setting
DIP 1 DIP 2 TERMINAL THRESHOLD
OFF OFF STOP input (default) -
ON OFF Anemometer input 20 Km/h (5,6 m/s)
OFF ON Anemometer input 40 Km/h (11,2 m/s)
ON ON Anemometer input 60 Km/h (16,8 m/s)
DIP 3:
OPEN/START input setting [OFF]
ON: Input between terminals 6-7 works as START
OFF: Input between terminals 6-7 works as OPEN
DIP 4:
Open/closed loop logic [OFF]
ON: closed loop
OFF: open loop
DIP 5:
Master/slave logic [OFF]
ON: Control panel is set up as the Master unit in a centralized
connection system.
OFF: Control panel is set up as a SLAVE unit in a centralized
connection system.
DIP 6:
Zone programming [OFF]
ON: Control panel is in Zone setting mode
OFF: Control panel is in normal operating mode
DIP 7:
Deadman [OFF]
ON:Deadmanmode:operationcontinuesaslongasthecontrol
key is held down. (OPEN-CLOSE). Input between termi-
nals 6-7 works as OPEN (regardless of position of DIP 3).
Input between terminals 6-9 works as STOP (regardless
of position of DIP 1 and 2). NEITHER A WIND SENSOR
NOR TWILIGHT SWITCH CAN BE CONNECTED.
OFF:Pulse operation, according to 2- or 4-step logic.
DIP 8:
Photocell off during opening [OFF]
ON:whenbeam is broken,operation ofthephotocellis switched
off during opening. During closing, movement is reversed
immediately.
OFF:when beam is broken, photocells are active during both
opening and closing. When beam is broken during closing,
movement is reversed only once the photocell is cleared.
DIP 9:
2-step logic on [OFF]
ON: Switches to 2-step logic. A start pulse has the fol-
lowing effects:
door closed:............................................................opens
during opening:…........................stops and closes again
door open:..............................................................closes
during closing:…..........................stops and opens again
OFF: Switches to 4-step logic. A start pulse has the fol-
lowing effects:
door closed:............................................................opens
during opening:…......stops and switches on TCA (if
congured)
door open:..............................................................closes
duringclosing:…..........................................stopsanddoes
not switch on tca (stop)
after stop:...............................................................opens
DIP 10:
Transmitter management [OFF]
ON: Control panel is in transmitter management mode (memo-
rizing/deletion of remote controls)
OFF:Control panel is in normal operating mode
DIP 11:
Wireless self-learning on [OFF]
ON: Enables wireless memorizing of transmitters:
1-Press in sequence the hidden key and normal key (T1-T2-
T3-T4) of a transmitter that has already been memorized.
2-Press within 10 sec. the hidden key and normal key
(T1-T2-T3-T4) of a transmitter to be memorized.
The receiver exits programming mode after 10 sec.: you
can use this time to enter other new transmitters.
This mode does not require access to the control panel.
OFF:Disables wireless memorizing of transmitters.
DIP 12:
Fixed-code receiver setting [OFF]
ON: Receiver is congured for operation in xed-code mode.
OFF:Receiver is congured for operation in rolling-code
mode.
5.3) ZONE SETTING (Fig. 3)
When you set DIP switch n°6 to ON, you enter zone setting mode allowing
you to set zones via the board. In this mode, you can assign a zone number
from 0 to 7 to the device. Use a universal handheld programmer to set values
in the range 8 to 127.
NOTE: if DIP switch n°10 is set to ON (transmitter management), this switch
has priority over n°6, which means you will not be able to enter zone setting
while wireless management is on.
While in this mode, the LED ashes as follows to show that the relevant
zone has been set correctly:
- zone 0: the LED stays permanently lit;
- zone from 1 to 7: the LED blinks a number of times equal to the number
of the zone set;
- zone from 8 to 127: the LED blinks rapidly and continually.
6) WIRELESS SETTINGS AND MANAGEMENT (Fig. 2)
Transmitters that can be used with the Elba panel can have 2 or 4 keys.
There are two possible ways of associating keys with commands:
- free: any key can be associated with the START command;
- automatic: t1 = START, t2 = STOP, t3 = OPEN, t4 = CLOSE.
Each command can be valid for a zone or room depending on how the board
has been set up (master/slave).
NOTE:Whileinwireless managementmode,wirelesscommandsare notexe-
cuted: once you have nished, remember to set DIP switch n°10 to OFF.
6.1) TRANSMITTER PROGRAMMING ON START OUTPUT (Fig.2)
6.2) AUTOMATIC TRANSMITTER PROGRAMMING (Fig.2)
In the xed key association, if key 1 is pressed in phase b), all the four keys
are automatically associated to the respective functions, if another key is
pressed (2, 3 or 4), only keys 2, 3 and 4 are automatically associated.
By appropriately memorising the transmitter keys on the various receivers,
a centralised-type system can be obtained without having to connect the
control panels via wire. For this purpose, use transmitters with 4 keys, and
memorise all transmitters on all the system panels using key 2 and each of
them on an individual panel using key 1; this way key 1 (START) will only
control the operator where it has been memorised, whereas keys 2 (STOP),
3 (OPEN) and 4 (CLOSE) will act globally on all operators (g. 5).
6.3) REMOTE TRANSMITTER PROGRAMMING (Fig.2)
6.4) DELETING LIST OF TRANSMITTERS (Fig.2)
6.5) FIXED-CODE RECEIVER
Using DIP switch n°12 you can set the management mode for transmitters
that have been memorized in the receiver built into the ELBA panel:
- DIP 12 OFF: rolling-code mode (default setting).
- DIP 12 ON: xed-code mode.
6.6) PROGRAMMING THE RECEIVER USING EELINK PROTOCOL
The receiver can also be programmed using the EElink protocol by con-
necting the universal handheld programmer via the UNIFLAT and UNIDA
accessories as illustrated in g. 6.
For receiver programming, refer to the programmer’s instructions. A total of
63 remote controls can be memorized.
When it comes to output arrangement, the ELBA control panel acts as a
4-channel receiver in which outputs have the following functions, regardless
of programmed operation:
- output 1: START (local command with 2- or 4-step logic);
- output 2: STOP (zone and local stop command);
- output 3: OPEN (zone and local open command);
- output 4: CLOSE (zone and local close command).
7) CENTRALIZED CONNECTION
Thecontrolpanel’sspecialserialinputsand outputs(SCS1)makethecentralized
connection of a number of automated devices possible. That way, all the auto-
mated devices connected can be opened or closed with a single command.
Connect all control panels using twisted pair cabling only, proceeding as
shown in the diagram in Fig.4.
When using a telephone cable with more than one pair, it is essential to use
wires from the same pair.
The length of the telephone cable between one unit and the next must not
be greater than 250 m.
ELBA - 9
D811585_03

INSTALLATION MANUAL
ENGLISH
At this point, each control panel needs to be congured appropriately, starting
by entering a MASTER control panel that will have control over all the others,
which therefore have to be set as SLAVE units (DIP 5).
Also set the Zone number (DIP 6) in the range 0 to 127 (range 9 to 127
with programmer).
A centralized system can be produced either with an open loop or closed
loop (DIP 4):
open loop: the connections marked with dotted lines in Fig.4 are not made.
When connecting, the MASTER unit must be the rst in the series.
Closed loop: the connections marked with dotted lines in Fig.4 are made.
When connecting, the MASTER unit can be in any position.
8) STATISTICS
By connecting a programmer that is compatible with the EElink protocol,
you can read a number of statistical parameters relating to the system,
such as:
Board version: gives the name and version of the board connected.
List description: gives the description assigned to the system. This descrip-
tion can be entered or edited via the universal handheld programmer.
Number of operations: gives the number of operations that the panel has
performed since its installation.
Number of operations since service: gives the number of operations perfor-
med since the last service, where service means any board conguration
operation, including self-diagnosis.
Service date: gives the date of the last service.
Update service: can be used to update the number of operations since
the last service.
9) SELF-DIAGNOSIS
The panel features a LED that, during the automation system’s normal ope-
ration, ashes on and off quickly once a second to indicate that it is being
powered and that no programming modes are active.
If the LED stays unlit, check mains power and make sure DIP switch n°10
is not set to ON (wireless management on).
If the LED stays steadily lit, or ashes on and off a number of times followed
by a pause lasting approx. 1 sec., or ashes quickly and continuously, make
sure DIP switch n°6 is not set to ON (zone programming mode).
In addition to the warnings provided by the LED, the ELBApanel can be used
to run the self-diagnosis functions provided for by the EElink protocol.
When you run self-diagnosis with the aid of the universal handheld program-
mer, you get a diagnostic message telling you what inputs are active, i.e.
in a state other than the normal standby state. Standby state is dened as
the condition whereby no command signal is active and no safety device
has been triggered.
NOTE: the twilight sensor input appears as the timer input.
10) MAINTENANCE AND DEMOLITION
The maintenance of the system should only be carried out by qualied
personnel regularly. The materials making up the set and its packing must
be disposed of according to the regulations in force.
Batteries must be properly disposed of.
The descriptions and illustrations contained in the present manual are
not binding. The Company reserves the right to make any alterations
deemed appropriate for the technical, manufacturing and commercial
improvement of the product, while leaving the essential product fea-
tures unchanged, at any time and without undertaking to update the
present publication.
10 - ELBA
D811585_03

12
8
Fig.1
Fig. 2
1
DIP 10=ON
2 3 4 5
Radiocomando già memorizzato
Radio transmitter already memorised
Radiocommande déjà mémorisée
Bereits gespeicherte Funksteuerung
Radiomando ya memorizado
Radiocomando já memorizado
Radiocomando già memorizzato
Radio transmitter already memorised
Radiocommande déjà mémorisée
Bereits gespeicherte Funksteuerung
Radiomando ya memorizado
Radiocomando já memorizado
Cancellazione effettuata
Cancellation completed
Annulation effectuée
Löschung ist erfolgt
Cancelación efectuada
Cancelamento efectuado
Radiocomando da memorizzare
Radio transmitter to memorise
Radiocommande à mémoriser
Zu speichernde Funksteuerung
Radiomando que memorizar
Radiocomando a memorizar
Radiocomando da memorizzare
Radio transmitter to memorise
Radiocommande à mémoriser
Zu speichernde Funksteuerung
Radiomando que memorizar
Radiocomando a memorizar
PROGRAMMAZIONE TRASMETTITORI SU START, TRANSMITTER PROGRAMMING ON START, PROGRAMMATION EMETTEURS SUR START,
PROGRAMMIERUNG DER SENDER AUF START, PROGRAMACIÓN DE LOS TRANSMISORES CON START, PROGRAMAÇÃO DOS TRANSMISSORES AO START
PROGRAMMAZIONE TRASMETTITORI REMOTA, REMOTE TRANSMITTER PROGRAMMING, PROGRAMMATION ÉMETTEURS A DISTANCE,
FERNPROGRAMMIERUNG DER SENDER, PROGRAMACION DE TRANSMISORES REMOTA, PROGRAMAÇÃO REMOTA DOS TRANSMISSORES.
CANCELLAZIONE TRASMETTITORI, DELETING TRANSMITTERS, ANNULATION EMETTEURS, LÖSCHEN DER SENDER, CANCELACIÓN DE LOS
TRANSMISORES, ANULAÇÃO DOS TRANSMISSORES.
1
2
3
4
5
6
7
8
9
10
11
12
DIP 10=OFF
1
2
3
4
5
6
7
8
9
10
11
12
T2=STOP
T3=OPEN
T4=CLOSE
T1=START
T2=STOP
T3=OPEN
T4=CLOSE
1 2 3 4
DIP 10=ON
1
2
3
4
5
6
7
8
9
10
11
12
1
DIP 11=ON
DIP 10=OFF
1
2
3
4
5
6
7
8
9
10
11
12
5
DIP 10=OFF
1
2
3
4
5
6
7
8
9
10
11
12
10 s
LED
1
N L C
2 3 4 5
14 15
1
2
3
4
5
6
7
8
9
10
11
12
6
COM
CLOSE
PHOT
OPEN/START
STOP/WIND
7 8 9 10 111213
M
CREPUSC.
24V~
SHIELD
ANT
Cancellazione in corso
Cancellation in progress
Annulation en cours
Löschvorgang läuft
Cancelación en curso
Cancelamento em curso
24V~
24V~
COM
COM
CREPUSC.
STOP/WIND
Trimmer regolazioni, Adjustment trimmer,
Trimmer réglages,Einstelltrimmer,
Trimmers para las regulaciones,
Trimmer regulações.
DIP SWITCH
Connettore scheda opzionale (SCS1)
SCS1 optional board connector
Connecteur carte facultative SCS1
Steckverbinder Zusatzkarte SCS1
Conector de la tarjeta opcional (SCS1)
Conector placa opcional SCS1
Connettore programmatore palmare,
Palmtop programmer connector,
Connecteur programmateur de poche,
Steckverbinder Palmtop-Programmierer,
Conector del programador de bolsillo,
Conector programador palmar.
LED+TASTO PROGRAMMAZIONE,LED+PROGRAMMING KEY,LED+TOUCHE PROGRAMMATION,
LED + PROGRAMMIERUNGSTASTE,LED+TECLA DE PROGRAMACIÓN,LED+TECLA DE PROGRAMAÇÃO
ANENOMETRO
ANENOMETER
ANENOMETRE
ANEMOMETER
ANEMOMETRO
ANEMÓMETRO
CREPUSCOLARE
TWILIGHT SENSOR
CREPUSCULAIRE
DÄMMERUNGSSENSOR
CREPUSCULAR
CREPUSCULAR
T1 T2
T4 T3
spento
unlit
éteint
aus
apagado
apagado
2
lampeggia
flashing
clignote
blinkend
parpadea
pisca
lampeggia
flashing
clignote
blinkend
parpadea
pisca
lampeggia
flashing
clignote
blinkend
parpadea
pisca
43
lampeggia x 10s.
flashing for 10 sec
clignote pendant 10s.
blinkend,10-mal pro Sekunde
parpadea 10 seg.
pisca por 10s.
lampeggia x 10s.
flashing for 10 sec
clignote pendant 10s.
blinkend,10-mal pro Sekun
de
parpadea 10 seg.
pisca por 10s.
8 9
fisso
steadily lit
fixe
an
fijo
fixo
fisso
steadily lit
fixe
an
fijo
fixo
fisso
steadily lit
fixe
an
fijo
fixo
6
fisso,
steadily lit
fixe,an
fijo,fixo
10
5 7
0÷9 s.
5
6
1
DIP ON
1
2
3
4
5
6
7
8
9
10
11
12
DIP OFF
1
2
3
4
5
6
7
8
9
10
11
12
11
23
4
13
0÷9 s.
altro radiocomando, other remote control, autre radiocommande, andere Fernsteuerung, otro radiomando,outro radiocomando
PROGRAMMAZIONE TRASMETTITORI AUTOMATICA, AUTOMATIC TRANSMITTER PROGRAMMING, PROGRAMMATION AUTOMATIQUE EMETTEURS,
PROGRAMACION DE TRANSMISORES EN AUTOMATICO, AUTOMATISCHE PROGRAMMIERUNG DER SENDER,PROGRAMAÇÃO AUTOMÁTICA DOS TRANSMISSORES.
3 s.
tasto nascosto
hidden key
touche cachée
verborge ne taste
tecla escondida
tecla escondida
or
9
tasto nascosto
hidden key
touche cachée
verborge ne taste
tecla escondida
tecla escondida
or
7
lampeggia
flashing
clignote
blinkend
parpadea
pisca
spento
unlit
éteint
aus
apagado
apagado
spento
unlit
éteint
aus
apagado
apagado
F1=T 3,15A
110V/230V
ELBA - 23
D811585_03

Fig.4
Fig.3
Fig.5 Fig.6
MITTO 1 MITTO 2 MITTO 3
M2 M3M1
ELBA 1 ELBA 2 ELBA 3
SLAVE
SCS1
SLAVE
SCS1
MASTER
SCS1
Max. 250m
TX1
TX2
RX1
RX2
SLAVE
SCS1
TX1
TX2
RX1
RX2
TX1
TX2
RX1
RX2
TX1
TX2
RX1
RX2
DIP4=ON
DIP 6=ON
ZONE Ø
ZONE 1
ZONE 2
ZONE 3
4
5
6
7
ZONE >7
1
2
3
4
5
6
7
8
9
10
11
12
DIP 6=OFF
1
2
3
4
5
6
7
8
9
10
11
12
x 8
x 1
x 2
x 3
x 4
x 5
x 6
x 7
5s
MEM OK
1112
13
1112
13
1112
13
Other manuals for ELBA
2
Table of contents
Other BFT Control Unit manuals