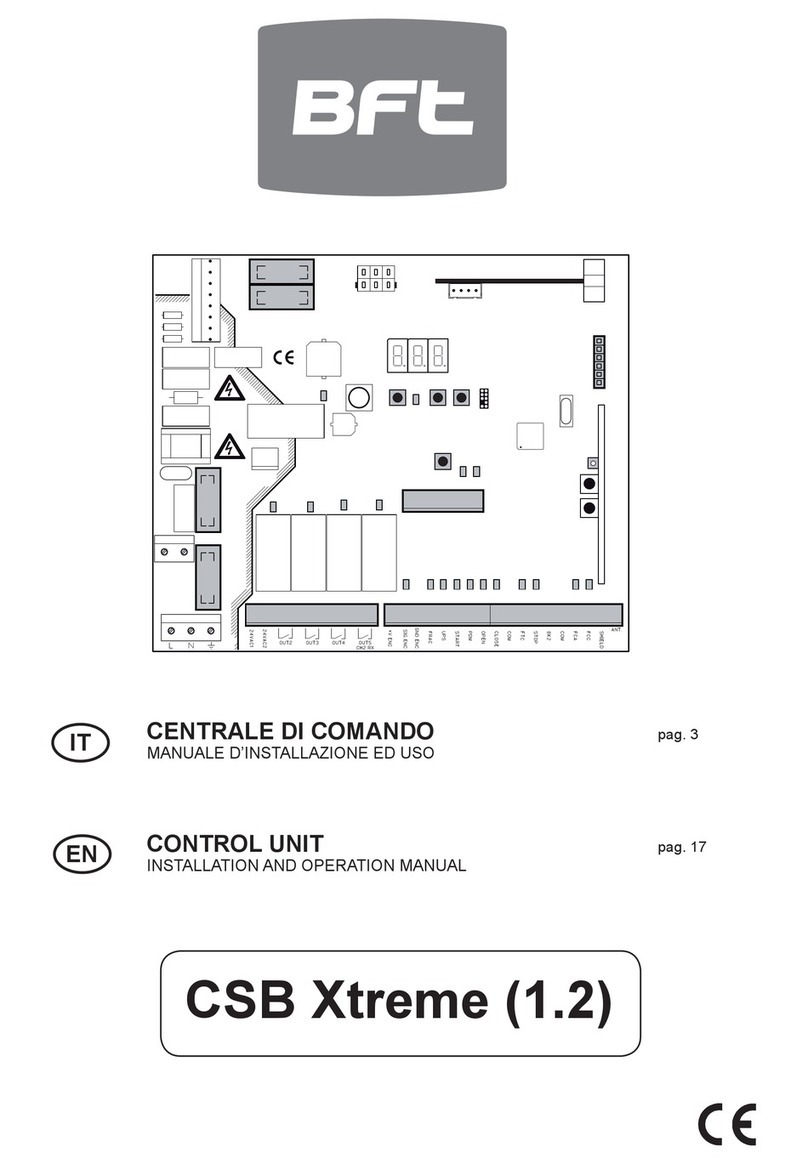
BFT RIGEL 5 User manual

ISTRUZIONI D’USO E DI INSTALLAZIONE
INSTALLATION AND USER’S MANUAL
INSTRUCTIONS D’UTILISATION ET D’INSTALLATION
INSTALLATIONS-UND GEBRAUCHSANLEITUNG
INSTRUCCIONES DE USOY DE INSTALACION
INSTRUÇÕES DE USO E DE INSTALAÇÃO
D811472 ver. 07 24-04-07
I
GB
F
D
E
P
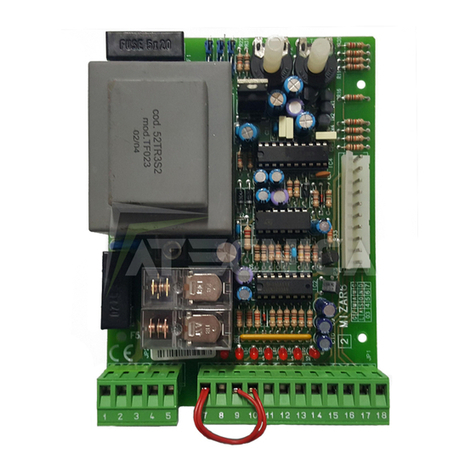
CENTRALINA UNIVERSALE PER IL CONTROLLO DI UNO O DUE MOTORI
UNIVERSAL CONTROL UNIT FOR OPERATING ONE OR TWO MOTORS
UNITE DE COMMANDE UNIVERSELLE POUR LE CONTROLE D’UN OU DEUX MOTEURS
UNIVERSALSTEUERUNG FÜR EINEN ODER ZWEI MOTOREN
CENTRAL UNIVERSAL PARA EL CONTROL DE UNO O DOS MOTORES
CENTRAL UNIVERSAL PARA O CONTROLO DE UM OU DOIS MOTORES
Via Lago di Vico, 44
36015 Schio (VI)
Tel.naz. 0445 696511
Tel.int. +39 0445 696533
Fax 0445 696522
Internet: www.bft.it
E-mail: [email protected]
RIGEL 5
8027908 2 8 1 5 1 7

2 - RIGEL 5 - Ver. 07
D811472_07

MANUALE D’USO ITALIANO
Nel ringraziarVi per la preferenza accordata a questo prodotto, la Ditta è
certa che da esso otterrete le prestazioni necessarie al Vostro uso.
Leggete attentamente l’opuscolo ”Libretto istruzioni” che lo accompagna
in quanto esso fornisce importanti indicazioni riguardanti la sicurezza,
l’installazione, l’uso e la manutenzione. Nel ringraziarVi per la preferenza
accordata a questo prodotto, la Ditta è certa che da esso otterrete le pre-
stazioni necessarie al Vostro uso. Leggete attentamente l’opuscolo ”Libretto
istruzioni” che lo accompagna in quanto esso fornisce importanti indicazioni
riguardanti la sicurezza, l’installazione, l’uso e la manutenzione.
Questo prodotto risponde alle norme riconosciute della tecnica e delle
disposizioni relative alla sicurezza. Confermiamo che esso è conforme alle
seguentidirettiveeuropee:73/23/CEE-93/68/CEE,89/336/CEE-91/236/CEE
- 92/31/CEE - 93/68/CEE, 98/37/CEE. Per quanto applicabile, essa rispetta
le seguenti norme tecniche EN60335-1, EN12453, EN12445.
AVVERTENZE
Nelle operazioni di cablaggio ed installazione riferirsi alle norme vigenti e
comunque ai principi di buona tecnica.
AVVERTENZE
Qualunqueinterventosuicomponentidell’automazionedeveessereeseguito
da personale qualificato (installatore).
1) GENERALITÁ
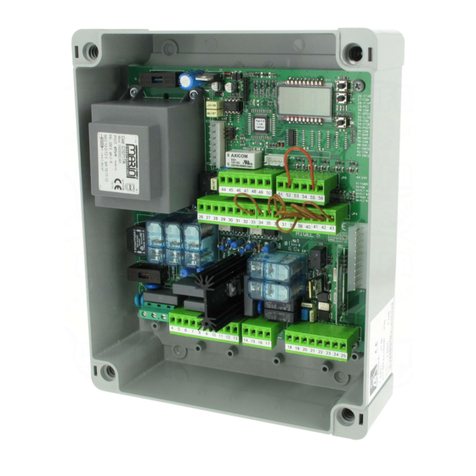
La centralina RIGEL 5 viene fornita dal costruttore con settaggio standard.
Qualsiasi variazione, deve essere impostata mediante il programmatore
palmare universale o il display integrato. La Centralina supporta completa-
mente il protocollo EELINK .
Le caratteristiche principali sono:
- Controllo di uno o due motori fino a 600W di potenza.
- Regolazione elettronica della coppia.
- Frenatura elettrodinamica regolabile.
- Rallentamento della velocità all’accostamento.
- Ingressi di fine-corsa chiusura / apertura separati per ogni motore.
- Uscita per luce di zona.
- Ingressi separati per le sicurezze.
- Uscita 12V per elettroserratura a scatto o a ventosa.
- Uscita per pilotare un timer.
- Ingresso orologio.
- Connettore per scheda semaforo / preriscaldamento motori.
La scheda è dotata di una morsettiera di tipo estraibile per rendere più
agevole la manutenzione o sostituzione.Viene fornita con una serie di ponti
precablati per facilitare l’installatore in opera.
2) DEMOLIZIONE
Attenzione: Avvalersi esclusivamente di personale qualificato.
L’eliminazione dei materiali va fatta rispettando le norme vigenti. Nel caso di
demolizione, non esistono particolari pericoli o rischi derivanti dal prodotto
stesso. È opportuno, in caso di recupero dei materiali, che vengano separati
per tipologia (parti elettriche - rame - alluminio - plastica - ecc.).
3) SMANTELLAMENTO
Attenzione: Avvalersi esclusivamente di personale qualificato.
Nel caso la centralina venga smontata per essere poi rimontata in altro
sito bisogna:
• Togliere l’alimentazione e scollegare tutto l’impianto elettrico.
• Nel caso alcuni componenti non possano essere rimossi o risultino
danneggiati, provvedere alla loro sostituzione.
USER’S MANUAL ENGLISH
Thank you for buying this product, our company is sure that you will be
more than satisfied with its performance. This product is supplied with an
“Instruction Manual” which should be read carefully as it provides important
information about safety, installation, operation and maintenance.
Thisproduct complieswith the applicabletechnicalstandardsandregulations
regarding safety. We confirm that it complies with the following European
directives: 73/23/CEE - 93/68/CEE, 89/336/CEE - 91/236/CEE - 92/31/CEE
- 93/68/CEE, 98/37/CEE. Where applicable, it also complies with technical
standards EN60335-1, EN12453, EN12445.
IMPORTANT
For the operations of wiring and installation, refer to the regulations in effect
and, in any case, to the principles of proper workmanship.
IMPORTANT
Any operation on the parts relative to automation must be carried out by
qualified personnel (the installer).
1) GENERAL OUTLINE
TheRIGEL5controlunitissuppliedbythe manufacturerwith standardsetting.
Any changes must be set by means of the universal palmtop programmer
or the incorporated display.
This Control unit supports the entire EELINK protocol, including the pro-
grammer self-supply from the control unit.
These are its main features:
- Control of one or two motors up to 600W power.
- Electronic torque setting.
- Adjustable electrodynamic braking.
- End-of-run speed slow-down.
- Separate opening / closing limit-switch inputs for each motor.
- Output for zone light.
- Separate inputs for safety devices.
- 12V output for click or suction-type electric lock.
- Output for timer piloting.
- Clock input.
- Connector for traffic-light board / motor preheating.
Theboard is providedwith a removableterminalboard foreasiermaintenance
and replacement.This is supplied with a series of prewired jumpers to make
work easy for the installer.
2) SCRAPPING
Warning:This operation should only be carried out by qualified person-
nel. Materials must be disposed of in conformity with the current regulations.
In case of scrapping, the automation devices do not entail any particular risks
or danger. In case of materials to be recycled, these should be sorted out by
type (electrical components, copper, aluminium, plastic etc.).
3) DISMANTLING
Warning:This operation should only be carried out by qualified person-
nel. When the control unit is disassembled to be reassembled on another
site,proceed as follows:
• Disconnect the power supply and the entire electrical installation.
• In the case where some of the components cannot be removed or are
damaged, they must be replaced.
RIGEL 5 - Ver. 07 - 3
D811472_07

BEDIENUNGSANLEITUNG
DEUTSCH
Wir danken Ihnen, daß Sie sich für diese Anlage entschieden haben. Ganz
sicherwird sie mit ihren LeistungenIhrenAnsprüchenvollaufgerecht werden.
Lesen Sie aufmerksam die Broschüre mit den „GEBRAUCHSANWEISUN-
GEN“ durch, die dem Produkt beiliegen. Sie enthält wichtige Hinweise zur
Sicherheit, Installation, Bedienung undWartung der Anlage.Dieses Produkt
genügt den anerkannten technischen Normen und Sicherheitsbestimmun-
gen. Wir bestätigen, daß es folgenden europäischen Richtlinien entspricht:
73/23/EWG - 93/68/EWG, 89/336/EWG - 91/236/EWG - 92/31/EWG - 93/68/
EWG, 98/37/EWG.Soweit anwendbar, werden folgende technische Normen
berücksichtigt: EN60335-1, EN12453, EN12445.
HINWEISE
Die Verkabelung und Installation sind fachgerecht nach den geltenden
Vorschriften durchzuführen.
HINWEISE
Eingriffe an der automatischen Anlage dürfen nur von Fachleuten (Installa-
teur) vorgenommen werden.
1) ALLGEMEINES
Die Steuerung RIGEL 5 wird vom Hersteller mit einer standardmäßigen
Voreinstellung ausgeliefert. Jede Änderung muß auf dem UniversellenUniversellen
Palmtop-Programmierer oder dem integrierten Display eingestellt werden.oder dem integrierten Display eingestellt werden.
Die Steuerung unterstützt vollständig das Protokoll EELINK einschließlich
Selbstspeisung des Programmierers von der Steuerung aus.Folgendes sind
die Haupteigenschaften:
- Steuerung eines oder zweier Motoren bis 600W Leistung.
- Elektronische Drehzahlregulierung.
- Regelbare elektrodynamische Bremsung.
- Drosselung der Geschwindigkeit beim Zufallen.
- Eingänge für Endschalter Schließung / Öffnung für jeden Motor ge-
trennt.
- Ausgang für Nachtbeleuchtung.
- Separate Eingänge für Sicherheitsvorrichtungen.
- Ausgang 12V für Schnapp-oder Unterdruck-Elektroschloß.
- Ausgang zur Steuerung eines Timers.
- Eingang für Uhr.
- Steckkontakt für Ampelkarte / Motorvorerwärmung.
MANUEL D’UTILISATION
FRANÇAIS
Nous vous remercions pour avoir choisi ce produit. Nous sommes sûrs qu’il
vousrendra leservicenécessaireàvos besoins.Lireattentivementle«Manuel
d’instructions» qui accompagne ce produit puis qu’il fournit d’importantes
indications concernant la sécurité, l’installation, l’utilisation et l’entretien.
Ce produit est conforme aux normes reconnues de la technique et aux
dispositions en matière de sécurité. Nous confirmons qu’il répond aux
directives européennes suivantes: 73/23/CEE - 93/68/CEE, 89/336/CEE
- 91/236/CEE - 92/31/CEE - 93/68/CEE, 98/37/CEE. Pour ce qui est ap-
plicable, il est conforme aux normes techniques suivantes: EN60335-1,
EN12453, EN12445.
AVERTISSEMENTS
Dans les opérations de câblage et d’installation, se référer aux normes en
vigueur et en tous les cas aux principes de la bonne technique.
AVERTISSEMENTS
Toute intervention sur les composants de l’automation doit être effectuée
par un personnel qualifié (installateur).
1) GENERALITES
L’unité de commande RIGEL 5 est fournie par le constructeur avec un régla-
ge standard. Toutes les modifications éventuelles doivent être effectuées à
travers le programmateur de poche universel ou un écran incorporé. L’unité
decommandesupportecomplètementleprotocoleEELINK,y compris l’auto-
alimentation du programmateur à partir de l’unité de commande.
Les caractéristiques principales sont:
- Contrôle d’un ou deux moteurs jusqu’à 600W de puissance.
- Réglage électronique du couple.
- Freinage électrodynamique réglable.
- Ralentissement de la vitesse à l’approche.
- Entrée de fins de corse fermeture / ouverture séparées pour
chaque moteur.
- Sortie pour lumière de zone.
- Entrées séparées pour les sécurités.
- Sortie 12V pour électroserrure à encliquetage ou à ventouse.
- Sortie pour piloter un temporisateur.
- Entrée minuteur.
- Connecteur pour carte feu / préchauffage moteurs.
La carte est dotée d’un bornier de type extractible pour faciliter l’entretien
ou le remplacement. Elle est fournie avec une série de connexions volantes
précâblées pour faciliter l’installation en oeuvre.
2) DEMOLITION
Attention:S’adresserexclusivementàdupersonnelqualifié.L’élimination
des matériaux doit être faite en respectant les normes en vigueur.
En cas de démolition, il n’existe aucun danger ou risque particulier dérivant
du produit. En cas de récupération des matériaux, il sera opportun de les
trier selon leur genre (parties électriques - cuivre - aluminium - plastique
- etc.).
3) DEMONTAGE
Attention: S’adresser exclusivement à du personnel qualifié. Si l’unité
de commande doit être démontée et remontée ailleurs, il faut:
• Couper l’alimentation et débrancher toute l’installation électrique.
• Si des composants ne peuvent pas être enlevés ou sont endommagés,
il faudra les remplacer.
Die Karte ist zur einfacheren Instandhaltung und Ersetzung mit einem
herausnehmbaren Klemmbrett ausgestattet. Sie wird mit einer Reihe von
bereits verkabelten Brücken geliefert, um dem Installateur seine Arbeit zu
erleichern.
2) VERSCHROTTUNG
Vorsicht: Die Verschrottung ist ausschießlich Fachleuten vorbehalten.
Bei der Beseitigung der Materialien sind die einschlägigen Vor-
schriften zu beachten. Bei der Verschrottung der Anlage bestehen keine
besonderen Gefahren oder Risiken, die von der Anlage selbst ausgehen.
Werden die Materialien der stofflichen Verwertung zugeführt, sollten sie
nach Arten sortiert werden (Elektrische Komponenten - Kupfer - Alumi-
nium - Plastik - usw.).
3) ZERLEGUNG
Vorsicht: die zerlegung ist ausschließlich fachleuten vorbehalten.
Wird die Anlage zerlegt, um an anderer Stelle wieder aufgebaut zu werden:
• Stromversorgung unterbrechen und die gesamte elektrische Anlage
abklemmen.
• Teile,diesichnichtentfernenlassen oder beschädigt sind, müssen ersetzt
werden.
4 - RIGEL 5 - Ver. 07
D811472_07

MANUAL PARA DE USO PORTUGUÊS
Agradecendolhe pela preferência dada a este produto, a Empresa tem a
certeza que do mesmo obterá as prestações necessárias ao seu uso.
Leia atentamente o opúsculo ”Manual de instruções” que o acompanha,
pois que esse fornece indicações importantes respeitantes a segurança,
a instalação, o uso e a manutenção. Este produto responde às normas
reconhecidas pela técnica e pelas disposições relativas à segurança.
Confirmamos que está em conformidade com as seguintes directivas eu-
ropeias: 73/23/CEE - 93/68/CEE, 89/336/CEE - 91/236/CEE - 92/31/CEE
- 93/68/CEE, 98/37/CEE. No que for aplicável, esse respeita as seguintes
normas técnicas EN60335-1, EN12453, EN12445.
RECOMENDAÇÕES
Nas operações de cablagem e instalação tomar como referência as normas
vigentes e de todas as formas os códigos de uma boa prática.
RECOMENDAÇÕES
Qualquer intervenção nos componentes do automatismo deve ser levada
a cabo por pessoal qualificado (instalador).
1) GENERALIDADES
A central RIGEL 5 é fornecida pelo construtor com definição standard.
Toda e qualquer variante, deve ser definida por intermédio do programa-
dor Programador palmar universal ou display integrado. A Central suporta
completamente o protocolo EELINK incluída a auto-alimentação do pro-
gramador da central.
As características principais são:
- Controlo de um ou dois motores até 600W de potência.
- Regulação electrónica do binário.
- Travagem electrodinâmica regulável.
- Afrouxamento da velocidade na aproximação.
- Entradas de limitadores de curso fecho / abertura separadas para cada
motor.
- Saída para luz de zona.
- Entradas separadas para os dispositivos de segurança.
- Saída 12V para trinco eléctrico de lingueta ou de ventosa.
- Saída para pilotar um temporizador.
- Entrada relógio.
- Conector para placa semáforo / pré-aquecimento dos motores.
MANUAL DE USO ESPAÑOL
Al agradecerle la preferencia que ha manifestado por este producto, la
empresa está segura de que de él obtendrá las prestaciones necesarias
para sus exigencias. Lea atentamente el “Manual de Instrucciones” que
lo acompaña, pues proporciona importantes indicaciones referentes a la
seguridad, la instalación, el uso y el mantenimiento. Este producto cumple
los requisitos establecidos por las normas reconocidas de la técnica y
las disposiciones relativas a la seguridad, y es conforme a las siguientes
directivas europeas: 73/23/CEE - 93/68/CEE, 89/336/CEE - 91/236/CEE -
92/31/CEE - 93/68/CEE, 98/37/CEE. En lo aplicable, respeta las siguientes
normas técnicas EN60335-1, EN12453, EN12445.
ADVERTENCIAS
Alrealizarlas operacionesdecableadoe instalación,hayquetenerencuenta
las normas vigentes y, en todo caso, los principios de buena técnica.
ADVERTENCIAS
Cualquier intervención en los componentes del automatismo debe ser
realizada por personal cualificado (instalador).
1) DATOS GENERALES
La central RIGEL 5 se suministra con configuración estándar. Cualquier
variación debe realizarse mediante el Programador de bolsillo universal o
display integrado. La central soporta completamente el protocolo EELINK,
incluida la autoalimentación del programador. Las características princi-
pales son:
- Control de uno o dos motores de hasta 600 W de potencia.
- Regulación electrónica del par.
- Frenado electrodinámico regulable.
- Deceleración de la velocidad al acercarse la cancela al final de la car-
rera.
- Entradas de fin de carrera cierre / apertura separadas para cada mo-
tor.
- Salida para la luz de zona.
- Entradas separadas para los dispositivos de seguridad.
- Salida de 12 V para electrocerradura de golpe o de ventosa.
- Salida para controlar un temporizador.
- Entrada para reloj.
- Conector para tarjeta semáforo / precalentamiento motores.
La tarjeta está dotada de un tablero de bornes de tipo extraíble, para hacer
más fácil el mantenimiento o la sustitución. Asimismo, se suministra con
una serie de puentes precableados, para facilitar la instalación.
2) DEMOLICION
Atención: Sírvase exclusivamente de personal cualificado.
La eliminación de los materiales debe hacerse de conformidad con las
normas vigentes. En caso de demolición, no existen particulares peligros o
riesgos que deriven del producto mismo. Es oportuno, en caso de recupe-
ración de los materiales, que se separen por tipos (partes eléctricas, cobre,
aluminio, plástico, etc.).
3) DESMANTELAMIENTO
Atención: Sírvase exclusivamente de personal cualificado.
En el caso de que la central se desmonte para después volver a montarla
en otro lugar, hay que realizar lo siguiente:
• Cortar el suministro de corriente y desconectar toda la instalación elé-
ctrica.
• En el caso de que algunos componentes no se puedan sacar o resulten
dañados, será necesario sustituirlos.
A placa está equipada com uma placa de bornes de tipo extraível, para
facilitar a manutenção ou a substituição. É fornecida com uma série de
pontes pré-cabladas para facilitar o trabalho do instalador.
2) DEMOLIÇÃO
Atenção: Use exclusivamente pessoal qualificado.
A eliminação dos materiais deve ser feita respeitando-se as normas legais e
técnicas vigentes. Em caso de demolição, não existem perigos particulares
ou riscos derivantes do próprio produto. É oportuno, em caso da reciclagem
dos materiais, que esses sejam separados por tipologia (partes eléctricas,
cobre, alumínio, plástico, etc.).
3) DESMANTELAMENTO
Atenção: Use exclusivamente pessoal qualificado.
No caso em que a central seja desmontada para depois ser remontada num
outro sítio, é necessário:
• Interromper alimentação e desligar todo o sistema eléctrico.
• No caso em que alguns componentes não possam ser removidos ou
estejam danificados, efectuar a substituição dos mesmos.
RIGEL 5 - Ver. 07 - 5
D811472_07

MANUALE PER L’INSTALLAZIONE
ITALIANO
Nel ringraziarVi per la preferenza accordata a questo prodotto, la Ditta è
certa che da esso otterrete le prestazioni necessarie al Vostro uso.
Leggete attentamente l’opuscolo ”Libretto istruzioni” che lo accompagna in
quanto esso fornisce importanti indicazioni riguardanti la sicurezza, l’instal-
lazione, l’uso e la manutenzione.
Questo prodotto risponde alle norme riconosciute della tecnica e delle
disposizioni relative alla sicurezza. Confermiamo che esso è conforme alle
seguenti direttive europee: 73/23/CEE - 93/68/CEE , 89/336/CEE - 91/236/
CEE - 92/31/CEE - 93/68/CEE, 98/37/CEE. Per quanto applicabile, essa
rispetta le seguenti norme tecniche EN60335-1, EN12453, EN12445.
AVVERTENZE
Nelle operazioni di cablaggio ed installazione riferirsi alle norme vigenti e
comunque ai principi di buona tecnica.
AVVERTENZE
Qualunqueinterventosuicomponentidell’automazionedeveessereeseguito
da personale qualificato (installatore).
1) VERIFICA
La centrale effettua il controllo (verifica) dei relè di marcia e dei dispositivi
di sicurezza (fotocellule, costa sensibile, ecc.), prima di eseguire ogni ciclo
di apertura e chiusura.
2) COLLEGAMENTO FOTOCELLULE E COSTE SENSITIVE:
Per convenzione si fa riferimento ad un dispositivo ricevente (Rx- fig.6) a 5
morsetti dei quali: morsetti 1 e 2 di alimentazione 24V~, morsetto 3 comu-
ne, morsetto 4 contatto normalmente chiuso a riposo, morsetto 5 contatto
normalmente aperto a riposo. Il contatto è libero da tensione.
3) LEGENDA
LEGENDA
RX: ricevente fotocellule o coste infrarossi.
TX: trasmittente fotocellule o coste infrarossi.
I trasmettitori vanno collegati ai morsetti 20-44 di RIGEL 5.
I ricevitori vanno collegati ai morsetti 20-21 di RIGEL 5.
- Infig.8,èrappresentatoil collegamento di RIGEL 5 con nessun dispositivo
di sicurezza.
- In fig.9, è rappresentato il collegamento di RIGEL 5 con 1 fotocellula
verificata.
- In fig.10, è rappresentato il collegamento di RIGEL 5 con 1 dispositivi di
sicurezza in Apertura verificati.
- In fig.11, è rappresentato il collegamento di RIGEL 5 con 1 dispositivi di
sicurezza in Chiusura verificati.
- In fig.12, è rappresentato il collegamento di RIGEL 5 con 2 fotocellule
verificate.
- In fig.13, è rappresentato il collegamento di RIGEL 5 con due dispositivi
di sicurezza in apertura verificati.
- In fig.14, è rappresentato il collegamento di RIGEL 5 con due dispositivi
di sicurezza in chiusura verificati.
- In fig.15, è rappresentato il collegamento di RIGEL 5 con 3 fotocellule
verificate.
- In fig.16, è rappresentato il collegamento di RIGEL 5 con 3 dispositivi di
sicurezza in apertura verificati.
- In fig.17, è rappresentato il collegamento di RIGEL 5 con 3 dispositivi di
sicurezza in chiusura verificati.
- In fig.18, è rappresentato il collegamento di RIGEL 5 con 2 dispositivi: 1
fotocellula e 1 dispositivo di sicurezza in apertura verificati.
- In fig.19, è rappresentato il collegamento di RIGEL 5 con 3 dispositivi:
1 fotocellula, 1 dispositivo di sicurezza in apertura e 1 dispositivo di
sicurezza in chiusura, tutti verificati.
- In fig.20, è rappresentato il collegamento di RIGEL 5 con 4 dispositivi:
2 fotocellule, 1 dispositivo di sicurezza in apertura e 1 dispositivo di
sicurezza in chiusura, tutti verificati.
- In fig.21, è rappresentato il collegamento di RIGEL 5 con 5 dispositivi:
3 fotocellule, 1 dispositivo di sicurezza in apertura e 1 dispositivo di
sicurezza in chiusura, tutti verificati.
4) SICUREZZA GENERALE
ATTENZIONE! Una installazione errata o un uso improprio del prodot-
to, può creare danni a persone, animali o cose.
• Leggete attentamente l’opuscolo ”Avvertenze”ed il ”Libretto istruzioni”
che accompagnano questo prodotto, in quanto forniscono Importanti indi-
cazioni riguardanti la sicurezza, l’installazione, l’uso e la manutenzione.
• Smaltire i materiali di imballo (plastica, cartone, polistirolo, ecc.) secon-
do quanto previsto dalle norme vigenti. Non lasciare buste di nylon e
polistirolo a portata dei bambini.
• Conservare le istruzioni per allegarle al fascicolo tecnico e per consul-
tazioni future.
• Questoprodottoèstatoprogettatoe costruito esclusivamenteper l’utilizzo
indicato in questa documentazione.
Usi non indicati in questa documentazione potrebbero essere fonte di
danni al prodotto e fonte di pericolo.
• La Ditta declina qualsiasi responsabilità derivante dall’uso improprio o
diverso da quello per cui è destinato ed indicato nella presente docu-
mentazione.
• Non installare il prodotto in atmosfera esplosiva.
• Gli elementi costruttivi della macchina devono essere in accordo con le
seguenti Direttive Europee: 89/336/CEE, 73/23/CEE, 98/37 CEE e loro
modifichesuccessive.PertuttiiPaesi extraCEE,oltreallenormenazionali
vigenti, per un buon livello di sicurezza è opportuno rispettare anche le
norme sopracitate.
• La Ditta declina qualsiasi responsabilità dall’inosservanza della Buona
Tecnica nella costruzione delle chiusure (porte, cancelli, ecc.), nonché
dalle deformazioni che potrebbero verificarsi durante l’uso.
• L’installazione deve essere in accordo con quanto previsto dalle Direttive
Europee: 89/336/CEE, 73/23/CEE,98/37 CEE e loro modifiche successive.
• Togliere l’alimentazione elettrica, prima di qualsiasi intervento sull’im-
pianto. Scollegare anche eventuali batterie tampone se presenti.
• Prevedere sulla rete di alimentazione dell’automazione, un interruttore
o un magnetotermico onnipolare con distanza di apertura dei contatti
uguale o superiore a 3,5 mm.
• Verificare che a monte della rete di alimentazione, vi sia un interruttore
differenziale con soglia da 0.03A.
• Verificare se l’impianto di terra è realizzato correttamente: collegare tutte
le parti metalliche della chiusura (porte, cancelli, ecc.) e tutti i componenti
dell’impianto provvisti di morsetto di terra.
• Applicare tutti i dispositivi di sicurezza (fotocellule, coste sensibili, ecc.)
necessari a proteggere l’area da pericoli di schiacciamento, convoglia-
mento, cesoiamento.
• Applicare almeno un dispositivo di segnalazione luminosa (lampeggiante)
in posizione visibile, fissare alla struttura un cartello di Attenzione.
• La Ditta declina ogni responsabilità ai fini della sicurezza e del buon
funzionamento dell’automazione se vengono impiegati componenti di
altri produttori.
•
Usare esclusivamente parti originali per qualsiasi manutenzione o
riparazione.
• Non eseguire alcuna modifica ai componenti dell’automazione se non
espressamente autorizzata dalla Ditta.
• Istruirel’utilizzatoredell’impiantoper quantoriguardai sistemidicomando
applicati e l’esecuzione dell’apertura manuale in caso di emergenza.
• Non permettere a persone e bambini di sostare nell’area d’azione del-
l’automazione.
• Non lasciare radiocomandi o altri dispositivi di comando alla portata dei
bambini onde evitare azionamenti involontari dell’automazione.
• L’utilizzatore deve evitare qualsiasi tentativo di intervento o riparazione
dell’automazione e rivolgersi solo a personale qualificato.
• Tutto quello che non è espressamente previsto in queste istruzioni, non
è permesso.
• L’installazione deve essere fatta utilizzando dispositivi di sicurezza e
comandi conformi alla EN 12978.
5) GENERALITÁ
La centralina RIGEL 5 viene fornita dal costruttore con settaggio standard.
Qualsiasi variazione, deve essere impostata mediante il programmatore
palmare universale o display integrato. La Centralina supporta completa-
mente il protocollo EELINK.
Le caratteristiche principali sono:
- Controllo di uno o due motori fino a 600W di potenza.
- Regolazione elettronica della coppia.
- Frenatura elettrodinamica regolabile.
- Rallentamento della velocità all’accostamento.
- Ingressi di fine-corsa chiusura / apertura separati per ogni motore.
- Uscita per luce di zona.
- Ingressi separati per le sicurezze.
- Uscita 12V per elettroserratura a scatto o a ventosa.
- Uscita per pilotare un timer.
- Ingresso orologio.
- Connettore per scheda semaforo / preriscaldamento motori.
- Ricevitore radio incorporato
La scheda è dotata di una morsettiera di tipo estraibile per rendere più
agevole la manutenzione o sostituzione.Viene fornita con una serie di ponti
precablati per facilitare l’installatore in opera.
I ponti riguardano i morsetti: 33-34, 35-36, 36-37, 38-39, 39-40, 41-42, 42-43,
52-55. Se i morsetti sopraindicati, vengono utilizzati, togliere i rispettivi ponti.
6) DATI TECNICI
Alimentazione: ................................................................230V±10% 50Hz*
Isolamento rete/bassa tensione: .................................> 2MOhm 500V
Rigidità dielettrica: ..........................................rete/bt 3750V~ per 1 minuto
Corrente uscita motore: ......................................................3.5A+3.5A max
Corrente di commutazione relè motore: ...............................................10A
Potenza massima motori: ..................................................... 600W + 600W
Luce di zona/cortesia: ................................................................ max 150W
Alimentazione accessori: ..............................24V~ (1A assorbimento max)
Elettroserratura:.......................................... 12V (0.5A max, 2A per 3 s)
6 - RIGEL 5 - Ver. 07
D811472_07
MANUALE PER L’INSTALLAZIONE ITALIANO
Uscita luce/allarme a contatto n.o. libero: ............................max 3A 250V~
Spia cancello aperto: ............................................................24V~ 3W max
Lampeggiante: ....................................................................230V 40W max
Dimensioni: ..............................................................................vedi figura 1
Fusibili: .....................................................................................vedi figura 2
(* altre tensioni disponibili a richiesta)
7) COLLEGAMENTI MORSETTIERA (Fig.3)
AVVERTENZE - Nelle operazioni di cablaggio ed installazione riferirsi alle
norme vigenti e comunque ai principi di buona tecnica.
I conduttori alimentati con tensioni diverse, devono essere fisicamente
separati, oppure devono essere adeguatamente isolati con isolamento
supplementare di almeno 1mm.
I conduttori devono essere vincolati da un fissaggio supplementare in pros-
simità dei morsetti, per esempio mediante fascette.
ATTENZIONE! Per il collegamento alla rete, utilizzare cavo multipolare
di sezione minima 3x1.5mm2e del tipo previsto dalle normative vigenti.
A titolo di esempio, se il cavo è all’esterno (all’aperto), deve essere
almeno pari a H07RN-F mentre, se all’interno (in canaletta),deve essere
almeno pari a H05 VV-F con sezione 3x1.5mm2.
JP1
1 Morsetto GND
2-3 Alimentazione 230V~±10%, 50-60Hz (2 neutro, 3 fase).
JP2
4-5-6 Collegamentomotore 1 (ritardatoapertura),morsetti 5-6 marcia
motore, morsetto 4 comune.
5-14(JP12) Collegamento condensatore motore 1.
7-8-9 Collegamentomotore2 (ritardato chiusura),morsetti 8-9 marcia
motore, morsetto 7 comune.
8-15(JP12) Collegamento condensatore motore 2.
N.B. Se si utilizza un solo motore utilizzare l’uscita per il motore
2 e configurare la logica “1 motore attivo”.
10-11 Uscita 230V~ per luce lampeggiante (40W max) ed elettroser-
ratura modello EBP 230V.
ATTENZIONE! Se si usa la scheda ausiliaria SSR5 per preri-
scaldamento motori, spostare il collegamento ai morsetti 12-13
(Fig.3) e fare riferimento al Cap. 9.2 Menu Logiche --> Uscita
lampeggiante.
12-13 Uscita230V~perlucedizona/cortesia/lampeggiantemax150W.
Per l’impostazione dell’uscita fare riferimento al paragrafo 9.2
Menu Logiche (“luce cortesia” e “lampeggiante”).
JP12
14 Collegamento condensatore motore 1.
15 Collegamento condensatore motore 2.
16-17 Uscita Luce/Allarme contatto n.o. libero, per pilotare timer luce-
scale o segnalatore allarme di non chiusura cancello.Come luce
comandaunimpulso(tempoimpulso1s)adiniziomanovra,come
allarme interviene se il cancello rimane aperto per il doppio del
TCA impostato. (inibito con logica TCA pausa =0).
JP3
18-19 Uscita N.O. (3W max) per 2° canale radio o per luce spia di
segnalazione cancello aperto. Questa spia è spenta a cancello
chiuso, lampeggia in chiusura e rimane accesa con cancello
aperto o in fase di apertura.
20-21 Uscita 24V~ (1A max) per alimentazione accessori e fotoricevitori.
20-44 Uscita 24V~ per alimentazione fototrasmettitori.
22-23 Uscita per elettroserratura 12V a scatto (impulso di 3 se-
condi), o a ventosa.
24-25 Ingresso antenna scheda radioricevente (24 segnale, 25 calza).
JP4
26-27 Pulsante Start interno (n.o.). Start interno per semaforo.
27-28 Pulsante Start (n.o.). In parallelo al relè ricevente radio (CH1).
Start esterno per semaforo.
27-29 Pulsante pedonale (n.o.). L’azionamento avviene sul motore
2, inoltre, se il ciclo di apertura è iniziato (non da pedonale), il
comando pedonale ha lo stesso effetto di uno Start.
30-31 Pulsante Apre (n.o.).
30-32 Pulsante Chiude (n.o.).
33-34 Pulsante di Blocco (n.c.). Se non si utilizza lasciare il ponticello
inserito.
35-36 Ingressi contatto fotocellula ADMAP (area pericolosa di movi-
mento accessibile al pubblico) (n.c.).Se non si utilizza lasciare
i ponticelli inseriti.
Con Logica Fotocellula ADMAP=0: In caso di intervento prima
dell’apertura il movimento viene interdetto, se avviene durante
l’apertura si ha l’arresto e una volta linberato riprende l’apertura.
Con Logica Fotocellula ADMAP=1: Fotocellula esclusa in aper-
tura. Il movimento di apertura avviene anche in presenza di
ostacolo.
N.B. Indipendentemente dalla Logica Fotocellula ADMAP,
durante la manovra di chiusura l’intervento della fotocellula
provoca l’arresto e la riapertura.
36-37 Ingressicontattofotocellula-costadiaperturaSAFEOP(n.c.).In
caso di intervento durante l’apertura si ha l’arresto e la chiusura
parziale. Se non si utilizza lasciare i ponticelli inseriti.
38-39 Finecorsa apertura motore 1 (n.c.). Se non si utilizza lasciare
il ponticello inserito.
39-40 Finecorsa chiusura motore 1 (n.c.). Se non si utilizza lasciare
il ponticello inserito.
41-42 Finecorsa apertura motore 2 (n.c.). Se non si utilizza lasciare
il ponticello inserito.
42-43 Finecorsa chiusura motore 2 (n.c.). Se non si utilizza lasciare
il ponticello inserito.
JP5
20(JP3)-44 Uscita 24V per trasmettitori.
45-46-47
Connessione dispositivi di sicurezza verificati (vedi Fig.da 9a 21).
48-49-50
Connessione dispositivi di sicurezza verificati (vedi Fig.da 9a 21).
JP6
51-52 Ingresso0Orologio (n.o.).Seil contattocollegatoèaperto(n.o.),
leantesichiudonoesipredispongonoalnormalefunzionamento.
Se il contatto è chiuso (n.c.), le ante si aprono e rimangono
aperte fino all’apertura del contatto.Se il movimento di apertura
comandato dal TIMER è inibito dalle sicurezze, il cancello ri-
prenderà l’apertura a fronte di un comando di START/OPEN.
52-55 Ingressi contatto fotocellula-costa di chiusura SAFE CL (n.c.).
In caso di intervento in chiusura si ha l’arresto e la riapertura
parziale. Se non si utilizza lasciare i ponticelli inseriti.
53 Ingresso verifica fotocellula (PHOT-FAULT)
54 Ingresso verifica costa sensibile/fotocellule in apertura (BAR-FAULT).
56 Ingresso verifica fotocellule in chiusura (PHOT CL-FAULT).
JP7 Connettore scheda radioricevente.
JP8 Connettore scheda connessione seriale (SCS1)
JP9 Connettore scheda SSR5 Semaforo / Preriscaldamento.
8) PROGRAMMAZIONE
Il quadro comandi dotato di microprocessore, viene fornito con parametri di
funzionamento preimpostati dal costruttore, validi per installazioni standard.
I parametri predefiniti possono essere variati mediante il programmatore a
display incorporato o mediante programmatore palmare universale.
Nel caso la programmazione venga effettuata mediante programmatore
palmare universale, leggere attentamente le istruzioni relative al program-
matore palmare universale e procedere come segue.
Collegareilprogrammatorepalmareuniversaleallacentralina tramitel’acces-
sorio UNIFLAT (Vedere fig.5). Entrare nel menù “CENTRALINE”, nel sotto-
menù “PARAMETRI” e scorrere le schermate del display con le frecce su/giù
impostando numericamente i valori dei parametri di seguito elencati.
Per le logiche di funzionamento, riferirsi al sottomenù “LOGICA”.
Nel caso si proceda alla programmazione mediante il programmatore incor-
porato fare riferimento alla Fig. A e B e al paragrafo “configurazione”.
Di seguito si elenca il significato ed i valori che possono essere assunti da
ogni parametro.
9) CONFIGURAZIONE
Il programmatore a display consente di impostare tutte le funzioni del quadro
comandi RIGEL 5.
Il programmatore dispone di tre pulsanti per la navigazione tra i menu e la
configurazione dei parametri di funzionamento (Fig.2):
+ tasto scorrimento menu/incremento valore
- tasto scorrimento menu/riduzione valore
OK tasto di invio (conferma).
La pressione simultanea dei tasti + e - consente di uscire dal menu in cui si
sta operando e passare al menu superiore.
Se la pressione simultanea dei tasti + e - avviene al livello principale dei menu
(parametri-logiche-radio-lingua-autodiagnosi), siescedallaprogrammazione
e si spegne il display (viene visualizzato il messaggio FINE).
Le modifiche apportate vengono impostate solo se seguite dalla pressione
del tasto OK.
Con la prima pressione del tasto OK si entra in modalità programmazione.
Inizialmente sul display compaiono le seguenti informazioni:
- Versione Software display
- Versione Software centrale di comando
- Numero manovre totali effettuate (il valore è espresso in centinaia quindi
durante le prime cento manovre il display indica costantemente 0000)
- Numero manovre effettuate dall’ultima manutenzione (il valore è espres-
so in centinaia quindi durante le prime cento manovre il display indica
costantemente 0000)
- Numero radiocomandi memorizzati.
UnapressionedeltastoOKdurantela fasedipresentazioneinizialeconsente
di passare direttamente al primo menu (parametri).
Di seguito vengono elencati i menu principali ed i relativi sottomenu disponibili.
Il parametro predefinito, è quello chiuso fra parentesi quadre [ 0 ].
Tra parentesi rotonde viene indicata la scritta che appare sul display.
Fate riferimento alle Figure A e B per la procedura di configurazione della
centrale.
RIGEL 5 - Ver. 07 - 7
D811472_07

MANUALE PER L’INSTALLAZIONE
ITALIANO
9.1) Menu Parametri (PARAM)
1- Tempo di lavoro motore 1 (t.lavoro mot1) [60s]
Impostare numericamente il valore del tempo di lavoro da 3 a 180 secondi
per il motore 1.
1- Tempo di lavoro motore 2 (t.lavoro mot 2) [60s]
Impostare numericamente il valore del tempo di lavoro da 3 a 180 secondi
per il motore 2.
2- Tempo di lavoro pedonale (t.pedonale) [6s]
Impostare numericame nte il valore del tempo di apertura pedonale da
3 a 90 secondi.
3- Tempo di chiusura automatica (tca) [40s]
Impostare numericamente il valore del tempo di chiusura automatica
TCA da 3 a 120 secondi.
4- Tempo di ritardo apertura anta 1 (t.sfas.ap) [3s]
Impostare il tempo di ritardo di apertura del motore 1 rispetto al motore
2, regolabile da 0 secondi a 10 secondi.
5- Tempo di ritardo chiusura anta 2 (t.sfas.ch) [3s]
Impostare il tempo di ritardo di chiusura del motore 2, regolabile da 0 a
60 secondi.
6- Tempo di rallentamento (t.rall.)[0s]
Impostare il tempo di rallentamento all’accostamento, da 0 a 20 secondi.
Il tempo di rallentamento si sottrae al tempo di lavoro.
NOTA: si consiglia di attivare il conteggio dei tempi.
NOTA: Usare questa funzione solo in presenza di finecorsa.
7- Tempo di sgombero zona semaforica (t.sgomb.)[15s]
Impostareiltempodesideratodisgomberodellazonainteressatadaltraffico
regolato dal semaforo, da 0 a 30 secondi. Impostare a 0 se non utilizzato.
8- %Coppia motori (coppia mot) [50%]
Impostare numericamente il valore da 1 a 99% della coppia.
NOTA: In caso di utilizzo con motori oleodinamici è necessario
impostare il valore di coppia a 99% e procedere alla regolazione
della forza direttamente sul motore.
9- %Coppia motori in rallentamento (coppia rall.) [50%]
(Parametri avanzati ⇒indirizzo 5)
Impostarenumericamenteilvaloreda 1 a 99% dellacoppiamotoridurante
il rallentamento.
10-%Frenatura (freno) [0%]
Impostarelapercentualedifrenaturadesideratada0a99%compatibilmente
con il peso del cancello e con le sollecitazioni meccaniche presenti.
11-%Frenatura di emergenza (freno emer.) [60%]
Impostare numericamente il valore da 0 a 99% della frenatura di emer-
genza, che viene eseguita attivando i comandi di sicurezza presenti agli
ingressi 34 (Blocco), 37 (SAFE OP), 55 (SAFE CL).
12-%Preriscaldamento (prerisc.) [30%]
Impostare il valore percentuale di corrente da 0 (preriscaldamento di-
sattivato) a 99% che si può far passare negli avvolgimenti dei motori per
mantenerli in temperatura.
13-Zona (Zone) [ 0 ]
(Parametri avanzati ⇒indirizzo 1)
Impostare il numero di zona tra un valore minimo di 0 ed un valore mas-
simo di 127. Vedi paragrafo 14 “Connessione seriale”.
9.2) Menu Logiche (LOGIC)
- TCA (TCA) [ ON ]
ON: Attiva la chiusura automatica
OFF:Esclude la chiusura automatica.
- Blocca impulsi in apertura (bl.imp. ap) [OFF]
ON: L’impulso di start non ha alcun effetto durante la fase di apertura.
OFF:L’impulso di start ha effetto durante la fase di apertura.
- Blocca impulsi in chiusura (bl.imp. ch) [OFF]
ON: L’impulso di start non ha alcun effetto durante la fase di chiusura.
OFF:L’impulso di start ha effetto durante la fase di chiusura.
- Blocca impulsi in TCA (bl.imp. tca) [OFF]
ON: L’impulso si start non ha effetto durante la pausa TCA.
OFF:Accetta lo start durante la pausa TCA.
- Colpo di ariete in apertura (col. ariete ap.) [OFF]
ON: Prima di effettuare l’apertura il cancello spinge per circa 2 secondi in
chiusura.Questo consente lo sgancio più agevole della elettroserratura
(non è influenzato dai fine-corsa).
OFF:Esclude il colpo d’ariete.
IMPORTANTE - In assenza di adeguati fermi d’arresto meccanici, non
usare questa funzione. E’ assolutamente vietata nella motorizzazione
di cancelli scorrevoli.
- Colpo di ariete in chiusura (col. ariete ch.) [OFF]
ON: Prima di effettuare la chiusura il cancello spinge per circa 2 secondi in
apertura.Questo consente lo sgancio più agevole della elettroserratura
(non è influenzato dai fine-corsa).
OFF:Esclude il colpo d’ariete.
IMPORTANTE - In assenza di adeguati fermi d’arresto meccanici, non
usare questa funzione. E’ assolutamente vietata nella motorizzazione
di cancelli scorrevoli.
- Logica 2 passi - 4 passi (2 passi) [OFF]
ON: Abilita la logica 2 passi ( prevale su “Logica 3 passi ” ). Un impulso di
start ha i seguenti effetti:
porta chiusa:.................................................................................apre
in apertura:................................................................................chiude
porta aperta:..............................................................................chiude
in chiusura:....................................................................................apre
dopo stop:.....................................................................................apre
OFF:Abilita la logica 4 passi (nel caso in cui la Logica 3 passi sia impostata
a OFF). Un impulso di start ha i seguenti effetti:
porta chiusa:.................................................................................apre
in apertura:...........................ferma ed inserisce il TCA se configurato
porta aperta:..............................................................................chiude
in chiusura:....................................ferma e non inserisce il TCA (stop)
dopo stop:.....................................................................................apre
- Logica 3 passi (3 passi) [OFF]
ON: Abilita la logica 3 passi (con logica 2 passi = OFF). Un impulso di start
ha i seguenti effetti:
porta chiusa:.................................................................................apre
in apertura:...........................ferma ed inserisce il TCA se configurato
pota aperta:...............................................................................chiude
in chiusura:....................................................................................apre
dopo stop:.....................................................................................apre
OFF:Disabilita la Logica a 3 passi.
- Costa sensibile (bar) [ON]
ON: L’ingresso morsetti 36-37 è attivo come ingresso costa sensibile.
OFF:L’ingresso morsetti 36-37 è attivo come ingresso fotocellule in apertura.
- Pre allarme (preAll.) [ OFF ]
ON: Il lampeggiante si accende circa 3 secondi prima della partenza del motore.
OFF:Il lampeggiante si accende contemporaneamente alla partenza dei
motori.
- Uomo Presente (uomo pres) [ OFF ]
ON: Funzionamento a uomo presente: la manovra continua finchè viene
mantenuta la pressione sul tasto di comando. Non è possibile utilizzare
il radiocomando.
OFF:Funzionamento a impulsi: un impulso, apre il cancello se chiuso,
chiude se aperto.
- Fotocellule in apertura (Fotoc. ap) [ OFF ]
ON: in caso di oscuramento, esclude il funzionamento della fotocellula in
apertura. In fase di chiusura, inverte immediatamente.
OFF:in caso di oscuramento, le fotocellule sono attive sia in apertura che in
chiusura. Un oscuramento della fotocellula in chiusura, inverte il moto
solo dopo il disimpegno della fotocellula.
- Mantenimento blocco (mant. blocco) [OFF]
ON: Se i motori rimangonofermiin posizionedi completaaperturao completa
chiusura per più di un’ora, vengono attivati per circa 3 secondi nella
direzione di battuta. Tale operazione viene effettuata ogni ora.
N.B.: Questa funzione ha lo scopo di compensare, nei motori oleodi-
namici l’eventuale riduzione di volume dell’olio dovuta alla diminuzione
della temperatura durante le pause prolungate, ad esempio durante la
notte, o dovute a trafilamenti interni.
IMPORTANTE - In assenza di adeguati fermi d’arresto meccanici, non
usare questa funzione. E’ assolutamente vietata nella motorizzazione
di cancelli scorrevoli.
OFF:Esclude tale funzione.
- Conteggio dei tempi (cont. tempi) [OFF]
ON: La centralina calcola il tempo di attivazione di ogni motore in base alle
manovre precedenti.
OFF:La centralina attiva i Motori ad ogni manovra per il tempo impostato.
N.B. In ogni caso impostare il tempo di lavoro ad un valore leggermente
superiore a quello necessario per compiere la manovra completa.
- Chiusura rapida (ch. rapida) [ OFF ]
ON: Chiude il cancello dopo il disimpegno delle fotocellule prima di attendere
il termine del TCA impostato.
OFF:Comando non inserito
- Orologio / Pedonale (orol. ped) [OFF]
Ingresso per il collegamento di un temporizzatore esterno.
ON:
L’ingresso Orologio agisce solo nel Motore 2, per il tempo pedonale impo-
stato. Uno start dato durante la fase orologio, esegue l’apertura e chiusura
completa del cancello, ripristinando la posizione di pedonale aperto.
OFF:L’ingresso Orologio agisce su entrambi i motori.
- Luce cortesia (l. zona) [OFF]
ON: Luce di zona. Rimane attivo per tutta la durata della manovra.
OFF:
Luce di cortesia. Rimane attivo per 90 secondi dopo l’ultima manovra.
N.B. Queste impostazioni non sono utilizzabili se l’uscita lampeggiante è
impostata su ON.
- Uscita lampeggiante (lampegg.) [OFF]
Attivare questa funzione solo in presenza della scheda semaforo-preriscaldo SSR5.
ON: Imposta l’uscita ai morsetti 12-13 (“luce di cortesia”) come uscita lam-
peggiante (attiva solo durante la movimentazione delle ante).
N.B. Qualsiasi impostazione relativa alla funzione “luce di cortesia” viene
ignorata.
OFF:
Mantiene l’uscita ai morsetti 12-13 come “luce di cortesia” o“luce di zona”.
ATTENZIONE! Non è possibile utilizzare la scheda SSR5 in modalità pre-
riscaldo motori ed allo stesso tempo avere Luce di zona/Luce di cortesia e
8 - RIGEL 5 - Ver. 07
D811472_07

ITALIANO
Lampeggiante/Elettroserratura.Le uscite 10-11 in questo caso non possono
essere utilizzate e le uscite 12-13 possono essere utilizzate solamente per
una delle due funzioni.
- Luce/Allarme (allarme - luce) [ON]
ON: Uscita allarme cancello aperto ( si attiva se il cancello rimane aperto
per un tempo doppio rispetto al TCA impostato).
OFF:Comando luce scale (l’impulso rimane per 1 secondo).
- 1 Motore attivo (1 mot. att.) [OFF]
ON: Attivo solo motore 2 (1 anta).
OFF:Attivi entrambi i motori (2 ante).
- Tipo serratura (s. ventosa) [OFF]
ON: Serratura a ventosa.
OFF:Serratura a scatto.
- Master/Slave (master) [ OFF ]
(Logiche avanzate ⇒indirizzo 11)
ON: Il quadro comando viene settato come Master in un collegamento
centralizzato (vedi Paragrafo 14).
OFF:Il quadro comando viene settato come Slave in un collegamento cen-
tralizzato (vedi Paragrafo 14).
- Spia cancello aperto o II° canale radio (sca-2ch) [ OFF ]
ON: L’uscita tra i morsetti 18-19 viene configurata come Spia cancello aperto,
il II° canale radio in questo caso comanda l’apertura pedonale.
OFF:L’uscita tra i morsetti 18-19 viene configurata come II° canale radio
- Codice Fisso (cod. fisso) [ OFF ]
(Logiche avanzate ⇒indirizzo 13)
ON: Il ricevitore risulta configurato per il funzionamento in modalità codice
fisso, vedi paragrafo “Clonazione dei Radiotrasmettitori”
OFF:Il ricevitore risulta configurato per il funzionamento in modalità rolling-
code, vedi paragrafo “Clonazione dei Radiotrasmettitori”
- Programmazione radiocomandi (prog. radio) [ ON ]
(Logiche avanzate ⇒indirizzo 15)
ON: Abilita la memorizzazione via radio dei trasmettitori:
1- Premere in sequenza il tasto nascosto (P1) e il tasto normale (T1-
T2-T3-T4) di un trasmettitore già memorizzato in modalità standard
attraverso il menu radio.
2- Premere entro 10s il tasto nascosto (P1) ed il tasto normale (T1-
T2-T3-T4) di un trasmettitore da memorizzare.
La ricevente esce dalla modalità programmazione dopo 10s, entro
questo tempo è possibile inserire ulteriori nuovi trasmettitori.
Questa modalità non richiede l’accesso al quadro comando.
OFF:Disabilita la memorizzazione via radio dei trasmettitori.
I trasmettitori vengono memorizzati solo utilizzando l’apposito menu
Radio.
- Test fotocellule (test phot) [ OFF ]
(Logiche avanzate ⇒indirizzo 13)
ON: Attiva la verifica delle fotocellule (vedi fig. da 9a 14)
OFF:Disattiva la verifica delle fotocellule
- Test fotocellule in chiusura (test phot cl.) [ OFF ]
ON: Abilita la verifica delle fotocellule attive in chiusura
OFF:Disabilita la verifica delle fotocellule attive in chiusura
- Test costa sensibile (test BAR) [ OFF ]
- Menù visibile solo con costa sensibile attivata.
(Logiche avanzate ⇒indirizzo 14)
ON: Attiva la verifica delle coste sensibili (vedi fig. da 9a 14)
OFF:Disattiva la verifica coste sensibili.
- Test fotocellule in apertura (test phot op.) [ OFF ]
- Menù visibile solo con costa sensibile disattivata.
ON: Abilita la verifica delle fotocellule attive in apertura.
OFF:Disabilita la verifica delle fotocellule attive in apertura.
9.3) MENU RADIO (RADIO)
- Aggiungi
Consente di aggiungere un tasto di un radiocomando nella memoria della
ricevente, dopo la memorizzazione restituisce numero della ricevente
nella locazione della memoria (da 01 a 64).
Aggiungi Tasto start (Agg start)
associa il tasto desiderato al comando Start
Aggiungi Tasto 2ch (Agg 2ch)
associa il tasto desiderato al comando 2° canale radio
- Leggi (Leggi)
Effettua una verifica di un tasto di una ricevente, se memorizzato resti-
tuisce numero della ricevente nella locazione della memoria (da 01 a
64) e numero del tasto (T1-T2-T3 o T4).
- Elimina Lista (elim. 64)
ATTENZIONE! Rimuove completamente dalla memoria della ricevente
tutti i radiocomandi memorizzati.
- Lettura codice ricevitore (cod RX)
Visualizza il codice inserito nel ricevitore (par.11).
Consultate i paragrafi 8/9/10/11 per ulteriori informazioni inerenti le
funzionalità avanzate del ricevitore incorporato Clonix.
MANUALE PER L’INSTALLAZIONE
9.4) Menu Lingua (LINGUA)
Consente di impostare la lingua del programmatore a display.
Sono disponibili 5 lingue:
- ITALIANO (ITA)
- FRANCESE (FRA)
- TEDESCO (DEU)
- INGLESE (ENG)
- SPAGNOLO (ESP)
9.5) MENU DEFAULT (DEFAULT)
Riporta la centrale ai valori preimpostati dei default.
9.6) DIAGNOSTICA
Il display presente sul quadro RIGEL 5 sia nel normale funzionamento, sia
nel caso di anomalie visualizza alcune utili informazioni.
Diagnostica:
Nel caso di malfunzionamenti il display visualizza un messaggio che indica
quale dispositivo è necessario verificare:
STRE = attivazione ingresso START ESTERNO
STRI = attivazione ingresso START INTERNO
PED = attivazione ingresso PEDONALE
OPEN = attivazione ingresso OPEN
CLS = attivazione ingresso CLOSE
STOP = attivazione ingresso STOP
PHOT = attivazione ingresso FOTOCELLULA
PHOP = attivazione ingresso FOTOCELLULA IN APERTURA
PHCL = attivazione ingresso FOTOCELLULA IN CHIUSURA
BAR = attivazione ingresso COSTA SENSIBILE
SWC1 = attivazione ingresso FINECORSA CHIUSURA MOTORE 1
SWO1 = attivazione ingresso FINECORSA APERTURA MOTORE 1
SWC2 = attivazione ingresso FINECORSA CHIUSURA MOTORE 2
SWO2 = attivazione ingresso FINECORSA APERTURA MOTORE 2
TIME = attivazione ingresso TIMER
ATTENZIONE: Verificare che il valore della forza d’impatto
misurato nei punti previsti dalla norma EN12445, sia inferiore
a quanto indicato nella norma EN 12453.
Una errata impostazione della sensibilità può creare danni a
persone, animali o cose.
9.7) Statistiche
Collegato il programmatore palmare universale alla centralina, entrare nel
menù CENTRALE / STATISTICHE e scorrere la schermata dei parametri
statistici:
- Versione software microprocessore scheda.
- Numero cicli effettuati. Se si sostituiscono i motori, annotarsi il numero
di manovre eseguite fino a quel momento.
- Numero cicli effettuati dall’ultima manutenzione. Viene azzerato auto-
maticamente ad ogni autodiagnosi o scrittura parametri.
- Data ultima manutenzione. Da aggiornare manualmente dall’apposito
menù “ Aggiorna data di manutenzione”.
- Descrizione impianto. Permette di inserire 16 caratteri di individuazione
impianto.
10) DATI TECNICI RICEVITORE INTEGRATO
Canali di uscita della ricevente:
- canale uscita1, se reso attivo comanda uno START
- canale uscita 2, se reso attivo comanda l’eccitazione del relè II° canale
radio per 1s.
Versioni trasmettitori utilizzabili:
Tutti i trasmettitori ROLLING CODE compatibili con .
INSTALLAZIONE ANTENNA
Usare una antenna accordata sui 433MHz.
Per il collegamento Antenna-Ricevitore usare cavo coassiale RG58.
La presenza di masse metalliche a ridosso dell’antenna, può disturbare la
ricezione radio.In caso di scarsa portata del trasmettitore, spostare l’antenna
in un punto più idoneo.
11) CONFIGURAZIONE RICEVITORE
Il ricevitore a bordo di tipo clonabile unisce le caratteristiche di estrema
sicurezza alla copiatura della codifica a codice variabile (rolling code), la
praticità di poter effettuare, grazie ad un esclusivo sistema, operazioni di
“clonazione” di trasmettitori.
Clonare un trasmettitore significa generare un trasmettitore in grado di inse-
rirsi automaticamente nella lista dei trasmettitori memorizzati nel ricevitore
aggiungendosi o sostituendo un particolare trasmettitore.
La clonazione per sostituzione consente di creare un nuovo trasmettitore che
prende il posto nel ricevitore di un trasmettitore precedentemente memo-
rizzato, in questo modo sarà possibile rimuovere dalla memoria e rendere
non più utilizzabile un trasmettitore.
Saràquindipossibileprogrammareadistanzaesenzainterveniresulricevitore
un gran numero di trasmettitori in aggiunta o in sostituzione di trasmettitori
che, per esempio, siano stati smarriti.
RIGEL 5 - Ver. 07 - 9
D811472_07

Quando la sicurezza della codifica non sia determinante, il ricevitore a bordo
permettedi effettuarelaclonazioneinaggiuntaacodicefissoche,rinunciando
al codice variabile, permette comunque di avere una codifica con un elevato
numero di combinazioni, mantenendo la possibilità di “copiare” un qualsiasi
trasmettitore già programmato.
PROGRAMMAZIONE
La memorizzazione dei trasmettitori può avvenire in modalità manuale o a
mezzo del programmatore palmare universale, che consente la gestione
tramite il software EEdbase del database completo dell’installazione.
In questo ultimo caso la programmazione della ricevente avviene tramite la
connessionedelprogrammatorepalmareuniversalealquadrocomandoRIGEL
5, utilizzando gli accessori UNIFLAT e UNIDA come indicato in Fig. 4.
12) PROGRAMMAZIONE MANUALE
Nelcasodiinstallazionistandardnellequalinonsianorichiestelefunzionalità
avanzateèpossibileprocedereallamemorizzazionemanualedeitrasmettitori,
facendo riferimento alla Fig.B per la programmazione base.
- Se si desidera che il trasmettitore attivi l’uscita 1 (START) con il tasto 1
o con il tasto 2 o con il tasto 3 o con il tasto 4, inserire il trasmettitore nel
menu tasto start come in fig. B.
- Se si desidera che il trasmettitore attivi l’uscita 2 (rele II° canale radio)
con il tasto1 o con il tasto 2 o con il tasto 3 o con il tasto 4, inserire il
trasmettitore nel menu tasto 2ch. come in fig. B.
Nota:Il tasto nascosto P1 assume aspetto diverso a seconda del modello
di trasmettitore.
Per i trasmettitori dotati di tasto nascosto, premere il pulsante nascosto P1
(Fig.B1).Peritrasmettitorisprovvistideltastonascosto,iltastoP1corrisponde
alla pressione contemporanea dei 4 tasti del trasmettitore o, aprendo il vano
batteria, a ponticellare con un cacciavite le due piazzole P1 (Fig.B2).
NOTA IMPORTANTE: CONTRASSEGNARE IL PRIMOTRASMETTITORE
MEMORIZZATO CON IL BOLLINO CHIAVE (MASTER).
Il primo trasmettitore, nel caso di programmazione manuale, assegna il
CODICE CHIAVE DEL RICEVITORE; questo codice risulta necessario per
poter effettuare la successiva clonazione dei radiotrasmettitori.
13) CLONAZIONE DEI RADIOTRASMETTITORI
Clonazione con rolling code/Clonazione a codice fisso
Fate rifermento alle istruzioni del programmatore palmare universale e alla
Guida programmazione CLONIX.
13.1) PROGRAMMAZIONE AVANZATA: COMUNITÀ DI RICEVITORI
Fate rifermento alle istruzioni del programmatore palmare universale e alla
Guida programmazione CLONIX.
14) CONNESSIONE SERIALE MEDIANTE SCHEDA SCS1 (Fig.5)
Il quadro di comando RIGEL 5 consente, tramite appositi ingressi e uscite
seriali (SCS1), la connessione centralizzata di più automazioni. In questo
modo è possibile, con un unico comando, eseguire l’apertura o la chiusura
di tutte le automazioni connesse.
Seguendo lo schema di Fig.6, procedere alla connessione di tutti i quadri co-
mando RIGEL 5, utilizzando esclusivamente un doppino di tipo telefonico.
Nel caso si utilizzi un cavo telefonico con più coppie risulta indispensabile
utilizzare i fili della stessa coppia.
Lalunghezzadelcavotelefonicofraunaapparecchiaturaelasuccessiva
non deve eccedere i 250 m.
Aquestopuntoènecessarioconfigurareopportunamenteogniquadrocomando
RIGEL 5, impostando inanzitutto una centrale MASTER, che avrà il controllo
di tutte le altre, necessariamente settate come SLAVE (vedi menu logiche).
Impostare inoltre il numero di Zona (vedi menu parametri) tra 0 e 127.
Il numero di zona consente di creare dei gruppi di automazioni, ognuna delle
quali risponde al Master di Zona. Ogni zona può avere un solo Master, il
Master della zona 0 controlla anche gli Slave delle altre zone.
15)
SCHEDA SEMAFORO / PRERISCALDAMENTO MOTORI SSR5 (Fig.4)
Inserita nel connettore predisposto, consente:
- Gestione di due semafori a 2 luci.
- Preriscaldamento motori per clima freddo.
15.1) Predisposizione semaforo
Il semaforo 1 deve essere posto all’esterno del cancello ed il semaforo 2
all’interno (vedi figura 4).
AVVERTENZE - Predisporre segnali che limitino la velocità “A passo d’uomo”.
15.2) Predisposizione preriscaldamento motori
La sonda “S” deve essere posta e fissata all’esterno per rilevare la
temperatura esterna. Va collegata ai rispettivi morsetti 7-8della scheda
preriscaldamento.
15.3) Configurazione
A) Per semaforo
Impostare a “ON” le funzioni “Blocca imp. Ap.”, “Blocca imp. TCA”, “logica 2
passi”, “preallarme”.
I Dip-switch presenti in SSR5 sono 3.
MANUALE PER L’INSTALLAZIONE
ITALIANO
Dip-switch 1
ON - Si esclude il lampeggio all’inizio del movimento.
OFF - Si attiva il lampeggio all’inizio del movimento (durata 5 s).
Dip-switch 2
ON - A cancello chiuso attiva luci rosse.
OFF - Luci spente se cancello chiuso.
B) Per preriscaldamento motori
Impostare un valore % maggiore di 0 (altrimenti la funzione di preriscalda-
mento non sarà attiva) dal menù “Parametri” per stabilire la corrente che
manterrà i motori riscaldati.
Trimmer preriscaldamento
Regola la temperatura di intervento del preriscaldamento.
Regolabile da +8° a -8°.
15.4) Collegamenti morsettiera SSR5 (Fig.4)
A) Semaforo.
JP1 - Connettore a scheda RIGEL 5.
JP2
1 fase.
2 luce rossa semaforo 1.
3 luce rossa semaforo 2.
4 luce verde semaforo 1.
5 luce verde semaforo 2.
B) Preriscaldamento motori
JP3
6-7 Collegamento sonda termica.
15.5) Collegamenti morsettiera RIGEL 5 per semaforo
26-27 START interno - provoca l’apertura del cancello segnalato con l’ac-
censione della luce rossa all’esterno, e con la luce verde all’interno
quando il cancello è completamente aperto.
27-28 START esterno - il quale provoca l’apertura del cancello segnalato
con l’accensione della luce verde all’esterno quando il cancello è
completamente aperto, e con la luce rossa all’interno.
Dall’esterno l’unico comando per accedere deve essere lo Start esterno
(già presente sul primo canale radioricevente).
15.6) Led di segnalazione presenti nella scheda (Fig.4)
DL1 led verde semaforo 1 (esterno).
DL3 led rosso semaforo 1 (esterno).
DL2 led verde semaforo 2 (interno).
DL4 led rosso semaforo 2 (interno).
15.7) Segnalazione semafori
Luce verde: possibilità di accesso.
Luce rossa fissa: non si può accedere. Durante la manovra di apertura o
chiusura le 2 lampade rosse rimangono accese.
Luce rossa lampeggiante: inizio movimento cancello; non si può accedere.
N.B.: Se in fase di pausaTCA oppure in chiusura la centrale riceve uno start
per abilitare il senso opposto di marcia, la centrale apre, termina il tempo
TCA ed aspetta per il “tempo di sgombero area semaforo” impostato
mantenendo per tutta questa fase le luci rosse fisse prima di abilitare il verde
richiesto.Un attraversamento delle fotocellule durante il tempo di sgombero
area semaforo, ricarica questo tempo.
16) DEMOLIZIONE
Attenzione: Avvalersi esclusivamente di personale qualificato.
L’eliminazione dei materiali va fatta rispettando le norme vigenti.
Nel caso di demolizione, non esistono particolari pericoli o rischi derivanti
dal prodotto stesso.
È opportuno, in caso di recupero dei materiali, che vengano separati per
tipologia (parti elettriche - rame - alluminio - plastica - ecc.).
17) SMANTELLAMENTO
Attenzione: Avvalersi esclusivamente di personale qualificato.
Nel caso la centralina venga smontata per essere poi rimontata in altro
sito bisogna:
• Togliere l’alimentazione e scollegare tutto l’impianto elettrico.
• Nel caso alcuni componenti non possano essere rimossi o risultino dan-
neggiati, provvedere alla loro sostituzione.
Le descrizioni e le illustrazioni del presente manuale non sono impe-
gnative. Lasciando inalterate le caratteristiche essenziali del prodotto,
la Ditta si riserva di apportare in qualunque momento le modifiche che
essa ritiene convenienti per migliorare tecnicamente, costruttivamente
e commercialmente il prodotto, senza impegnarsi ad aggiornare la
presente pubblicazione.
10 - RIGEL 5 - Ver. 07
D811472_07

lampegg.
RIGEL 5 - Ver. 07 - 11
D811472_07

Fig. B
ITA
FRA
DEU
ENG
esp
MENU PRECEDENTI
FIG. A
OK OK
OK
OK
OK
OK
OK
PRG
-
+
+/-
DEFAULT
-
+
-
+
-
+
-
+
LINGUA
-
+
+/-
radio
-
+
+/-
Premere P1 del radioco-
mando.
Premere T desiderato del
radiocomando vedi Fig.B3
Premere T desiderato del
radiocomando vedi Fig.B3
Rilasciare P1 del
radiocomando
Agg. start
tasto nascosto rilascia
tasto desiderato
01
PRG.
Leggi
OK
OK
OK
Elimina 64
-
+
-
+
COD RX
OK
1A9C
OK
22FD
OK
0 1
OK
-
+
Premere P1 del radioco-
mando.
Premere T desiderato del
radiocomando vedi Fig.B3
Rilasciare P1 del
radiocomando
Agg 2ch
tasto nascosto rilascia
tasto desiderato
01
OK
-
+
+/-
01 t1
T1
T2
T1
T2
T3
T4
P1
123
T1 T2 T1 T2
T3 T4
P1
P1
12 - RIGEL 5 - Ver. 07
D811472_07

INSTALLATION MANUAL ENGLISH
Thank you for buying this product, our company is sure that you will be more
than satisfied with its performance.
This product is supplied with an “Instruction Manual” which should be read
carefully as it provides important information about safety, installation, ope-
ration and maintenance.
Thisproduct complieswith the applicabletechnicalstandardsandregulations
regarding safety. We confirm that it complies with the following European
directives: 73/23/CEE - 93/68/CEE, 89/336/CEE - 91/236/CEE - 92/31/CEE
- 93/68/CEE, 98/37/CEE. Where applicable, it also complies with technical
standards EN60335-1, EN12453, EN12445.
IMPORTANT
For the operations of wiring and installation, refer to the regulations in effect
and, in any case, to the principles of proper workmanship.
IMPORTANT
Any operation on the parts relative to automation must be carried out by
qualified personnel (the installer).
1) AUTODIAGNOSTICS
The control unit runs a check on the operating relays and safety mecha-
nisms (photocells, sensor ridge, etc.) before performing opening and closing
cycles.
2) CONNECTION OF PHOTOCELLS AND SENSOR RIDGE:
Byconvention,referto a receiver(Rx-fig.6)with 5 terminalsofwhichterminals
1 and 2 are for the 24V ~ power supply, terminal 3 is shared, terminal 4 is
the normally closed contact when at rest, terminal 5 is the normally open
contact when at rest. The contact is not powered.
3) LEGEND
RX: receiver photocells or infrared ridges.
TX: transmitter photocells or infrared ridges.
The transmitters should be connected to terminals 20-44 of RIGEL 5.
The receivers should be connected to terminals 20-21 of RIGEL 5.
- Fig.8 shows connection of RIGEL 5 with no safety device.Fig.8 shows connection of RIGEL 5 with no safety device.
- Fig. 9 shows the connection of the RIGEL 5 with 1 tested photocell.
- Fig. 10 shows connection of RIGEL 5 with 1 safety device with verifiedFig. 10 shows connection of RIGEL 5 with 1 safety device with verified
opening.
- Fig.11 shows connection of RIGEL 5 with 1 safety device with verifiedFig.11 shows connection of RIGEL 5 with 1 safety device with verified
closing.
- Fig. 12 shows the connection of the RIGEL 5 with 2 tested photocells
- Fig.13 shows connection of RIGEL 5 with 2 safety devices with verifiedFig.13 shows connection of RIGEL 5 with 2 safety devices with verified
opening.
- Fig.14 shows connection of RIGEL 5 with 2 safety devices with verifiedFig.14 shows connection of RIGEL 5 with 2 safety devices with verified
closure.
- Fig.15 shows the connection of the RIGEL 5 with 3 tested photocells
- Fig.16 shows the connection of the RIGEL 5 with 3 tested safety devices
on opening.
- Fig.17 shows the connection of the RIGEL 5 with 3 tested safety devices
on closing.
- Fig.18 shows the connection of the RIGEL 5 with 2 devices: 1 photocell
and 1 tested safety device on opening
-
Fig.19 shows the connection of the RIGEL 5 with 3 devices: 1 photocell, 1
safety device on opening and 1 safety device on closing, all being tested.
-
Fig.20 shows the connection of the RIGEL 5 with 4 devices: 2 photocells, 1
safety device on opening and 1 safety device on closing, all being tested.
-
Fig.21 shows the connection of the RIGEL 5 with 5 devices: 3 photocells, 1
safety device on opening and 1 safety device on closing, all being tested.
4) GENERAL SAFETY
WARNING! An incorrect installation or improper use of the product can
cause damage to persons, animals or things.
• The “Warnings” leaflet and “Instruction booklet” supplied with this
product should be read carefully as they provide important information
about safety, installation, use and maintenance.
• Scrap packing materials (plastic, cardboard, polystyrene etc) according
to the provisions set out by current standards. Keep nylon or polystyrene
bags out of children’s reach.
• Keep the instructions together with the technical brochure for future
reference.
• This product was exclusively designed and manufactured for the use
specified in the present documentation. Any other use not specified in
this documentation could damage the product and be dangerous.
• The Company declines all responsibility for any consequences resulting
from improper use of the product, or use which is different from that
expected and specified in the present documentation.
• Do not install the product in explosive atmosphere.
• The constructioncomponentsofthisproductmustcomplywiththefollowing
European Directives: 89/336/CEE, 73/23/EEC, 98/37/EEC and subse-
quent amendments. As for all non-EEC countries, the above-mentioned
standards as well as the current national standards should be respected
in order to achieve a good safety level.
• The Company declines all responsibility for any consequences resulting
fromfailure to observeGoodTechnicalPracticewhen constructing closing
structures (door, gates etc.), as well as from any deformation which might
occur during use.
• The installation must comply with the provisions set out by the following
EuropeanDirectives:89/336/CEE,73/23/EEC,98/37/EECandsubsequent
amendments.
• Disconnect the electrical power supply before carrying out any work on
the installation. Also disconnect any buffer batteries, if fitted.
• Fit an omnipolar or magnetothermal switch on the mains power supply,
having a contact opening distance equal to or greater than 3,5 mm.
• Check that a differential switch with a 0.03A threshold is fitted just before
the power supply mains.
• Check that earthing is carried out correctly: connect all metal parts for
closure (doors, gates etc.) and all system components provided with an
earth terminal.
• Fitall the safetydevices(photocells,electric edges etc.) which are needed
to protect the area from any danger caused by squashing, conveying and
shearing.
• Position at least one luminous signal indication device (blinker) where it
can be easily seen, and fix a Warning sign to the structure.
• TheCompanydeclinesallresponsibilitywithrespecttotheautomationsafety
and correct operation when other manufacturers’ components are used.
• Only use original parts for any maintenance or repair operation.
• Do not modify the automation components, unless explicitly authorised
by the company.
• Instruct the product user about the control systems provided and the
manual opening operation in case of emergency.
• Do not allow persons or children to remain in the automation operation
area.
• Keep radio control or other control devices out of children’s reach, in
order to avoid unintentional automation activation.
• The user must avoid any attempt to carry out work or repair on the automa-
tion system, and always request the assistance of qualified personnel.
• Anything which is not expressly provided for in the present instructions,
is not allowed.
• Installation must be carried out using the safety devices and controls
prescribed by the EN 12978 Standard.
5) GENERAL OUTLINE
The RIGEL 5 control unit is supplied by the manufacturer with standard
setting. Any modifications must be entered using the universal palmtop
programmer or the incorporated display.This Control unit supports the entire
EELINK protocol.
These are its main features:
- Control of one or two motors up to 600W power.
- Electronic torque setting.
- Adjustable electrodynamic braking.
- End-of-run speed slow-down.
- Separate opening / closing limit-switch inputs for each motor.
- Output for zone light.
- Separate inputs for safety devices.
- 12V output for click or suction-type electric lock.
- Output for timer piloting.
- Clock input.
- Connector for traffic-light board / motor preheating.
- Incorporated radio receiver.
Theboard is providedwith a removableterminalboard foreasiermaintenance
and replacement.This is supplied with a series of prewired jumpers to make
work easy for the installer.
The jumpers relate to the following terminals: 33-34, 35-36, 36-37, 38-39,
39-40, 41-42, 42-43, 52-55. If the above terminals are used, remove the
respective jumpers.
6) TECHNICAL SPECIFICATIONS
Power supply: ..................................................................230V±10% 50Hz*
Mains/low voltage insulation:........................................> 2MOhm 500V
Dielectric strength:.......................................mains/bty 3750V~ for 1 minute
Motor output current: .......................................................... 3.5A+3.5A max
Motor relay commutation current:.......................................................... 10A
Maximum motor power:.........................................................600W + 600W
Zone/courtesy light:................................................................... max 150W
Supply to accessories:...................................... 24V~ (1A max absorption)
Electric lock:.................................................12V (0.5A max, 2A for 3 s)
Light/alarm output with free n.o. contact:..............................max 3A 250V~
Gate-open warning light:........................................................24V~ 3W max
Blinker:................................................................................ 230V 40W max
Dimensions: ..............................................................................see figure 1
Fuses:....................................................................................... see figure 2
(* other voltages available on request)
RIGEL 5 - Ver. 07 - 13
D811472_07

INSTALLATION MANUAL
ENGLISH
7) TERMINAL BOARD CONNECTIONS (Fig.3)
WARNINGS - For wiring and installation operations, refer to the current
standards and good technical principles.
Wires powered at different voltages must be physically separated, or suitably
insulated with at least 1 mm extra insulation. The wires must be clamped by
an extra fastener near the terminals, for example by bands.
WARNING! For connection to the mains, use a multipolar cable with a
minimum of 3x1.5mm2cross section and complying with the previou-
sly mentioned regulations. For example, if the cable is out side (in the
open), it has to be at least equal to H07RN-F, but if it is on the inside
(or outside but placed in a plastic cable cannel) it has to be or at least
egual to H05VV-F with section 3x1.5mm2.
JP1
1 GND terminal.
2-3 230V~±10%, 50-60Hz power supply (2 neutral, 3 phase).
JP2
4-5-6 Motor connection 1 (delayed opening), terminals 5-6 for motor
drive, terminal 4 common.
5-14 (JP12) Motor capacitor connection 1.
7-8-9 Motor connection 2 (delayed closing), terminals 8-9 for motor
drive, terminal 7 common.
8-15 (JP12) Motor capacitor connection 2.
N.B.If only one motor is used, use motor output 2 and configure
logic “1 active motor”.
10-11 230V~ output for blinker light (40W max) and EBP 230V mo-
delelectric lock.
WARNING! If the SSR5 auxiliary board is used for motor
preheating, move the connection to terminals 12-13 (Fig.3)
and refer to Chap. 9.2 Logic Menu --> Blinker output.
12-13 230V~ output for zone/courtesy/blinking lights, 150W max. To
set the output, refer to paragraph 9.2 Logic Menu (“courtesy
light” and “blinking light”).
JP12
14 Motor 1 capacitor connection.
15 Motor 2 capacitor connection.
16-17
Light/alarm output with free n.o. contact, to pilot stair-light timer
or alarm signal for failed gate closure. As a light it commands an
impulse (impulse time 1 s) at the start of the operation, as an
alarm it lights up if the gate remains open for twice theTCA setting
(inhibited by dwell TCA (automatic closing time) logic = 0).
JP3
18-19 N.O. output (3W max) for 2nd radio channel or for gate-open
warning light.This light is off when the gate is closed, flashing on
closing and turned on if the gate is opening or already open.
20-21 Output 24V~ (1A max) powers accessories and photoreceivers.
20-44 Output 24V~ powers phototransmitters.
22-23 12V electric lock output, with click (3-second impulse), or
suction.
24-25 Antenna input for radio receiver board (24 signal, 25 braid).
JP4
26-27 Internal Start Pushbutton (n.o.). Internal Start command for
traffic light.
27-28 Start Pushbutton (n.o.). Parallel to radio receiver relay (CH1).
External Start command for traffic light.
27-29 Pedestrian pushbutton (n.o.).Activation takes place on motor 2;
moreover, if the opening cycle has started (not from pedestrian
pushbutton), the pedestrian control has the same effect as a
Start command.
30-31 Open Pushbutton (n.o.).
30-32 Close Pushbutton (n.o.).
33-34 Lock pushbutton (n.c.). If not used, leave the jumper con-
nected.
35-36 Input for ADMAP (dangerous movement area accessible to
the public) photocell contact (n.c.). If this is not used, leave the
jumper connected.
With ADMAP Photocell Logic = 0: In case of activation before
opening, movement is prevented; if activation occurs during
opening, movement is stopped and the opening manoeuvre is
resumed after release.
WithADMAPPhotocellLogic=1:Photocellexcludedonopening.
The opening movement takes place even when an obstacle is
present.
N.B.RegardlessoftheADMAPPhotocellLogic,photocellactivation
during the closing manoeuvre causes stopping and reopening.
36-37 If not used, leave the jumper connected.Input for photocelledge
contact on opening SAFE OP(n.c.). In case of activation during
opening, the gate is stopped and partly closed.If not used, leave
the jumper connected.
38-39 Opening limit switch for motor 1 (n.c.). If not used, leave the
jumper connected.
39-40 Closing limit switch for motor 1 (n.c.). If not used, leave the
jumper connected.
41-42 Opening limit switch for motor 2 (n.c.). If not used, leave the
jumper connected.
42-43 Closing limit switch for motor 2 (n.c.). If not used, leave the
jumper connected.
JP5
20(JP3)-44 24V output for transmitters.
45-46-47 Connection with tested safety devices (see Fig. from 9to 21).
48-49-50 Connection with tested safety devices (see Fig. from 9to 21).
JP6
51-52 Clock input (n.o.). If the connected contact is open (n.o.), the
leaves close and get ready for normal operation. If the contact
is closed (n.c.), the leaves open and stay open until the contact
reopens. If the opening movement controlled by the TIMER is
prevented by the safety devices, gate opening can be resumed
by activating the START/OPEN control.
52-55 Input for photocelledge contact on closing SAFE CL (n.c.). In
case of activation during closing, the gate is stopped and partly
reopened. If not used, leave the jumper connected.
53 Photocell test input (PHOT-FAULT).
54 Safety edge/opening photocell test input (BAR-FAULT).
56 Closing photocell test input (PHOT CL-FAULT).
JP7 Radio receiver board connector.
JP8 Serial connection board connector (SCS1).
JP9 Traffic-light / Preheating SSR5 board connector.
8) PROGRAMMING
Thecontrolunit is providedwitha microprocessorandsuppliedwithoperation
parameters set by the manufacturer.The predefined parameters can only be
changed by means of the universal palmtop programmer.
Before modifying the parameters, carefully read the instructions relating to
the universal palmtop programmer, and proceed as described below.
Connect the universal palmtop programmer to the control unit through the
UNIFLAT accessory (See fig.5). Enter the “CONTROL UNIT” menu and
the “PARAMETERS” submenu, and scroll the display screenfuls using the
up/down arrows, then set the numerical values of the parameters listed
below. For the function logics, refer to the “LOGIC” submenu. When using
the incorporated programmer for programming, make reference to Fig. A
and B and the “Configuration” paragraph. Here is a list of the meanings and
values which can be ascribed to each parameter.
9) CONFIGURATION
The display programmer is used to set all the RIGEL 5 control panel functions.
The programmer is provided with three pushbuttons for menu scrolling and
function parameter configurations (Fig. 2):
+ menu scrolling/value increment key
- menu scrolling/value reduction key
OK Enter (confirm) key
The simultaneous pressure of the + and – keys is used to exit the active
menu and move to the preceding menu.
If the + and – keys are pressed simultaneously at the main menu level (para-
meters, logics, radio, language, autosetting), programming is exited and the
display is switched off (The END message will be displayed).
The modifications made are only set if the OK key is subsequently pressed.
When the OK key is pressed for the first time, the programming mode is entered.
The following pieces of information appear on the display at first:
- Display Software version
- Control unit Software version
- Number of total manoeuvres carried out (the value is expressed in hun-
dreds, therefore the display constantly shows 0000 during the first cent
manoeuvres).
- Numberofmanoeuvrescarriedoutsince thelatestmaintenanceoperation
(the value is expressed in cent, therefore the display constantly shows
0000 during the first hundreds manoeuvres).
- Number of memorised radio control devices.
When the OK key is pressed during the initial presentation phase, the first
menu (parameters) can be accessed directly.
Here follows a list of the main menus and the respective submenus available.
The predefined parameter is shown between square brackets [ 0 ].
The writing appearing on the display is indicated between round brackets.
Refer to Figures A and B for the control unit configuration procedure.
9.1) Parameter Menu (PARAM)
1 - Operation time motor 1(work. t. mot.1) [60s]
Enter the numerical value corresponding to the working time from 3 to
180 seconds for motor 1.
1 - Operation time motor 2 (work. t. mot.2) [60s]
Enter the numerical value corresponding to the working time from 3 to
180 seconds for motor 2.
14 - RIGEL 5 - Ver. 07
D811472_07

INSTALLATION MANUAL ENGLISH
2 - Pedestrian operation time (ped. t.) [6s]
Set the numerical value of the pedestrian opening time from 3 to
90 seconds.
3 - Automatic closing time (tca) [40s]
Set the numerical value of the TCA automatic closing time from 3 to
120 seconds.
4 - Opening delay time for leaf 1 (open delay time) [3s]
Set the opening delay time for motor 1 with respect to motor 2, which can
be adjusted from 0to 10 seconds.
5 - Closing delay time for leaf 2 (cls delay time) [3s]
Set the closing delay time for motor 2, which can be adjusted from 0to
60 seconds.
6 - Slow-down time (slow-down t.) [0s]
Set the end-of-run slow-down time from 0 to 20 seconds.
The slow-down time must be subtracted from the working time.
NOTE: it is advised to activate timing.
NOTE: only use this function when limit switches are fitted.
7 - Traffic-light area clearance time (clear. t) [15s]
Setthe required clearance time for the area involved in the trafficgoverned
by traffic light, from 0 to 30 seconds. Set to 0 if not used.
8 - %Motor torque (mot. torque) [50%]
Set the numerical torque value from 1 to 99%.
NOTE: When using with oil-hydraulic motors, it is necessary to set
the torque value to 99% and adjust the force directly on the motor.
9 - %slowdown motor torque (sloud torque) [50%]
(Advanced parameters ⇒address 5)
Setnumericallyfrom 1%to99%thevalueof motortorqueduringslowdown
time.
10-%Braking (brake) [0%]
Set the required braking percentage from 0 to 99%, compatibly with the
weight of the gate and the existing mechanical stresses.
11-% Emergency braking (emer. brake) [60%]
Set the emergency braking numerical value from 0 to 99%; emergency
braking is carried out by activating the safety controls available at inputs
34 (Lock), 37 (SAFE OP), and 55 (SAFE CL).
12-%Preheating (preheat.) [30%]
Set the percentage value of the current from 0 (deactivated pre-heating)
to 99% which can be made to pass through the motor windings to keep
them at the right temperature.
13-Zona (Zone) [ 0 ]
(Advanced parameters ⇒address 1)
Enter the zone number between 0 (minimum value) and 127 (maximum
value). See paragraph 14 “Serial connection”.
9.2) LOGIC MENU (LOGIC)
- TCA (TCA) [ ON ]
ON: Activates automatic closing
OFF: Excludes automatic closing
- Opening Impulse lock (Ibl open) [ OFF ]
ON: The Start impulse has no effect during the opening phase.
OFF: The Start impulse becomes effective during the opening phase.
- Impulse lock on closing (ibl close) [OFF]
ON: The start impulse has no effect during the closing stage.
OFF: The start impulse is effective during the closing stage.
- Impulse lock TCA (ibl TCA ) [ OFF ]
ON: The Start impulse has no effect during the TCA dwell period.
OFF: The Start impulse becomes effective during the TCA dwell period.
- Ram blow on opening (ram blow c.op) [OFF]
ON: It pushes for approx. 2 seconds in closing direction before opening.
This allows the electric lock to be released more easily (not affected
by limit switches).
OFF: Excludes the ram blow in closing.
IMPORTANT - When no adequate mechanical backstops are instal-
led, do not use this function. It is also to be absolutely avoided in the
automation of sliding gates.
- Ram blow in closing (ram blow c.cl.) [OFF]
ON: Before carrying out the closing manoeuvre, the gate pushes for about 2
seconds on opening.This allows the electric lock to be released more
easily.(not affected by limit switches)
IMPORTANT - When no adequate mechanical backstops are instal-
led, do not use this function. It is also to be absolutely avoided in the
automation of sliding gates.
OFF: Excludes the ram blow in closing.
- 2-step, 4-step logic (2 step) [OFF]
ON: Enables 2-step logic (prevails over “3-step logic”). A start impulse has
the following effects:
door closed:...............................................................................opens
on opening:................................................................................closes
door open:.................................................................................closes
on closing:..................................................................................opens
after stopping:............................................................................opens
OFF:Enables 4-step logic when the 3-step logic is set to OFF. A start impulse
has the following effects:
door closed:...............................................................................opens
on opening:...................................stops and enters TCA if configured
door open:.................................................................................closes
on closing:..................................stops and does not enter TCA (stop)
after stopping:............................................................................opens
- 3-step logic (3 step) [OFF]
ON: Enables 3-step logic (with 2 steps=OFF). A start impulse has the
following effects:
door closed:...............................................................................opens
on opening:...................................stops and enters TCA if configured
door open:.................................................................................closes
on closing:..................................................................................opens
after stopping:............................................................................opens
OFF: Disables 3-step logic.
- Safety edge (bar) [ON]
ON: Input of terminals 36-37 is active as input for the safety edge.
OFF:
Input of terminals 36-37 is active as input for opening photocells.
- Pre alarm (pre-alarM) [ OFF ]
ON: The blinker comes on about 3 seconds before the motor starts.
OFF: The blinker comes on at the same time as the motor starts.
- Hold-to-run (hold-to-run ) [ OFF ]
ON: Hold-to-runoperation:themanoeuvrecontinuesaslongasthecommand
key is kept pressed. It is not possible to use the radio transmitter.
OFF: Impulse operation: one impulse opens the gate if closed, and closes
it if open.
- Photocells on opening (photc. open) [ OFF ]
ON: In case of obscuring, this excludes photocell operation on opening.
During the closing phase, it immediately reverses the motion.
OFF: In case of obscuring, the photocells are active both on opening and
on closing. When a photocell is obscured on closing, it reverses the
motion only after the photocell is disengaged.
- Lock hold (bloc persist) [OFF]
ON: If the motors remain still in a totally open or closed position for over one
hour, they are activated for about 3 seconds in the respective direction.
This operation takes place once every hour.
N.B.: This function has the purpose of compensating any oil volume
decrease in the hydraulic motors, due to a temperature drop during
prolonged pauses, for instance at night, or to internal leaks.
IMPORTANT - When no adequate mechanical backstops are instal-
led, do not use this function. It is also to be absolutely avoided in the
automation of sliding gates.
OFF: Excludes the said function.
- Time count (time. c.) [OFF]
ON: The control unit calculates the activation time of each motor, based on
the preceding manoeuvres.
OFF:
The control unit activates the motors at each manoeuvre for the time set.
N.B.Always set the operationtimetoaslightlyhighervaluethan needed
to carry out the complete manoeuvre.
- Rapid closing (fast cls ) [ OFF ]
ON: Closes the gate after photocell disengagement, before waiting for the
end of the TCA (automatic closing time) set.
OFF: Command not entered.
- Clock / Pedestrian (clock ped.) [OFF]
Input for the connection of an external timer.
ON: The Clock input is only active in Motor 2, for the pedestrian time set.
A start command given during the clock phase carries out complete
gate opening and closing, resetting the open pedestrian position.
OFF: The Clock input acts on both motors.
- Courtesy light (zone light) [OFF]
ON: Zone light. Remains active as long as the manoeuvre lasts.
OFF: Courtesy light. Remains active for 90 seconds after last operation.
N.B. These settings cannot be used if the blinker output is set to ON.
- Blinking output (blink.) [OFF]
Activate this function only when the SSR5 traffic light-preheating board is present.
ON: Set the output at terminals 12-13 (“courtesy light”) as blinking output
(active only during leaf movement).
N.B. Any setting relating to the “courtesy light” function is ignored.
OFF: Keep the output at terminals 12-13 as “courtesy light” or “zone li-
ght”.
WARNING!Itisnotpossibleto use the SSR5 board in motor preheating mode
and at the same time have the Zone light/Courtesy Light and Blinker/Electric
lock on. In this case, outputs 10-11 cannot be used and outputs 12-13 can
only be used for one of the two functions.
- Light/Alarm (light-alarm) [ON]
ON: Gate-open alarm output (activated if the gate remains open for twice
the TCA time set).
OFF: Stair-light control (the impulse stays on for 1 second).
- 1 active motor (1 mot. on) [OFF]
ON: Only motor 2 activated (1 leaf).
OFF: Both motors are activated (2 leaves).
RIGEL 5 - Ver. 07 - 15
D811472_07

INSTALLATION MANUAL
- Type of lock (suction-type) [OFF]
ON: Suction-type lock.
OFF: Click lock.
- Master/Slave (master) [ OFF ]
(Advanced logics ⇒address 11)
ON: The control panel is set as Master in a centralised connection (see
Paragraph 14).
OFF: The control panel is set as Slave in a centralised connection (see
Paragraph 7).
- Gate-open or 2nd radio channel warning light (sca-2ch) [ OFF ]
ON: The output between terminals 18 and 19 is configured as Gate-open
warning light, in this case the 2nd radio channel controls pedestrian
opening.
OFF: The output between terminals 18 and 19 is configured as 2nd radio
channel.
- Fixed code (fixed code) [ OFF ]
(Advanced logics ⇒address 13)
ON: The receiver is configured for operation in fixed-code mode, see pa-
ragraph on “Radio Transmitter Cloning”.
OFF: The receiver is configured for operation in rolling-code mode, see
paragraph on “Radio Transmitter Cloning”.
- Radio transmitter programming (radio prog) [ ON ]
(Advanced logics ⇒address 15)
ON: This enables transmitter storage via radio:
1 – First press the hidden key (P1) and then the normal key (T1, T2,
T3 or T4) of a transmitter already memorised in standard mode by
means of the radio menu.
2 – Within 10s press the hidden key (P1) and the normal key (T1, T2,
T3 or T4) of a transmitter to be memorised.
The receiver exits the programming mode after 10s, other new tran-
smitters can be entered before the end of this time.
This mode does not require access to the control panel.
OFF: This disables transmitter storage via radio.
The transmitters can only be memorised using the appropriate Radio
menu.
- Photocell test (test phot) [ OFF ]
(Advanced logics ⇒address 13)
ON: Activates photocell check (see fig. 9to 14)
OFF: Deactivates photocell check
- Photocell test on closing (test phot cl.) [ OFF ]
ON: Enables the test of the active photocells on closing.
OFF: Desables the test of the active photocells on closing.
- Electric edge test (test bar) [ OFF ]
- Menu visible with safety edge activated only.
(Advanced logics ⇒address 14)
ON: Activates electric edge check (see fig. 9to 14)
OFF: Deactivates electric edge check
- Photocell test on opening (test phot op.) [ OFF ]
- Menu visibile with safety edge deactivated only.
ON: Enables the test of the active photocells on opening.
OFF: Desables the test of the active photocells on opening.
9.3) RADIO MENU (RADIO)
- Add (add)
Allows you to add one key of a radio control device to the receiver memory;
after storage it displays a message showing the receiver number in the
memory location (from 01 to 64).
Add Start button (add start)
associates the required key to Start command
Add 2ch button (add 2ch)
associates the required key to 2nd radio channel
- Read (read)
Checks one key of a receiver; if stored it displays a message showing
the receiver number in the memory location (from 01 to 64), and the key
number (T1, T2, T3 or T4).
- Eliminate list (erease 64)
WARNING! Completely removes all memorised radio control devices
from the receiver memory.
- Receiver code reading (RX code)
This displays the code entered in the receiver (par.11).
Consult paragraphs 8/9/10/11 for further information concerning the
advanced functions of the Clonix incorporated receiver.
9.4) Language Menu (Language)
Allows you to set the language on the display programmer.
5 languages are available:
- ITALIAN (TA)
- FRENCH (FRA)
- GERMAN (DEU)
- ENGLISH (ENG)
- SPANISH (ESP)
9.5) MENU DEFAULT (DEFAULT)
Restores the preset default values on the control unit.
9.6) DIAGNOSTICS AND MONITORING
The display on the RIGEL 5 panel shows some useful information, both
during normal operation and in the case of malfunctions.
Diagnostics:
In the case of malfunctions, the display shows a message indicating which
device needs to be checked:
STRE = EXTERNAL START input activation
STRI = INTERNAL START input activation
PED = input activation PEDESTRIANinput activation PEDESTRIAN
OPEN = OPEN input activation
CLS = CLOSE input activation
STOP = STOP input activation
PHOT = PHOT input activation
PHOP = activation of input for PHOTOCELL ON OPENING
PHCL = activation of input for PHOTOCELL ON CLOSING
BAR = input activation SAFETY EDGE
SWC1 = activation of input for MOTOR 1 CLOSING LIMIT SWITCH
SWO1 = activation of input for MOTOR 1 OPENING LIMIT SWITCH
SWC2 = activation of input for MOTOR 2 CLOSING LIMIT SWITCH
SWO2 = activation of input for MOTOR 2 OPENING LIMIT SWITCH
TIME = TIMER input activation
WARNING: Check that the impact force value measured at the
points established by the EN 12445 standard is lower than that
specified in the EN 12453 standard.
Incorrect sensitivity setting can cause injuries to persons or
animals, or damage to things.
9.7) STATISTICS
Havingconnected the universalpalmtop programmertothe controlunit,enter
the CONTROL UNIT / STATISTICS menu and scroll the screenful showing
the statistical parameters:
- Board microprocessor software version.
- Number of cycles carried out. If motors are replaced, count the number
of manoeuvres carried out up to that time.
- Number of cycles carried out from the latest maintenance operation.
It is automatically set to zero after each self-diagnosis or parameter writing.
- Date of latest maintenance operation. To be updated manually from the
appropriate menu “Update maintenance date”.
- Installation description. 16 characters can be entered for installation
identification.
10) INTEGRATED RECEIVER TECHNICAL SPECIFICATION
Receiver output channels:
- output channel 1, if activated, controls a START command.
- output channel 2, if activated, controls the excitation of the 2nd radio
channel relay for 1s.
Transmitter versions which can be used:
all Rolling Code transmitters compatible with .
ANTENNA INSTALLATION
Use an antenna tuned to 433MHz.
For Antenna-Receiver connection, use RG8 coaxial cable.
The presence of metallic masses next to the antenna can interfere with radio
reception. In case of insufficient transmitter range, move the antenna to a
more suitable position.
11) RECEIVER CONFIGURATION
The on-board receiver combines characteristics of utmost safety in copying
variable code (rolling code) coding with the convenience of carrying out
transmitter “cloning” operations thanks to an exclusive system.
Cloninga transmittermeanscreatinga transmitterwhich canbeautomatically
included within the list of the transmitters memorised in the receiver, either
as an addition or as a replacement of a particular transmitter.
Cloning by replacement is used to create a new transmitter which takes
the place of the one previously memorised in the receiver; in this way a
specific transmitter can be removed from the memory and will no longer
be usable.
Therefore it will be possible to remotely program a large number of additional
transmitters or, for example, replacement transmitters for those which have
been lost, without making changes directly to the receiver.
ENGLISH
16 - RIGEL 5 - Ver. 07
D811472_07

When coding safety is not a decisive factor, the on-board receiver allows you to
carryoutfixed-codeadditionalcloningwhich,althoughabandoningthevariable
code, provides a high number of coding combinations, therefore keeping it
possible to “copy” any transmitter which has already been programmed.
PROGRAMMING
Transmitter storage can be carried out in manual mode or by means of
the universal palmtop programmer which allows the complete installation
database to be managed through the Eedbase software.
Inthissecondcase,receiver programmingtakes placethrough theconnection
of universal palmtop programmer to the RIGEL 5 control panel, using the
UNIFLAT and UNIDA accessories as indicated in Fig. 4.
12) MANUAL PROGRAMMING
In the case of standard installations where advanced functions are not
required, you can proceed to manual storage of the transmitters, making
reference to fig. B for basic programming.
- If you wish the transmitter to activate output 1 (START) by means of key1,
key2, key3 or key4, enter the transmitter in menu “Start key”, as in fig. B.
- If you wish the transmitter to activate output 2 (2nd radio channel relay)
by means of key1, key2, key3 or key4, enter the transmitter in menu “2ch
ch. key”, as in fig. B.
Note: Hidden key P1 appears differently depending on the transmitter model.
Fortransmitterswith hiddenkey, press hidden keyP1 (fig.B1).For transmit-
ters without hidden key, the key P1 function corresponds to simultaneously
pressing the 4 transmitter keys or, after opening the battery compartment,
bridging the two P1 points by means of a screwdriver (fig. B2).
IMPORTANT NOTE:ATTACHTHE ADH ESIVE KEY LABELTOTHE FIRST
MEMORISED TRANSMITTER (MASTER).
In the case of manual programming, the first transmitter assigns the key
code to the receiver; this code is necessary in order to carry out subsequent
cloning of the radio transmitters.
13) RADIO-TRANSMITTER CLONING
Rolling-code cloning / Fixed-code cloning
Make reference to the universal palmtop programmer Instructions and the
CLONIX Programming Guide.
13.1) ADVANCED PROGRAMMING: COLLECTIVE RECEIVERS
Make referencetothe
universal palmtop programmer
Instructions andtheCLONIX
Programming Guide.
14) SERIAL CONNECTION USING SCS1 BOARD (Fig.5)
The RIGEL 5 control panel allows several automation units (SCS1) to be
connected in a centralised way by means of appropriate serial inputs and
outputs. This makes it possible to use one single command to open and
close all the automation units connected.
Following the diagram in Fig.6, proceed to connecting all the RIGEL 5 control
panels, exclusively using a telephone-type line.
Should a telephone cable with more than one pair be needed, it is indispen-
sable to use wires from the same pair.
The length of the telephone cable between one appliance and the next
must not exceed 250 m.
At this point, each of the RIGEL 5 control panels must be appropriately
configured, by setting a MASTER unit first of all, which will have control over
all the others, to be necessarily set as SLAVE (see logic menu).
Also set the Zone number (see parameter menu) between 0 and 127.
The zone number allows you to create groups of automation units, each one
answering to the Zone Master unit. Each zone can only be assigned one
Master unit, the Master unit in zone 0 also controls the Slave units in
the other zones.
15) SSR5 TRAFFIC-LIGHT / MOTOR PREHEATING BOARD (Fig.4)
When inserted in the appropriate connector, it provides:
- Control of two traffic lights with 2 lights each.
- Preheating of motors for cold climate.
15.1) Traffic light layout
Traffic light 1 must be positioned on the outside of the gate and traffic light
2 on the inside (see figure 4).
WARNINGS - Place signs for speed limitation to “Walking pace”.
15.2) Motor preheating layout
The “S” probe must be positioned and fixed on the outside to detect exter-
nal temperature. It is to be connected to respective terminals 7-8 on the
preheating board.
15.3) Configuration
A) For the traffic light.
Connect universal palmtop programmer to the RIGEL 5 board and set the
following functions to “ON”: “Open. Imp. Lock”, “TCA Imp. Lock”, “2- step
logic”, “pre-alarm”.
There are 3 Dip-switches in the SSR5 board.
Dip-switch 1
ON - Blinking is excluded when movement starts.
OFF - Blinking is activated when movement starts (lasting 5 s).
Dip-switch 2
ON - With gate closed, switches red lights on.
OFF - Lights off with gate closed.
B) Motor preheating
Enter a % value greater than 0 (otherwise the pre-heating function will not
work) from the “Parameter functions” menu to establish the value of the
power supply current necessary to keep the motors heated.
Preheating trimmer.
Regulates the preheating activation temperature. Can be set from +8° to -8°.
15.4) SSR5 terminal board connections (Fig.4)
A) Traffic light.
JP1 - RIGEL 5 board connector.
JP2
1 phase.
2 red light for traffic light 1.
3 red light for traffic light 2.
4 green light for traffic light 1.
5 green light for traffic light 2.
B) Motor preheating
JP3
6-7 Thermal probe connection.
15.5) RIGEL 5 terminal board connections for traffic light
26-27 Internal START command - causes the gate to open, which is signalled
by the red light coming on outside and the green light inside, when
the gate is fully open.
27-28 ExternalSTARTcommand-causesthe gatetoopen,which is signalled
by the green light coming on outside when the gate is fully open, and
the red light coming on inside.
The external START command must be the only access control
available from the outside (already existing on the first radiz receiver
channel).
15.6) Signal indication LEDs existing in the board (Fig.4)
DL1 Green LED for traffic light 1 (external).
DL3 Red LED for traffic light 1 (external).
DL2 Green LED for traffic light 2 (internal).
DL4 Red LED for traffic light 2 (internal).
15.7) Traffic light signal indication
Green light: access allowed.
Red fixed light : no access. During the opening and closing manoeuvres,
the 2 red lights stay on.
Red blinking light : gate starts moving: no access.
N.B.: In the case where, during the TCA dwell time or closing phase, the
control unit receives a Start command to enable the opposite direction of
movement, the control unit starts opening, completes theTCA time and waits
for the “traffic-light area clearance time” set, keeping the fixed red lights
on throughout this entire phase before enabling the green lights requested.
Should any obstacle interfere with the photocells during the traffic-light area
clearance time, the previously set time will be restored.
16) SCRAPPING
Warning: This operation should only be carried out by qualified person-
nel. Materials must be disposed of in conformity with the current regulations.
In case of scrapping, the automation devices do not entail any particular risks
or danger. In case of materials to be recycled, these should be sorted out
by type (electrical components, copper, aluminium, plastic etc.).
17) DISMANTLING
Warning:This operation should only be carried out by qualified person-
nel. When the control unit is disassembled to be reassembled on another
site,proceed as follows:
• Disconnect the power supply and the entire electrical installation.
• In the case where some of the components cannot be removed or are
damaged, they must be replaced.
The descriptions and illustrations contained in the present manual are not
binding.The Company reserves the right to make any alterations deemed
appropriateforthe technical,manufacturingandcommercialimprovement
of the product, while leaving the essential product features unchanged, at
any time and without undertaking to update the present publication.
INSTALLATION MANUAL ENGLISH
RIGEL 5 - Ver. 07 - 17
D811472_07

blink
18 - RIGEL 5 - Ver. 07
D811472_07
Fig. B
language
ITA
FRA
DEU
ENG
esp
PRECEDING MENUS
FIG. A
OK OK
OK
OK
OK
OK
OK
PRG
-
+
-
+
+/-
+/-
DEFAULT
-
+
-
+
-
+
-
+
T1
T2
T1
T2
T3
T4
1 2 3
T1 T2 T1 T2
T3 T4
P1P1
P1
RADIO
-
+
-
+
+/-
OK
+/-
Press P1 (pushbutton) on radio
control device.
Press the required T (key) on
radio control device – see Fig. B3
Press the required T (key) on
radio control device – see Fig. B3
Release P1 on radio
control device
ADD start
hidden button release
desired button
01
PRG.
READ
OK
OK
OK
ERASE 64
-
+
-
+
Press P1 (pushbutton) on radio
control device.
Press the required T (key) on
radio control device – see Fig. B3
Release P1 on radio
control device
ADD 2ch hidden button release
desired button
01
OK
-
+
01 t1
COD RX
OK
1A9C
OK
22FD
OK
0 1
OK
-
+
+/-
RIGEL 5 - Ver. 07 - 19
D811472_07

MANUEL D’INSTALLATION
FRANÇAIS
Nous vous remercions pour avoir choisi ce produit. Nous sommes sûrs qu’il
vous rendra le service nécessaire à vos besoins.
Lireattentivementle«Manueld’instructions» qui accompagneceproduitpuis
qu’il fournit d’importantes indications concernant la sécurité, l’installation,
l’utilisation et l’entretien.
Ce produit est conforme aux normes reconnues de la technique et aux dis-
positions en matière de sécurité.Nous confirmons qu’il répond aux directives
européennes suivantes:73/23/CEE - 93/68/CEE, 89/336/CEE - 91/236/CEE
-92/31/CEE-93/68/CEE,98/37/CEE.Pourcequiestapplicable,ilestconforme
aux normes techniques suivantes: EN60335-1, EN12453, EN12445.
AVERTISSEMENTS
Dans les opérations de câblage et d’installation, se référer aux normes en
vigueur et en tous les cas aux principes de la bonne technique.
AVERTISSEMENTS
Toute intervention sur les composants de l’automation doit être effectuée
par un personnel qualifié (installateur).
1) VERIFICATION
L’unité de commande effectue le contrôle (vérification) des relais de marche
et des dispositifs de sécurité (cellules photoélectriques, barre palpeuse etc.),
avant d’effectuer chaque cycle d’ouverture et de fermeture.
2) CONNEXION DES CELLULES PHOTOÉLECTRIQUES ET DES BAR-
RES PALPEUSES
Par convention, on se réfère à un dispositif récepteur (Rx- fig.6) à 5 bornes
dont: bornes 1 et 2 d’alimentation 24V~, borne 3 commune, borne 4 contact
normalement fermé à repos, borne 5 contact normalement ouvert à repos.
Le contact est sans tension.
3) LEGENDE
RX: récepteur cellules photoélectriques ou barres palpeuses à infrarouges
TX: émetteur cellules photoélectriques ou barres palpeuses à infrarouges
Les émetteurs doivent être connectés aux bornes 20-44 de RIGEL 5.
Les récepteurs doivent être connectés aux bornes 20-21 de RIGEL 5.
- La fig.8 illustre la connexion de RIGEL 5 avec aucun dispositif de sécurité.La fig.8 illustre la connexion de RIGEL 5 avec aucun dispositif de sécurité.
-
La Fig. 9 illustre la connexion du RIGEL 5 avec 1 cellule photoélectrique vérifiée.
- La fig.10 illustre la connexion de RIGEL 5 avec 1 dispositif de sécuritéLa fig.10 illustre la connexion de RIGEL 5 avec 1 dispositif de sécurité
en Ouverture vérifiés.
- La fig.11 illustre la connexion de RIGEL 5 avec 1 dispositif de sécuritéLa fig.11 illustre la connexion de RIGEL 5 avec 1 dispositif de sécurité
en Fermeture vérifiés.
- La Fig. 12 illustre la connexion du RIGEL 5 avec 2 cellules photoélectri-
ques vérifiées.
- Lafig.13 illustre la connexionde RIGEL 5 avecdeux dispositifsde sécuritéLa fig.13 illustre la connexiondeRIGEL 5 avecdeux dispositifs de sécurité
en ouverture vérifiés.
- Lafig.14 illustre la connexionde RIGEL 5 avecdeux dispositifsde sécuritéLa fig.14 illustre la connexiondeRIGEL 5 avecdeux dispositifs de sécurité
en fermeture vérifiés.
- La Fig. 15 illustre la connexion du RIGEL 5 avec 3 cellules photoélectri-
ques vérifiées.
- La Fig. 16 illustre la connexion du RIGEL 5 avec 3 dispositifs de sécurité
en ouverture vérifiés.
- La Fig. 17 illustre la connexion du RIGEL 5 avec 3 dispositifs de sécurité
en fermeture vérifiés.
- La Fig. 18 illustre la connexion du RIGEL 5 avec 2 dispositifs: 1 cellule
photoélectrique et 1 dispositif de sécurité en ouverture, vérifiés.
- La Fig. 19 illustre la connexion du RIGEL 5 avec 3 dispositifs: 1 cellule
photoélectrique, 1 dispositif de sécurité en ouverture et 1 dispositif de
sécurité en fermeture, tous vérifiés.
- La Fig. 20 illustre la connexion du RIGEL 5 avec 4 dispositifs: 2 cellules
photoélectriques, 1 dispositif de sécurité en ouverture et 1 dispositif de
sécurité en fermeture, tous vérifiés.
- La Fig. 21 illustre la connexion du RIGEL 5 avec 5 dispositifs: 3 cellules
photoélectriques 1 dispositif de sécurité en ouverture et 1 dispositif de
sécurité en fermeture, tous vérifiés.
4) SECURITE GENERALE
ATTENTION! Une installation erronée ou une utilisation impropre du
produit peuvent provoquer des lésions aux personnes et au animaux
ou des dommages aux choses.
• Lisezattentivementlabrochure“Avertissements”etle“Manueld’instruc-
tions” qui accompagnent ce produit, puisqu’ils fournissent d’importantes
indications concernant la sécurité, l’installation, l’utilisation et l’entretien.
• Eliminer les matériaux d’emballage (plastique, carton, polystyrène etc.)
selon les prescriptions des normes en vigueur. Ne pas laisser des enve-
loppes en nylon et polystyrène à la portée des enfants.
• Conserver les instructions et les annexer à la fiche technique pour les
consulter à tout moment.
• Ce produit a été conçu et réalisé exclusivement pour l’utilisation indi-
quée dans cette documentation. Des utilisations non indiquées dans
cette documentation pourraient provoquer des dommages au produit et
représenter une source de danger pour l’utilisateur.
• La Société décline toute responsabilité dérivée d’une utilisation impropre
ou différente de celle à laquelle le produit a été destiné et qui est indiquée
dans cette documentation.
• Ne pas installer le produit dans une atmosphère explosive.
• Les éléments constituant la machine doivent être conformes aux Di-
rectives Européennes suivantes: 89/336/CEE, 73/23/CEE, 98/37 CEE
et modifications successives. Pour tous les Pays en dehors du Marché
Commun, outre aux normes nationales en vigueur il est conseillé de
respecter également les normes indiquées cihaut afin d’assurer un bon
niveau de sécurité.
•
La Société décline toute responsabilité en cas de non respect des règles de
bonne technique dans la construction des fermetures (portes, portails etc.),
ainsi qu’en cas de déformations pouvant se produire pendant l’utilisation.
• L’installation doit être conforme aux prescriptions des Directives Européen-
nes: 89/336/CEE, 73/23/CEE, 98/37 CEE et modifications successives.
•
Couperl’alimentationélectriqueavantd’effectuern’importequelleintervention
sur l’installation. Débrancher aussi les éventuelles batteries de secours.
• Prévoir sur la ligne d’alimentation de la motorisation un interrupteur ou un
magnétothermique omnipolaire avec distance d’ouverture des contacts
égale ou supérieure à 3,5 mm.
• Vérifier qu’en amont de la ligne d’alimentation il y a un interrupteur dif-
férentiel avec seuil de 0,03A.
• Vérifier si l’installation de terre est effectuée correctement: connecter
toutes les parties métalliques de la fermeture (portes, portails etc.) et
tous les composants de l’installation dotés de borne de terre.
• Appliquertouslesdispositifsde sécurité(cellulesphotoélectriques, barres
palpeusesetc.)nécessairesàprotéger lazonedesdangersd’écrasement,
d’entraînement, de cisaillement.
• Appliqueraumoinsundispositifdesignalisationlumineuse(feuclignotant)
en position visible, fixer à la structure un panneau de Attention.
• La Société décline toute responsabilité en matière de sécurité et de bon
fonctionnementde lamotorisationsi descomposantsd’autresproducteurs
sont utilisés.
• Utiliser exclusivement des pièces originales pour n’importe quel entretien
ou réparation.
• Ne pas effectuer des modifications aux composants de la motorisation
si non expressément autorisées par la Société.
• Informer l’utilisateur de l’installation sur les systèmes de commande
appliqués et sur l’exécution de l’ouverture manuelle en cas d’urgence.
• Ne pas permettre à des personnes et à des enfants de stationner dans
la zone d’action de la motorisation.
•
Nepaslaisserdesradiocommandesoud’autresdispositifsdecommandeàportée
des enfants afin d’éviter des actionnements involontaires de la motorisation.
• L’utilisateur doit éviter toute tentative d’intervention ou de réparation de
la motorisation et ne doit s’adresser qu’à du personnel qualifié.
•
Tout ce qui n’est pas expressément prévu dans ces instructions, est interdit.
• L’installation doit être faite en utilisant des dispositifs de sécurité et des
commandes conformes à la norme EN 12978.
5) GENERALITES
L’unité de commande RIGEL 5 est fournie par le constructeur avec un
réglage standard. N’importe quelle variation doit être introduite au moyen
d’un programmateur de poche universel ou un écran incorporé. L’unité de
commande supporte complètement le protocole EELINK. Les caractéristi-
ques principales sont:
- Contrôle d’un ou deux moteurs jusqu’à 600W de puissance.
- Réglage électronique du couple.
- Freinage électrodynamique réglable.
- Ralentissement de la vitesse à l’approche.
- Entrée de fins de corse fermeture/ouverture séparées pour chaque moteur.
- Sortie pour lumière de zone.
- Entrées séparées pour les sécurités.
- Sortie 12V pour électroserrure à encliquetage ou à ventouse.
- Sortie pour piloter un temporisateur.
- Entrée minuteur.
- Connecteur pour carte feu / préchauffage moteurs.
- Récepteur radio incorporé.
La carte est dotée d’un bornier de type extractible pour faciliter l’entretien
ou le remplacement. Elle est fournie avec une série de connexions volantes
précâblées pour faciliter l’installation en oeuvre.
Les connexions volantes concernent les bornes: 33-34, 35-36, 36-37, 38-39,
39-40, 41-42, 42-43, 52-55. Si les bornes surindiquées sont utilisées, enlever
les connexions volantes correspondantes.
6) CARACTERISTIQUES TECHNIQUES
Alimentation:............................................................... 230V~ ±10%, 50Hz*
Isolation ligne/basse tension:..................................... > 2MOhm 500 V
Rigidité diélectrique: ............................... ligne/bt 3750 V~ pour une minute
Courant de sortie du moteur:............................................. 3.5A+3.5A maxi
Courant de commutation relais moteur:................................................ 10A
Puissance maxi des moteurs:............................................... 600W + 600W
Lumière de zone/courtoisie: ..................................................... maxi 150W
Alimentation des accessoires:..................24V~ (1A courant absorbé maxi)
Electroserrure: ...................................12V (0.5A maxi, 2A pendant 3 s)
Sortie lumière/alarme à contact n.o. libre: .......................... maxi 3A 250V~
Témoin de portail ouvert: .....................................................24V~ 3W maxi
20 - RIGEL 5 - Ver. 07
D811472_07
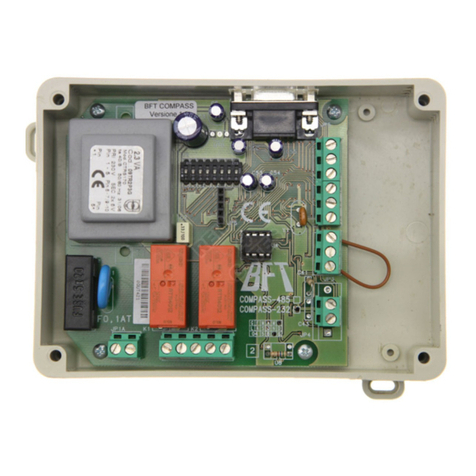
Other manuals for RIGEL 5
5
Table of contents
Languages:
Other BFT Control Unit manuals