eBoxx EASY+2 I English
Operating instructions
Dear customer,
Thank you for choosing aparcel box with the BURG-WÄCHTER eBoxx EASY+
electronics. This parcel box allows you to securely receive parcels and other
deliveries while you are out.
Important: Please read the entire operating instructions before
programming and keep this manual safe so that you can look it up
at any time.
We hope that you are pleased with your new BURG-WÄCHTER parcel box.
Your Burg-Wächter KG
Activating the electronics
Design
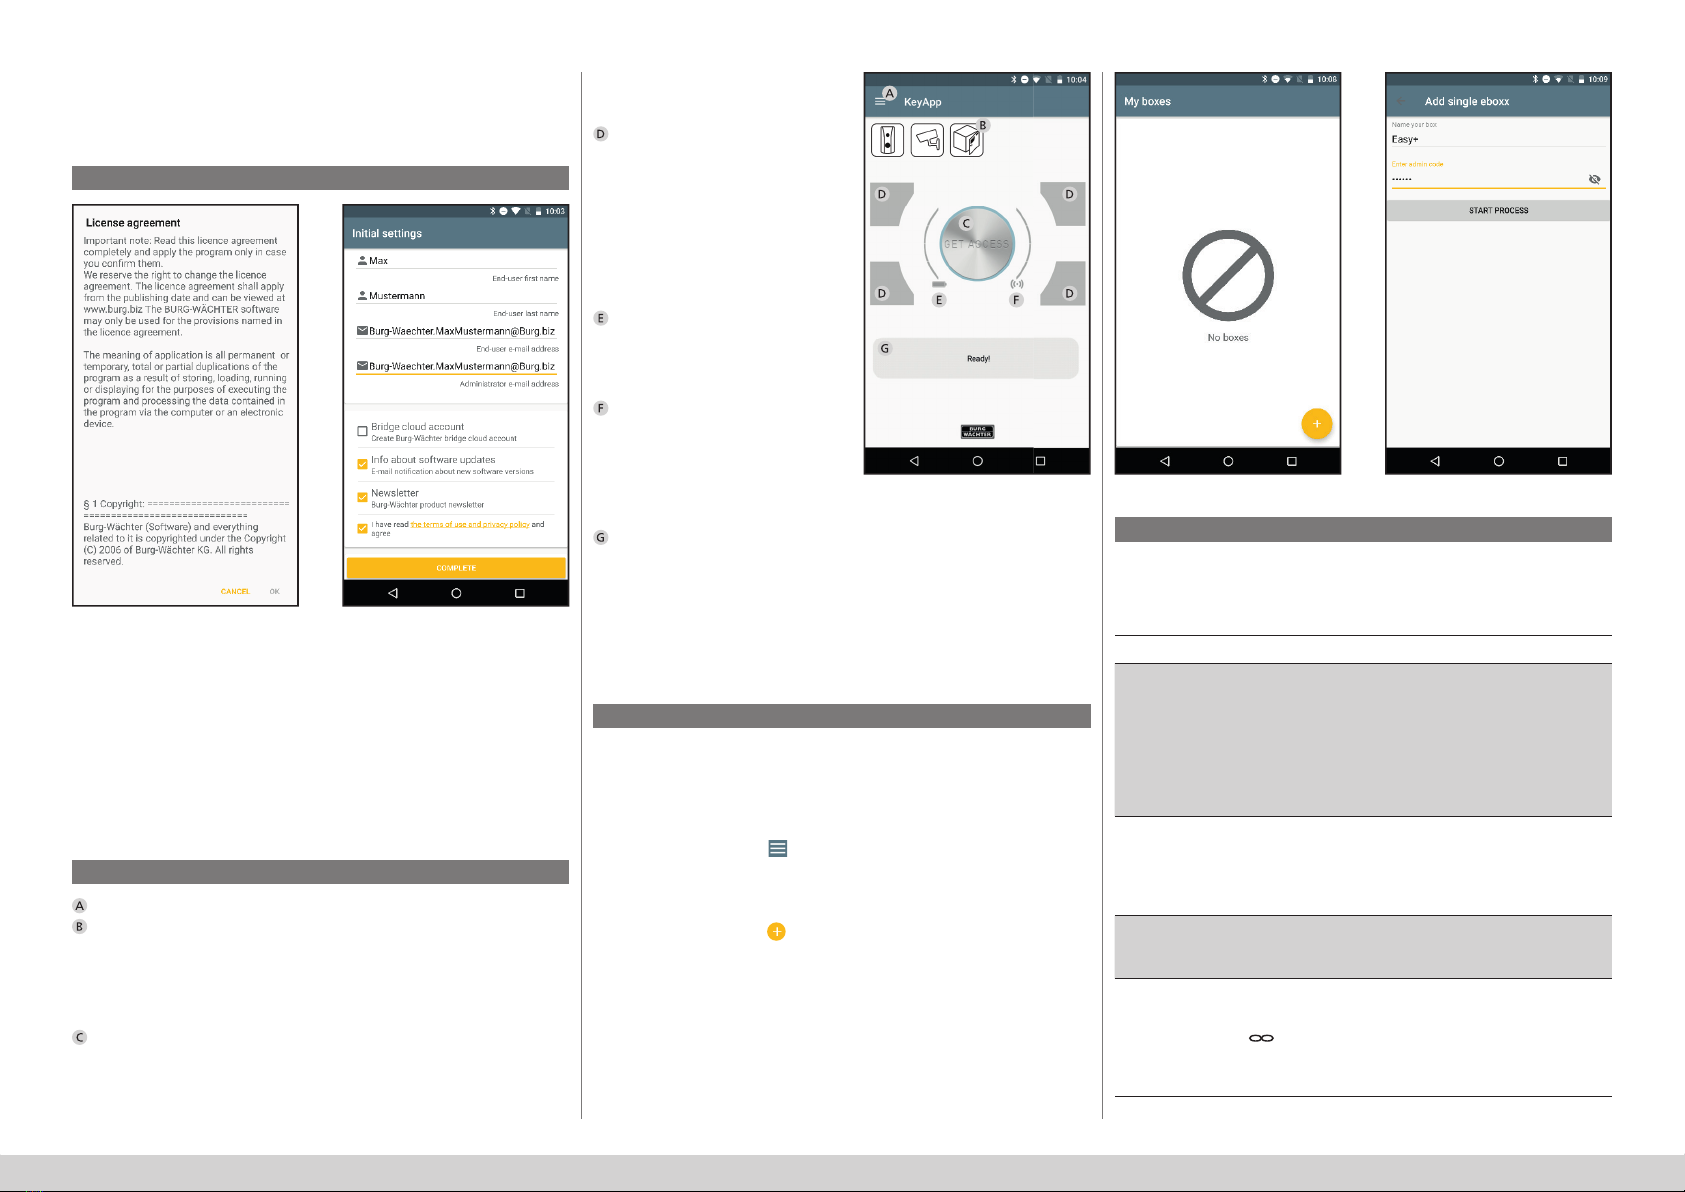
Download the secuENTRY KeyApp
General information
Blocking times
Increasing burglary protection
As asafeguard against tampering, the electronics block access for one minute
if an incorrect numerical code is entered ten times in succession. After which,
access is blocked again for one minute for each further incorrect entry. Ared
LED ashes when the blocking time is active. It is not possible to open during
this time, even with avalid user code.
Please take care that the codes do not fall into the wrong hands. Therefore,
store the codes in asafe location so that these can only be accessed by
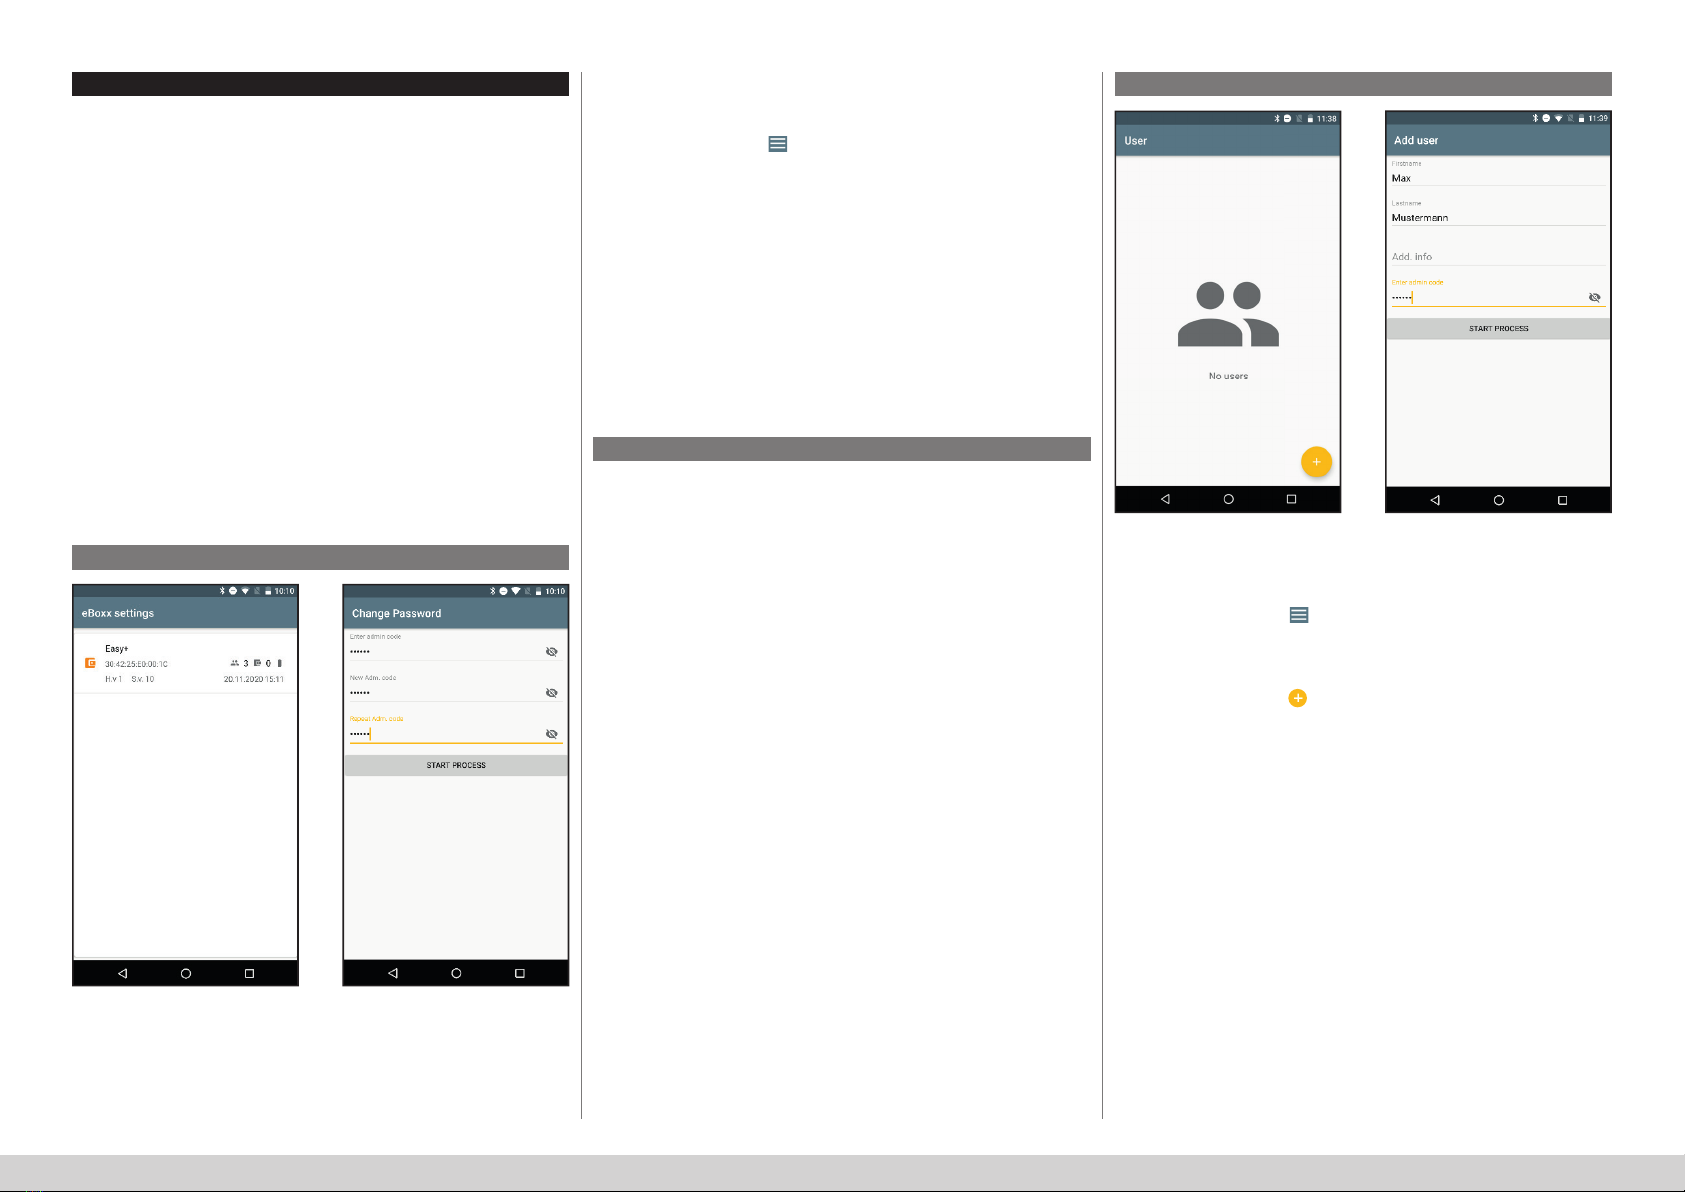
authorised persons. The lock code should be changed if the user code is
misplaced. If the administrator code is misplaced reset the eBoxx to restore
the factory code and then set up anew administrator code. Set delivery codes
should be renewed at regular intervals. Further information regarding these
codes can be found in the chapters Administrator and User.
• The factory administration code must be changed as soon as the lock is
commissioned.
• Codes that are easy to guess (e.g. 1-2-3-4-5-6) should not be used.
• Personal data (e.g. birthdays) or other data that may be concluded with
knowledge of the code owner should not be used as acode.
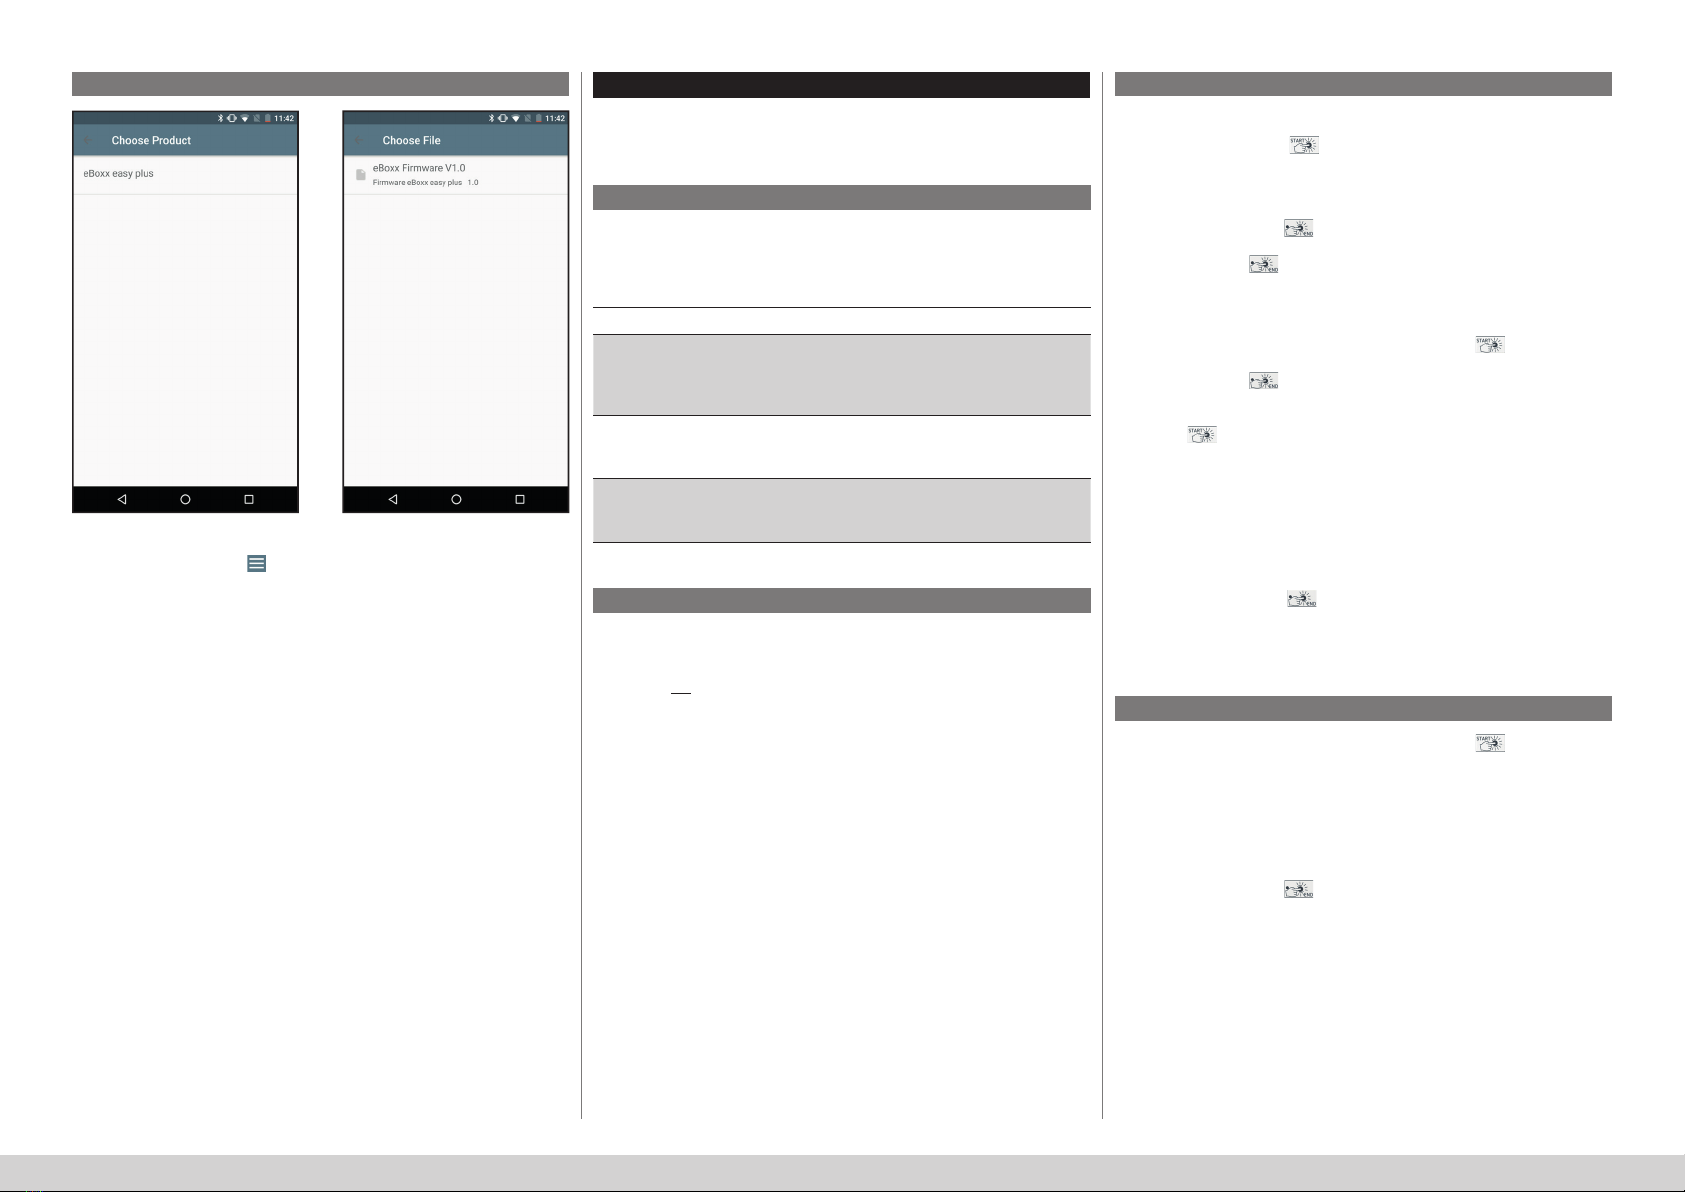
• After changing the code, the lock must be checked several times with
the door opened. This is done by operating the electronics several times
according to the instructions in the chapter "Operating the eBoxx".
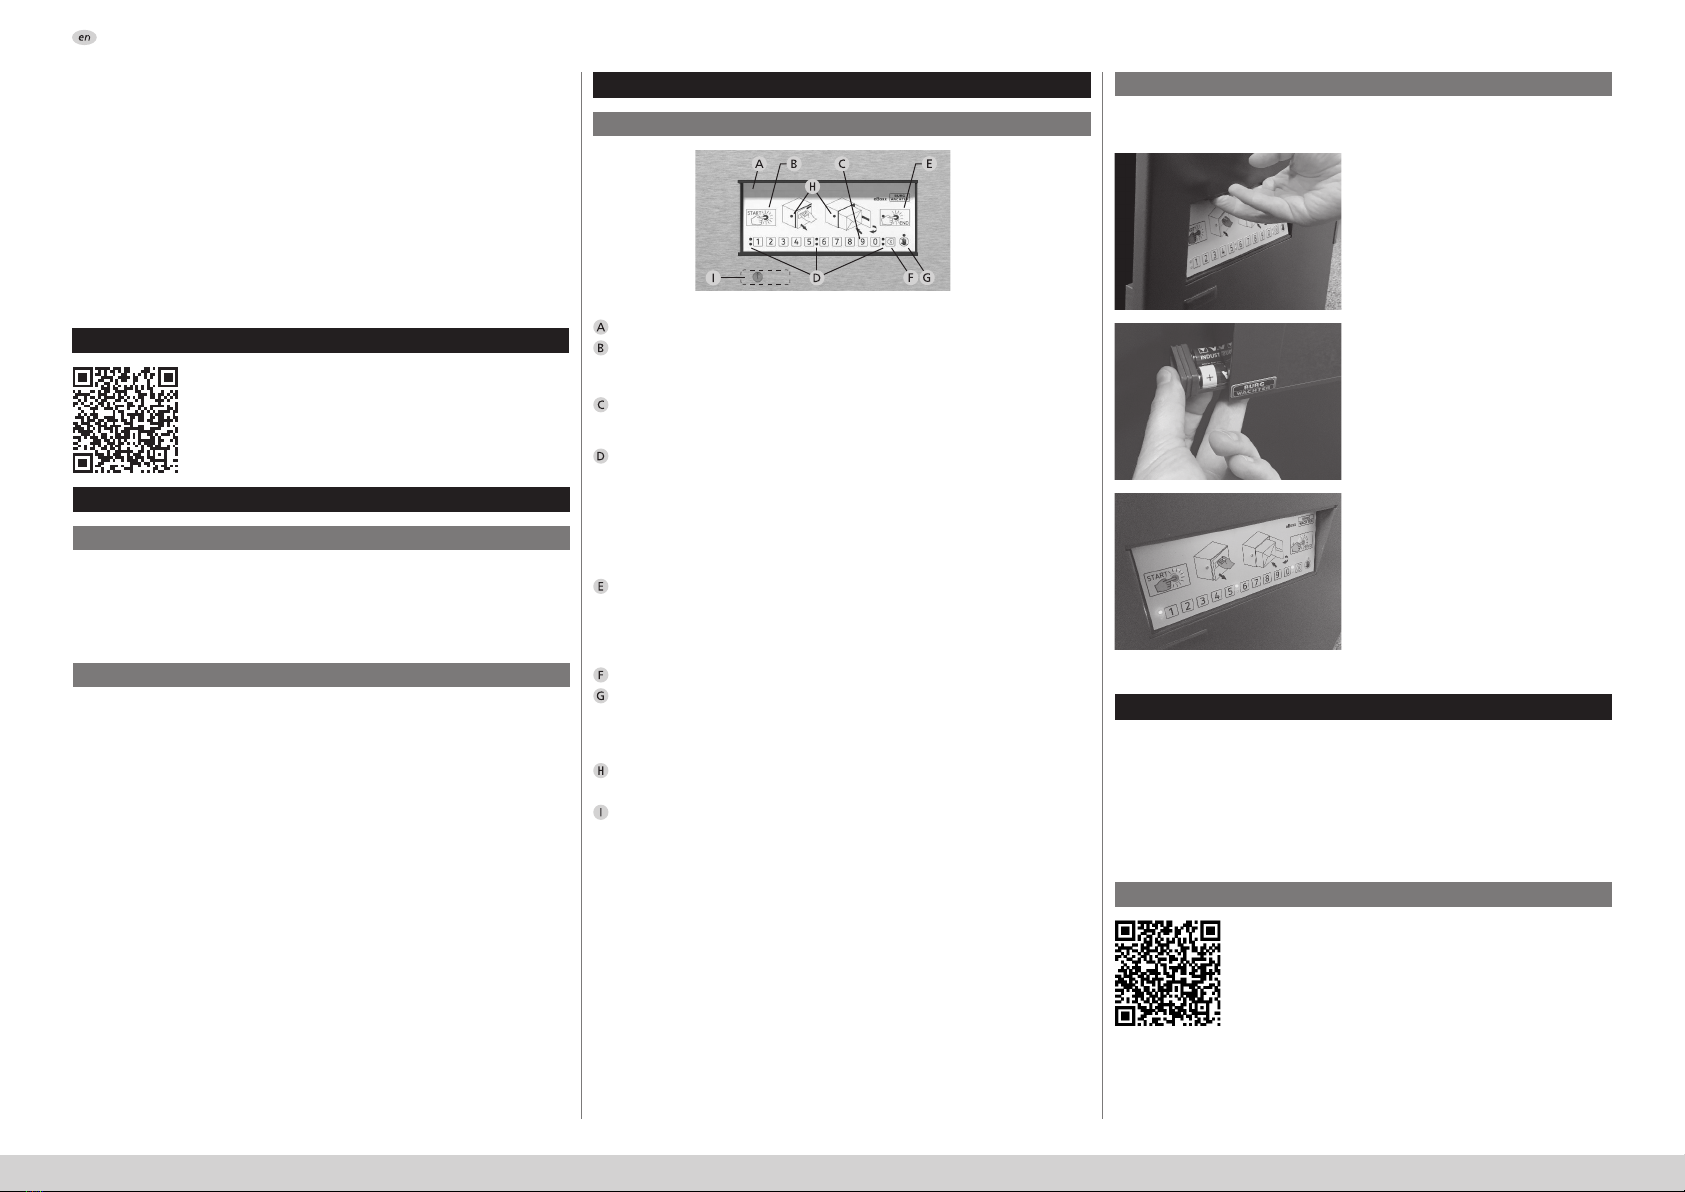
Control panel
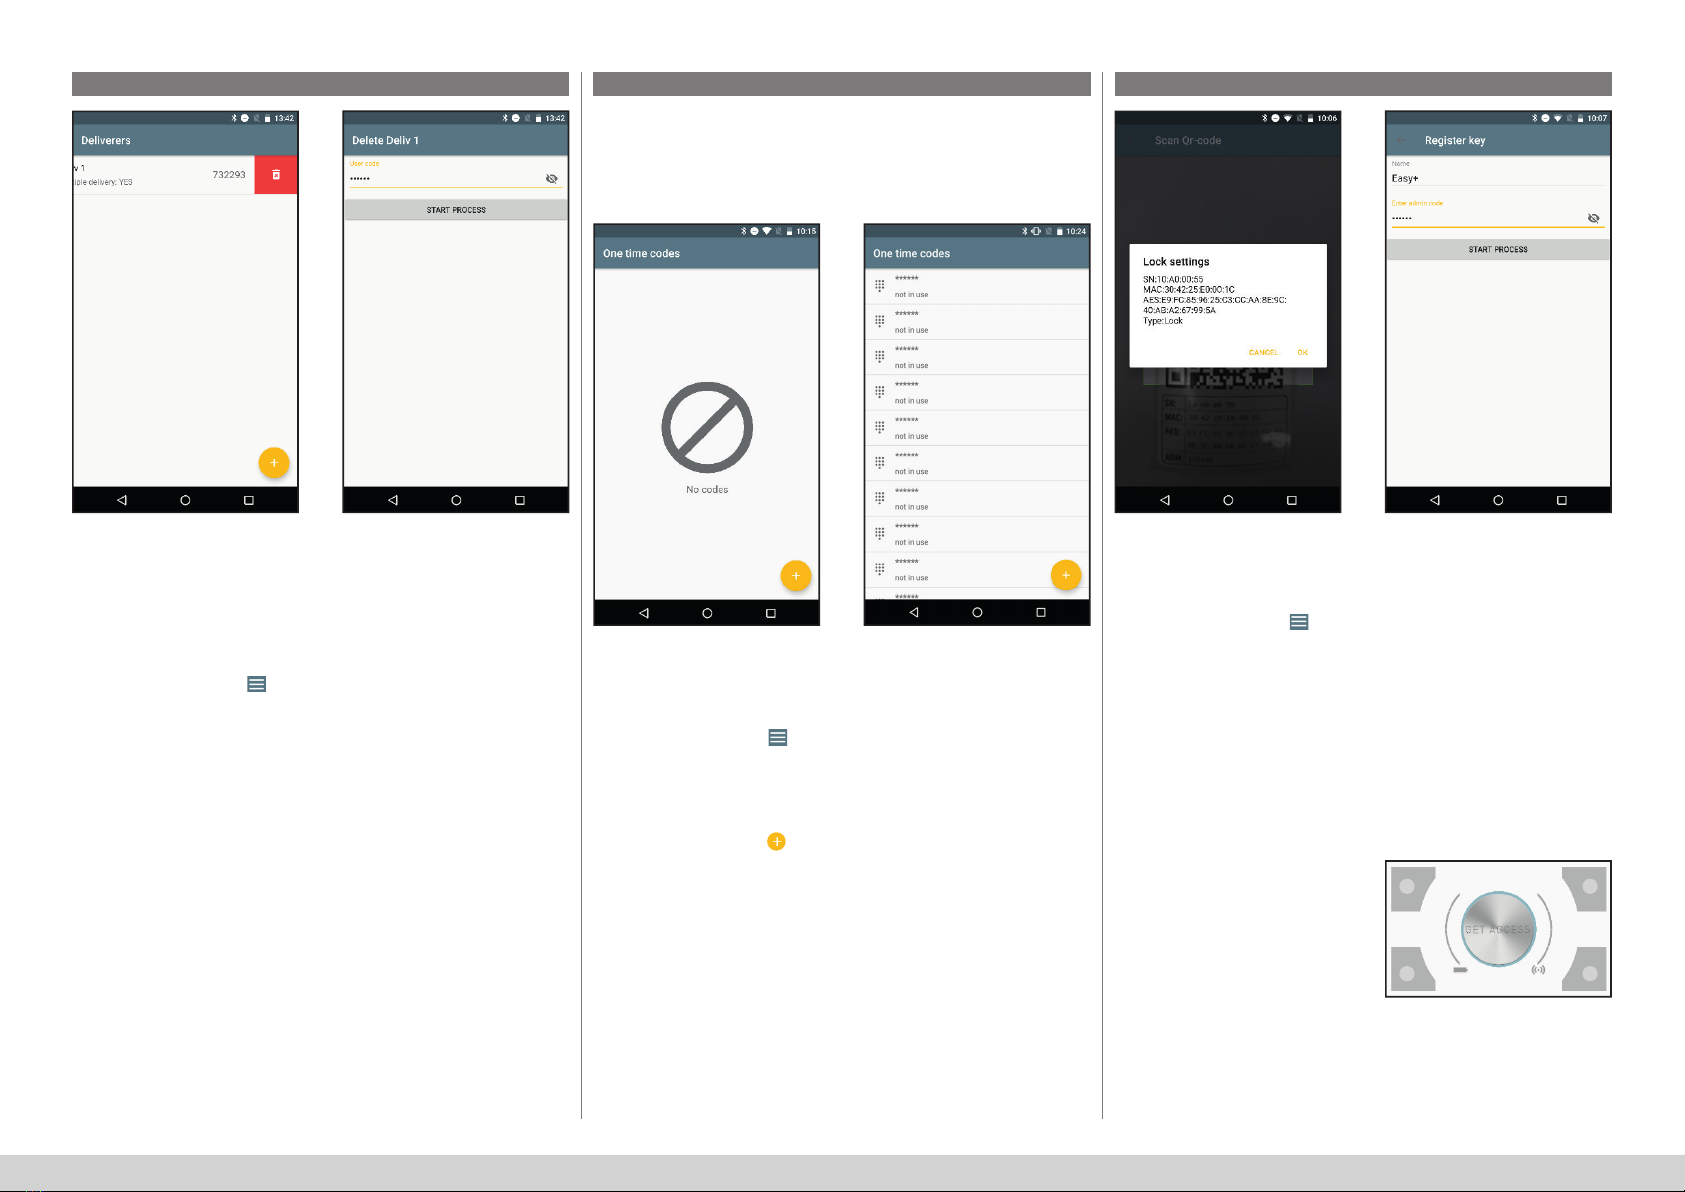
"Start" button
Initiates the opening process or opens the parcel box immediately if the
box does not contain any parcels ("Empty" status ).
Numeric buttons
The digits "1" – "0" are used for input, such as when the parcel box is
opened.
Signal LEDs
The signal LEDs adjacent to the digit keys provide further information.
(Examples):
- The red LEDs (top row) indicate the prompt to enter acode or that the
eBoxx contains aparcel (depending on the situation).
- The green LEDs (bottom row) indicate that avalid code has been entered
or that the eBoxx is empty (depending on the situation).
"End button"
- Ends the opening process and closes the parcel box. The red LED on the
"End" key indicates when the key can be activated for this purpose.
- Status query. The eBoxx status can be queried independently of the
opening process by pressing the "End" button (see chapter "eboxx status").
"Delete" buttonDeletes entered digits.
Display indicating unauthorised code as well as blocking time.
This LED indicates that the code entered does not have the authorisation to
open the eBoxx at the current time. The LED also indicates when the eBoxx
has been blocked because too many incorrect entries have been made.
Display indicating authorised opening
These LEDs ash when the door can be opened and aparcel inserted.
Emergency lock
Used for opening in an emergency
Please only remove the cover over the
emergency lock if you need to open the eBoxx in an emergency.
Opening
theparcel box using the enclosed key is only intended for emergencies.
This procedure does not change the status of the eBoxx and will cause the
unit to malfunction.
The BURG-WÄCHTER eBoxx EASY+
eBoxx instructions
Instructions for using the eBoxx, its conguration,
theass
ociated app and notes on setting up the storage
location can be found using the following link:
https://www.burg.biz/bedienungsanleitung-
paketkasten-eboxx-easy-plus/
or directly via the QR code displayed.
Download the secuENTRY KeyApp for your particular
operating system. The corresponding AppStore links can
be found on our website:
https://www.burg.biz/bedienungsanleitung-
paketkasten-eboxx-easy-plus/
or directly from the QR code shown.
To save data volume, we recommend downloading the
secuENTRY KeyApp when connected to aWi-Fi network.
secuENTRY KeyApp
The rst step is to remove the battery compartment contact strip.
Proceedasfollows:
The secuENTRY KeyApp is the smart all-round opening app from
BURG-WÄCHTER. It enables asmartphone to be used as akey by
controlling and managing all BURG-WÄCHTER secu-ENTRY cylinders.
Other smart BURG-WÄCHTER products can also be controlled via the
KeyApp. eBoxxes can be opened or the contents status can be viewed.
WLAN cameras can also be integrated, as can the Door eGuard Video
Bell doorbell system with image and sound.
Open the eBoxx by pulling the door
using the recessed grip above the
keypad. Please remove and retain
all of the documents supplied with
the parcel box, store in asafe and
secure place.
Pull out the battery compartment
which is located on the inside of
the door to the bottom left of the
electronics, remove the contact strip
and reinsert the battery compartment
with the required batteries.
An automatic calibration process
starts when the batteries are
deposited. All of the LEDs on the
eBoxx illuminate for one second
and the eBoxx EASY+ lock is opened
and closed several times. After
calibration the lock is in the "Open"
status. Please do not close the
door. Perform the following steps
immediately and with the door open.
Attention: If the door is locked at
this point, it can only be opened
using the emergency lock.