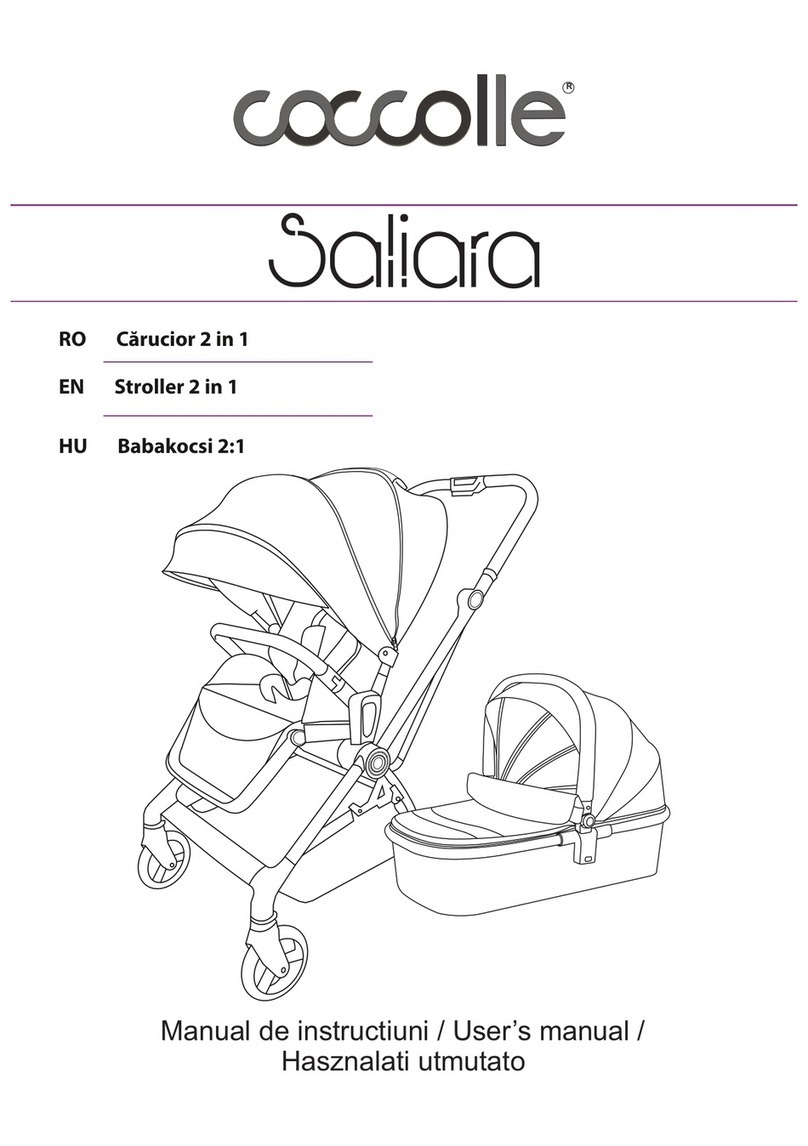
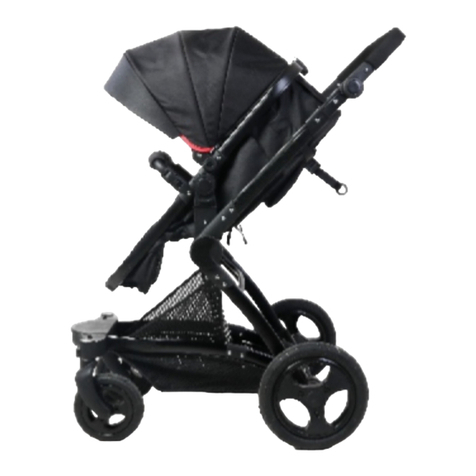
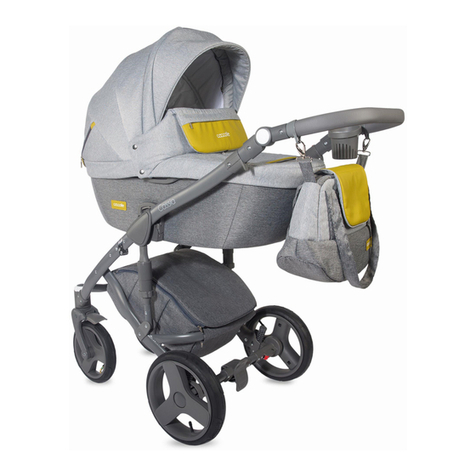
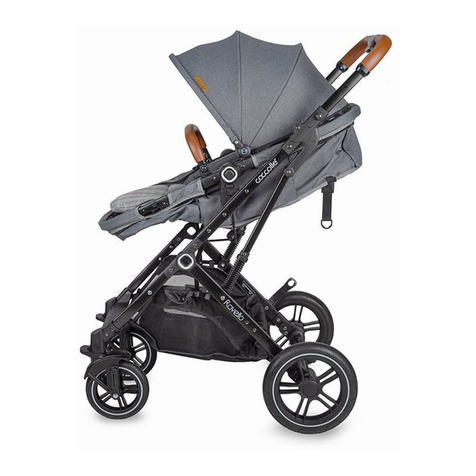
Coccolle Silene User manual

RO Cărucior 2 in 1
EN Stroller 2 in 1
Manual de instructiuni / User’s manual /
Hasznalati utmutato
R
HU Babakocsi 2:1

HU: Az útmutatóban bemutatott képek szemléletes célt szolgálnak. Az Ön
által megvásárolt termék eltérő lehet. / A termék helyese müködéséhez
kötelezö hogy a tisztitási és karbantartási utasitást is betartsa.
EN: the images shown in this instructions manual have illustrative
purpose. The product purchased by you may look different. / The proper
functioning of this product is strictly dependent on its well maintenance.
RO: imaginile din acest manual au scop ilustrativ. Produsul achizitionat
de dvs poate sa difere. / Functionarea in parametri normali a acestui
produs depinde de mentinerea acestuia in conditii de igiena propice.

7
1 2
8
CLICK
34
PUSH
65

910
11
12
PUSH
13

PUSH
14
15
16 17
18 19 20

2221
23 24

6. Orice încărcătură agațată pe mânerul căruciorului afectează stabilitatea
acestuia.
1. Nu lăsaţi niciodată copilul nesupravegheat in carucior!
16. Obiectele amplasate in geanta căruciorului nu trebuie să depăşească 2 kg.
21. Păstraţi căruciorul în locuri ferite, departe de copii.
14. Activați întotdeauna frâna în timpul staţionarii, montării sau demontării de
accesorii ori când aşezaţi sau ridicaţi copilul din cărucior.
13. Copilul trebuie să fie scos din raza de acţiune a părţilor mobile atunci când
faceţi ajustări căruciorului.
5. Întotdeauna folosiţi centura abdominală împreună cu modulul central al
cataramei.
17. Orice geantă sau încărcătură suplimentară agățată de mânerul cărucioului
afectează stabilitatea acestuia.
Atentionari de siguranta
4. Înainte de utilizare, asigurați-vă că toate mecanismele de siguranţă ale
căruciorului sunt fixate corect.
7. Nu utilizaţi acest produs în alte scopuri decât cele prevăzute de către
producător.
Pentru siguranța copilului dvs. citiți cu atenție acest manual de
instrucțiuni și păstrați-l pentru referințe viitoare. Nerespectarea indicațiilor
din acest manual poate avea riscuri asupra sănătății copilului și poate
conduce la pierderea garanției produsului.
3. Nu folosiţi saltele suplimentare în acest cărucior.
10. Nu lăsaţi copilul în cărucior atunci când acesta este aflat în pantă, chiar
dacă a fost activată frâna.
2. Folosirea centurilor de siguranță este obligatorie, în specoal copilul începe să
stea singur în șezut.
Sistem modular 2in1 Coccolle Silene
9. Acest cărucior este recomandat copiilor cu vârsta între 0 - 36 luni şi cu
greutatea de pana la 15 kg.
12. Pe durata montării/deschiderii sau demontării/închiderii, asiguraţi-vă că
micuțul se află la o distanţă sigură de cărucior.
8. Acest vehicul este utilizabil doar de către un singur copil în același timp.
11. Nu utilizaţi căruciorul dacă descoperiţi defecte de orice fel.
18. Folosiţi numai accesorii sau componente aprobate de producător.
15. Obiectele amplasate in coşul pentru cumpărături nu trebuie să depăşească
3 kg.
19. Atunci când doriți să urcați borduri, trepte sau obstacole ridicați partea din
faţă a căruciorului.
20. Nu coborâţi cu produsul pe trepte/scări.
RO

RO
Intretinere si curatare
Căruciorul necesită întreţinere periodică. Având în vedere destinaţia acestuia
(utilizare în aer liber în diferite condiţii atmosferice şi pe diferite suprafeţe)
respectarea condiţiilor
de întreţinere de mai jos este necesară pentru funcţionarea corectă a
căruciorului.
4. Este interzisă folosirea înălbitorilor. Puteţi folosi doar detergenţi delicaţi.
7. Piesele mobile trebuie întreţinute în mod periodic prin utilizarea produselor de
curăţare-lubrifiere cu evaporare rapidă de tip WD-40.
6. Nu expuneţi produsul în lumina directă a soarelui deoarece componentele
textile şi elementele din plastic se pot decolora sau deteriora.
10. Evitaţi contactul cu apă sărată (apă de mare, briză marină, sare de asfalt),
pentru a preveni coroziunea.
3. Datorită componentelor structurale utilizate (elemente de rigidizare, întărire,
umplere), nu spălaţi piesele textile în maşină de spălat, nu centrifugați şi nu
lăsaţi aceste textile înmuiate în apă pentru mai mult timp.
11. Intervalul de temperaturi admisibil pentru utilizarea căruciorului: de la -5
până la +35 °C.
1. Garanţia nu acoperă:
1. Piesele din metal pot fi curăţate cu o cârpă umedă cu folosirea detergentului
delicat. După curăţare produsul trebuie uscat pentru a preveni ruginirea
acestuia.
- Deteriorările apărute din vina utilizatorului.
5. În cazul în care produsul a fost udat, uscaţi componentele metalice ale
acestuia în mod natural, lăsându-l la uscare totală într-un loc cu ventilaţie bună.
9. Curăţaţi în mod regulat roţile, frânele şi elementele de suspensie pentru a
elimina depunerile de nisip, sare şi alte impurităţi. Nu folosiţi lubrifianţi în locuri
în care poate pătrunde nisip.
2. Părțile textile se pot curăţa cu o cârpă umedă și un detergent neutru. După
curăţare produsul trebuie uscat în mod natural într-un loc în care aceasta nu
este expus în lumina directă a soarelui sau prin plasarea lui într-un loc cu
ventilaţie bună.
- Deteriorările apărute din cauza nerespectării recomandărilor, avertizărilor şi
restricţiilor incluse în
8. Verificaţi periodic reglajul hamului de siguranţă şi al altor elemente reglabile.
Conditii de pastrare a garantiei
instrucţiunile de utilizare, precum şi pe elementele produsului.
îndelungate la soare sau la temperaturile ridicate, jocuri, zgomote cum ar fi
scârţâit/ piuit, deteriorările mecanismelor din cauza murdăriei.
- Uzura normală a pieselor de schimb, cum ar fi: anvelope, camere de aer,
banda de rulare, materialele utilizate pe mânere, structura şi culoarea ţesăturilor
şi materialelor expuse la frecare, bucşele din roţi, axe, elementele imprimate.
- Deteriorările cauzate de nerespectarea condiţiilor de întreţinere de exemplu:
coroziune, modificarea culorii materialului textil sau a elementelor din plastic ca
urmare a expunerii îndelungate la soare, deteriorarea elementelor din plastic
sau a componetelor textile ca urmare a expunerii
RO
3. Produsul trimis in service pentru reparatie trebuie sa fie expediat curat.
- Deteriorări şi murdăriri cauzate de ambalarea necorespunzătoare a produsului
pe timpul trimiterii
Montarea şi demontarea roţilor
Folosirea funcției de pivot a roților din față
Instructiuni de asamblare
2. Modul de reparaţie va fi stabilit de către producător/firma care realizează
rezolvarea solicitărilor privind garanția.
acestuia prin serviciul de curierat.
4. Garanţia pentru bunuri de consum vândute nu exclude şi nu suspendă
drepturile cumpărătorului rezultând din lipsa de conformitate a bunurilor de uz
îndelungat.
Desfacerea căruciorului
Pentru a deplia căruciorul, deschideți clema de siguranță (fig. 1) și ridicați
mânerul căruciorului până când acesta s-a depliat complet (fig. 2, 3).
ATENŢIE! Înainte de a utiliza căruciorul asiguraţi-vă că acesta este depliat
corect.
Pentru a monta roţile din faţă, introduceţi butucul acestora în locașul
corespunzător din partea frontală a cadrului. (fig. 4). Pentru a demonta roțile,
apăsați butonul care se află pe partea laterală a suportului roții și scoateți roata
din cadru (fig. 5). Pentru a monta roţile din spate, introduceţi butucii în axurile de
fixare care se află în suspensia posterioară a cadrului (fig. 6). Pentru a demonta
roţile, apăsaţi butonul de metal din partea inferioară a axului de fixare şi scoateţi
roata (fig. 7).
Căruciorul are un sistem de roţi faţă pivotante care ofera si posibilitatea blocării
sensului de mers pe faţă. Pentru ca roțile să se poată pivota, împingeți în jos
maneta care se află pe partea din față a roții (fig. 8). Ca să blocați roțile pentru
mersul înainte, ridicați maneta.
Folosirea frânei
ATENŢIE! Înainte de a începe să împingeți căruciorul asiguraţi-vă că frâna este
deblocată.
ATENŢIE! Blocaţi întotdeauna frâna atunci când lăsaţi căruciorul pe o suprafaţă
înclinată.
Căruciorul este dotat cu frâna pe roțile spate. Pentru a activa frâna, apăsaţi-o
ferm (fig. 9). Pentru a o debloca ridicaţi-o în sus.
ATENŢIE! Nu utilizaţi frâna pentru a încetini mersul căruciorului. Blocaţi frâna
doar după oprirea completă a căruciorului.
ATENŢIE! Căruciorul nu este destinat pentru alergare.
- Deteriorările cauzate de reparaţii efectuate de către persoane neautorizate.
- Devierea verticală a roţilor sub sarcină (aceasta este o caracteristică normală
pentru acest tip de construcţie).

RO
ATENŢIE! Înainte de a utiliza căruciorul, asiguraţi-vă că unitatea sport este
corect montată.
Montarea şi demontarea unității sport
Pentru a monta unitatea sport, introduceţi adaptoarele acestuia în sloturile de
fixare care se află pe cadrul căruciorului. Unitatea sport poate fi montată atât cu
faţa cât şi cu spate la direcţia de mers
(fig. 10).
ATENŢIE! Niciodată nu mutaţi căruciorul ţinând de unitatea sport.
Pentru a demonta unitatea sport, apăsaţi simultan butoanele care se află pe
ambele părţi ale adaptoarelor şi ridicați unitatea de pe cadru (fig. 10).
Montarea şi demontarea copertinei
Pentru a monta bara de protecţie, introduceţi capetele acesteia în slotul
corespunzător de pe unitatea sport. Pentru a demonta bara, apăsaţi butoanele
care se află în partea de jos a unității și îndepărtați-o(fig. 13). Demontați bara de
protecție înainte de a plia căruciorul.
ATENŢIE! Nu transportaţi căruciorul ţinându-l de bara de protecție.
ATENŢIE! Utilizarea bării de protecţie nu exonerează de obligaţia folosirii
centurii de siguranţă.
Reglarea suportului de picioare
Pentru a regla poziția suportul pentru picioare, apăsaţi butoanele rotunzi care se
află pe părţile laterale ale acestuia (fig. 14) atunci când doriți să îl lăsați jos.
Pentru a ridica suportul pentru picioare, este suficient să-l împingeţi în sus.
ATENŢIE! Suportul de picioare are rolul de a sprijini picioarelor copilului. În
cazul în care copilul este în poziţia aşezat, suportul pentru picioare trebuie să fie
coborât.
Pentru a monta copertina, introduceţi cârligele acesteia în dispozitivele de fixare
care se află pe cadrul scaunului (fig. 11). Apoi, trageți copertina în poziţia dorită
(fig. 12). Copertina este prevăzută cu un compartiment suplimentar ce se
deschide printr-un fermoar astfel încât să conferire acoperire perfectă chiar și în
poziția complet pe spate.
Montarea şi demontarea bării de protecţie
Spătarul este prevăzut cu sistem de reglare în 3 poziţii. Pentru a coborî spătarul,
trageţi butonul care se află în partea posterioară a spătarului şi ajustaţi-l în
poziţia dorită (fig. 15). Pentru a ridica spătarul, este suficient să-l împingeţi în
sus. Acesta se va bloca automat în poziţia respectivă.
Reglarea spătarului
Utilizarea centurii de siguranţă
Căruciorul este echipat cu o unitate sport destinată copiilor cu vârsta cuprinsă
între 0-36 de Luni și este dotată cu centură de siguranţă în 5 puncte. Hamurile
care trec peste umeri trebuie ajustate conform vârstei copilului. În spătar se află
două perechi de sloturi pentru hamurile de umeri. Pentru copiii cu vârstă mai
mică de 6 luni folosiţi orificiile care se află în partea inferioară.

RO
ATENŢIE! La transportarea în cărucior a copilului cu vârstă sub 6 luni, spătarul
trebuie aşezat în poziţie complet pe spate.
Reglarea înălțimii mânerului
Pentru copii cu vârstă de peste 6 luni folosiţi sloturile situate mai sus. Pentru a
închide centura de siguranţă în 5 puncte, împreunați dispozitivele de închidere
ale hamurilor pentru umeri cu dispozitivele de închidere ale centurilor
abdominale şi apoi introduceţi-le în catarama centrală situată în punctul central
(fig. 16). Ajustaţi lungimea centurilor astfel încât să adere la corpul copilului fără
să-l sufoce. (fig. 17). Pentru a deschide centura de siguranţă, apăsaţi butonul de
pe catarama centrale şi dezlegaţi dispozitivele de închidere ale centurilor (fig.
18).
Plierea căruciorului
ATENŢIE! Înainte de a utiliza căruciorul, asiguraţi-vă dacă landoul este montat
corect. Pentru a demonta landoul, apăsaţi butoanele de pe adaptoarele situate
pe părţile laterale ale landoului şi ridicați landoul (fig. 24).
Căruciorul este dotat cu mâner cu reglare telescopică a înălțimii. Pentru a regla
mânerul apăsați butonul de deblocare situat în centrul acestuia şi setați
înălțimea corespunzătoare.
Montarea scaunului auto pe cadru
Acest cărucior poate fi folosit cu orice scaun auto care se potrivește cu adaptorii
pe care îi aveți în pachet. Recomandăm utilizarea sistemului modular cu
scaunul auto GB Idan, produs certificat normelor iSize. Îndepărtați unitatea
sport/landoul de pe cadru, apoi introduceți în sloturi adaptorii pe care puteți apoi
montați coșul auto. Pe adaptori se regăsesc și butoanele cu ajutorul căror puteți
demonta coșul de pe cadru.
Asamblarea landoului
Pentru a plia căruciorul, întoarceți roțile din față conform figurii. Apoi pliați
scaunul, împingând suportul de picioare în direcția spătarului (fig. 19). Împingeți
în lateral butonul mic care se află pe mânerul căruciorului, țineți-l și, în aceeași
timp, apăsați butonul cel mare (fig. 20). Împingeți mânerul până la plierea
completă a căruciorului (fig. 21).
Montarea şi demontarea landoului pe cadru
Pentru a monta landoul, plasați-l pe cadrul căruciorului astfel încât adaptorii care
se află pe părţile laterale ale landoului să se blocheze în dispozitivele de
prindere de pe cadrul căruciorului (fig. 22, 23). Blocarea se face în mod
automat.
Depliați landoul tragând cele 2 axuri metalice în partea dreaptă, respectiv
stângă. Acoperiți-le cu salteluța (fig.1a-1b). Inserați bara de protecție a landoului
în sloturile corespunzătoare (1c). Trageți copertina spre dvs pentru a o deschide
complet (1d).

EN
10. Do not leave the stroller with a baby on the slope, even if the brake is
locked.
9. This stroller is designated for the babies up to 0 - 36 months and weight 15 kg
11. Do not use the stroller, if any component is damaged.
13. Making any adjustments, make sure that the movable parts are not close to
the baby's body.
12. During the assembling and disassembling the stroller, be sure that the baby
is at the safe distance.
14. Always lock the brake when you're not pushing the stroller.
15. Maximum load of the shopping basket is 3 kg.
17. Every bag or other load hanging on the handle affects its stability.
16. Maximum load of the bag is 2 kg.
Coccolle Silene multifunctional 2in1 baby stroller
3. Do not use any additional mattress in the product.
2. Use the safety belt once the baby begins to sit on his own.
6. Every load hanging on the handle affects the stroller's stability.
For your child's safety please read this manual and keep it for future
reference. Using the product in ways other than the ones indicated in this
manual can cause harm to your child and might lead to losing the
warranty of your product.
Safety warnigns
1. Never leave the child unattended while in the stroller.
4. Before usage make sure that the moving mechanisms are blocked.
5. Always use the crotch belt together with the hip belt.
8. This stroller has been designed to be used by one child only.
7. This product is not designed for skating, going rollerblading, jogging or
running.
19. When pushing the stroller on pavement or any other steep surface please lift
the front axle.
Cleaning and maintenance
20. Do not push the stroller on stairs.
4. It is forbidden to use bleach. Use mild detergents only.
21. The stroller should be kept away from babies.
2. The upholstery may be cleaned using a damp cloth with mild washing agent.
Once cleaned, the upholstery should be dried by hanging in a place not exposed
to prolonged sunlight or leave spread out in a well ventilated place.
The stroller requires periodic maintenance. Given the fact that it has been
designed for outdoor use observing the following maintenance guidelines is
necessary for its correct functioning.
3. It is forbidden to wash the upholstery in a washing machine, to tumble dry it or
soak it for long periods due to the structural elements used (stiffeners,
reinforcements, filling).
1. Metal parts may be cleaned using a damp cloth with mild detergent. Once
cleaned wipe dry to prevent corrosion.
18. Only use original spare parts, confirmed by the producer.

EN
7. Moving parts should be periodically treated with fast evaporating cleaning and
lubricating agents such as WD-40.
6. Do not expose the product to direct sunlight for prolonged periods as the
upholstery and plastic parts may become discoloured or damaged.
1. The warranty does not cover:
5. If the product becomes wet, wipe dry the metal parts and leave the product
unfolded in a well ventilated place until it is completely dry.
8. Safety belts and other adjustable elements should be checked regularly.
10. regularly. Do not use lubricant in places exposed to sand ingression.
- Damage occurred as a result of failure to use the product according to
recommendations, warnings and restrictions found in the user manual and on
product elements.
11. Avoid contact with salt water (seawater, sea breeze, road salt) in order to
prevent corrosion.
- Damage occurred for reasons attributable to the user.
- Consumables subject to natural wear and tear during normal usage such as:
tyres, inner tubes, tread, materials used on handles, structure and colour of
fabrics and materials subject to friction, sleeves in wheels, axels, prints.
- Damage occurred due to repairs being carried out by unauthorised personnel.
- Damage and soiling occurred due to the product being incorrectly packaged for
shipping (courier online purchases).
2. The repair method is determined by the manufacturer/warranty service
provider.
3. The product subject to a complaint should be provided clean.
4. The consumer goods warranty does not exclude or suspend the purchaser's
rights stemming from goods noncompliance with the agreement.
9. Sand, salt and other contaminants should be removed from wheels, breaks
and suspension
Warranty conditions
- Damage occurred as a result of failure to observe maintenance guidelines
such as: corrosion, changed upholstery or plastic elements colour as a result of
prolonged exposure to sunlight, damage to plastic elements of upholstery as a
result of prolonged exposure to sunlight or excessive temperatures, excessive
play, squeaking / creaking noises, damage to mechanism due to over-load.
12. Stroller functional temperature range: from -5 to +35 °C
- Single wheels being pushed into a vertical position as a result of loading (this
is normal).
Assembly steps
NOTE! Before starting to use the pram, make sure that it has been correctly
unfolded.
In order to unfold the stroller, release the automatic lock (fig. 1) and pull the
stroller handlebar upward until fully unfolded (fig. 2, 3).
Unfolding the stroller

EN
In order to assemble the canopy, insert its hooks on the handles on the stroller
frame (fig. 11). Set the canopy in the desired position (fig. 12). The canopy is
equipped with additional for maximum coverage during the full recline position.
In order to reveal it, unzip the top of the canopy.
Using the brake
Assembly and removal of the bumper bar
NOTE! Never move the stroller by holding the seat. In order to remove the seat,
push the buttons located on both sides of its adapters and pull the seat up (Fig.
10).
NOTE! The brake is not designed for slowing down. It should be engaged after
the pram has been stopped completely.
The stroller has swiveling front wheels, which may also be locked in a forward
facing position. To allow the wheels to rotate, move the lever on the front of the
wheel down (fig. 8). To lock the wheels for straight pushing, move the lever
upwards.
NOTE! The pram is not designed for running.
In order to assemble the seat, unstick the seat adapters from the handle on the
stroller frame. The seat can be assembly both facing and back to the direction of
travel (fig. 10).
NOTE! Before starting to push the pram, make sure that the brake has been
disengaged.
To attach the front wheels, push their hubs into the mounts on the ends of the
front tubes (fig. 4). To remove the wheels, press the button on the side of the
wheel holder and pull the hub out of the holder (fig. 5). To attach the rear
wheels, push their hubs into the mounts on the rear suspension (fig. 6). To
remove the wheels press the metal button on the bottom of the wheel mounts
and slide the hubs out (fig. 7).
The pram is equipped with a rear parking brake. To engage the brake, press its
lever down (Fig. 9). In order to disengage it, lift the lever.
ATTENTION! Make sure the wheels are correctly attached prior to use.
NOTE! Always engage the safety brake, when you leave the pram on an
inclined surface.
Swiveling front wheel system
Attaching and removing wheels
Assembly and removing the seat
NOTE! Before usage, make sure that the seat is properly assembled.
Assembly and removing the canopy
In order to assemble the bar, insert its hooks on the handles on the seat side
tubes. In order to remove it, push the buttons located in the lower part of the
handles and slide the clips out (fig. 13).
Remove the bumper bar before folding the pram.
NOTE! Using the bumper bar does not exempt from the obligation of using the
seat belts.
NOTE! Never move the stroller by holding the bumper bar.

EN
The stroller's seat unit has a 3-position adjustment of the backrest. In order to
lower the backrest, pull the lever on the rear of the backrest and set the desired
position (fig. 15). In order to lift the backrest, just push it upward. It locks
automatically in the desired position.
Backrest adjustment
Footrest adjustment
In order to lower the footrest, press the round buttons on its sides (fig. 14). In
order to raise the footrest, just lift it upwards.
NOTE! The footrest is to support the legs of a child. If a child is in a sitting
position, the footrest must be lowered.
To fold the pram, rotate the front wheels as shown in the figure. Then fold the
seat by pushing the foothold towards the backrest (fig. 19). Slide the small
button on the pram's guide to the side, hold it and at the same time press the big
button (fig. 20). Push the handle until the pram is completely folded (fig. 21).
Assembly of the carrycot
Unfold the carrycot by pulling the rods that support the carrycot's frame left and
right. Cover them with the mattress (fig.1a-1b). Attach the carrycot's bumper by
inserting it in the proper slots on the frame (1c). Pull the canopy towards you to
unfold it at its entire length (1d).
Folding the stroller
The pram has a telescopic height-adjustable pushbar. To adjust it at the suitable
height for you, press the button in the centre and adjust the height.
The seat unit has a five point safety harness appropriate for children from birth.
The shoulder straps should be adjusted according to the child's age. There are
two pairs of slots in the backrest for the shoulder straps. The lower slots should
be used for children less than six months old. The upper slots should be used
for children older than six months old. To put the five point safety harness on,
connect the shoulder straps with the hip straps and then slot them into the
central buckle attached to the groin strap. (fig. 16). Adjust all the straps and belts
so that they are snug with the child's body, but at the same time are not
uncomfortable (fig. 17). To open the harness press the button on the central
buckle and disconnect all straps (fig. 18).
Using the 5 points safety harness
ATTENTION! If the pram is used to carry a child less than 6 months old, the
backrest has to be in a lie flat position.
Pushbar adjustment

EN
In order to attach the carrycot press it into the pram frame so that the adapters
on both sides of the carrycot lock onto the catches on the pram frame (fig. 22,
23). They will lock in place automatically.
Placing the infant carrier on the stroller's frame
Attaching and removing the carrycot
You may use this stroller with any infant carrier that fits the adapter in package.
We recommend using the GB Idan iSize certified car seat. Remove the
seat/carrycot from the frame, then insert in the slots the adapters, you can then
insert the carrier in. On the adapters you will find also the buttons that you
should press when removing the car seat from the frame.
ATTENTION! Make sure the carrycot is attached correctly prior to use. To
remove the carrycot press the buttons on the adapters at the sides of the
carrycot and lift the carrycot upwards (fig. 24).

HU
5. Mindig használja együtt az ágyékövet a medenceövvel.
4. A babakocsi használata előtt győződjön meg róla, hogy az összecsukáso
mechanizmusok le vannak blokkolva.
3. Tilos a termékben további matracot használni.
A gyerekek biztonságáért, olvassa el ezt az utmutatót és tartsa meg
referenciaként. A termék használása más modón mint azt utmutatóban van
irva biztonsági kockázatokat okozhat és a garancia elvesztésére vezethet.
Coccolle Silene Multifunkciós 2az1-ben babakocsi
1. Tilos a gyereket felügyelet nélkül hagyni a babakocsiban vagy a
mozeskosárban.
2. Mindig használja a biztonsági övet amikor a gyerek elkezd magától felülni.
20. Ne tolja a babakocsit a lépcsőken.
19. A járdaszegélyre vagy más lépcsőre való feltolás esetén emelje meg az első
kerekeket.
21. Tárolja a babakocsit olyan helyeken ahova a gyerekek nem férhetnek
hozza.
11. Tilos használni a babakocsit ha romlott vagy hianyzó alkatrészei vannak.
14. Amikor parkolva van a babakocsival mindig blokkolni kell a féket.
13. Amikor beállitásokat csinál a babakocsin győződjön meg arrol hogy a mozgó
alkatrészek jól blokkoltak.
9. A babakocsi 0 - 36 hónapos közötti és maximum 15kg súlyú gyerekek
számára lett tervezve.
18. A terméken csak eredeti, a gyártó által elfogadott alkatrészeket szabad
használni.
8. A babakocsi csak egy gyerek szállítására szolgál.
10. Tilos a babakocsit lejtős felületen hagyni, föleg akkor a ha gyerek benne
van. A fék nem fog anyira hogy lejtőn mozgatlanul lehessen a termék.
17. A babakocsi tolókarjára felakasztott táska vagy más terhelés csökkenti a
babakocsi stabilitását.
12. A babakocsi kinyitása és összecsukásakor győződjön meg arrol hogy a
gyerek biztonságos távolságra található.
7. Tilos a termékkel korcsolyázni vagy futni.
15. A vásárló kosár maximális terhelése 3 kg.
16. A kismama táska maximális terhelése 2 kg.
6. A babakocsi tolókarjára felakasztott terhelés csökkenti a babakocsi
stabilitását.
Figyelmeztetések

HU
5. Ha a termék elázott, a fém alkatrészeket szárazra kell törölni és ameddig
teljesen megszáradott egy jól szellőző helyre kell kitenni.
1. A fém alkatrészeket nedves törlővel kell tisztítani. Tisztítás után a terméket
szárazra kell törölni a rozsda megelőzése érdekében.
2. A textil alkatrészeket nedves törlővel és finom mosószer felhasználásával kell
tisztitani. Tisztítás után a terméket szárítani kell olyan helyen kirakva, ahol nincs
a direkt napsugarsütésben és ahol jól szellőztetett helyen van.
Garancia feltételek
- A tulságos terhelés egy helytelen használás mint pl. a tolás csak egy részen
levö kerekeken, a huzás lépcsöken vagy mozgó lépcsöken stb.
3. A textil alkatrészeket nem szabad mosógépben mosni, centrifugálni vagy
hosszú ideig áztatni. .
8. Biztonsági övek és más rőgzitési alkatrészek beállítását rendszeresen kell
ellenőrizni.
4. Tilos fehérítőt használni a tisztitásnál. Csak finom mosószerek használata
ajánljuk.
Tisztitás és karbantartás
10. Kerülni kell a sós vízzel érintkezést (tengeri víz, tengeri szél, útszóró só) a
korrózió elkerülése érdekében.
- Felhasználó hibájából keletkezett sérülések,
6. Tilos a babakocsit direkt napsütésben hagyni vagy tárolni. Akár a fém és a
textil alkatrészek elszíneződhetnek és gyengülhetnek.
- A használati útmutatóban és a termék alkatrészein szereplő ajánlások,
figyelmeztetések és korlátozások be nem tartása következtében keletkezett
sérülések,
- Karbantartási feltételek be nem tartásából adódó sérülések, pl.: korrózió, textil
és műanyag alkatrészek elszíneződése a napsütés miatt vagy magas
hőmérséklet miatt, holtjátékok, szokatlan hangok mint nyikorgás/csikorgás,
mechanizmusok sérülése a szennyeződések következtében.
11. A babakocsi használatának megengedett hőmérséklettartománya: -5°C-tól
+35 °C-ig
- Illetéktelen személyek által végzett javításokból adódó sérülések.
- A termék futárpostával való szállításának idejére nem megfelelő
becsomagolásából adódó sérülések és szennyeződések.
A babakocsi időszakos karbantartást igényel. A termék helyes müködése kinti
területeken az alábbi karbantartási feltételek betartása szükséges a kocsi helyes
működéséhez.
9. A kerekeket, fékeket és felfüggesztési alkatrészeket rendszeresen tisztítani
kell a homoktól, sótól és egyéb szennyeződésektől. Nem szabad kenőanyagot
azokon az alkatrészeken használni ahová homok juthat be.
7. A mozgó alkatrészeket rendszeresen kell karbantartani és olajazni a gyorsan
elpárolgó tisztító-kenő szerek használatával, mint pl. WD-40.
1. A garancia nem terjed ki az alábbiakra:
- Üzemeltetés során természetes módon elhasználódó alkatrészek, mint pl.:
gumik, tömlők, gumiprofilok, fogantyúkon használt anyagok, dörzsölésnek kitett
textil részeken és változtatások a műanyagok struktúrájában és színében,
perselyek a kerekekben, tengelyek, feliratok.

HU
2. A gyartó/szakszerviz javitó cég dönthet a javitási módszerben.
A kerekek fel- és leszerelése
Az első kerekek forgótengelyes kerékrendszer
3. A reklamált terméket tiszta állapotban kell átadni javitásra.
A hátsó kerekek felszerelésére nyomja be a kerékagyakat a váz hátsó
felfüggesztésben lévő tartókban.(6. kép). A kerekek leszereléséhez nyomja be a
keréktartó alsó részében lévő fémgombot és vegye ki a kerékagyat a tartóból (7.
kép).
FIGYELEM! Győződjön meg arrol hogy az ülés jól lett be rőgzitve amielőtt
elkezdi a babakocsi használatát.
4. Az értékesített fogyasztói cikkre nyújtott garancia nem zárja ki és nem
függeszti fel a vevő a szerződésnek nem megfelelő termékből adódó jogait.
Babakocsi kinyitása
Felszerelési utmutató
Az első kerekek felszerelésére illessze be a kerékagyakat a fém első csövek
végén lévő tartókba. (4. kép). A kerekek eltávolítására nyomja meg a keréktartó
oldalán lévő gombot, majd
FIGYELEM! Használat előtt győződjön meg arrol hogy a babakocsi megfelelően
van szétnyitva.
vegye ki a kerékagyakat (5. kép).
FIGYELEM! A babakocsi használása előtt győződjön meg arról, hogy a kerekek
helyesen vannak felszerelve.
A babakocsi kinyitásához nyissa meg az automatikus zárat (1. kép) és húzza fel
a tolókart addig amíg teljesen szétnyílik a babakocsi (2, 3. kép).
A babakocsi első kerekeki forgótengelyes kerékrendszerrel rendelkeznek, mely
egyenes irányba való menet pozícióban is rögzíthetőek. Ahhoz, hogy a kerekek
bolygósithatoak legyenek, mozgassa lefelé kerék elülső részén lévő gombot (8.
kép). A kerekek rögzítése egyenes pozicióban mozgassa a gombot lefelé.
A babakocsi hátsó kerekek biztonsági fékkel rendelkezinek. A fék behúzásához
nyomja meg a féket (9. kép). A fék kioldásához emelje meg a féket.
FIGYELEM! Használat előtt győződjön meg arrol hogy a fék ki van oldva.
FIGYELEM! Mindig nyomja meg a biztonsági féket amikor dőlt felületen hagyja
a babakocsit.
FIGYELEM! A biztonsági fék nem lassításra szolgál. A biztonsági féket a
babakocsi megállítása után kell megnyomni.
FIGYELEM! Nem szabad futni a babakocsival.
A biztonsági fék használása
Az ülés fel- és leszerelése
A sport ülés felszereléséhez illessze be az ülés adaptereit a babakocsi vázán
található tartókban. A gyerekülést a menetirányal megegyezve és menetirányal
elentétesen is lehet használni (10. kép).
FIGYELEM! Soha ne hordozza a babakocsit az ülésnél fogva. Az ülés
kivételéhez, nyomja le az adapterek két oldalán található gombokat és húzza
felfelé az ülést (10. kép).

HU
A tolokar beállítása
A babakocsi teleszkópos állítható tolokarral rendelkezik. A magasság
beállításhoz nyomja meg a középen található gombot, majd állítsa be a
megfelelő magasságot.
A lábtartó pozició beállitásához nyomja meg az oldalon található két kerek
gombokat egyidejűleg (14. kép). A lábtartó felemeléséhez elég felfele tolni a
lábtartót.
FIGYELEM! A lábtartó a gyerek lábának tartására szolgál. Ha a gyerek ülő
pozicióban van, akkor a lábtartónak leeresztett pozicióban kell lennie.
FIGYELEM! A lökharitó használata nem mentesíti a biztonsági öv használatátol.
A lökháritó fel- és leszerelése
A lökháritó felszereléséhez csatolja a horgokat az ülés oldalsó csöveinél
található fogantyúkban. A leszereléséhez nyomja meg a gombokat, amelyek a
lökháritó alsó részén találhatóak és huzza ki a horgokat (13. kép). A babakocsi
összecsukása előtt vegye le a lökháritót.
FIGYELEM! Ne hordozza a babakocsit a lökháritótol fogva.
A lábtartó állítása
A háttámla beállítása
A biztonsági övek használása
FIGYELEM! 6 hónap alatti gyermek szállításakor a háttámlát fekvő pizicióban
kell beállítani.
A babakocsi háttámláját 3 hátradöntési pozicióban lehet állítani. A háttámla
leengedéséhez húzza felfelé a hátsó felén található go,bot és állítsa a háttámlát
a kivánt pozícióba (15. kép). A háttámla felemeléséhez elég előre tolni, amíg el
a kívánt pozicióban lesz. A háttámlá a kiválasztott pozicioban automatikusan
rögzül.
A babakocsi 0-36 hónapos gyerekek számára lett tervezve igy 5-pontos
biztonsági övekkel felszerelt üléssel rendelkezik. A vállöveket a gyerek korának
megfelelően kell beállitani. A háttámlában két nyillás van pont arra hogy
megfelelő pozicióban tudja beállitani minden szüllö a gyerek testéhez képes. A
6 hónap alatti gyerekeknek a lejjebb lévő nyílásokat kell használni; a 6 hónap
feletti gyerekek számára a feljebb lévő nyílásokat kell használni. Az 5-pontos
biztonsági öv bekötéséhez a vállövek villáit a csípőövek villáival kell összekötni,
majd a gátövhez rögzített központi csatba kell betenni. (16 kép). Az övek
hosszúságát úgy válassza meg, hogy megfelelő legyenek a gyerek testéhez, de
viszont a gyereket ne szorítsák (17 kép). Az övek kioldásához nyomja meg a
központi csaton található gombot és kapcsolja szét az övek villáit (18. kép).
A napellenző kupola fel- és leszerelése
A napellenző kupola felszereléséhez, csúsztassa be a horgot az ülésvázon
található tartókban (11. kép). Majd állítsa be a napellenző a kívánt pozícióba. A
napellenző tetőnek van egy extra, nagyobitó része (12. kép). Egy hálos ablak is
található a kupolán amely nyitására emelni kell a textil takarót.
Table of contents
Languages:
Other Coccolle Stroller manuals

Coccolle
Coccolle Siyana User manual

Coccolle
Coccolle Oppa User manual

Coccolle
Coccolle Saliara User manual

Coccolle
Coccolle Sole User manual

Coccolle
Coccolle Alla User manual

Coccolle
Coccolle Arona User manual

Coccolle
Coccolle Nessia User manual

Coccolle
Coccolle Juno User manual

Coccolle
Coccolle Oro User manual

Coccolle
Coccolle Vispo User manual

Coccolle
Coccolle Amani User manual

Coccolle
Coccolle Mino User manual

Coccolle
Coccolle urbio air User manual

Coccolle
Coccolle Beyla User manual

Coccolle
Coccolle Lissia User manual

Coccolle
Coccolle Lemira User manual

Coccolle
Coccolle Neve User manual

Coccolle
Coccolle Ambra User manual

Coccolle
Coccolle Melia User manual

Coccolle
Coccolle Gioia User manual