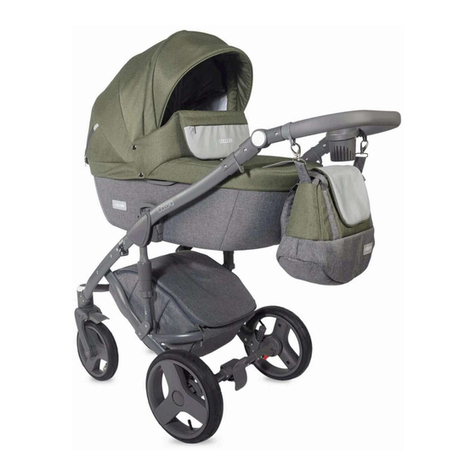
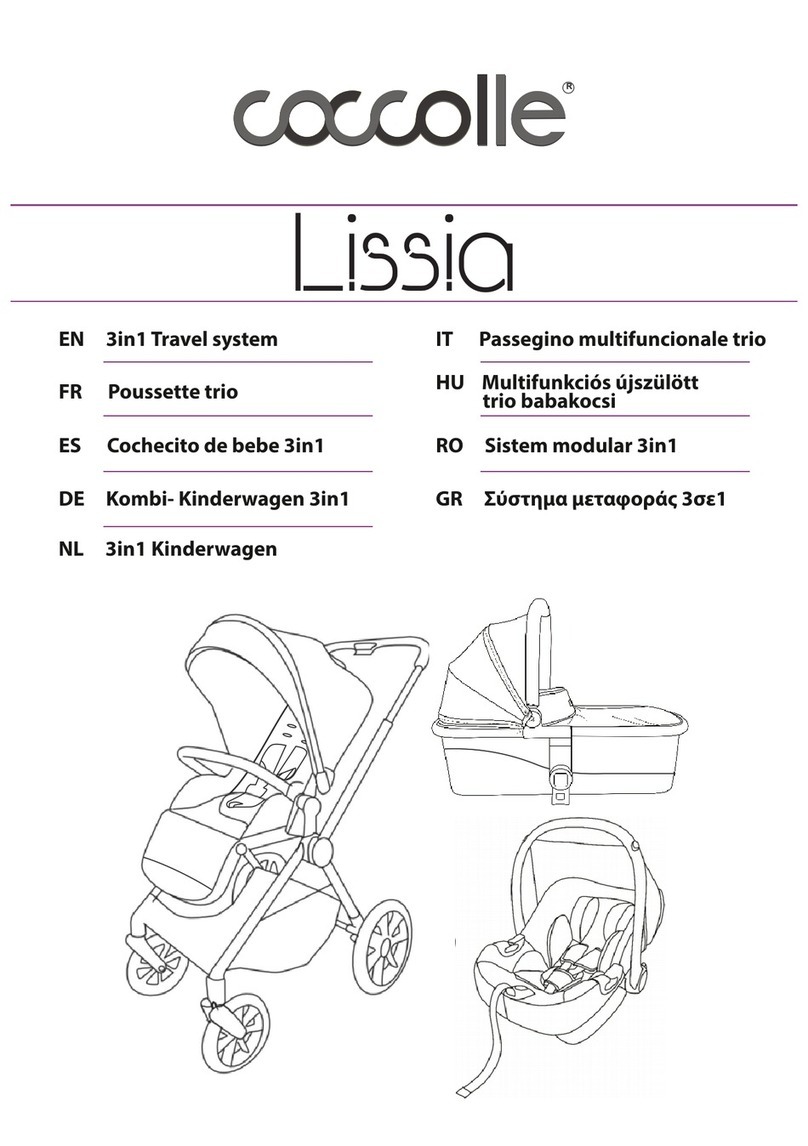
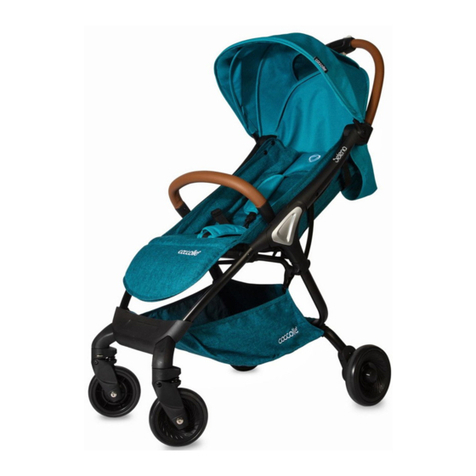
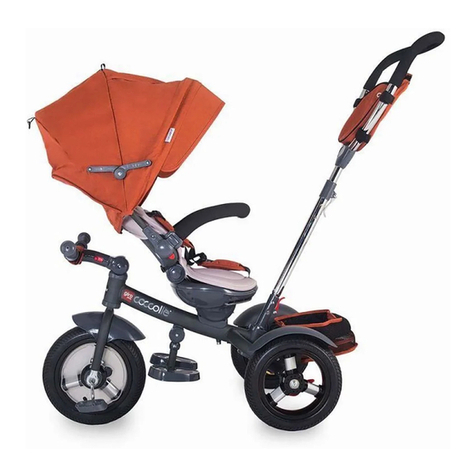
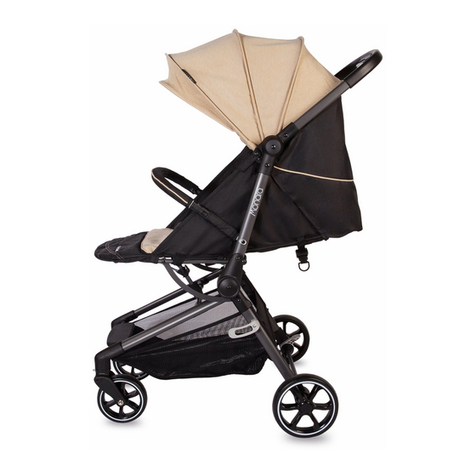
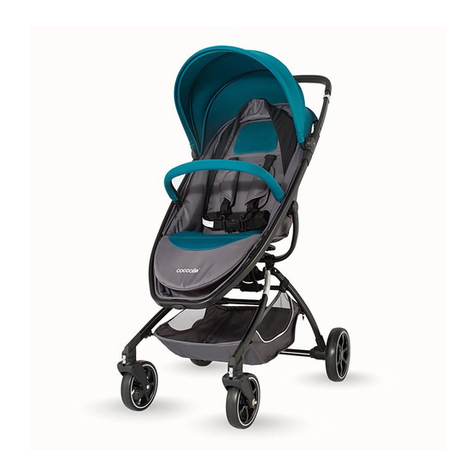
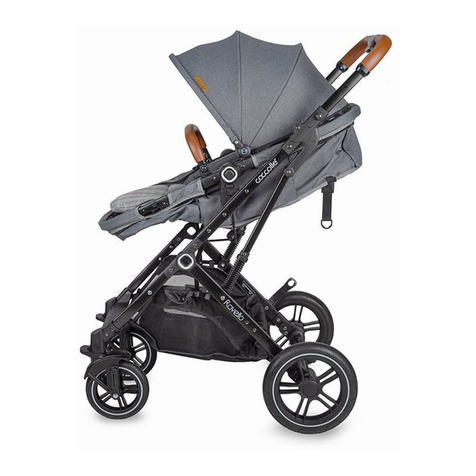
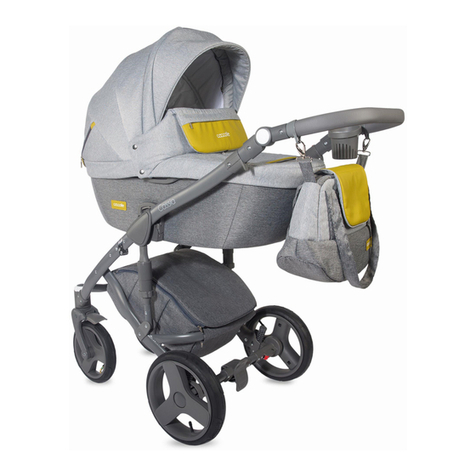
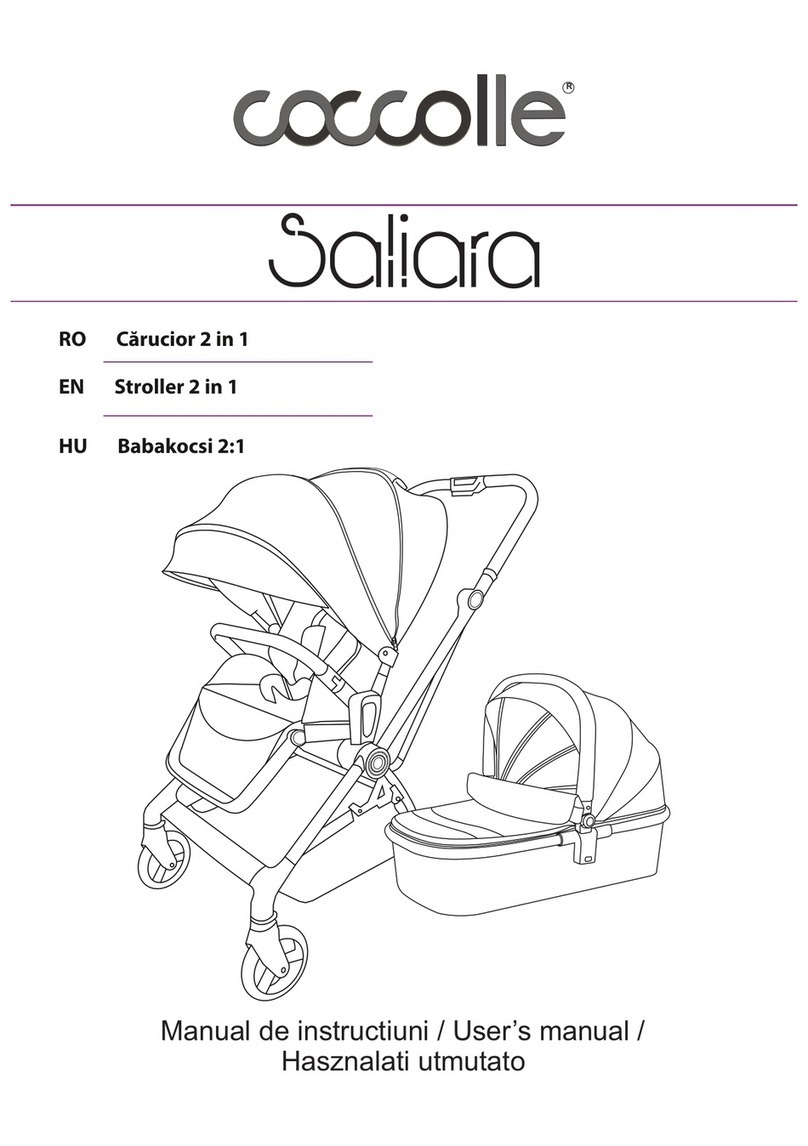
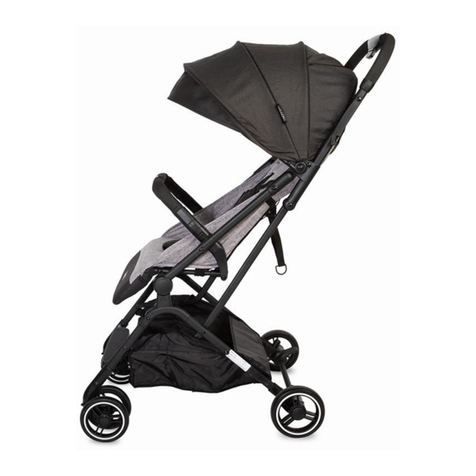
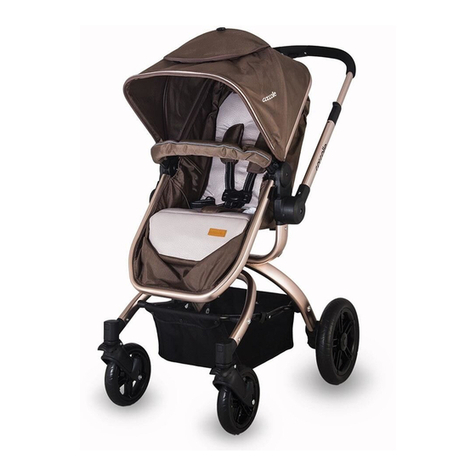
Coccolle Gioia User manual

RO Cărucior 3 in 1
GB Stroller 3 in 1
Manual de instructiuni / User’s manual /
Manuale di instruzioni / Hasznalati utmutato
IT Passeggino 3 in 1
R
HU Babakocsi 3:1

Intretinere:
1. Curatati captuseala caruciorului cu un burete imbibat in apa sau in apa cu cateva picaturi de
detergent lichid.
2. Axurile roților trebuie curatate cu un lubrifiant solid iar componentele mobile cu spray lubrifiant.
3. Protejati caruciorul impotriva expunerii la ploaie si expunerea excesiva la soare.
Termeni de utilizare:
1. Caruciorul Gioia este destinat copiilor cu varsta cuprinsa intre 0-36 de ani. Partea sport poate fi
utilizata numai pentru copiii cu varsta peste 6 luni. Cosuletul auto este conceput pentru nou-nascuti
si poate fi folosit pana cand copilul poate sta singur (maxim 10 kg).
2. Caruciorul Gioaia este destinat copiilor pana la 15 kg care au o inaltime de pana la 110 cm.
3. Activati intotdeauna frana atunci cand caruciorul nu este impins.
4. Nu lasati niciodata caruciorul cu copilul in interior pe o suprafata inclinata, chiar daca frana este
activata, deoarece caruciorul poate sa alunece.
5. Ridicati intotdeauna rotile din fata atunci cand mergeti pe o bordura sau pe o treapta inalta
deoarece un impact puternic cu un obstacol poate rasuci sau indoi cadrul.
6. Componentele caruciorului, cum ar fi partea sport, landoul sau cosuletul, pot fi montate numai
pe acest cadru. Orice modificari aduse sau montarea componentelor caruciorului pe alte modele
sunt interzise.
7. Cand puneti / duceti copilul in / din carucior, asigurati-va ca acesta a fost blocat de frana.
8. In partea de jos a caruciorului se afla eticheta de informatii cu cod de bare care specifica data de
fabricatie si numarul lotului.
Păstrați eticheta pentru a putea identifica corect produsul.
9. ATENȚIE:
Nu utilizați niciun echipament suplimentar care nu a fost furnizat de catre producator.
10. ATENȚIE:
Căruciorul este potrivit numai pentru un copil.
Atentie!
Nu utilizati alta saltea in plus la carucior.
Nu lasati niciodata copilul nesupravegheat.
Partile componente:
1. Cleme pentru gentuta
2. Maner ajustabil pe inaltime
3. Maner landou
4. Prima blocare de siguranta pe cadru
5. A doua blocare de siguranta pe cadru
6. Suspensie
7. Frana
8. Butonul de indepartare a rotii din spate
9. Vizor parinte
10. Buton anti-balansare
11. Buton de indepartare a partii sport sau a landoului
12. Buton pentru demontarea rotilor din fata
13. Buton de blocare a rotilor din fata
14. Valva rotii
15. Buton de detasare a barii de protectie
16. Suport de picioare ajustabil
17. Buton de blocare a cusuletului auto
18. Buton de detasare a cosuletului auto
19. Maner cosulet auto
RO

Atentie!
In cazul utilizarii unui cosulet auto impreuna cu cadrul caruciorului, cosuletul auto nu inlocuieste un
landou sau un patut pentru copii. Daca copilul trebuie sa doarma, este recomandat sa il puneti in
landou sau in patut.
Orice greutate suplimentara care atarna pe manerul caruciorului, pe spatele spatarului sau pe
partea laterala a acestuia, ii va afecta stabilitatea.
Inainte de a utiliza caruciorul, asigurati-va ca toate mecanismele de pliere au fost blocate
corespunzator.
Inainte de a utiliza caruciorul, asigurati-va ca atat landoul cat si partea sport au fost bine fixate pe
cadru.
Partea sport nu este potrivita pentru copiii cu varsta sub 6 luni.
Utilizati intotdeauna centurile de siguranta.
Utilizati intotdeauna centura de bifurcatie impreuna cu centura abdominala.
Produsul nu este potrivit pentru jogging sau patinaj.
Greutatea maxima permisa pentru cosul de cumparaturi este 2 kg.
Atentie!
Va rugam sa folositi numai piese furnizate sau recomandate de catre producator/distribuitor.
Accesoriile care nu sunt aprobate de producator nu pot fi folosite.
Instructiuni de instalare:
1. Deplierea cadrului
Pentru a deplia cadrul caruciorului apasati axul rotii (A) cu piciorul apoi trageti manerul (B) in sus
pana cand auziti clar ca dispozitivele de blocare se fixeaza in pozitie.
2. Plierea caruciorului
Pentru a plia caruciorul este necesar sa detasati toate elementele de pe cadru, sa apasati butonul
de blocare situat pe partea dreapta a cadrului (C), si, in acelasi timp trageti de butoanele din ambele
parti ale cadrului (D): partea dreapta acolo unde se afla dispozitivul de blocare si partea stanga.
3. Ajustarea spatarului
Pentru a schimba inclinarea spatarului, trageti de dispozitivul de reglare aflat in spatele spatarului si
selectati pozitia dorita.
4. Frana
Pentru a cupla frana, apasati cu piciorul pedala situata intre roti (G). Pentru a debloca frana ridicati
pedala cu piciorul.
5. Introducerea si scoaterea rotilor din fata
Inserati rotile in locasul destinat acestora pana cand auziti sunetul „click”. Pentru a le scoate, apasati
butonul (R).
6. Introducerea si scoaterea rotilor din spate
Inserati rotile in locasul destinat acestora pana cand auziti sunetul „click”. Pentru a le scoate, apasati
butonul situat in mijlocul rotii (S) si apoi scoateti roata.
7. Instalarea landoului/partii sport pe cadru
Introduceti clemele landoului/partii sport in ghidajele (I) (J) situate pe ambele parti ale cadrului pana
cand auziti sunetul „click”. Apoi fixati landoul sau partea sport cu clema de siguranta (K).
8. Detasarea landoului/partii sport de pe cadru
Desfaceti clema de siguranta (L), miscati maneta sub elementul de fixare. Ridicati elementul de
detasare (N) si trageti.
9. Instalarea cosuletului auto pe cadru
Pentru a instala cosuletul auto pe cadru, fixati adaptoarele speciale (O) in sinele de montare de pe
ambele parti ale cadrului pana cand auziti sunetul „click” , apoi fixati cosuletul auto in ghidajele
adaptoarelor.
10. Detasarea cosuletului auto de pe cadru
Pentru a detasa cosuletul auto de pe cadru trageti parghiile (P) de pe ambele parti ale cadrului si
apoi ridicati cosuletul auto. Pentru a detasa adaptorii de pe cadru procedati in acelasi fel ca in cazul
detasarii landoului sau al partii sport.
11. Centura de siguranta in 5 puncte
Trageti curelele de umar peste umerii copilului si cureaua cu catarama centrala intre picioarele
copilului. Introduceti clemele laterale in catarama pana cand auziti sunetul „click”. Reglati apoi
lungimea curelei si asigurati-va ca cele doua cleme sunt bine fixate in pozitie.
RO

EN
Keep this leaflet for future reference. Your child's safety may be threatened if you do not follow these
instructions
Stroller maintenance:
1. Clean the stroller fabrics with a sponge soaked in soap water or water with a few drops of laundry
washing liquid.
2. The wheel axles should be lubricated with a solid lubricant, movable components - with e.g.
WD40 spray.
3. Protect the stroller against rain and excessive sunlight exposure. No claims concerning changes
in the fabrics appearance caused by a failure to follow the above instructions shall be
acknowledged.
Conditions of the stroller use:
1. The stroller is intended for children from O to 3 years of age. The stroller seat is suitable for
children over 6 months. The carrycot is intended for babies up to 6 months old, who cannot sit up
unaided.
2. The stroller frame is suitable for children weighing up to 15 kg and up to 110 cm tall.
3. Always apply the break of the stroller when not in use.
4. Never leave the stroller with the baby inside on a sloping surface, even with the brake blocked, as
the stroller may slide down.
5. Always raise the front wheels when riding onto a curb or high step because a strong impact on an
obstacle may twist or bend the frame.
6. The combine components such as the frame, seat or carrycot are suitable to be assembled only
with this model. Any modifications or assembling the stroller components in other models are
forbidden.
7. When putting in or taking the child out of the stroller, make sure that safety break has been
applied.
8. In the bottom part of the stroller is located information label with bar code that specifies the
manufacturing date and the number of batch. Keep the label to be able correctly identify the item.
9. WARNING : Do not use any extra equipment which has not been supplied by the pram
manufacturer.
10. WARNING : The stroller is suitable for one child only.
WARNING : Do not use any extra equipment for carrycot.
WARNING : Never leave the child unattended.
1. Diaper bag hangers
2. Height-adjustable handle
3. Carrycot holder
4. The first safety lock on a frame
5. The second safety lock on a frame
6. Spring suspension
7. Rear wheels safety brake (pedal)
8. Rear wheels detaching element
9. Mesh skylight
10. The carrycot rocking stoppers
11. The carrycot or a seat detaching element
12. Front wheels detaching element
13. Front rotating wheels locking device
14. Wheel valve
15. Safety bar detaching element
16. Height- adjustable footrest
17. Car seat handle folding lock
18. The car seat detaching element
19. The car seat holder
WARNING : In case of using a car seat together with a frame, hereby stroller does not substitute
a cradle or a baby bed. If a child needs to sleep, it is recommended to put the child in the
appropriate carrycot, cradle or baby bed.
WARNING : Any extra load hung on the pram's handle and/or rear part of the backrest and/or side
part of the pram upsets its stability.

EN
WARNING : Before using the pram, make sure that all folding mechanisms have been
properly blocked.
WARNING : Before using the pram, check if the carrycot or the stroller's seat has been securely
fastened to the frame.
WARNING : The seat is not suitable for children younger than 6 months. WARNING : Always use
safety belts.
WARNING : Always use the crotch strap in conjunction with the hip strap.
WARNING! Only spare parts supplied or recommended by the producer/distributor can be used.
Accessories that are not approved by the producer should not be used.
1. UNFOLDING THE PRAM
To unfold the pram, press the wheel axle with your foot (A) and then pull the handle (B) upwards
until your distinctly hear the locking devices click.
2. FOLDING THE PRAM
To fold the pram it's necessary to: detach all the elements from the frame, press safety lock located
on the right side of the frame (C) and at the same time pull both sides handgrips of the pram
(D): rightside (with the safety lock) and left side.
3. FOUR-STEP BACKREST ADJUSTMENT
To adjust the backrest angle, pull the regulation bar at the back of the backrest and select the
position.
4. ATTACHING SAFETY BAR
To attach the safety bar, apply it to the fastening elements on both sides of the seat. Push until they
are safely locked in place (both sides' buttons are protruding).
5. ADJUSTING FOOTREST
To adjust the footrest position, press at the same time the buttons located on its both sides (E) and
change its position. To raise up the footrest just lift it without pressing the buttons.
6. BRAKE SYSTEM
To apply the pram brake, press the pedal between wheels (G) with your foot until the brake is safely
locked. To release the brake, lift the pedal with your foot.
7. INSTALLATION AND DETACHING OF FRONT WHEELS
To install the front wheels with & forks insert them in the appropriate guides until you hear a distinct
'click' sound. To detach the front wheels with forks press button (R) located on the frame detaching
element (12).
8. INSTALLATION AND DETACHING OF REAR WHEELS
To install rear wheels insert them in the guides until you heara distinct "click" sound. To remove the
wheel press the button located in the center of the wheel (S), then slide the wheel from the axle.
9. INSTALLATION OF THE CARRYCOT OR STROLLER SEAT ON THE FRAME
Insert the hooks of the carrycot/ stroller seat into the guides (I) (J) on both sides of the frame until
your hear a distinct "click" sound. Then secure carrycot/stroller seat with a hook lock (K).
10. DETACHING THE CARRYCOT OR STROLLER SEAT FROM THE FRAME
Undo the hook lock (L) on the frame. Shift the lever (M) @ under the fastening element. Lift the
detaching element (N) and pull out of the guides.
11. INSTALLATION OF THE CARSEAT ON THE FRAME
First attach special adapters into the fastening elements (O) on both sides of the frame until your
hear a distinct "click" sound. Next attach
the car seat into the adapters' guides.
12. DETACHING THE CAR SEAT FROM THE FRAME
Pull the levers (P) on both sides of the car seat, then lift the car seat. To detach adapters from the
frame proceed the same as in case of detaching the carrycot or the stroller seat.
13. FIVE POINT HARNESS OF THE SEAT
Pass the shoulder straps around each arm. Pass a strap with a buckle between legs. Insert the side
clips into the buckle until you feel distinct resistance. Then adjust the strap length and make sure
that the clips have been fastened in place.

IT
Importante: Conservare questo manuale per riferimento futuro. La sicurezza del bambino potrebbe
essere minacciata se non si seguono queste istruzioni.
funzioni passeggino:
1. Appendini per la borsa
2. Manico regolabile in altezza
3. Manubrio navicella
4. Il primo blocco di sicurezza sul telaio
5. Il secondo blocco di sicurezza sul telaio
6. Sospensione a molla
7. Freno ruote posteriori
8. Pulsante rimozione ruote posteriori
9. Visiera tessile
10. Fermi a dondolo della navicella
11. elemento di stacco navicella / seduta
12. Pulsante rimozione route anteriori
13. Dispositivo di bloccaggio ruote girevoli
14. Valvola della ruota
15. barra di protezione
16. Poggiapiedi regolabile in altezza
17. Bottone blocco maniglia seggiolino auto
18. Seggiolino
19. Maniglia seggiolino
AVVERTENZA:
In caso di utilizzo di un seggiolino per auto insieme a un telaio, il presente passeggino non
sostituisce una culla o un lettino. Se un bambino ha bisogno di dormire, si raccomanda di mettere il
bambino nella propria navicella, culla o lettino.
AVVERTENZA:
Qualsiasi carico aggiuntivo appeso sulla maniglia del passeggino e / o sulla parte posteriore dello
schienale e / o sulla parte laterale del passeggino influisce sulla stabilità.
AVVERTENZA:
La seduta non è adatta a bambini di età inferiore ai 6 mesi.
AVVERTENZA:
Utilizzare sempre le cinture di sicurezza.
AVVERTENZA:
Utilizzare sempre la cintura spartigambe insieme alla cintura addominale.
AVVERTENZA:
Il prodotto non è adatto per il jogging o il pattinaggio.
AVVERTENZA:
Il carico massimo nel carrello è di 2 kg.
A. APERTURA PASSEGGINO
Per aprire il passeggino, premere l'asse della ruota con il piede e quindi tirare la maniglia verso l'alto
fino a sentire distintamente che i dispositivi di bloccaggio e scattano in posizione.
B. CHIUSURA PASSEGGINO
Per piegare il passeggino è necessario: staccare tutti gli elementi dal telaio, premere il blocco di
sicurezza situato sul lato destro del telaio e contemporaneamente tirare il manubrio su entrambi i lati
dell passeggino.
Prima di utilizzare il passeggino, assicurarsi che tutti i meccanismi di piegatura siano stati
correttamente bloccati.
Prima di usare il passeggino, controllare se la navicella o la seduta del passeggino sono stati fissati
saldamente al telaio.
C. REGOLAZIONE DELLO SCHIENALE
(Quattro fasi)
Per modificare l'inclinazione dello schienale, tirare la regolazione, il dispositivo sotto lo schienale (1)
e selezionare la posizione dello schienale (2).
D. ATTACCAMENTO BARRA DI PROTEZIONE
Per fissare la barra di sicurezza, applicarla agli elementi di fissaggio su entrambi i lati della seduta.
Spingere fino a quando sono bloccati in sicurezza (i pulsanti di entrambi i lati sono sporgenti).

IT
E. POGGIAPIEDI REGOLABILE
Per regolare la posizione del poggiapiedi (per abbassarla), premere contemporaneamente i pulsanti situati su
entrambi i lati e modificare la sua posizione. Per sollevare il poggiapiedi basta sollevarlo senza premere i pulsanti.
F. SISTEMA DI FRENATA
Per applicare il freno del passeggino, premere il pedale tra le ruote (G) con il piede fino a quando il freno è bloccato
in sicurezza.
Per rilasciare il freno, sollevare il pedale con il tuo piede
G. INSTALLAZIONE E DISTACCO DELLE RUOTE ANTERIORI
Per installare le ruote, inseriscile nelle guide fino a sentire un suono "clic" distinto.
Per staccare le ruote anteriori con le forche premere il pulsante (R) situato sull'elemento staccatore del telaio (12).
H. INSTALLAZIONE E DISTACCO DELLE RUOTE POSTERIORI
Per installare le ruote, inseriscile nelle guide fino a sentire un suono "clic" distinto.
Per rimuovere la ruota, premere il pulsante situato al centro della ruota (S), quindi rimuovere la ruota dall'asse.
I. INSTALLAZIONE DELLA NAVICELLA / SEDUTA SUL TELAIO DEL PASSEGGINO
Inserire i ganci della navicella / seduta nelle guide (I) (J) su entrambi i lati del telaio finché non si sente un "clic"
distinto. Quindi fissare la navicella / seduta del passeggino con un gancio (K).
J. STACCARE LA NAVICELLA/SEDUTA DALLA STRUTTURA DEL PASSEGGINO
Sbloccare il gancio (L) sul telaio. Spostare la leva (M) sotto l'elemento di fissaggio. Sollevare l'elemento di distacco
(N) ed estrarlo dalle guide
K. INSTALLAZIONE DEL SEGGIOLINO AUTO SUL TELAIO
Innanzitutto collegare gli adattatori speciali negli elementi di fissaggio (O) su entrambi i lati del telaio fino a quando
non si sente un "clic" distinto. Dopo allegare
il seggiolino auto nelle guide degli adattatori.
L. DISTACCARE IL SEGGIOLINO AUTO DALLA STRUTTURA
Tirare le leve (P) su entrambi i lati del seggiolino, quindi sollevare il seggiolino. Per staccare gli adattatori dal telaio
procedere come nel caso di scollegare la navicella o la seduta del passeggino.
Avvertimento ! Possono essere utilizzati solo pezzi di ricambio forniti o consigliati dal produttore / distributore. Gli
accessori che non sono approvati dal produttore non devono essere utilizzati.
Imbracatura a 5 punti
Passare gli spallacci attorno ad ogni braccio. Passa lo sparti gambe con la fibbia tra le gambe. Inserire le clip laterali
nella fibbia finché non si sente una resistenza distinta. Quindi regolare la lunghezza della cinghia e assicurarsi che le
clip siano state fissate saldamente in posizione.
Manutenzione del passeggino
1. Pulire l'imbottitura del passeggino con una spugna imbevuta di acqua saponata o acqua con alcune gocce di
liquido lavante.
2. Gli assi delle ruote devono essere lubrificati con un lubrificante solido, componenti mobili - ad es. Spray WDA40.
3. Proteggere il passeggino dalla pioggia e dall'eccessiva esposizione alla luce solare Non si accettano reclami
relativi a cambiamenti nell'aspetto dell rivestimento causati dall'inosservanza delle istruzioni di cui sopra.
Condizioni per l'uso
1. Il passeggino è destinato ai bambini da 0 a 3 anni. La seduta del passeggino è adatto a bambini di età superiore a
6 mesi. La navicella è destinata ai bambini fino a 6 mesi che non possono stare seduti senza aiuto.
2. Il telaio del passeggino è adatto a bambini di peso fino a 15 kg e alti fino a 110 cm.
3. Sempre attivare il freno quando il passeggino non è in uso.
4. Non lasciare mai il passeggino con il bambino all'interno su una superficie inclinata, anche con il freno bloccato,
poiché il passeggino potrebbe scivolare.
5. Sollevare sempre le ruote anteriori quando si guida su un gradino alto perché un forte impatto su un ostacolo
potrebbe ruotare o piegare il telaio.
6. I componenti del passeggino come il telaio, la seduta o la navicella sono adatti per essere montati solo su questo
modello.
7. Quando si mette / prende il bambino dentro / fuori dal passeggino, assicurarsi che il passeggino sia stato attivato il
freno.
8. Nella parte inferiore del passeggino si trova l'etichetta informativa con codice a barre che specifica la data di
produzione e il numero di lotto.
Mantenere l'etichetta per identificare correttamente il prodotto.
9. AVVERTENZE:
Non utilizzare alcun equipaggiamento extra che non è stato fornito dal produttore del passeggino.
10. AVVERTENZE:
Il passeggino è adatto per un bambino alla volta.
AVVERTENZE:
Non utilizzare extra materassini nel prodotto.
Non lasciare mai il bambino incustodito.
HU
Babakocsi karbantartása
1. Tisztitsa a babakocsit semleges mosószerrel egy szivacs segitségével.
2. Időnként a kerék tengelyét szilárd kenőanyaggal kell kenni.
3. Tartsa messze direkt napsugártol mivel az erős nap változtatja az anyag szinét.
Felhasználási feltételek
1. A Gioia babakocsi a 0-36 honapos gyerekek számára lett tervezve. A sportrész használható csak a
6 honapos vagy nagyobb gyerekek számára. A mozeskosár az újszülöttek számára lett tervezve és
használható addig ameddig a baba nem tud egyedül ülni.
2. A babakocsi váza 15 kg-ig birja a súlyt és tervezve lett maximum 110 cm-es mágás gyerekek
számára.
3. Minding használja a féket amikor a babakocsi nincs tolva.
4. Kerjük ne hagya a gyereket felügyelet nélkül babakocsiban, akkor se ha a termék fékezve van.
5. Minding emelje fel az első kerekeket amikor magassabb lépéseket csinál; egy lehetséges erős
ütközés esetén a váz elhajolhat.
6. A babakocsi alkatrészei (sportrész, mozeskosár) csak ezzel a vázzal használhatok.
7. Amikor teszi be vagy veszi ki a gyereket a babakocsibol győződjön meg arrol hogy a termék
fékezve van.
8. A váz alsó részen van egy cimke ami azonosítja a gyártási dátumát és a tétel számát. Kérjük tartsa
meg ezt a cimkét hogy helyesen tudjuk azonositani a termékét baj esetén.
9. Figyelem: ne használjon külön kiegészítőket.
10. Figyelem: ez a termek egy gyerek számára lett tervezve.
Kérjük, őrizze meg ezt az utmutatot későbbiekben. A gyermeke biztonságát veszélyeztetheti, ha nem
tartja be az utasításokat.
Alkatrész lista
1 – kismama táska akasztó
2 – magasságban álitható tolokar
3 – mozeskosár fogantyú
4 - első biztonsági zár a vázon
5 – masodik biztonsági zár a vázon
6 – szuszpenzió
7 – fék
8 – hátsó kerekek eltávolitásához gomb
9 - háló ablak a kupolán
10 – mozeskosár stabilitás gombok
11 – mozeskosár vagy sportrész eltávolitó gomb
12 – első kerekek eltávolitásához gomb
13 – bolygositás blokkoló gomb
14 - kerekek felfúvó szelep
15 – lökháritó eltávolitó gomb
16 – lábtartó
17 – zár a hordozó fogantyú blokkolására
18 – gomb a hordozó eltávolitására
19 – hordozó fogantyúja
Figyelem. A vázon használt hordozó nem helyetesiti az ágyat vagy a mozeskosárt. A gyartó nem
ajánlja hogy sokk ideig sétáltassák a babát a hordozóban. Ha helyes alvó poziciót keress a baba
részére kérjük használja a mozeskosarat.
Bármilyen extra terhelés ami a fogantyúra vagy a babakocsi hátsó részáre van akasztva befolyásolja
a termék stabilitását.
Minden használás előtt ellenőrizze hogy az összecsukási mekanizmus helyesen müködik.
A sportrész nem ajánlott 6 hónapnál fiatalabb gyerekek számára. Mindig használja a biztonsági övet.
A terméket nem szabad használni mikor szaladnak vagy korcsojáznak. A vasarló kosár maximális
terhelése: 2 kg.

HU
Telepítési utasításokat
A váz emelése: a váz kinyitásához lábbal nyomja a kerék részét és emelje fel a babakocsi tolokarát
ameddig a klick hangot hallatszik.
A váz öszzecsukása: a sikeres összecsukásert szukséges a kiegészítők eltávolitása; ezután, nyomja a
vázon talált biztonsági zárt és ugyanabban az időben emelye a tolokar alatti gombokat miközben
lassan engedi lefele a tolokart.
A háttámla álitása: a háttámla szögének megváltoztatásához huzza a szabályozó eszközt ami a
háttámla alatt található és válassza ki a megfelelő pozíciót.
Rögzíthető lökhárító beillesztése: hogy a lökhárítót csatolja a vázhoz nyomja be a megfelelö két
résben ami a babakocsin talalható.
A lábtartó álitása: hogy megváltoztassa a lábtartó pozicióját (hogy csökkentse) nyomja meg egyszerre
mindkét gombot amelyek a lábtartó oldalsó részen találhatók és helyezze a megfelelő pozicióban.
Hogy vissza tegye a kezdeti pozicióban emelje felfele, anelkül hogy a gombokat nyomja.
A fék használása: amikor a féket lenyomja (1) akkor a kerekek leblokkolnak. Amikor a féket felnyomja
(2) akkor a kerekek használhatók.
A első kerekek telepítése vagy leválása: a telepitésre, nyomja be a kereket a helyes résben ameddig a
klick hangot halja. A leválásra, nyomja meg a R gombot ami a kerek felső oldalan látható.
A hátsó kerekek telepítése vagy leválása: a telepitésre, nyomja be a kereket a helyes résben ameddig
a klick hangot halja. A leválásra, nyomja meg a gombot ami a kerek közepén oldalan látható.
A mozeskosár vagy sportrész telepitése: illésze be a kampokat babakocsin található résben. A
telepités helyes mikor a klick hang halatszik. Ezutan biztositja az alkatrészet a vázra a kampo zárával.
A mozeskosár vagy sportrész leválása: nyissa ki a kampo zárt a vázrol. Tolja el a gombot ami a
rögzítőelem alatt található. Emelje fel a részt a résből.
A hordozó illesztése a vázban: előre illessze az adaptereket a vázban. A helyes telepitést a klick hang
megerősíti. Ezutan illesze be a hordozót az adapterekben.
A hordozó leválása: tolja el a kart ami a fogantyú mellett találhátó majd emelje fel a hordozót. Az
adapterek eltávolitásara kövesse a telepítés fordított lépéseit.
Biztonsági öv: helyezze a vállpántokat a helyes pozicióban és a központi csattot a gyerek lába közé.
Illesze be a csat nyelveit a csatban ameddig a klick hang halatszik. Ezutan álitsa be az öv
hosszuságát és ellenőrizze hogy a gyerek helyesen van bekötve.

RO
Cosulet auto
Componente:
1. Maner
2. Buton de reglare al manerului
3. Centura de siguranta (cureaua de jos)
4. Baza cosulet
5. Husa
6. Curea de tragere
7. Buton curea de tragere
8. Catarama centura de siguranta
9. Sticker cu informatii
10. Informatii-Avertizari
11. Centura de siguranta
12. Protectie de umeri
13. Ghidaj centura de umar (in spate)
14. Copertina
Dragi parinti,
Va multumim pentru achizitionarea si utilizarea acestui cosulet auto. Produsul este fabricat conform
ECE R44 / 04 si este destinat copiilor de la 0 la 10 kg. Va rugam sa tineti cont ca acest cosulet auto
ofera o siguranta maxima numai daca este utilizat in conformitate cu manualul de utilizare.
Atentionari!
1. Cosuletul auto ofera o siguranta maxima numai daca este utilizat in conformitate cu manualul de
utilizare. Pastrati manualul pe toata durata de utilizare a scaunului auto.
2. Cosuletul auto poate fi instalat pe scaunul din fata sau din spate al masinii, dar intotdeauna cu
spatele la directia de mers.
3. Nu asezati cosuletul auto pe scaunul pentru pasageri, prevazut cu airbag deoarece poate fi
periculos pentru copil!
4. Pentru siguranta dumneavoastra, cosuletul auto trebuie fixat intotdeauna cu centurile de siguranta
ale masinii chiar si atunci cand copilul nu este transportat in el.
5. Atunci cand cosuletul auto este folosit, scaunul pasagerului din spate trebuie sa fie intotdeauna
blocat in pozitia standard tipica.
6. Orice modificare a cosuletului auto de catre utilizator este strict interzisa.
7. Este interzisa utilizarea cosuletului auto fara husa. Va rugam sa retineti ca husa cosuletului auto
reprezinta o parte integranta a acestuia.
8. Inainte de a folosi cosuletul auto intr-o masina, asigurati-va ca nu exista obiecte pierdute in masina,
care ar putea afecta bebelusul in timpul franarii.
9. Bagajele sau alte obiecte care ar putea fi periculoase pentru copil sau pentru alti pasageri in caz de
franare brusca sau de accident ar trebui sa fie corect securizate.
10. Componentele rigide sau de plastic ale cosuletului auto trebuie amplasate si asigurate in asa fel
incat in conditiile normale de utilizare a vehiculului acestea sa nu fie prinse sau blocate intre usi.
11. Este interzis sa se utilizeze alte puncte de fixare pentru instalarea cosuletului auto decat cele
descrise in manualul de utilizare si marcate pe acesta.
12. Din motive de siguranta, nu folositi cosulete auto la mana a doua. Intr-o astfel de situatie nu puteti
fi 100% sigur daca cosuletul auto nu a fost implicat intr-un accident sau nu a fost deteriorat altfel.
13. Retineti ca dupa un accident, un scaun de siguranta poate avea deteriorari care nu pot fi detectate
prin inspectia vizuală normala. Astfel de avarii pot ameninta siguranta copilului dumneavoastra. Un
astfel de cosulet auto trebuie inlocuit cu unul nou.
Transportul copiilor in cosuletul auto
Cosuletul auto este potrivit pentru instalare numai in vehicule echipate cu centuri de siguranta in 3
puncte si centuri retractoare cu 3 puncte care au fost omologate in conformitate cu Regulamentul nr.
16 al CEE-ONU sau cu alte standarde echivalente.
Atentie: Nu lasati niciodata copilul nesupravegheat in cosuletul auto.

RO
1. Apasati butonul rosu si deschideti catarama centrala a cosuletului auto.
2. Asezati copilul in cosuletul auto.
3. Asigurati-va ca cel mic a fost plasat corespunzator in cosulet si ca spatele lui este sprijinit corect.
4. Puneti centurile de siguranta pe umerii copilului asigurandu-va ca acestea nu sunt rasucite.
5. Alaturati cele doua limbi ale cataramei
6. Si inserati-le pe ambele in catarama centrala pana cand auziti sunetul „click”
7. Trageti cureaua de mijloc din fata pentru a fixa copilul in cosuletul auto.
8. In final verificati daca toate componentele de siguranta au fost bine fixate.
Reglarea centurilor de siguranta in cosuletul auto
Centurile de siguranta trebuie sa tina copilul bine fixat in cosuletul auto si sa nu fie rasucite.
1. Pentru a slabi centurile de prindere – apasati catarama centrala, tragand ambele curele in acelasi
timp.
2. Pentru a strange centurile de siguranta, trageti benzile de mijloc din partea frontala pana cand
curelele de fixare se potrivesc perfect cu corpul copilului.
Asigurati-va ca bazinul copilului este bine fixat in cosuletul auto..
Instalarea in masina (fig A-F)
Nu instalati niciodata cosuletul auto pe scaunul pasagerului prevazut cu airbag pentru ca poate pune
in pericol viata copilului.
Instalati intotdeauna cosuletul auto pe scaunul pasagerului cu spatele la directia de mers.
1. Pozitionati manerul de transport al cosuletului auto si plasati-l pana pe scaunul pasagerului (fig. B)
2. Impingeti scaunul pasagerului din fata cat mai departe posibil.
3. Scoateti centura de siguranta a autovehiculului cat mai mult posibil si trageti centura transversala
prin sloturile superioara ale cosuletului auto. ( fig. C)
4. Strangeti catarama de siguranta a centurii autovehiculului. (Fig D)
5. Apoi introduceti centura de umar a scaunului auto prin slotul din spatele cosuletului auto (fig E).
6. Fixati manerul cosuletului auto in pozitia care impiedica deplasarea acestuia in timpul functionarii.
(Fig. F)
7. Abia dupa ce ati facut toti pasii de mai sus puteti sa porniti la drum.
Reglarea manerului cosuletului auto
Pentru a schimba pozitia manerului, apasati simultan butoanele de pe ambele parti laterale ale
manerului si fixati in pozitia dorita. Atunci cand pozitia manerului este corecta, mecanismul se va bloca
(veti auzi un sunet de click distinct), iar butoanele vor reveni la pozitia anterioara.
Manerul poate fi reglat in patru pozitii (fig G)
1. Pozitia pentru a transporta cosuletul auto in masina (fig. G -1)
2. Pozitia de a purta cosuletul auto (fig G-2)
3. Pozitia de dormit/balansare (fig G-3)
4. Pozitia de stat – folosit in casa (fig G-4)
Intretinerea cosuletului auto
Baza cosuletului auto trebuie curatata cu apa calduta.
Husa poate fi spalata manual, la temperaturi sub 30 ° C.
Lasati sa se usuce natural, fara uscator.
Scoaterea husei cosuletului auto
1. Desfaceti catarama principala a hamului.
2. Scoateti dispozitivul de reglare a cosuletului auto.
3. Treceti curelele de umar si cureaua de picioare prin sloturile husei.
4. Scoateti husa cosuletului auto.
Punerea husei cosuletului auto
1. Introduceti curelele de umar si cureaua de picioare prin sloturile husei.
2. Puneti husa cosuletului auto.
3. Puneti dispozitivul de reglare al cosuletului.
4. Strangeti catarama principala a hamului.

EN
Description of the safety seat components:
1. Carrier handle
2. Handle regulation button
3. Lap belt path (seat sides)
4. Seat body
5. Seat cover
6. Pull strap
7. Pull strap regulation buckle
8. Harness fastening buckle
9. Position of information sticker (seat side)
10. Information and warning label
11. Safety harness
12. Shoulder pads
13. Shoulder belt path (seat back)
14. Seat canopy
Dear Parents,
Congratulations on the purchase of our car safety seat.
We guarantee that this safety seat meets the most stringent safety requirements as set out in the
European safety standard ECE R44/04 and is suitable for children in the weight group 0 - up to 10 kg.
Please remember that this safety seat ensures maximum safety only if used according to the user
manual.
Attention!
This car safety seat guarantees optimum safety only if used according to this user manual. Keep the
user manual handy and available all the time during the whole period of the car seat use.
This child safety seat can be installed in the front or rear passenger seat of the car but always facing
backwards.
Never install the child safety seat in the passenger seat fitted with an air bag because it may be
dangerous for the child!!!
For your safety, the child seat should always be fastened with the car seat belts, even when no child
is transported in it.
When the child safety seat is used, the folding rear passenger seat must be always locked in the
typical standard position.
Any modifications of the child safety seat by the user are strictly forbidden.
It is forbidden to use the child safety seat without the cover or with any non-standard covering. Please
remember that the proper seat cover fulfills an important restraining function.
Before using the child safety seat in a car make sure that there are no loose objects in the car, which
might hurt the baby during braking.
Luggage or other objects which could be dangerous for the child or other passengers in the event of
sudden braking or accident should be properly secured.
Rigid points or plastic components of the child safety seat must be placed and secured in such a way
that in the normal vehicle usage conditions they could not be trapped or blocked by the sliding seats or
doors. It is forbidden to use other load bearing attachment points to install the child safety seat than
those described in the user manual and marked on this child safety seat.
For safety reasons please do not use second-hand safety seats. In such a situation you cannot be
100% sure if the child safety seat has not been involved in an accident or has not been damaged
otherwise.
Please note that after an accident a safety seat may have damage which cannot be detected by
normal visual inspection. However, during further child safety seat usage such damage may threaten
your child's safety. Such a seat must absolutely be replaced with a new one.
Putting the child in the safety seat
This car safety seat is suitable for installation only in vehicles fitted with 3-point static seat belts and 3-
point retractor belts which have been type approved according to UN/ECE Regulation No. 16 or to
other equivalent standards.
Warning! Never leave the child in the safety seat unattended, also when using the safety seat outside
a car.

EN
1. Press the red button and open the central buckle of the child seat.
2. Place the child in the car seat.
3. Make sure that the child has been placed correctly in the seat and that his back adheres to the
seatback.
4. Put the harness on the child's shoulders making sure that the harness straps are not twisted.
5. Join the plastic tongues of both harness straps.
6. Then insert them into the main buckle and press until you hear a click sound.
7. Pull the middle strap at the seat front to immobilize the child by the fastening system.
8. Finally check if all safety components have been properly fastened.
Harness adjustment in safety seat
Remember that all the belts fastening the child restraint in the car must be tight, the harness straps
must fit the child's body and must not be twisted.
1. To loosen the harness straps press the regulation device – the buckle at the front of the seat shell,
pulling both straps at the same time.
2. To tighten the harness straps pull the middle strap at the front of the seat shell until the harness
straps fit the child's body snugly.
Make sure that the lap straps are placed low so that the child's pelvis is securely restrained.
Installation of child safety seat in a car (Fig. A – F)
Never install the child safety seat in the passenger seat fitted with an air bag because it may cause
danger to the child's life.
Always install the child safety seat in a passenger seat in a rear-facing position.
1. Please set the carrier handle of the child safety seat and place it in the passenger seat (Fig. B)
2. Push the front passenger seat as far back as possible.
3. Pull out the car safety belt as far as possible and thread the lap belt through the upper slots in the
child safety seat. (Fig. C)
4. Fasten the safety buckle of the car seat belts. (Fig. D)
5. Then thread the car seat shoulder belt through the slot at the back of the child safety seat (Fig. E).
6. Set the safety seat carrier handle in the position preventing the excessive tilting of the seat during
the drive. (Fig. F)
7. When you have done all these things properly and made sure that the safety seat has been
correctly installed, you can drive off.
Car seat handle reglation (Fig. G)
To change the position of the handle, press at the same time the buttons on both sides of the handle
where it connects with the seat body and set the handle in the required position. When the right
position is found, the mechanism will lock again (you will hear a distinct click sound), and the buttons
will return to their previous position.
The handle can be set in four positions (Fig. G)
1. Position to transport the child safety seat in a car (Fig. G pos. 1)
2. Position to carry the seat ((Fig. G pos. 2)
3. Sleeping / rocking position (Fig. G pos. 3)
4. Sitting position – child seat for home use (Fig. G pos. 4)
Cleaning / maintenance of child safety seat
▪ The body of this child safety seat should be cleaned with warm soapy water.
▪ The seat cover can be hand washed in the temperature below 30oC.
▪ The washed cover should be laid flat to dry.
▪ Do not spin or tumble dry.
Removing the seat cover
▪ Undo the main harness buckle.
▪ Remove the fabric seat leveller.
▪ Pass the shoulder straps and the crotch strap through the slots in the cover.
▪ Remove the cover from the child safety seat.
Putting the cover on the child safety seat
▪ Thread the shoulder straps and the crotch strap through the slots in the cover.
▪ Put the cover on the child safety seat
▪ Put the fabric seat leveller.
▪ Fasten the main harness buckle.

IT
Cari genitori,
Congratulazioni per l'acquisto del nostro seggiolino auto CAPRI. Garantiamo che seggiolino CAPRI
soddisfa i requisiti di sicurezza più severi previsti nella norma europea di sicurezza ECE R44 / 04 ed è
adatto per i bambini nel gruppo di peso 0 - fino a 10 kg.
Si prega di ricordare che il seggiolino di sicurezza CAPRI garantisce la massima sicurezza solo se
utilizzato secondo il manuale dell'utente.
ATTENZIONE – IMPORTANTE
· Il seggiolino auto CAPRI garantisce una sicurezza ottimale solo se usato secondo questo manuale
utente. Tenere il manuale dell'utente a portata di mano e sempre a disposizione durante l'intero
periodo di utilizzo del seggiolino
· Il seggiolino per CAPRI può essere installato sul sedile anteriore o posteriore del passeggero, ma
sempre rivolto all'indietro
· Non installare MAI il seggiolino sul sedile del passeggero dotato di airbag perché potrebbe essere
pericoloso per il bambino !!!
· Per la vostra sicurezza, il seggiolino deve sempre essere fissato con le cinture del auto, anche
quando non e utilizato da un bambino.
· Quando viene utilizzato il seggiolino, il sedile del passeggero posteriore deve essere sempre
bloccato nella normale posizione standard.
· Qualsiasi modifica del seggiolino da parte dell'utente è strettamente PROIBITO.
· È PROIBITO a utilizzare il seggiolino senza rivestimento o con un rivestimento non standard.
· Si ricorda che il corretto rivestimento del seggiolino svolge un'importante funzione di trattenimento.
· Prima di utilizzare il seggiolino nell'auto macchina, assicurarsi che non siano oggetti liberi nell'auto,
che potrebbero ferire il bambino durante una frenata.
· Bagagli o altri oggetti che potrebbero essere pericolosi per il bambino o altri passeggeri in caso di
frenata improvvisa o incidente dovrebbero essere adeguatamente assicurati.
· Punti rigidi o componenti in plastica del seggiolino devono essere posizionati e fissati in modo tale
che, nelle normali condizioni di utilizzo del veicolo, non possano essere intrappolati o bloccati dai
sedili o dalle porte scorrevoli.
· È VIETATO utilizzare altri punti di attacco del carico per installare il seggiolino rispetto a quelli
descritti nel manuale dell'utente e contrassegnati sul seggiolino per bambini CAPRI.
· Per motivi di sicurezza, non utilizzare seggiolini di sicurezza di seconda mano. In tale situazione non
è possibile essere sicuri al 100% che il seggiolino non è stato coinvolto in un incidente o se non è
stato danneggiato in altro modo.
· Si prega di notare che dopo un incidente, un seggiolino può avere danni che non possono essere
rilevati da una ispezione visiva. Tuttavia, durante l'utilizzo di un seggiolino, questo tipo di danno può
minacciare la sicurezza del bambino. Tale seggiolino deve assolutamente essere sostituito con uno
nuovo.
I. Mettendo il bambino nel seggiolino
Il seggiolino CAPRI è adatto all'installazione solo su veicoli dotati di cinture di sicurezza riavvolgimenti
a 3 punti e omologate secondo il regolamento UN / ECE n. 16 o altre norme equivalenti.
Non lasciare MAI il bambino sul seggiolino incustodito, anche quando si utilizza il seggiolino
all'esterno di un'automobile.
1. Premere il pulsante rosso e aprire la fibbia centrale del seggiolino.
2. Mettere il bambino nel seggiolino auto CAPRI.
3. Assicurarsi che il bambino sia stato posizionato correttamente nel sedile e che la sua schiena
aderisca allo schienale.
4. Mettere l'imbracatura sulle spalle del bambino assicurandosi che le cinture dell'imbragatura non
siano attorcigliate.
5. Unire le linguette delle entrambe cinture.
6. Quindi inserirli nella fibbia principale e premere finché si sente un clic.
7. Tirare la cintura centrale del seggiolino per trattenere il bambino dal sistema di fissaggio.
8. Al fine verificare se tutti i componenti di sicurezza sono stati correttamente fissati.

IT
II. Regolazione imbracatura del seggiolino CAPRI
RICORDARE che tutte le cinture che fissano il seggiolino in auto devono essere strette, le cinture
dell'imbragatura devono adattarsi al corpo del bambino e non devono essere attorcigliate.
1. Per allentare le cinture dell'imbracatura premere il dispositivo di regolazione - la fibbia nella parte
anteriore della scocca del seggiolino, tirando entrambe le cinture contemporaneamente.
2. Per stringere le cinture dell'imbracatura, tirare la cintura centrale nella parte anteriore della scocca
finché le cinture dell'imbracatura non si adattano perfettamente al corpo del bambino.
ASSICURARSI che le cinture del seggiolino siano posizionate in basso in modo che il bacino del
bambino sia trattenuto in modo sicuro.
III. Installazione del seggiolino CAPRI in auto (Fig. A - F)
MAI installare il seggiolino sul sedile del passeggero dotato di air bag perché può causare pericolo per
la vita del bambino.
Installare SEMPRE il seggiolino in un sedile del passeggero in posizione rivolta verso il indietro.
1. Impostare la maniglia del seggiolino e posizionarlo sul sedile del passeggero (Fig. B)
2. Spingere il sedile anteriore del passeggero in più indietro possibile.
3. Estrarre la cintura di sicurezza dell'auto il più lungo possibile e infilare la cintura addominale
attraverso le fessure superiori del seggiolino. (Fig. C)
4. Allacciare la fibbia di sicurezza delle cinture di sicurezza dell'auto. (Fig. D)
5. Quindi infilare la tracolla del sedile auto attraverso la fessura sul retro del seggiolino (figura E).
6. Mettere la maniglia del seggiolino nella posizione che impedisce l'inclinazione eccessiva del
seggiolino durante la guida. (Fig. F)
7. Quando sono stati percorsi tuti passi correttamente e il seggiolino e stato installato correttamente, si
puo partire.
IV. Regolazione della maniglia del sedile
Per modificare la posizione della maniglia, premere contemporaneamente i pulsanti su entrambi i lati
della maniglia in cui si collega al corpo del seggiolino e impostare la maniglia nella posizione
desiderata. Quando viene trovata la posizione corretta, il meccanismo si blocca di nuovo (si sentirà un
suono di clic distinto) e i pulsanti torneranno alla posizione precedente.
La maniglia può essere regolata in quattro posizioni (figura G)
1. Posizione per il trasporto del seggiolino in una macchina (Fig. G pos.1)
2. Posizione per il trasporto del seggiolino auto (Fig. G pos.2).
3. Posizione di riposo / dondolo (figura G pos.3).
4. Posizione seduta - sedia per uso domestico (figura G pos.4).
V. Pulizia / manutenzione del seggiolino
· Il corpo del seggiolino deve essere pulito con acqua calda e sapone.
· Il rivestimento del seggiolino può essere lavato a mano alla temperatura inferiore a 30 ° C.
· Il rivestimento lavato deve essere appiattita ad asciugare.
· Non centrifugare o asciugare in asciugatrice.
1. Rimozione rivestimento del seggiolino
· Aprire la fibbia dell'imbracatura.
· Rimuovere la livella per tessuto del seggiolino.
· Passare gli spallacci e la cinghia inguinale attraverso le fessure del coperchio.
· Rimuovere il rivestimento dal seggiolino auto.
2. Mettere il rivestimento sul seggiolino
· Infilare gli spallacci e la cinghia inguinale nelle fessure del rivestimento.
· Mettere il rivestimento sul seggiolino.
· Mettere il livellatore del seggiolino.
· Allacciare la fibbia dell'imbracatura.

HU
Neve/Gioia Hordozó
Alkatrészek:
1. Hordozó fogantyú
2. Gomb a fogantyú álitásához
3. Alsó övvezeték
4. Külső plasztik burkolat
5. Üléshuzat
6. Álitási pánt
7. Álitási pánt gombja
8. Csat
9. Magyarázat matrica (külső resz)
10. Figyelmeztető címke
11. Biztonsági öv
12. Vállpánt
13. Felső övvezeték
14. Kupola
Kedves szüllő,
Köszönjük hogy ezt a hordozót vásárolta és használja. A termék a ECE R44/04 szabvány szerint lett
gyártva és alkalmas 0 és 10 kg-os gyerekek számára. Kérjük olvassa el és szem előtt tartva használja
termékünket mivel csak igy a hordozó garantálhat maximális biztonságot.
Figyelem – fontos feltételek
1. A hordozó csak akkor biztosit maximális védelmet ha az utmutató szerint van használva. Kérjük
ovatosan olvassa el és tartsa meg jövőbeli hivatkozás.
2. Ez a hordozó rögzíthető a jármű első vagy hátsó ülésére és mindig a menetiránnyal ellentétesen.
3. Az első ülésen kizárólag kikapcsolt légzsák esetén használható a Neve/Gioia hordozó.
4. Az ön biztonságára kérjük mindig rögzitse a hordozót a jármü biztosági övvel, akkor is ha gyerek
nincs benne.
5. Tiltott a hordozó használása az üléshuzat nelkül.
6. Mielőtt a hordozót a jármüben használjá, győződjön meg arrol hogy nincsenek laza tárgyak a
jármüben amelyek a gyereknek fájdalmat okozhat egy fék esetén.
7. A poggyász vagy egyéb veszélyes tárgy megfelelő módon kell lenniük rögzítve, mivel
veszélyeztetheti a gyermeket vagy a másik utasok a hirtelen fékezés vagy baleset esetén.
8. A hordozó merev pontjait vagy műanyag részeit helyezni és olyan módon biztosítani kell, hogy a
szokásos járműhasználati körülmények között nem lehetett csapdába ejteni vagy blokkolni a csúszó
ülésekknél vagy ajtóknál.
9. Tillos más rögzitési modszert használni különbözö az utmutatónál.
10. Biztonsági okokból ne használjon használt biztonsági üléseket. Ilyenekben helyzetekben nem
biztos hogy a hordozó nem volt balesetben érintett vagy más módon nem sérült.
11. Kérjük, vegye figyelembe, hogy baleset után a hordozó sérülést kaphat ami nem észlelhető normál
szemrevételezéssel. Azonban a továbbiakban a hordozó használatával a károsodás veszélyeztetheti
gyermeke biztonságát. Az ilyen terméket feltétlenül kell cserélni.
A gyerek elhelyezése a hordozóban
A Neve/Gioia hordozó csak abban a jármükben használható amelyek ellátva vannak hárompontos
biztonsági övvel, gyártva az ECE 16 szabváni szerint.
Soha ne hagyja felügyelet nélkül a gyermeket a hordozóban, még akkor is, ha a terméket a jármün
kívül használja.
1. Nyomja meg a középső piros gombot hogy a biztonsági öv csatját nyissa ki.
2. Ültesse gyerekét a hordozóban.
3. Ellenőrizze hogy a gyerek helyesen lett ültetve és hogy a háta a háttámlán pihen.
4. Tegye a biztonsági övet a gyerek vállára és ellenőrizze hogy egyenessen van és nincsenek
tekercsek rajta.
5. Tegye össze a csat csipeszeket.
6. Ezutan illessze be a csatban ameddig halja a klick hangot.
7. Huzza meg az álitási pántot hogy a megfelelő hosszuságban legyen a biztonsági öv.
8. Ellenőrizze hogy az összes biztonsági öv helyesen van be kötve.

HU
A biztonsági öv beállítása
Vigyázzon arra hogy a biztonsági öv minding elégé soros és nem csavaros.
1. A vállpántok lazításához nyomja meg az álitási pánt gombját és mindkét pántot egyszerre húzza.
2. A vállpántok megszorításához húzza meg a középső pántot az ülés elején amíg a válpántok szoros
a gyermek testéhez.
Ellenőrizze azt hogy az alsó öv a helysen állitva van a gyerek medence altestén.
A hordozó telepitése a jármüben
Soha ne szerelje a gyermekülést a légzsákkal felszerelt utasülésbe mert veszélyt jelenthet a gyermek
életére. Minding telepitse a hordozót a menetiránnyal ellentétesen.
1. Helyeze a hordozót az utasülésre (B kép).
2. Tolja az első utasülést a legmesszéb pozicioban.
3. Huzza ki teljesen a jármü biztonsági övet és tegye át a felső övvezetékben (C kép).
4. Rögzítse a jármü biztonsági övet (D kép).
5. Ezután tegye át a hordozó vállövet az alsó övvezetéken keresztül (E kép).
6. Állítsa a hordozó fogantyúját a felesleges pozicióban hogy megakadályozzák a hordozó billentését
(F kép).
7. Amiutan az összes lépéseket megtette ellenőrizze hogy a hordozó helyesen van rőgzitve és
használja ovatosan.
A fogantyú álitása (G kép)
A fogantyú pozició megváltoztatásához egyszerre nyomja meg a gombokat a fogantyú oldalain, ahol a
hordozó plasztik vázához csatlakozik és válasza a kívánt pozíciót. Mikor megtalálta a helyes pozíciót,
a mechanizmus automatikuson zárva (a klick hang halatszik) és a gombok visszatérnek az előző
pozícióban.
A fogantyú 4 pozicioban álitható:
1. A jármüben rőgzitett pozicio ( G kép 1)
2. A hordozó pozicio (G kép 2)
3. Alvo/ hintaszék pozicio (G kép 3)
4. Ülés pozició, otthoni használatra (G kép 4)
Karbantartás és tisztitás
- a plasztik váz langyos vizzel és szappannal tisztiható
- a huzátot alacsony hőmérséklet kezzel kell mosni
- a megmosott huzatot normálison kell hagyni száradjon
- ne csavarja centrifugával és tilos száritani gépben.
A huzat eltávolítása
- nyissa ki a biztonsági öv csatot
- távolítsa el az anyag ülésszintezőjét
- tegye át a biztonsági öv 2 részét a huzaton levö vágatokon
- távolitsa el a huzatot.
A huzat telepitése
- tegye át a biztonsági öv 2 részét a huzaton levö vágatokon
- tegye a huzatot a hordozó vázára
- tegye az anyag ülésszintezőjét
- rögzítse a biztonsági öv csatját.
Table of contents
Languages:
Other Coccolle Stroller manuals

Coccolle
Coccolle Amani User manual

Coccolle
Coccolle Mino User manual

Coccolle
Coccolle Vispo User manual

Coccolle
Coccolle Ambra User manual

Coccolle
Coccolle Neve User manual

Coccolle
Coccolle Siyana User manual

Coccolle
Coccolle Perla User manual

Coccolle
Coccolle Sole User manual

Coccolle
Coccolle urbio air User manual

Coccolle
Coccolle Alla User manual

Coccolle
Coccolle Cassia User manual

Coccolle
Coccolle Arona User manual

Coccolle
Coccolle Lissia User manual

Coccolle
Coccolle Silene User manual

Coccolle
Coccolle primo User manual

Coccolle
Coccolle Saliara User manual

Coccolle
Coccolle Ravello User manual

Coccolle
Coccolle Oro User manual

Coccolle
Coccolle Melia User manual

Coccolle
Coccolle gire plus User manual