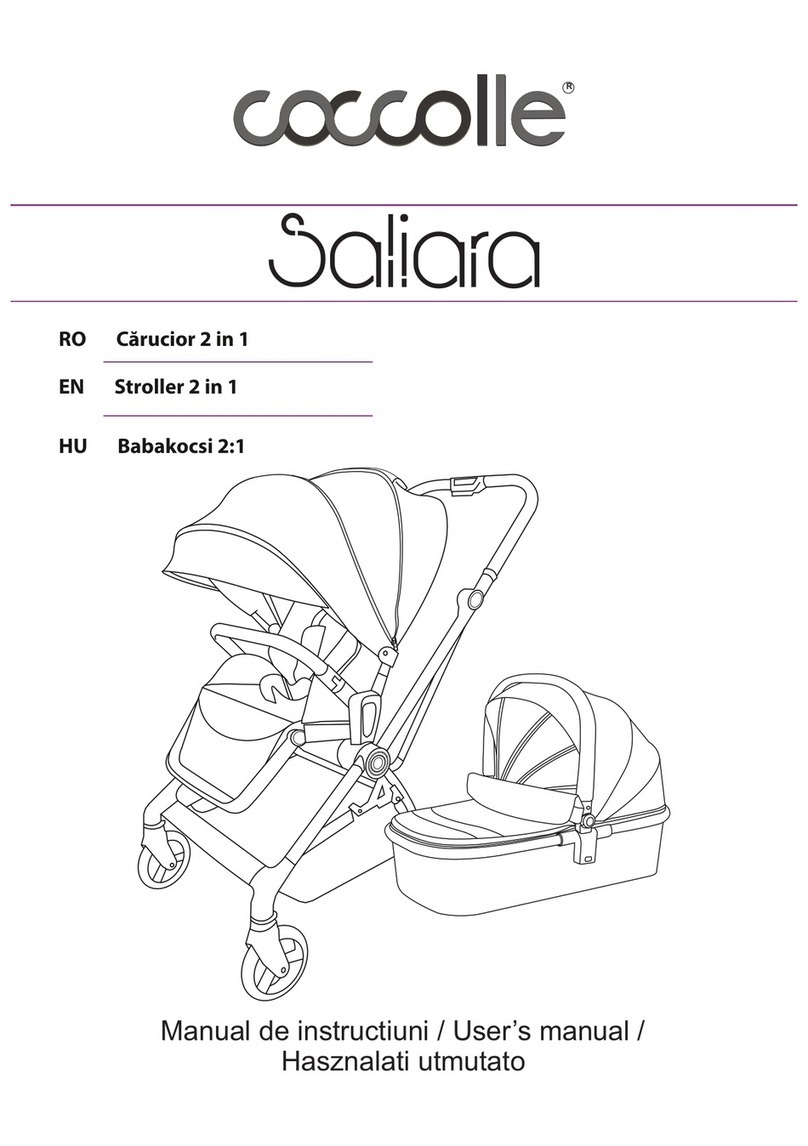
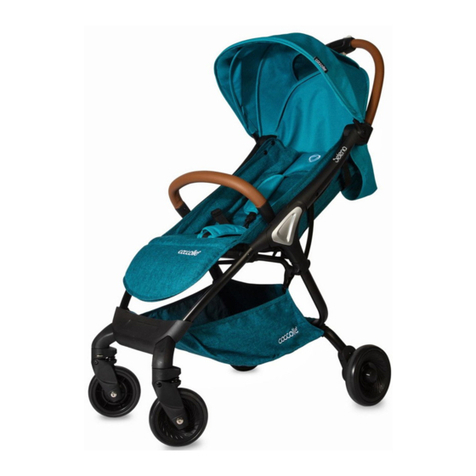
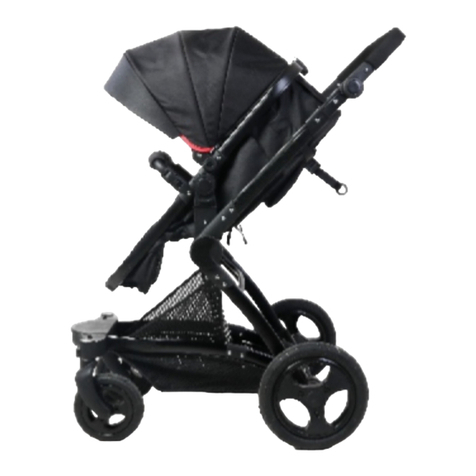
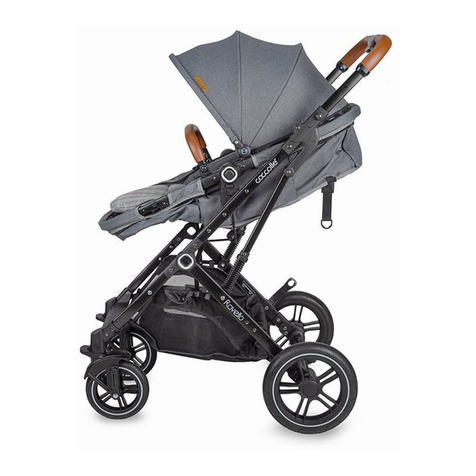
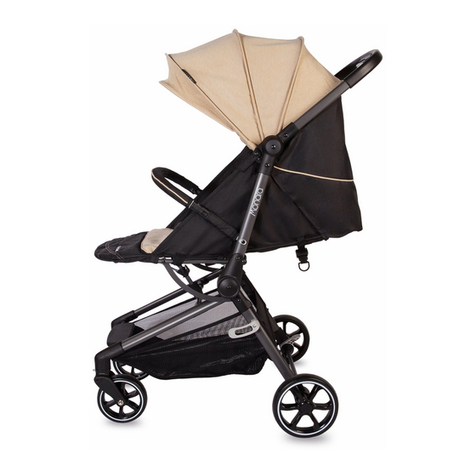
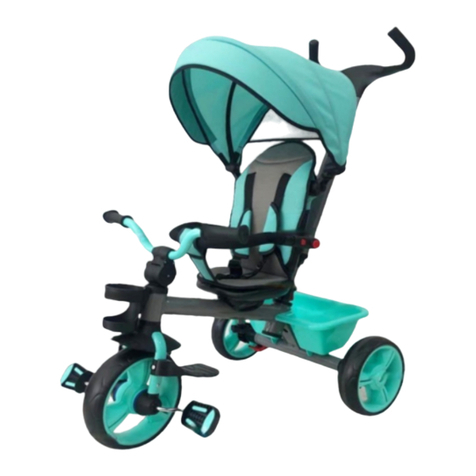
Coccolle Mino User manual

RO Cărucior
GB Stroller
Manual de instructiuni / User’s manual /
Manuale di instruzioni / Hasznalati utmutato
IT Passeggino
R
HU Babakocsi

A. B.
C.
D.
E.
F.
G.
H.
I. J.
K.
L.
RO: imaginile din acest manual au scop ilustrativ. Produsul achizitionat de
dvs poate sa difere.
EN: the images shown in this instructions manual have illustrative purpose.
The product purchased by you may look different.
IT: Le immagini mostrate in questo manuale di istruzioni hanno scopo
illustrativo. Il prodotto acquistato da voi potrebbe sembrare diverso.
HU: Az útmutatóban bemutatott képek szemléletes célt szolgálnak. Az Ön
által megvásárolt termék eltérő lehet.


RO
Atentionari
1. Nu lasati niciodata copilul nesupravegheat.
2. Utilizati intotdeauna centura de siguranta.
3. Asigurati-va ca toate dispozitivele sunt bine fixate inainte de utilizare.
4. Pentru a evita pericolul asigurati-va ca tineti copilul departe atunci cand pliati si
depliati caruciorul.
5. Utilizati caruciorul doar pentru un copil o data.
6. Acest carucior este destinat copiilor de la 0-36 luni.
7. Nu puneti greutati mai mari de 15 kg in carucior.
8. Nu puneti greutati greutati mai mari de 5 kg in cosul de cumparaturi.
9. Nuj adaugati salteluta mai mare de 25mm in carucior.
10. Nu lasati copilul sa se joace cu caruciorul.
11. Nu adaugati genta sau alte accesorii pe maner sau pe copertina deoarece
caruciorul se poate rasturna si copertina se poate prabusi.
12. Orice greutate aditionala adaugata pe maner poate afecta stabilitatea caruciorului.
13. Folositi pozitia cea mai inclinata atunci cand utilizati caruciorul pentru copilul nou
nascut.
14. Ajustati curelele de umeri la nivelul cel mai jos atunci cand copilul este sub 6 luni
si trebuie sa foloseasca centura de siguranta.
15. Asigurati-va ca frana este activata atunci cand puneti sau scoateti copilul din
carucior.
16. Va rugam sa folositi doar piese autorizate de producator sau distribuitor.
17. Acest produs nu este destinat pentru alergare sau patinaj.
18. Tineti departe de foc.
19. Tineti pungile de plastic departe de copil pentru a evita sufocarea.
20. Este periculos sa lasati copilul nesupravegheat.
21. Utilizati intotdeauna bifurcatia curelei cu centura de talie.
22. Verificati daca toate elementele sunt bine fixate inainte de utilizare.
23. Nu folositi accesorii care nu sunt aprobate de producator.
Atentie!
Citit acest manual de instructiuni cu atentie inainte de utilizare si pastrati-l pentru
referinte viitoare. Siguranta copilului dvs poate fi pusa in pericol daca nu respectati
aceste instructiuni.
Componente
A. Clema de pliere
B. Maner
C. Buton pliere
D. Copertina
E. Tetiera
F. Bara de protectie
G. Centura de siguranta
H. Suport de picioare
I. Roata fata
J. Buton inchidere pivot
K. Roti spate
L. Cos de cumparaturi

RO
Depliere si asamblare
1. Deschideti caruciorul: desfaceti carligul pliabil conform indicatiei sagetii din imagine,
asa cum se arata in figura A. Dupa ce caruciorul a fost deschis la jumatate ca in figura
C, ridicati manerul in directia indicată in figura B, pana cand auziti sunetul click. Tineti
manerul cu amandoua mainile pentru a deschide cadrul asa cum este aratat in figura
D. Apasati ambele parti ale manerului pentru a va asigura ca cele doua parti sunt bine
fixate, ca in imaginea D.
2. Instalarea si scoaterea barii de protectie: Introduceti bara de protectie in locasurile
destinate acesteia de pe ambele parti ale caruciorului pana cand auziti sunetul click
care arata ca bara de protectie fixata corect (partea canelurii trebuie sa fie deasupra)
Apasati butonul de pe fiecare parte a barii de protectie si trageti afara bara.
3. Utilizarea copertinei: Pentru a deschide si inchide copertina, impingeti copertina in
fata si trageti in spate.
4. Rotirea rotii pivotante din fata: Apasati butonul de blocare de pe roata din fata.
Roata din fata se poate pivota la fel cum arata in figura A. Orientarea rotirii rotii din
fata: Ridicati butonul rotii din fata si asa roata din fata va sta in pozitie dorita.
5. Utilizarea franei de pe roata din spate: Apasati frana de pe roata din spate. Ridicati
pedala pentru a dezactiva frana. Cand caruciorul este in pozitia de stationare, frana
trebuie activata.
6. Utilizarea centurii de siguranta in 5 puncte:
Fixare: Introduceti limbile cataramei de siguranta in catarama centrala pana cand
auziti sunetul click.
Deschidere: Apasati butonul cataramei pentru a deschide.
Ajustarea lungimii: Daca vreti sa ajustati lungimea centurii de siguranta, tineti apasat
butonul de reglare si trageti cureaua.
7. Asamblarea centurilor de umeri: Asamblati/dezasamblati curelele de umeri:
Inchideti/ scoateti catarama carligului de la centura de umar fixata deasupra curelei
pentru a asambla sau scoate centura inferioara a umarului.
8. Ajustarea spatarului: vedeti fig A, tineti cureaua cu o mana, apasati butonul si
trageti in sus pentru a ridica spatarul si apasati butonul si lasati in jos pentru lasa in
pozitia cea mai joasa.
9. Plierea: Pliati copertina asa cum se arata in poza A, apasati butonul de pliere si mai
apoi manerul asa cum se arata in poza B. Tineti manerul de ambele parti ale
caruciorului si apasati caruciorul in jos asa cum se arata in poza C.
10. Utilizarea carligului de pliere: Cand caruciorul este pliat, carligul de pliere trebuie
sa fie atarnat pe cilindru.
Instructiuni de utilizare:
Verificati daca fiecare accesoriu a fost instalat si bine fixat la locul lui. Nu lasati copiii
sa stea in picioare in carucior sau sa se urce pe cadrul acestuia. Tineti departe de foc!
Nu depozitati intr-un mediu umed sau fierbinte. Imaginile din acest manual au scop
ilustrativ. Produsul achizitionat de dvs poate sa difere.
Intretinere si mentenanta:
Pastrati intotdeauna caruciorul in bune conditii pentru a va asigura ca acesta este
sigur. Partile din material nu pot fi spalate, va rugam sa le curatati cu peria sau cu alte
instrumente de curatare. Alte accesorii pot fi curatate cu sapun de uz casnic sau cu
apa calduta. Verificati in mod regular partile caruciorului cum ar fi suruburile sau
cusaturile. Va rugam sa inlocuiti partile defecte in timp util. Va rugam sa cititi acest
manual de instructiuni cu atentie inainte de folosire pentru a evita pericolele.
EN
Warnings!
1. Never leave your child unattended. Always keep child in view when in stroller.
2. Always use the restraint system.
3. Ensure that all locking devices are engaged before use. To avoid injury ensure that
your child is kept away when unfolding and folding this product.
4. Only use one child for one stroller.
5. This stroller is suitable for 0-36 months.
6. Do not put more than 15kg in each stroller seat. Do not put more than 5kg in each
basket.
7. Do not allow to add cushion over than 25mm in the seat. Do not let your child play
with this product.
8. Never place or hang parcels, bags or accessories on the handle or canopy. The
stroller may tip over or the canopy may collapse. This stroller is for use by one child in
each seating only. Any load attached to the handle affects the stability of the
pram/pushchair.
9. This stroller is designed to be used from birth shall recommend the use of the most
reclined position for new born babies. Please adjust the shoulder belt to the lowest
level when the child less than 6 months and must use the safety harness. Keep child
away from the product when you folding, unfolding or adjusting it.
10. Ensure the parking brake is engaged during the loading and unloading of children.
11. Please use the spare parts from manufacturer or distributor.
12. This product is not suitable for running or skating.
13. Please keep away from fire.
14. Keep the plastic packaging away from children to avoid suffocation.
15. It may be dangerous to leave your child unattended.
16. Always use the crotch strap in combination with the waist belt.
17. Check that this product body or seat unit attachment devices are correctly
engaged before use.
18. Any accessories which are not approved by the manufacturer shall not be used.
The product complies with EN 1888:2012.
IMPORTANT- READ THESE INSTRUCTIONS CAREFULLY BEFORE USE AND
KEEP THEM FOR FUTURE REFERENCE. YOUR CHILD'S SAFETY MAY BE
AFFECTED IF YOU DO NOT FOLLOW THESE INSTRUCTIONS.
Spare parts list
A. Folding button
B. Handle
C. Folding hook
D. Canopy
E. Headrest
F. Bumper bar
G. Safety belt
H. Footrest
I. Front wheel
J. Swivel lock button
K. Rear wheels
L. Shopping basket

EN
Assembly steps
1. Opening the stroller: Loosen the folding hook according to the direction of arrow as
shown in figure A, after the stroller frame has been opened at half status as figure C,
elevate the pushing bar to the direction as arrow shown in figure B until you hear
“click” sound. Hold the pushing handle by two hands to open the frame, the stroller is
opened fully as shown in figure D. Press both sides of pushing handle according to
the direction of arrow in order to ensure two sides were locked in place as shown D.
2. Installation and removal of bumper bar: Insert the front bumper bar into the mounts
on each side of stroller until you hear a “click” sound to indicate the handlebar is
installed in place (notice: the groove side should be at top). Press the button of each
side of handlebar and pull out the bumper in order to remove it.
3. Use of canopy: To open or close canopy, push the canopy forward or rearward of
the stroller.
4. Front wheel swiveling: Press the lock direction button on the front wheel, Front-
wheel can swivel as figure a. To stop swivel function, lift the lock button.
5. Use of brakes on rear wheel: Step on the rear wheel brake device and the rear
wheel will be braked. Uplift the brake device, rear wheel will not be braked any more.
When a stroller intends to remain stationary, please always brake the rear wheel.
6. Use of the five point safety belts: Fastening: insert the safety buckle plug into the
safety buckle socket; you will hear a “click” when they are connected tightly. Open:
press the socket button to open the plug (as picture ten shows). Adjust length: if you
need to adjust the belt length, please hold down the adjustment button and pull the
belt.
7. Assembly/ remove the shoulder belt: Hang up / remove the hook buckle to/ from the
top fixed shoulder belt to assembly or remove the lower shoulder belt.
8. Backrest adjustment: see fig A, to hold the webbing with one hand, then press the
button and move the hand upward. Press the button to put downward the backrest.
9. Folding: Fold the canopy as shown A, press the folding button and press the
pushing handlebar as shown B. Hold the pushing handle on the both sides of stroller
and press the stroller downward according to the direction of arrow as shown C.
10. Use of folding hook: as picture eight shows, when a stroller is folded, folding hook
must be hung on the frame.
Instruction Warning
Check every accessory was installed in place and firmly before using. Do not let kids
stand on the chair or climb out of the fence of the stroller.
Keep away from Fire, rugged ground and dangerous place.
Do not use and store in frozen, humid or hot environment.
Pictures for reference only, subject to our available products.
Please always maintain the stroller in order to make sure the stroller is safe for using.
The fabric parts cannot be washed, please be cleaned by brush or other cleaning
tools; other accessories can be cleaned by household soap or warm cleaner.
Regular check the parts like adjustable screw and sewing problem. Please change the
defective parts in time. Please read the instruction carefully before installing in order to
avoid damage parts.

IT
Avvertenze!
Avvertimento! Non lasciare mai il bambino incustodito. Tenere sempre in vista il
bambino quando si trova nel passeggino.
Avvertimento! Utilizzare sempre il sistema di imbracatura.
Avvertimento! Assicurarsi che tutti i dispositivi di bloccaggio siano innestati prima
dell'uso.
Avvertimento! Per evitare lesioni, assicurarsi che il bambino sia tenuto lontano
durante lo spiegamento e la piegatura di questo prodotto.
Avvertimento! Questo prodotto è adatta solo per un bambino alla volta.
Avvertimento! Questo passaggio e adatto per bambini tra 0 e 36 mesi.
Avvertimento! Il peso massimo non deve superare 15 kg.
Avvertimento! Peso massimo cestino: non deve superare 5 kg.
Avvertimento! Non aggiungere un cuscino piu grosso di 25 mm.
Avvertimento! Non lasciare il vostro bambino giocare con il prodotto.
Avvertimento! Mai posizionare o appendere pacchi, borse e accessori su manubrio o
sul tettuccio. il passeggino potrebbe ribaltarsi o il tettuccio potrebbe collassare.
Avvertimento! La sedia del passeggino è adatta a un bambino a la volta.
Avvertimento! Qualsiasi carico collegato al manico influisce sulla stabilità del
passeggino.
Avvertimento! I passeggini progettati per essere usati dalla nascita raccomandano
l'uso della posizione più reclinata per i neonati.
Avvertimento! Si prega di aggiustare gli spallacci a livello più basso quando il bambino
a meno di 6 mesi, e sepre usare la imbracatura.
Avvertimento! Sempre assicurarsi che la freno del passeggino è impegnata quando si
mette o si toglie il bambino dal passeggino.
Avvertimento! Questo prodotto non è adatto per pattinare o correre.
Avvertimento! Tenere lontano dal fuoco.
Avvertimento! Tenere il coperchio di plastica lontano dai bambini per evitare il
soffocamento.
Avvertimento! Può essere pericoloso a lasciare il vostro bambino incustodite.
Avvertimento! Sempre utilizzare la cintura inguinale con gli spallacci.
Avvertimento! Controllare che i dispositivi di fissaggio del telaio o del sedile siano
correttamente inseriti prima dell'uso.
Avvertimento! Gli accessori che non sono approvati dal produttore non devono esere
utilizati.
AVVERTIMENTO
IMPORTANTE - LÉGÈRE QUESTI ISTRUZIONI CON ATTENZIONE PRIMA
DELL'USO E CONSERVARLI PER USO FUTURO. LA SICUREZZA DEL TUO
BAMBINO PUÒ ESSERE AFECTATA SE NON SEGUETE QUESTE INSTRUZZIONI.

IT
Elenco parti componenti:
A. Pulsante Piegatura
B. Maniglia Di Spinta
C. Gancio Di Sicurezza
D. Tettuccio
E. Poggiatesta
F. Paraurti
G. Imbracatura
H. Poggiapiedi
I. Ruota Anteriore
J. Pulsante Bloccaggio Diretione
K. Ruota Posteriore
L. Cestino Di Spesa
Apertura e assemblaggio
1. Apertura passeggino: Allentare il gancio di sicurezza piegatura secondo la direzione
della freccia come mostrato nella figura A. Dopo che il telaio del passeggino è stato
aperto a metà strada come nella figura C, sollevare la maniglia di spinta nella
direzione indicata dalla freccia nella figura B, finché non si sente un clic. Tenere la
maniglia di spinta con due mani per aprire il telaio, il passeggino si apre
completamente come mostrato nella figura D. Premere entrambi i lati del manubrio di
spinta in base alla direzione della freccia per assicurarsi che i due lati siano bloccati in
posizione come mostrato D.
2. Installare e rimuovere il paraurti: Inserire il paraurti nei supporti su ciascun lato del
passeggino finché si sente un clic. (avviso: il lato scanalato dovrebbe essere in alto).
Premere il pulsante su ciascun lato del paraurti e sollevare il paraurti per estrarlo.
3. Uso del tettuccio: Per aprire il tettuccio o per chiuderlo, spingere esso in avanti o in
dietro dal passeggino.
Assemblaggio
4. Giramento della ruota anteriore girevole: Premere il pulsante di direzione della
serratura sulla ruota anteriore. La ruota anteriore può ruotare come in figura a.
Bloccaggio in posizione fissa: sollevare il pulsante di direzione della chiusura del
dispositivo della ruota anteriore.
5. Frena ruote posteriori: Premere sul dispositivo del freno della ruota posteriore, la
ruota posteriore verrà frenata. Sollevare il dispositivo del freno della ruota posteriore,
la ruota posteriore sara sbloccato. Quando il passeggino è fermo, il freno deve essere
impegnato.
6. Uso imbracatura:
Fissaggio: inserire la linguetta della fibbia di sicurezza nella fessura della fibbia di
sicurezza, si sentirà un clic quando sono collegati.
Aprimento: premere il pulsante di rilascio per aprire la fibbia (come mostra l'immagine)
Regola la lunghezza: se devi regolare la lunghezza della cintura, tieni premuto il
pulsante di regolazione e tira la cintura.
7. Montaggio / rimozione dei spallacci: riagganciare / rimuovere la fibbia del gancio
dalla / alla tracolla fissa superiore per il montaggio o rimuovere la cintura inferiore
della cintura.

IT
8. Regolazione dello schienale; vedere la figura A per tenere la cinghia con una mano,
per premere il pulsante, con l'altra mano tirare la cinghia per regolare l'inclinazione
dello schienale.
Piegatura
9. Piega il tettuccio come mostrato in A, premi il pulsante pieghevole e premi il
manubrio spingendo come mostrato in figura B. Tenere la maniglia di spinta su
entrambi i lati del passeggino e premere il passeggino verso il basso in base alla
direzione della freccia come mostrato in C.
10. Uso del gancio di sicurezza: Come l'immagine mostra quando un passeggino è
piegato, il gancio di sicurezza deve essere appeso al cilindro.
Istruzioni di sicurezza
Controllare che ogni accessorio sia stato installato saldamente prima dell'uso.
Non lasciare che i bambini stanno in piedi sulla sedia o escano dal passeggino.
Tenere lontano da fuoco, terreno accidentato e luoghi pericolosi.
Non usare e conservare in ambienti freddi, umidi o tropo caldi.
Le immagini sono solo di riferimento.
Manutenzione
Si prega di mantenere sempre il passeggino per assicurarsi che il passeggino sia
sicuro per l'utilizzo.
Le parti in tessuto non possono essere lavate, si prega di essere pulite da sapone
domestico o detergente caldo.
Controllo regolarmente le parti come vite regolabile e problemi di cucitura.
Si prega di cambiare le parti difettose in tempo. Si prega di leggere attentamente le
istruzioni prima dell'installazione per evitare di danneggiare le parti.

HU
Coccolle Mino sport babakocsi
Figyelmeztetések!
1. Ne hagya soha a gyereket felügyelet nélkül.
2. Minding használja a biztonsági övet.
3. Mindig használja az utasbiztonsági rendszert.
4. Győződjön meg arrol hogy az összes reteszelőeszköz be van kapcsolva használat
előtt.
FIGYELEM! A sérülések elkerülése érdekében győződjön meg róla, hogy gyermekét a
termék kinyitása és összecsukása közben tartja távol.
5. Ez a babakocsi egy gyerek használására lett tervezve.
6. Ez a babakocsi 0-36 hónap közt használható.
7. A babakocsi maximális terhelés súlya: 15 kg. A vásárló kosár maximális terhelés
súlya 5 kg.
8. Ne tegyen 25 mm-nél vastagabb párnát a babakocsi ülésében. FIGYELEM! Ne
hagyja, hogy a gyermek játsszon ezzel a termékkel.
9. Soha ne tegyen csomagot, táskát vagy tartozékot a tolokarra vagy a kupolára. A
babakocsi felborulhat, vagy a kupola összeomolhat. FIGYELEM! Ez a babakocsi csak
egy gyermek számára használható. FIGYELEM! A tolokarhoz csatlakoztatott terhelés
befolyásolja a babakocsi stabilitását.
10. Az újszülőtt kortol tervezett babakocsiknal javasolniuk kell a leginkább fekvő
pozíció használatát. FIGYELEM! Kérjük, állítsa be a vállszíjat a legalsó szintre, ha a
gyermek fiatalabb mint 6 hónap, és mindig használja a biztonsági övet. FIGYELEM!
Tartsa távol a gyereket amikor a babakocsit kinyissa, összecsukja vagy állítsa be.
11. Győződjön meg róla, hogy a fék be van kapcsolva a gyermekek be- és kirakodása
közben.
12. Kérjük, használja csak a gyártó vagy forgalmazó pótalkatrészeit.
13. Ez a termék nem alkalmas futásra vagy korcsolyázásra.
14. Kérjük tartsa távol a tüztöl.
15. Tartsa a műanyag csomogolást a gyermekektől távol, hogy ne legyen fulladás
veszély.
16. Veszélyes lehet felügyelet nélkül hagyni a gyermeket. FIGYELEM! Mindig
használja a mellső hevedert a derékövvel együtt.
17. Ellenőrizze, hogy a termék váza vagy az ülése rögzítő eszközei megfelelően
működnek-e használat előtt.
18. A gyártó által nem jóváhagyott tartozékokat nem szabad használni.
Összeszerelés és utasítások
FIGYELMEZTETÉS – HASZNÁLÁS ELŐTT OLVASSA EL AZ UTASÍTÁSOKAT ÉS
TARTSA MEG JÖVŐBELI REFERENCIÁKRA. A GYERMEK BIZTONSÁGA
ÉRDEKÉBEN TARTSA BE EZEKET UTASÍTÁSOKAT.
Alkatrészek
A. Összecsukási gomb
B. Tolókar
C. Összecsukási csat
D. Kupola
E. Fejtámla
F. Lökhárító

HU
G. Biztonsági öv
H. Lábtartó
I. Első kerek
J. Bolygósitás záró gomb
K. Hátsó kerek
L. Vásárló kosár
Kinyitás és felszerelés
Nyissa ki a összecsukási csatot ahogy mutassa a kép. Amiutan a babakocsi félig kinyitva
van mint a C képen, emelye felfele a tolokart ameddig a B pozicioban lesz és a klick hang
halatszik. Mindkét kézzel fogja a tolokart a váz kinyitásához, a babakocsi teljesen nyitva
van a D képen. Ovatosan nyomja mindekét részet a váznak hogy biztositsa azt hogy a
babakocsi oldalai helyre blokkolnak.
A lökhárító felszerelése és eltávolítása
Helyezze be a lökhárítót a vázban amíg a gombja felugrik. Nyomja meg a gombot hogy a
lökhárítót eltávolitsa. Figyelem: a gomb a lökháritó felső részén van!
A kupola kinyitása és összecsukása
Húzza előre és hátra a kupola első drotót.
Első kerek bolygósitása
Nyomja le a kerek felül talaható gombot hogy endedje a babakocsi kerekeit bolygósitani.
Nyomja le a gombot ha a bolygósitás funckiot zárni akarja.
A fék használása
Nyomja le a féket a váz hátsó részen. Emelje fel amikor indulni akar. Minding fékeze le a
babakocsit amikor nem tolja.
A biztonsági öv beálitása
Kövesse az illusztrációkat hogy helysen használja és beálitsa a biztonsági övet.
A válpánt felszerelése és eltávolítása
Vegye ki a kampót az övekről hogy a válpántot sikeresen tudja eltavolitani és ujra feltenni.
A háttamla beálitása
Mint az A képen látható, nyomja meg a gomb közep részet és huzza felfele a hevederen
hogy a háttámla üllő pozicioban legyen. Nyomja a gombot és huzza lefele a hevederen
hogy a háttámla alvó pozicioban legyen.
Összecsukás
Hajtsa hátra a kupolát mint az A. képen látható, majd nyomja meg az összecsukási
gombot és engedje lefele a vázot mint a B. képen látható . Mindkét kézzel tartsa a tolokart
és nyomja lefele a babakocsit (lásd C képet).
Az összecsukási csat használása
Mint a 10-es kép mutasa, amikor a babakocsi összecsukva van a csat zárt tesz a váz két
része között.
Figyelmeztetések
Minden hasnálás előtt, ellenőrizze hogy az összes alkatrész helyesen van összeszerelve.
Ne engedje gyerekeit felmászanak vagy ugrájanak a babakocsin.
Tartsa tavol a tűztöl és hőforrásoktol.
Ne tarolja fagyasztott, nedves vagy forró környezetben.
Ápolás és karbantartás
Mindig tegye meg a minimális tenni valot ahoz hogy a babakocsi helyesen müködjön.
Ellenőrizze hogy minden alkatrész a helyén van és nem sérült vagy törött.
A babakocsi anyag részei nem moshatók, kérjük takaritani nedves kendövel vagy egy kis
vizzel és kefével. A többi alkatrészek moshatók vizzel és szappannal.
Table of contents
Languages:
Other Coccolle Stroller manuals

Coccolle
Coccolle Selena User manual

Coccolle
Coccolle Saliara User manual

Coccolle
Coccolle Monara User manual

Coccolle
Coccolle Neve User manual

Coccolle
Coccolle Oro User manual

Coccolle
Coccolle primo User manual

Coccolle
Coccolle Lemira User manual

Coccolle
Coccolle Gioia User manual

Coccolle
Coccolle Melia User manual

Coccolle
Coccolle Alla User manual

Coccolle
Coccolle Siyana User manual

Coccolle
Coccolle Beyla User manual

Coccolle
Coccolle Amani User manual

Coccolle
Coccolle Lissia User manual

Coccolle
Coccolle Silene User manual

Coccolle
Coccolle Sole User manual

Coccolle
Coccolle Perla User manual

Coccolle
Coccolle Ambra User manual

Coccolle
Coccolle urbio air User manual

Coccolle
Coccolle gire plus User manual