manuals.online logo
Brands
  1. Home
  2. •
  3. Brands
  4. •
  5. Connects2
  6. •
  7. Automobile Accessories
  8. •
  9. Connects2 CTUAR01 User manual

Connects2 CTUAR01 User manual

INSTRUCTION MANUAL
CTUAR01
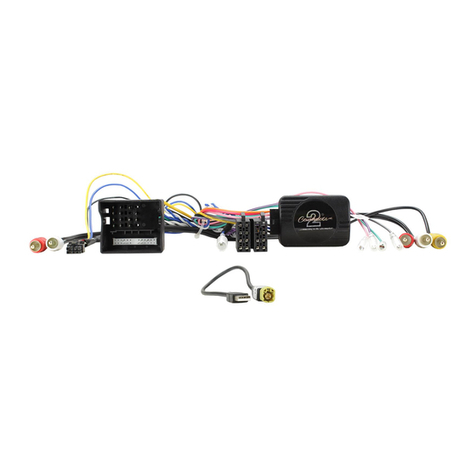
ALFA ROMEO INFODAPTER
2
ABOUT
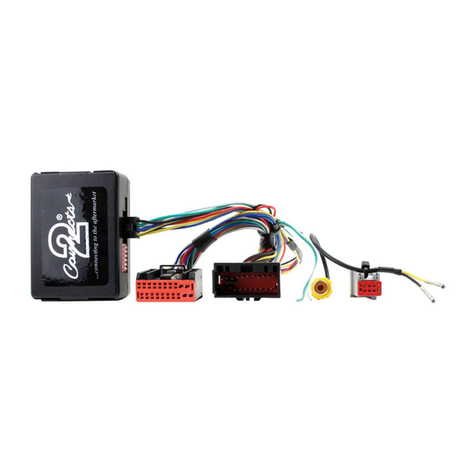
The Infodapter for Alfa Romeo vehicles allows vehicle setting and parking
sensor information to be displayed on any aftermarket head unit with rear camera input.
The Infodapter also allows the use of the steering wheel controls with almost every
steering wheel control compatible head unit on the market.
DIP SWITCH SETTINGS
See Fig 1.
Up = Off, Down = On
1: On = Pioneer head units. Off = All other head units
2: Setting for reverse camera. On = PAL, Off = NTSC. The default setting is Off (NTSC).
3: Resets the display settings back to default. If the display settings have been
manipulated in a way that it is no longer possible to make adjustments, change the
DIP switch #3 from Off to On and back. This will reset the screen settings to the factory
defaults. During this procedure the screen background will change to red. While the
background is red, no settings can be made.
4: Not applicable
Interface Connections
Fig 1.
Reverse Camera output
to head unit and reverse
camera input from
optional camera
Power Harness Steering Wheel
Remote control
connector to
head unit
Dip Switches Not Used
Fig 2.
2
7
Park Brake
(Green)
Mute(Grey)
Speed Pulse (Pink)
Reverse (Purple)
1 Aftermarket head
Alfa Romeo Infodapter
4
Steering Wheel
Control Input
5ISO
Connector
6
Reverse Camera Input
8
9
10
11
Reverse camera
(optional)
To car connector
3
3
1 Speech Button
2 Track Up/Down
Fig 3.
Steering Wheel Controls
Conguration Menu
To access the menu, push and hold the speech button for 2 seconds (Fig. 3). This will
enable the conguration menu. To navigate through the menu options use the Track Up/
Track Down buttons. To select a menu option, push the speech button once.
Conguration Menu
Vehicle Settings
Infodapter Settings
Language
Version
< Back
1
2
2
Vehicle Settings
Display
Clock
Safety and Driving Assistance
Lights
Doors and Locks
< Back
• Vehicle Settings
Vehicle settings can be adjusted via
the menu. All vehicle setup options
that were available with the original
head unit, are now available through
the aftermarket head unit. See the
vehicle handbook for more information
regarding these features.
Screen Size/Position
Horizontal Size
Horizontal Position
Vertical Size
Vertical Position
< Back
• Infodapter Settings
o Screen Size/Position -
Make sure all 4 corner markers
are touching the corners of the
aftermarket head unit display.
4
Conguration Menu...continued
Legal Information
Please consult the relevant road trafc laws governing the country in which this product is being operated.
No liability is accepted for material damage, loss or personal injury, directly or indirectly, from installation and
operation of this product. This product should only be operated when safe to do so.
Preferences
Park Assist Version 0
Camera Connected Yes
Reverse Priority Park Assist
Park Brake Source Speed
Restore factory settings
< Back
o Preferences -
Park Assist Version - Select according to the
colour conguration of the park assist tted to
the vehicle.
Camera Connected - Select Yes if an optional
camera is connected.
Reverse Priority* - Select which image (Camera
or Park Assist) will be shown by default when
reversing. The driver can select the desired
image by pushing the Source button (Fig.3)
while reversing. (*Note this option is only
available when Camera Connected is set to
Yes)
Park Brake Source - Set to Speed, Brake or
Always On.
Restore factory settings - Reverts all
Infodapter settings to factory defaults.
(This does not restore vehicle settings)
Infodapter Settings
Screen Size/Position
Picture Settings
Preferences
<Back
o Picture Settings -
Adjust Brightness, contrast and
colour saturation.
Note that the OEM DNA switch is still functional. The Infodapter will display
the relevant DNA setting on the aftermarket head unit display.
DNA Settings

Other Connects2 Automobile Accessories manuals
Connects2 CAM-MB13 User manual

Connects2

Connects2 CAM-MB13 User manual

Connects2 CTUSK03 User manual

Connects2

Connects2 CTUSK03 User manual

Connects2 Gator G162V User manual

Connects2

Connects2 Gator G162V User manual

Connects2 CAM-56 User manual

Connects2

Connects2 CAM-56 User manual

Connects2 CTKIV02 User manual

Connects2

Connects2 CTKIV02 User manual

Connects2 Aerpro CAKI01 User manual

Connects2

Connects2 Aerpro CAKI01 User manual

Connects2 CAN-Connect CANHBJP1 User manual

Connects2

Connects2 CAN-Connect CANHBJP1 User manual

Connects2 Vision CAM-16 User manual

Connects2

Connects2 Vision CAM-16 User manual

Connects2 Vision CAM-26 User manual

Connects2

Connects2 Vision CAM-26 User manual

Connects2 CTULR04 User manual

Connects2

Connects2 CTULR04 User manual

Connects2 Connects2Vision CAM-AU4 User manual
Connects2

Connects2 Connects2Vision CAM-AU4 User manual

Connects2 Aerpro CAKI01 User manual

Connects2

Connects2 Aerpro CAKI01 User manual

Connects2 CT23CA06 User manual

Connects2

Connects2 CT23CA06 User manual

Connects2 AdaptivMini ADVM-AU6 User manual

Connects2

Connects2 AdaptivMini ADVM-AU6 User manual

Connects2 CTSJD001.2 User manual

Connects2

Connects2 CTSJD001.2 User manual

Connects2 CAM-MB14 User manual

Connects2

Connects2 CAM-MB14 User manual

Connects2 CAM-32 User manual

Connects2

Connects2 CAM-32 User manual

Connects2 Connects2Vision CAM-8 User manual
Connects2

Connects2 Connects2Vision CAM-8 User manual

Connects2 CTSPO008.2 User manual

Connects2

Connects2 CTSPO008.2 User manual

Connects2 CT23MB26L User manual

Connects2

Connects2 CT23MB26L User manual

Connects2 Vision CAM-4 User manual

Connects2

Connects2 Vision CAM-4 User manual

Connects2 CTUPO01 User manual

Connects2

Connects2 CTUPO01 User manual

Connects2 CAM-61 User manual

Connects2

Connects2 CAM-61 User manual

Connects2 Connects2Vision CAM-PO1 User manual

Connects2

Connects2 Connects2Vision CAM-PO1 User manual

Popular Automobile Accessories manuals by other brands

Witter CL114BU Fitting instructions

Witter

Witter CL114BU Fitting instructions

Saris McAlu Pro FW manual

Saris

Saris McAlu Pro FW manual

Kuda 079040 Installation instruction

Kuda

Kuda 079040 Installation instruction

Prorack K114 Fitting instructions

Prorack

Prorack K114 Fitting instructions

Prorack K557 Fitting instructions

Prorack

Prorack K557 Fitting instructions

Motorola HF850 - Deluxe Bluetooth Car manual

Motorola

Motorola HF850 - Deluxe Bluetooth Car manual

Goobay 45162 manual

Goobay

Goobay 45162 manual

Parrot CK 3000 Evolution Specifications

Parrot

Parrot CK 3000 Evolution Specifications

Atera SIGNO 044 322 manual

Atera

Atera SIGNO 044 322 manual

Brodit ProClip 804438 installation instructions

Brodit

Brodit ProClip 804438 installation instructions

STO N SHO SNS 22 Installation procedures

STO N SHO

STO N SHO SNS 22 Installation procedures

Hilltip SnowStriker 1800-VP Owner's manual and installation instructions

Hilltip

Hilltip SnowStriker 1800-VP Owner's manual and installation instructions

Cruz Evo Rack Alu A30-140 Assembly instructions

Cruz

Cruz Evo Rack Alu A30-140 Assembly instructions

Front Runner FAJL004 quick start guide

Front Runner

Front Runner FAJL004 quick start guide

Ironman4x4 BBT045 installation guide

Ironman4x4

Ironman4x4 BBT045 installation guide

Addictive Desert Designs Venom Side Steps installation instructions

Addictive Desert Designs

Addictive Desert Designs Venom Side Steps installation instructions

Sirius XM RAdio Starmate 5 user guide

Sirius XM RAdio

Sirius XM RAdio Starmate 5 user guide

APA 29640 operating instructions

APA

APA 29640 operating instructions

manuals.online logo
manuals.online logoBrands
  • About & Mission
  • Contact us
  • Privacy Policy
  • Terms and Conditions

Copyright 2025 Manuals.Online. All Rights Reserved.