manuals.online logo
Brands
  1. Home
  2. •
  3. Brands
  4. •
  5. Crosswater
  6. •
  7. Plumbing Product
  8. •
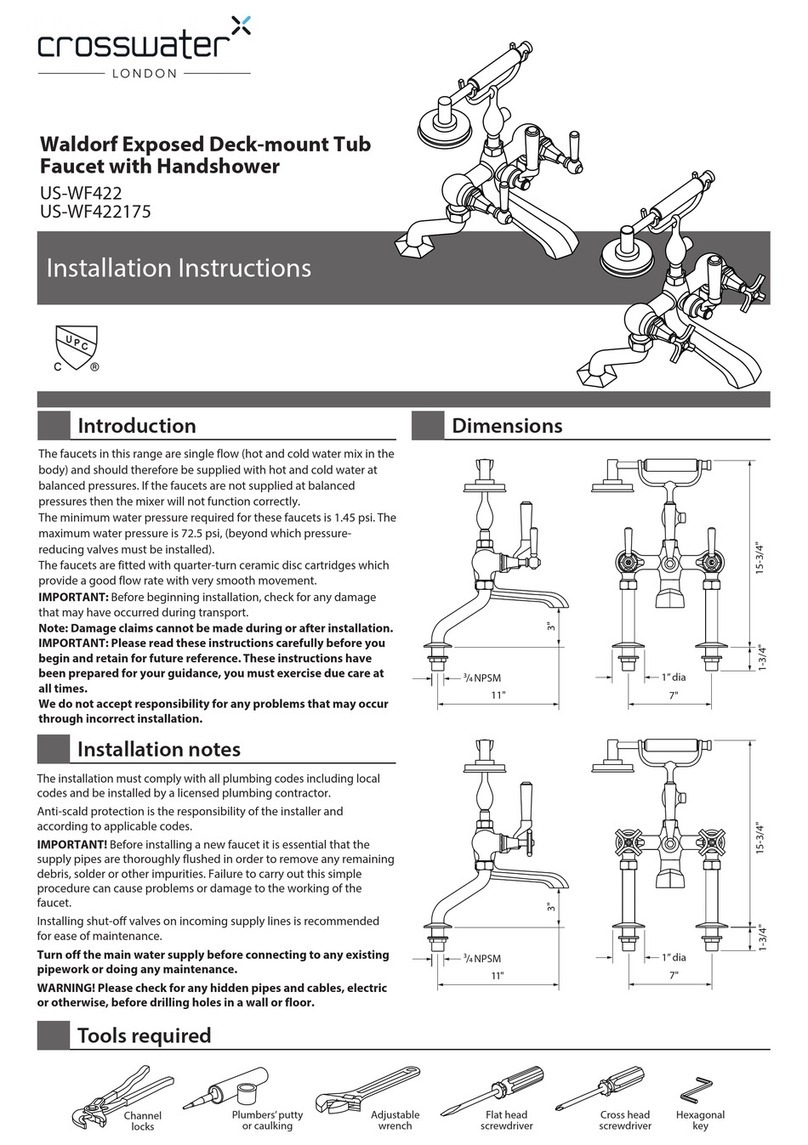
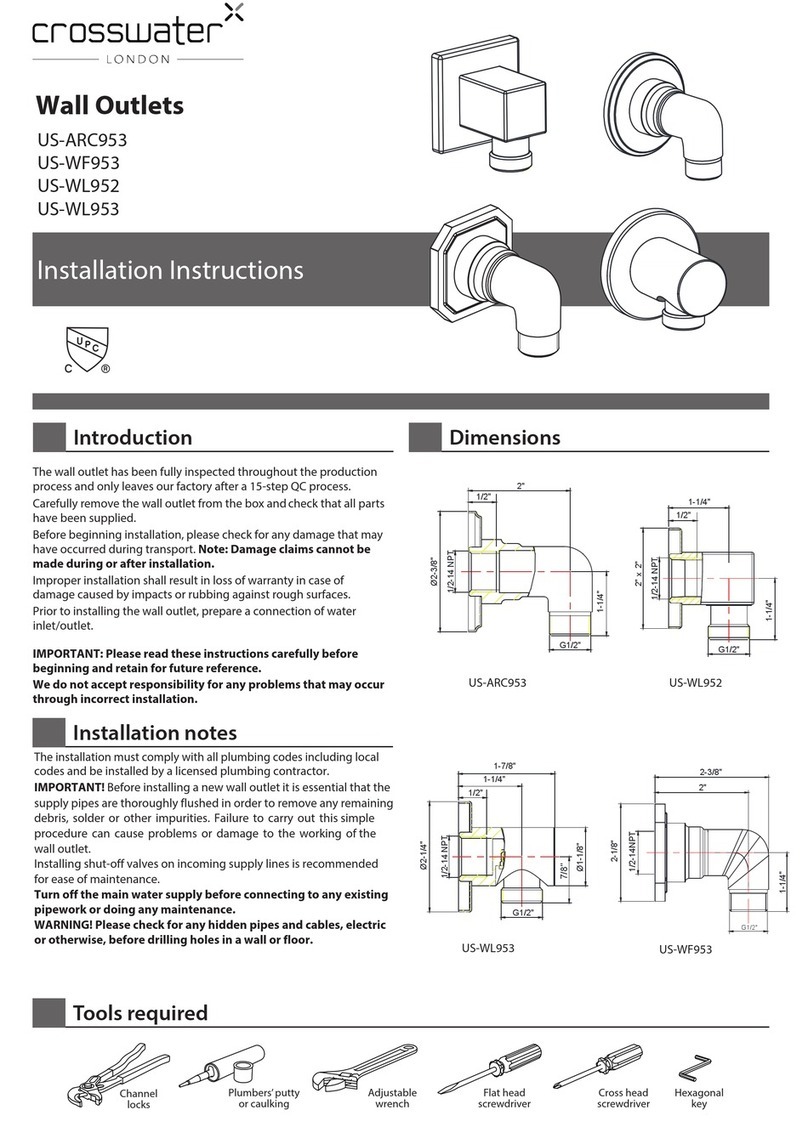
  9. Crosswater 28-07 User manual

Crosswater 28-07 User manual

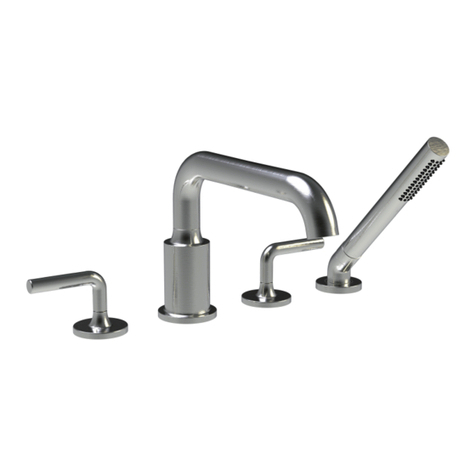
Fenmore
Handshower with Wall Outlet/Port with Ribbing
28-07
Warranty - This Crosswater London product is covered by a limited lifetime warranty. For full details, terms and conditions please visit our website.
For further information contact:
Crosswater London, 393 Fortune Blvd., Milford, MA 01757
Toll free number: 844-XWATER-1 (844-992-8371) tel: 508-381-6062 fax: 508-381-6068
www.crosswaterlondon.com
Issue date:16092022
email: [email protected]
Installation Instructions
15125635
15125635 4
28-16-T
Adjustable PliersAdjustable Wrench
Tools You Will Need
Screwdriver
For ease of installation you will need:
● To read the installation instructions completely before beginning.
● To read all warnings, care, and maintenance information.
● To complete the valve rough-in prior to installing this trim kit.
Applicable Standards/Codes
Installation Dimensions
Before beginning installation, check for any damage
that may have occurred during transport.
Note: Damage claims cannot be made during or
after installation.
IAPMO certified to meet or exceed the following:
• ASME A112.18.1/CSA B125.1
• Uniform Plumbing Code
• National Plumbing Code of Canada
• ADA Compliant
2 3/16"
1 1/8"
3 1/16"3 7/16"
2 13/16"
1 1/4"
7 1/4"
4 1/16"
1/2" 14 NPT
1 1/4"-1 3/4"
2 3/16"- 3 3/16"
Cleaning Instructions
Replacement Parts
Rinse away any traces of soap and gently dry with a clean, soft cloth after each use. Rinse completely with water and
dry any overspray. This will maintain the finish and avoid water spotting.
To remove mineral deposits, use a 50/50 solution of white vinegar and water. Do not allow the solution to soak on the
product.
Simichrome Polish® contains a protective film to enhance maintenance and is helpful in preventing water spot buildup.
Follow instructions to ensure optimum results.
Never use an abrasive material such as a brush or scouring pad to clean the surface. The use of abrasive cleaners,
cleansers or disinfectants will alter the surface finish and void the warranty.
Do not allow certain materials such as toothpaste, cologne, shaving cream, nail polish remover, vinegar, wine, drain
and glass cleaners to remain on the surface. Prolonged contact will alter surface finishes and void the warranty.
We DO NOT recommend using any household cleaners as many can cause damage to the finish.
Please see the website for care instructions for specific finishes.
2
3
4
8
10
7
6
5
1
NO. Description Part NO.
7
Connector
6D006802NC
8
Check Valve
53001229PL
9
Hand Shower Hose
5G0000602
10
Allen Key 2.5mm
51002812NT
4
O Ring
5R0R0114PL
5
Set Screw
5T0F0037NT
6
Red Steel Pad Paper
6D006803NT
1
Hand Shower
5Y0301802
2
Ribbing Cover Assembly
5Y0342700
3
Connector
5J0019200NT0
Installation Instructions
123
Wrap the joint with thread teflon tape
and connect with the wall mounted
joint.
Install the ribbing cover and shower
fixing seat on the joint and secure it.
Connect the shower hose to the
shower and water outlet.
Thread Teflon Tape
15125635 2
28-07
151256353
4
Installation completed.
9
Fenmore
Handshower with Wall Outlet/Port with Ribbing
28-07
Warranty - This Crosswater London product is covered by a limited lifetime warranty. For full details, terms and conditions please visit our website.
For further information contact:
Crosswater London, 393 Fortune Blvd., Milford, MA 01757
Toll free number: 844-XWATER-1 (844-992-8371) tel: 508-381-6062 fax: 508-381-6068
www.crosswaterlondon.com
Issue date:16092022
email: [email protected]
Installation Instructions
15125635
15125635 4
28-16-T
Adjustable PliersAdjustable Wrench
Tools You Will Need
Screwdriver
For ease of installation you will need:
● To read the installation instructions completely before beginning.
● To read all warnings, care, and maintenance information.
● To complete the valve rough-in prior to installing this trim kit.
Applicable Standards/Codes
Installation Dimensions
Before beginning installation, check for any damage
that may have occurred during transport.
Note: Damage claims cannot be made during or
after installation.
IAPMO certified to meet or exceed the following:
• ASME A112.18.1/CSA B125.1
• Uniform Plumbing Code
• National Plumbing Code of Canada
• ADA Compliant
2 3/16"
1 1/8"
3 1/16"3 7/16"
2 13/16"
1 1/4"
7 1/4"
4 1/16"
1/2" 14 NPT
1 1/4"-1 3/4"
2 3/16"- 3 3/16"

This manual suits for next models

1

Other Crosswater Plumbing Product manuals

Crosswater PRO125DNJ User manual

Crosswater

Crosswater PRO125DNJ User manual

Crosswater Heir 18-31 User manual

Crosswater

Crosswater Heir 18-31 User manual

Crosswater ATOLL SQUARE EXPOSED THERMO SHOWER VALVE... User manual

Crosswater

Crosswater ATOLL SQUARE EXPOSED THERMO SHOWER VALVE... User manual

Crosswater INFINITY 500mm FURNITURE User manual

Crosswater

Crosswater INFINITY 500mm FURNITURE User manual

Crosswater US-ARC953 User manual

Crosswater

Crosswater US-ARC953 User manual

Crosswater US-BTW0201 User manual

Crosswater

Crosswater US-BTW0201 User manual

Crosswater Arcade US-ARC14 User manual

Crosswater

Crosswater Arcade US-ARC14 User manual

Crosswater Solo Product manual

Crosswater

Crosswater Solo Product manual

Crosswater US-SP380 User manual

Crosswater

Crosswater US-SP380 User manual

Crosswater UNION US-UN399 User manual

Crosswater

Crosswater UNION US-UN399 User manual

Crosswater Darby 15-15P-T User manual

Crosswater

Crosswater Darby 15-15P-T User manual

Crosswater Fenmore 28-15P-T User manual
Crosswater

Crosswater Fenmore 28-15P-T User manual

Crosswater US-AL7005CW User manual

Crosswater

Crosswater US-AL7005CW User manual

Crosswater 17-20-T User manual

Crosswater

Crosswater 17-20-T User manual

Crosswater Belgravia US-BL440 User manual

Crosswater

Crosswater Belgravia US-BL440 User manual

Crosswater Berea 11-02-T User manual

Crosswater

Crosswater Berea 11-02-T User manual

Crosswater Berea 11-01 User manual

Crosswater

Crosswater Berea 11-01 User manual

Crosswater Smith SMI-UM1913-TSQ-WH User manual

Crosswater

Crosswater Smith SMI-UM1913-TSQ-WH User manual

Crosswater WS2001RC User manual

Crosswater

Crosswater WS2001RC User manual

Crosswater Waldorf US-WF0613 User manual

Crosswater

Crosswater Waldorf US-WF0613 User manual

Crosswater Leyden 14-05 User manual

Crosswater

Crosswater Leyden 14-05 User manual

Crosswater Wisp US-WP418 User manual

Crosswater

Crosswater Wisp US-WP418 User manual

Crosswater MPRO US-PRO110 User manual

Crosswater

Crosswater MPRO US-PRO110 User manual

Crosswater Darby 15-16-T User manual

Crosswater

Crosswater Darby 15-16-T User manual

Popular Plumbing Product manuals by other brands

Blanco BlancoPrecision 515-824 Specification sheet

Blanco

Blanco BlancoPrecision 515-824 Specification sheet

Selectronic 6067.721.002 installation instructions

Selectronic

Selectronic 6067.721.002 installation instructions

Axor ShowerHeaven 1200/300 4jet Installation

Axor

Axor ShowerHeaven 1200/300 4jet Installation

newform ERGO-Q 66409 instructions

newform

newform ERGO-Q 66409 instructions

Cooke & Lewis Solani 3663602949565 manual

Cooke & Lewis

Cooke & Lewis Solani 3663602949565 manual

Kohler ENGLEFIELD TAPWARE STUDIO 20149A-4 installation instructions

Kohler

Kohler ENGLEFIELD TAPWARE STUDIO 20149A-4 installation instructions

Graff MALI 2105-LM20 installation instructions

Graff

Graff MALI 2105-LM20 installation instructions

Brizo MultiChoice T75P5 Series manual

Brizo

Brizo MultiChoice T75P5 Series manual

Clou CL/03.03141 installation instructions

Clou

Clou CL/03.03141 installation instructions

Hayward WGX1048E owner's manual

Hayward

Hayward WGX1048E owner's manual

Geberit MEPLA 601.485.00.1 user manual

Geberit

Geberit MEPLA 601.485.00.1 user manual

ZUCCHETTI SIMPLY BEATIFUL Z93118 Instruction for the installation

ZUCCHETTI

ZUCCHETTI SIMPLY BEATIFUL Z93118 Instruction for the installation

Salvatori ADDA installation instructions

Salvatori

Salvatori ADDA installation instructions

Olympia L-7240 installation instructions

Olympia

Olympia L-7240 installation instructions

Hans Grohe C 04219 0 Series Installation/User Instructions/Warranty

Hans Grohe

Hans Grohe C 04219 0 Series Installation/User Instructions/Warranty

Hans Grohe E 04353 0 Series Installation/User Instructions/Warranty

Hans Grohe

Hans Grohe E 04353 0 Series Installation/User Instructions/Warranty

Hans Grohe Talis Select S 220 72822001 Installation/User Instructions/Warranty

Hans Grohe

Hans Grohe Talis Select S 220 72822001 Installation/User Instructions/Warranty

Hans Grohe Talis C 14113 1 Series Installation/User Instructions/Warranty

Hans Grohe

Hans Grohe Talis C 14113 1 Series Installation/User Instructions/Warranty

manuals.online logo
manuals.online logoBrands
  • About & Mission
  • Contact us
  • Privacy Policy
  • Terms and Conditions

Copyright 2025 Manuals.Online. All Rights Reserved.