manuals.online logo
Brands
  1. Home
  2. •
  3. Brands
  4. •
  5. Crux
  6. •
  7. Automobile Accessories
  8. •
  9. Crux SWRGM-49L User manual

Crux SWRGM-49L User manual

Crux Interfacing Solutions • Chatsworth, CA 91311
phone: (818) 609-9299 • fax: (818) 996-8188 • www.cruxinterfacing.com
rev.0717201 of 4
RADIO REPLACEMENT
SWC RETENTION
+
R
INTERFACING SOLUTIONS
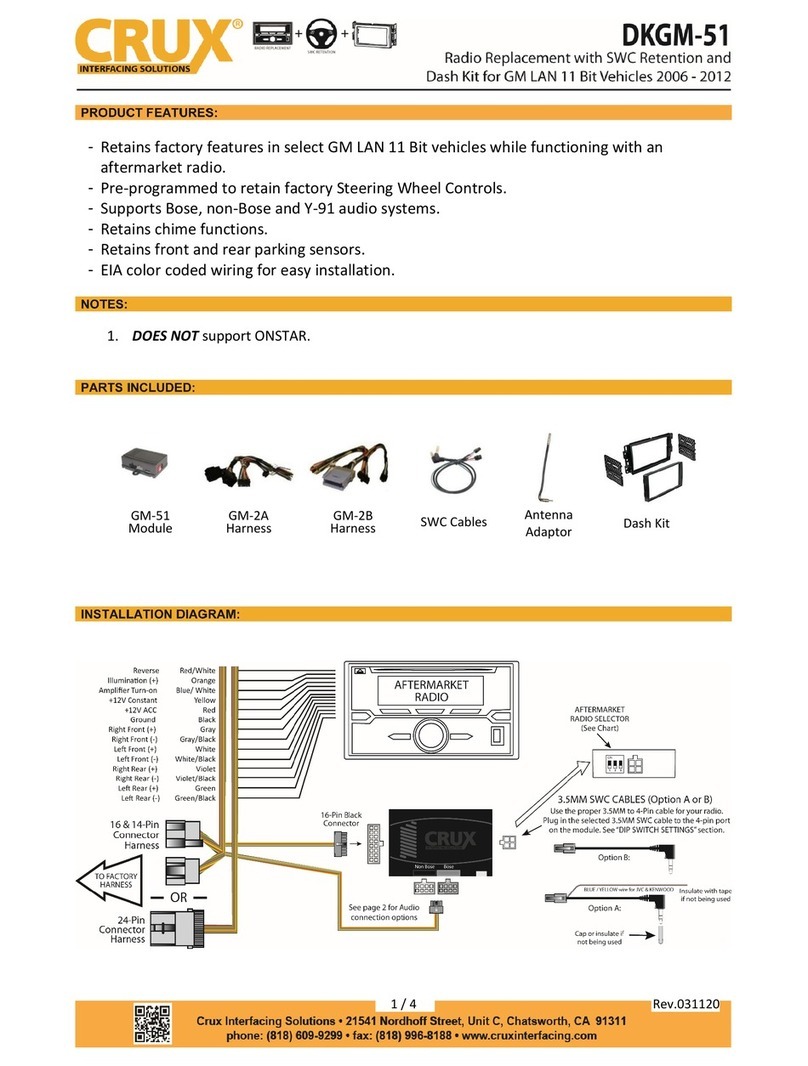
- Retains factory features in select GM LAN V2 (LIN) Bus vehicles while functioning with an aftermarket radio.
- Retains chime functions.
- Retains factory Steering Wheel Controls.
- Provides Factory Rear Seat Entertainment activation.
- Retains RAP (Retained Accessory Power).
- Includes factory backup camera connection for the IO3 system. (vehicles with IO4, IO5 & IO6 systems can be hard
wired to retain the OEM camera. See page 2)
PRODUCT FEATURES:
PARTS INCLUDED:
INSTALLATION DIAGRAM:
SWRGM-49L MODULE SWRGM-49L HARNESS SWC CABLE ANTENNA ADAPTER
AFTERMARKET
RADIO
Reverse Red/White













TO FACTORY
HARNESS
16-Pin Black
Connector
16-Pin Green
Connector
20-Pin Gray
Connector
INTERFACING SOLUTIONS
4-Pin
Connector
Cap or insulate if
not being used
Kenwood/JVC (BLUE /YELLOW) Insulate with tape
if not being used
3.5MM SWC CABLE
Plug in the 3.5MM SWC cable to the 4-pin port
on the module. See “DIP SWITCH SETTINGS” section.
1 2 3 4
ON
AFTERMARKET
RADIO SELECTOR
(See Chart)
1 2 3 4
ON
Audio Input
Rear Camera (IO3)
Chime volume
adjustment
LIN Bus (GREEN)
Antenna Adapter
(Included)
SWRGM-49L
Radio Replacement Interface with Steering Wheel Control
Retention for GM LAN v2 (LIN) Bus Vehicles 2014 -2018
Crux Interfacing Solutions • Chatsworth, CA 91311
phone: (818) 609-9299 • fax: (818) 996-8188 • www.cruxinterfacing.com
rev.071720
SWRGM-49L
Radio Replacement Interface with Steering Wheel Control
Retention for GM LAN v2 (LIN) Bus Vehicles 2014 -2018
2 of 4
RADIO REPLACEMENT
SWC RETENTION
+
R
INTERFACING SOLUTIONS
BOSE AMPLIFIER BYPASS:
For vehicles equipped with a factory Bose amplier, extend the speaker wires of the SWRGM-49L harness and
connect to the Bose amplier output wires. Locate the Bose amplier to nd out how much speaker wires is
neccessary. The Bose amplier is located as follows: (NOTE: Bose ampliers are commonly found in the locaons listed
below but the manufacturer can mount it elsewhere. Installer should verify the locaon before installaon.)
Trucks = Center of the rear wall / SUVs = Center console or in the cargo space / Sedans = Rear deck or Trunk area
Pinout for the 8 and 16 pin OEM Bose amplier connectors:
14
8 5
1
8
9
16
Pin # Wire Color Descrip�on
1 Dark Blue / Grey Subwoofer +
2 Yellow Right Front Speaker +
3 Dark Blue Le� Front Speaker +
4 Red / Yellow Constant +12V
5 Grey / Black Subwoofer -
6 Yellow / Black Right Front Speaker -
7 Brown / Dark Blue Le� Front Speaker -
8 Black Ground
Pin # Wire Color Descrip�on
4 Brown / Light Green Right Front Tweeter +
5 Yellow / Dark Blue Le� Front Tweeter +
6 White Right Rear Speaker +
7 Light Green Le� Rear Speaker +
12 Purple / Brown Right Front Tweeter -
13 Yellow / Grey Le� Front Tweeter -
14 Dark Blue / Black Right Rear Speaker -
15 Light Green / Black Le� Rear Speaker -
The SWRGM-49L is prewired with an RCA connector to retain the OEM camera
on vehicles with a IO3 system. To retain the OEM camera on IO4, IO5 and IO6
systems, you will need connect an RCA cable to the 12-pin connector on the
HMI module found either by the passenger kick panel or behind the glove box.
Connect the RCA as follows:
HMI Connector
PIN 5 = Gray/Yellow to RCA posive
PIN 6 = White/Blue to RCA shield
We recommend soldering and using heat shrink tubing these wires for a secure
connecon.
Pin 6 Pin 5
White/Blue Gray/Yellow
OEM CAMERA RETENTION:
The SWRGM-49L has a potenometer to adjust the chime
volume. It is set at half way by default. To adjust the volume,
simply use a suitable screw driver and turn the potenometer
clockwise to increase the volume and counter-clockwise to
decrease the volume.
Chime
Volume
Adjustment
CHIME VOLUME ADJUSTMENT:
INSTALLATION INSTRUCTIONS:
1. Connect the aermarket radio’s
power/speaker harness to the
SWRGM-49L T-Harness using the
Installaon Diagram on page 1. Use
good quality crimp caps or bu splice
for a secure connecon. Solder and
heat shrinking the connecons is highly
recommended.
2. Carefully remove the radio trim with a plasc
pry tool and pull outward.
3. Remove the radio bezel by removing the
4 screws on the corners.
4. Unplug the GREEN and GRAY
connectors from the headunit.
5. Plug the GREEN and GRAY connectors to the
SWRGM-49L T-Harness.
6. Use the supplied antenna adapter to plug
between the OE antenna connector and
aermarket radio antenna port.
7. Remove plasc trim under the
steering wheel column and locate a
GREEN/BLACK wire in the bundle. Tap
the GREEN/BLACK from the SWC Cable.
We recommend soldering the wires
together for a reliable connecon.
8. Use a dash kit (not included) for a clean
install. Test the radio for funconality. Test
the chime and Retained Accessory Power
(RAP) funcons. Reverse the process to
install the new aermarket radio.
Crux Interfacing Solutions • Chatsworth, CA 91311
phone: (818) 609-9299 • fax: (818) 996-8188 • www.cruxinterfacing.com
rev.071720
SWRGM-49L
Radio Replacement Interface with Steering Wheel Control
Retention for GM LAN v2 (LIN) Bus Vehicles 2014 -2018
3 of 4
RADIO REPLACEMENT
SWC RETENTION
+
R
INTERFACING SOLUTIONS
Crux Interfacing Solutions • Chatsworth, CA 91311
phone: (818) 609-9299 • fax: (818) 996-8188 • www.cruxinterfacing.com
rev.071720
SWRGM-49L
Radio Replacement Interface with Steering Wheel Control
Retention for GM LAN v2 (LIN) Bus Vehicles 2014 -2018
4 of 4
RADIO REPLACEMENT
SWC RETENTION
+
R
INTERFACING SOLUTIONS
VEHICLE APPLICATIONS:
DIP SWITCH SETTINGS:
AFTERMARKET RADIO DIP SWITCH SETTINGS:
RADIO BRAND: DIP#: 1 2 3 4
Atoto, Dual, Fahrenheit, Jensen,
Pioneer, Power Acoustik, Soundstream
Blaupunkt, Most o-brand Radio
Alpine
Clarion
Kenwood
JVC
Boss, Old Sony
New Sony
NOTE: For Atoto, Blaupunkt, Dual, Farenheit, Power Acoustik, Soundstream, and most o-brand radios,
check the aftermarket radio’s manual to see if the SWC buttons need to be programmed.
SWC MODULE
DIP SWITCH
1 2 3 4
ON
OFF OFF ON ON
OFF OFF ON ON
OFF OFF ON ON
OFF OFF OFF OFF
OFF ON ON OFF
OFF ON ON ON
OFF ON OFF ON
OFF ON OFF OFF
OFF OFF ON OFF
NOTES:
- Does not retain Bose amplier.
- Does not retain OnStar. Use Crux part# SOOGM-19L instead.
BUICK
2017 ENVISION
2016 LACROSSE
2014-2015 REGAL
CADILLAC
2015-2016 ATS
2014-2015 CTS
2015 ESCALADE
2015-2016 SRX
2017 XT5
CHEVROLET
2016-2018 CAMARO (with 8” IO5/IO6)
2018 CAMARO (with 7” iOB)
2015-2016 COLORADO
2016 - 2017 CRUZE
2018 CRUZE (with 7” iOB)
2014-2016 IMPALA Non Classic (with 8” IO5/IO6)
2017-2019 IMPALA (with 8” IO5/IO6)
2016 MALIBU Non Classic
2017-2018 MALIBU
2014-2017 SILVERADO
2018 SILVERADO (with 7” iOB)
2018 SILVERADO (with 8” IO5/IO6)
2019 SILVERADO Classic (with 7” iOB)
2019 SILVERADO Classic (with 8” IO5/IO6)
2015-2019 SILVERADO HD
2017 SONIC
2015, 2018 SPARK
2015-2019 SUBURBAN
2015-2019 TAHOE
GMC
2017 ACADIA (with 8” IO5/IO6)
2015-2016 CANYON
2014-2016 SIERRA
2017 SIERRA (with 7” iOB)
2017-2018 SIERRA (with 8” IO5/IO6)
2015-2017, 2019 SIERRA HD
2015-2019 YUKON
2015-2017, 2019 YUKON XL
NOTE: Cap or Insulate the 3.5mm plug and Blue/Yellow wire if not being used.
3.5MM SWC CABLE
Plug in the 3.5MM to 4-Pin SWC cable to the SWC module.
RED to SWC Key 1
WHITE to SWC Key 2
SHIELD to SWC Ground
For aermarket radios that have wires for SWC connecons,
cut o the 3.5mm plug on the Crux SWC Cable (opon B)
and connect the SWC wires as follows:
Note that there are some radios that only have SWC1 and SWC2, in this case “shield” does not need to be connected.

Other Crux Automobile Accessories manuals

Crux BTI-ISO User manual

Crux

Crux BTI-ISO User manual

Crux WVI-X User manual

Crux

Crux WVI-X User manual

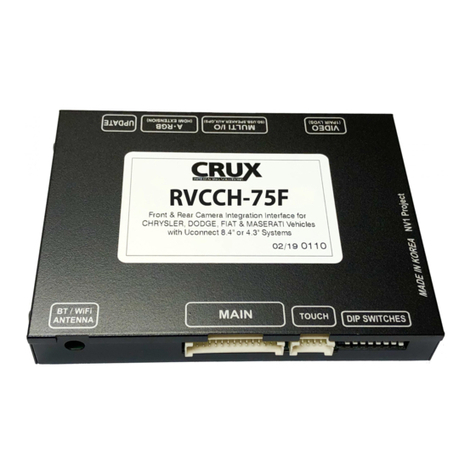
Crux RVCCH-75F User manual

Crux

Crux RVCCH-75F User manual

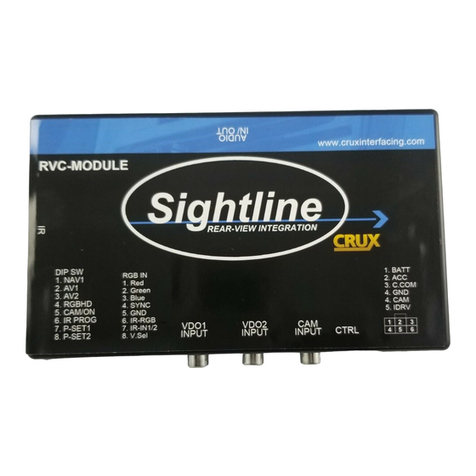
Crux Sightline RVCHN-76D User manual

Crux

Crux Sightline RVCHN-76D User manual

Crux RVCMZ-72D User manual

Crux

Crux RVCMZ-72D User manual

Crux Sightline RVCAD-81 User manual

Crux

Crux Sightline RVCAD-81 User manual

Crux Sightline RVCCH-75E User manual

Crux

Crux Sightline RVCCH-75E User manual

Crux Sightline VIMMB-85N User manual

Crux

Crux Sightline VIMMB-85N User manual

Crux VRFAD-81C User manual

Crux

Crux VRFAD-81C User manual

Crux RVCAD-81T User manual

Crux

Crux RVCAD-81T User manual

Crux RVCCH-75 User manual

Crux

Crux RVCCH-75 User manual

Crux BEECR-35D User manual

Crux

Crux BEECR-35D User manual

Crux Sightline MRVBM-77Q User manual

Crux

Crux Sightline MRVBM-77Q User manual

Crux SWRVL-54 User manual

Crux

Crux SWRVL-54 User manual

Crux RVCCH-75E User manual

Crux

Crux RVCCH-75E User manual

Crux AVIGM-04S User manual

Crux

Crux AVIGM-04S User manual

Crux VIMBM-86B User manual

Crux

Crux VIMBM-86B User manual

Crux Sightline RVCVW-73 User manual

Crux

Crux Sightline RVCVW-73 User manual

Crux ACPAD-01 User manual

Crux

Crux ACPAD-01 User manual

Crux SOOGM-15 User manual

Crux

Crux SOOGM-15 User manual

Crux ACPGM-80N User manual

Crux

Crux ACPGM-80N User manual

Crux RVCCH-75D User manual

Crux

Crux RVCCH-75D User manual

Crux SWRGM-49 User manual

Crux

Crux SWRGM-49 User manual

Crux DKGM-51 User manual

Crux

Crux DKGM-51 User manual

Popular Automobile Accessories manuals by other brands

Caltrend CV580 installation instructions

Caltrend

Caltrend CV580 installation instructions

Acrosser Technology AR-B6005 user manual

Acrosser Technology

Acrosser Technology AR-B6005 user manual

Baja Designs 447575 instructions

Baja Designs

Baja Designs 447575 instructions

WIX WP6830 Installation instruction

WIX

WIX WP6830 Installation instruction

Whelen Engineering Company SA315 installation guide

Whelen Engineering Company

Whelen Engineering Company SA315 installation guide

Tuffy 182 installation instructions

Tuffy

Tuffy 182 installation instructions

Go Rhino 3160MB Assembly instructions

Go Rhino

Go Rhino 3160MB Assembly instructions

Saris 4425 manual

Saris

Saris 4425 manual

Cruz 907-402 Assembly instructions

Cruz

Cruz 907-402 Assembly instructions

Blueant EzyTalk Faq

Blueant

Blueant EzyTalk Faq

P3 International MK5 installation guide

P3 International

P3 International MK5 installation guide

Car Shades LRO-FREE-5-B installation manual

Car Shades

Car Shades LRO-FREE-5-B installation manual

Magnat Audio PRO CHARGER Owner's manual/warranty document

Magnat Audio

Magnat Audio PRO CHARGER Owner's manual/warranty document

Subaru S0A367010 installation instructions

Subaru

Subaru S0A367010 installation instructions

Drive & Talk ML021-V01 Installation instruction

Drive & Talk

Drive & Talk ML021-V01 Installation instruction

Polaris 2882167 manual

Polaris

Polaris 2882167 manual

Huf HUF8432MS Technical description and user manual

Huf

Huf HUF8432MS Technical description and user manual

GReddy Turbo Kit installation manual

GReddy

GReddy Turbo Kit installation manual

manuals.online logo
manuals.online logoBrands
  • About & Mission
  • Contact us
  • Privacy Policy
  • Terms and Conditions

Copyright 2025 Manuals.Online. All Rights Reserved.